
How to Create a Responsive Multi-Column Form on WordPress?


Table of Content
Download Paymattic – it’s Free!

Subscribe To Get
WordPress Guides, Tips, and Tutorials
We will never spam you. We will only send you product updates and tips.
A well-designed form is very crucial for online business, as it directly impacts users’ experience and conversion rates. Creating a form is not complicated, but it can be tricky to make it visually appealing and ensure it stays responsive across devices.
With Paymattic, you can easily create an eye-catching form that remains responsive on any device and doesn’t appear overly lengthy to users. In this article, we’ll talk about the process of creating a responsive multi-column form on WordPress.
But before diving into the form creation guide, let’s know about the multi-column container field.
What is a multi-column container field?
Multi-column container field is a design feature in form builder plugins that allows you to organize multiple form fields within a single container. This layout helps keep your form well-organized and enables you to collect more data in a compact space. Instead of stacking all fields vertically, the multi-column layout arranges fields side by side, enhancing the form’s visual appeal and functionality.
As a payment and donation plugin, Paymattic offers all the essential features to build effective payment or donation forms. If your form appears too lengthy, users might be discouraged from completing it. That’s why Paymattic includes a multi-column layout feature to make your forms look more organized, reducing the risk of form abandonment.
Ready to get started?
Experience payments and donations for WordPress like never before. Try Paymattic now!
Why use multi-column fields on a form?
There are several advantages of using multi-column fields on a form. Let’s see some key benefits of using multi-column fields on a form.
Improved user experience – It helps improve user experience by reducing scrolling and displaying form fields side by side, so users can fill out the form quickly and easily.
Reduce form length perception – Arranging form fields in a multi-column, may give the form a clear look and reduce the form length perception.
Better visual appeal – This layout helps to create a better visually appealing form, that is needed to present your website as attractive to visitors.
Increase conversion rate – Multi-column makes forms easily readable, so users are more like to fill it out, and this ultimately increases the conversion rate.
Responsive design – You don’t need to worry about its responsiveness, this layout dynamically adjusts on all screens, to ensure the usability of all devices.
Now let’s discover the steps to create a multi-column form on WordPress.
Subscribe Newsletter
Subscribe to our newsletter for updates, exclusive offers, and news you won’t miss!

Steps to create a multi-column form on WordPress
Paymattic offers this multi-column field in its free version, so download the free version to get started. Then walk through the steps mentioned below:
Create a new form
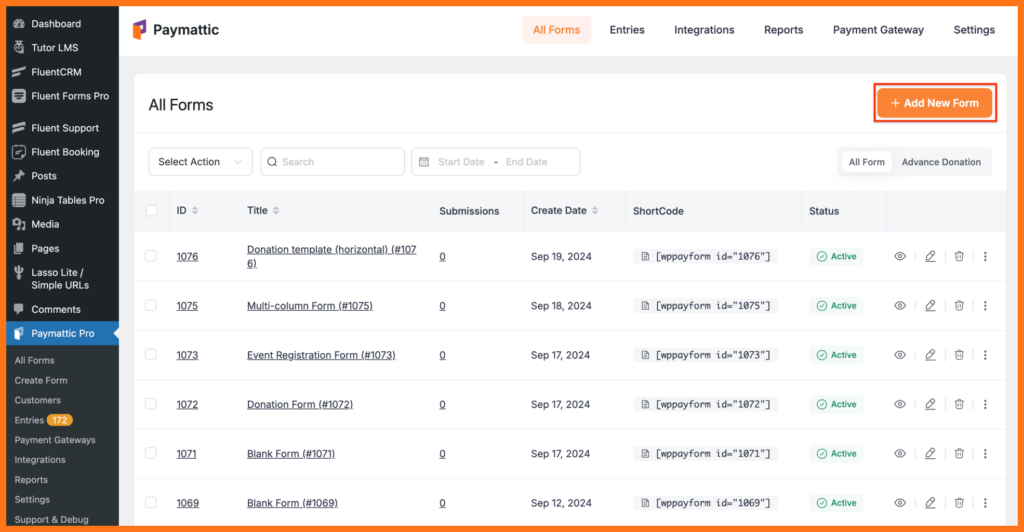
First, you have to create a new form. Let’s create a payment form. Go to your WordPress admin dashboard and click on the Paymattic from the left sidebar. Now click on the Add New From button.
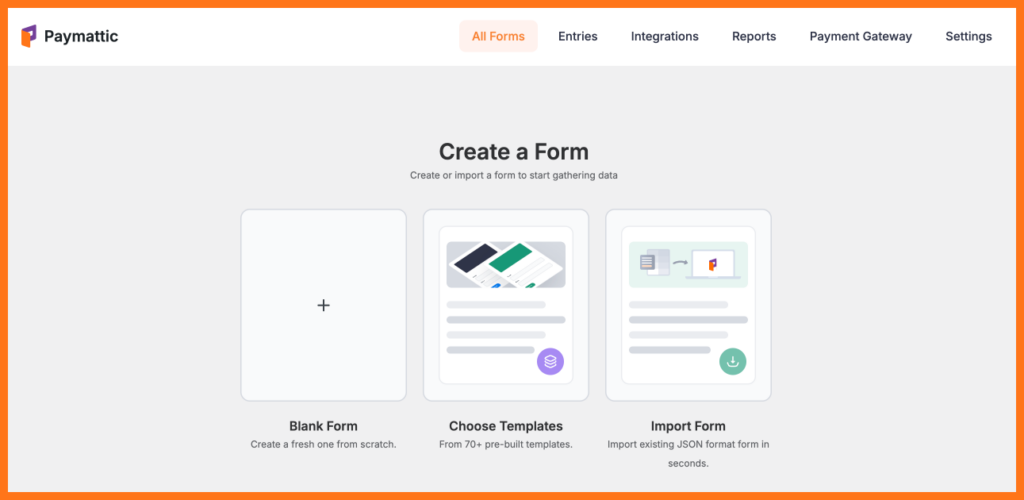
Here you will find three options. You can go with the pre-built template. But for your better understanding, we will start with the Blank Form.
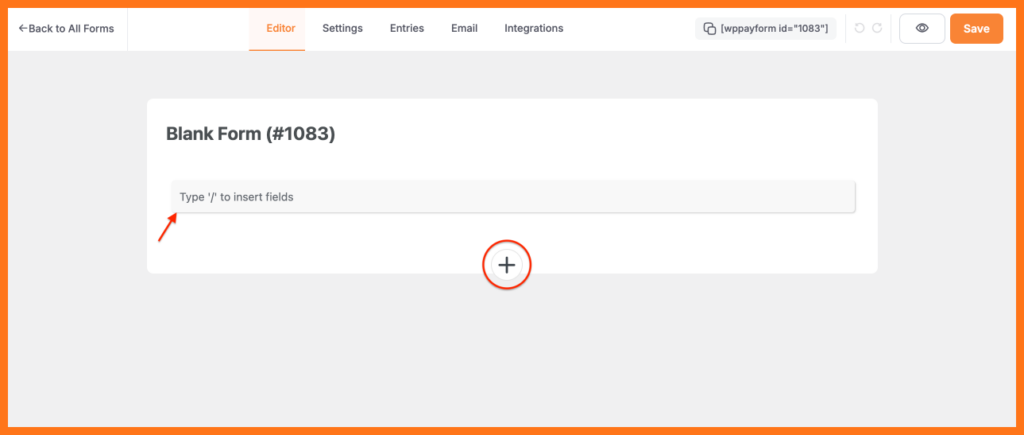
Now a blank form will open, and you can start editing it with drag and drop control. Just type ” / ” to directly insert fields, or you can click on the + icon to see the fields section.
Then add some input fields in this form and arrange them in multi-column layouts. As we are creating payment forms, we have added the following fields.
- Payment method
- Name
- Address
- Payment item
By default, the address field is displayed as two columns.
Click here to know the details of payment form creation process
Add multi-column fields
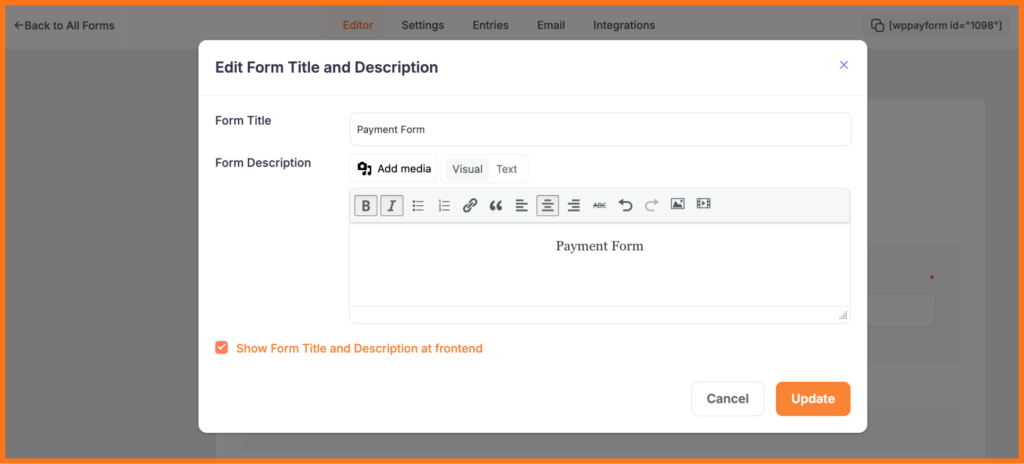
Before starting editing, give your form a name. Click on the Blank Form title and change it to the name you want.
Then, look at the fancy form fields and drag and drop the fields you seem fit for your form.
After adding all the necessary fields to your form, then add a two or three-column container. With Paymattic you can use two and three-column containers. Suppose you want to use a two-column layout with the Name and Email field, here’s how you can do it.
- Choose a two-column layout for the form fields.
- In the first column, add the Name field.
- In the second column, add the Email field.
Just drag and drop the desired field in the multi-column container. This setup will display the “Name” and “Email” fields side by side, allowing users to input both names in one section.
Here you will notice a resize icon between these two columns.
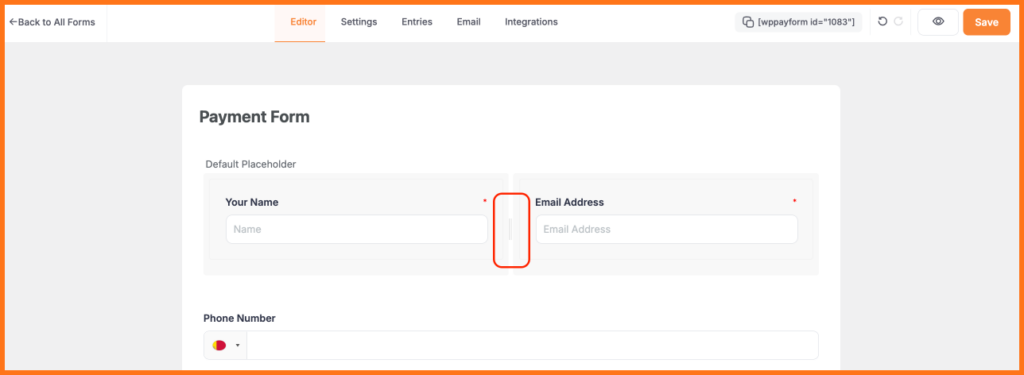
That lets you control the width of the columns, just drag left and right to adjust the size.
After adding all the form fields, don’t forget to click on the Save button. That’s all, you created a form with a multi-column layout.
Publish form on your website
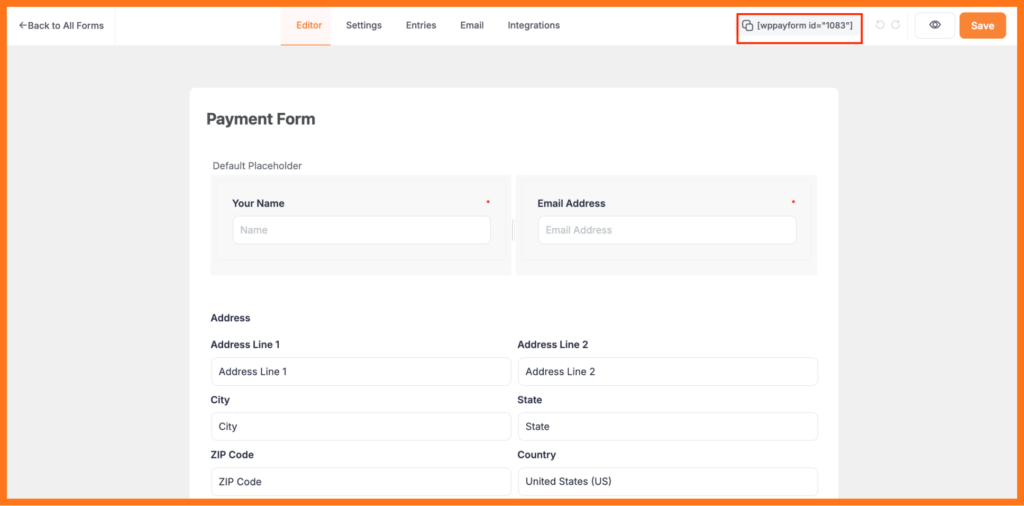
Now come to the final step, publishing the form on your site. To publish the form, simply just copy the shortcode from the upper left of the form editor page and paste it where you want the form to appear.
You’ll also find the shortcode in the All Forms tab, located on the right side of the form’s name.
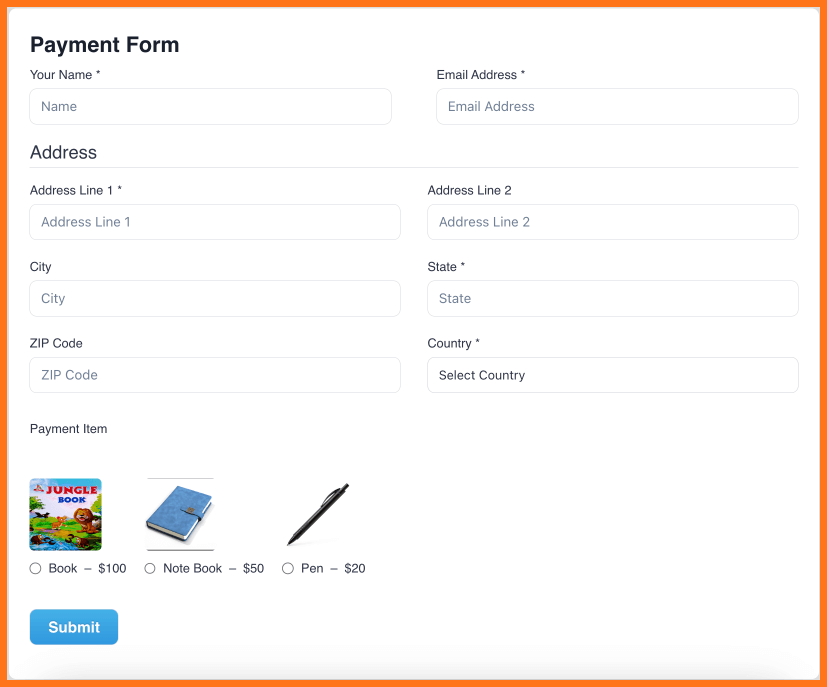
Here is the final look and frontend view of your payment form.
Wrapping up
Multi-column forms are a great way to enhance users’ experience by providing a clean and organized front end to your website. They ensure that more data is collected in a shorter space without feeling overwhelming to users. With Paymattic, you can easily build a multi-column form that not only looks professional but is also responsive to all devices.
Hope, this article gives you a clear concept, of how you can create a multi-column form on WordPress. You can check out our documentation to learn more details about the process.
Visit our website for more informative articles like this. Feel free to comment below with any questions.
Join the thousands already enjoying Paymattic Pro!

Madhobi
This is Madhobi, a content writer at WPManageNinja with expertise in technical writing and email marketing. Outside of work, she likes traveling and exploring new places.


Leave a Reply