Business Process Automation with Payment Reminder Email | The WordPress Way
Table of Content
Download Paymattic – it’s Free!

Subscribe To Get
WordPress Guides, Tips, and Tutorials
We will never spam you. We will only send you product updates and tips.
Are you struggling to make your payment collection process easier? One of the most proven ways to avoid late payments from customers is to send a payment reminder email.
Oh, wait! You must be thinking of the hassle of manually sending emails to every single customer.
No worries! Here’s an easy solution for you. Now, you can send automatic payment request emails to all of your customers with the help of the Paymattic WordPress plugin.
Why you should send a payment reminder email

In simple words, you should send invoice reminder emails, because it gets you paid on time. And as a business, you know how important it is to receive payments timely. Besides, it helps you make business operations smoother and you can make more planned decisions.
Let’s assume, you are taking a pre-order but want your customers to make payments at a later date. It’s so uncomfortable to directly ask customers for the payments. So, a nicely worded payment reminder message right through the inbox of the customer is a professional courtesy.
If you are in a business like insurance, gym center or any subscription-based venture, it’s so unprofessional to take payments from the customer without even reminding them. An advance reminder helps your customers avoid any payment issues or invoicing errors.
Let’s see how you can set up a gentle payment reminder message for your customers using Paymattic.
Set up an automatic payment reminder email
It’s so handy to set up automatic payment reminder emails in WordPress. You don’t need to write a single line of coding. Follow this step-by-step guide and set up the automation on your own.
Step 1 – Install Paymattic & FluentCRM
First of all, you need the Paymattic & FluentCRM WordPress plugins to create a payment form & set up automatic payment reminder email in WordPress. The Paymattic form helps you to register customers, collect customer data, save email addresses and FluentCRM will help you to launch the email automation. To install the plugins –
- Go to your WordPress admin dashboard and click on Plugins → Add New. Search for the Paymattic plugin and install it, then activate the plugin.
- Install the FluentCRM plugin in the same process and activate it.
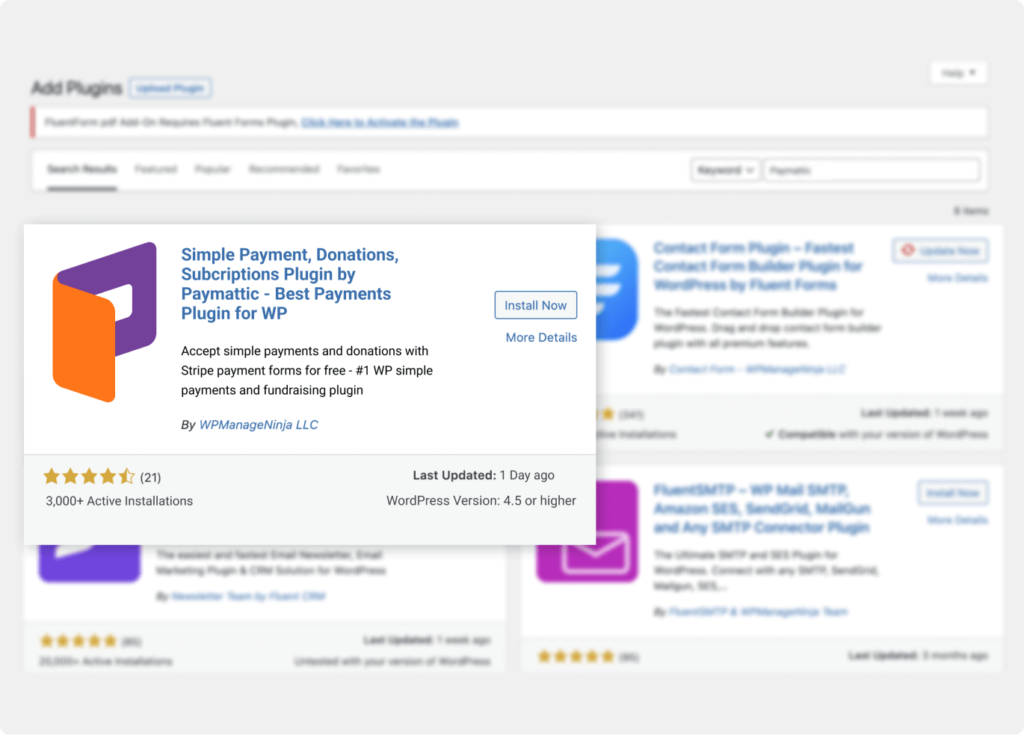
Paymattic has a free version but we recommend you to upgrade to the pro version to use all the premium features.
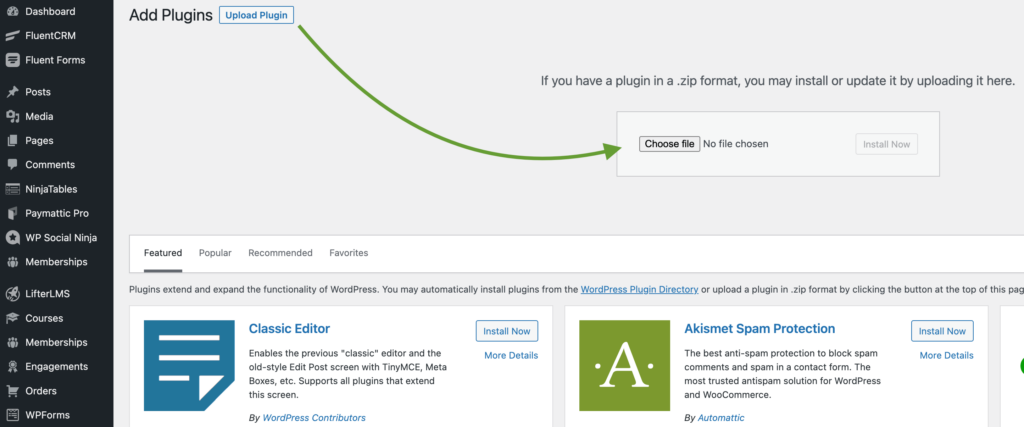
As email automation is a premium feature in FluentCRM, so you need to upgrade to the pro version to avail this feature. You can download the premium plugin from the FluentCRM site and upload it to your WordPress dashboard from Plugins → Add New → Upload Plugin.
Step 2 – Create a form
Now, you will be able to create forms in Paymattic. You can use this form as a customer registration form, payment form or taking subscription payments from the customers. Users will submit data on the form & you can automate email sending based on the submissions.
To create your form, go to Paymattic > Create Form from your WordPress dashboard.
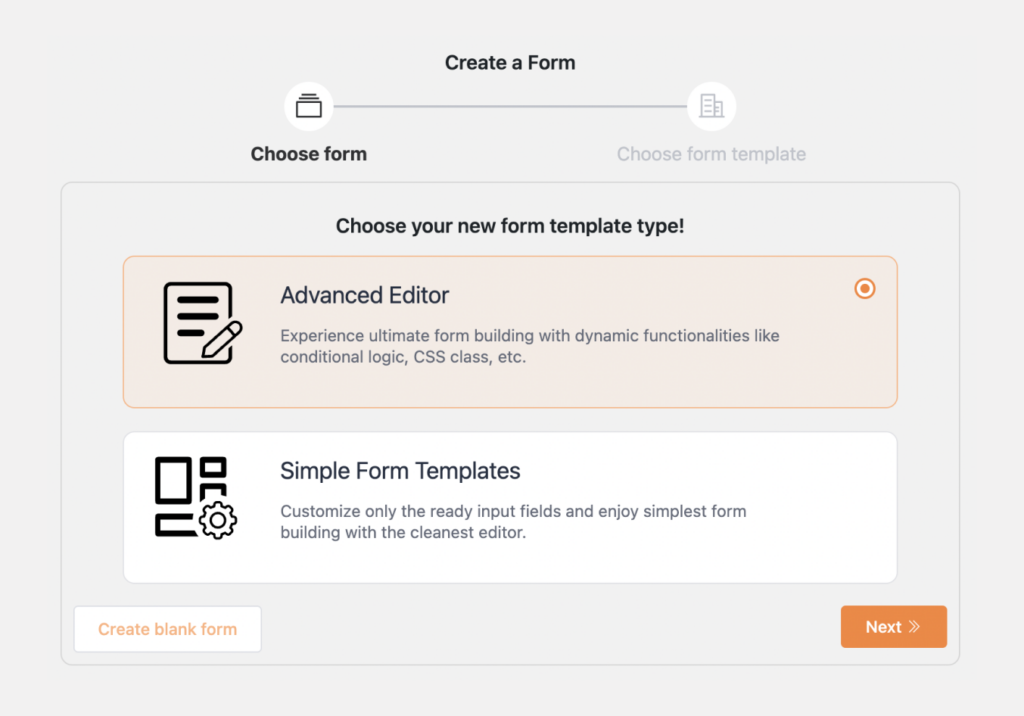
Read this blog to learn how to create a form in WordPress in more detail
Step 3 – Integrate the form with the FluentCRM WordPress plugin
You need to integrate the form you have just created with the FluentCRM email automation plugin. This integration will automatically send data to the FluentCRM contact list and FluentCRM will automatically shoot emails to the registered customers.
To do so –
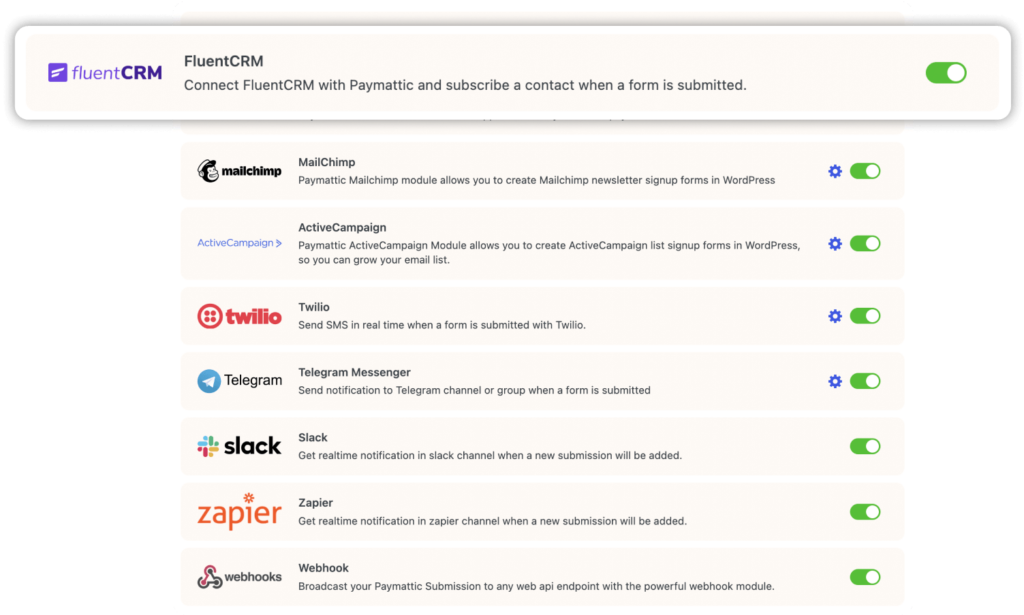
- Go to Paymattic → Integrations and enable the FluentCRM module.
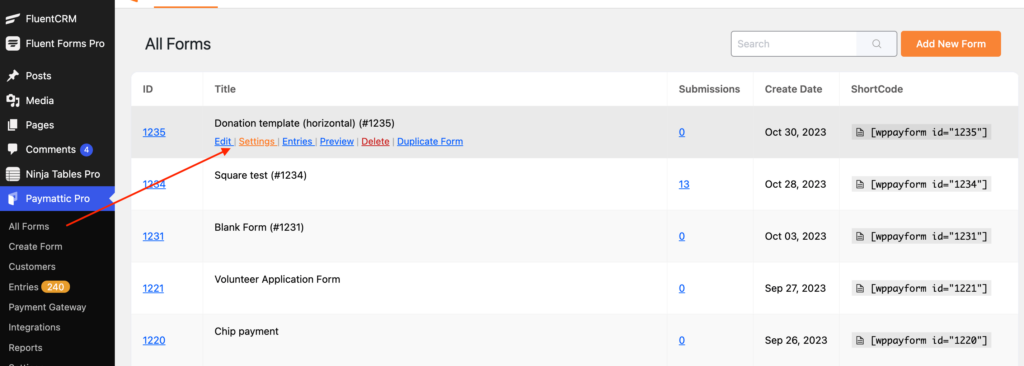
- Then, select the form by navigating to Paymattic → All Forms.
- Click on the Settings.
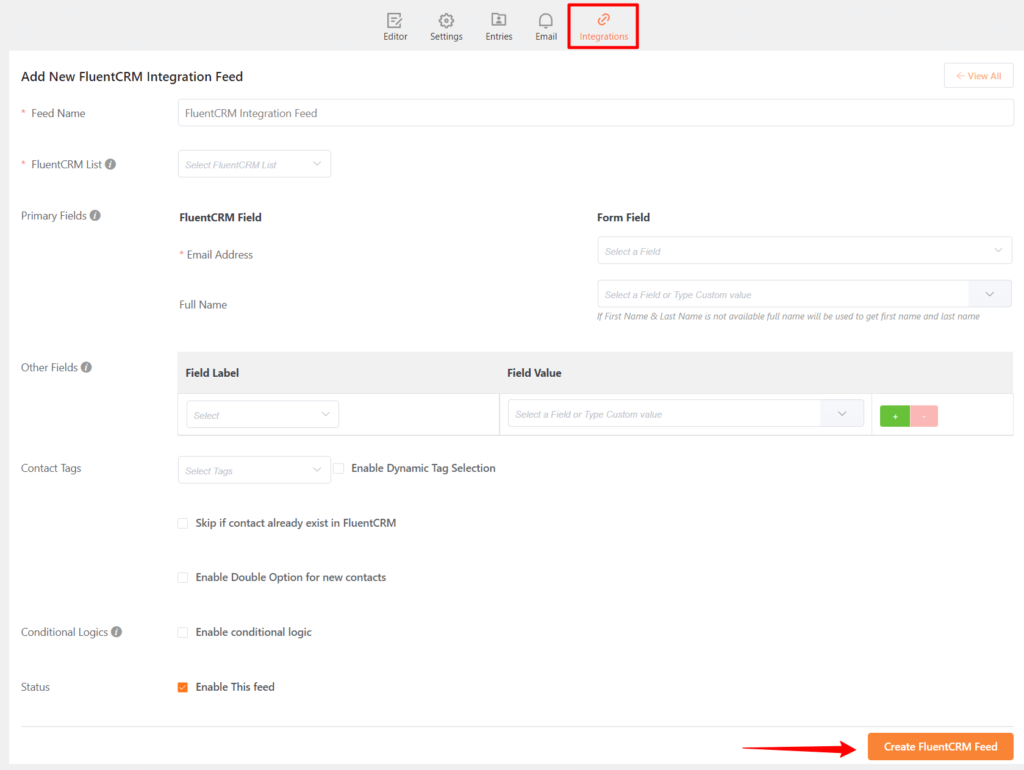
- Now, click on the Integrations tab.
- Press the Add New Integration → FluentCRM integration button.

- Configure the field with the necessary settings & map the fields of FluentCRM with the fields of your Paymattic form. You must map the Email Address field, otherwise, the integration won’t work successfully.
- At last, check the Enable this feed option & click on the Create FluentCRM Feed button.
Congratulations! You have successfully created the integration. Now, when a customer is registered by the Paymattic form, they will automatically be added to the FluentCRM contact list.
Subscribe Newsletter
Subscribe to our newsletter for updates, exclusive offers, and news you won’t miss!
Step 4 – Set up the payment reminder email automation
You are nearly done! You have created the form and integrated it with the FluentCRM. Now, you need to set up the email automation to send a gentle reminder for payment.
To do so –
- Go to, FluentCRM → Automation and click on the Create a New Automation button.

- Now, select the option List Applied. Click on the Continue button.

- Provide an automation name in the List Applied pop-up and select the List.
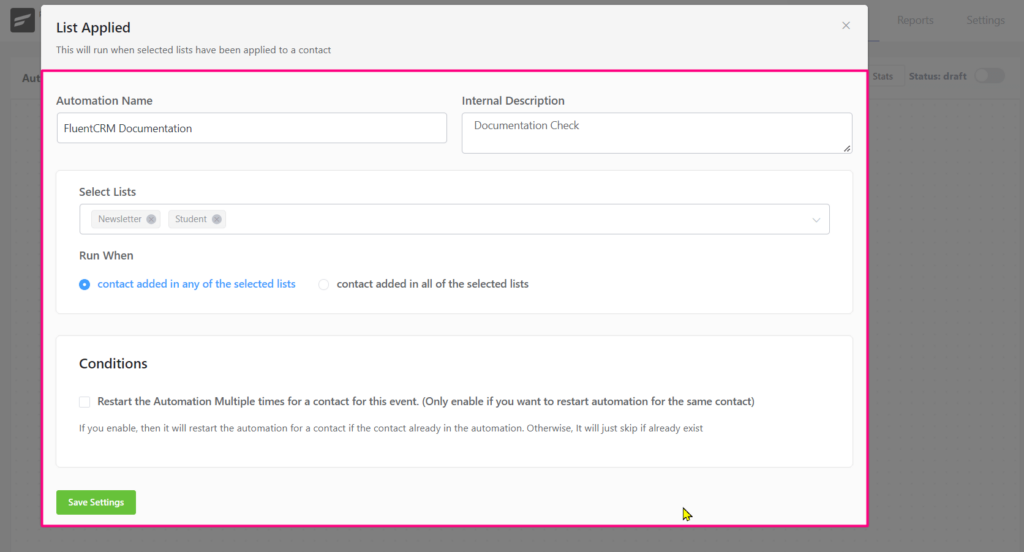
- You can restart automation for a contact multiple times for this event by enabling it from the Conditions section.
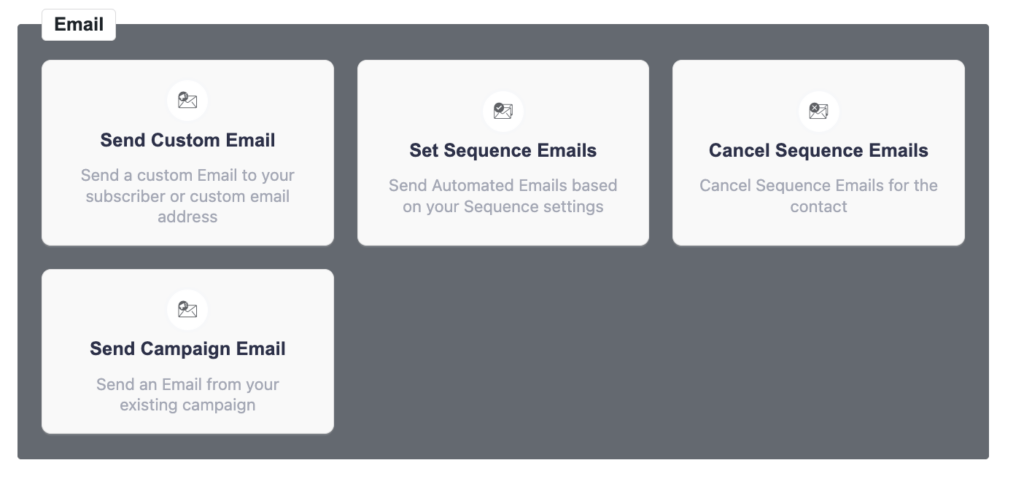
- Now, select Add Action → Send Custom Email by clicking on the ‘+’ icon.
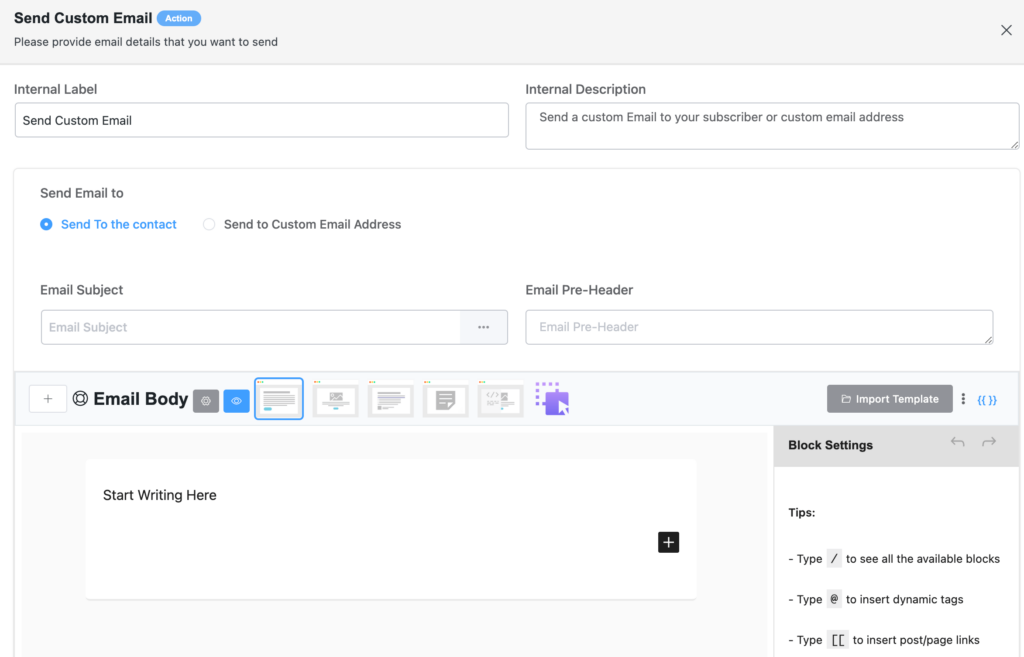
- The Custom Email Settings tab will open up.
- Check the Schedule this email to a specific date option & set the date when you want to send the payment reminder email.
- At last, click on the Save Settings button.
- Change the automation status from Draft to Published from the top right corner.
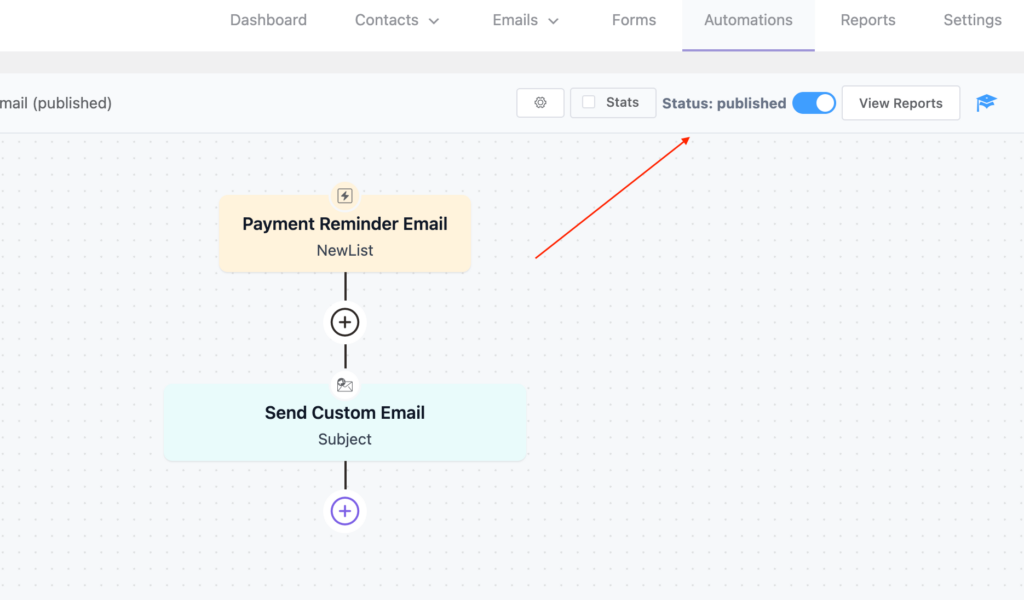
That’s it! You have successfully set up the payment reminder email.
Final notes
A payment reminder email is a crucial technique to automate your business process while maintaining the customer relationship. It saves a lot of time & resources as well as makes it easy for you to collect payment faster.
So, no more delay! Join the new revolution of online payment with Paymattic & fuel your business growth today!
Join the thousands already enjoying Paymattic Pro!




Leave a Reply