

How to Integrate Square Payment Gateway with WordPress?


Table of Content
Download Paymattic – it’s Free!

Subscribe To Get
WordPress Guides, Tips, and Tutorials
We will never spam you. We will only send you product updates and tips.
As a business owner, you understand how stressful it is to get paid at all. Instead of going through the hassle of agreeing to pay on a certain day, your customers prefer to pay immediately and be done with it. Payment gateways help them to do so, creating a win-win situation for you and your customers.
What is Square payment gateway
Square is a payment processing system that accepts credit or debit card payments through online channels. Like PayPal and Stripe, you can integrate Square payment gateway with WordPress for fast and secure payment processing. Millions of websites are using Square for online payments.
Square online payment offers low-cost credit card processing fees for businesses which has less than $10000 transactions per month. Besides online payments, it offers in-store and POS payments through its own devices.
Square is a fully secure payment gateway as it maintains all PCI standards in its network. It also provides an all-in-one dashboard to manage all payments swiftly.
Paymattic payment plugin for WordPress
Paymattic is the best WordPress plugin for accepting online payments. It is very simple to create donation and payment forms with Paymattic in just a few clicks.
Other than Square, it supports Stripe, PayPal, Payrexx, Billplz, Paystack, Xendit, Mollie, Moneris, Viva Wallet, Flutterwave, Razorpay and SSLCOMMERZ. Using the Offline payment method, you can collect payments by cheque or bank account.
This multi-purpose plugin can be used to accept payments for a product or service as well as to collect donations. The Donation Progress Item feature adds a dynamic progress bar to the form. With the Tabular Product Items field, you can create a product table in the form.
Paymattic accepts 135+ currencies. So, you can accept payments globally with any type of currency you wish!
The upcoming version of Paymattic is coming with more robust features such as donors’ profiles, PDF payment receipts, etc.
Ready to get started?
Experience payments and donations for WordPress like never before. Try Paymattic now!
Integrate Square payment gateway with WordPress
Let’s learn how to setup Square online payment gateway with WordPress using Paymattic in this blog.
- At the start, go to Paymattic(Pro) > Payment Gateway from your WordPress dashboard.
- Then, Click on Square from the left navigation bar.
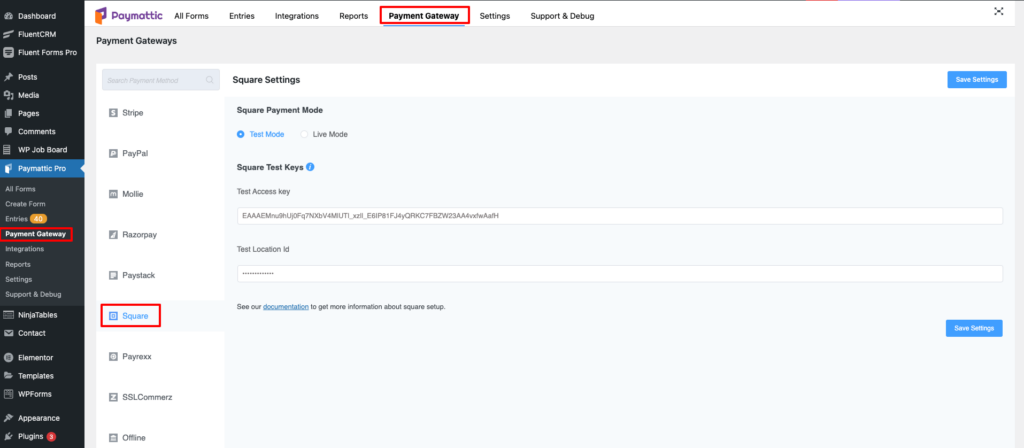
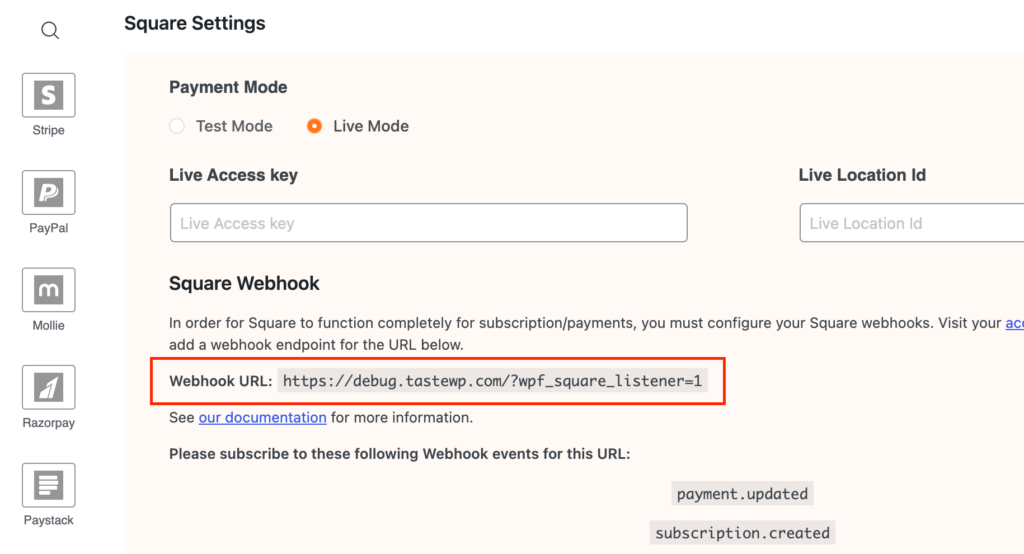
Now, the Square settings page will open up. Here, you have to set up Live Mode or Test Mode. However, you can follow the same procedure to set up the Live Mode or Test Mode.
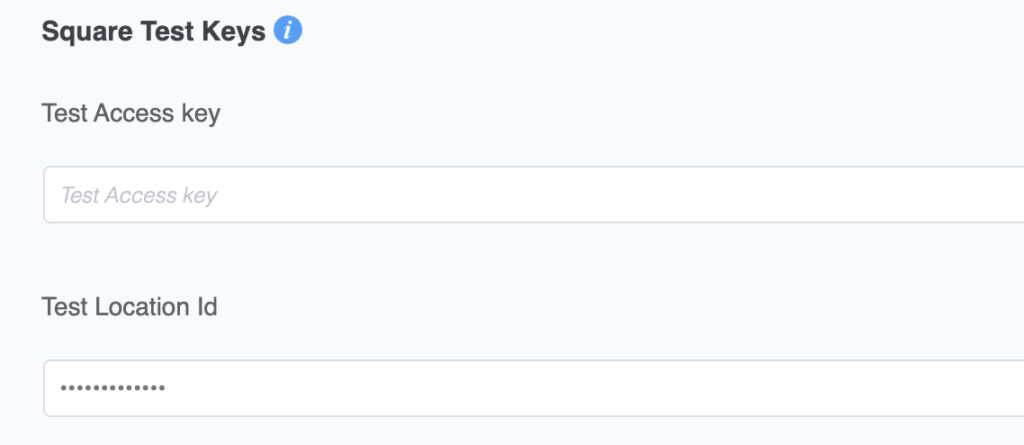
Next, the Square settings page will ask you to insert an Access Token and Location ID.
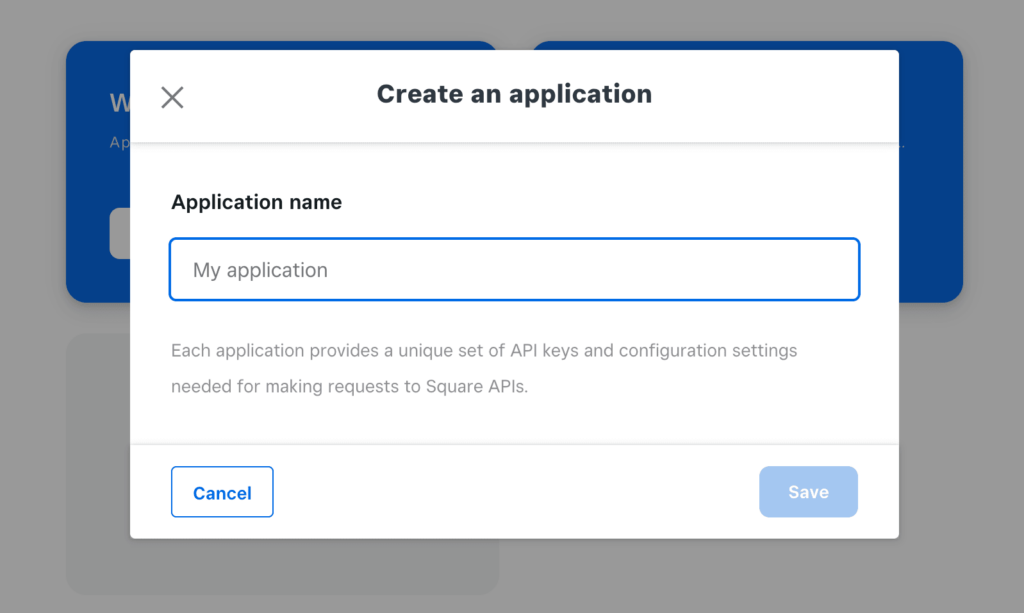
To avail your Access Token and Location ID, go to the Square Developer Dashboard page and log in to your Square account.
- Now, press the Create An Application button.
- Provide your application name and click the Save button.
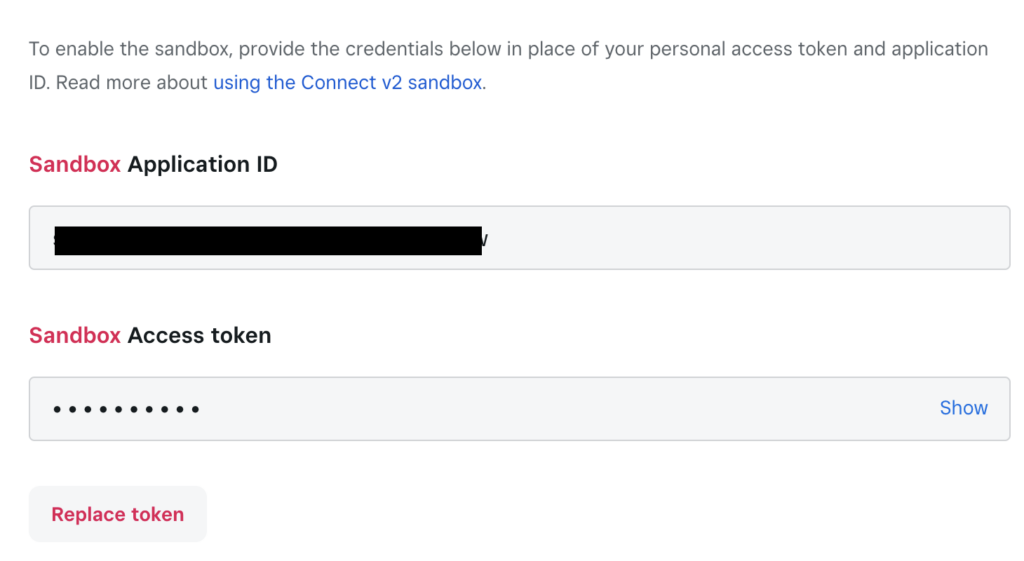
- Click Open right below your application name.
- Your application credential page will appear.
- Then, you will get your Sandbox Access Token.
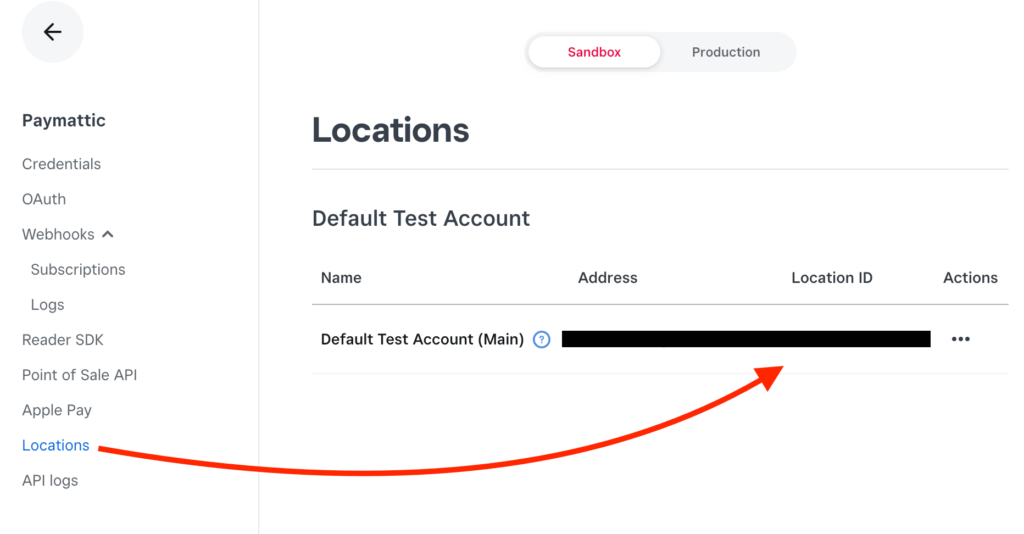
- Next, click on the Location tab from the left navigation menu.
- Copy your Location ID.
Put your Access Token and Location ID into the respective field from Paymattic (Pro) > Settings > Payment Gateway > Square.
Finally, click on Save Settings to finish the Square integration with WordPress site.
Configure Webhooks for Square subscription payments
Paymattic is going to introduce subscription payment in Square using the Paymattic plugin. It will take very little time to configure webhooks for Square subscription payments. It helps you get the payment status automatically right from the WordPress dashboard.
You will find your Webhook URL from Paymattic → Payment Gateway → Square in your WordPress dashboard. You just need to paste this Webhook URL into your Square developer dashboard.
You are all set! Now it’s time to create a new form and test the integration. To create a new form –
- Go to Paymattic(Pro) > Create Form.
- Click on the Advance Editor option.

- Here, you can use a prebuilt form template or create a fresh one.
- Click on the New Blank Form to build a form from the beginning.
- Add all your required form fields.
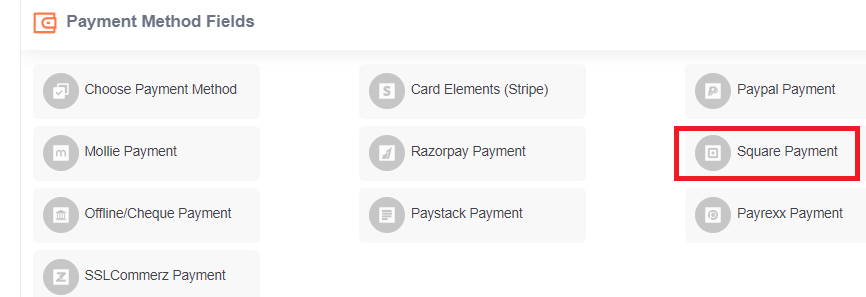
- At last, add Square payment gateway from the payment method fields.
- Finally, you must click on the Update Fields button to save the changes.
You have successfully created a form with the Square payment gateway. Copy the shortcode of the form on a page and publish the page. Wow! You are ready to accept Square payments on your website!
Also check this simple guide to Stripe payment gateway integration with Paymattic
Final notes
Now, you know how easy it is to collect payments in WordPress through the Square payment gateway with Paymattic. Do not miss the chance to give it a shot and take your website to the next level.
Also, if you find this blog interesting, let us know your thoughts in the comment section below.
Join the thousands already enjoying Paymattic Pro!

Shuyeb Ahmed
Hi, This is Shuyeb. I am a digital marketing enthusiast, love to write about WordPress products and new updates. At the weekend, you will find me exploring nature & beautiful places.


Leave a Reply