

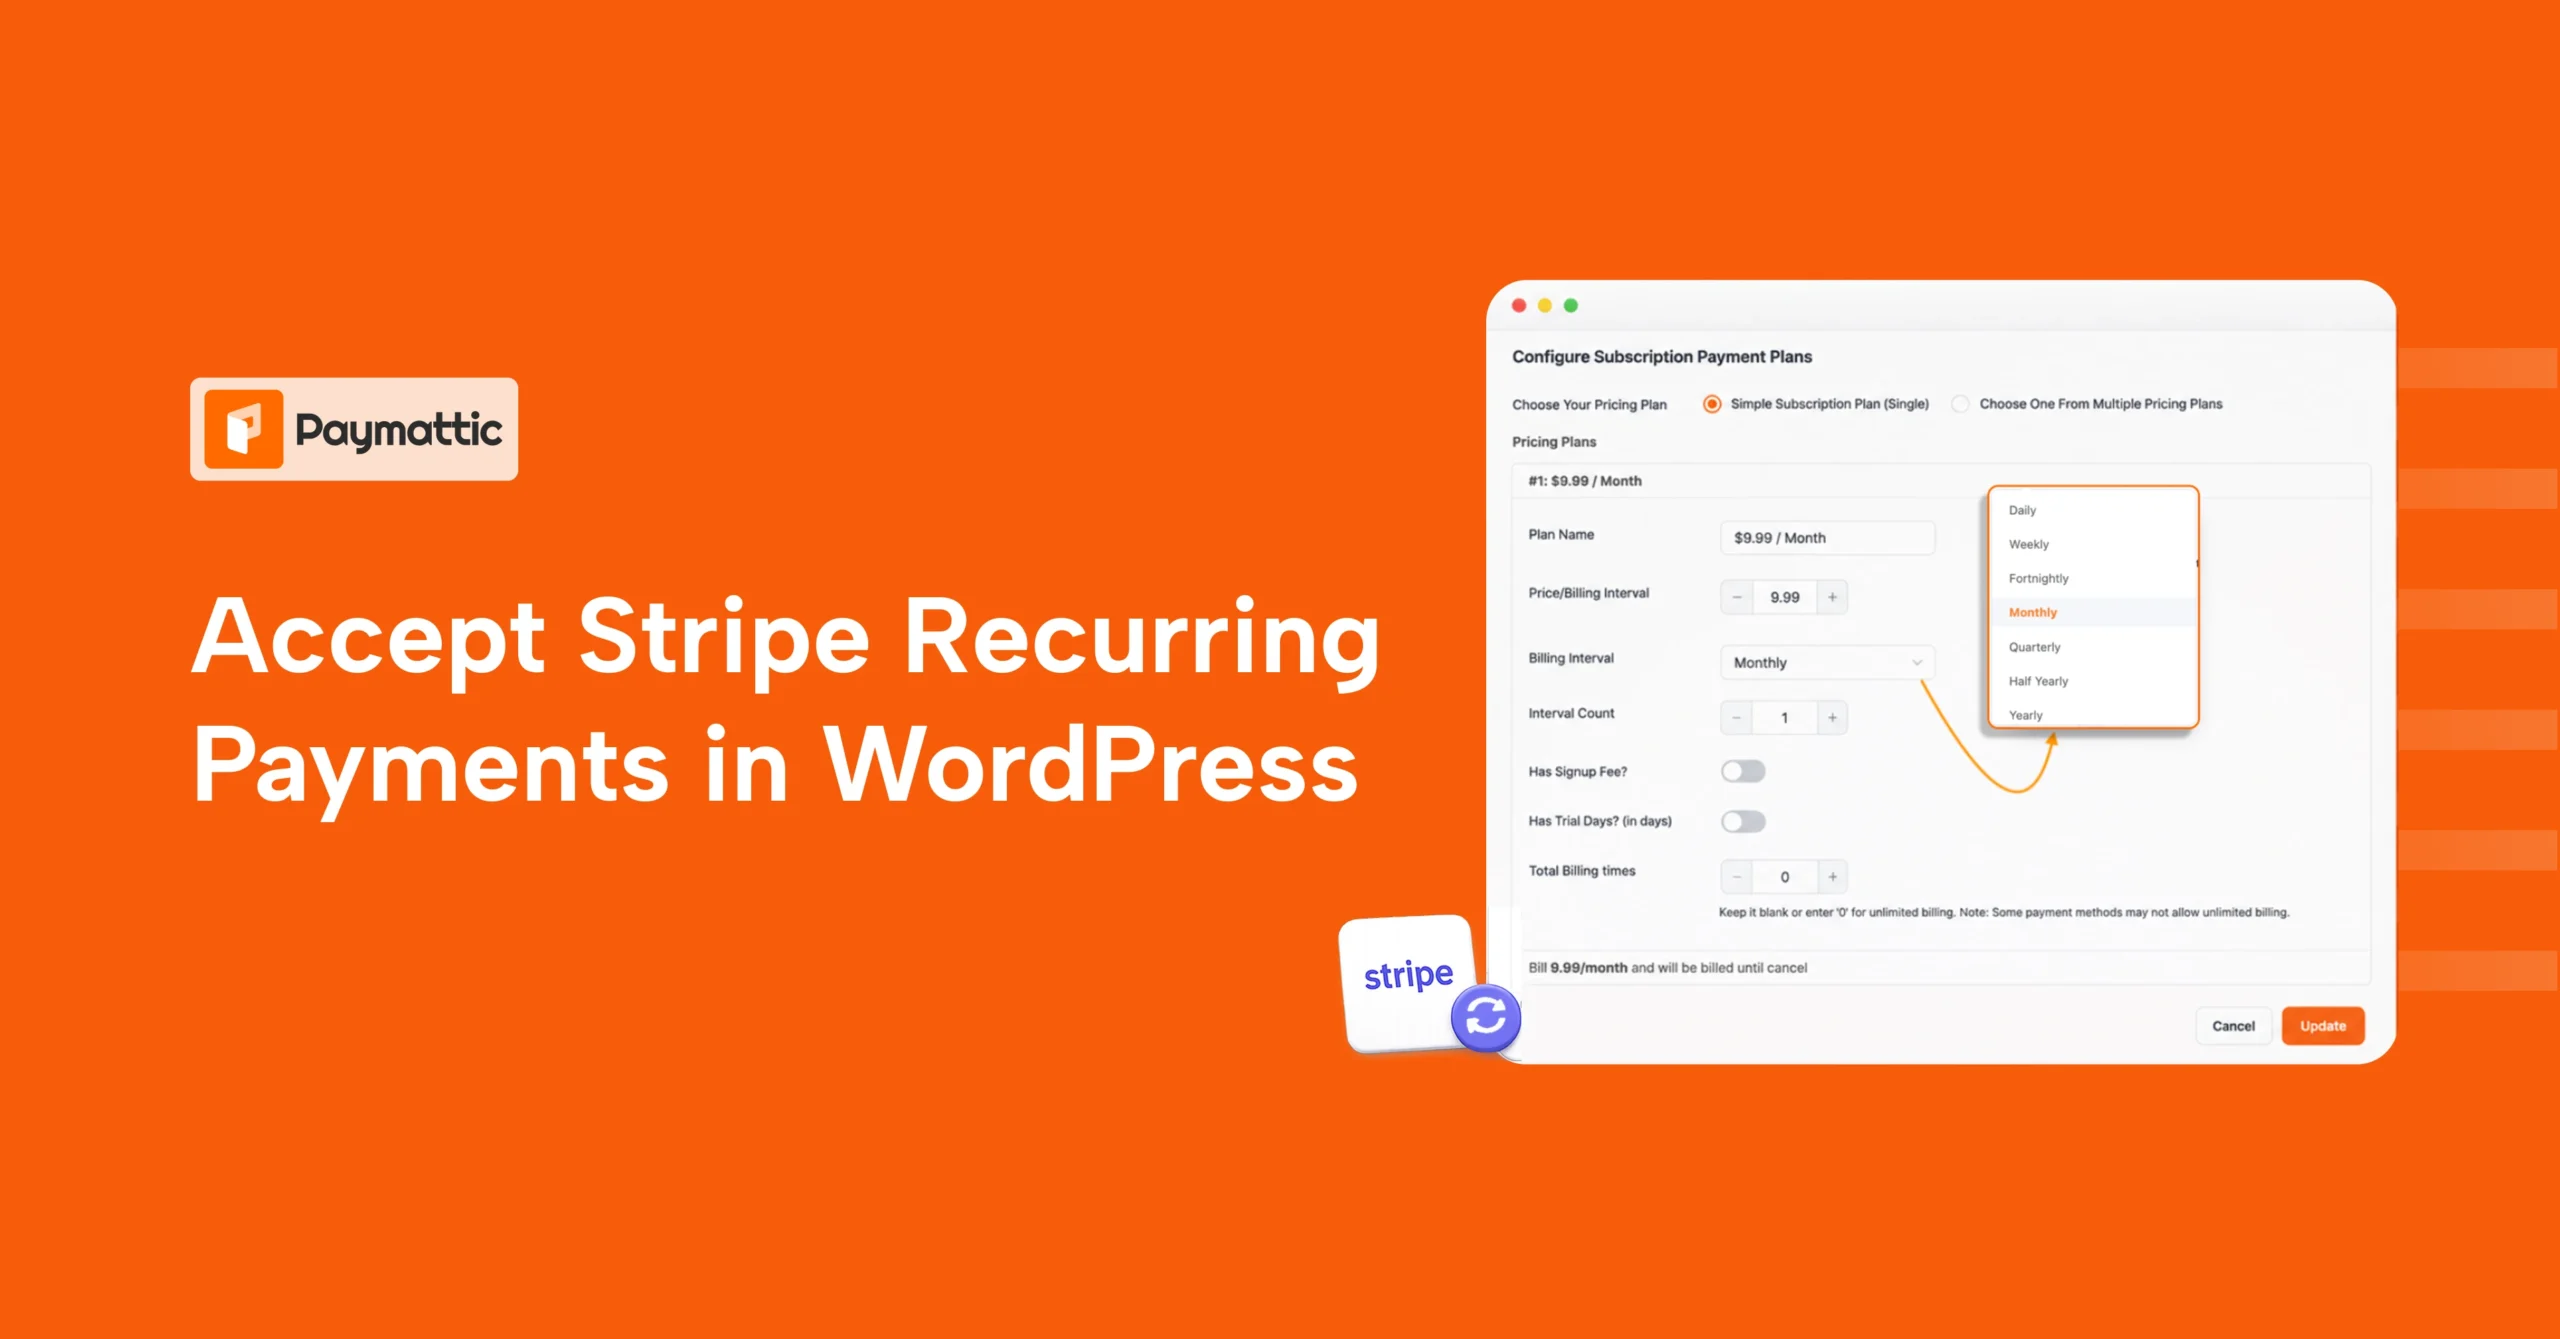
Accept Stripe Recurring Payments in WordPress


Table of Content
Download Paymattic – it’s Free!

Subscribe To Get
WordPress Guides, Tips, and Tutorials
We will never spam you. We will only send you product updates and tips.
If you’re running any kind of subscription business, a membership site, or a nonprofit that relies on monthly donors, you’ve probably already figured out that chasing one-time payments every single billing cycle is a losing game.
Nobody has time to manually invoice fifty subscribers every month. That’s exactly the gap Stripe recurring payments fill, and if you’re on WordPress, setting this up is a lot less intimidating than it sounds.
This guide walks you through everything you need, from understanding what recurring payments actually mean in Stripe’s world, to the exact steps for getting a subscription form live on your WordPress site.
By the end, you’ll have a working setup and enough context to troubleshoot it yourself if something looks off.
Key takeaways
- Stripe recurring payments automatically bill customers on a set schedule, no manual invoicing, no re-entering card details every cycle
- Recurring billing gives you predictable revenue, cuts down on manual admin work, and reduces churn caused by friction at renewal time
- Stripe supports 135+ currencies, so this setup works whether your subscribers are local or global
- Paymattic lets you connect Stripe and build a subscription form on WordPress without touching any code
- Webhooks are the piece most people skip or rush, and they’re what keeps Stripe and your WordPress site in sync on payments, renewals, and cancellations
- Always test in Stripe’s Test Mode first, confirm entries, emails, and webhook events are firing correctly before switching to Live
- Once live, Paymattic’s subscription management panel gives you a way to track and cancel subscribers without digging through Stripe directly
What are Stripe recurring payments?
Stripe recurring payments are transactions that get charged automatically on a set schedule, without your customer having to enter their card details again and again.
Think of it as the backbone of any subscription payment system: someone signs up once, agrees to a billing plan, and Stripe takes care of collecting that payment every week, month, or year until they cancel.
Behind the scenes, Stripe handles this through what it calls Subscriptions, which are built on top of two core objects: a Customer and a Price.
Once a customer is linked to a subscription plan, Stripe’s billing engine takes over the entire recurring payment in the Stripe lifecycle, generating invoices, retrying failed charges, and sending renewal notifications, all without you writing a single line of code.
This is different from a one-time payment where the transaction happens once, and it’s done. With subscription payment setups, the relationship continues. That’s what makes it so useful for SaaS products, online courses, membership communities, and recurring donation programs.
Benefits of accepting Stripe recurring payments
Before you get into the how, it’s worth understanding why so many WordPress site owners lean on Stripe for this specific job.
Predictable, steady revenue
Instead of guessing what next month looks like, recurring billing gives you a baseline you can actually plan around. That predictability matters whether you’re running a business or funding a nonprofit’s operating costs.
Less manual work
Once a subscription payment system is in place, you won’t have to manually charge cards or send payment reminders. Stripe automatically bills the customer, retries failed payments a few times, and notifies both you and the subscriber when something needs attention.
Better customer experience
Nobody enjoys re-entering their card details every month. Accepting recurring payments with Stripe online means your customers set it up once and forget about it, which reduces churn that happens simply because renewing felt like a chore.
Wide global reach
Stripe supports 135+ currencies, so if you accept recurring payments with WordPress for an international audience, you’re not limited to a handful of markets.
Flexible billing options
You can offer trial periods, setup fees, multiple pricing tiers, and different billing intervals, daily, weekly, monthly, or yearly, all from the same subscription setup.
If you’re running a fundraising campaign specifically, this same mechanism powers recurring donations, which tend to be far more valuable over time than one-off gifts.
We’ve covered that angle in more depth in our guide on Stripe for nonprofits if that’s closer to your use case.
Subscribe Newsletter
Subscribe to our newsletter for updates, exclusive offers, and news you won’t miss!

How to accept recurring payments with Stripe in WordPress
Now for the part you actually came here for.
There are a few ways to bring Stripe recurring payments to a WordPress site, but the simplest, no-code route is through Paymattic, which handles the entire subscription payment system, from card collection to renewal tracking, without needing a developer.
Here’s the full Stripe recurring payments setup guide, step by step.
- Step 1: Install and activate Paymattic Pro
- Step 2: Configure the Stripe payment gateway
- Step 3: Set up Stripe webhook
- Step 4: Set up a subscription form
- Step 5: Test payments and go live
Step 1: Install and activate Paymattic Pro
Go to your WordPress dashboard, then
- Plugins > Add New Plugin
- Search for Paymattic, click Install Now, then Activate
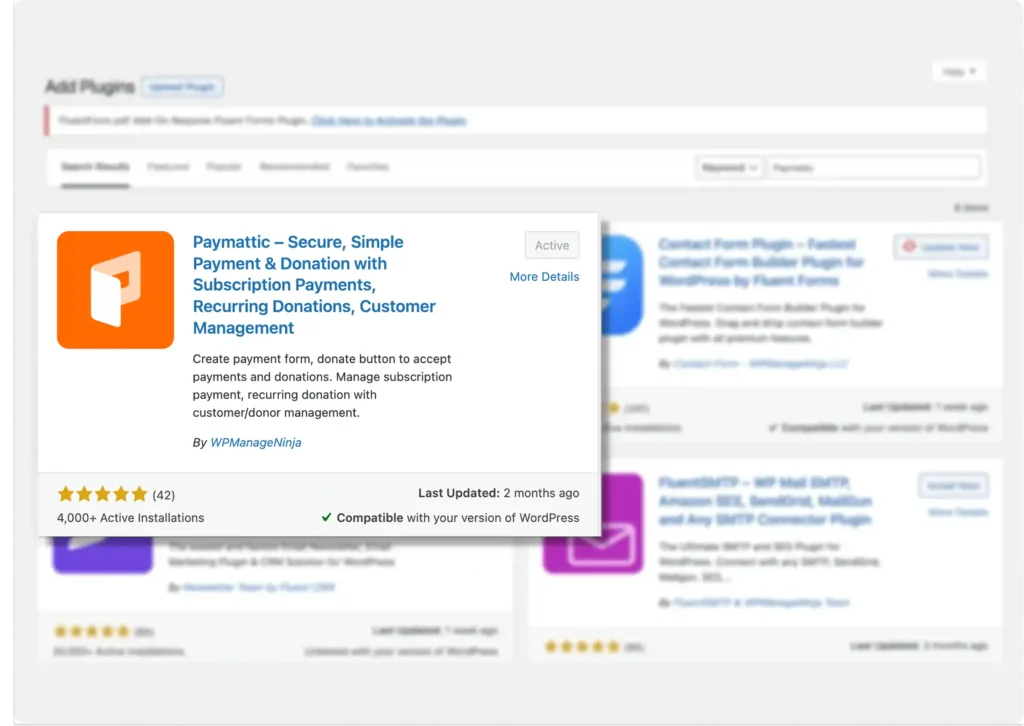
Prefer manual installs? Download the zip from WordPress.org and upload it instead.
Once activated, you’ll see a new Paymattic menu appear in your WordPress sidebar. That’s your control center for everything from here on.
NB: You can accept one-time Stripe payments with the Paymattic free version, but to accept recurring payments with Stripe, you’ll need the Paymattic Pro version, which starts at 4.99/months.
Step 2: Configure the Stripe payment gateway
This is where you connect your actual Stripe account to Paymattic, and it’s genuinely the most important step to get right.
From the Paymattic navbar,
- Go to Payment Gateway, then click the Stripe tab
- You’ll be asked to choose between Test Mode and Live Mode
- Choose Test Mode first; always test before going live
It lets you run through the entire setup and confirm everything fires correctly before real money is involved.
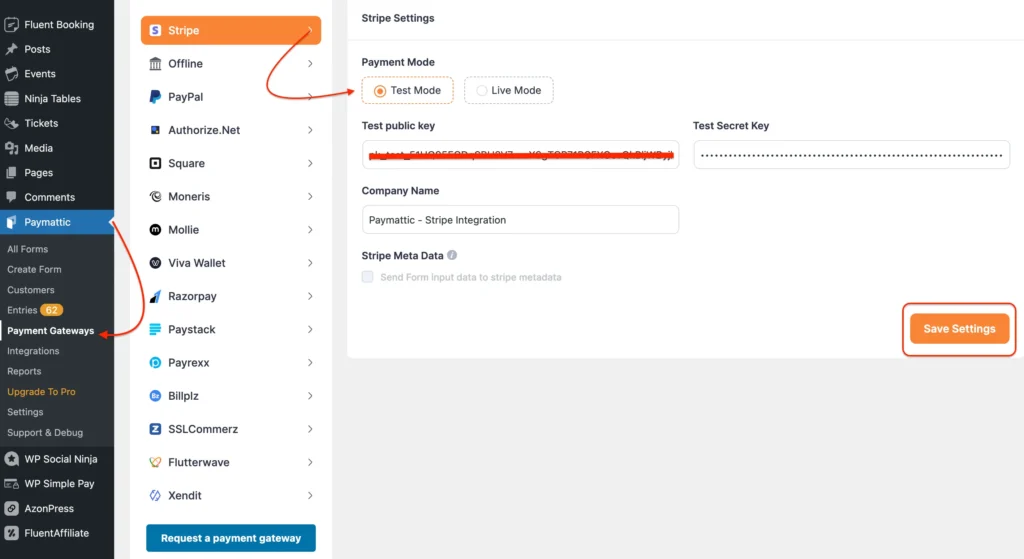
- Log into your Stripe dashboard and head to Developers > API keys
- Copy your Publishable key and Secret key
- Paste both keys into the matching fields in Paymattic, then hit Save Settings
Optional: add your Company Name (shows up on checkout) and enable Stripe Metadata if you want form data passed through
Check out the full breakdown of configuring Stripe API keys.
Step 3: Set up Stripe webhook
Webhooks are what keep your Stripe dashboard and your WordPress site in sync. Without one, Stripe might successfully charge a subscriber, but your site would have no idea whether the payment went through, later failed, was renewed, or was cancelled.
From the same Stripe settings page in Paymattic
- Copy the Webhook URL.
- Go back to your Stripe dashboard > Developers > Webhooks
- Click + Create an endpoint.
- Paste in the URL you copied, and select the events Paymattic recommends.
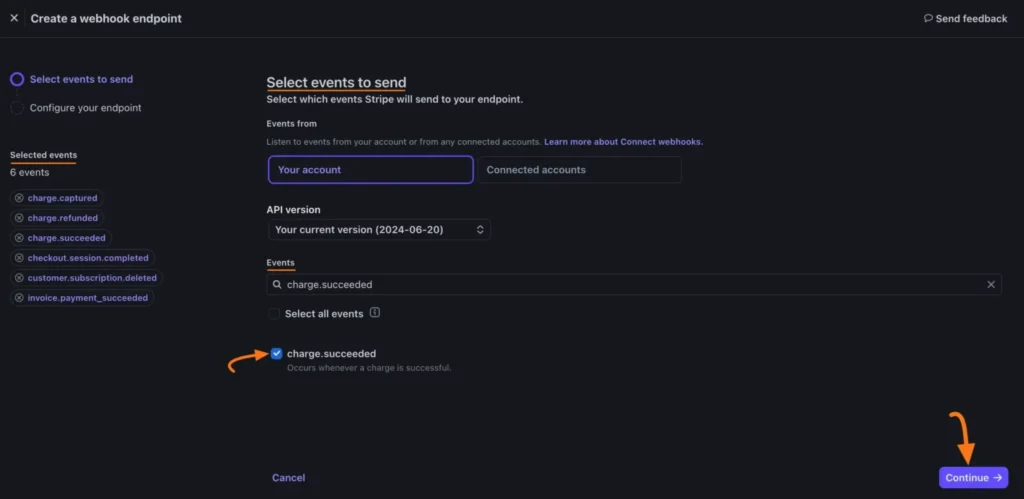
For recurring payments in Stripe specifically, you’ll want:
invoice.payment_succeeded, which confirms a subscription payment went throughcustomer.subscription.deleted, which fires when a subscription ends or gets cancelledcheckout.session.completed, which confirms the initial checkout was successfulcharge.succeededandcharge.refundedfor general payment and refund tracking
Once selected, click Continue, then Create destination. Your Stripe account and WordPress site are now synced in real time.
Step 4: Set up a subscription form
With the gateway connected, it’s time to actually build the subscription form your customers or donors will use.
- Go to Paymattic > All Forms > Create Form.
You can start from a blank form or use one of the pre-built templates, which is usually faster if you’re not picky about exact layout.
- Inside the form editor, add required fields either by typing “/” or clicking the plus (+) icon
- Add a Subscription Payment field
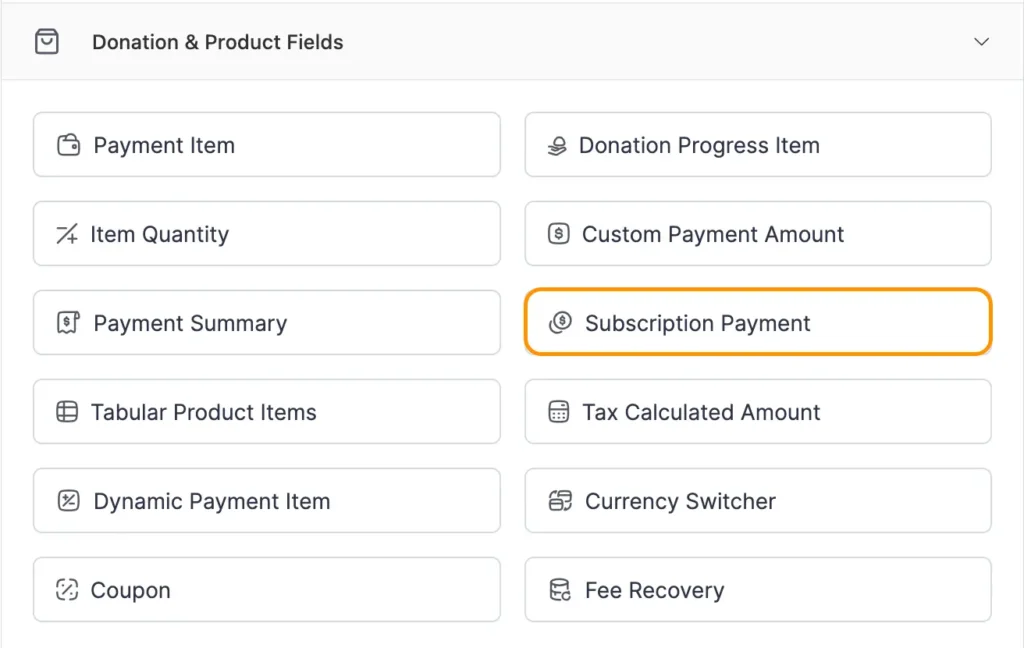
- From there, click the settings icon on that field to configure your pricing plan.
You can set a single flat subscription price, or offer multiple pricing tiers with different billing intervals. This is also where you’d add trial periods or one-time setup fees if your plan needs them.
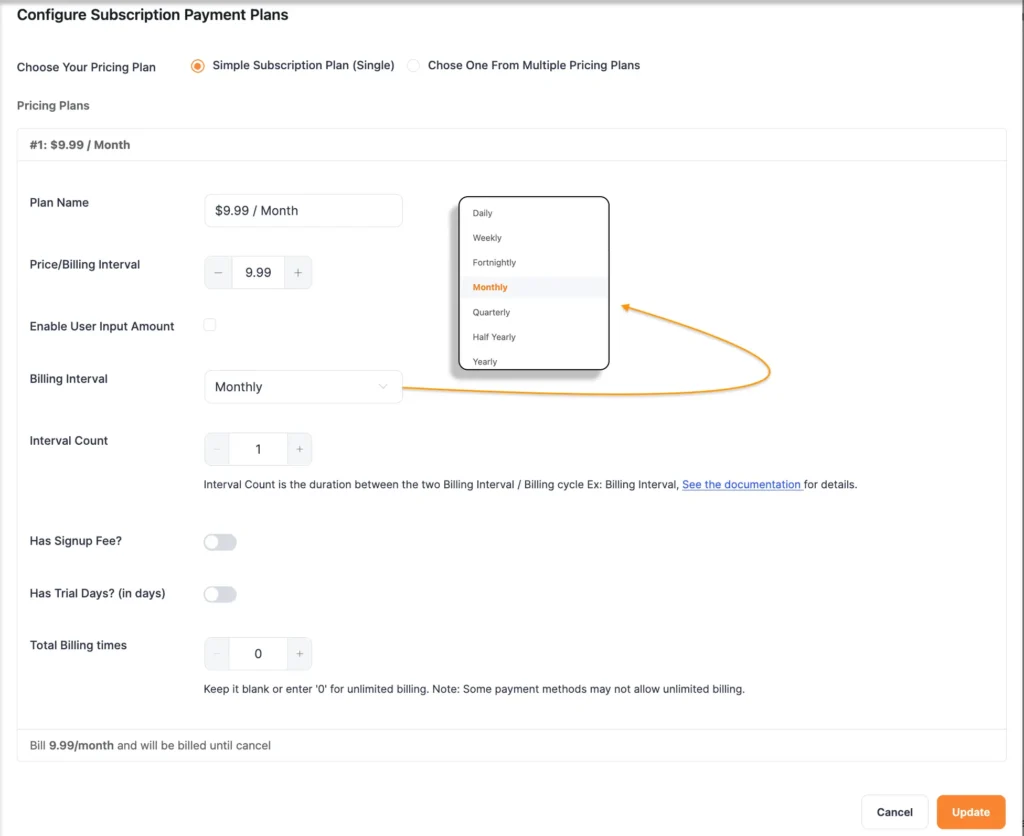
Once your fields are in place, add the Payment Method field and make sure Stripe is selected.
That’s it!
Save the form, then copy the shortcode and paste it into whichever page or post you want the form to live on.
Step 5: Test payments and go live
Before you flip the switch to Live Mode, run a few test transactions. Stripe provides test card numbers specifically for this, so you can simulate a successful subscription payment, a failed card, and even a subscription cancellation without touching real money.
Check that:
- The subscription actually shows up under Stripe’s Customers and Subscriptions tabs
- Paymattic’s entries dashboard reflects the same transaction
- Confirmation emails are firing correctly for both you and the subscriber
- The webhook events are being received (you can check delivery logs right in Stripe’s webhook settings)
Once everything checks out, switch back to Payment Gateway > Stripe in Paymattic, flip the mode to Live, and replace your test API keys with your live ones.
From this point forward, you’re accepting Stripe recurring payments in WordPress.
Wrapping up
Setting up online subscription payment processing sounds like it should require a developer, but between Stripe handling the billing logic and Paymattic handling the WordPress side, most of the heavy lifting is already done for you.
The part that actually matters is getting the webhook right and testing thoroughly before you go live, since that’s usually where things quietly break.
Once it’s running, you get a system that bills itself, tracks itself, and frees you up to focus on actually growing whatever it is you’re charging for.
If you haven’t already, it’s worth reading through our broader Stripe payment gateway guide for context on fees and how Stripe processes payments end-to-end; it pairs well with everything covered here.
Join the thousands already enjoying Paymattic Pro!

Tipu Deb
Hey! Tipu here, working as a Marketing Strategist at WPManageNinja & Paymattic. A nature lover and a person who is addicted to exploring historical events. In my leisure, you’ll find me playing with different musical instruments.






Leave a Reply