
Paymattic User Dashboard: User Profile, Subscription Payments & Form Entries – Unified in a Single Pack


Table of Content
Download Paymattic – it’s Free!

Subscribe To Get
WordPress Guides, Tips, and Tutorials
We will never spam you. We will only send you product updates and tips.
Paymattic is already in the buzz particularly in the WordPress industry for its surprising features. Recently, it came up with another breakthrough feature – User Dashboard! Now, your users can access their personal profiles, subscription payments and form entries in a single module.
Paymattic WordPress donation plugin
Paymattic is the ultimate donation plugin that comes with dynamic features. You can accept donations, create donation forms, take subscription payments and many more with this plugin.
Paymattic supports 13 payment gateways so that you can receive payments around the globe. The payment methods include Stripe (free), PayPal, Square, Billplz, Payrexx, Paystack, Mollie, Razorpay, SSLCOMMERZ, Xendit, Flutterwave, Moneris, Viva Wallet and offline payments.
Other mind-blowing features of Paymattic are –
- 135+ currencies
- 14+ integrations
- Donation progress item
- Donation template
- Advanced editor
- Donor profile
- Currency switcher
- Advanced reporting
- World-class support and many more.
Ready to get started?
Experience payments and donations for WordPress like never before. Try Paymattic now!
Paymattic User Dashboard
Your users may subscribe to several services on your website and make payments multiple times. Besides, they provide plenty of information through the forms on your website. So, it can be daunting to keep track of all the different payment details, form entries and customer data for individual users. This is where the User Dashboard comes in.
This User Dashboard feature lets the users access their individual dashboards and view all the submitted information and payment history. You can also use it as a customer dashboard or donor dashboard while you collect payments and donations. It provides a clear overview of account information, payment history, and form entries. In this blog, we will explore how you can enable the User Dashboard in Paymattic.
Subscribe Newsletter
Subscribe to our newsletter for updates, exclusive offers, and news you won’t miss!

How to enable the User Dashboard in Paymattic
If you are familiar with WordPress, it’s like a breeze to enable User Dashboard in Paymattic. Before you begin the process of enabling the User Dashboard you need to turn on the WP User Registration module and integrate the user registration feed with your form.
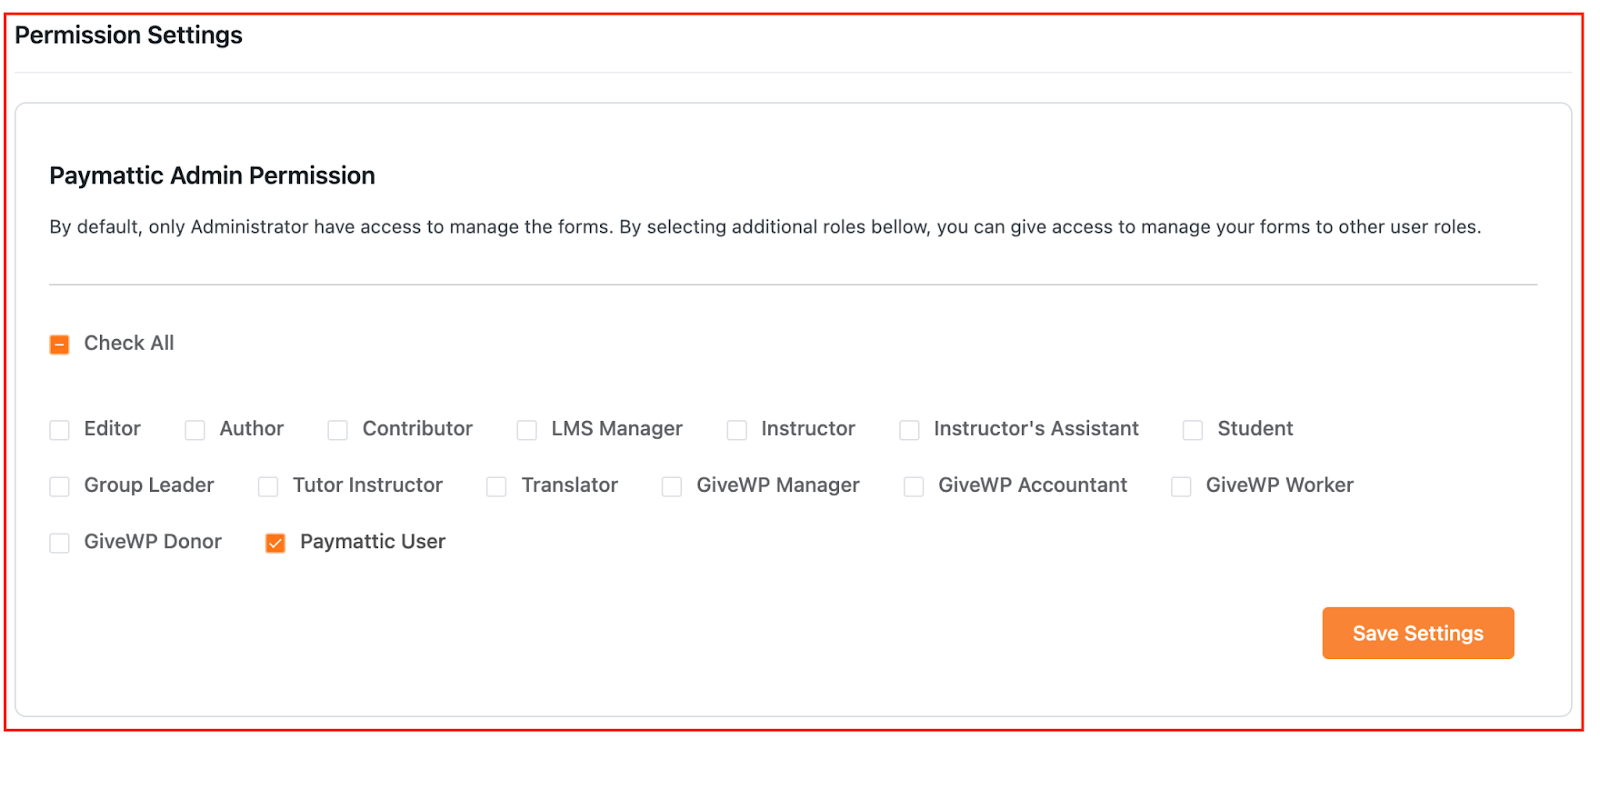
- Now, go to Paymattic (Pro) > Settings from your WordPress admin dashboard.
- Then, click the Permission module at the left sidebar.
- You can find three types of user roles for Paymattic in the Paymattic User Permission section.
Then go to Paymattic (Pro) → Settings → User Dashboard to access the Dashboard Settings
You can provide 4 different types of permissions for individual user roles. You can set the following permission for each user role –
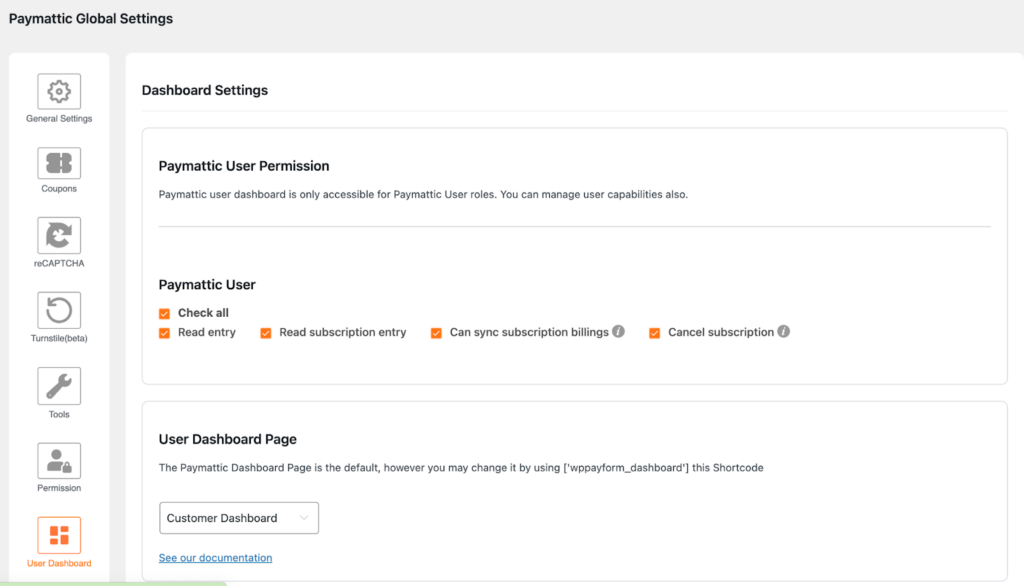
- Read entry – Users can only read the entry submitted by them.
- Read subscription entry – Users can read the subscription payment entry made by them.
- Can sync subscription billings – Enabling this option will automatically sync subscription billing.
- Cancel subscription – Users can cancel their subscription payment.
Once you set the necessary permission click the Save Settings button to save the changes.
However, you can select a page where you want to view the User Dashboard or you can use the shortcode [‘wppayform_dashboard’].
Excellent! You have activated the User Dashboard module and set permission for users. Now your users can access the “User Dashboard”. If your website URL is “example.com” then your users can access the dashboard through the following link –
“www.example.com/wp-admin”
Let’s see what your users view when they access the User Dashboard. Upon visiting the Paymattic (Pro) →Dashboard users will find two tabs. These are –
- Dashboard
- Manage Subscription
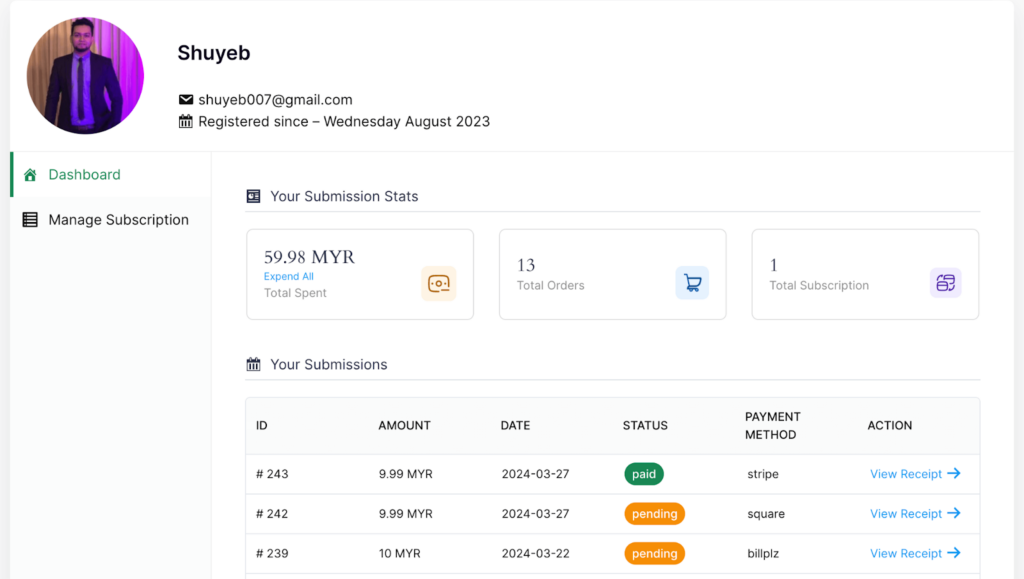
Dashboard
The dashboard page will appear after clicking on the page where you have placed the shortcode for the User Dashboard page. This page shows the user’s profile information, site permission status, payment information and membership status.
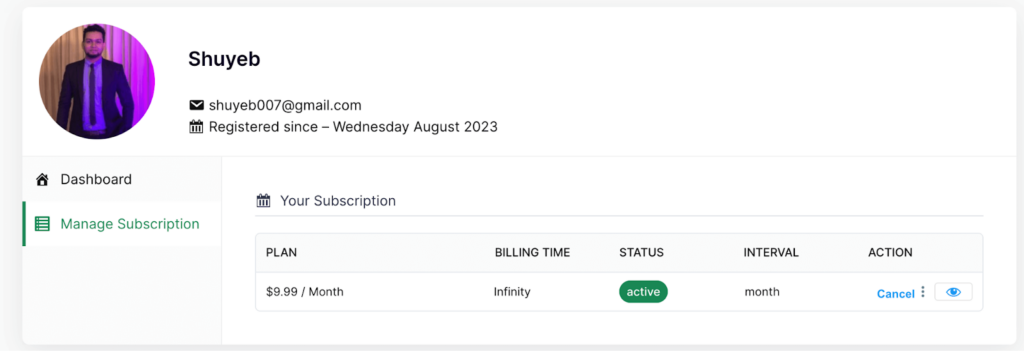
Manage Subscriptions
A user can view all his subscription entries from the User Dashboard upon clicking on the Manage Subscription tab. Here, he can view all the subscription entry details by clicking the view entry data option of the individual entry. He can also manage the subscription by himself right from the dashboard.
Bottom lines
With the help of the User Dashboard, users can save time, increase productivity, and make informed decisions about their online presence. It will also help your users to stay organized.
Paymattic is the perfect payment plugin to facilitate your users with such a comprehensive dashboard. Try Paymattic today and reveal all the exciting features of Paymattic to take your website to the next level.
Good luck!
Join the thousands already enjoying Paymattic Pro!

Shuyeb Ahmed
Hi, This is Shuyeb. I am a digital marketing enthusiast, love to write about WordPress products and new updates. At the weekend, you will find me exploring nature & beautiful places.


Leave a Reply