WordPress Stripe Checkout (A Complete Guide)


Table of Content
Download Paymattic – it’s Free!

Subscribe To Get
WordPress Guides, Tips, and Tutorials
We will never spam you. We will only send you product updates and tips.
Takeaways:
Integrating Stripe for checkout functionality on a WordPress website typically involves using a plugin that bridges the two platforms.
Ideal steps should be:
Step 1: Install and activate the Paymattic WordPress payment plugin
Step 2: Connect your Stripe account to Paymattic
Step 3: Create a payment form with Paymattic
Step 4: Add the Stripe payment method
Adding a Stripe checkout to your WordPress website is one of the most effective methods to accept online payments.
But there are multiple ways you can do it. And how do you do it? The information is not easily found on the internet. That’s why I’ve assembled everything related to Stripe WordPress checkout in this blog.
In this blog, we’ll know what Stripe checkout pages are, their types, and their differences. And I’ll show you the simplest way to add WordPress Stripe checkout to your websites.
So, why wait? Let’s get started.
What is Stripe?
Stripe is a payment processing platform that lets businesses accept payments from customers almost anywhere on the internet. With Stripe APIs, you can integrate Stripe payments on your websites, e-commerce platforms, apps, web pages, and online wallets.
Stripe allows you to accept one-time payments, manage subscription payments, issue refunds, and automate your financial processes. The best part of Stripe is its ability to accept credit card payments as well as debit card payments.
Also, the Stripe payment gateway is extremely easy to use. With just a few lines of code, you can add Stripe to any service you want. For example, Stripe for WordPress websites revolutionized the whole WordPress-based business and industry.
Stripe was founded in 2010 by two brothers, John and Patrick Collison. It received multiple rounds of funding and grew to acquire the second-largest market share after PayPal.
Due to its revolutionary Stripe API, which is extremely easy to manage and integrate into third-party products, Stripe has become the go-to payment solution for many online and offline businesses.
Stripe offers 8 types of payment methods. And these methods cover most of the payments you make.
Does Stripe work with WordPress?
Yes, of course.
The flexibility of the Stripe payment gateway compared to other platforms is its top-selling point.
Also, a question might pop into your head: can you embed Stripe checkout?
Yes. There are two ways you can integrate the Stripe payment gateway into your WordPress website:
- By integrating the Stripe API directly into your website with coding.
- By using a free WordPress payment plugin like Paymattic that integrates Stripe into their plugin.
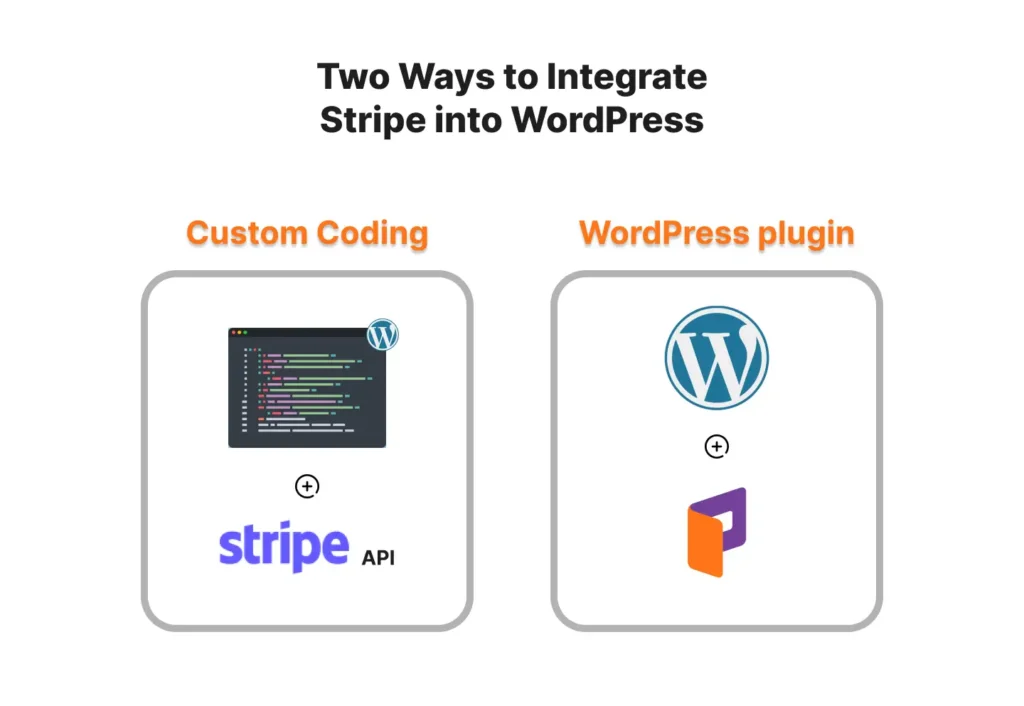
Using code to integrate Stripe requires coding skills. And it’s not very easy. On the other hand, using a WordPress plugin is easy. It’s best if it’s available for free in the WordPress plugin directory.
For example: Paymattic. It’s free. It’s light. You can create unlimited payment and donation forms using Stripe with Paymattic.
Not only that, but you can also create Stripe payment and donation buttons with Paymattic. And manage all of these from the plugin dashboard. It’s as easy as it gets.
I’ll tell you more about Paymattic in the later sections.
What is Stripe checkout?
Stripe checkout is a prebuilt payment form created by Stripe. You can embed Stripe checkout on your website and accept payments through the Stripe hosted payment page.
When you direct your customers to pay via Stripe, the Stripe payment processing takes them to a new page hosted by Stripe. The users can input their card details or other information there. And the payment is ready for further processing.
This processing is called Stripe-hosted checkout. Or off-site checkout. You can customize the checkout page according to your brand’s appearance. But it’s not the only way to run transactions via Stripe.
There are two ways you can conduct checkout with Stripe:
- Stripe hosted checkout or off-site checkout.
- Stripe on-site checkout.
We will talk about these two in detail in the following section. Also, you’ll be able to decide which one is suitable for your purpose.
Types of Stripe checkout pages
As we have already talked about this, there are two types of Stripe checkout pages. Although both of them offer the same functionalities, the presentation is different.
Two types of Stripe checkout pages are:
- Stripe hosted checkout pages.
- Stripe embedded checkout pages.
1. Stripe-hosted checkout page:

Stripe hosted checkout is also known as Stripe off-site checkout. When your customers click on the “Buy Now” or “Checkout” button, they are sent to the Stripe site.
The checkout page is located on the checkout.stripe.com URL.
Also, the order information is sent to the Stripe hosted page. And your users can input their credentials and pay through Stripe.
This is the Stripe hosted checkout or off-site Stripe checkout.
2. Stripe embedded checkout page:
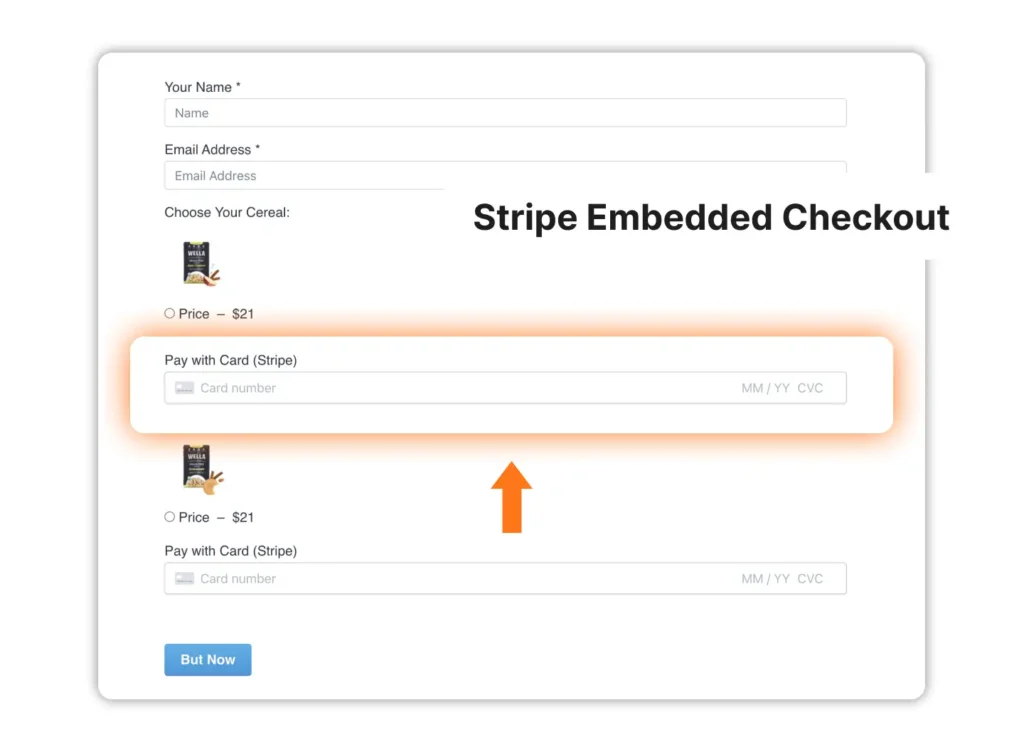
Stripe embedded checkout or on-site checkout means you let your customers pay through an embedded form on your website. The Stripe embedded form is linked with Stripe with some coding.
Unlike the Stripe hosted checkout, customers click the “Buy Now” or “Checkout” button after they enter their card credentials. And the payment processing is done on the same webpage.
It doesn’t redirect users to the Stripe website.
Your users feel much more comfortable paying on a website they trust. It might be a little off-putting when they are redirected to another webpage while ordering.
There are multiple ways you can embed the Stripe checkout form there. You can get the full idea from the Stripe embedded checkout documentation.
Differences between Stripe-hosted checkout and embedded checkout
Stripe Hosted Checkout and Stripe Embedded Checkout do the same job. Get your payments processed.
They use the same methods you choose for your Stripe account. The main difference is the way they process the payment credentials. Whether it’s WordPress sites or any other website, it works the same way.
But there are some subtle differences between them. Let’s look at them:
| Stripe Hosted Checkout | Stripe Embedded Checkout | |
| The way they work | Redirects to the checkout.stripe.com page when clicked on the “checkout” button. | Take payment credentials right on the order page. No redirection is necessary. |
| Customization | Not a lot to customize since the page is hosted on the Stripe website. | You can go crazy with customization. It’s your website. You can change colors, sections, and everything you want to do. |
| Conversion | Since it’s more like a stock webpage, there’s not a lot to do to make it conversion-friendly. | You can make it super conversion-friendly. Customize the way you want for conversions. |
| Security | Transactions are processed via Stripe’s PCI-compliant services. | Transactions are processed via Stripe’s PCI-compliant services. Since the payment is done on the website itself, it gives a more secure vibe. |
| Setup process | Easy to set up through most of the WordPress plugins. Adding via custom coding is a bit difficult. | The same goes for this. However, most WordPress plugins don’t support this on-site checkout process. |
Subscribe Newsletter
Subscribe to our newsletter for updates, exclusive offers, and news you won’t miss!

How to embed WordPress Stripe checkout?
Already we know everything about different types of Stripe checkouts. Now we are going to see how to add Stripe checkout to WordPress websites. By integrating Stripe in WordPress, you can start accepting credit card payments for your online stores easily.
As we have discussed before, there are two ways to add Stripe checkout to your WordPress website. One is custom coding, which requires coding skills. Another is WordPress plugins that let you integrate Stripe on your website.
The latter one is easier. And I am going to show you the easiest way of adding the Stripe checkout on your WordPress website.
We are going to use the simplest WordPress payment plugin, Paymattic, to do that. Paymattic is compatible with all of the popular WordPress themes.
And we are going to set up the Stripe WordPress checkout in four easy steps:
- Step 1: Install Paymattic on your WordPress website.
- Step 2: Set up Stripe in Paymattic.
- Step 3: Create a payment or donation form with Stripe payment gateway.
- Step 4: Configure your Stripe checkout page.
Let’s dive into these steps.
Step 1: Install Paymattic on your WordPress website
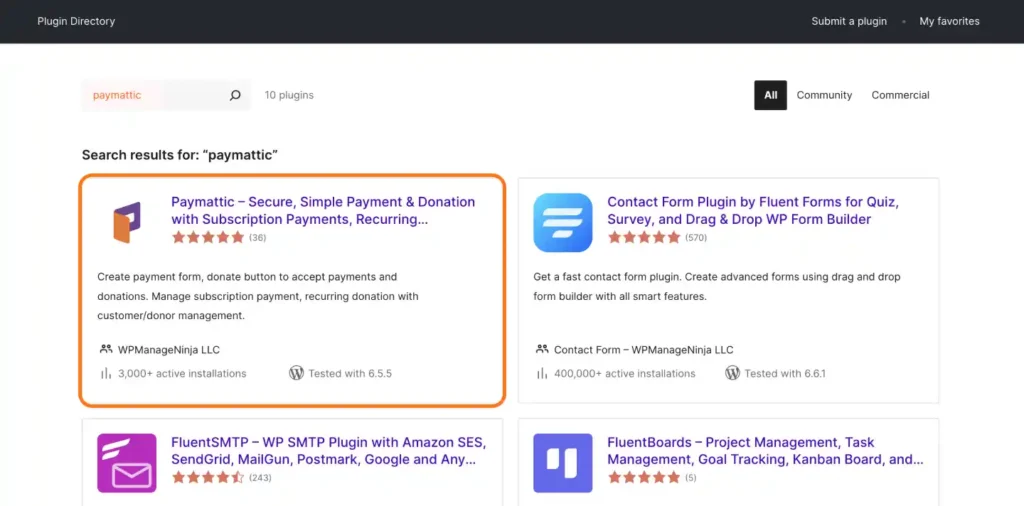
Let’s install Paymattic on your WordPress website. To do that:
- Go to the WordPress plugin directory and search for “Paymattic”.
- Install the Paymattic plugin and activate it.
Easy, right? Now you are ready for the second step.
Step 2: Set up Stripe in Paymattic
In this step, we are going to configure Stripe in the Paymattic plugin.
- Open the Paymattic plugin from your WordPress dashboard.
- Go to the “Payment Gateway” settings from the sidebar. The Stripe payment method is auto selected.
- Insert your Stripe API keys from your Stripe dashboard and save settings.
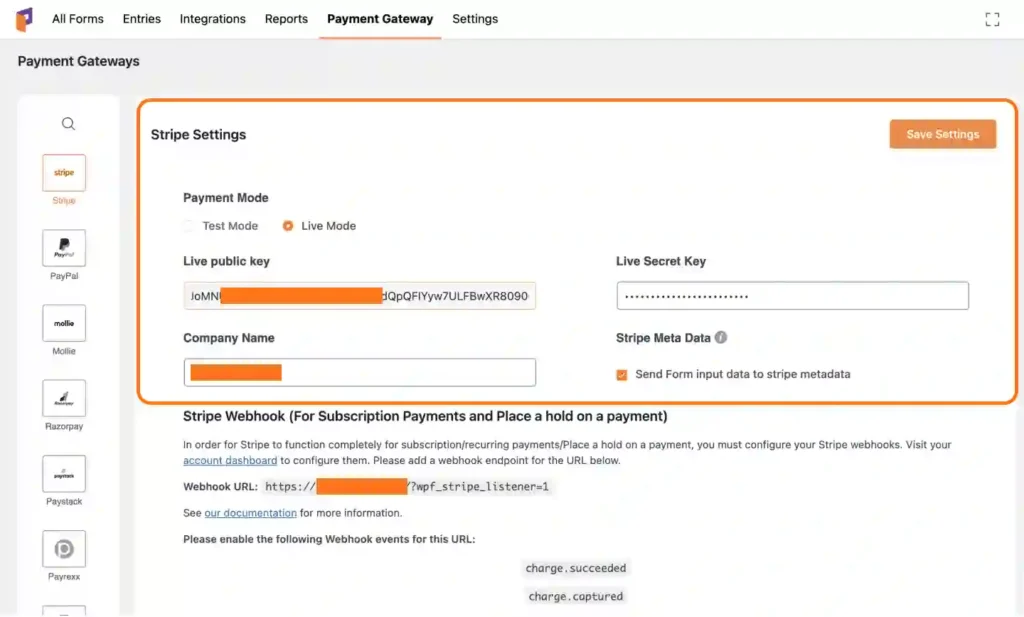
And you are ready for the third step.
Step 3: Create a form with the Stripe payment method
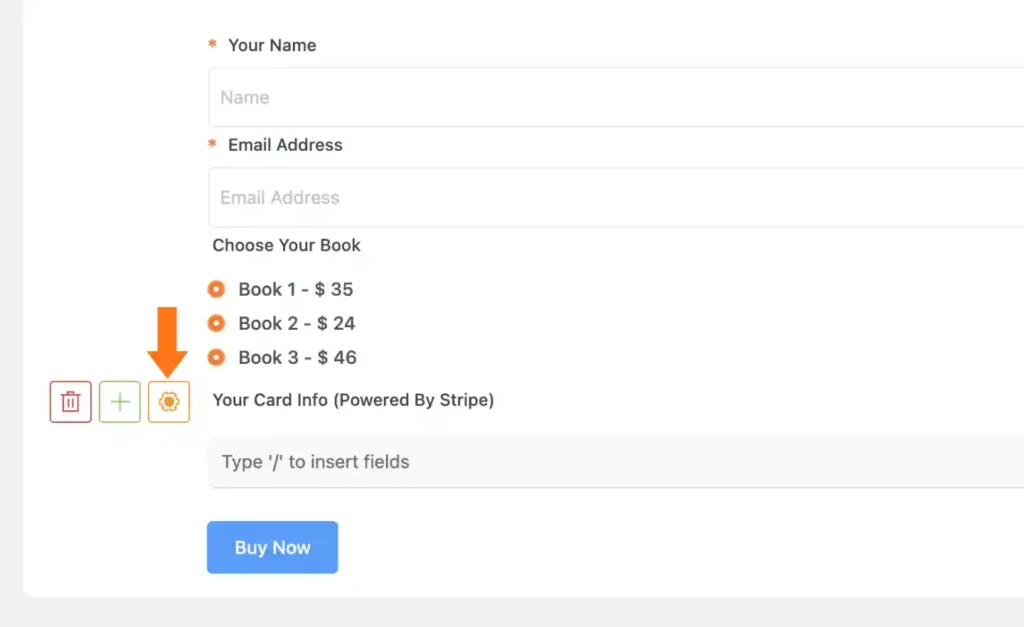
In this step, we are going to create a payment form with Paymattic. And we are going to add Stripe as the payment gateway. With pre-built templates, it’s as easy as it gets.
- Go to the Paymattic dashboard and click “Add New Form”.
- Select any pre-built form or create your own custom form.
- From the payment method field, choose “Card Elements (Stripe)” and save the form.
Your payment form with Stripe has been created. You can customize the checkout button the way you want it.

You can add this form to your WordPress website with a shortcode.
Step 4: Choose your Stripe checkout settings
As we have talked before, you have two types of Stripe checkout pages. Stripe embedded checkout and Stripe hosted checkout.
I’m going to show you how to configure both of these pages.
a) Set up Stripe hosted checkout for WordPress
As you’ve already created a Stripe payment form using Paymattic, you are 90 percent done here. Let me show you how to set up the Stripe hosted checkout page.
- From the form edit options, click on the gear (⚙) icon.
- Select the Stripe Hosted Checkout (recommended) and click Update.
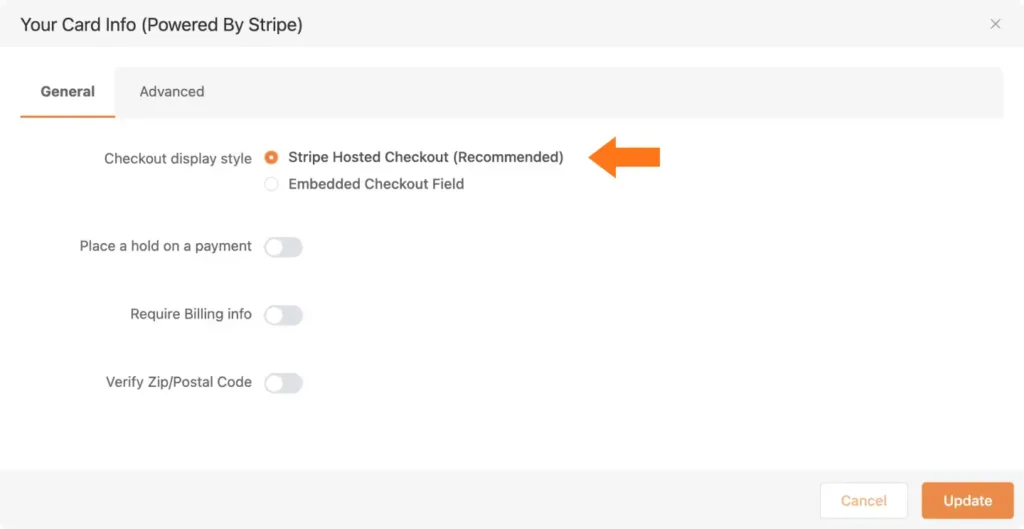
Stripe hosted checkout for your WordPress site is set.
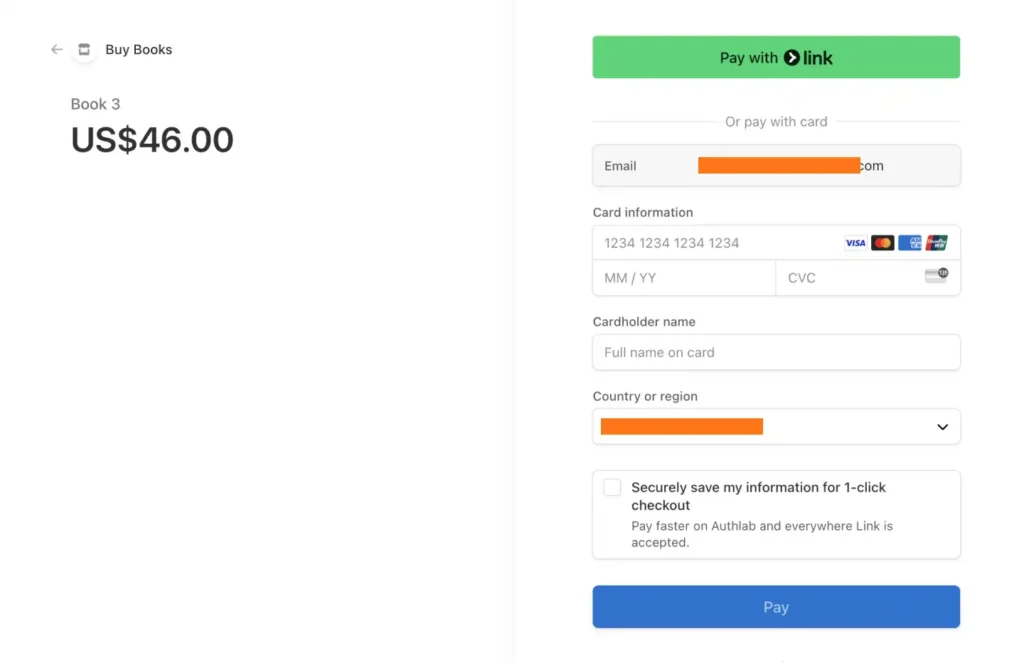
Now when your customers click on the checkout button, they get redirected to the Stripe website for further processing.
b) Set up Stripe embedded checkout for WordPress
To set up the Stripe embedded checkout process –
- From the form edit options, click on the gear (⚙) icon.
- Select the Embedded Checkout Field and click Update.
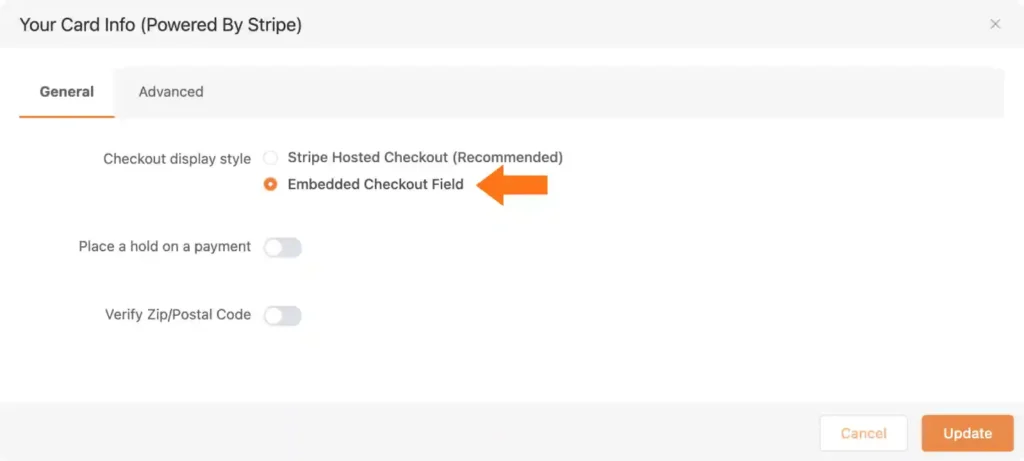
Now your customers can input the card credentials right on the buying page. And they are not redirected to the Stripe website.
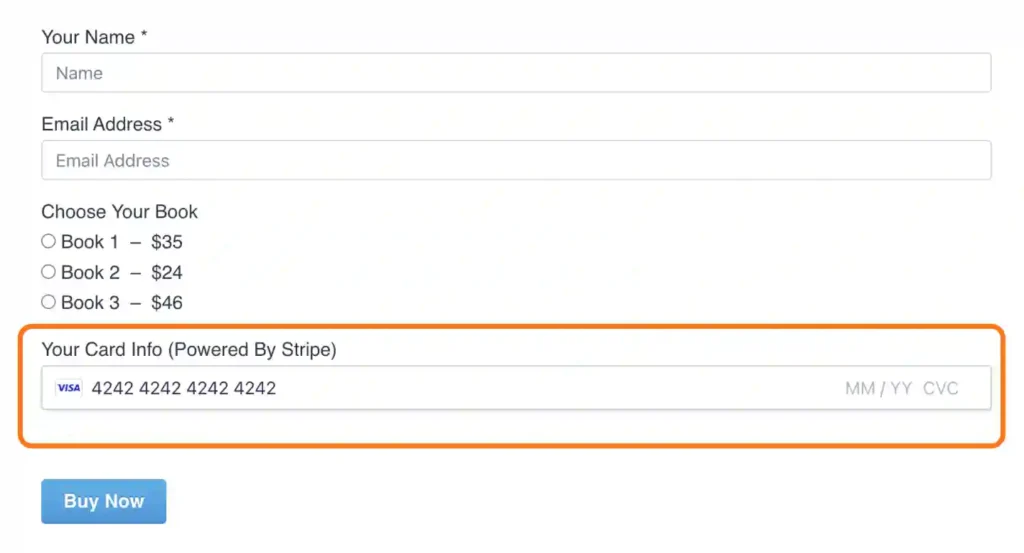
The payment is processed right on your web page.
This is how you set up Stripe checkout on your WordPress website.
Ready to get started?
Experience WordPress payment and donation like never before. Try Paymattic now!
Stripe payment form example
Many businesses prefer using Stripe for WordPress business because of its seamless integration and reliable security features. We expect you to do that too.
And now that you know how to add Stripe checkout to WordPress, you might want to look at some examples.
That’s why I’ve added some images of payment form examples created with the WordPress Stripe plugin, Paymattic.
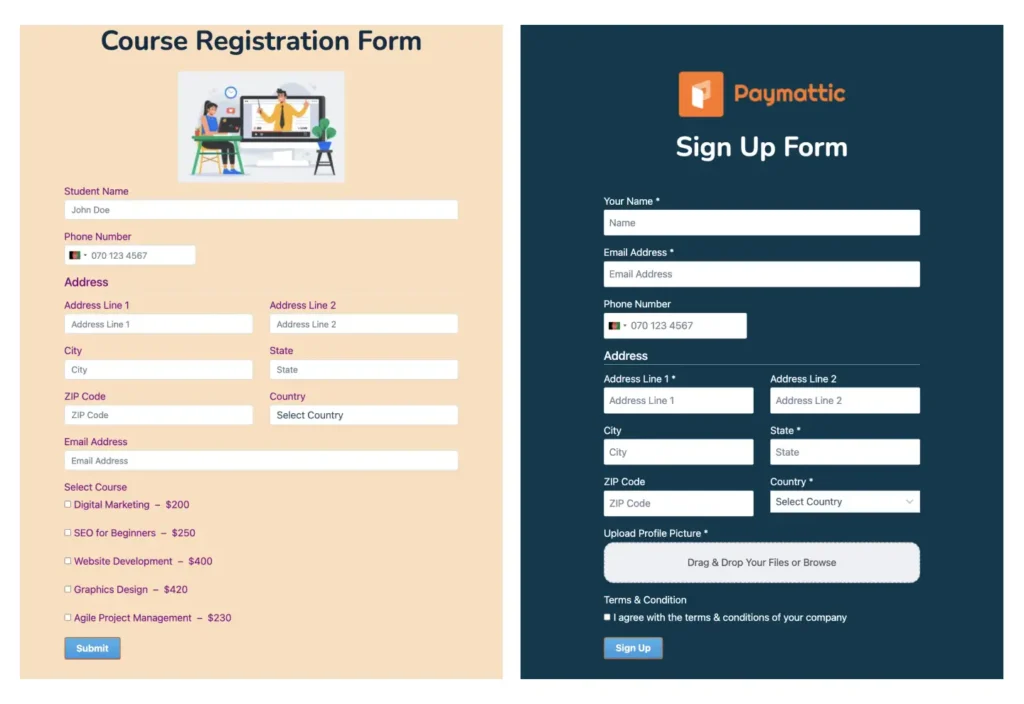

All of these forms are available on Paymattic’s demo page.
You can download the forms in JSON format. Then you can import the JSON file on the Paymattic WordPress plugin. And you are free to use the form.
Also, you have the access to change the payment method to Stripe.
Stripe checkout security
Stripe is one of the most secure payment processors. They have multiple layers of security with top-tier certifications from security regulation agencies.
Here are some security measures taken by Stripe:
- Stripe is certified at the highest level of PCI DSS compliance, ensuring the secure handling of cardholder data.
- Stripe undergoes regular SOC 1 and SOC 2 audits to assess its controls over financial reporting and security practices.
- Stripe complies with privacy regulations such as GDPR and CCPA to protect user data.
- Stripe requires multi-factor authentication for user accounts to enhance security.
- Stripe encrypts data both at rest and in transit to protect it from unauthorized access.
- Stripe follows secure coding practices to minimize the risk of vulnerabilities in its software.
- Stripe has a comprehensive incident response plan in place to handle security incidents effectively.
- Stripe continuously monitors its systems for threats and anomalies.
- Stripe collaborates with security experts to stay informed about emerging threats and best practices.
How can Paymattic help you using Stripe?
Stripe is a versatile payment solution for any online transactions. And using a WordPress payment plugin, like Paymattic, can take the experience to a whole new level.
With Paymattic –
- You can accept one-time payments using Stripe for free.
- You can accept subscription payments with Stripe.
- You can receive recurring donations with Stripe.
- You can choose multiple WordPress Stripe checkout options.
- Place a hold on Stripe payments.
- Request billing info in Stripe payments.
- Ask for ZIP or postal code verification.
Whether you want to add a payment button on your website or make a full-fledged shopping cart, Paymattic is your go-to WordPress plugin. You get the chance to create your payment form and accept payments with a high conversion rate.
Moreover, one-time Stripe payments are free in Paymattic.
Wrapping up
Stripe payment gateway, with its flexible API usage, is a true game changer.
If you’ve read this article, I believe you now know everything about WordPress Stripe checkouts and how to add different types of Stripe checkouts to your WordPress website.
The process is very easy. All you need is a good WordPress plugin, like Paymattic, and you’re good to go with your online ventures.
Also, read this article if you want to learn how to integrate PayPal with WordPress.
Frequently asked questions (FAQ)
Here are answers to some frequently asked questions regarding WordPress Stripe checkout:
Q. Can I use Stripe with WordPress without coding?
Answer: Yes. The easiest way is by using a WordPress payment plugin like Paymattic. It lets you connect your Stripe account, create payment forms, and start accepting payments without writing a single line of code.
Q. What’s the difference between Stripe-hosted checkout and embedded checkout?
Answer: Hosted checkout redirects users to Stripe’s secure page for payment. On the other hand, embedded checkout allows users to complete the payment directly on your website without redirection, giving a smoother user experience.
Q. How do I set up Stripe checkout in WordPress with a plugin?
Answer:
Using Paymattic plugin, follow these 4 steps:
Step 1: Install and activate the Paymattic WordPress payment plugin
Step 2: Connect your Stripe account to Paymattic
Step 3: Create a payment form with Paymattic
Step 4: Add the Stripe payment method
Q. Is Stripe secure for WordPress payments?
Answer: Yes. Stripe is PCI DSS compliant, uses data encryption, requires multi-factor authentication, and follows strict security audits. When integrated with WordPress via Paymattic, your transactions remain secure and reliable.
Join the thousands already enjoying Paymattic Pro!

Mahfuzur Rahman Nafi
Mahfuzur Rahman Nafi is a Marketing Strategist at WPManageNinja. With 4 years of experience in Product Marketing, he has developed marketing strategies, launched products, written content, and published websites for WordPress products. In his free time, he loves to read geeky stuffs.


Leave a Reply