

A Simple Guide to Integrate Stripe on WordPress


Table of Content
Download Paymattic – it’s Free!

Subscribe To Get
WordPress Guides, Tips, and Tutorials
We will never spam you. We will only send you product updates and tips.
Stripe is a global payment service provider that accepts credit cards, digital wallets and many other payment gateways. When you collect payments from your customers you will require a payment gateway to process the transaction. Stripe is the trusted payment gateway both for merchants and customers to pay online through websites. In this blog we will guide you on how to integrate Stripe on WordPress.
Stripe payment gateway – at a glance
Stripe supports 135+ currencies with a very reasonable transaction fee. Stripe not only accepts the four giant credit cards – Visa, Mastercard, American Express and Discover but also it accepts credit cards from other popular brands.
We know security is a huge concern when you accept payments online. So, Stripe comes up with robust security features in its cloud-based payment system. It uses end-to-end encryption in its own network. This means hackers can not access any sensitive data such as a customer’s credit card or payment information through any external server. Stripe holds PCI Service Provider Level 1 certifications, which is the highest level of security standard in the payment industry.
Paymattic WordPress plugin
Paymattic is a WordPress fundraising plugin that supports the Stripe payment gateway free of charge. Other than Stripe, it also supports PayPal, Square, Mollie, Billplz, Razorpay, Xendit, Paystack, Payrexx, SSLCOMMERZ and more with its pro version. You can easily create donation forms, payment forms, donor registration forms on your WordPress website with Paymattic.
Thousands of websites accept payments with Paymattic. It has a subscription payments feature that can automatically collect recurring or subscription payments on particular time intervals. On top of that, the smooth user interface of Paymattic lets you deal with donation forms without any hassle.
Ready to get started?
Experience payments and donations for WordPress like never before. Try Paymattic now!
Integrate Stripe on WordPress
You might be wondering how you can integrate Stripe for WordPress site. This blog will guide you on integrating the Stripe payment gateway with WordPress using the Paymattic payment plugin.
- First, go to Paymattic > Payment Gateway from your WordPress dashboard.
- Then, Click on the Stripe tab from the left navigation bar.
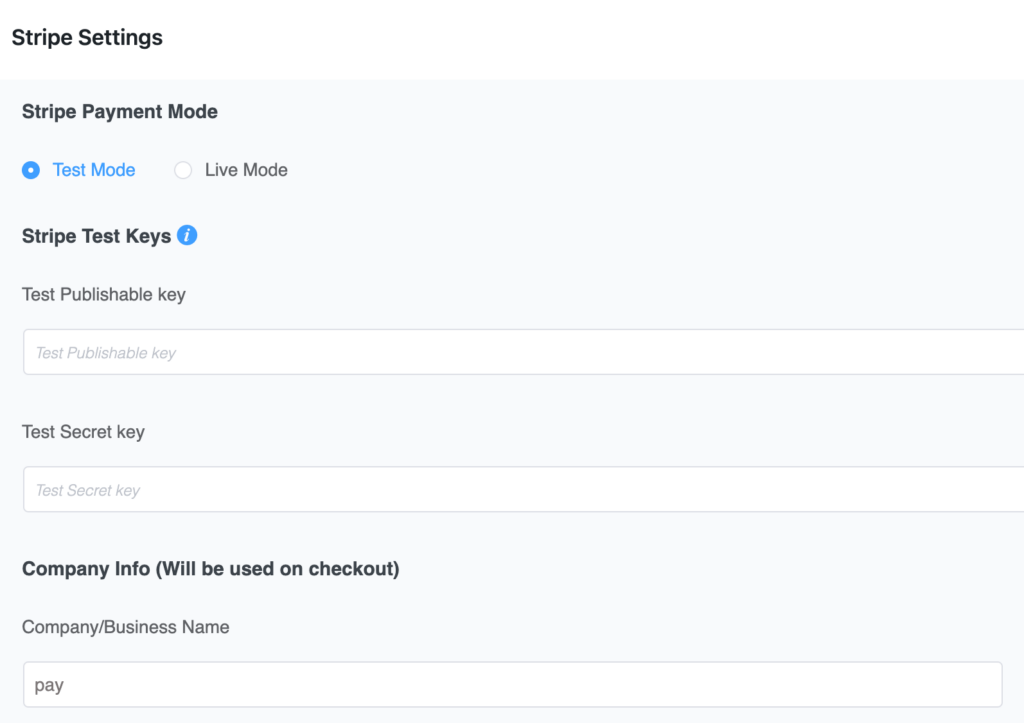
Stripe settings page will open up. You have to choose either test mode or live mode in the settings page.
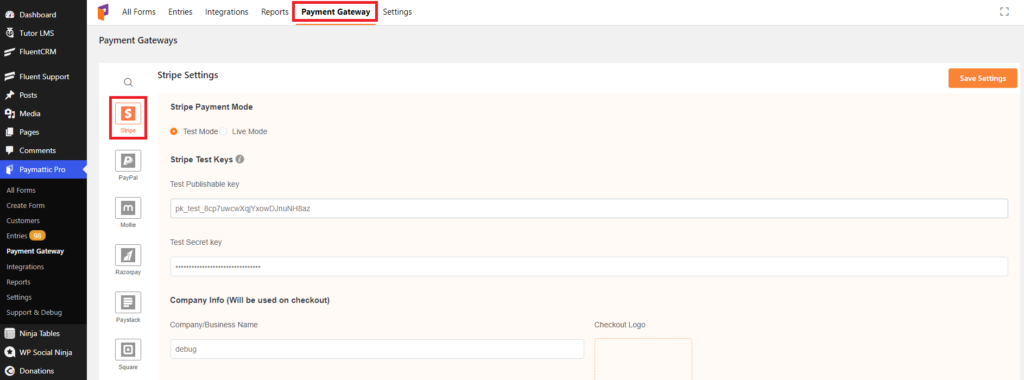
After selecting the mode you will require a publishable key and secret key. Setup a Stripe account and log in to your Stripe dashboard to find your publishable key and secret key.
- Once you login to your Stripe dashboard go to the Developers option.

- Now navigate to API Keys and toggle the switch Viewing test data on.
- Here, you will find the Publishable Key and the Secret Key.

- Simply copy and paste the Publishable Key and the Secret Key into the respective field from Paymattic > Payment Gateway > Stripe.
- Finally, click on the Save Settings button to finish the integration.
That’s all! You have successfully integrated Stripe with the WordPress website. Now, it’s time to create a form and see how Stripe works with Paymattic.
- To create your form go to Paymattic > Create Form.
- Then click on the Add New Form option.

- Click on the Advance Editor to build a form from scratch.
- Add all your required form fields.
- At last, add Stripe payment gateway from the payment method fields.
- Configure your desired settings for Stripe checkout in the Card Elements (Stripe) field.
Finally, click on the Update Fields button.

Webhooks for subscription payments
If you want to collect subscription payments from your customers you have to configure Stripe payment webhooks. You will find your Webhook URL from Paymattic > Payment Gateway> Stripe in your WordPress dashboard.
- To add the webhooks Visit your Stripe dashboard.
- Then go to Developers> Webhooks.
- Click on the Add an endpoint button.

- Paste the Webhook URL in the Endpoint URL field.
- Set a description for the Webhook.
- Select Events to listen to –
- charge.succeeded
- invoice.payment_succeeded
- charge.refunded
- customer.subscription.deleted
- checkout.session.completed
- Finally, click on the Add endpoint button.

This is how simple it is to create payment forms with Stripe for WordPress. Copy the shortcode of the form and publish it on any page you want in your website.
Also check out how to integrate PayPal payment gateway with Paymattic?
Final Words
Paymattic and Stripe payment gateway together create a synergy in your payment collection efforts. The best way to add Stripe on WordPress website is using the Paymattic payment plugin. Get Paymattic today and hit your fundraising goal without losing your wallet!
Good luck!
Join the thousands already enjoying Paymattic Pro!

Shuyeb Ahmed
Hi, This is Shuyeb. I am a digital marketing enthusiast, love to write about WordPress products and new updates. At the weekend, you will find me exploring nature & beautiful places.


Leave a Reply