
How to Migrate From GiveWP to Paymattic? (Step-by-Step Guide)


Table of Content
Download Paymattic – it’s Free!

Subscribe To Get
WordPress Guides, Tips, and Tutorials
We will never spam you. We will only send you product updates and tips.
Switching donation plugins can feel risky. You worry about losing donor data, breaking your forms, or spending hours rebuilding everything from scratch.
That’s exactly why Paymattic introduced the GiveWP Migrator, a built-in tool designed to move your entire donation setup over with minimal effort and zero manual copy-pasting.
If you’ve been using GiveWP but find yourself searching for a simpler, more affordable alternative, this guide is for you.
In this guide, we’ll walk you through every step of the migration process, so you can make the switch with confidence.
Why are users looking for a GiveWP alternative?
GiveWP (consolidate into Liquid Web) has been one of the most recognized WordPress donation plugins for nonprofits. Many organizations still use it successfully today. However, recently, a lot of users have started exploring alternatives that feel simpler, more flexible, and easier to manage long-term.
One major reason is the recent transition around the GiveWP brand. Users noticed GiveWP and several other StellarWP product websites redirecting to Liquid Web as part of a broader platform consolidation. While the product itself still exists, the sudden change created confusion in the WordPress nonprofit community. Many users began asking questions about future development, product direction, and long-term stability.
At the same time, some organizations are simply reevaluating their current setup and looking for tools that better fit their workflow and budget.
Along with that, there are some common reasons users start looking for a GiveWP alternative for donations:
- GiveWP pricing becomes expensive for small nonprofits
- Advanced fundraising features may require higher-tier plans
- The overall setup can feel complex for beginners
- Managing fundraising workflows may take more time for non-technical users
- Some organizations prefer a more all-in-one approach instead of managing separate fundraising workflows
That’s where Paymattic comes in. It’s a lightweight, affordable, and feature-rich WordPress donation plugin that bundles everything into one. No add-on hunting and no per-feature pricing surprises.
Just a clean, capable tool that handles donations, recurring payments, and payment gateway integrations out of the box.
GiveWP migrator feature – at a glance
The GiveWP migrator is a built-in migration tool inside Paymattic. It’s designed specifically to help existing GiveWP users move their data over to Paymattic without the manual work of exporting, reformatting, and re-importing spreadsheets.
The migrator intelligently scans your existing GiveWP installation and transfers everything that matters:
- Donor records – All existing donor profiles and contact information
- Donation history – Past transaction records linked to each donor
- Donation forms – Your existing GiveWP forms, brought into Paymattic’s format
- Recurring subscriptions – Quarterly, fortnightly, and half-yearly cycles preserved
Switching plugins typically means hours of manual data entry, the risk of broken records, and a whole lot of second-guessing. The GiveWP migrator eliminates all of that. It’s beginner-friendly, fast, and significantly reduces the risk of losing anything important during the transition.
Things to do before you migrate
A little preparation goes a long way. Before you start the migration, run through this checklist:
- GiveWP (Free/Pro): Must be installed and active on your site.
- Install Paymattic: You’ll need it to be active before you can access the migrator.
- Keep GiveWP active: Don’t deactivate or delete GiveWP during the migration process. The migrator reads data directly from GiveWP’s database tables.
- Database backup: Always perform a full site backup before running any migration tool that writes to your database.
Note: When done correctly, migration should not interrupt live donations. Your GiveWP forms will remain active throughout the process.
Tutorial: Step-by-step process to migrate from GiveWP to Paymattic
Paymattic simplifies the whole migration process. In only five steps, you can migrate GiveWP data to Paymattic.
Let’s look at the steps.
Step 1: Install and activate Paymattic
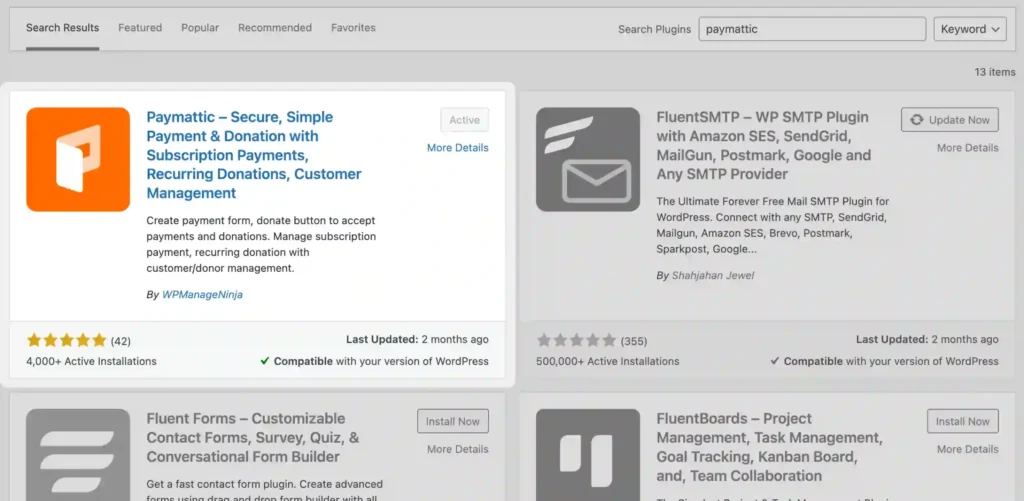
If you haven’t already, install Paymattic first. Head to your WordPress dashboard and navigate to Plugins → Add New. Search for “Paymattic,” install the plugin, and click Activate.
Once active, you’ll see the Paymattic menu appear in your WordPress sidebar. You’re ready to move on.
Step 2: Pre-flight check
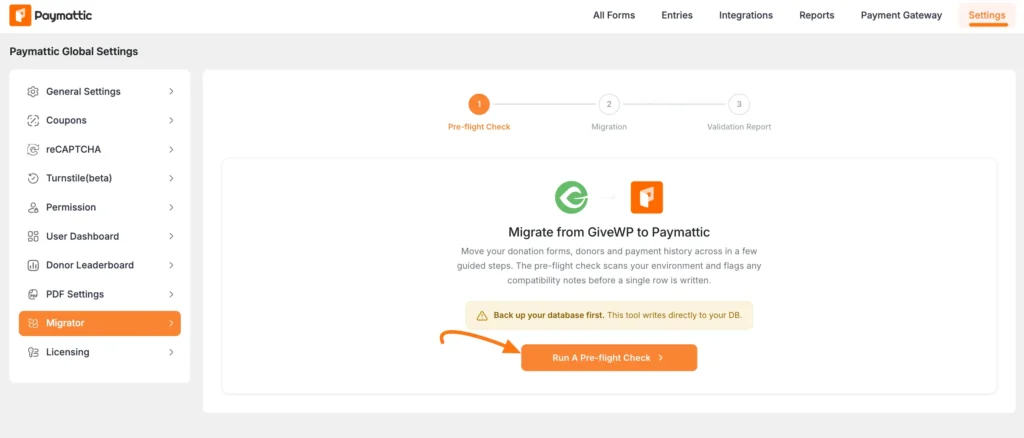
Go to Settings from the Paymattic navbar menu, then open the Migrator tab from the left panel.
Before starting the migration, Paymattic runs a quick pre-flight check to make sure your website environment is ready for migration. This helps identify compatibility issues before any data is transferred.
- Click the orange Run A Pre-flight Check button.
- Add-on Compatibility: The migrator will automatically detect GiveWP add-ons such as Recurring Donations, Gift Aid, Form Field Manager (FFM), and Currency Switcher.
Note: If you are migrating Currency Switcher data or other payment gateways (except Stripe), ensure Paymattic Pro is active; otherwise, these specific elements will not migrate.
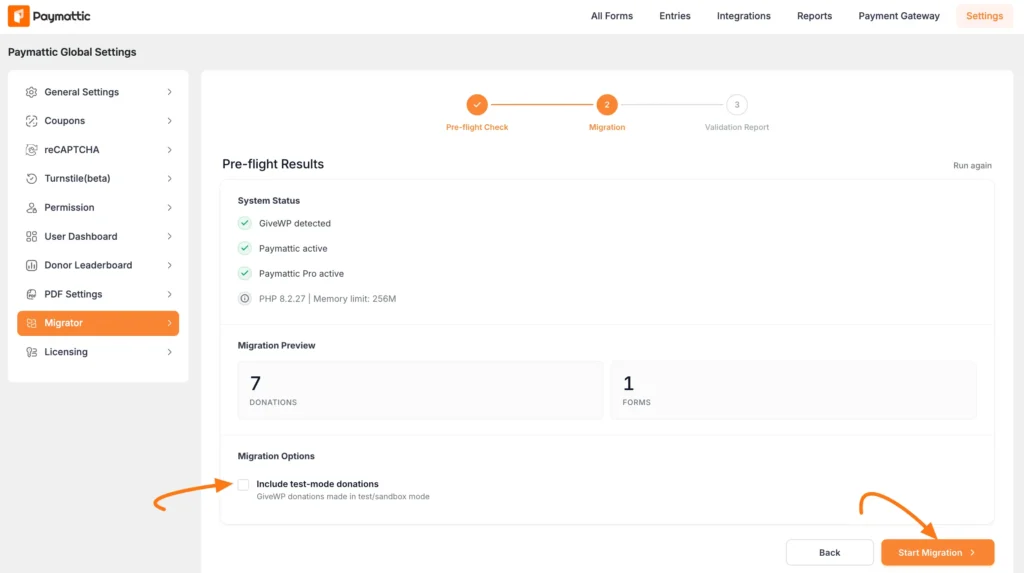
Step 3: Review the pre-flight results
After the check is complete, you will see a quick summary of the data ready for migration, including total Forms, Donations, and Subscriptions.
Once everything looks good, click the Start Migration button to begin migrating your GiveWP data to Paymattic.
If you want to migrate sandbox or testing data, enable the Include test-mode donations option.
Note: Don’t close the browser tab while the migration is in progress. Wait for the success message or completion notification before moving on.
Step 4: Review the validation report
Once the migration is complete, Paymattic will show a Validation Report confirming that your GiveWP data was transferred successfully.
- A green success banner will appear with a confirmation message.
- Click the View All Forms button to instantly access your migrated forms.
- The Migration Summary displays the total migrated Forms, Donations, and any migration errors, if found.
- You can also click Download JSON to export the migration report for future reference.
- If you want to start over. Use the Reset Migration section at the bottom to access rollback and recovery options.
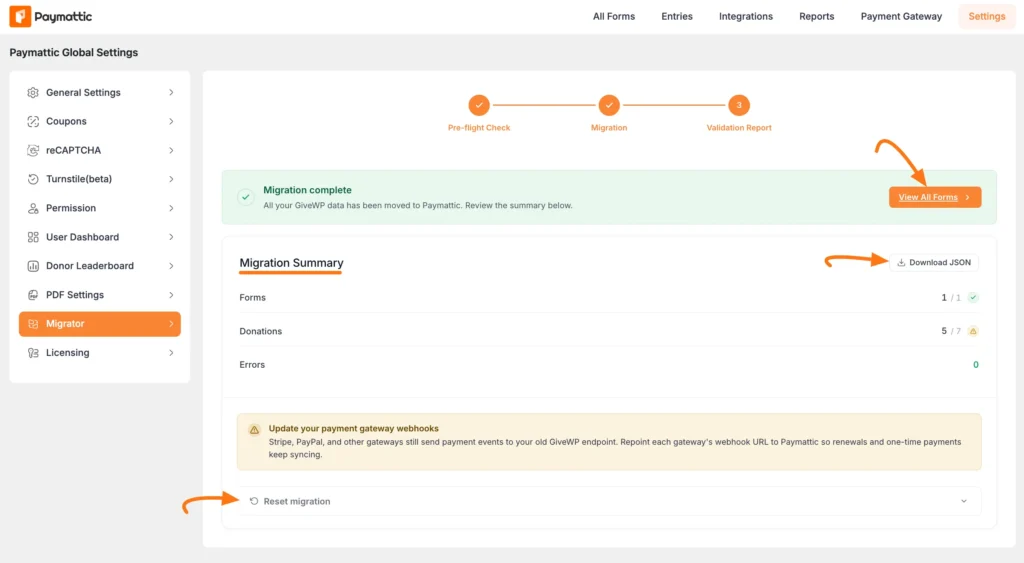
Note: Paymattic does not use a separate campaign system like GiveWP. During migration, GiveWP campaigns are automatically converted into Paymattic forms. To make them easier to identify, each migrated form will use the original campaign title with the form name.
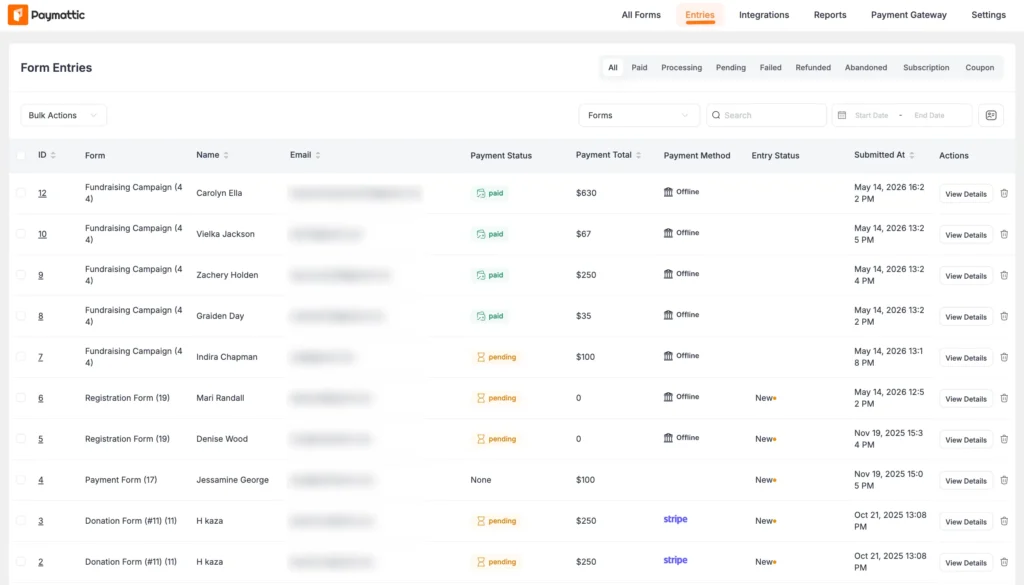
Step 5: Verify your migrated entries
Once migration is complete, take a few minutes to verify everything came through correctly.
For that, go to Paymattic > Entries from your WordPress dashboard.
Here, you will find your imported donations along with important details such as:
- Entry IDs
- Donor names
- Email addresses
- Payment status (Paid, Pending, etc.)
Note: If anything looks off, don’t panic, your original GiveWP data is still intact as long as GiveWP is still installed. You can troubleshoot or re-run the migration if needed.
Final words
Migrating from GiveWP to Paymattic is far simpler than it might seem. With the built-in GiveWP Migrator, your donors, donations, and forms move over automatically, no spreadsheets, no manual re-entry, no data loss.
If you’ve been holding off on switching because migration felt like too much work, now you have a clear path forward. The process takes minutes, your donor history stays intact, and you come out the other side with a cleaner, more affordable setup.
Ready to make the switch? Install Paymattic today and explore the GiveWP Migrator for yourself.
If you have any further queries or need assistance with the migration process, please contact our support team. They’ll be happy to assist you.
Join the thousands already enjoying Paymattic Pro!
Quick answers to common migration questions
Here are some common questions that people often ask about the migration process.
1. Will I lose my donor data during migration?
No, as long as GiveWP is still installed and your data is backed up, your donor records remain safe. The migrator copies data into Paymattic; it doesn’t delete anything from GiveWP.
2. Do I need coding knowledge to use the migrator?
Not at all. The GiveWP Migrator is designed for non-technical users. If you can install a WordPress plugin, you can run the migration.
3. Can I keep GiveWP installed during and after migration?
Yes. It’s actually recommended to keep GiveWP active during the migration process. After you’ve verified everything in Paymattic is working correctly, you can safely deactivate and remove GiveWP.
4. Can I run the migration on a live website?
Yes, migration can be performed on a live site without taking it offline. That said, running a test on a staging environment first is always the safer approach for large sites.
5. How long does migration take?
For most sites, the migration completes in under minutes. Larger sites with extensive donor histories may take longer.

Madhobi
This is Madhobi, a content writer at WPManageNinja with expertise in technical writing and email marketing. Outside of work, she likes traveling and exploring new places.


Leave a Reply