
How to Create Online Payment Form in WordPress (5 Easy Steps)


Table of Content
Download Paymattic – it’s Free!

Subscribe To Get
WordPress Guides, Tips, and Tutorials
We will never spam you. We will only send you product updates and tips.
TL;DR: How to Create an Online Payment Form in WordPress?
An online payment form lets you collect payments and customer information directly on your WordPress site. Using a plugin like Paymattic, you can quickly create professional forms for products, services, or donations. This guide covers why you need an online payment form, how to choose the right plugin, and walks you through 5 easy steps to create a payment form with Paymattic, so you can start collecting payments today.
Online has become the most convenient platform to grow anyone’s business. Every day the number of online sellers is getting larger. Web forms help these business owners to accept payment online easily.
Thousands of plugins are available in WordPress to create a payment form. But not all of these plugins are able to provide you flawless services.
In this blog, we will show you the step-by-step process of creating an online payment form in WordPress with an outstanding plugin.
What is an online payment form?
Payment forms are one of the most versatile online tools. Majority of people prefer to purchase online at this present time. If you want to sell a product or provide a service online, you must need a payment form to collect payment.
In general, an online payment form is a form that online stores use to authorize payments from customers with a given credit card. This form also allows you to collect basic information about your customers along with payments.
Subscribe Newsletter
Subscribe to our newsletter for updates, exclusive offers, and news you won’t miss!

Why you should use an online payment form?
We live in a wonderful age where we can easily send money to every corner of the world. With the help of a payment form, any online business owner can earn revenue by sitting at home.
When you decide to start selling online, the first thing that may come to your mind is how you can collect payment for your product. In WordPress, you can effortlessly accept payment with a secured payment form. Payment forms will allow you to set different options for your products and order process. You can also set a one-time payment or subscription payment method in your payment form.
However, if your payment form interference can satisfy your customer, it automatically generates your store’s sales rate.
You probably have an idea that multiple options are available in WordPress to build your payment form. But you want the best. This is where WordPress developers come in. They offer customized solutions, ensuring your payment form fits your brand and meets your specific needs.
Find out the easy way to design your payment form in WordPress
Choose a plugin to create an online payment form on WordPress
When it’s about creating a payment form in WordPress, you must look for a dedicated plugin that is user-friendly, convenient, and easy to use. Before selecting a plugin, you have to make sure about its features because a wrong step may be the reason for losing customers. Your chosen plugin should contain the following things:
- Easy to use
- All advanced features and functionality
- Unlimited customization option
- Painless payment processing
- Understand customer’s value and security
- And most importantly affordable price range
To create a secure and cost-effective payment form, we recommend you go with Paymattic.
Paymattic: The best plugin to create an online payment form on WordPress
Among the tons of plugins, you may think, why did you pick Paymattic? We suggest Paymattic because we know this plugin has the capability to meet your search need.
Paymattic is one of the most dynamic WordPress plugins with amazing functionality. This single plugin can offer all the freemium features for the users that none of the other competitor plugins can!
To provide the best services to your targeted audience, Paymattic has the following wondrous features:
- 35+ input fields
- Unlimited customizations
- Subscription payment
- Integrating with all major platforms
- 14 payment gateways
- Email notification
- Subscription payments
- Customer profile
- Multiple-layer security
Now let’s focus on the form editor features of Paymattic, which can be used to build and design a payment form.
- Gutenberg style editor
- Custom input fields
- Prebuilt form templates
- WP User registration
- Form layout
- Export-import
- Scheduling and restrictions
Try Paymattic without a second thought because these helpful features never let you go down.
Ready to get started?
Experience WordPress payment and donation like never before. Try Paymattic now!
5 easy steps to create a payment form with Paymattic
Paymattic is a multi-purpose plugin that lets you create a donation form and payment form with a few clicks. Follow this simple step mentioned below to create an online payment form easily.
Step 1: Install & activate Paymattic Pro
First, install and activate Paymattic Pro on your WordPress website. In this blog, we’re creating a form using the Pro version since we’ll be working with its advanced form fields. However, you can also get started with the free version.
Before installing and activating Paymattic Pro, you must have the .zip file of the Paymattic Pro Plugin. To get the Paymattic zip file you have to buy the Pro version from here.
Once you get the file, upload it and click on the Install Now button.
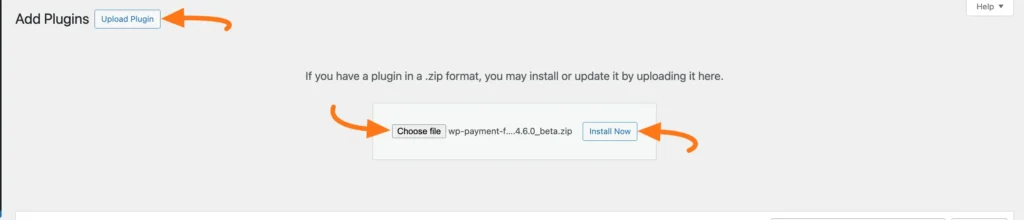
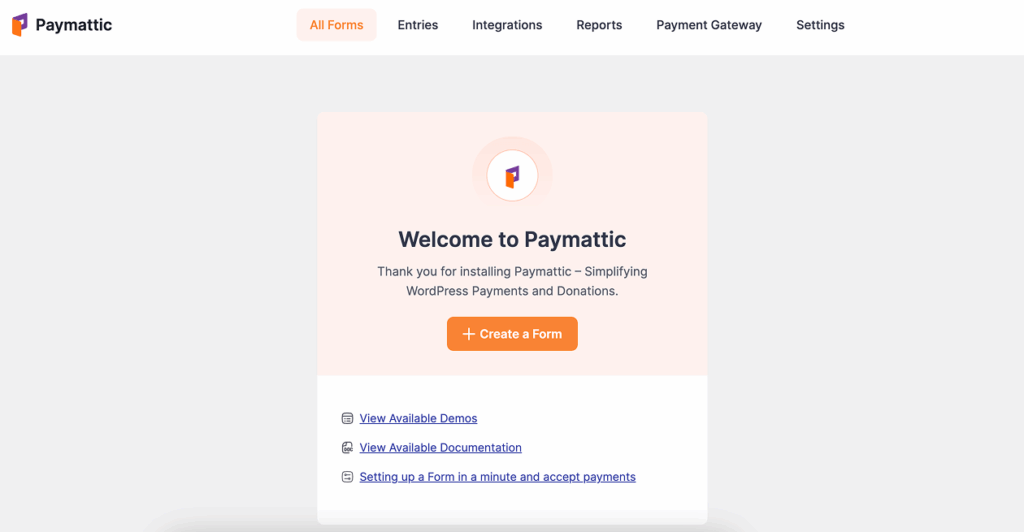
Now, click the Activate Plugin button to make Paymattic fully functional on your WordPress website.

Congratulations! Paymattic has been successfully activated on your website. Welcome to Paymattic!
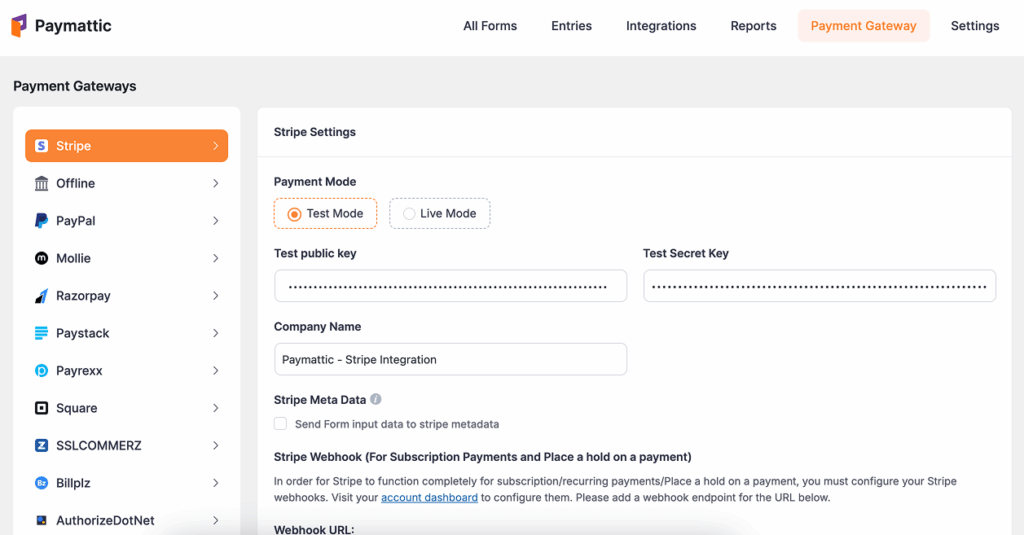
Step 2: Configure payment gateway
Now, to accept global payments, you have to configure a payment gateway to collect payments from your customers.
- For this, go to Paymattic dashboard > Payment Gateway. Here you will find all the available payment methods. Select your preferred payment system and insert the API credentials for your merchant account. Then click on the Save Settings button.
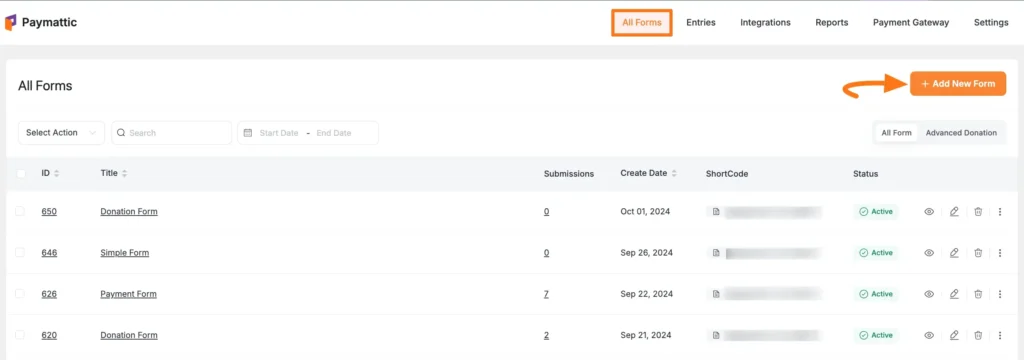
Create a payment form
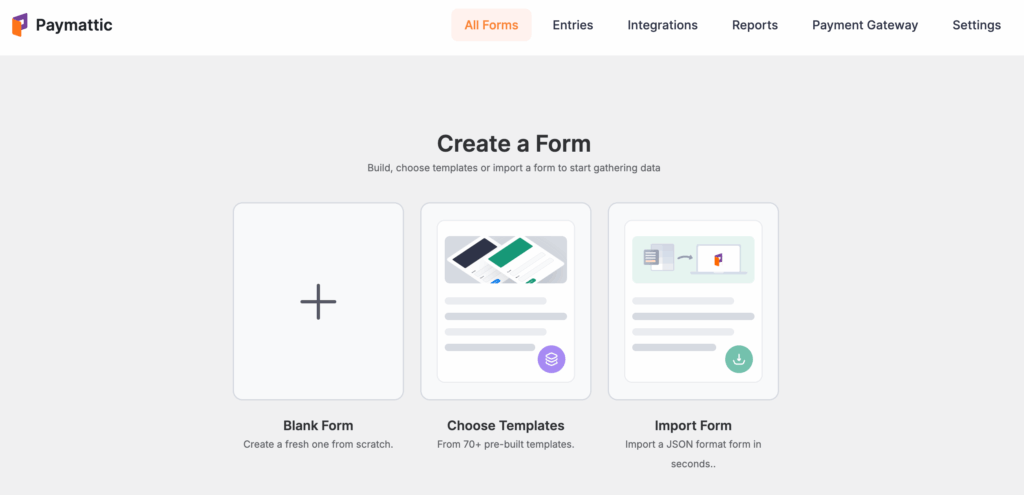
To create a payment form, go to Paymattic dashboard > All Forms > Add New Form.
Here you’ll find three options.
Blank Form: Start building your payment form from scratch.
Choose Template: Skip the hassle of creating a form manually by using one of our ready-made payment form templates.
Import Form: Already have a form created elsewhere? Simply import it here.
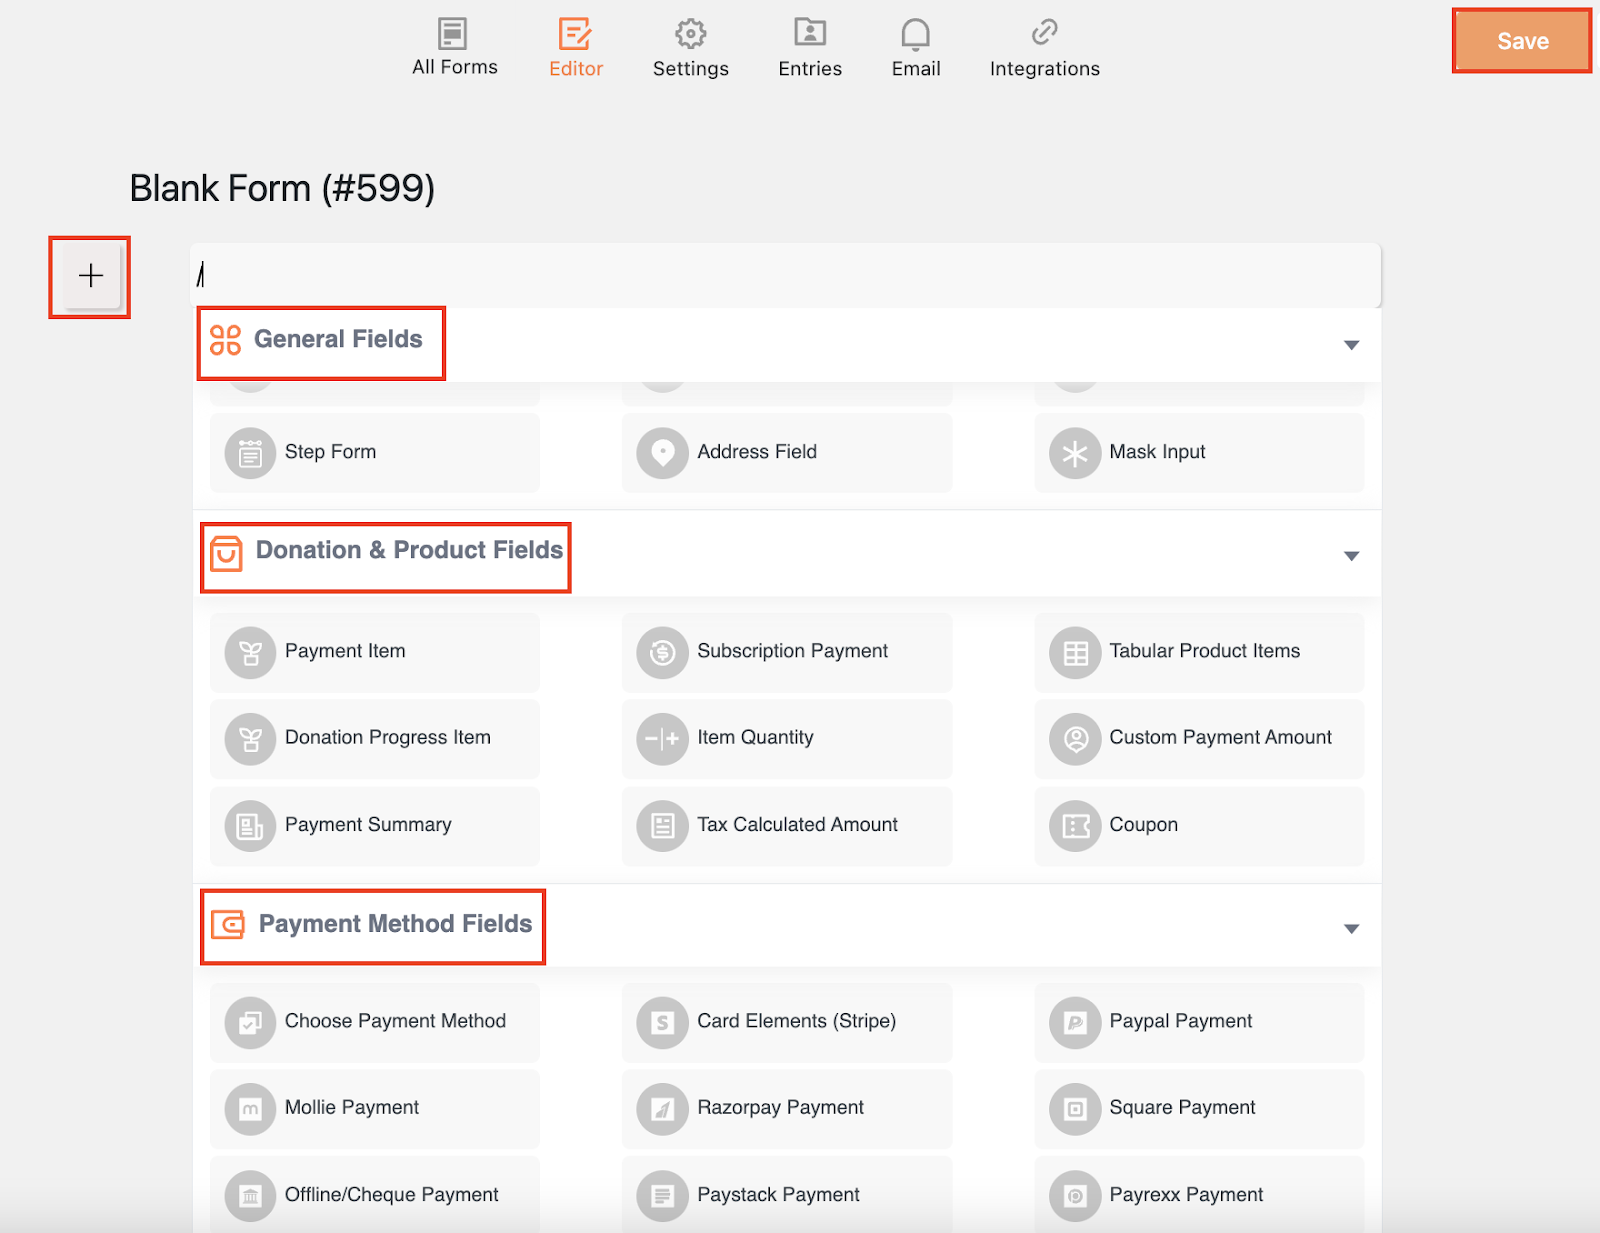
If you select Blank Form, you will get input fields to customize your own. To put input fields on your form, click on the (+) icon.
Here you can find three different form fields.
General Fields: Paymattic offers 20+ general form fields, allowing you to design a complete and professional payment form for your website.
Donation and Products Fields: It offers 10+ specialized fields to help you customize your donation and payment forms with ease.
Payment Method Fields: It also offers 14+ payment methods to accept payments worldwide, and even supports offline payment options.
Let’s create a payment form with Paymattic so you can see how simple it is. You already know how to access the blank form to start building from scratch.
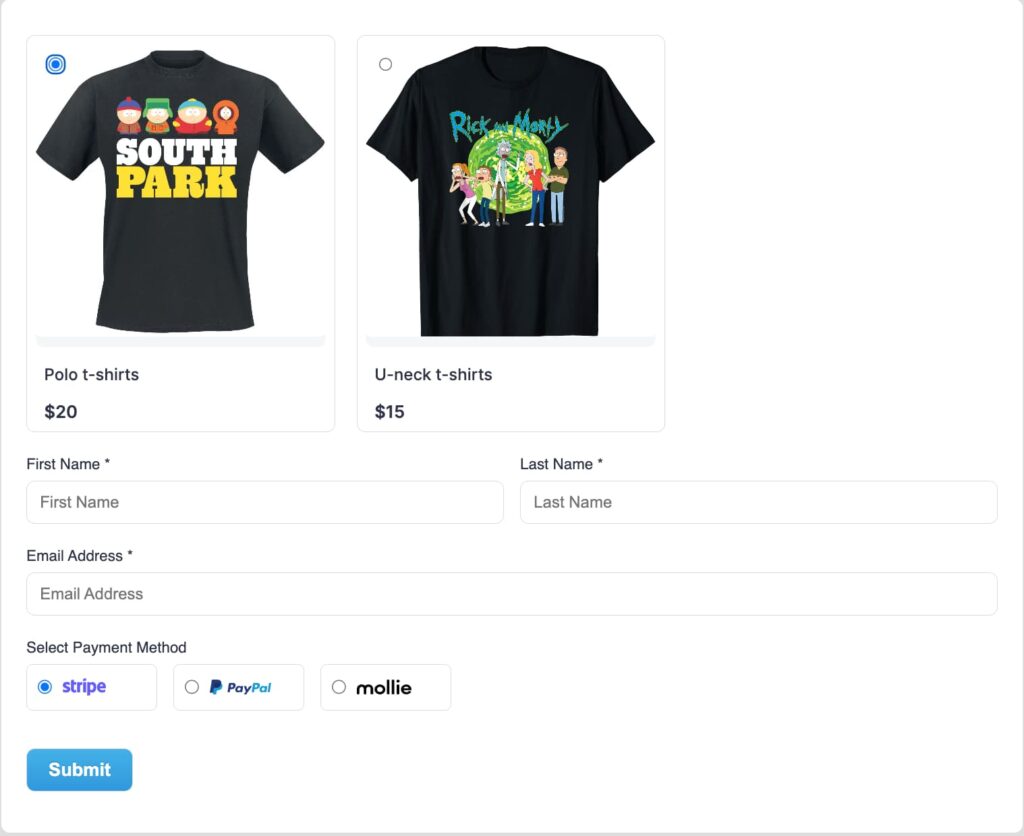
Suppose you want to create a payment form for your online store where you’ll not only collect payments but also display your products directly on the form.
- Give your form a clear name so you can easily recognize it later.
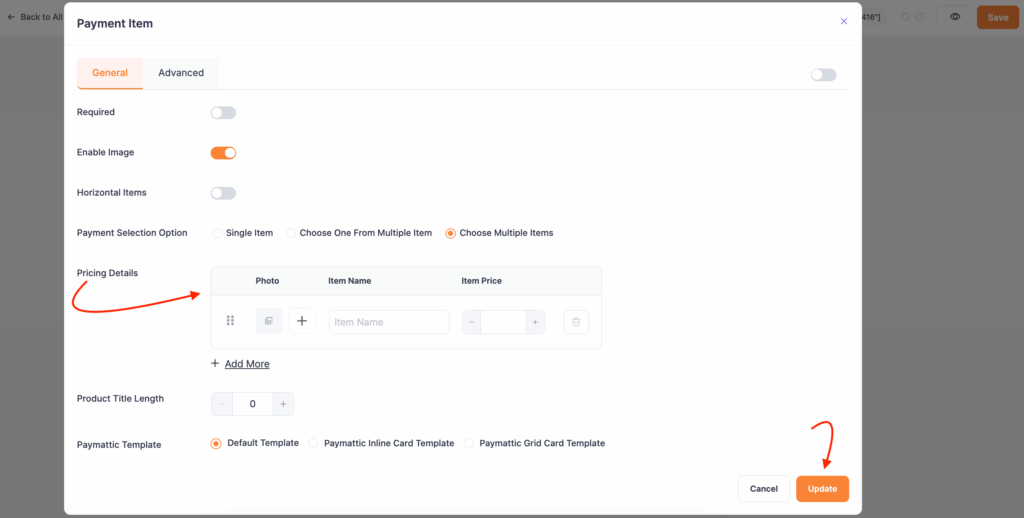
- Then, from the Donation & Products field section, add a Payment Item field to your form. This field lets you showcase one or multiple products, allowing customers to select and purchase their desired items right there in the form.
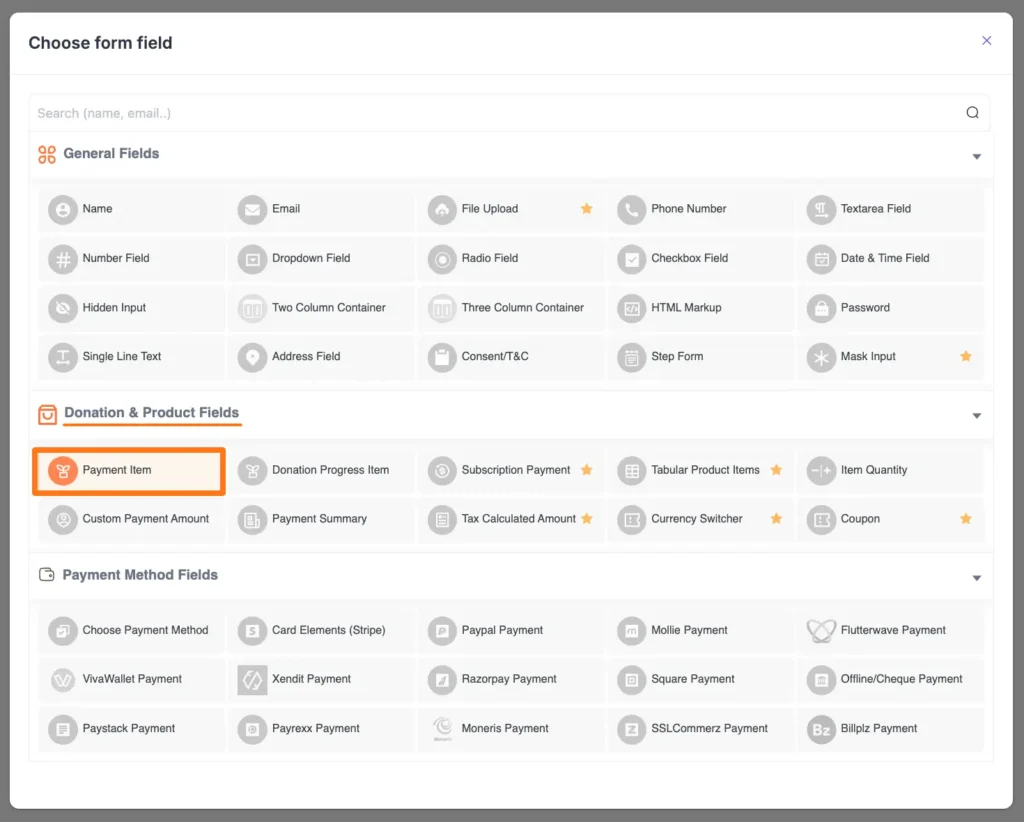
- Click the Settings icon on the field to customize product details, prices, and display options according to your needs.
- Here, you can list your items with fixed prices and add product images using the Plus icon. You can also rearrange the items using the drag-and-drop feature. To include additional items, click + Add More, and to remove any item, click the Trash icon.
- Once you are done, click the Update button to save all your settings and changes.
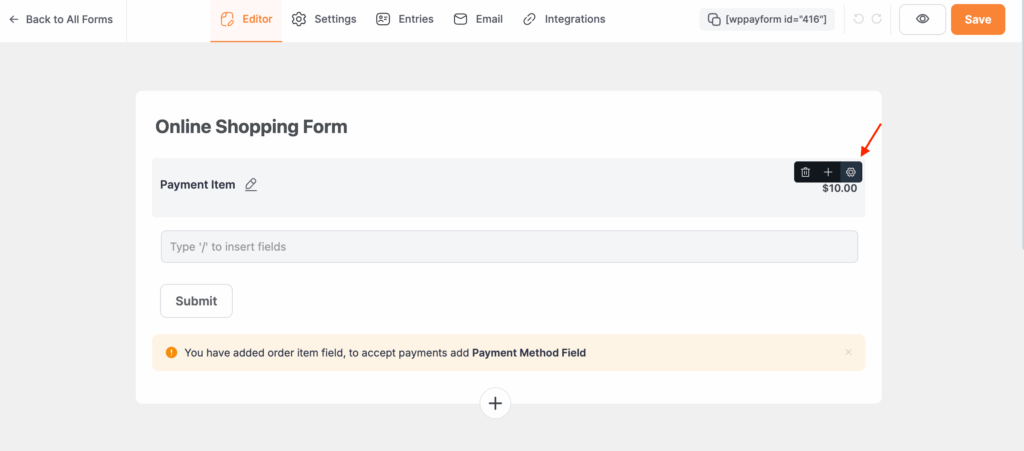
- After setting up your products on the form, it’s time to add additional fields to collect customer information and payment method fields to process payments for the products.
- Suppose you’re adding Name and Email fields to your form. Next, to collect payments, add a Payment Method field. If you plan to offer multiple payment options, choose the Choose Payment Method field from the Payment Method section, select the payment methods you want to enable. Then click on the Update button.
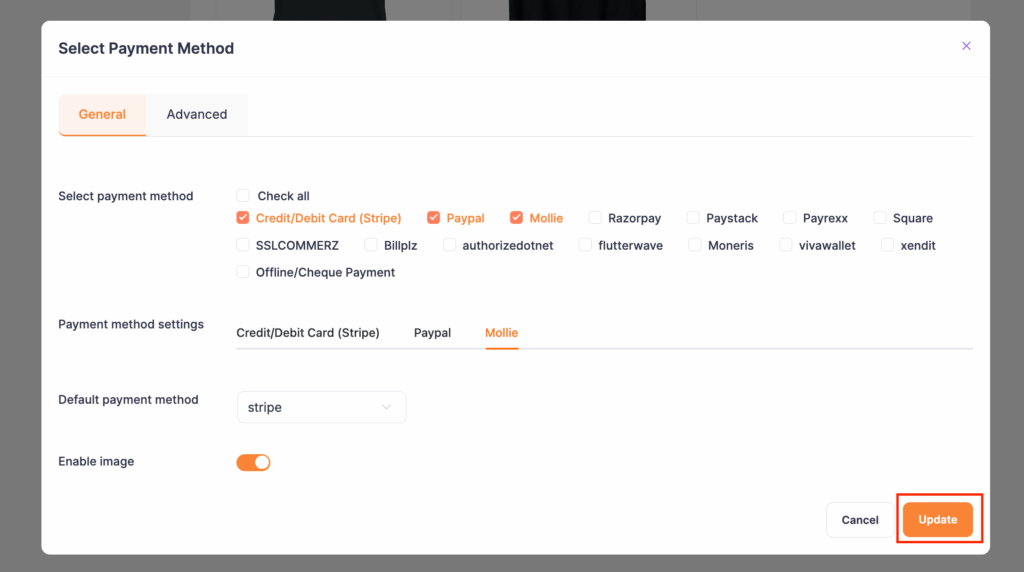
- Finally, click on the Save button after completing the configuration.
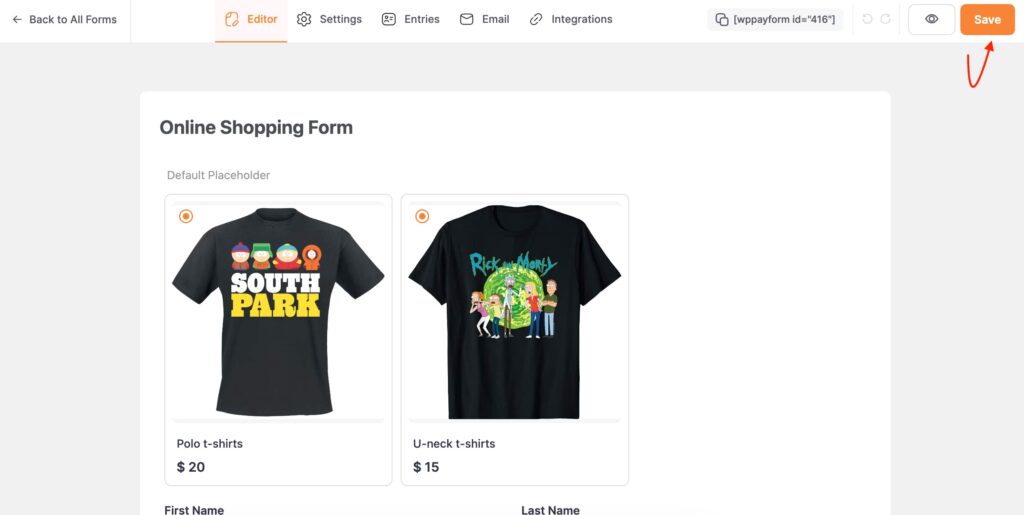
Preview form
Paymattic allows you to preview your form before publishing it. To preview your form, go to All forms and click on the preview option below your form name.
Here is the preview result; your form might look like this.
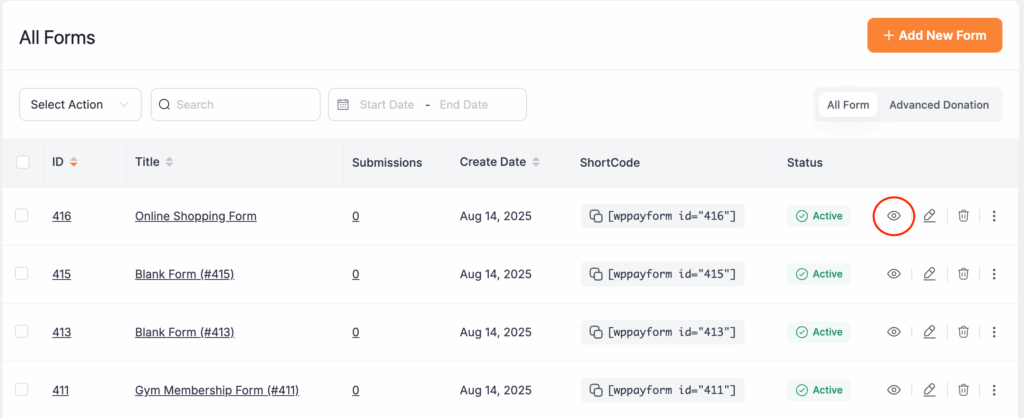
Add payment form in WordPress
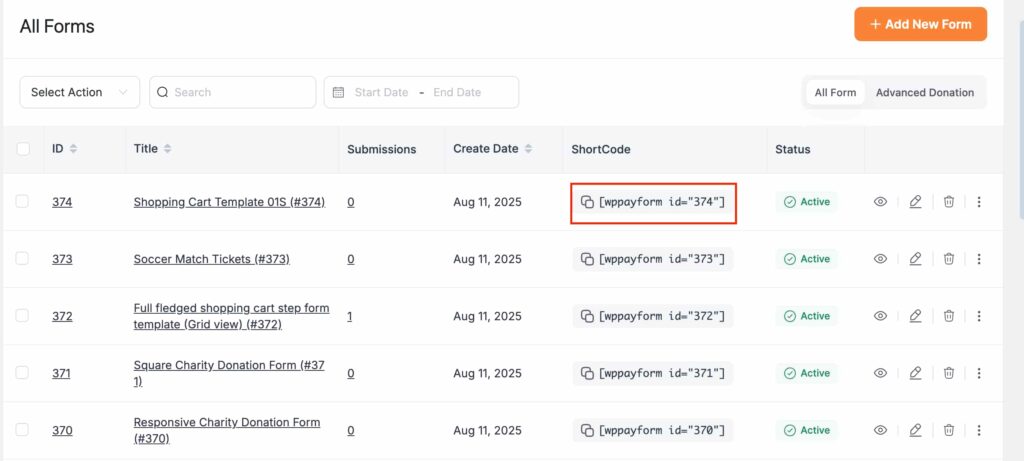
After you are done with the above stuff, now it’s time to embed the payment form on your website. For this, go to Paymattic > All forms.
Then copy the shortcode of your form, which is located on the right side of the form name.
Start collecting payment today
We hope you are now ready to start collecting online with an eye catchy payment form. As we mentioned already, Paymattic is a fantastic plugin for building your payment form. Its easy and smooth functionality lets you create any form, like a donation form, contact form, payment form, registration form, and more, without any hassle.
This plugin also lets you export-import your forms for further use. So what are you still looking for?
Try Paymattic today, to get amazed.
Frequently asked questions
Here are some frequently asked questions about “how to create an online payment form on WordPress.”
1. How can I create a payment form on WordPress?
You can easily create a payment form on WordPress using Paymattic. It allows you to design forms for products, services, or donations, add customer fields, and integrate payment gateways, all without the need for multiple plugins.
2. Do I need coding skills to create a payment form?
Not at all! Paymattic is user-friendly and drag-and-drop based. You can create fully functional payment forms, add products, and set up payment methods without any coding knowledge.
3. Which payment gateways does Paymattic support?
Paymattic supports multiple payment gateways, including Stripe, PayPal, and 12 others, as well as offline payment methods. You can offer single or multiple payment options to your customers easily.
4. Can I collect customer information with my payment form?
Yes! Paymattic lets you add fields to collect customer details like name, email, phone number, and address. You can combine these with your product or donation fields to get all the information you need during checkout.
5. Can I sell digital and physical products using the same form?
Absolutely! With Paymattic, you can sell both digital and physical products on a single payment form. You can showcase products, set prices, collect customer information, and process payments.
Join the thousands already enjoying Paymattic Pro!

Madhobi
This is Madhobi, a content writer at WPManageNinja with expertise in technical writing and email marketing. Outside of work, she likes traveling and exploring new places.


Leave a Reply