

How to Add Donation Forms in WordPress | 5 Easy Steps


Table of Content
Download Paymattic – it’s Free!

Subscribe To Get
WordPress Guides, Tips, and Tutorials
We will never spam you. We will only send you product updates and tips.
Are you wondering how you can add donation forms to the WordPress site? Then, you are in the right place!
A donation form is absolutely vital for any fundraising website to accept donations online. There are so many free online donation platforms available in the market. But these donation platforms do not allow you to run a donation campaign completely on your own website. If you are a WordPress user, you can do the trick with a little effort using the Paymattic WordPress plugin. Thousands of websites are already collecting donations flawlessly with this WordPress donation plugin.
Why you should use donation forms
If you are running a charity or non-profit online donation site, then adding a donation form is a must to make it a donation website. It helps you attract visitors who are looking for an online donation website. Donations from your visitors can help you support a cause. You can make donations on behalf of a particular organization, an individual, or anonymously with the Paymattic WordPress fundraising plugin.
So, no more wait! Start your fundraising campaign today with the best donation plugin for WordPress. Today, we will show how you can add a WordPress donation form to your fundraising website.
Check out these comparison blog on GiveWP vs Paymattic and find out which one is better for you.
5 Easy steps to add donation forms in WordPress !
Below we outline 5 simple steps to add a donation form. Follow the step below and create a donation form easily.
- Install and activate Paymattic (Pro)
- Configure payment gateways
- Create a donation form
- Select a template
- Add donation forms in WordPress
Install & activate Paymattic (Pro) WordPress plugin
First of all, you need to install the Paymattic WordPress payment and donation plugin to create donation forms. You can find dozens and dozens of form builder plugins available in the market. Among them, Paymattic is the most user-friendly and powerful donation form builder.
It is a drag-and-drop form builder WordPress plugin that allows you easily create professional forms for your website. It comes with a collection of pre-built donation form templates that will save you a lot of time.
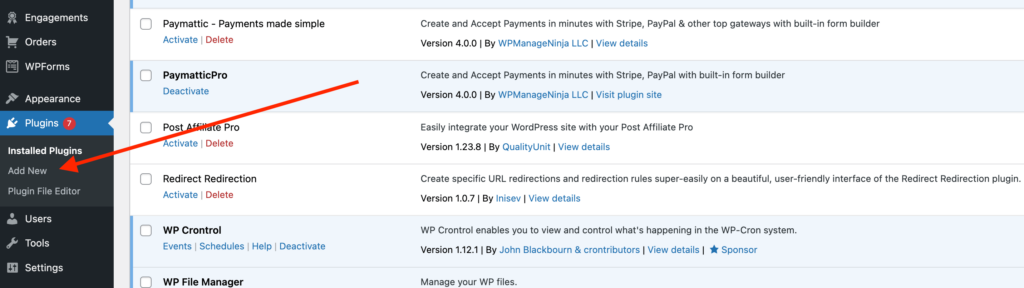
To install the plugin-
- Login to your WordPress dashboard and navigate to Plugins → Add New.
- Upload the Paymattic (Pro) plugin and complete the installation. ( Do not forget to activate the plugin after installation.)
- Activate the Paymattic (Pro) license and start enjoying.
Ready to get started?
Experience payments and donations for WordPress like never before. Try Paymattic now!
Configure payment gateways
You have to configure payment gateways to collect funds from your donor account.
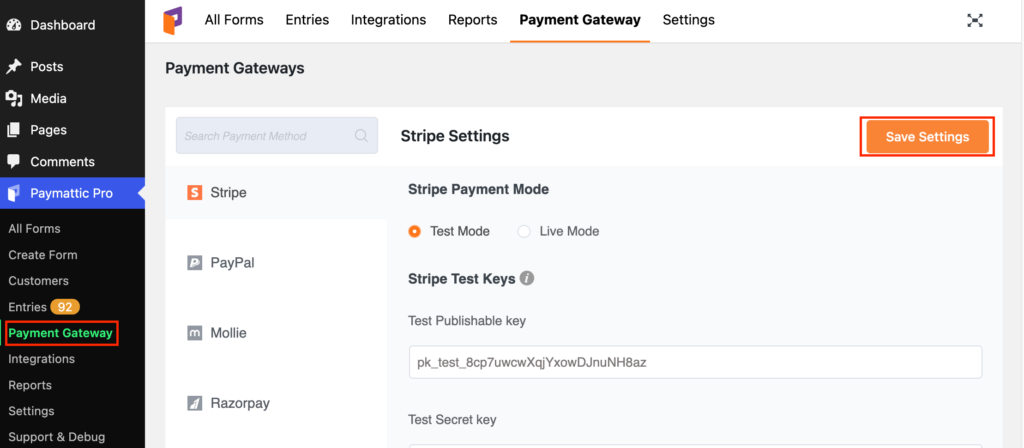
To configure the payment gateways navigate to Paymattic (Pro) → Payment Gateway from the top bar.
Here, you can see all available payment gateways. Select your preferred payment gateway and put the required API credentials for your merchant account. Click on the Save Settings button to save the changes.
Also learn more about how to configure payment gateways in WordPress in this blog.
Create a donation form
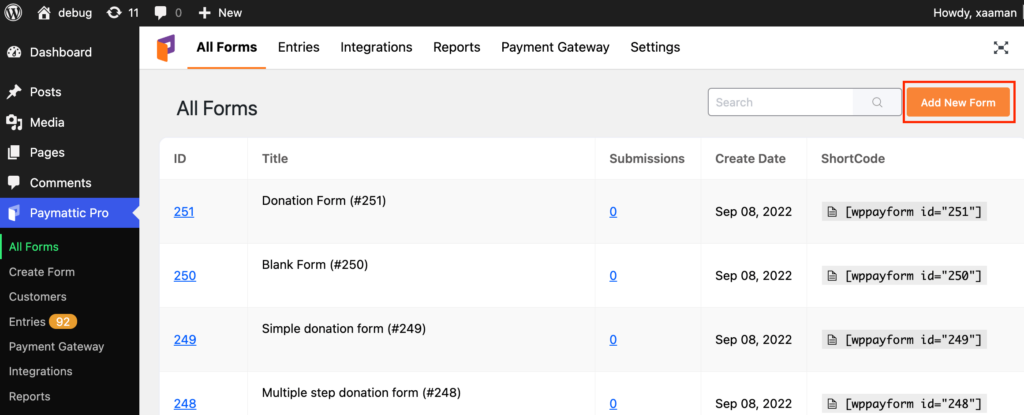
Now, it is time to create a donation form in WordPress site using Paymattic. To create a donation form, go to Paymattic (Pro) → All Forms → Add New Form.
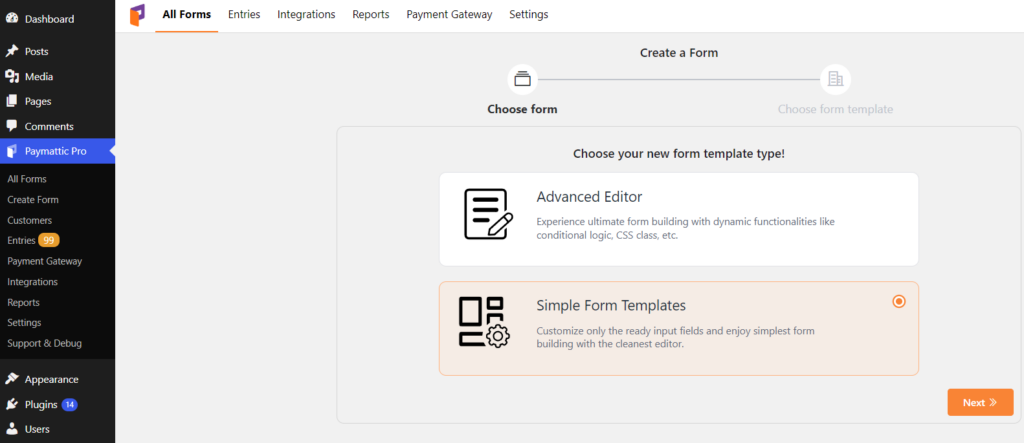
Then, you can start with Advanced Editor or a donation template. Select the Simple Form Templates to quickly create a donation form. The Donation template is a pro feature of Paymattic. Upgrade to Paymattic Pro to use all the premium features.
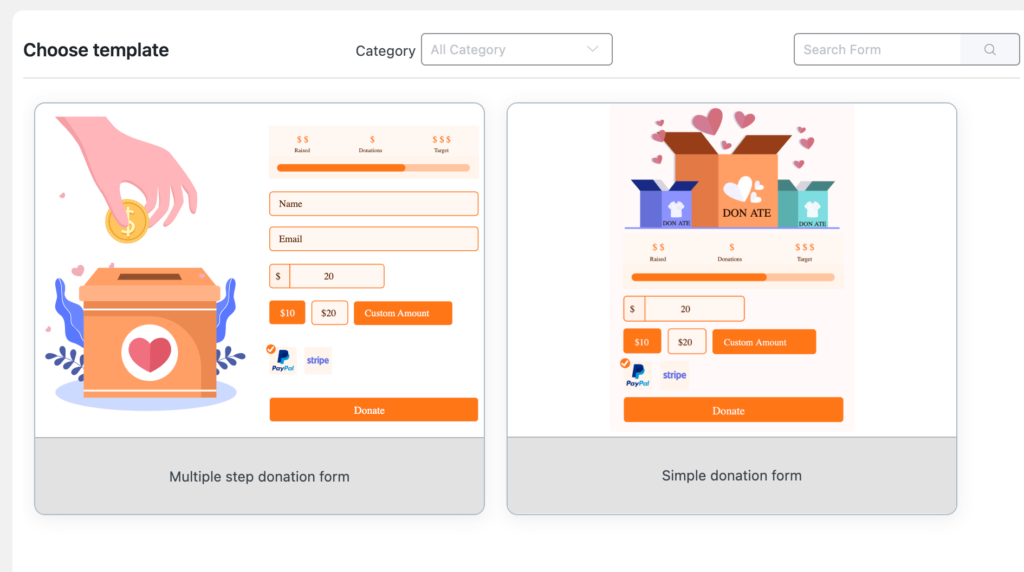
Select a template
You can view two ready-to-use donation templates. Select any of them to configure it on your own.
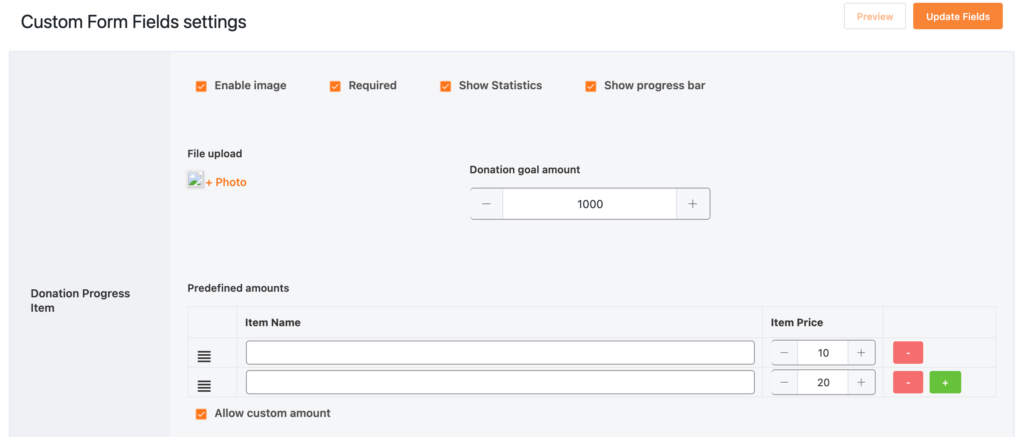
When you select a template, it will take you to the custom form field settings page. Here you will get the following configuration fields –
Enable image – Check the box if you want to attach an image with your form.
Required – Enabling this option makes it mandatory for users to select a specific donation item.
Show statistics – Enable the Show Statistics option if you want to display the donation data on the form header.
Show progress bar – This option displays a dynamic progress bar about what portion of the total donation amount is raised.
File upload – Click the button and upload a photo of your donation campaign. This photo will be displayed on the donation form when you publish it.
Donation goal amount – It is a numeric input field to specify the target amount that you want to raise. The progress bar and statistics section will display data based on the amount you mention here. There are two buttons to adjust the amount.
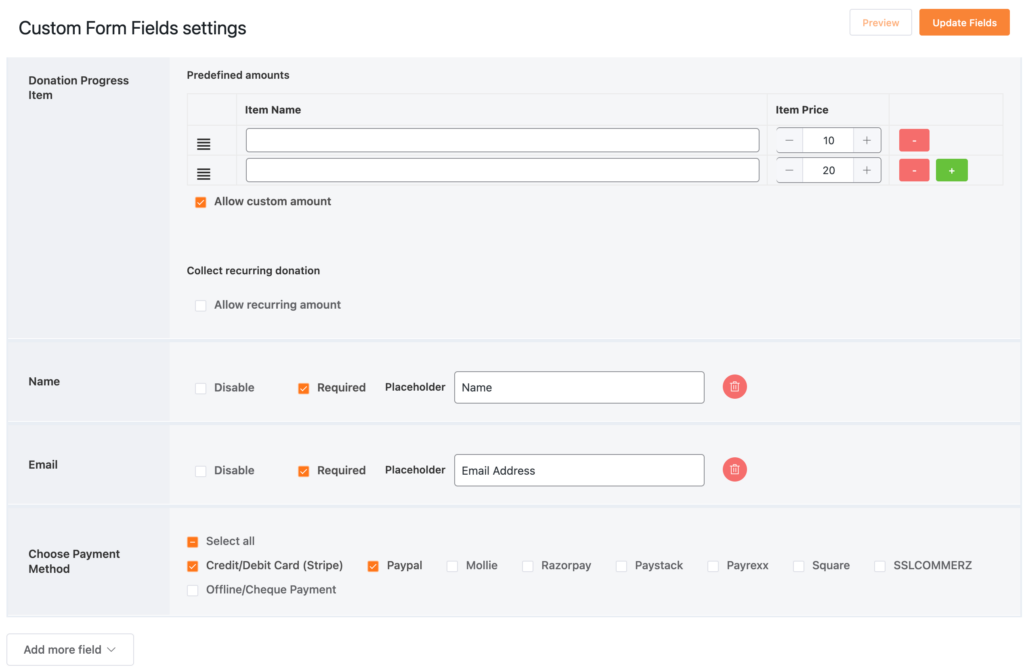
Predefined amounts – You can set some predefined donation items with Item Name and Item Price fields. Click on the ‘+‘ or ‘–‘ button to add and remove any item.
Allow custom amount – Click on the Allow custom amount option if you want your users to donate any amount they want.
Allow recurring amount – This option lets you collection recurring donations from your user. Here you can set the maximum billing time and billing interval – daily, weekly, monthly or annually. Keep the maximum billing time 0 for unlimited billing period. Remember, recurring payment only works with the Stripe and PayPal payment gateway.
Name & Email – These two fields collect the basic information of the user. You can change the placeholder text and disable the fields. Make the fields mandatory by clicking on the Required option.
Ready to get started?
Experience payments and donations for WordPress like never before. Try Paymattic now!
Choose payment method – At last, you need to pick a payment method to accept donations on the website. The Paymattic WordPress donation plugin supports Stripe(free), PayPal, Square, Mollie, Billplz, Razorpay, Paystack, Payrexx, Xendit, Flutterwave, Viva Wallet, Moneris SSLCOMMERZ and offline payment methods. Among them, the Stripe payment gateway is available on the free version. You can select more than one payment method if needed. Make sure your selected payment method is configured with Paymattic before you pick one.
Want to add some more fields? Just click on the Add more fields button. It will open up all the available input fields that you can attach to your donation form. You can change the donate button name by editing the button field from Add more field option.
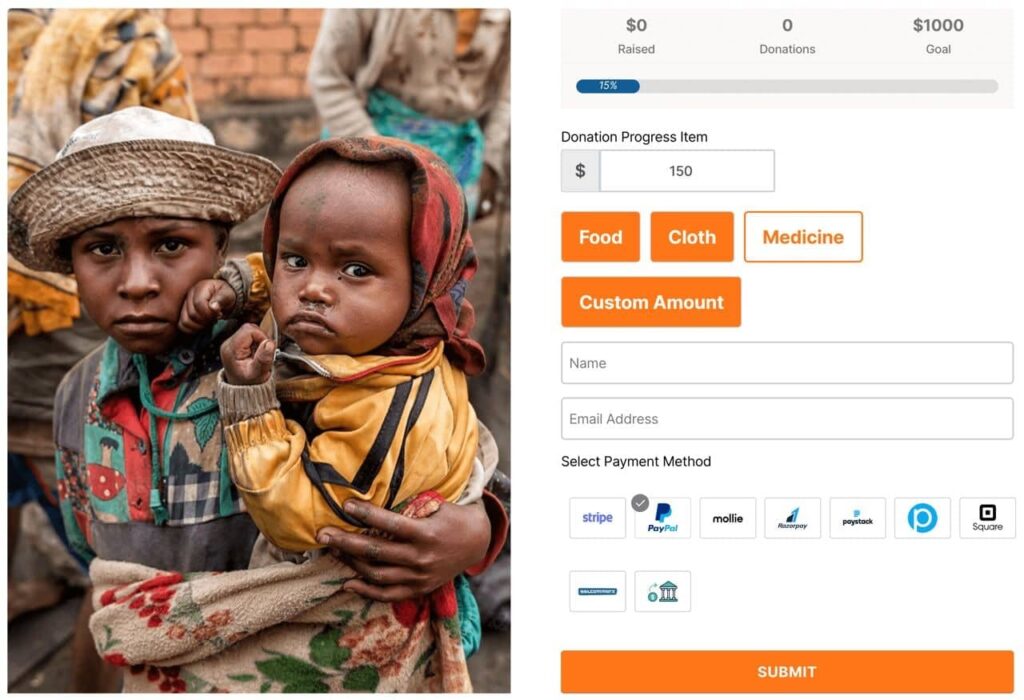
At last, click on the Update Fields button to save the form.
Bingo! You are all done. You have successfully created a donation form. Here is a preview of how your donation form might look like.
Add donation forms in WordPress
After you successfully create the form, your final task is to publish the form on a donation page of your website.
- To publish a form, go to Paymattic (Pro) → All Forms.
- Then copy the shortcode located on the right side of each form name.
- Create a donation page from your WordPress dashboard and paste the shortcode on the page where you want to publish the form.
After publishing the form, you can accept donations through your website.

Wrapping up
Paymattic is the best WordPress donation plugin to add donation forms to the WordPress site and create donation websites in minutes. You can use this plugin for your website without any doubt by purchasing any annual license of your choice. If you face any difficulty in using Paymattic, you may contact the support team to let us know your query.
If you find this article interesting, then please let us know your valuable feedback in the comment section below.
Join the thousands already enjoying Paymattic Pro!

Shuyeb Ahmed
Hi, This is Shuyeb. I am a digital marketing enthusiast, love to write about WordPress products and new updates. At the weekend, you will find me exploring nature & beautiful places.


Leave a Reply