

How to Create a PayPal Business Payment Form in WordPress?


Table of Content
Download Paymattic – it’s Free!

Subscribe To Get
WordPress Guides, Tips, and Tutorials
We will never spam you. We will only send you product updates and tips.
Most of the online businesses lose a sale because the checkout feels clunky.
This hesitation in checkout, is the silent killer of online payments. People bail the moment they don’t trust a form, or can’t find their preferred payment method.
PayPal fixes half that problem instantly. It’s one of the most popular payment methods that people already trust, already use, and already have saved card details in. Pair it with the right WordPress plugin, and you can have a working payment form live in minutes.
This guide walks you through creating a PayPal business payment form in WordPress using Paymattic, from connecting your account to publishing your first form.
TL;DR
– A PayPal payment form lets customers make payments without leaving your website.
– Using PayPal can increase trust and make the checkout experience more familiar for users.
– You’ll need a WordPress site, Paymattic, and a PayPal Business account to get started.
– Connecting PayPal to Paymattic takes only a few setup steps.
– You can build a payment form by adding customer information and payment fields with a drag-and-drop builder.
– Paymattic allows you to customize pricing, payment settings, and confirmation messages.
– The completed form can be embedded on any page or post using a shortcode or block.
– You can expand your form with features like subscriptions, coupons, conditional logic, and multi-step layouts.
– PayPal payment forms work well for service payments, product orders, event registrations, and donations.
– Keeping the form simple and mobile-friendly can help improve payment completion rates.
PayPal business payment form – at a glance
A PayPal business payment form is simply a form on your website that lets customers pay you through PayPal without ever leaving your site to do it manually.
Here’s the flow:
Customer fills out form → Submits payment → PayPal processes it → Confirmation shown
People use these forms for:
- Selling products (digital or physical)
- Charging for services
- Collecting event registration fees
- Accepting donations
- Running membership or subscription billing
The appeal is simple: customers get a payment method they already trust, and you get paid without building anything from scratch.
Why use PayPal for online payments?
PayPal has become one of the most widely recognized payment platforms in the world, making it easier for businesses, nonprofits, and creators to accept payments online. Millions of people already have PayPal accounts and feel comfortable using them, which can reduce hesitation during checkout and help improve conversion rates.
PayPal also offers flexibility in how customers pay. Buyers can complete transactions using their PayPal balance, linked bank accounts, debit cards, or credit cards, giving them multiple payment options without creating additional friction.
Security is another major benefit. PayPal handles sensitive payment information on its own secure infrastructure, helping businesses reduce compliance burdens while providing fraud protection and secure transaction processing.
For WordPress users, PayPal is also easy to integrate with payment form plugins like Paymattic. Instead of building a custom checkout system, you can start accepting payments through a simple form and have transactions processed securely through PayPal.
Key benefits at a glance
- Widely recognized and trusted by customers worldwide
- Supports multiple payment methods and currencies
- Helps reduce checkout abandonment through familiar payment flows
- Secure payment processing and fraud protection
- Suitable for businesses, freelancers, nonprofits, and creators
- Easy to integrate with WordPress using Paymattic
- Supports both one-time and recurring payments
Tutorial: Steps to create PayPal business payment form with Paymattic
Here, I am creating a PayPal business payment form with Paymattic. Follow this step-by-step guide to create a PayPal payment form in WordPress with Paymattic.
Quick checklist: things you’ll need before you start
- WordPress installed
- Paymattic activated
- PayPal Business account ready
- PayPal payment gateway configured
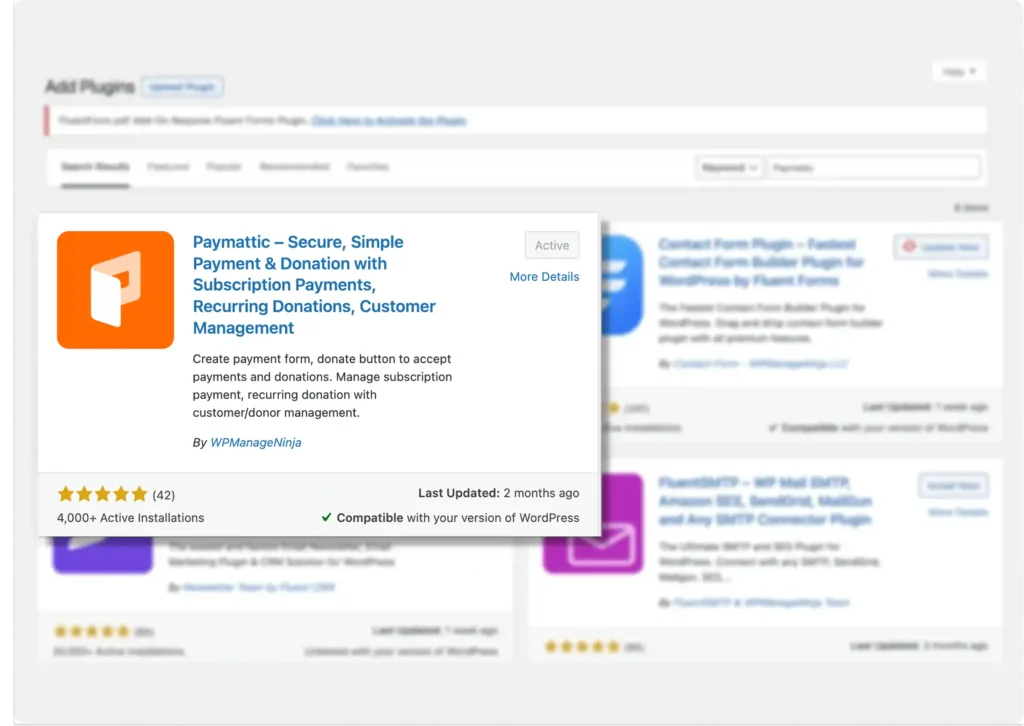
Step 1: Install and activate Paymattic
If you haven’t already, install Paymattic first. Head to your WordPress dashboard and navigate to Plugins → Add New. Search for “Paymattic,” install the plugin, and click Activate.
Once active, you’ll see the Paymattic menu appear in your WordPress sidebar. You’re ready to move on.
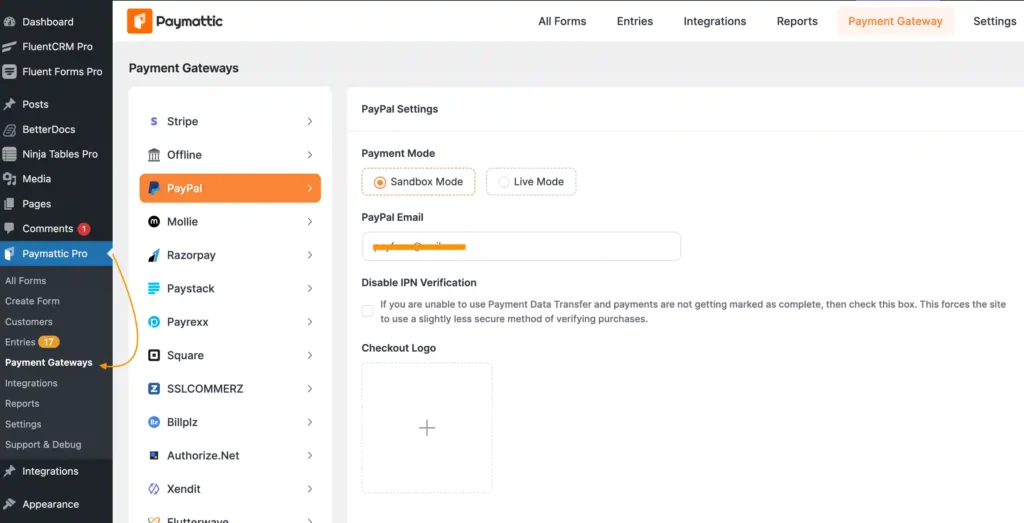
Step 2: Configure the PayPal payment gateway
To integrate PayPal payment with Paymattic, first, head to Paymattic (Pro) → Payment Gateway from your WordPress dashboard, then select PayPal from the list of gateways.
You’ll see two modes: Sandbox and Live. Use Sandbox to test before going live, and Live Mode once you’re ready to accept real payments. Both follow the same setup.
Here’s how to configure Live Mode:
- Select Live Mode
- Enter your PayPal account email
- Not seeing payments marked as complete? If Payment Data Transfer isn’t working for you, turn on Disable PayPal IPN Verification
- Add a logo in the Checkout Logo field to display during checkout
- Set up your Confirmation Page Settings to control what customers see after a successful payment or a failed one
- Click Save Settings
That’s it, you’re ready to accept one-time payments with PayPal.
Step 3: Enable PayPal recurring payments
If you want to collect PayPal recurring payments from your customer, you can do that too. Paymattic supports PayPal recurring payments; you just need to set up IPN notifications first.
Here’s how:
- On the same Paymattic PayPal settings page, scroll down a bit, and you’ll find your Notification URL
- Copy that URL
- Head to your PayPal account dashboard, go to your IPN settings, and paste the URL in
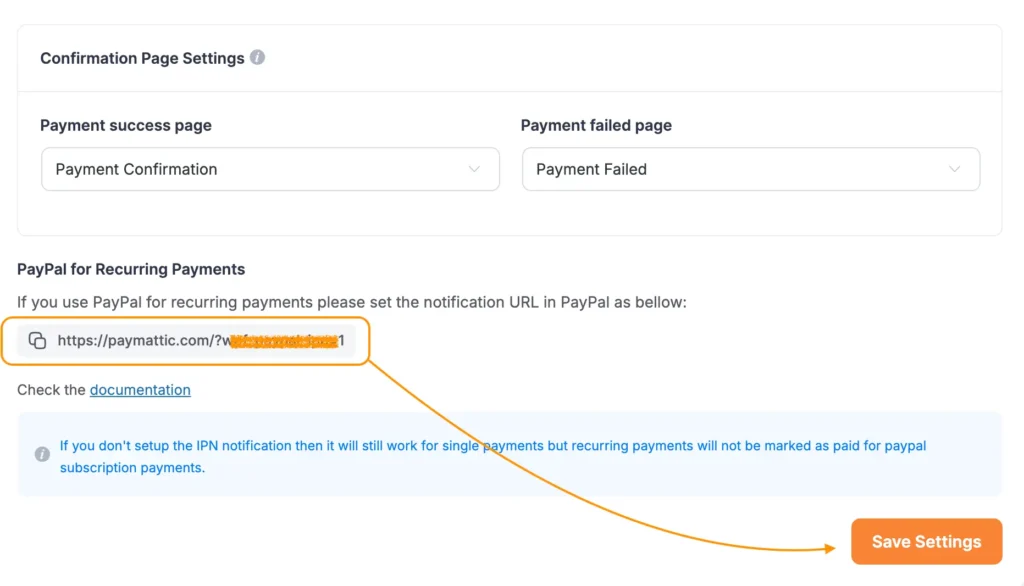
Once that’s connected, you’re all set to start collecting recurring payments through PayPal, no extra plugins, no manual tracking.
Step 4: Create PayPal business payment form
With PayPal connected, it’s time to build the actual form.
To create your form, go to Paymattic → All Forms → Add New. Choose a blank form or start from a template if you want a head start.
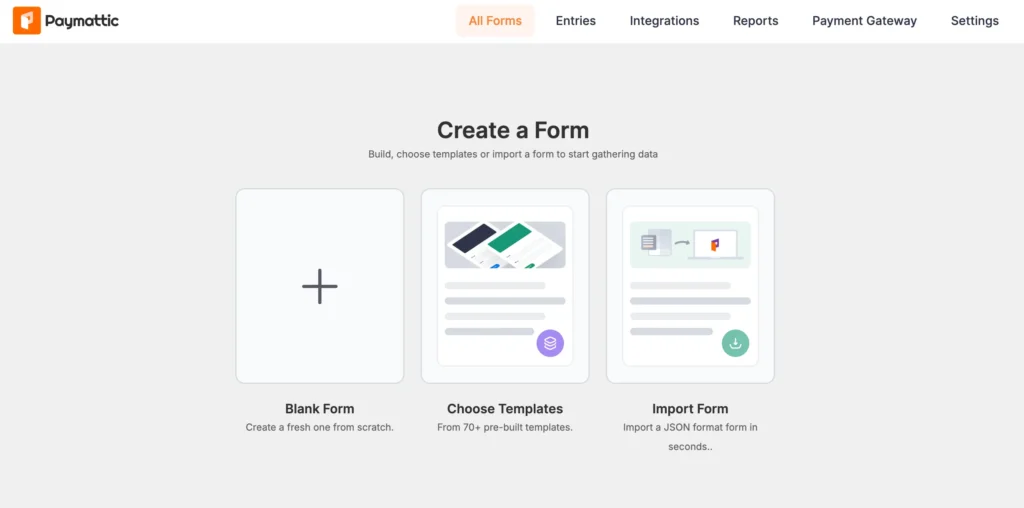
If you start with a blank form, you’ll find here all essential fields available; choose the fields that you want to add to your form.
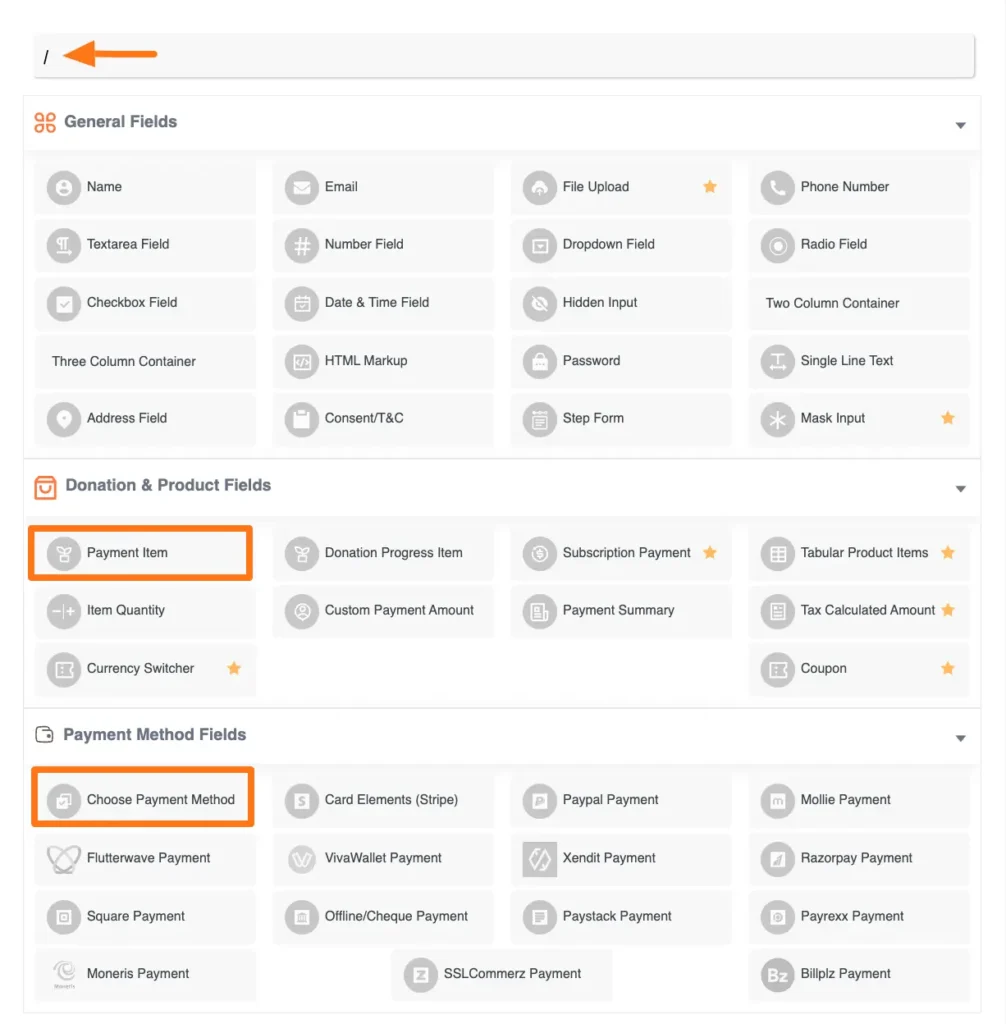
Here are our suggested fields for the PayPal business payment form. You can add more if necessary:
- Customer Name (First and Last Name fields)
- Email Address (required for payment receipts)
- Payment item fields ( to showcase your product)
- Payment Method field to display PayPal as an option
Once you’re done with form customizations, click on the save button.
Step 5: Preview & publish the form
Preview the form once before going live. Then copy the shortcode to embed the form on any page or post.
Here is the demo of your PayPal business payment form, created with Paymattic.
Best practices for a high-converting PayPal form
Here’s the quick checklist of best practices for a high-converting PayPal business payment form.
- Keep the form short; every extra field costs you conversions
- Show pricing clearly, with no hidden surprises at checkout
- Add trust signals (security badges, testimonials, SSL indicators)
- Optimize for mobile, most checkouts now happen on phones
- Offer more than one payment option if your audience expects it
- Always test before going live
- Use a clear, action-driven CTA button (“Buy Now,” not “Submit”)
Final words
PayPal remains one of the simplest, most trusted ways to collect payments online. Paired with Paymattic, building a professional payment form takes minutes.
Whether you’re collecting service payments, donations, event fees, or product orders, the setup is the same: connect PayPal, build your form, publish, and done.
Ready to start? Create your first PayPal payment form today and start accepting secure PayPal payments with Paymattic.
Join the thousands already enjoying Paymattic Pro!
Frequently asked questions
1. How do I create a PayPal payment form in WordPress?
Install Paymattic, connect your PayPal account, create a payment form, add payment fields, and publish it on your website.
2. Can I accept recurring payments with PayPal?
Yes. Paymattic supports recurring payments and subscriptions through supported PayPal integrations.
3. Do I need coding knowledge to create a PayPal payment form?
No. Paymattic provides a drag-and-drop form builder that lets you create payment forms without coding.
4. Can I use PayPal for donations on WordPress?
Yes. You can create donation forms and allow donors to contribute through PayPal.
5. Is PayPal secure for online payments?
Yes. PayPal uses encryption, fraud protection, and secure payment processing to protect both businesses and customers.

Madhobi
This is Madhobi, a content writer at WPManageNinja with expertise in technical writing and email marketing. Outside of work, she likes traveling and exploring new places.


Leave a Reply