Accept Payments With Authorize.Net Payment Gateway


Table of Content
Download Paymattic – it’s Free!

Subscribe To Get
WordPress Guides, Tips, and Tutorials
We will never spam you. We will only send you product updates and tips.
You’ve spent months building the perfect WordPress website, the products are amazing, your marketing is on point, but customers keep abandoning their carts at checkout.
Sound familiar?
The harsh reality is that payment processing can make or break your online business; that’s why choosing the right solution has never been more critical.
And when it comes to online payment processing in the United States, one name consistently dominates the conversation: Authorize.net.
It’s a Visa-owned payment solution that adds an extra layer of credibility and trust among customers. That’s why over 75% of the US businesses rely on this platform and make it one of their go-to payment gateways.
Whether you’re a small business owner in Kansas or a growing e-commerce store in California, there’s a good chance your competitors are already using Authorize.net to process their payments. So should you.
That’s why, in this article, we’ll guide you on how to accept online payments with the Authorize.net payment gateway. Also, guide you through the simple integration process with WordPress.
What is the Authorize.net payment gateway?
Authorize.net is an online payment gateway service that allows businesses to accept online payments securely. It is owned by Visa, and it’s one of the most established payment providers in the industry.
Authorize.net works as the middleman between your WordPress website and your customer’s bank account.
When a customer purchases on your site, Authorize.net:
- Collects the payment details (credit card, debit card, or eCheck)
- Encrypts and securely sends the data to the payment processor
- Verifies with the customer’s bank whether funds are available
- Approves or declines the transaction in real time
- Transfers funds to your merchant account once approved.
This process usually takes only a few seconds and ensures payments are handled safely while protecting sensitive customer information.
The platform also handles everything from one-time purchases to recurring subscriptions.
Why would you need the Authorize.net payment gateway?
As you know, the Authorize.net payment method is dominating in the US regions, so there must be something that makes it so popular. Let’s take a look at why you should use the Authorize net payment gateway to accept online payments.
Customer trust
Here’s the thing about trust in online payments: customers can smell sketch from a mile away. When they see some random payment processor they’ve never heard of, their brain goes into “this might be a scam” mode.
But when they see that familiar Visa logo? Suddenly, your little WordPress site feels as legit as Amazon.
You can use a cheap payment processor that saves you maybe $20 a month in fees. But it can lose you way more than that in abandoned carts because people didn’t trust the checkout process.
Switching to a reliable, popular payment gateway like Authorize.net can improve the conversion rate by 20%.
Compatibility
You can easily accept all major credit card payments through the Authorize.net payment gateway. Visa, Mastercard, American Express, and Discover, and even some of those weird store cards nobody talks about, are all supported.
Additionally, it integrates with over 300 shopping carts and business tools and has options for POS integrations, which makes it a popular choice for eCommerce businesses as well as many brick-and-mortar retailers.
So you don’t have to worry about compatibility issues.
Secured
The security stuff is where things get really interesting. Level 1 PCI compliance sounds boring until you realize it means you’re protected against the kind of data breaches that destroy businesses overnight.
You can sleep better knowing that even if someone hacks your website, they can’t get to your customers’ credit card information because it’s all handled on Authorize.net’s ultra-secure servers.
Authorize net payment gateway has a built-in Advanced Fraud Detection Suite (AFDS) that comes with 13 easily configurable fraud filters.
This system is scary good at catching suspicious and potentially fraudulent transactions.
Authorize.net transaction fees
The Authorize.net transaction fees are pretty reasonable when you break them down. Yeah, 2.9% plus 30 cents per transaction isn’t exactly free, but compare that to losing entire sales because customers don’t trust your checkout process.
Plus, the advanced fraud protection alone can save you more money than you pay in fees.
Recurring payments
One of the go-to reasons for using the Authorize.net gateway is, you can accept one-time to recurring payments. It’s perfect for many membership sites and subscription-based businesses.
This eliminates the hassle of manually entering the payment information for each transaction. You can accept automated payments at a regular interval through credit cards or eChecks.
Reports
The reporting features are another game-changer. You get real-time transaction data, detailed analytics, and the ability to track everything from sales trends to customer behavior. It’s like having a crystal ball for your business finances.
Subscribe Newsletter
Subscribe to our newsletter for updates, exclusive offers, and news you won’t miss!

How to integrate Authorize.net payment gateway in WordPress
To accept online payments, you need to integrate Authorize.net into your website. There are many WordPress plugins available that have integration with Authorize.net. For now, we’ll go with Paymattic, a WordPress plugin specially designed for accepting payments and donations worldwide.
Including Authorize.net gateway, Paymattic has 13 more region-focused payment gateways such as Stripe, PayPal, Moneris, Flutterwave, Xendit, Mollie, BillPlz, etc.
Now, let’s go into the step-by-step process of integrating Authorize.net into your WordPress website.
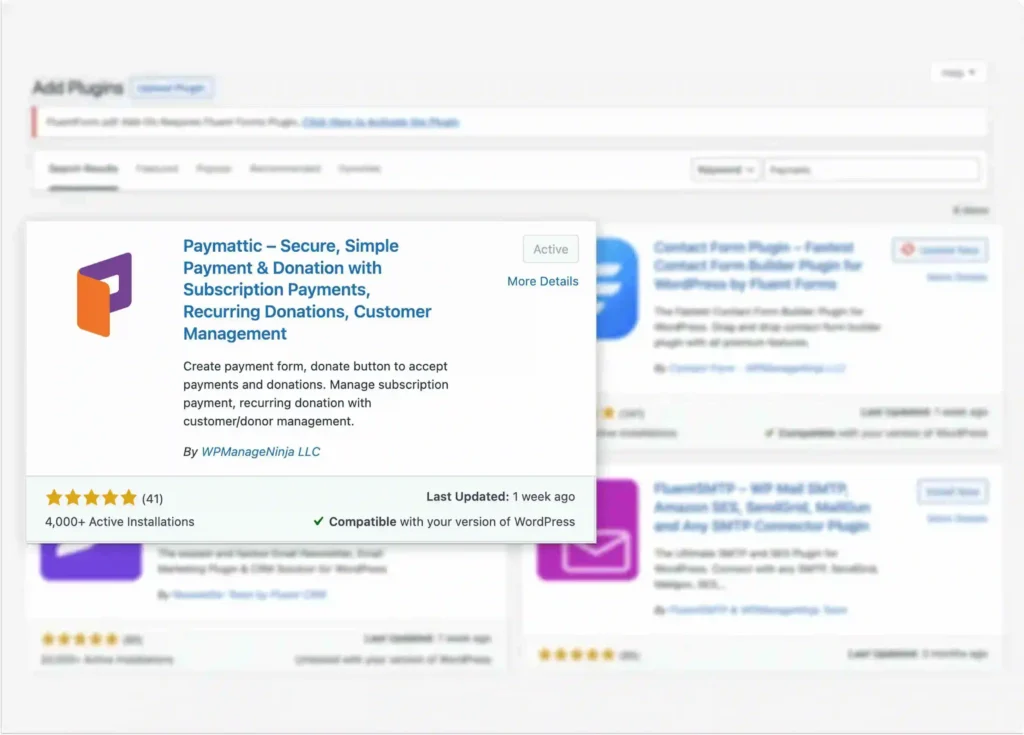
Install Paymattic
The first thing you need to do is install the Paymattic plugin.
- Go to your WordPress admin dashboard.
- Click on Plugins → Add New.
- Search for Paymattic and install the plugin.
- Click on the Activate button.
[Note: You need to upgrade to the pro version of Paymattic to use the Authorize.net payment gateway. Paymattic’s free version offers the Stripe payment gateway.]
Authorize.net gateway configuration in Paymattic
You can easily configure the Authorize.net payment method in Paymattic, following the steps below:
- From the Paymattic Navbar, go to Payment Gateways
- You’ll see a list of payment gateways available here; select Authorize.net
- Click the Install & Activate Authorize.net button to connect it with Paymattic
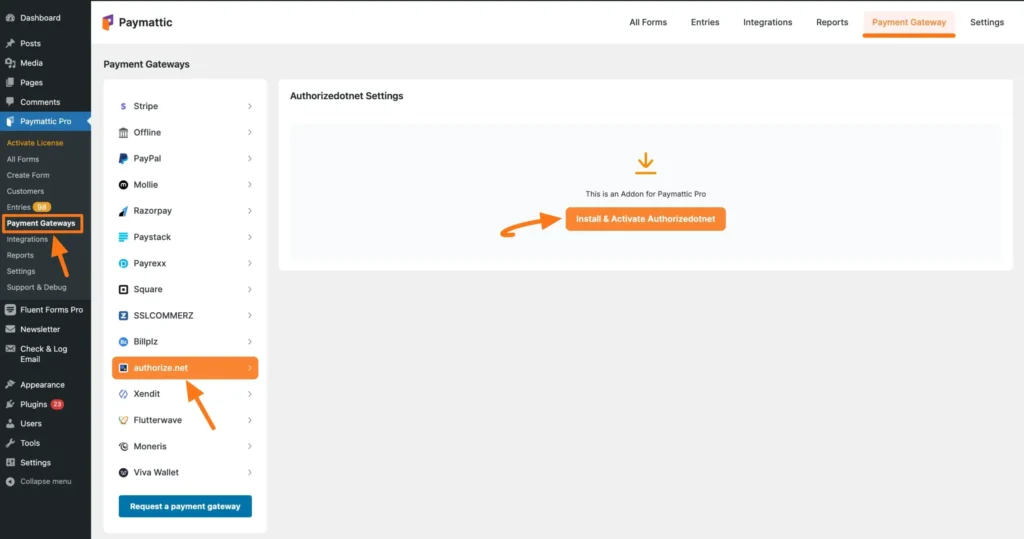
It’ll open up the settings window of Authorize net payment gateway.
On the configuration page, there will be two modes for payment.
- Test Mode: For testing dummy payments
- Live Mode: For accepting real payments on your website
We always suggest trying the “Test Mode” first before you connect to your real account. This is how you can identify if there are any issues with the payments. If everything looks fine, then you can switch to your real account.
The configuration process is the same in both modes.
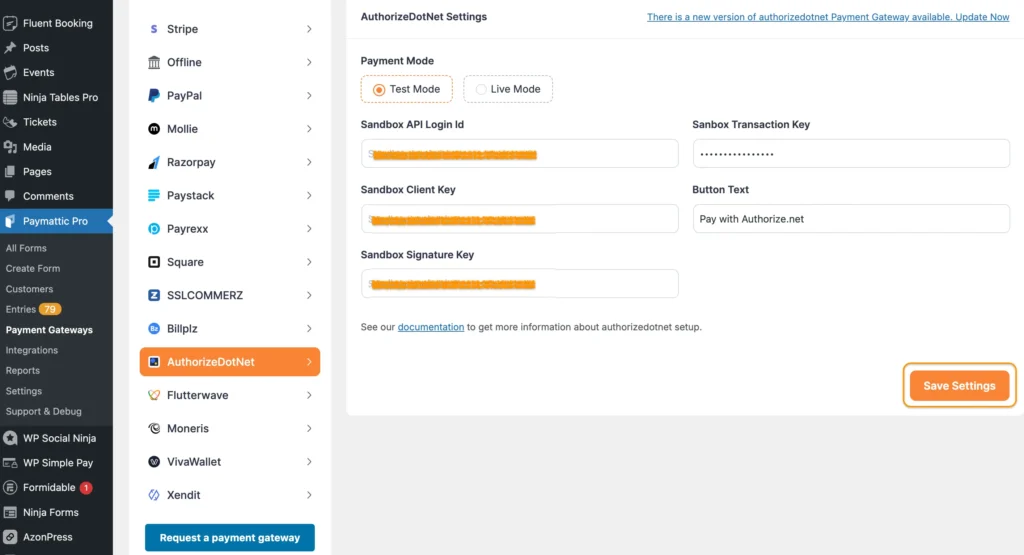
To connect your Authorize.net account to Paymattic, you need to provide some credentials here. Such as Authorize.net API, Transaction Key, Client Key, and Signature Key. You’ll get these IDs in your merchant account dashboard.
To know more about how to get the Authorize.net APIs, check out our documentation here.
Connect Authorize.net payment gateway with Paymattic
To connect Authorize.net with Paymattic, you need to put the right keys into the right fields. After accessing all the credentials, copy and paste them into the respective fields.
Click “Save Settings,” and you’re good to go with your account to accept one-time payment with Paymattic.
You can also set up Authorize.net webhooks and accept subscription payments with Paymattic.
Accept Authorize.net payment with Paymattic
After configuring your Authorize.net account with Paymattic, it’s time to get a taste of the real transactions.
To do so, you need to create a payment form with Paymattic. It’s very simple to create a professional form.
After creating your form with all the required fields, including the payment gateways, preview it, copy the shortcode, paste it on your WordPress website, and start accepting real payments seamlessly.
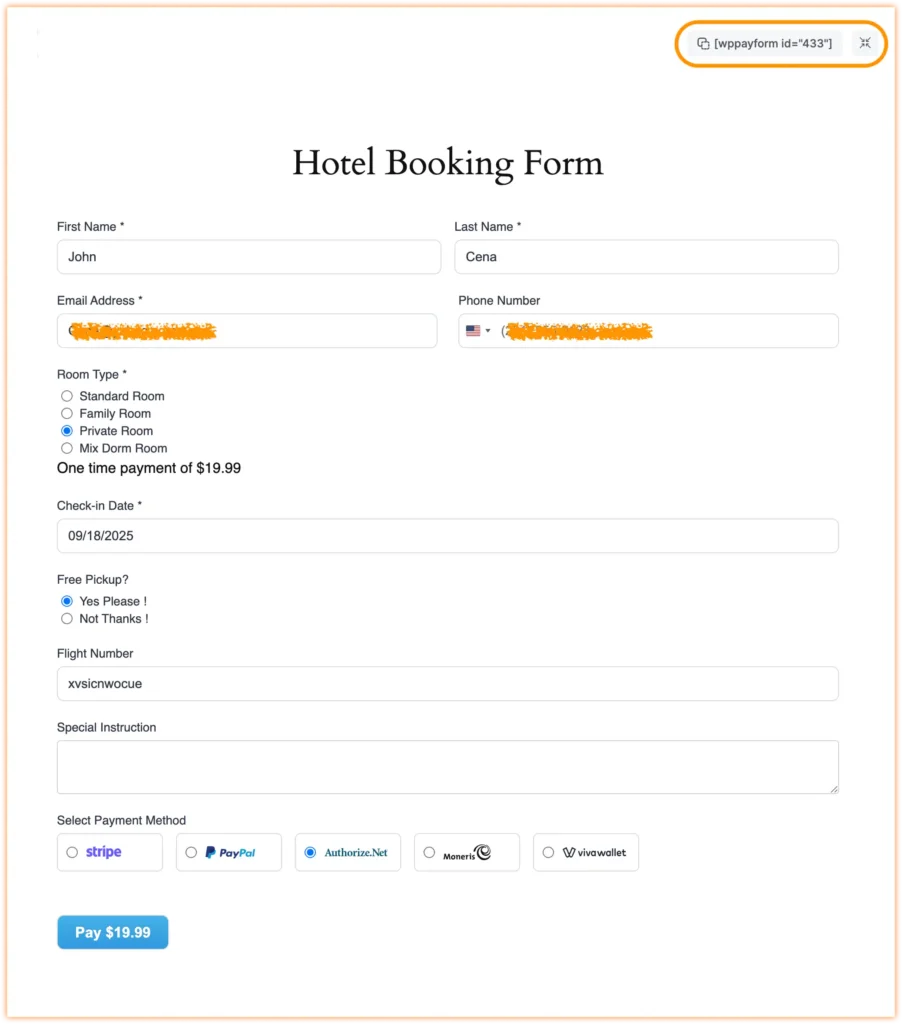
Paymattic also offers some cool-looking built-in payment forms to save you time and effort.
Wrapping up
Providing an extra option to your customers while they make an online payment has never been a losing proposition. You’ll always win there. Customers feel really connected and valued when they see multiple ways to pay during checkout.
It doesn’t just feel like another transaction; they feel like you actually thought about what would make their experience better.
Businesses operating globally must provide region-specific payment gateways. Offering Stripe in Nigeria instead of Flutterwave means you have already lost more than half of your customers.
Similarly, if you run your business in the US and target US customers, offering the Authorize.net payment gateway alongside Stripe or PayPal is essential.
Join the thousands already enjoying Paymattic Pro!

Tipu Deb
Hey! Tipu here, working as a Marketing Strategist at WPManageNinja & Paymattic. A nature lover and a person who is addicted to exploring historical events. In my leisure, you’ll find me playing with different musical instruments.


Leave a Reply