
How to Accept MobilePay Payments on WordPress for Free?


Table of Content
Download Paymattic – it’s Free!

Subscribe To Get
WordPress Guides, Tips, and Tutorials
We will never spam you. We will only send you product updates and tips.
If you’re running a WordPress site and want more payment options for customers, MobilePay is worth putting on your radar.
It’s one of the most widely used mobile wallets in the Nordic region, and for many Scandinavian shoppers, it’s the payment method they reach for before their card. And if you’re already using Stripe as your payment gateway, you don’t need a separate MobilePay integration to make that happen.
This guide covers what MobilePay is, why it’s worth adding to your site, and how to set it up on WordPress step by step.
First, let’s take a quick look at MobilePay.
TL;DR
- MobilePay is a mobile wallet used mainly in Denmark and Finland, with over 6 million users and near-universal adoption among younger Danes.
- If you’re already using Stripe on WordPress, MobilePay doesn’t need a separate integration; it’s a toggle in your Stripe Dashboard.
- Among Paymattic’s 13 payment gateways, only Stripe, Mollie, and Viva Wallet support MobilePay.
- Once enabled in Stripe, MobilePay works automatically on any Paymattic payment or donation form; no extra fields or code required.
- MobilePay is secured with mandatory user authorization, TLS encryption, automated fraud detection, and GDPR/PSD2 compliance.
- This guide walks through the full setup: connecting Stripe, enabling MobilePay, adding it to a Paymattic payment form, and testing the flow.
What is MobilePay?
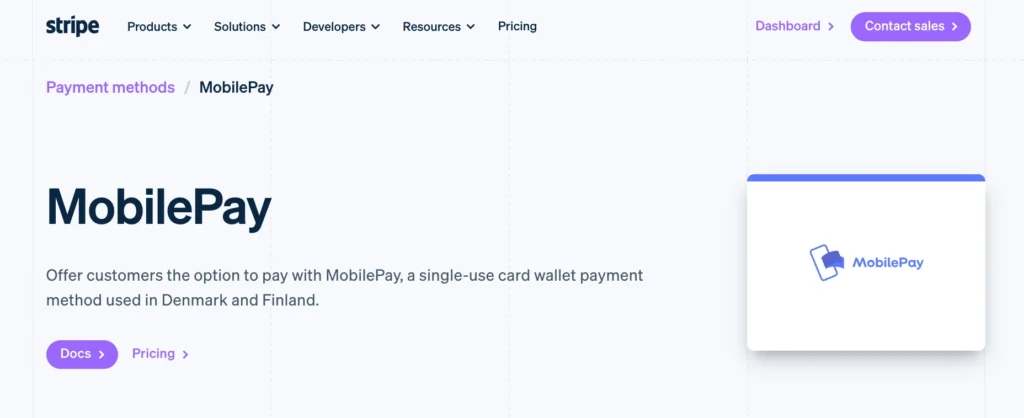
MobilePay is a mobile payment app that lets customers pay by authorizing the transaction directly from their phone, with no redirect to a separate banking app. It works as a digital wallet: customers link a card to the app once, then approve future payments with a tap.
Technically, when a customer pays with MobilePay through Stripe, Stripe processes it as a card transaction using the card data MobilePay provides. That’s the part that matters for you as a site owner: you don’t have to build or maintain a separate MobilePay integration. It rides on top of the Stripe connection you already have.
Is MobilePay secure?
Yes.
Every transaction needs the user’s active approval, and unlocking the app itself requires a PIN or fingerprint, so a lost phone alone can’t lead to a fraudulent payment.
Data moving between the app and MobilePay’s servers is encrypted with TLS, the same standard most banks use, and automated fraud detection flags unusual activity, like a sudden spending spike, before pausing a transaction for the user to confirm.
On top of that, MobilePay operates under GDPR and PSD2, so it’s legally required to use strong customer authentication and collect only the data needed to process a payment.
For your WordPress checkout, that means you’re offering customers a payment method already held to the same security bar as their own bank.
Why accept MobilePay on your WordPress site?
Adding MobilePay isn’t just a nice-to-have for Nordic-facing businesses; here’s how accepting MobilePay payments is beneficial:
- Higher conversion: One online marketplace reported 10-20% higher conversion after adding MobilePay as a checkout option through Stripe.
- Faster payouts: MobilePay settles quickly, which helps if cash flow timing matters to your business.
- Better cash flow: MobilePay quickly transfers payments to the business’s bank account.
- Broader use cases than you’d expect: e-Commerce stores, subscription businesses, and nonprofits collecting one-time donations all use MobilePay at checkout; it’s not limited to retail.
- Real-time reporting: You can see transactions as they happen instead of waiting on delayed reports, which makes daily sales tracking and financial planning easier.
- Built-in security: Encryption and fraud protection are handled on MobilePay’s end, so you’re not adding extra security work to your plate.
- Trust signal: For Danish and Finnish customers, seeing a mobile wallet they already use at checkout builds more confidence than an unfamiliar payment gateway would.
For WordPress sites running membership signups, one-time payment forms, or donation pages, this is a direct way to reduce checkout friction for a specific, high-intent segment of your audience.
What you’ll need:
To accept MobilePay payments, you need the following:
- A Stripe account with MobilePay eligibility enabled (this depends on your business’s registered country; check your Stripe Dashboard’s payment method settings to confirm)
- A WordPress payment plugin installed and activated on your WordPress site
Paymattic is a WordPress payment and donation plugin. The plugin supports 13+ payment gateways and offers Stripe in its free version. So you can even accept MobilePay payments for free.
Why Paymattic fits best for your MobilePay integration on WordPress?
There’s more than one way to get Stripe running on a WordPress site, but not every plugin makes MobilePay this straightforward.
A few reasons Paymattic is the better fit if you’re setting this up:
- Stripe is available in the FREE plan: A lot of WordPress payment plugins only let you connect Stripe once you upgrade; Paymattic gives you Stripe on the free version, MobilePay included.
- You’re not locked into WooCommerce: Paymattic works whether you’re building a standalone payment form or an order form, so you’re not forced to install a full WooCommerce plugin just to accept one payment method.
- One gateway connection covers your whole site: Once Stripe is connected in Paymattic, MobilePay is available across every form you build payment forms, subscription forms without reconnecting or reconfiguring anything per form.
- The webhook setup is already mapped out for you: Stripe integrations break most often because of missed or misconfigured webhooks. Paymattic gives you the exact webhook URL and the specific events to select, so you’re not guessing which ones matter.
- Reporting is built in: After a MobilePay transaction comes through, you can see it directly in Paymattic’s Reports & Analytics without needing to cross-reference your Stripe dashboard separately.
Tutorial: How to accept MobilePay payments on WordPress
Here is the step-by-step tutorial on exactly how to integrate MobilePay on your WordPress site and begin accepting MobilePay payments in minutes.
Without further ado, let’s jump into the key steps to add the MobilePay payment method to the WordPress site with the help of the Paymattic plugin.
Step 1: Install & activate Paymattic
First of all, you only need the free version of the Paymattic WordPress plugin to accept the MobilePay payment method in WordPress. To install the plugin –
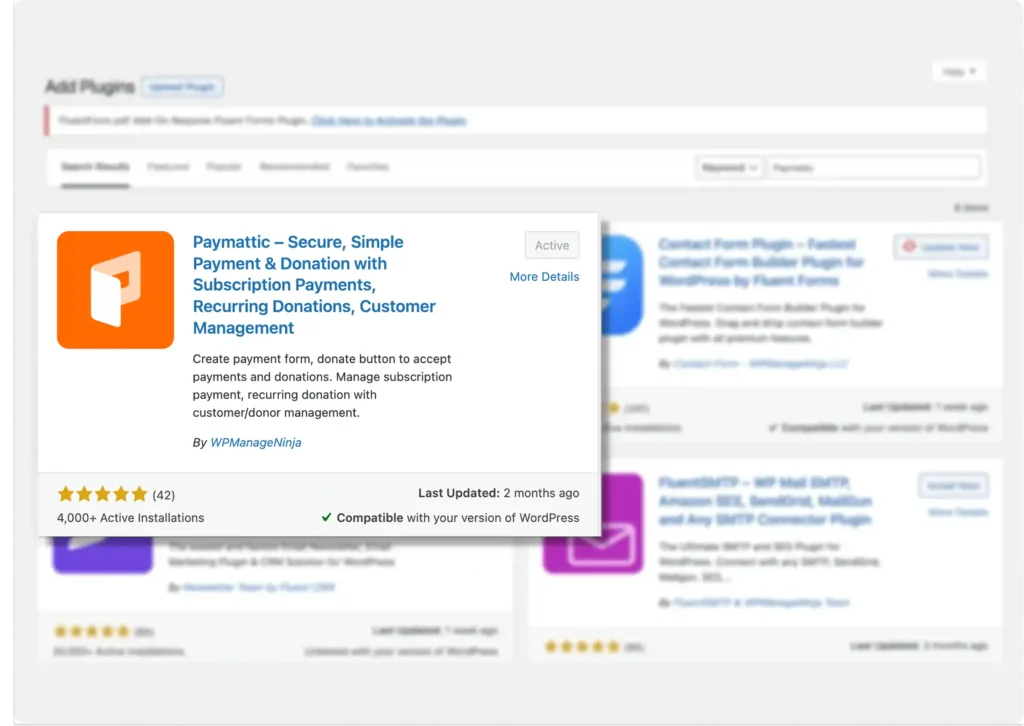
Head to your WordPress dashboard and navigate to Plugins → Add New. Search for “Paymattic,” install the plugin, and click Activate.
Once active, you’ll see the Paymattic menu appear in your WordPress sidebar. You’re ready to move on.
The Paymattic free version is enough to take payments through MobilePay using Stripe, but we recommend you upgrade to the Pro version to receive Mobile Pay payments using other payment gateways such as Mollie, Viva Wallet, etc.
Ready to get started?
Experience payments and donations for WordPress like never before. Try Paymattic now!
Step 2: Connect Stripe with Paymattic
After installing Paymattic, you’ll need to connect your Stripe account. To do that-
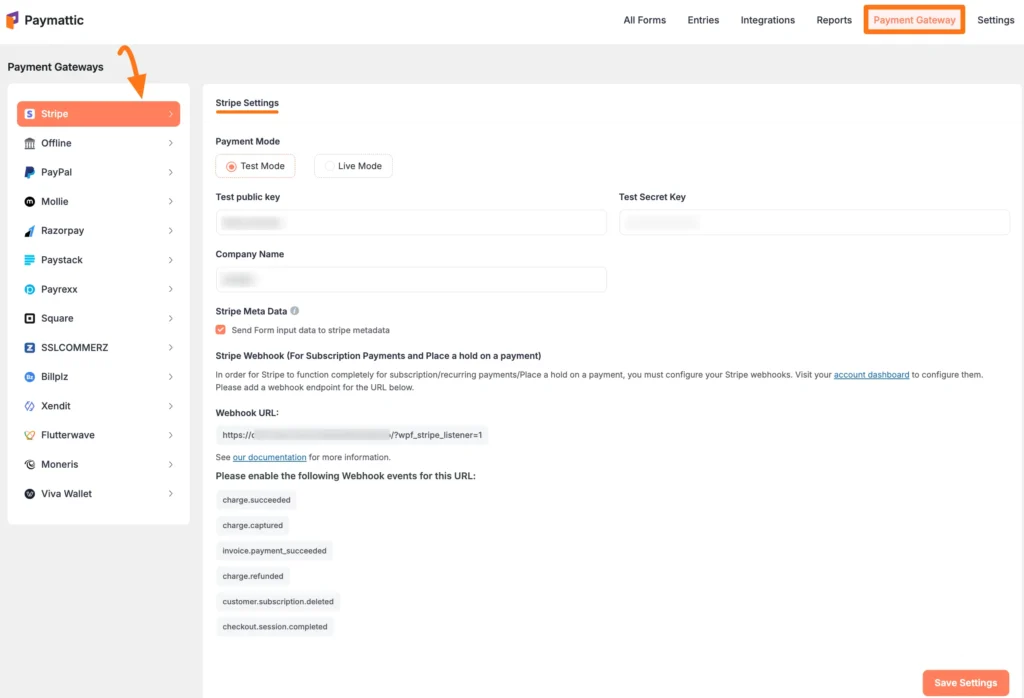
First, go to Payment Gateway from the Paymattic Navbar, click the Stripe tab from the left sidebar, and the Stripe Settings page will open.
Select any Payment Mode between Test (for test payments) and Live (for real payments).
Now, you need to obtain the Public key and Secret key from your Stripe Account. Now paste your Stripe credentials into this page and click on the Save Settings button.
Click here to learn how to get the publishable key and secret key from Stripe
Step 3: Enable MobilePay in your Stripe dashboard
MobilePay itself is turned on inside Stripe, not inside Paymattic. To enable MobilePay in your Stripe dashboard, follow the steps mentioned below.
- Log in to your Stripe Dashboard.
- Go to Settings → Payment methods.
- Find MobilePay in the list and click Turn on.

Once it’s active, it becomes available to any WordPress form or checkout page running through your Stripe gateway.
Step 4: Add Stripe to your Paymattic payment form
Once you enabled MobilePay on your Stripe account, you’ll be able to accept Stripe MobilePay payments. Now let’s create a Stripe payment form with Paymattic to accept MobilePay payments.
To create your form, go to Paymattic → All Forms → Add New. Choose a blank form or start from a template if you want a head start.
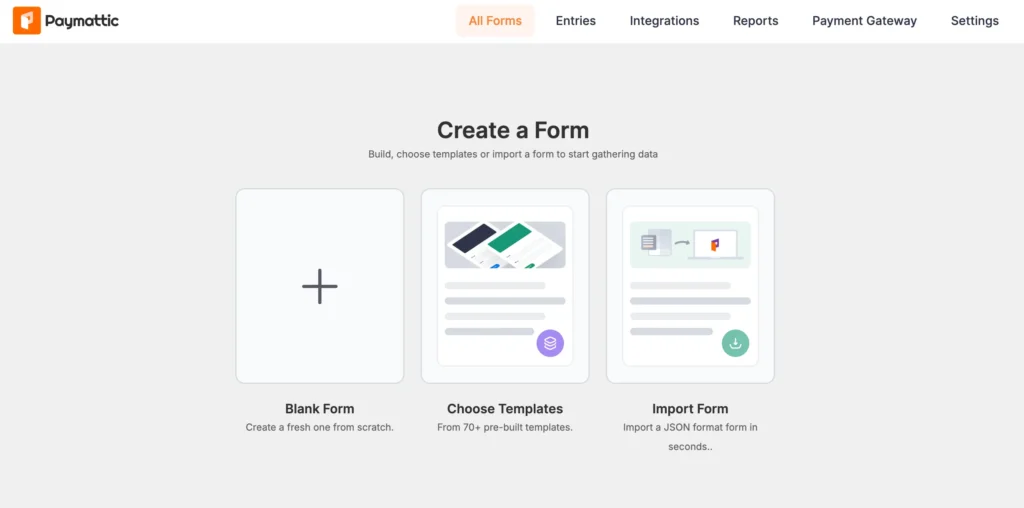
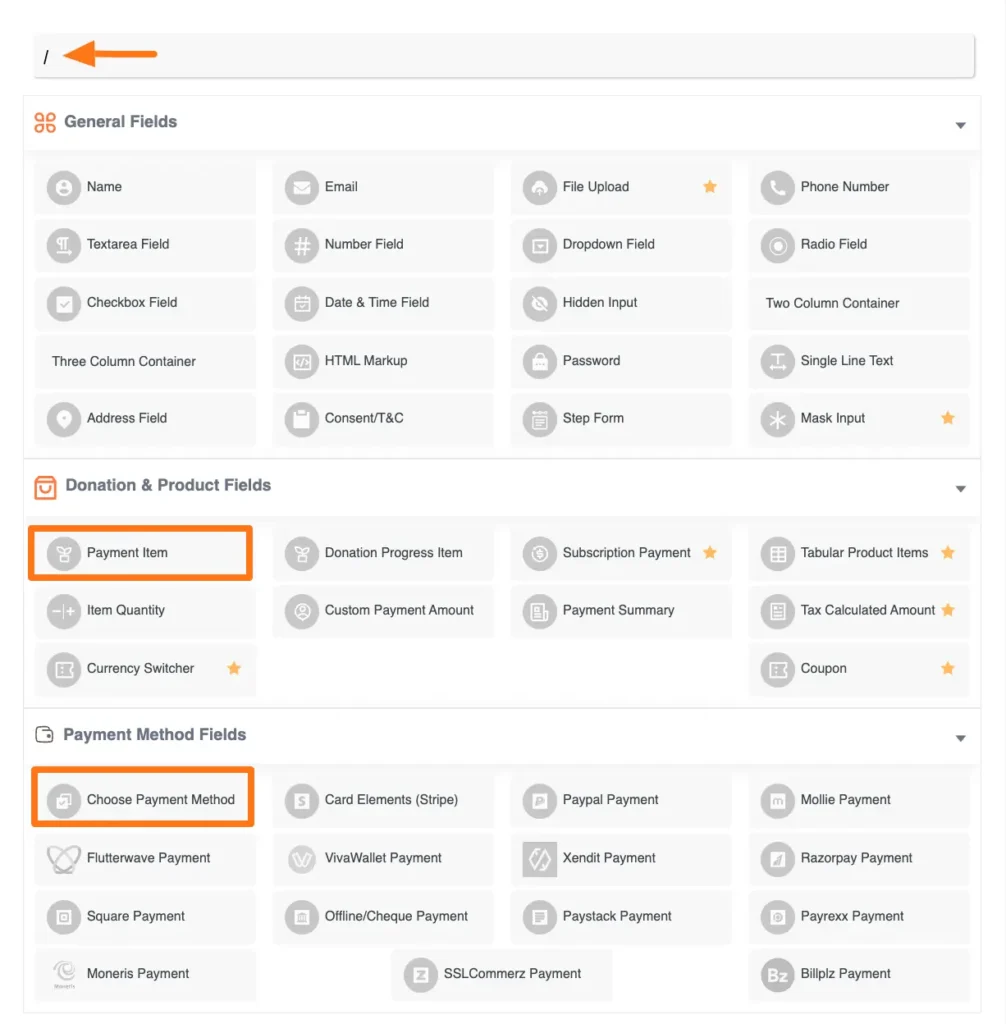
If you start with a blank form, you’ll find all essential fields available here; choose the fields that you want to add to your form. Select Stripe from the Payment Method Fields.
Once you’re done with form customizations, click on the Save button.
Check this blog to learn how to create a payment form in more detail
Step 5: Test your MobilePay payment flow
Before going live:
- Switch your Stripe integration to Test Mode in both Stripe and Paymattic.
- Submit a test payment through your live form using MobilePay as the payment option.
- Confirm the payment shows up correctly in your Stripe Dashboard and in Paymattic’s Reports & Analytics.
- Switch back to Live Mode once everything checks out.
Here is the demo of the Stripe payment form created with Paymattic.
Start accepting MobilePay payment on WordPress
MobilePay running on your WordPress site doesn’t take custom code or a separate integration. If Stripe is already connected, it’s just a setting you turn on in your Stripe Dashboard.
For any business taking payments or donations from customers in Denmark or Finland, that one setting removes a real point of friction at checkout.
Once your Stripe account is eligible and MobilePay is turned on, Paymattic picks up from there, so you can start accepting it on your payment forms and donation pages without touching a single line of code.
Join the thousands already enjoying Paymattic Pro!
Frequently asked questions
Here are some frequently asked questions regarding ‘accept MobilePay payments on WordPress.”
1. Do I need a separate MobilePay account to accept payments?
No. MobilePay runs through your existing Stripe account; you just need to enable it in your Stripe Dashboard.
2. Does MobilePay work with Paymattic’s free version?
Stripe is available on Paymattic’s free plugin, so MobilePay works wherever your Stripe gateway is active.
3. Will MobilePay show up automatically at checkout?
Yes, once it’s enabled in Stripe and your form uses the Stripe payment field, Stripe handles displaying it to eligible customers.
4. Can I use MobilePay for recurring or subscription payments?
No, MobilePay only supports one-time payments.
Why isn’t MobilePay showing up in my Stripe Dashboard?
This usually comes down to eligibility, not a setup mistake. MobilePay is only available to Stripe accounts registered in Denmark or Finland. If you don’t see it under Payment methods, check where your Stripe business is registered; filtering by “Popular in Denmark” only shows relevance for that market, but it doesn’t mean your account is eligible to enable it.

Madhobi
This is Madhobi, a content writer at WPManageNinja with expertise in technical writing and email marketing. Outside of work, she likes traveling and exploring new places.


Leave a Reply