
How to Accept Course Payments on WordPress Without LearnDash


Table of Content
Download Paymattic – it’s Free!

Subscribe To Get
WordPress Guides, Tips, and Tutorials
We will never spam you. We will only send you product updates and tips.
If you’ve been running a course on LearnDash for a while, you’ve probably noticed something strange happening this year. LearnDash.com redirects somewhere else now. Support feels different.
And if you went looking for answers, you may have stumbled onto news that StellarWP, the company behind LearnDash, GiveWP, and a bunch of other popular WordPress plugins, basically doesn’t exist anymore.
So like you, a lot of course creators are in the same dilemma: Is LearnDash still safe to build on, or is it time to look for a LearnDash alternative?
The good news is you can sell a course on WordPress without LearnDash now. You can run a full paid course, complete with community features, discussions, and progress tracking, using just two plugins: FluentCommunity and Paymattic.
In this guide, we’ll walk through exactly how that combo works and how to set it up step by step.
Key takeaways
- You don’t need LearnDash to sell a course on WordPress. FluentCommunity and Paymattic together can handle course delivery, community features, and payments in one setup.
- FluentCommunity comes with a built-in course builder, so you get modules, lessons, progress tracking, and discussions without a separate LMS plugin.
- Paymattic handles the payment side, letting you build a form that connects directly to FluentCommunity, so paying customers get instant access to your course.
- Setting it up takes four simple steps: install both plugins, build your course in FluentCommunity, create a payment form in Paymattic, then test and publish.
- This combo costs significantly less than running LearnDash plus a separate community plugin, while giving you full ownership of your course platform.
- If you’re unsure about switching, test the setup on a staging site first before moving your students over.
Why not LearnDash now?
If you’ve been keeping an eye on LearnDash news lately, you’ve probably felt a bit uneasy. LearnDash.com now redirects to Liquid Web’s site, StellarWP has been dissolved, and a chunk of the original team got laid off during the restructuring.
Pricing has also shifted to a tiered model, so features you once had included might now sit behind a higher plan.
LearnDash still works for now. But if your course income depends on a plugin that just went through a major ownership shuffle, it’s natural to start wondering what happens next. Will support stay the same? Will prices keep climbing? Will the features you rely on still be there next year?
You don’t have to wait around to find out. If you’d rather build your course on something you fully control, without depending on someone else’s acquisition roadmap, there’s a simpler setup worth looking at.
How the FluentCommunity x Paymattic combo works
Here’s the case for switching things up.
FluentCommunity is a community plugin that comes with a built-in course builder. Not a bolt-on, not a third-party add-on. You get spaces, activity feeds, discussions, progress tracking, and a Gutenberg-based course builder, all in one plugin.
Paymattic is a payment plugin that lets you build forms, accept one-time or recurring payments, and connect those payments directly to access permissions on your site.
Put them together, and you get something as a LearnDash alternative, plus a separate community plugin never quite managed: one setup, one price, and a direct line between “someone pays” and “someone gets access to the course.”
No bridge plugins, no compatibility patches, no juggling two admin panels and two support teams.
For course creators looking at the LearnDash situation right now, this combo isn’t just a workaround. It’s arguably a cleaner, lighter, and more future-proof way to sell a course on WordPress, and it costs a fraction of what a LearnDash plus community plugin stack usually runs.
How to accept course payments on WordPress without LearnDash using Paymattic
Setting this up takes four steps: 1. install the plugins, 2. build your course inside FluentCommunity, 3. create a payment form with Paymattic, and 4. connect the two so payment unlocks access.
Here’s how each step works.
Step 1: Install FluentCommunity Pro and Paymattic Pro
Start by getting both plugins onto your WordPress site.
If you don’t already have them, you can grab FluentCommunity Pro and Paymattic Pro from their respective websites.
Paymattic also has a free version available on the WordPress plugin directory if you want to test things out with one-time Stripe payments first.
Start Your Journey for Free!
With Paymattic free, you get a full suite of features to manage transactions from the moment you are in.
To install either plugin:
- Go to your WordPress dashboard, then Plugins > Add Plugin
- Click Upload Plugin and upload the plugin zip file
- Hit Install, then Activate
Do this for both FluentCommunity Pro and Paymattic Pro, and you’re ready for the next step.
Step 2: Create a course with FluentCommunity
Once FluentCommunity is active, run through its quick setup (community permalink, feed, basic branding).
Once you are set, create a private space or course in your community.
- From the plugin page, click “Go to the portal” to visit your community page
- From your community page, go to Courses > New Course
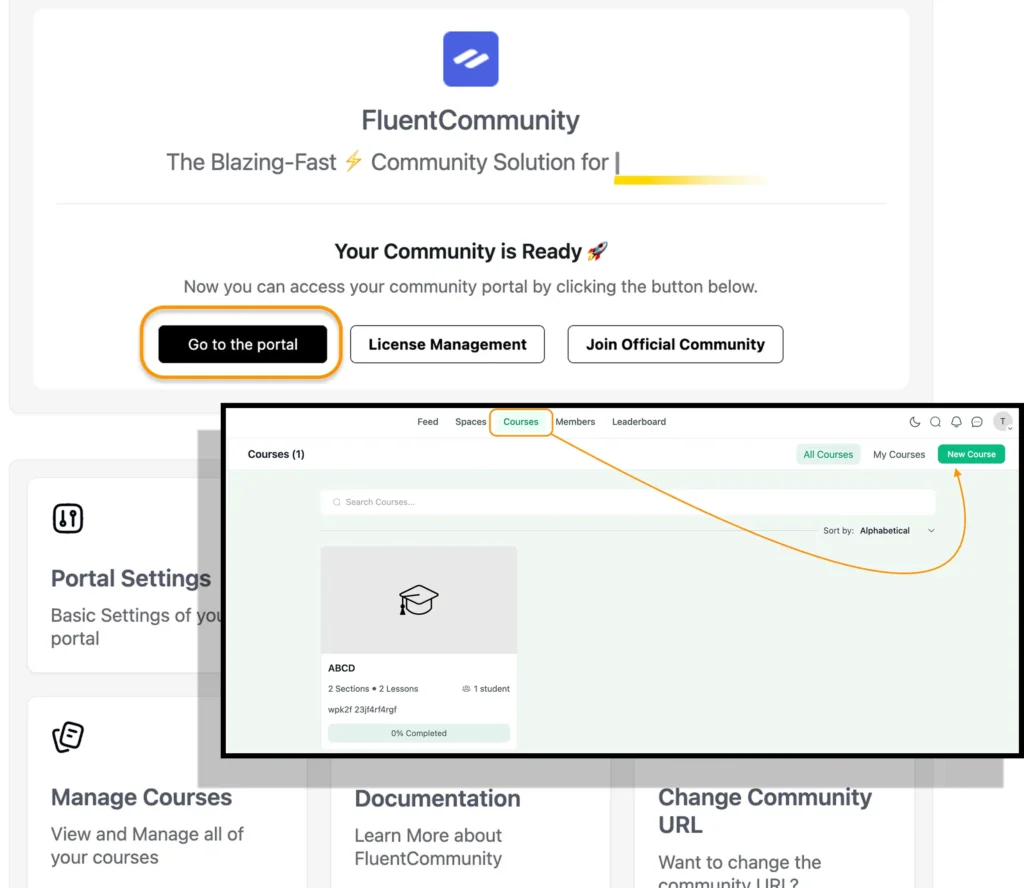
- You’ll get a pop-up of “Create a course”.
- Add your course title, URL slug, course description, and other settings.
- From “Access Control”, select Privacy settings to Private
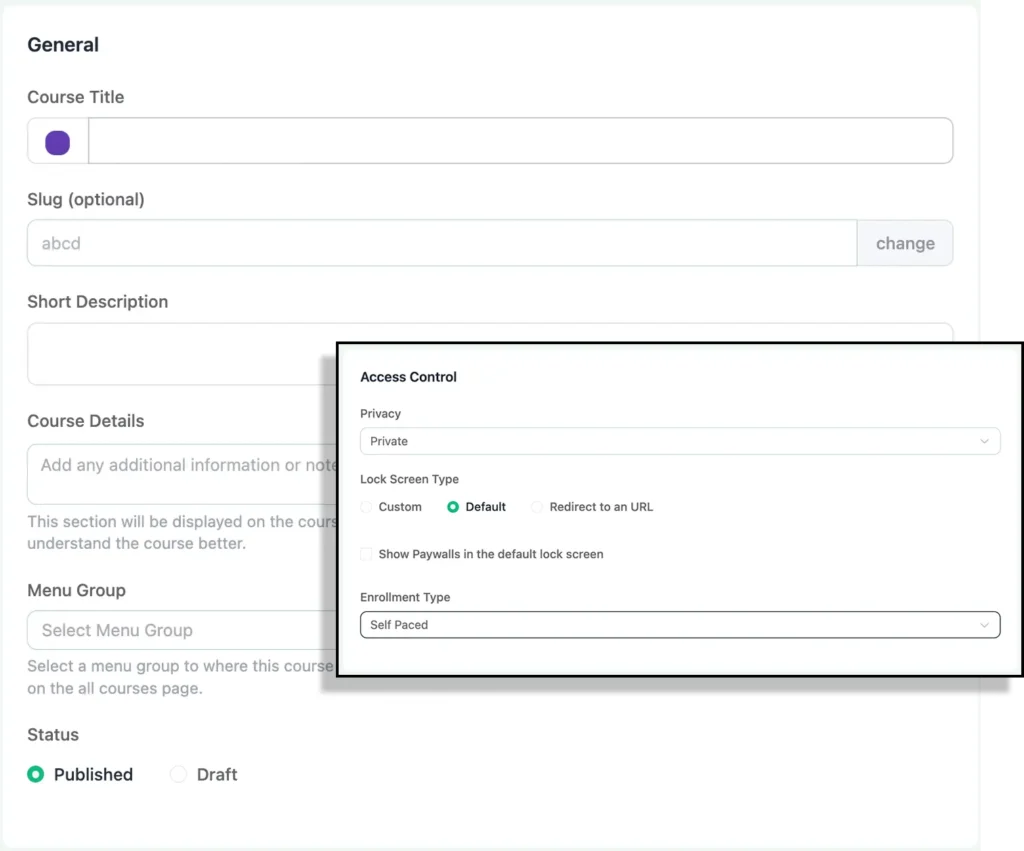
- Fill up the other necessary details, upload a “Thumbnail” image, and click Create
Your course page is ready.
From there, you can organize your content by adding sections. Think of each section as a chapter, something like “Section 1: Introduction” or “Section 2: Photography basics.”

Inside each section, click on “Add New” to add your lessons or quiz using the regular Gutenberg editor: text, video, images, downloads, whatever fits your content.
A couple of things worth keeping in mind while building it out:
- Keep sections short, around 3 to 5 lessons each, so students feel a sense of progress.
- End lessons with a quick discussion prompt. FluentCommunity supports lesson-level discussions, so students can talk through what they just learned right there.
- Once your course structure is in place, you can also create a dedicated space for students, a cohort space, an alumni space, or just a general discussion area tied to the course.
That’s really it for setup. Your private course is ready, and now it just needs a way for people to pay for access.
Step 3: Create a payment form with Paymattic
Now switch over to Paymattic to build the form that handles payment and access.
- From your WordPress dashboard, go to Paymattic Pro > Create Form > Blank Form.
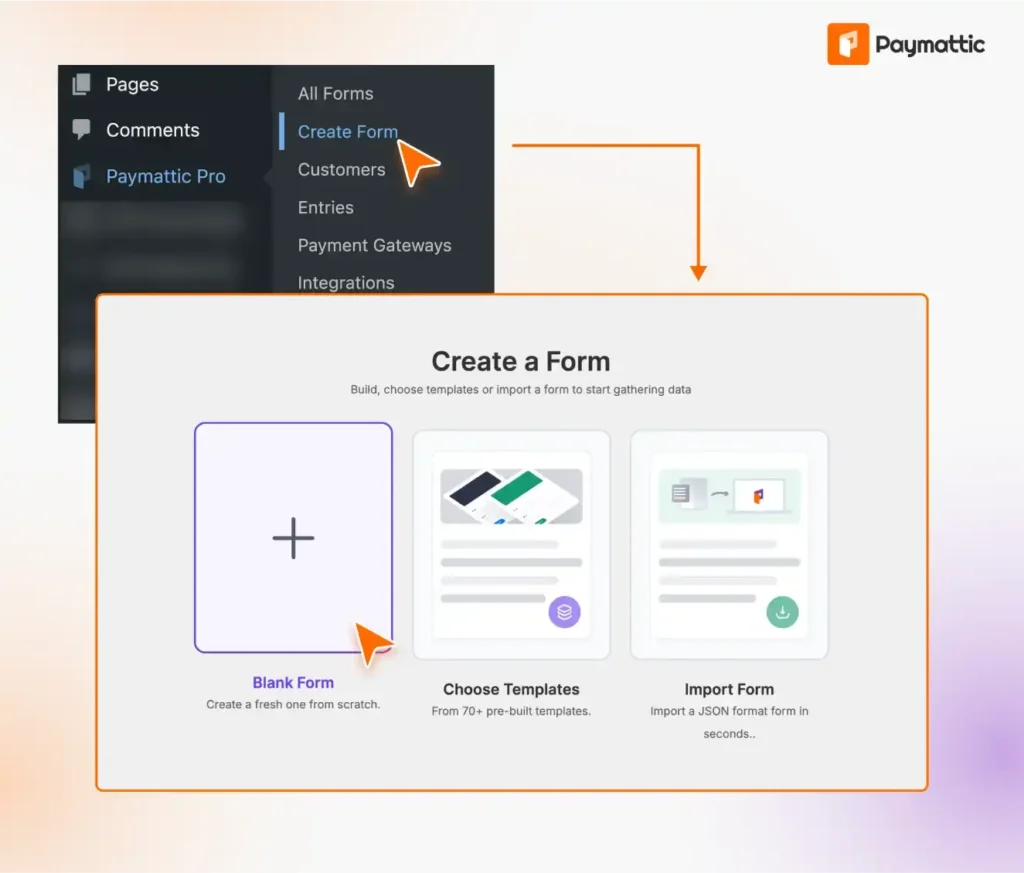
- Add the fields you need: a name field, an email field, a password field, and a payment field.
- Set your price in the payment field. This is what students will pay to unlock the course.
- Pick your payment gateway; Stripe works well if you’re just getting started.
- Next, add the FluentCommunity integration to the form. This is the part that connects payment to access. Once someone pays through this form, Paymattic automatically grants them access to your private course or space in FluentCommunity.
That’s all, you’re done. You can now live your payment form. The form will look like this:
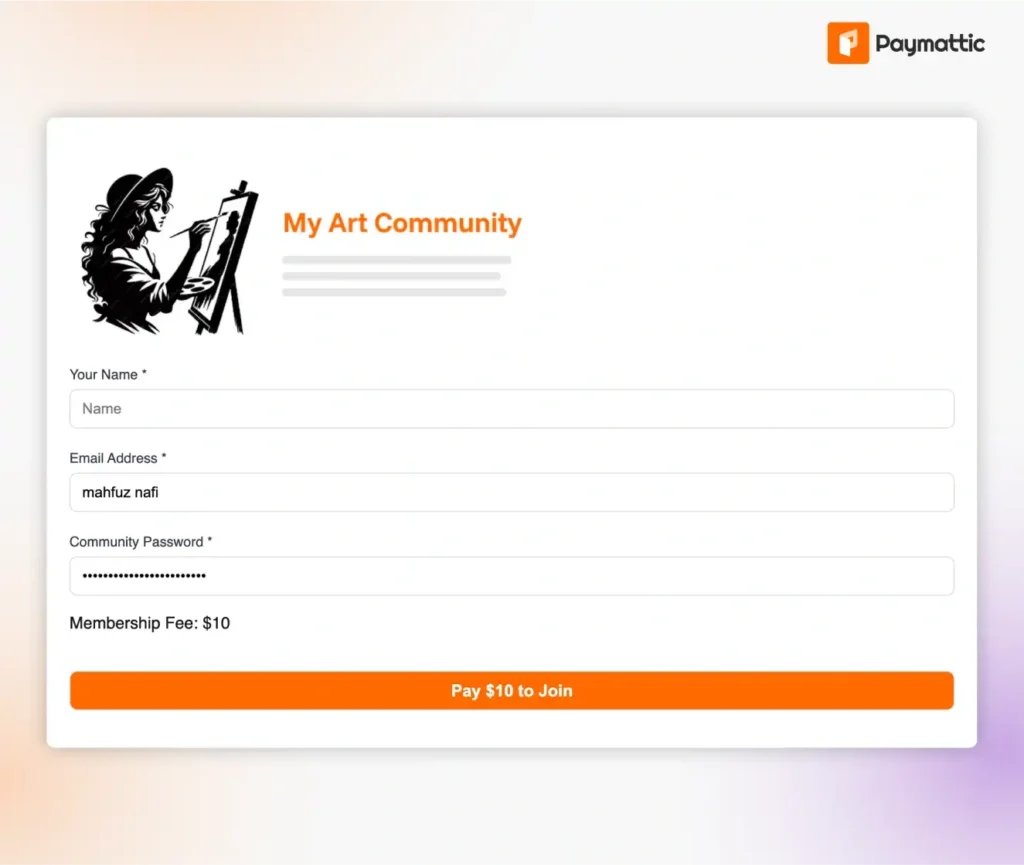
You can style and customize the form however it fits your brand. Keep it simple if you’re not sure where to start. Name, email, password, and payment are usually enough.
Step 4: Test and publish
Before you send this out to your audience, run through it yourself.
Grab the shortcode for your Paymattic form and place it on a page, maybe a sales page or a simple enrollment page describing your course.
Then go through the whole flow: fill out the form, complete a test payment using test card numbers, and check that you actually land inside the course with access unlocked.
If everything checks out, publish the page and start sharing it. From here on, every payment through that form automatically enrolls a new student into your course without using Learndash.
Wrapping Up
LearnDash isn’t going away overnight, but the recent shake-up is a fair reason to ask whether you want your course business tied to someone else’s acquisition decisions.
FluentCommunity and Paymattic give you a way to sell courses without that dependency. You get a course builder, a community space, and a payment system that talk directly to each other, all for a fraction of what a traditional LMS plus community stack costs.
If you’re already feeling uneasy about your current setup, this might be a good time to try this combo on a test site and see how it feels.
Worst case, you’ve got a backup plan ready. Best case, you’ve found your new home for selling courses on WordPress.
Join the thousands already enjoying Paymattic Pro!

Tipu Deb
Hey! Tipu here, working as a Marketing Strategist at WPManageNinja & Paymattic. A nature lover and a person who is addicted to exploring historical events. In my leisure, you’ll find me playing with different musical instruments.


Leave a Reply