
An Easy Guide to Set Up Payrexx Payment Gateway in WordPress


Table of Content
Download Paymattic – it’s Free!

Subscribe To Get
WordPress Guides, Tips, and Tutorials
We will never spam you. We will only send you product updates and tips.
Payrexx is a worldwide payment gateway to handle all your online payments effortlessly. It immediately receives website payments via Visa, Mastercard, PayPal, Apple Pay, Samsung Pay and further 200+ payment methods. You can integrate Payrexx in WordPress with the pro version of Paymattic very easily.
Payrexx payment gateway – advantages
Payrexx payment gateway comes with a bunch of features to make your online payments smooth and faster. Payrexx is very famous, especially in Central Europe, because it includes all regional medium of payment in Germany, Austria and Switzerland.
Its simplicity and speed made it user-friendly for SMEs and start-ups. Besides, it is the only payment service provider in Europe to offer acceptance contracts for multiple payment methods from a single source. Customers can pay with Twint, PostFinance, Visa, Mastercard, Samsung Pay, Google Pay, Apple Pay, GeckoCard and 9 other payment methods directly from Payrexx. When you are with Payrexx, you do not need additional contracts to be able to receive payments conveniently and easily.
All sign-ups with fully completed KYC information will be checked and activated by the same business day, including the credit card acceptance contract.
Some key advantages of the Payrexx payment gateway are –
- Simple activation
- Fast and simple checkout
- Accept credit card payments
- Take in-store payments
- Supports more than 20 payment providers
- Supports more than 200 payment methods
- Use SSL encryptions
Paymattic WordPress plugin for fundraising
Paymattic is a multipurpose WordPress donation and payment plugin. Along with Payrexx, it supports Stripe, PayPal, Square, Xendit, Billplz, Paystack, Mollie, Razorpay, SSLCOMMERZ, Moneris & more payment gateways. For direct bank transfer or manual payment, you can use the option Offline payment.
Subscription payment is now made simpler with Paymattic. You can collect subscription payments with the subscription payment item feature.
When you are using Paymattic, no one else owns the user data on your website. You can access all of your form submission data and export them into JSON, Excel, ODS and CSV format to use it in your own way.
It’s not finished yet. Integration with multiple platforms made this plugin a powerful tool to manage your business from a single space. You can integrate FluentCRM,Fluent Support, LeanDash, LifterLMS, TutorLMS, Mailchimp, Zapier, Webhooks, Telegram, Slack and many more!
Ready to get started?
Experience payments and donations for WordPress like never before. Try Paymattic now!
Set up Payrexx payment gateway in WordPress
You can set up Payrexx payment gateway in WordPress with Paymattic with some easy steps. Let’s learn how you can integrate Payrexx payment gateway in WordPress with Paymattic.
Let’s start!
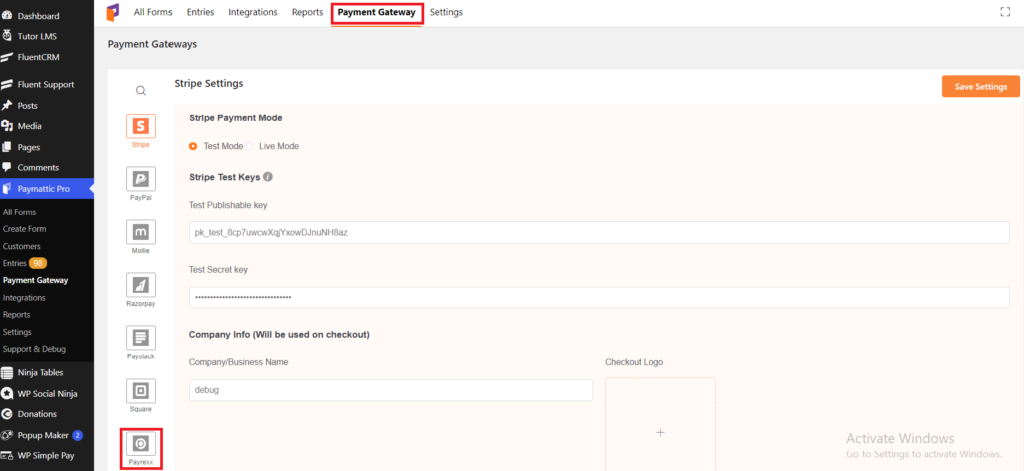
- To begin with, go to Paymattic (Pro) > Payment Gateway from your WordPress dashboard.
- Then, click on Payrexx from the left navigation bar.
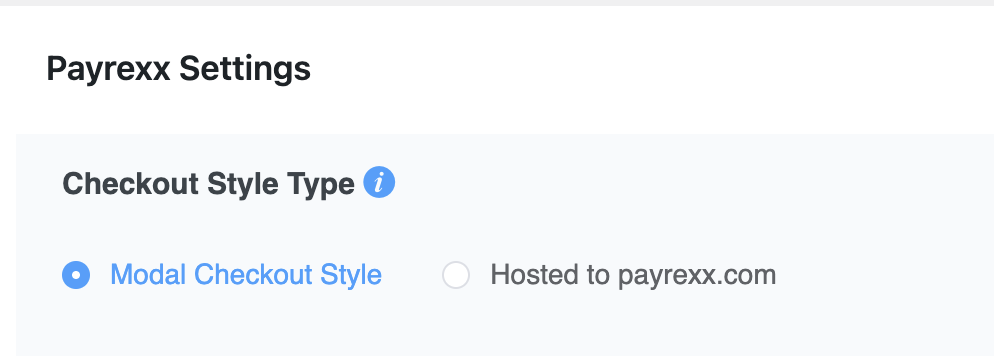
Now, select a checkout style. If you want your users to checkout on the same page select the Modal Checkout Style. If you want them to redirect to Payrexx website while checkout select the Hosted to Payrexx option.
Next, the Payrexx settings page will ask you to insert Instance Name and API key. To find out your Instance Name and API key sign in to your Payrexx account and go to API & Plugins under the Integration section from the left sidebar.
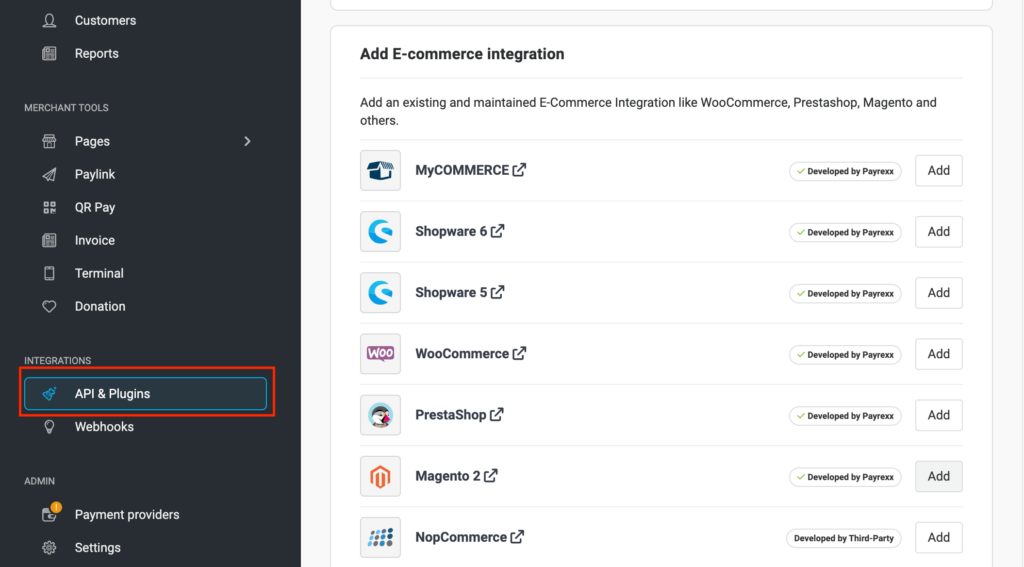
- Then, click on Add API Key under Add API Integration section.
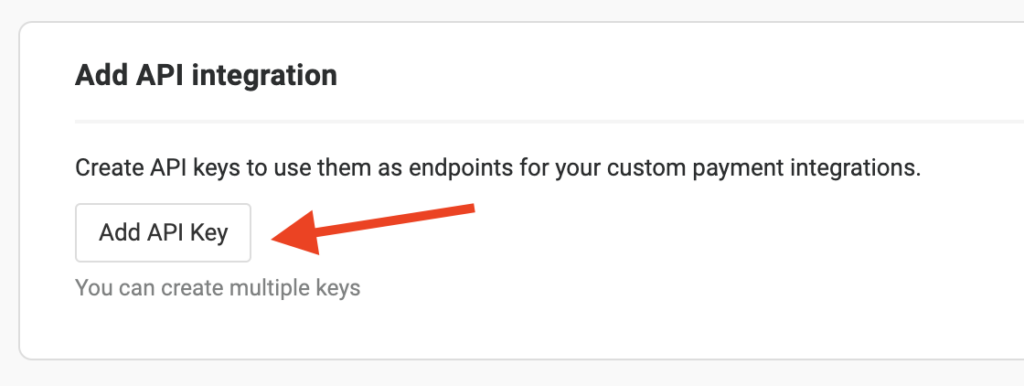
- Put an integration name and click on the Add button.
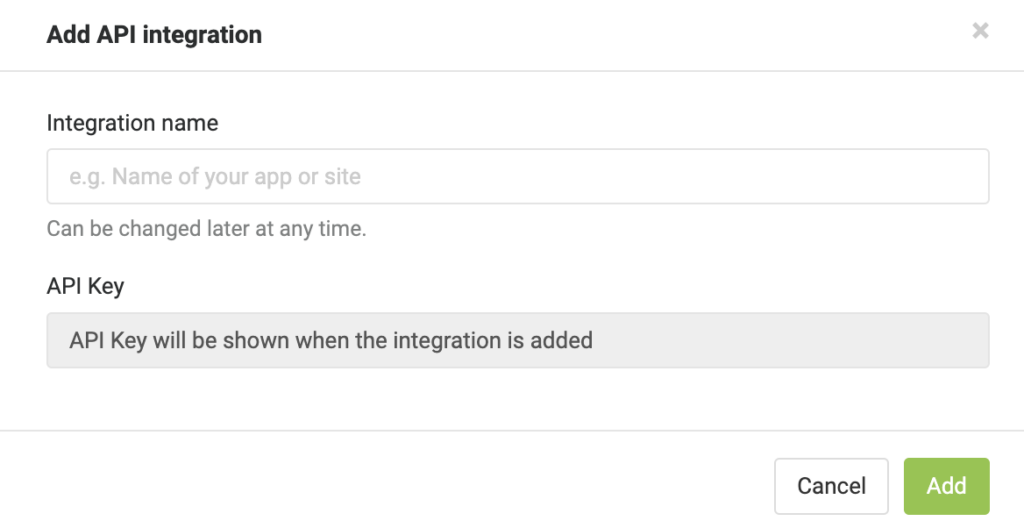
- Now, you will get your API Key here.
- Next, you will get an Instance Name in your email that you have provided while opening a Payrexx account.
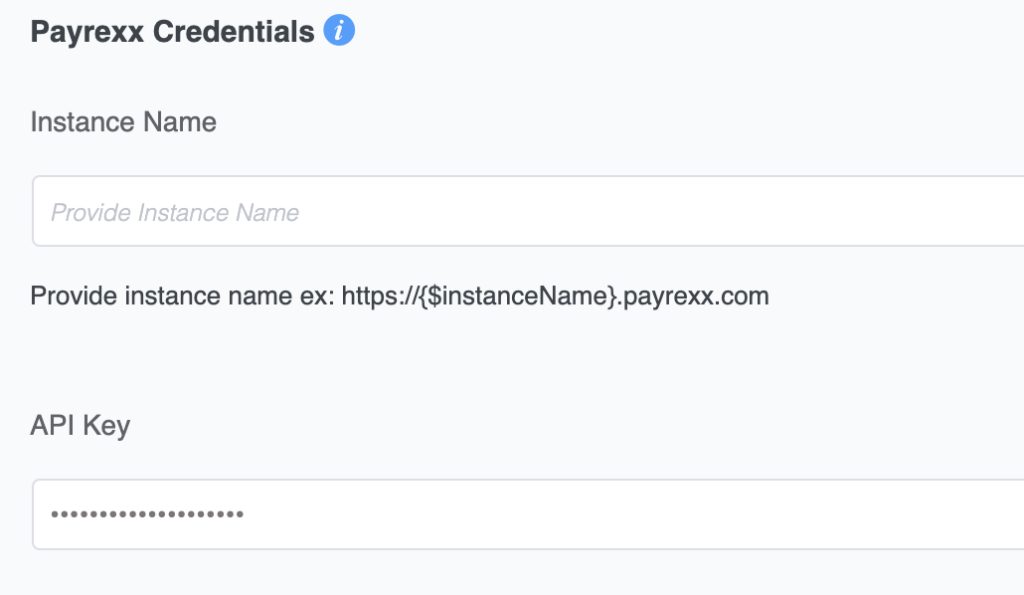
- Remember, if your payment page URL is https://example.payrexx.com then example is your Instance Name.
- Put your Instance Name and API Key into the respective field from Paymattic (Pro) > Payment Gateway > Payrexx.
- At last, click on the Save Settings button to finish the changes.
Great! You have successfully integrated Payrexx payment in WordPress. Now let’s create a form and see how Payrexx payment gateway works with Paymattic.
- To create your new form, go to Paymattic (Pro) > Create Form.
- Then, click on the Advance Editor option.

- Select a form template if you do not want to waste much of your time.
- Click on the New Blank Form in case you love to start from the beginning.
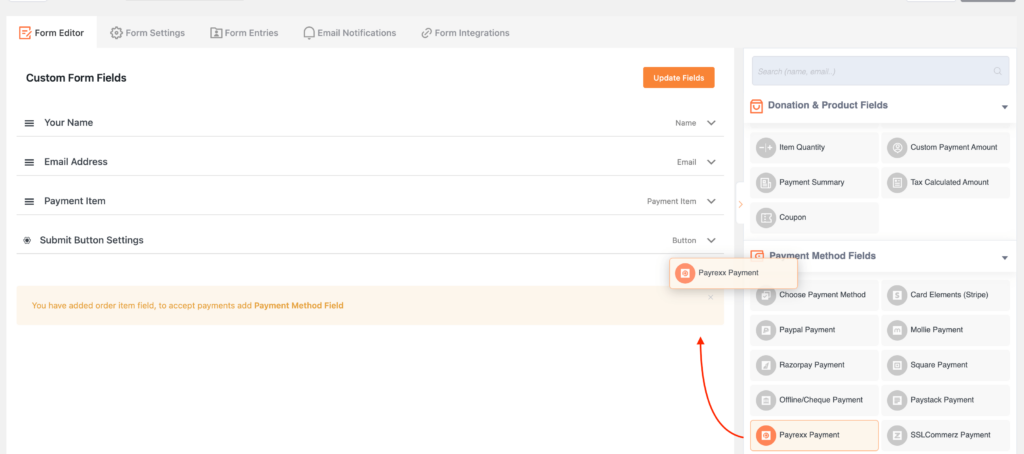
- Add all your desired form fields.
- At last, add Payrexx payment gateway from the payment method fields.
- Finally, click on the Update Fields button.
Now, publish the form on the specific page using shortcode and accept online payments from your customers using Payrexx.
You may find this blog helpful if you try to integrate Square payment gateway in WordPress?
Final notes
Payrexx payment gateway with Paymattic WordPress plugin is going to be a game-changer for your donation website. With more than 135 currencies, you can reach any corner of the world. Also, you can decorate your payment form matching the theme of your website with custom CSS.
The most thrilling fact about Paymattic is, it really fits in your budget! So, if you are on a tight budget then no other option is better than Paymattic for your fundraising website.
No more delay! Try Paymattic today and let us know your experience in the comment section below.
Join the thousands already enjoying Paymattic Pro!

Shuyeb Ahmed
Hi, This is Shuyeb. I am a digital marketing enthusiast, love to write about WordPress products and new updates. At the weekend, you will find me exploring nature & beautiful places.


Leave a Reply