
Integrating Mailchimp with Paymattic helps you automatically send a contact list from your WordPress website to your Mailchimp account when a form is submitted. This article will guide you through integrating Mailchimp with Paymattic on your WordPress Site.
Enable Mailchimp Integration #
To learn how to enable Mailchimp integration, follow the steps with the screenshots below –
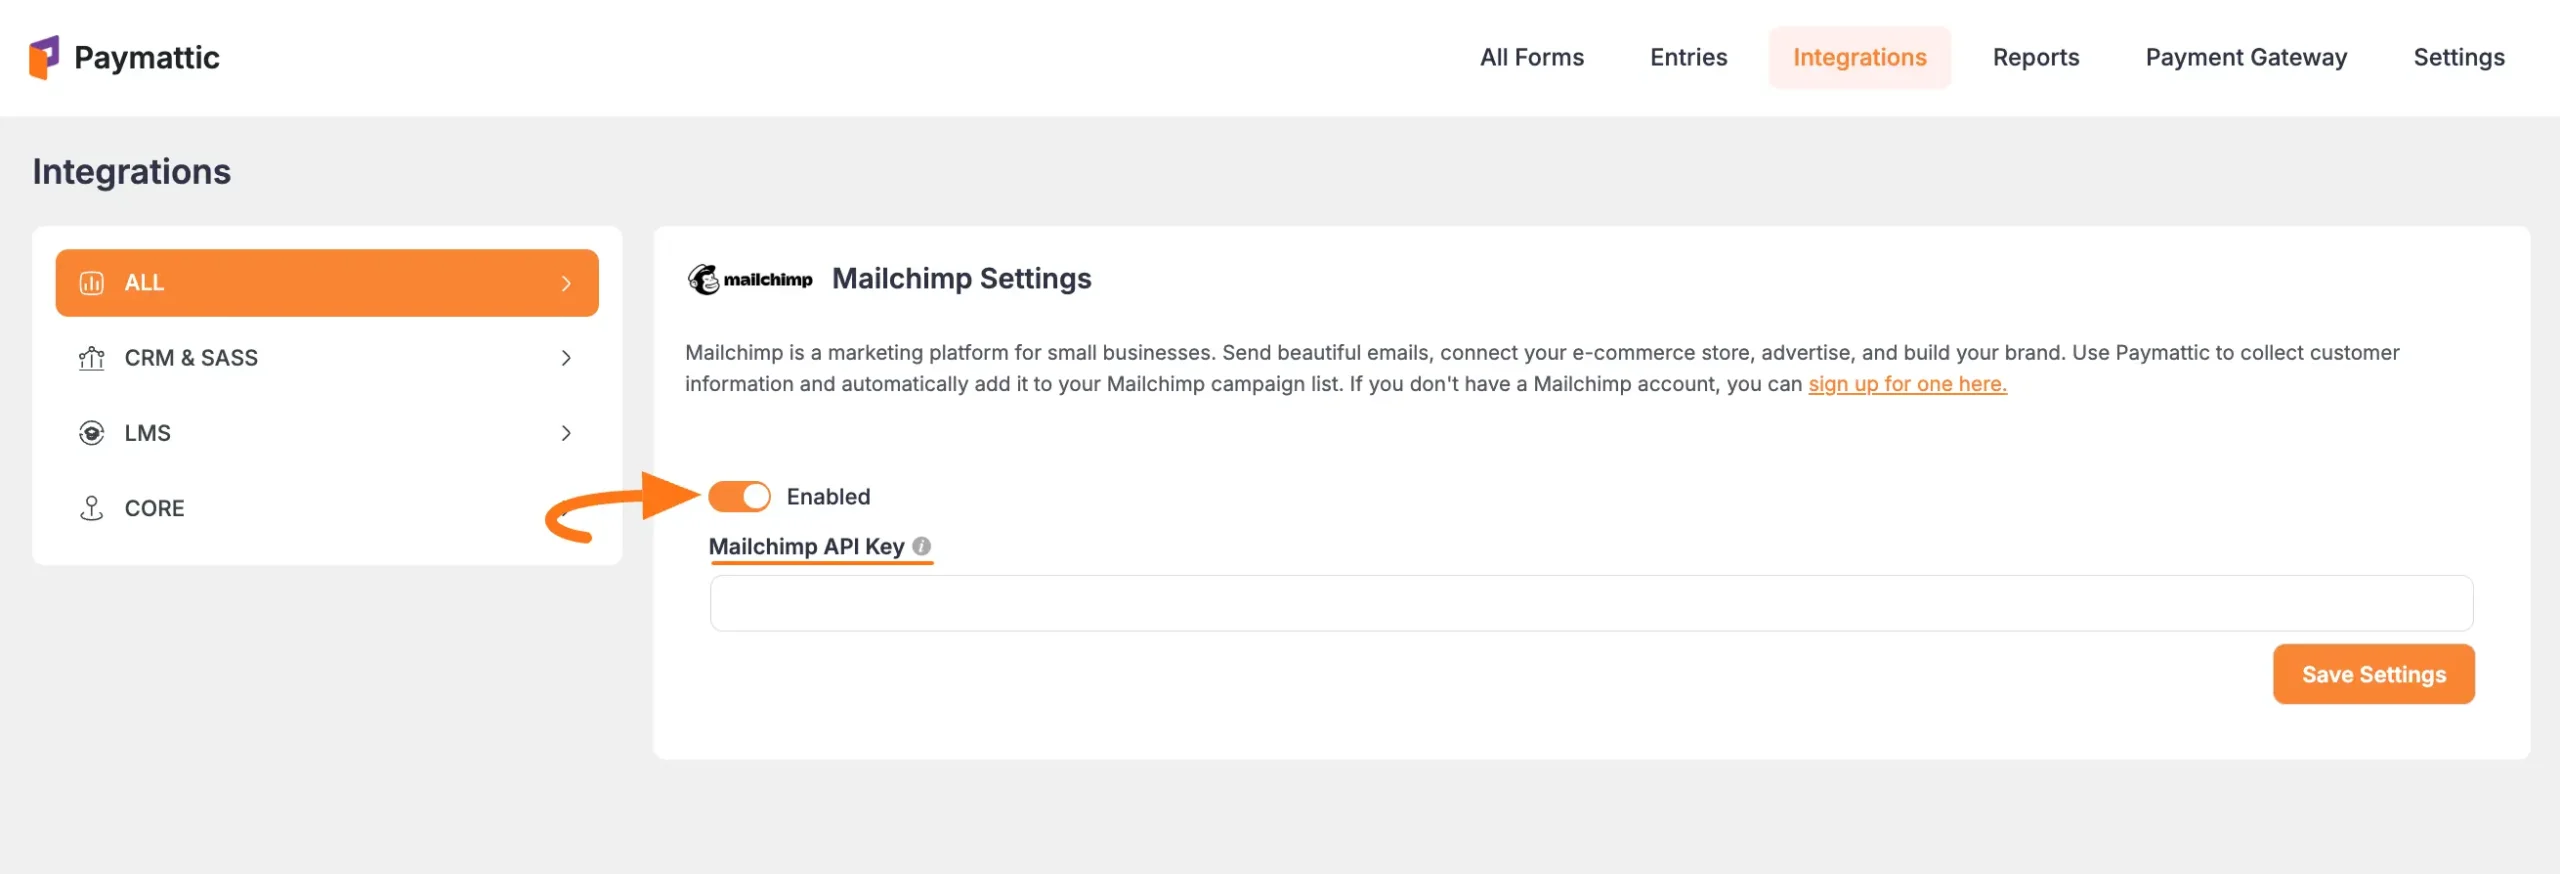
First, go to Integrations from the Paymattic Navbar, search for Mailchimp through the search bar, and you will get the Mailchimp integration module.
Here, you will see Mailchimp’s Settings Icon on the right side, click on it.
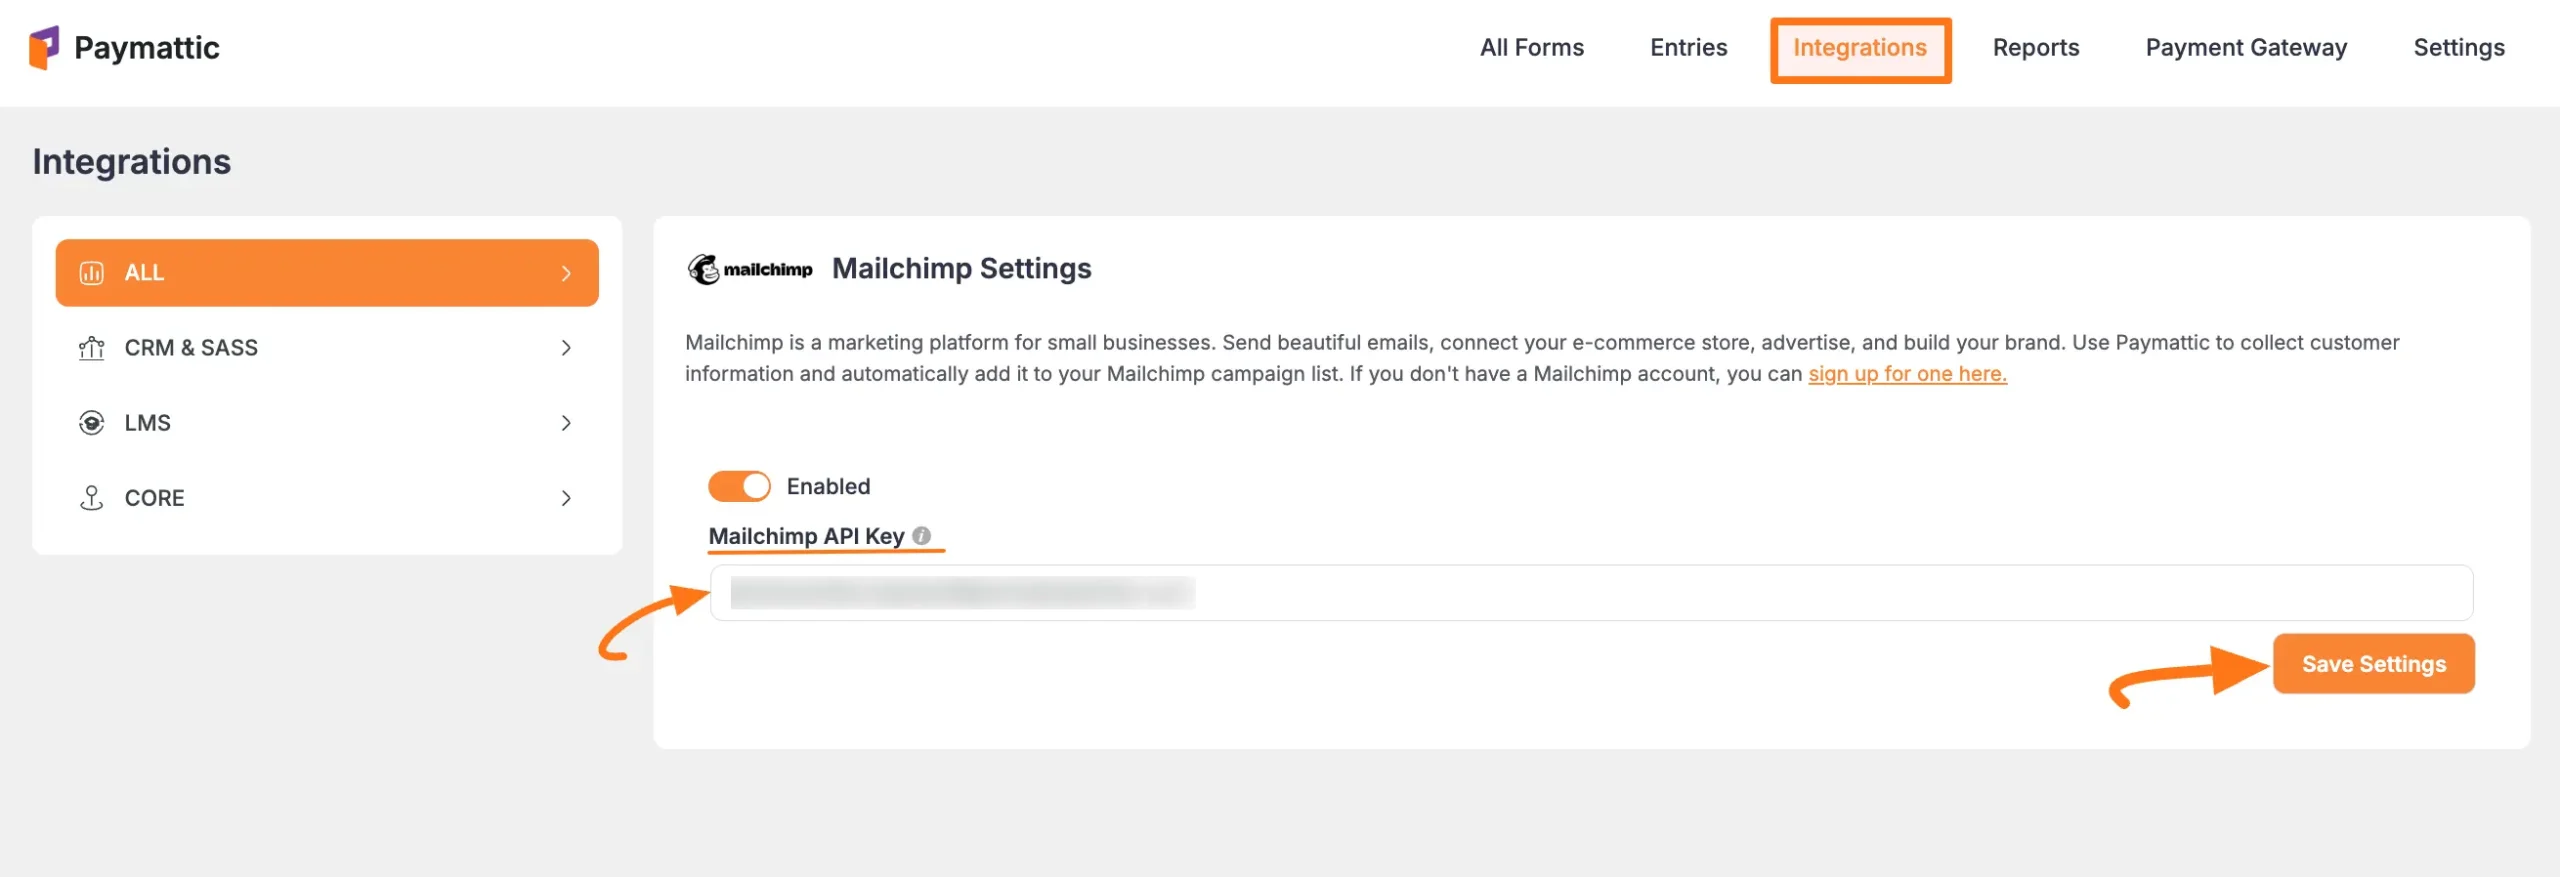
Click the Toggle button to enable the Mailchimp.
Once you enable ActiveCampaign, you will be asked for the Mailchimp API Key of your Mailchimp Account.
Get the API Key from Mailchimp #
To learn how to get the Mailchimp API Key from ActiveCampaign, follow the steps with screenshots below –
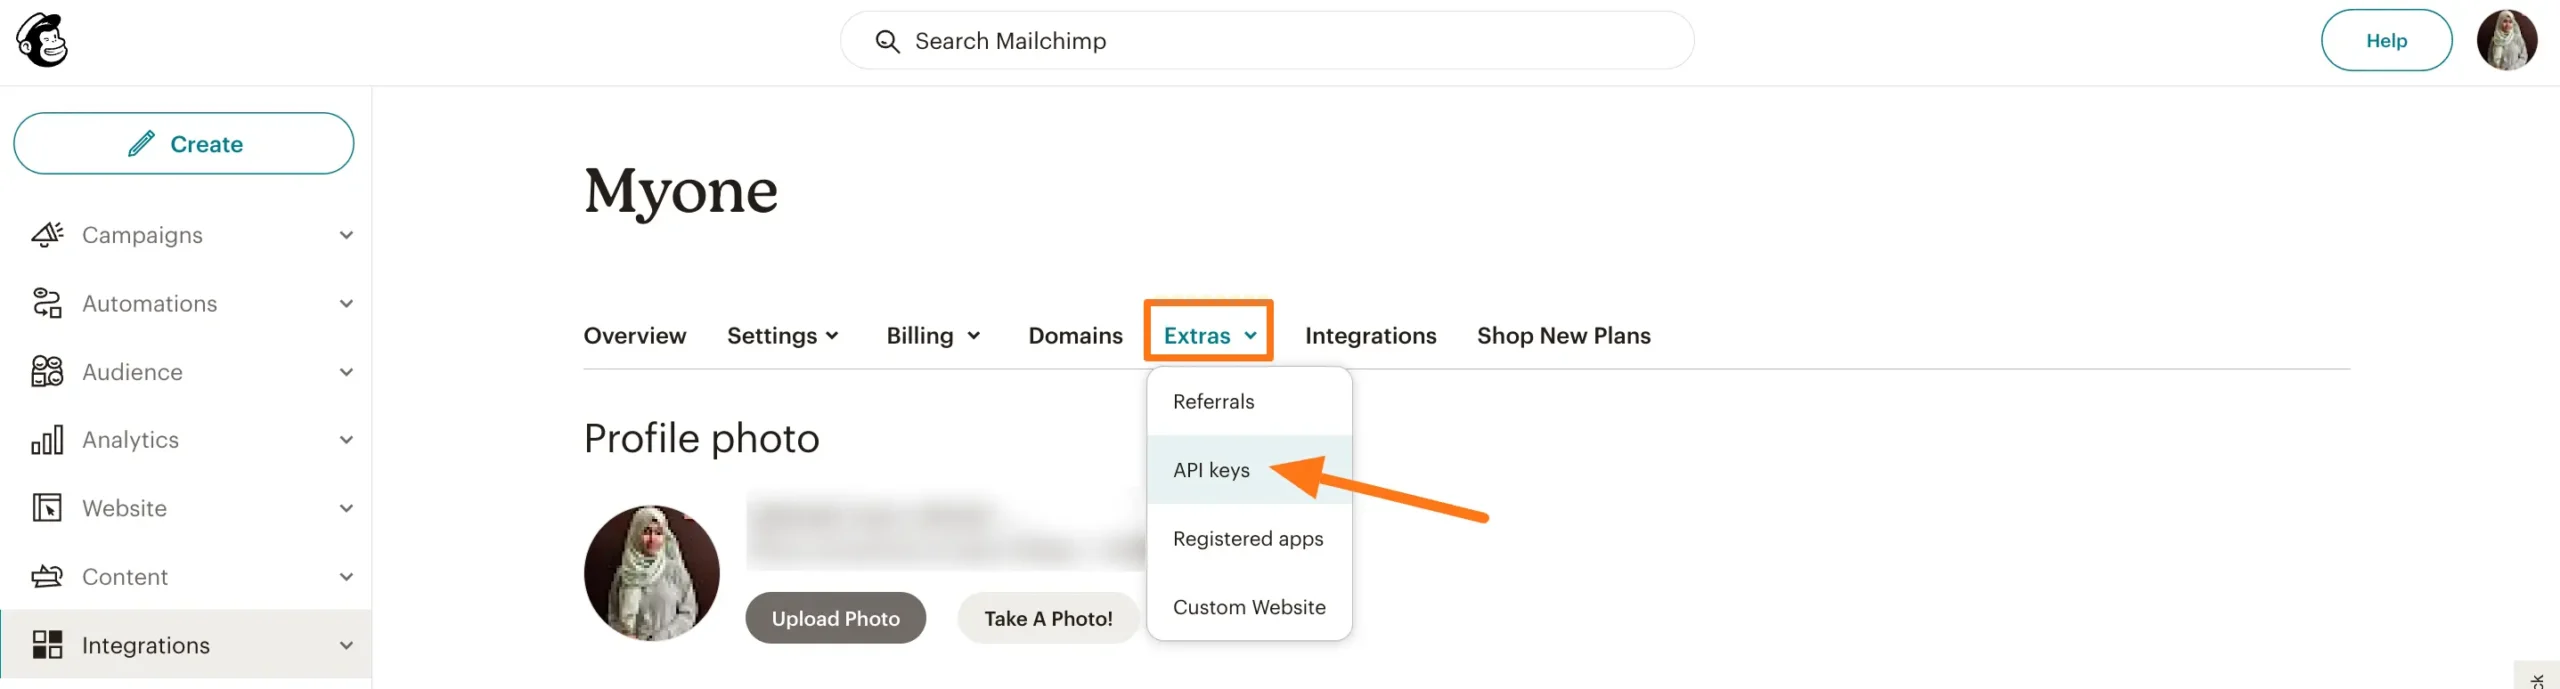
First, log in to your Mailchimp Account, go to Profile from the top right corner, and click the Profile button.
Now, open the Extras tab and select the API keys from the dropdown list.
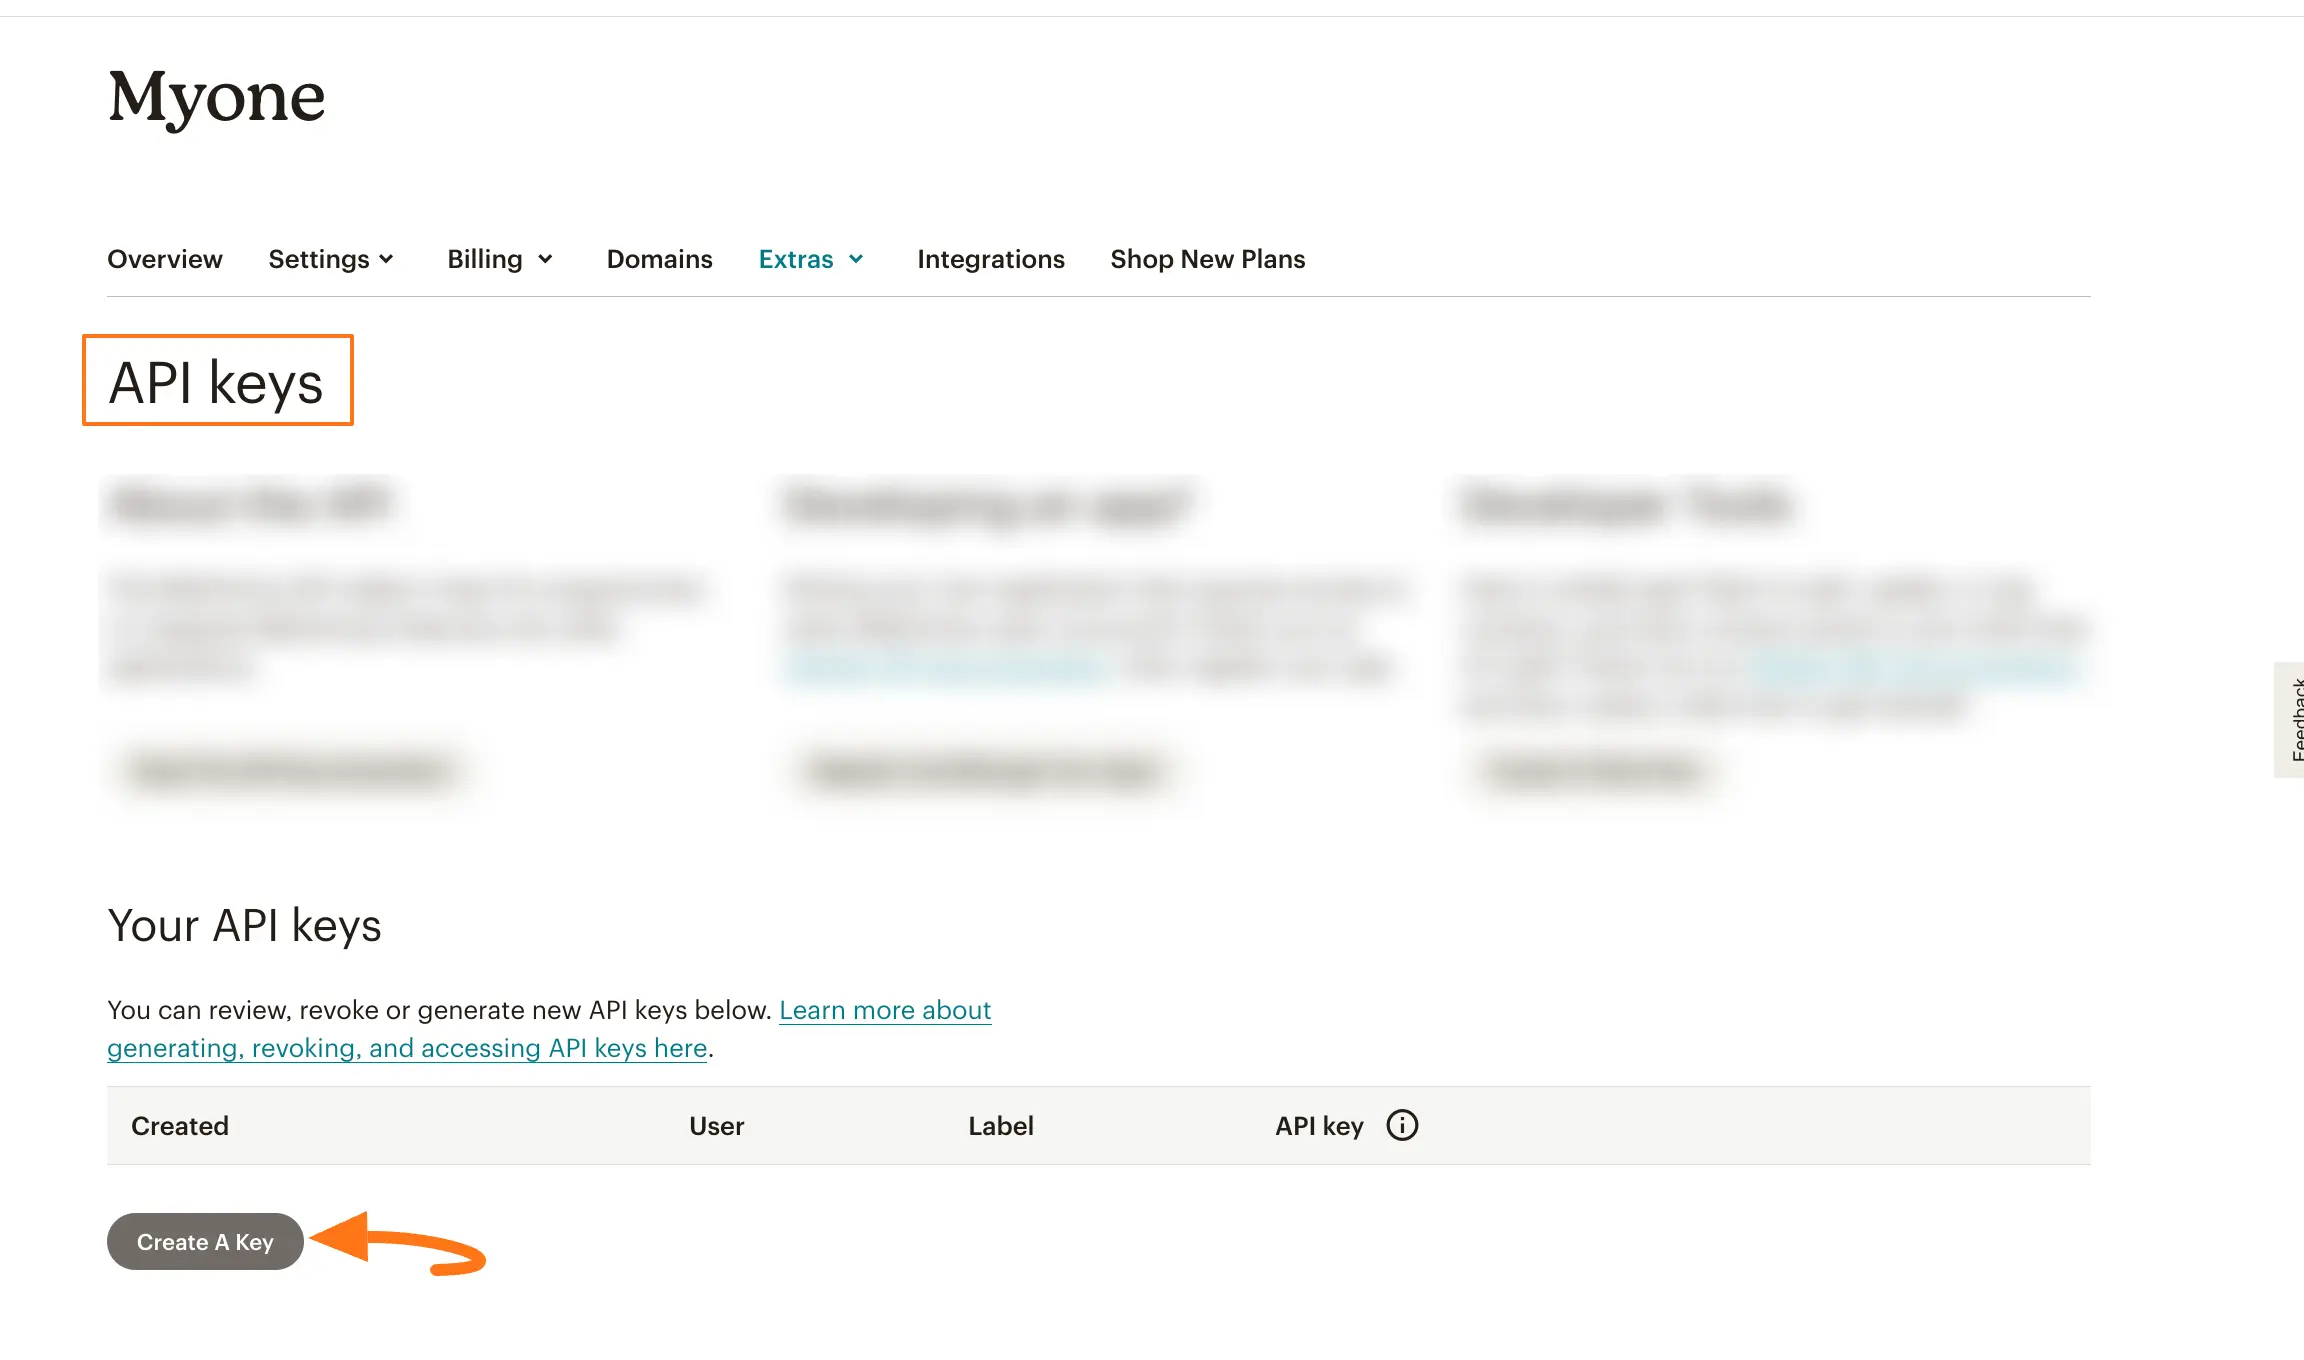
Then, press the Create A Key button.
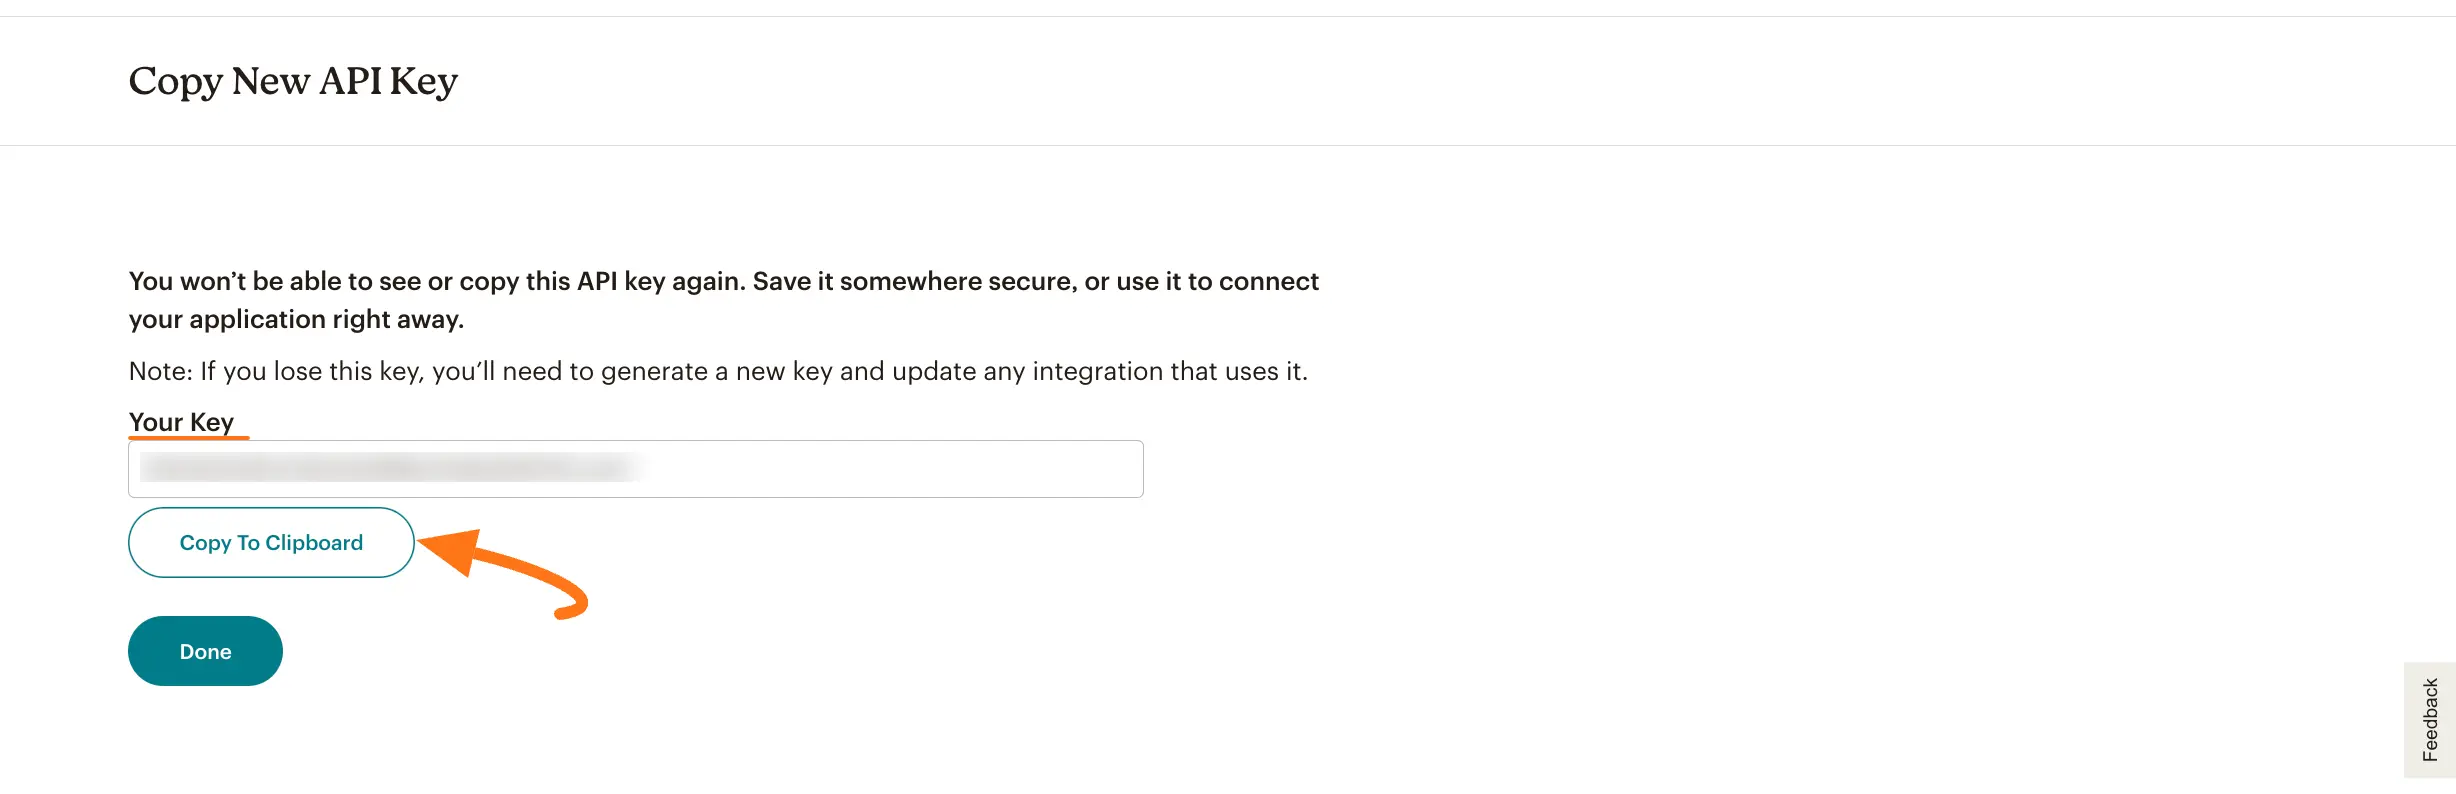
Provide a Name for your API key and click the Generate Key button.
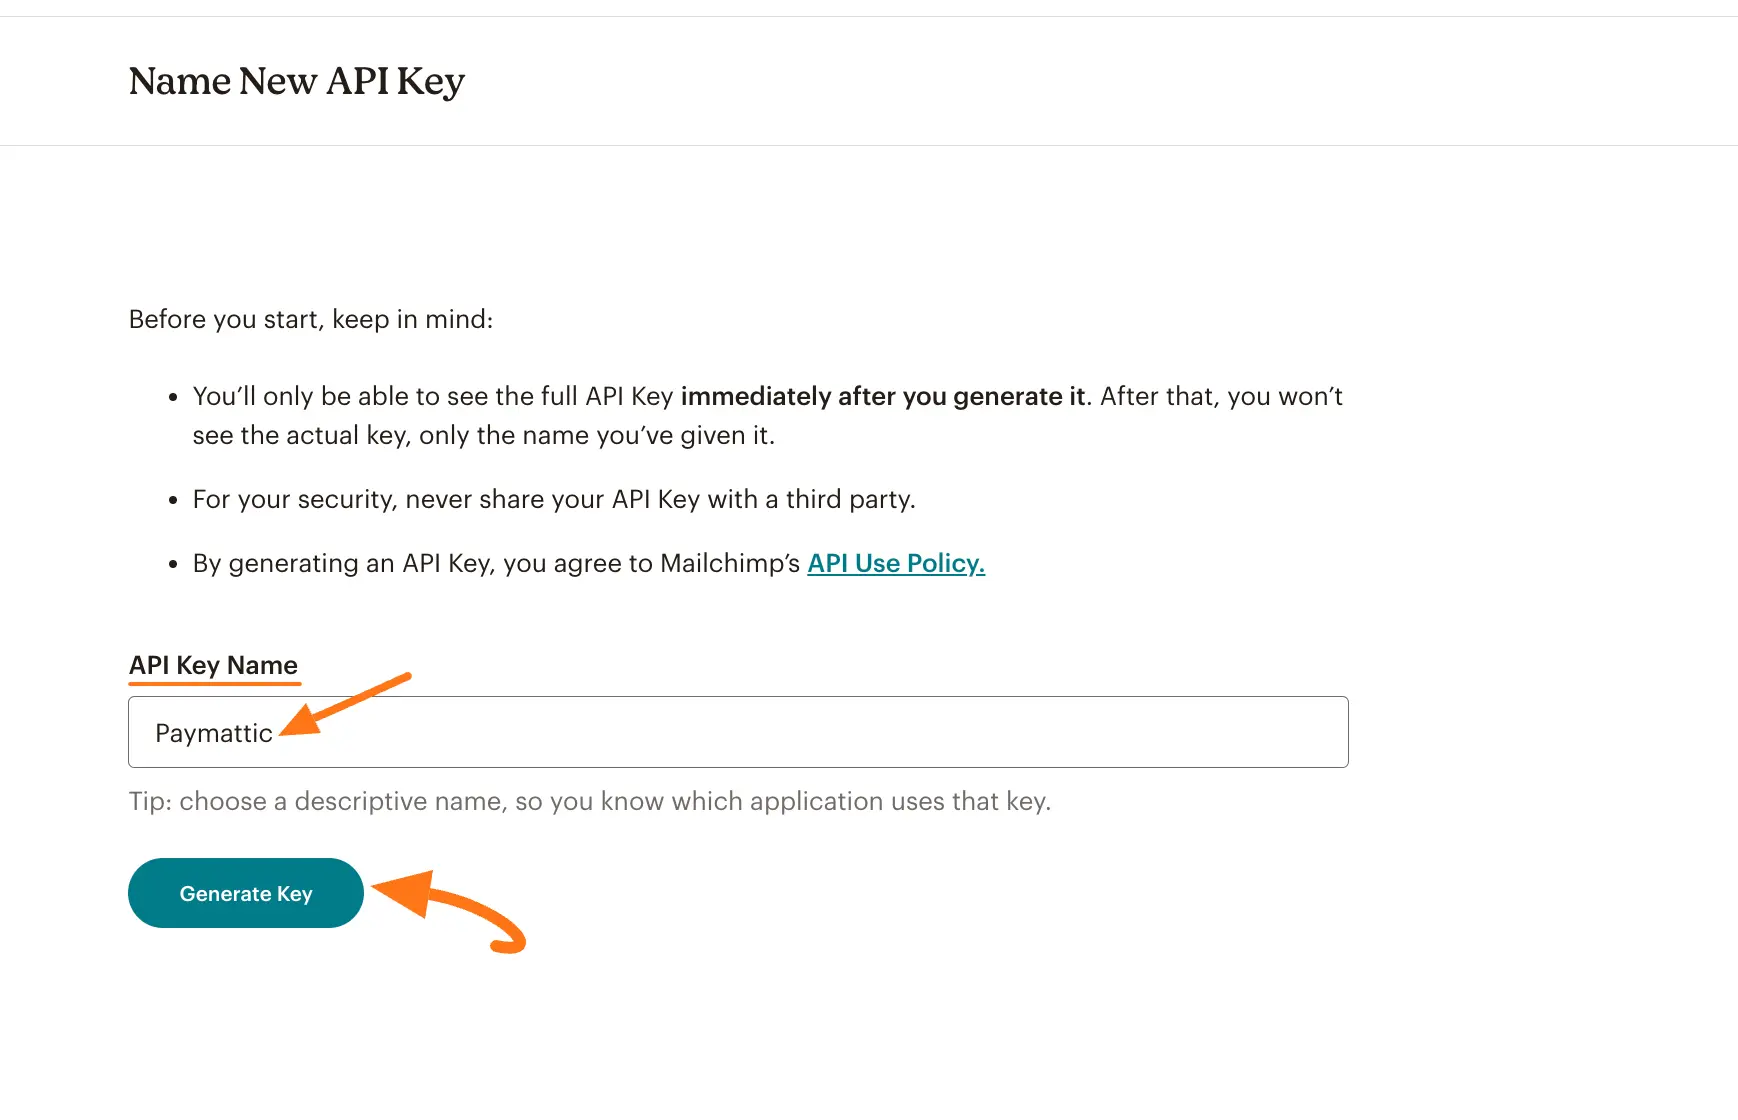
Finally, your Mailchimp API key is generated, copy it by clicking the Copy to Clipboard button.
Now, return to the Mailchimp Settings page under the Integrations section from the Paymattic Navbar and paste the copied API Key into the Mailchimp API Key fields
Finally, press the Save Settings button and your Mailchimp Integration module will be enabled.
Integrate Mailchimp into Forms #
To learn how to integrate Mailchimp into any specific Form in Paymattic, follow the steps with the screenshots below –
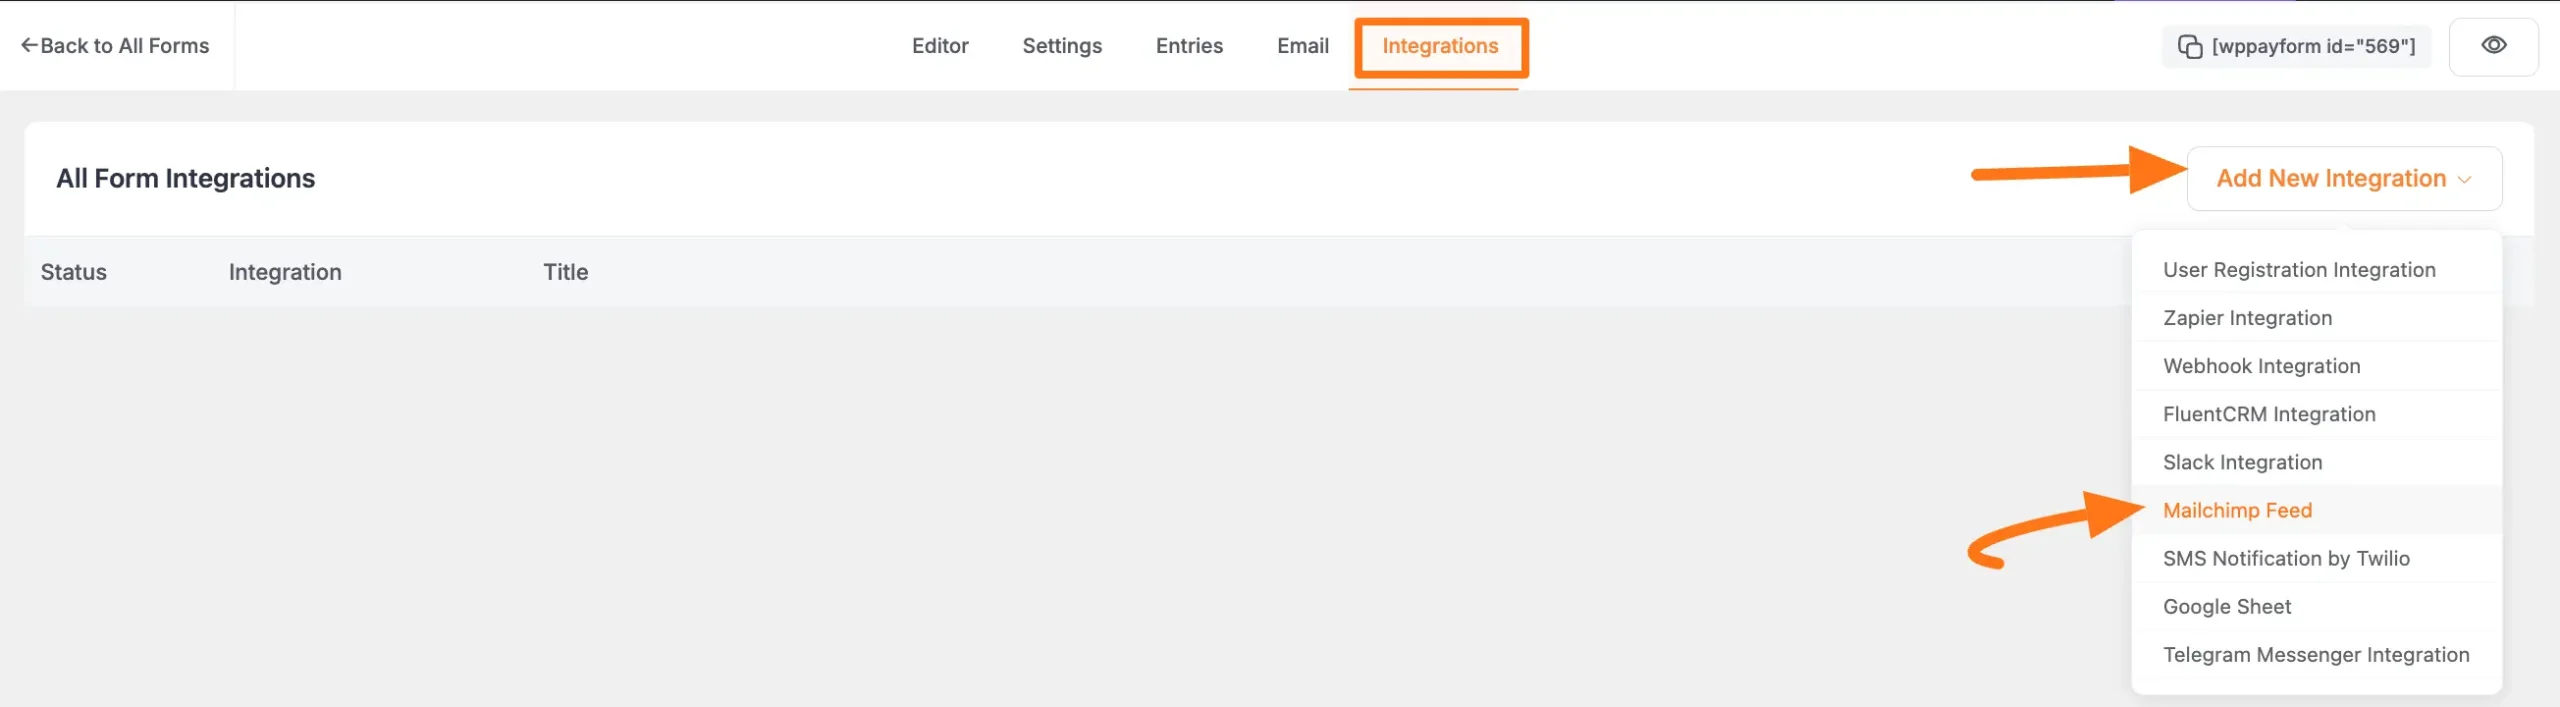
First, go to All Forms from the Paymattic Navbar, select the Desired Form where you want to integrate your Mailchimp and click the Pencil/Editor Icon.

Once the Editor page opens, go to the Integrations tab, click the Add New Integration button & select Mailchimp Integration feed from the dropdown list.
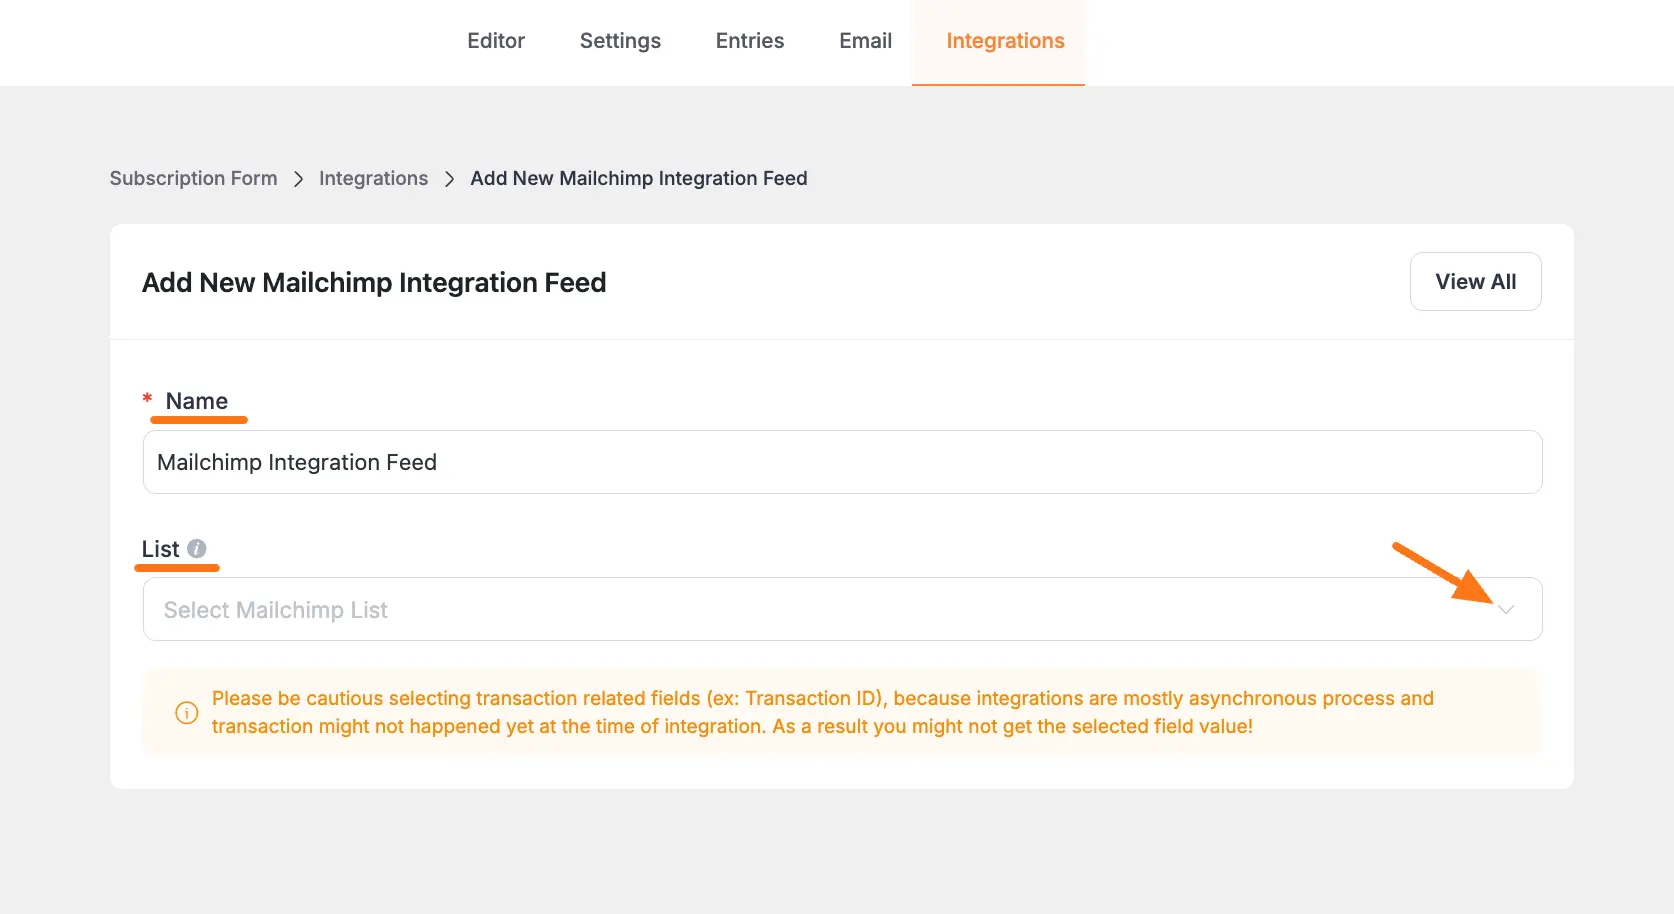
Here, you will find a required field to set a name for your integration feed according to your preference.
Also, you must select Mailchimp’s List from the dropdown where you want to send the submitted form data.
Once you select the list, a pop-up page will appear with various settings options for configuring the ActiveCampaign.
All the settings options mentioned in the screenshot below are briefly explained:
- Name: From here, you can change the name anytime if needed.
- List: From here, you can change the Mailchimp List anytime if needed.
- Map Fileds: Use all the fields under this option to properly link your Mailchimp Fields with the Form Fields. Also, you can easily select the Value for the Form Fields according to the Mailchimp Fields by using the Shortcode button.
- Interest Group: With this option, you can map your MailChimp’s Interest group here.
- Tags: With this option, you can add tags to your ActiveCampaign contacts with a comma-separated list (e.g. new lead, Paymattic, web source). Commas within a merge tag value will be created as a single tag.
- Enable Dynamic Tag Input: This option allows ActiveCampaign to add customized tags for specific contacts based on your submission values according to your set conditions.
- Notes: You can write a note for the contacts.
- Enable Double Opt-in: Enable this option if you want to check the validation of the user information (specifically user email).
- Enable ReSubscription: When this option is enabled, if the subscriber is in an inactive state or has previously been unsubscribed, they will be re-added to the active list.
- Mark as VIP Contact: When you enable this option, contacts will be marked as VIP.
- Conditional Logics: This option allows Mailchimp integration to function conditionally based on your submission values according to your set conditional logic/s. Also, here, you can add as much conditional logic as you need by clicking the + Add More button and delete any logic by clicking the Trash Icon if needed. To learn more, read this Documentation.
- Enable This Feed: Check this option, to ensure this integration feed remains enabled, and all the actions of this feed function properly.
Once the setup is done, finally, click the Create Mailchimp Feed button.
And, your Mailchimp will be integrated into this specific form!

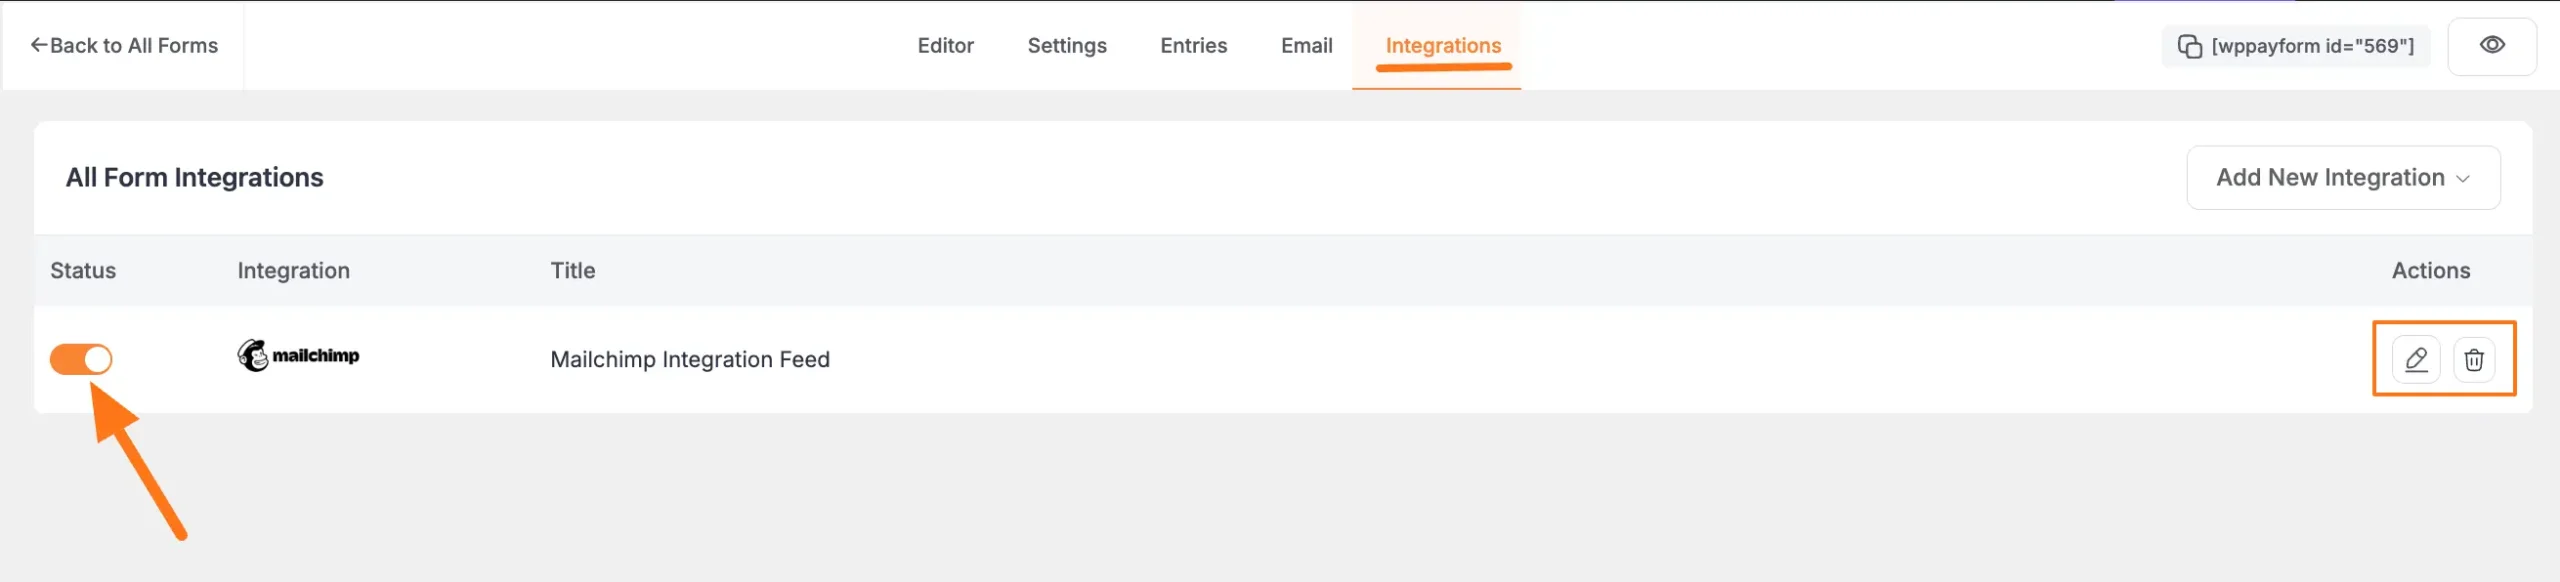
After successful Integration, now you will see that your MAilchimp Integration Feed has been added here.
You can modify your feed anytime by clicking the Pencil Icon and delete it by clicking the Trash Icon.
Also, you can disable or enable this feed anytime by clicking the Toggle button if needed.
Preview of Integrated Mailchimp #
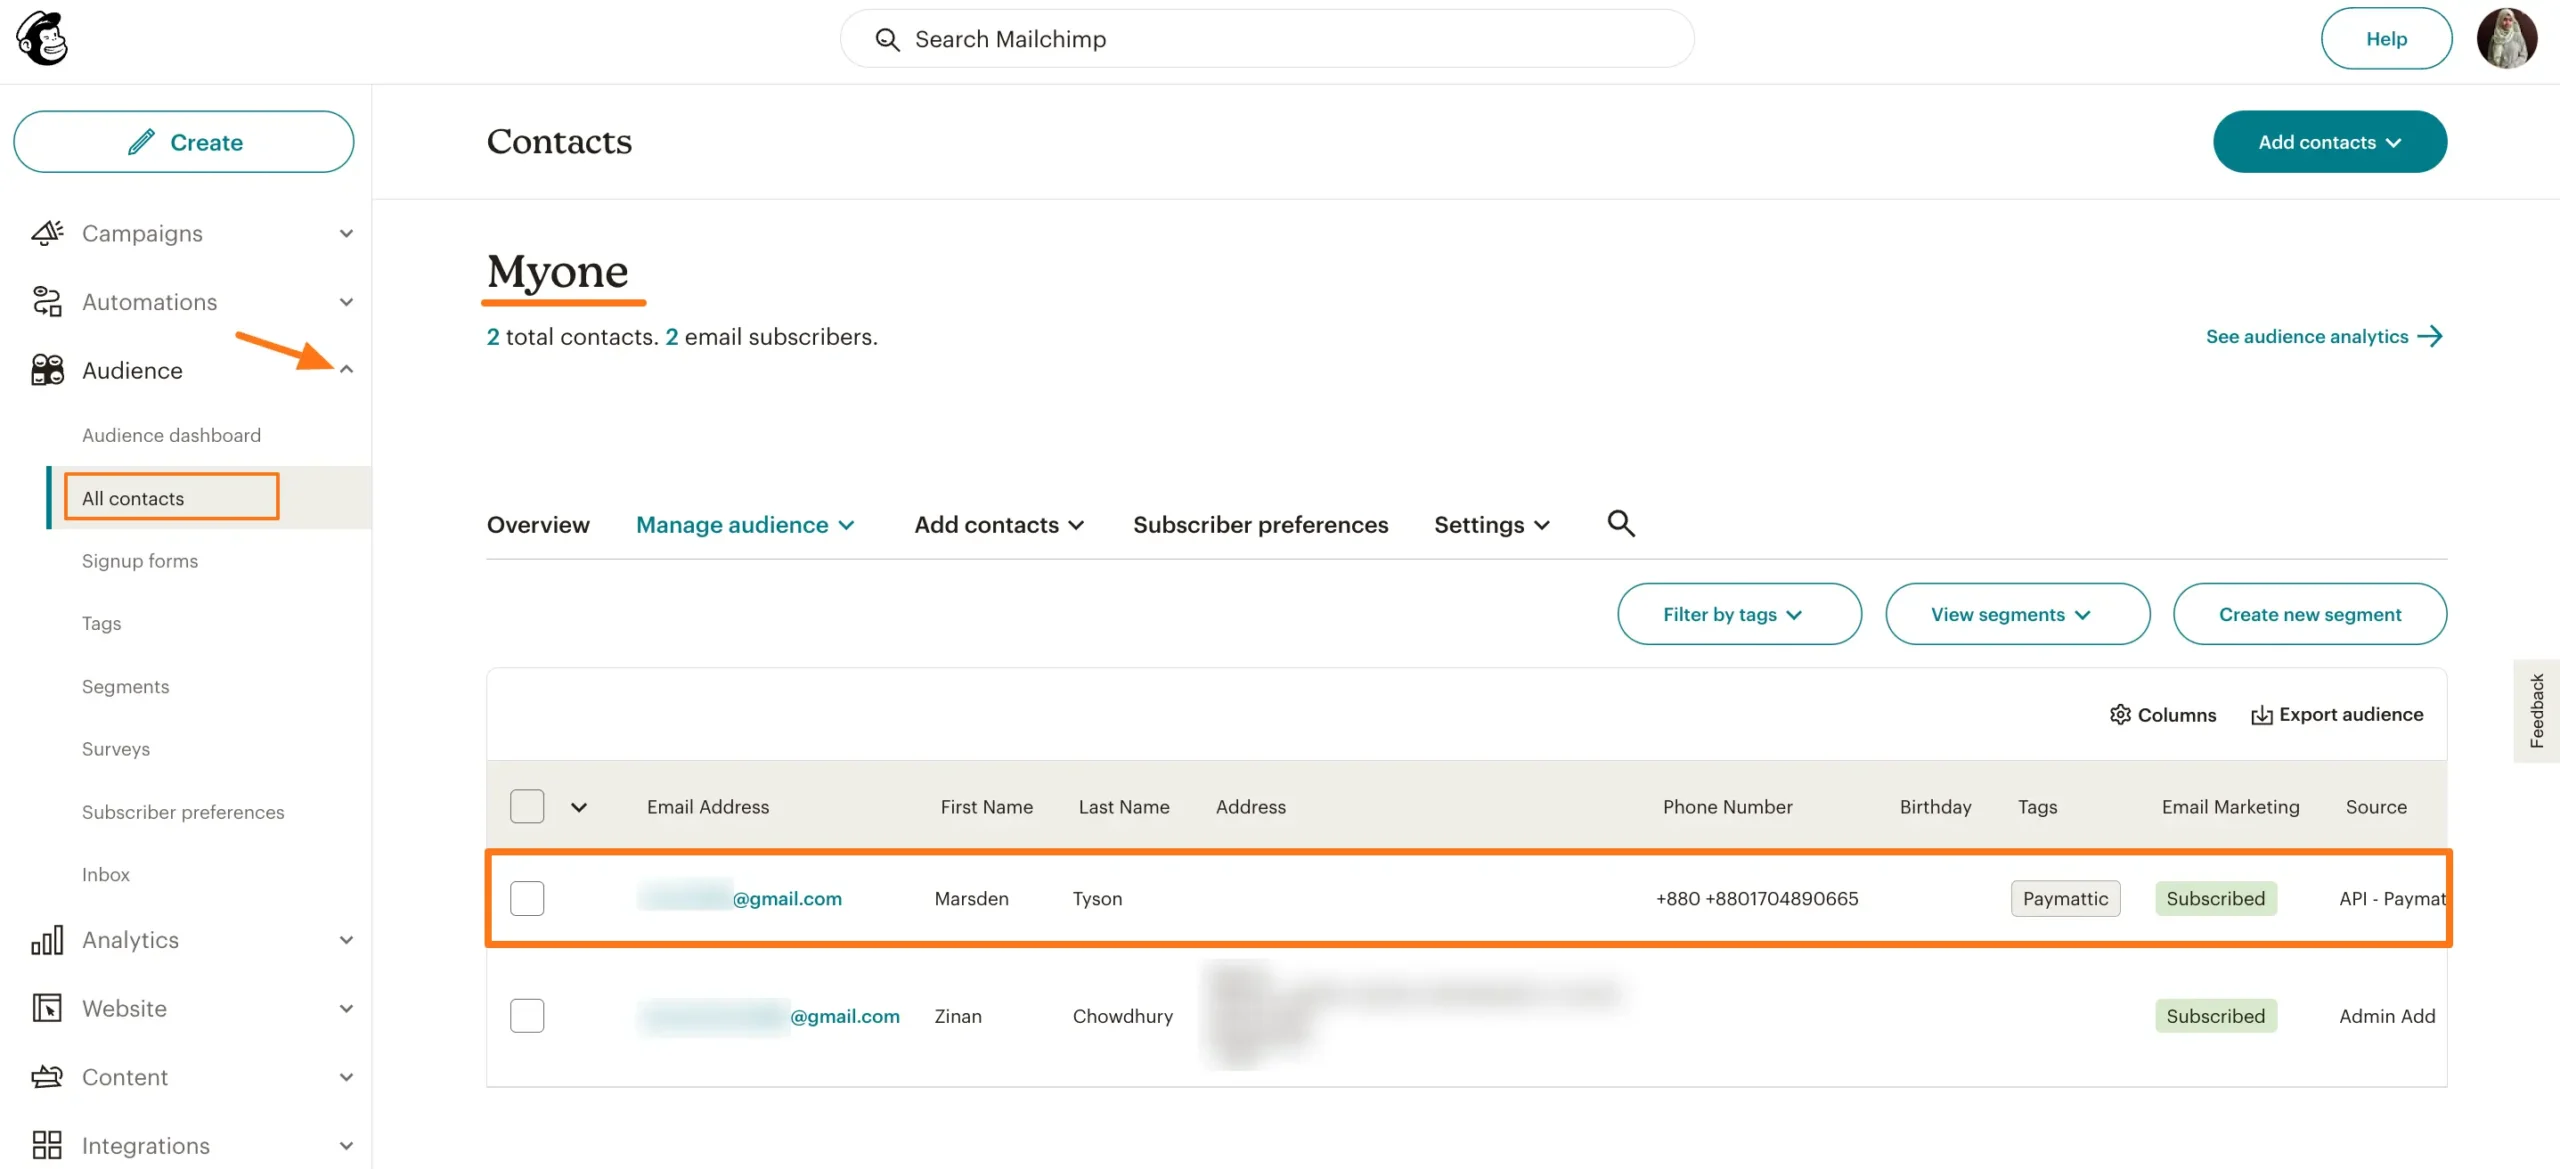
Here, you can see the preview of the added contacts of Mailchimp through the Form entries that I set up during the integration.
First, open the Audience dropdown and click the Contacts tab from the left sidebar.
And, you can see that Contacts are added automatically to the chosen Mailchimp Contact List through the Paymattic Form submission.
This way you can easily integrate Mailchimp with Paymattic!
If you have any further questions, concerns, or suggestions, please do not hesitate to contact our @support team. Thank you.


