
Xendit is a popular payment gateway based in Indonesia, Philippines, and South East Asia region. It supports various local and international payment methods such as VISA, Mastercard, American Express, JCB, local bank transfer, e-wallets, and many more. This article will guide you through configuring Xendit on your WordPress Site with the Paymattic plugin.
Remember, to get access to the Xendit payment gateway, you need the Paymattic Pro Plugin.
Configuring the Xendit Payment Method #
To learn how to configure the Xendit payment gateway through Paymattic, follow the steps with screenshots below –
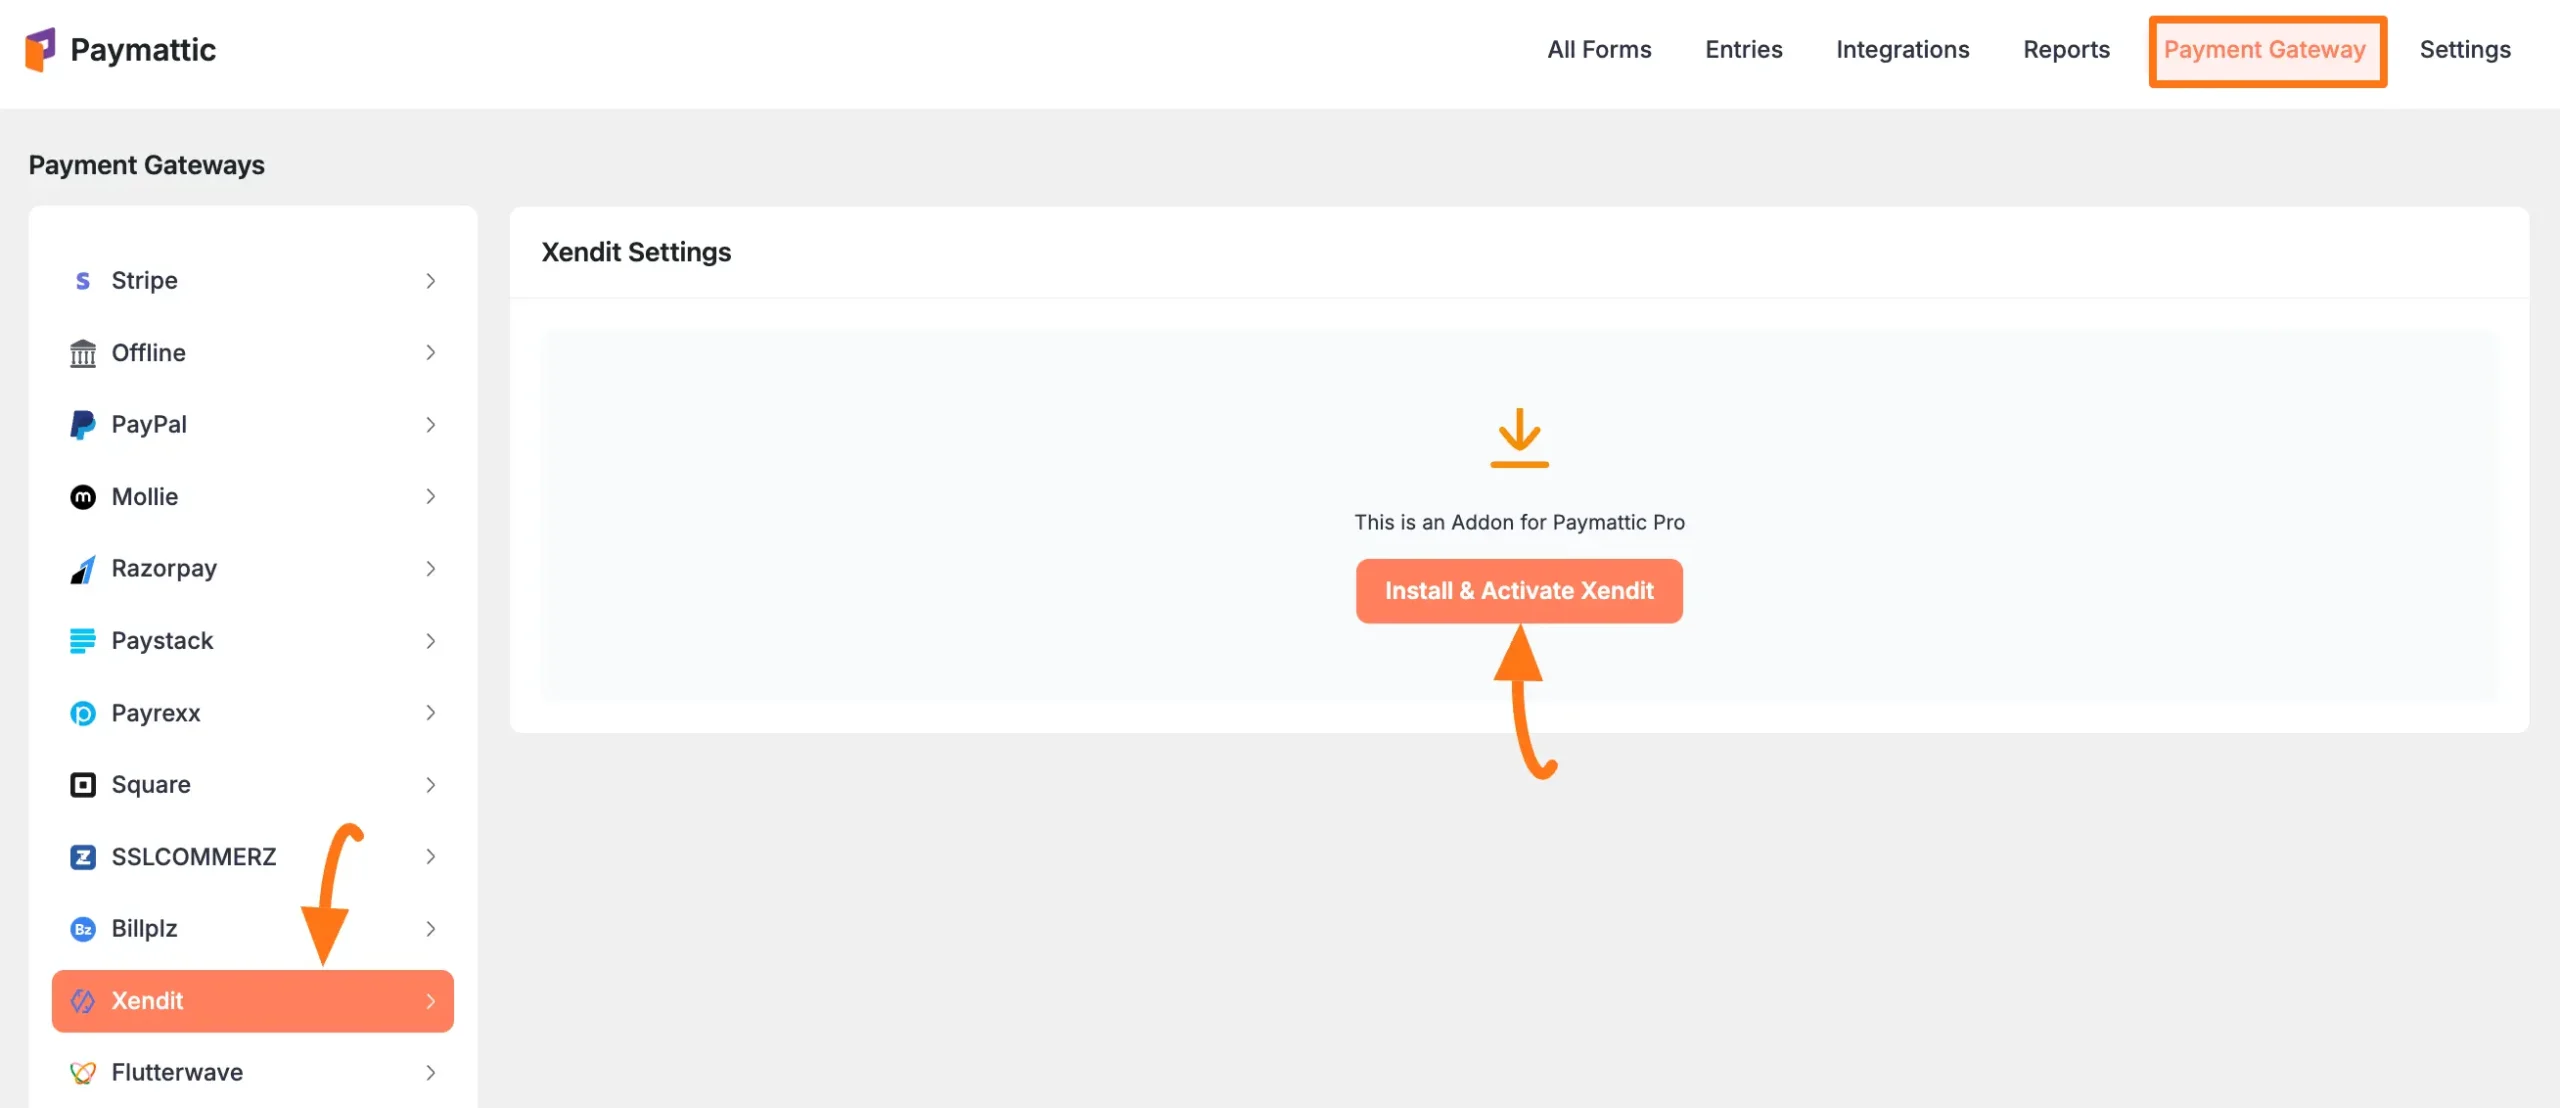
First, go to Payment Gateway from the Paymattic Navbar, click the Xendit tab from the left sidebar, and the Xendit Settings page will open.
Click the Install and Activate Xendit button to connect Xendit with Paymattic Pro.
This add-on needs to be installed the first time you integrate with Xendit.
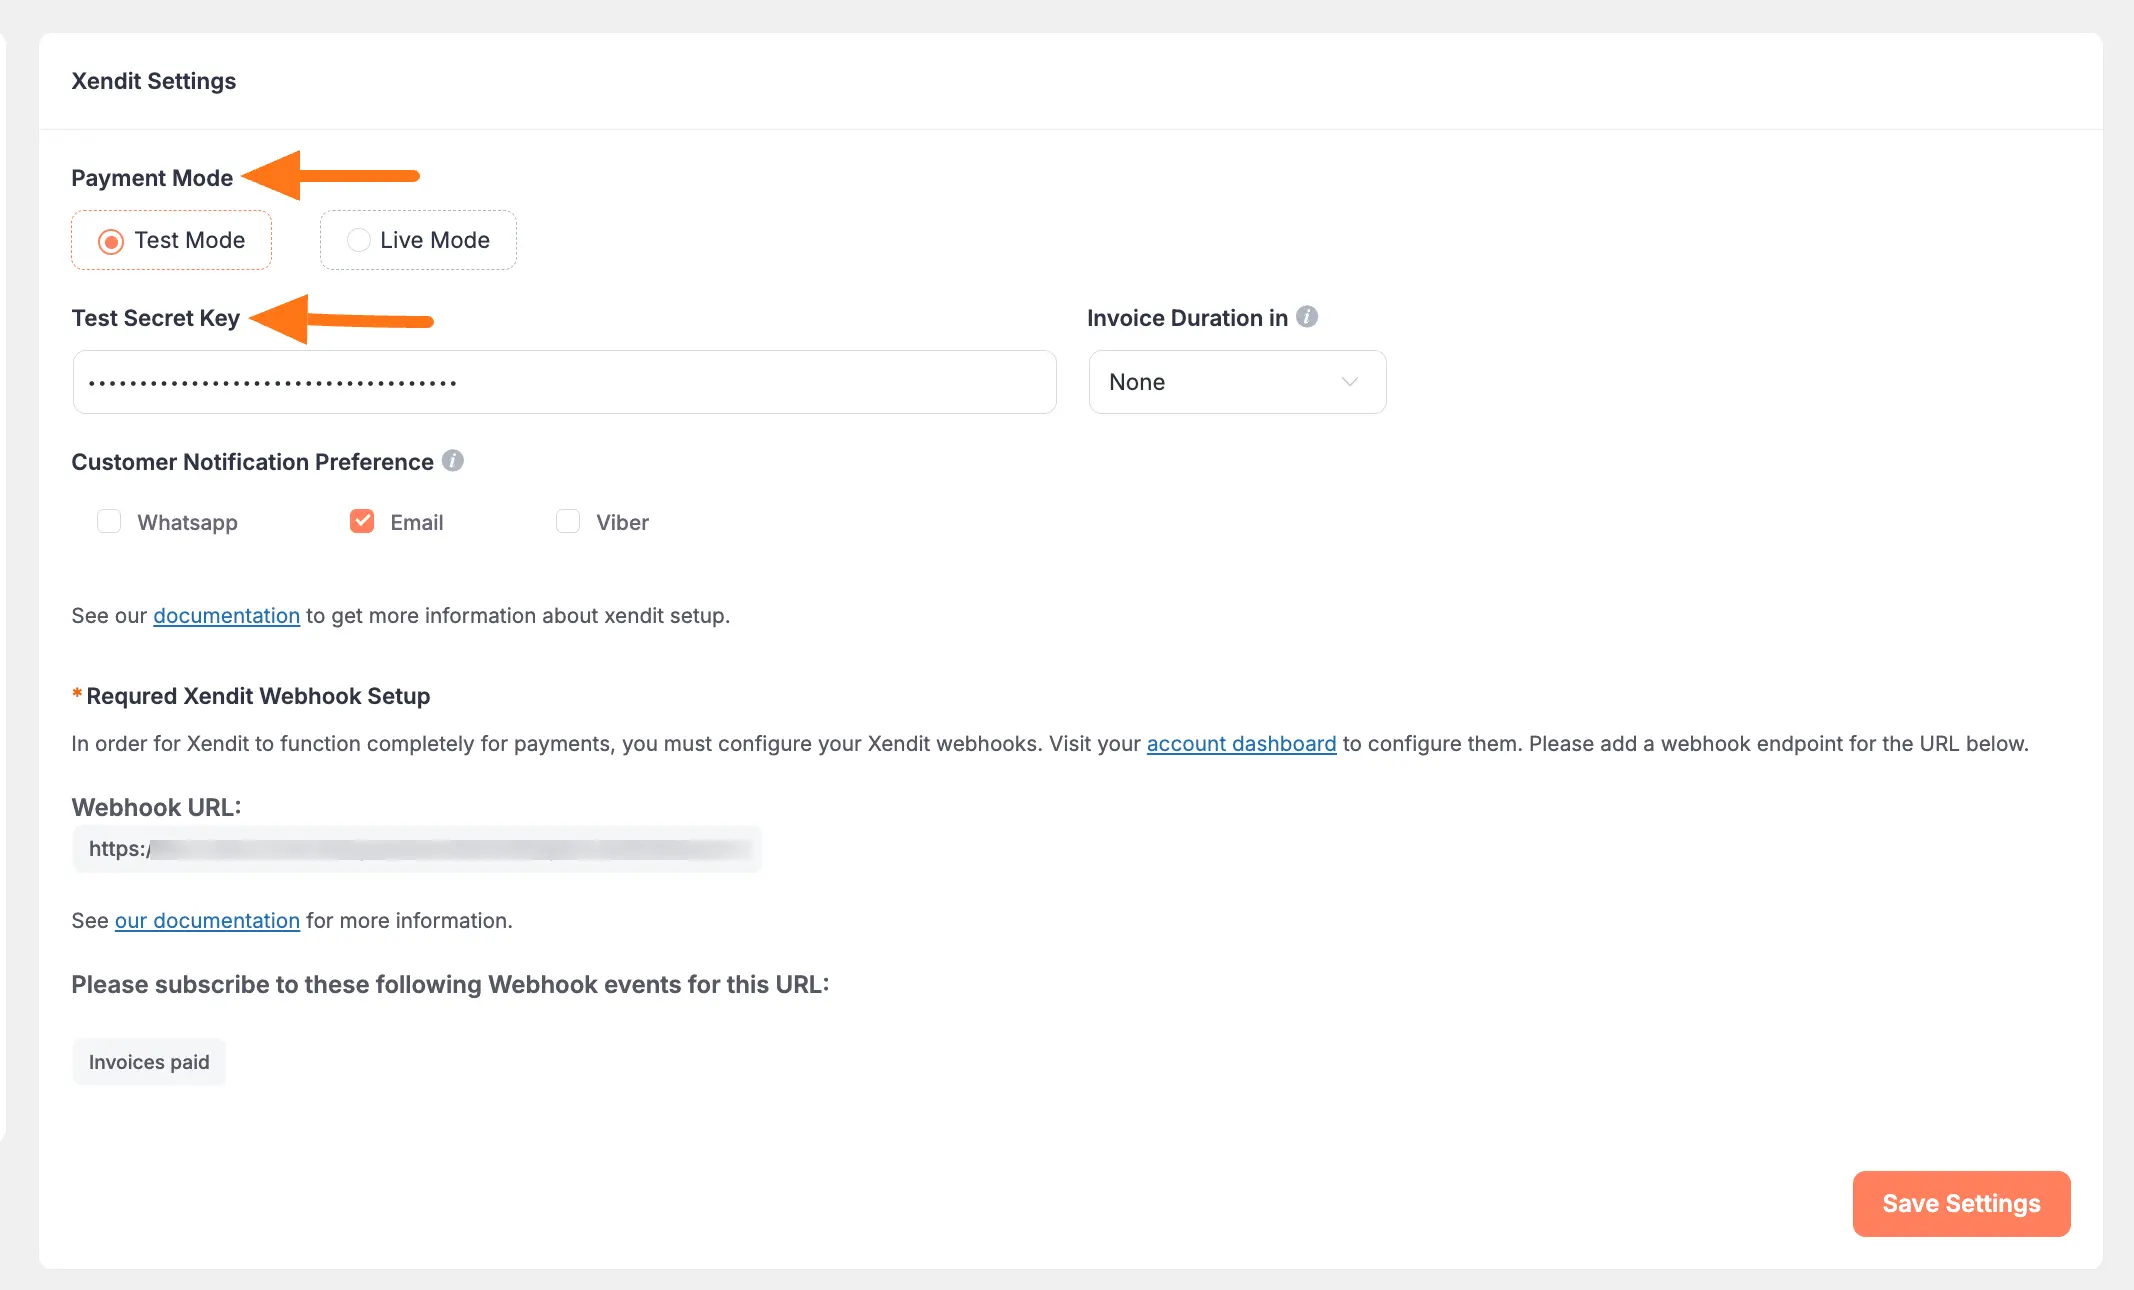
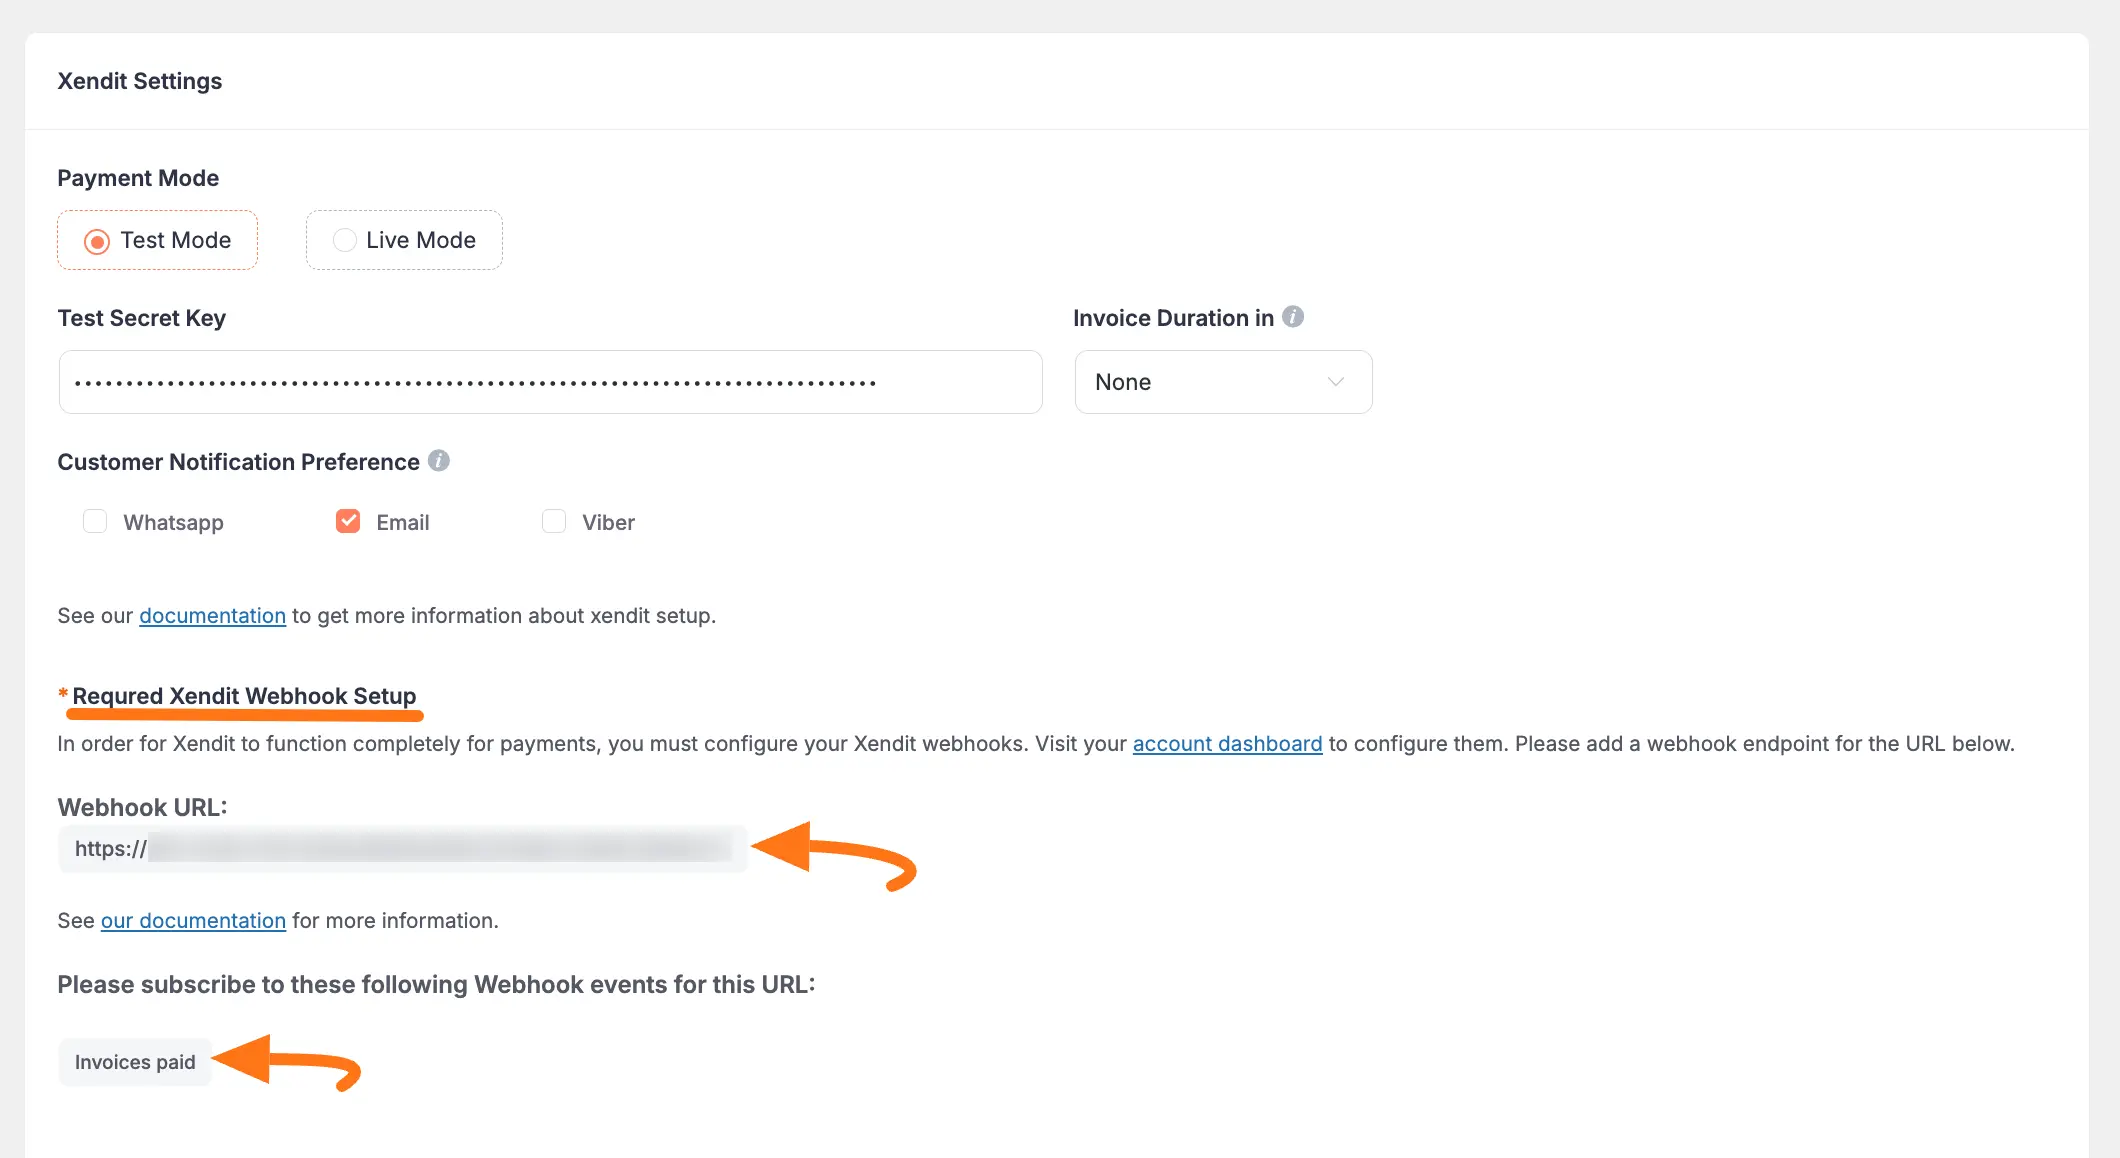
Select any Payment Mode between Test (for test payments) and Live ( for real payments) as both options follow the same configuration process, e.g., I choose the Test Mode.
Then, you need to obtain the Test Secret Key from your Xendit Account.
Get the Secret Key from Xendit #
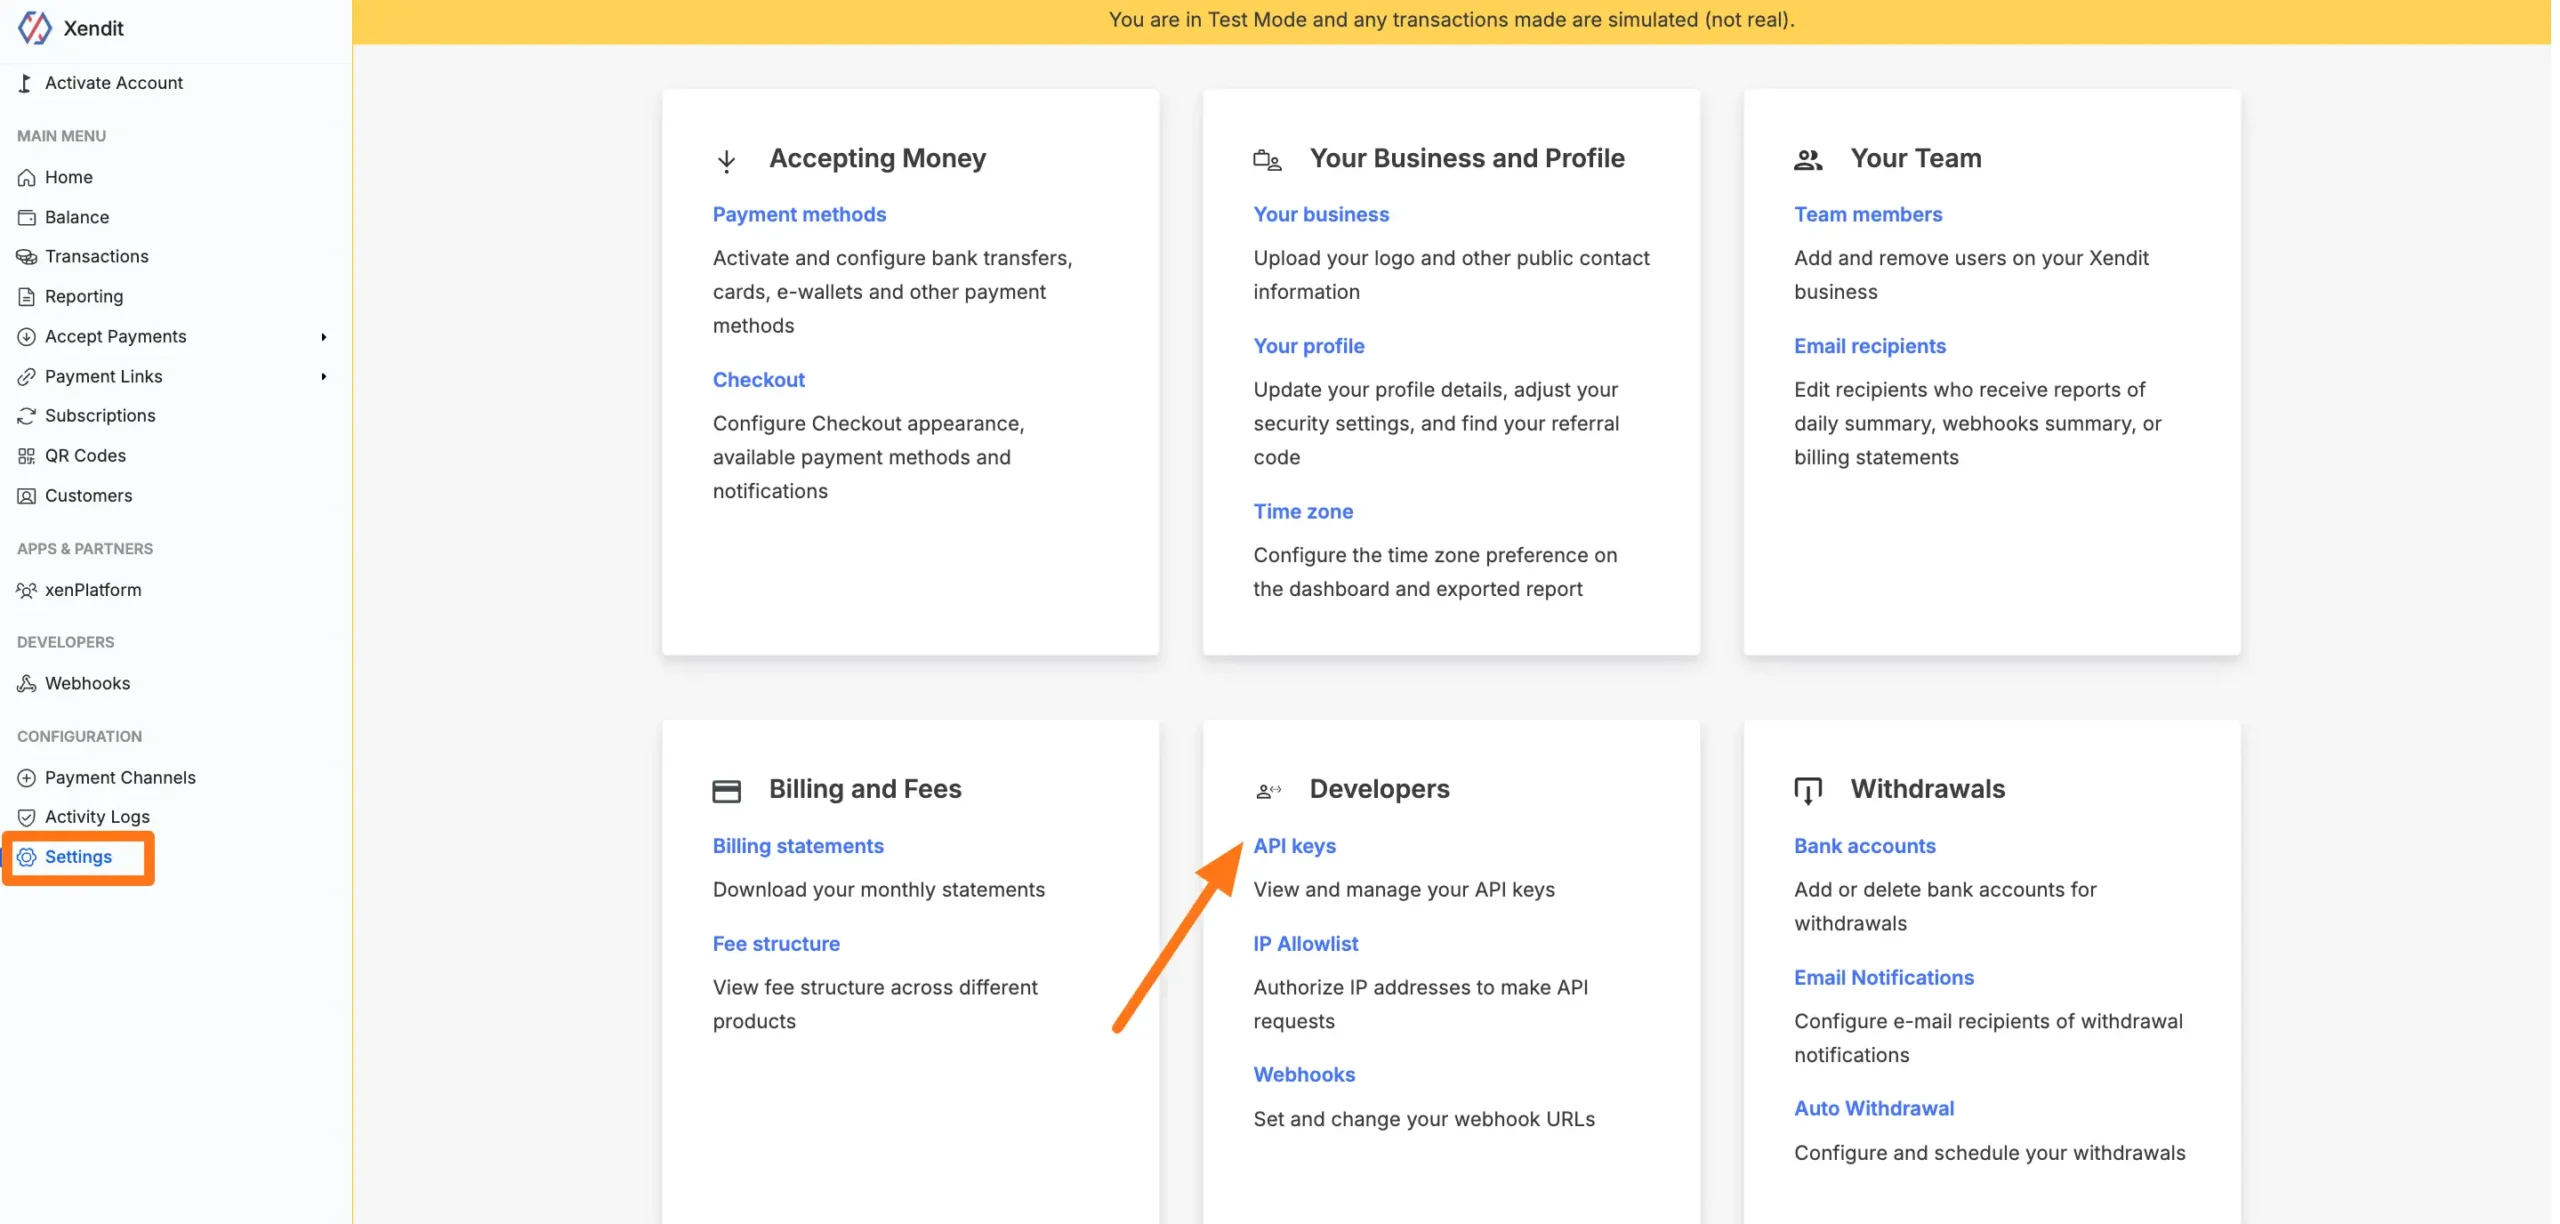
First, log in to your Xendit Account. If you do not have an account, sign up from here.
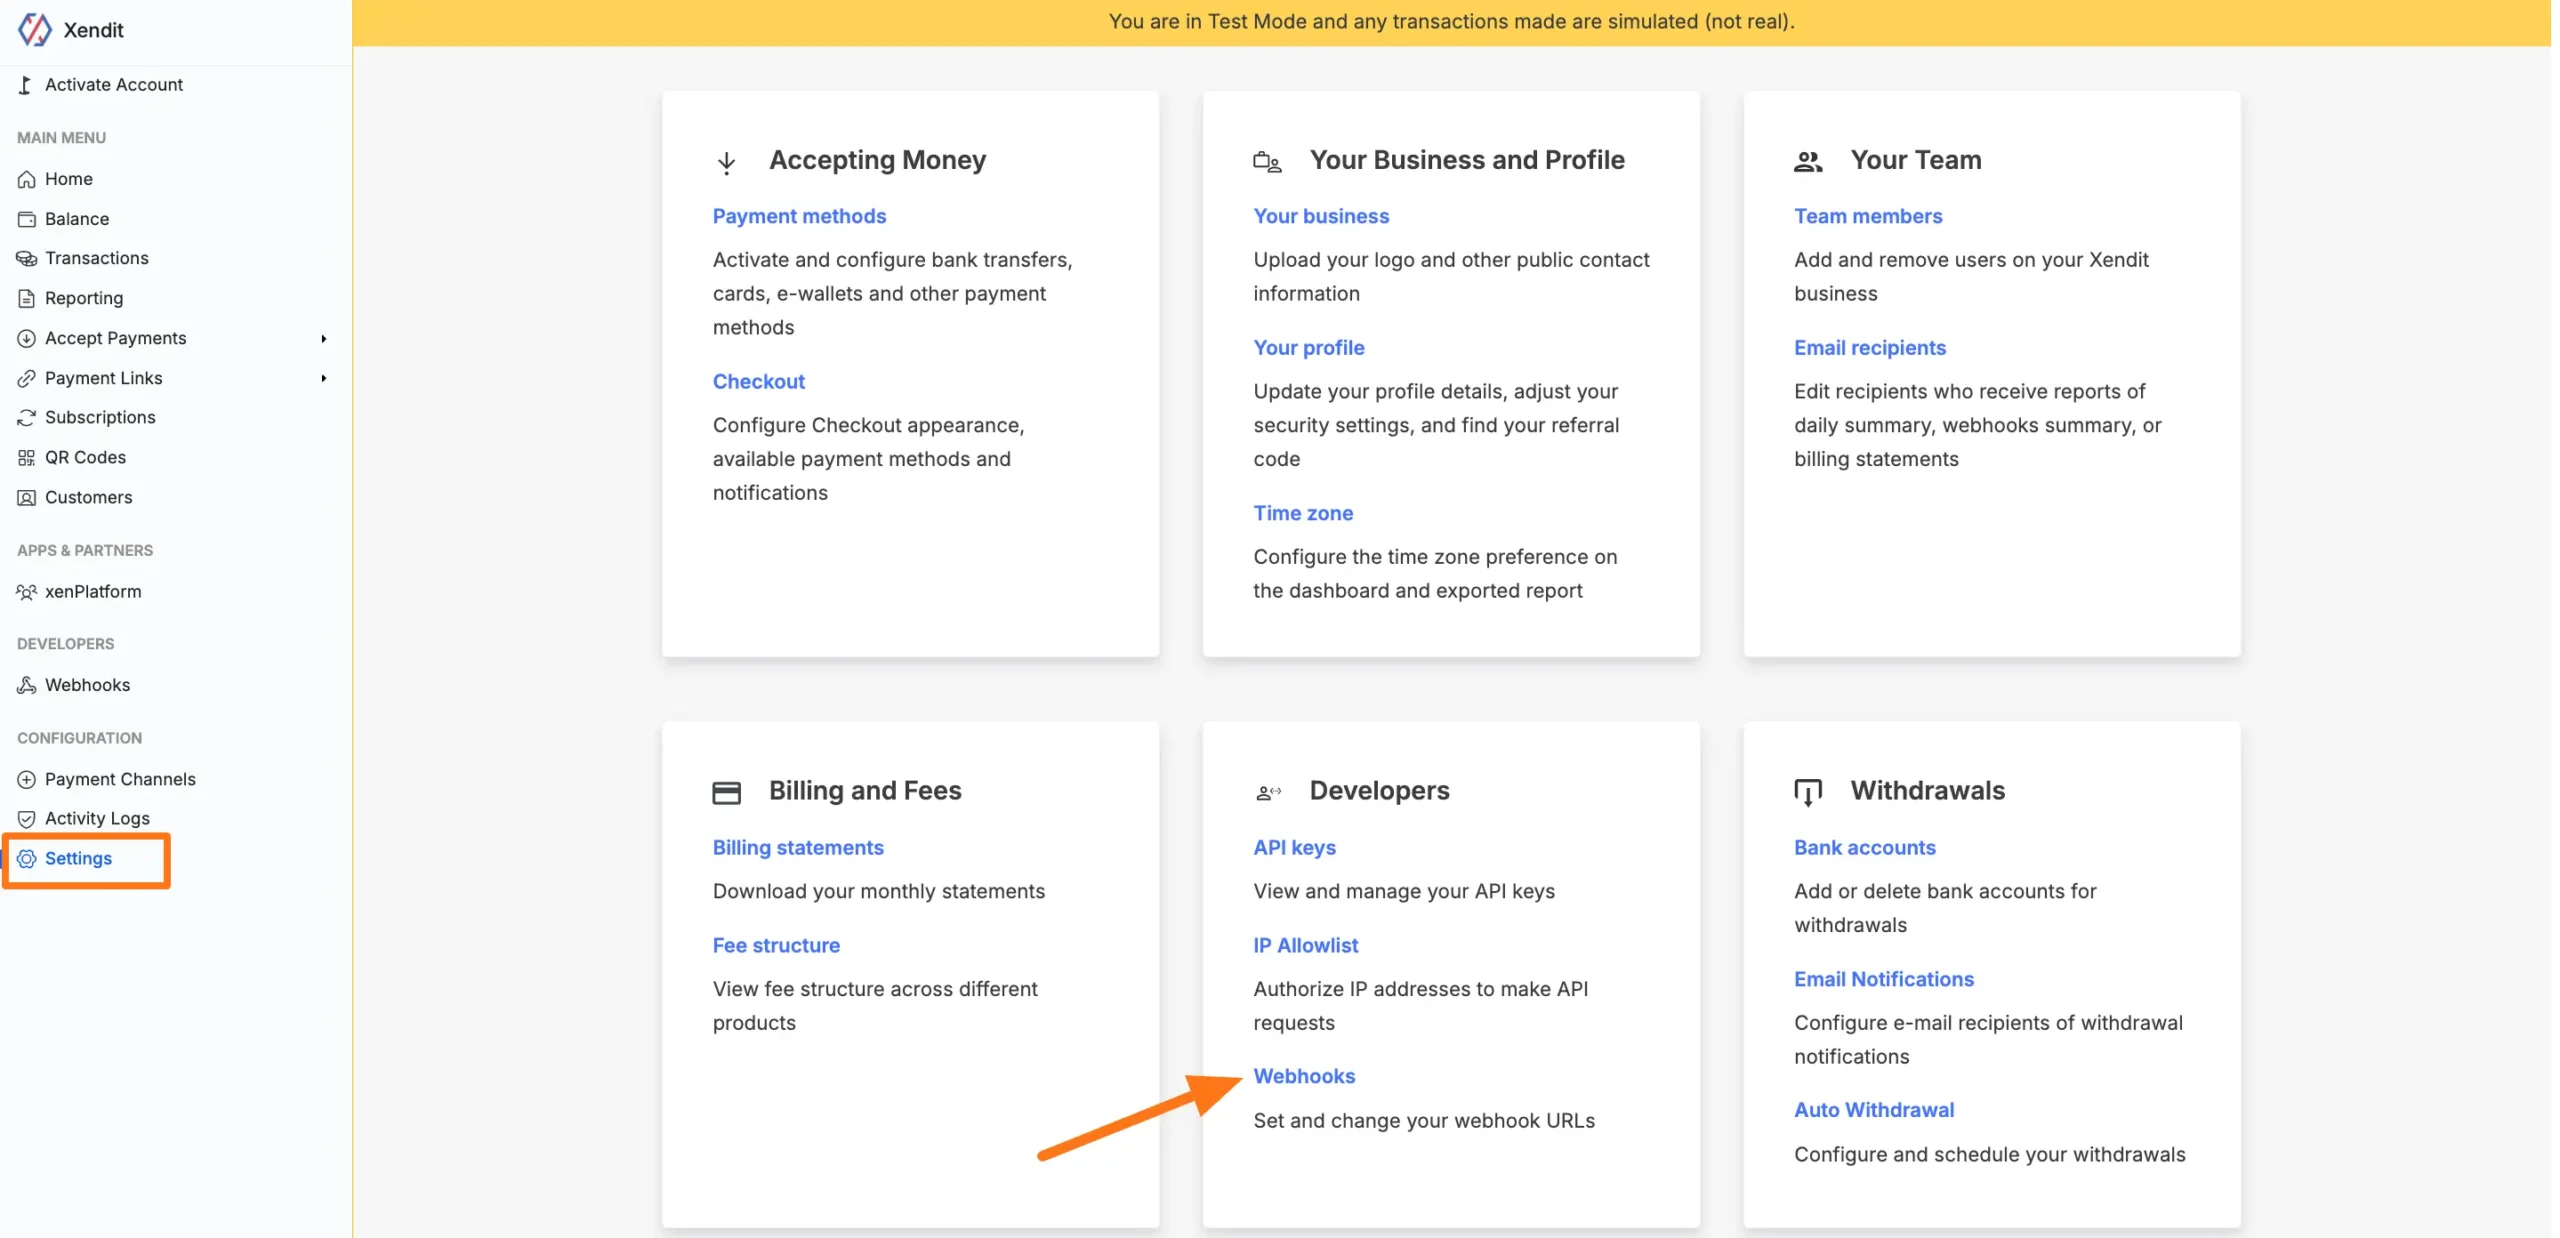
Once you log in to the Xendit Dashboard, go to the Settings section from the left sidebar, and click the API Keys under the Developers tab.
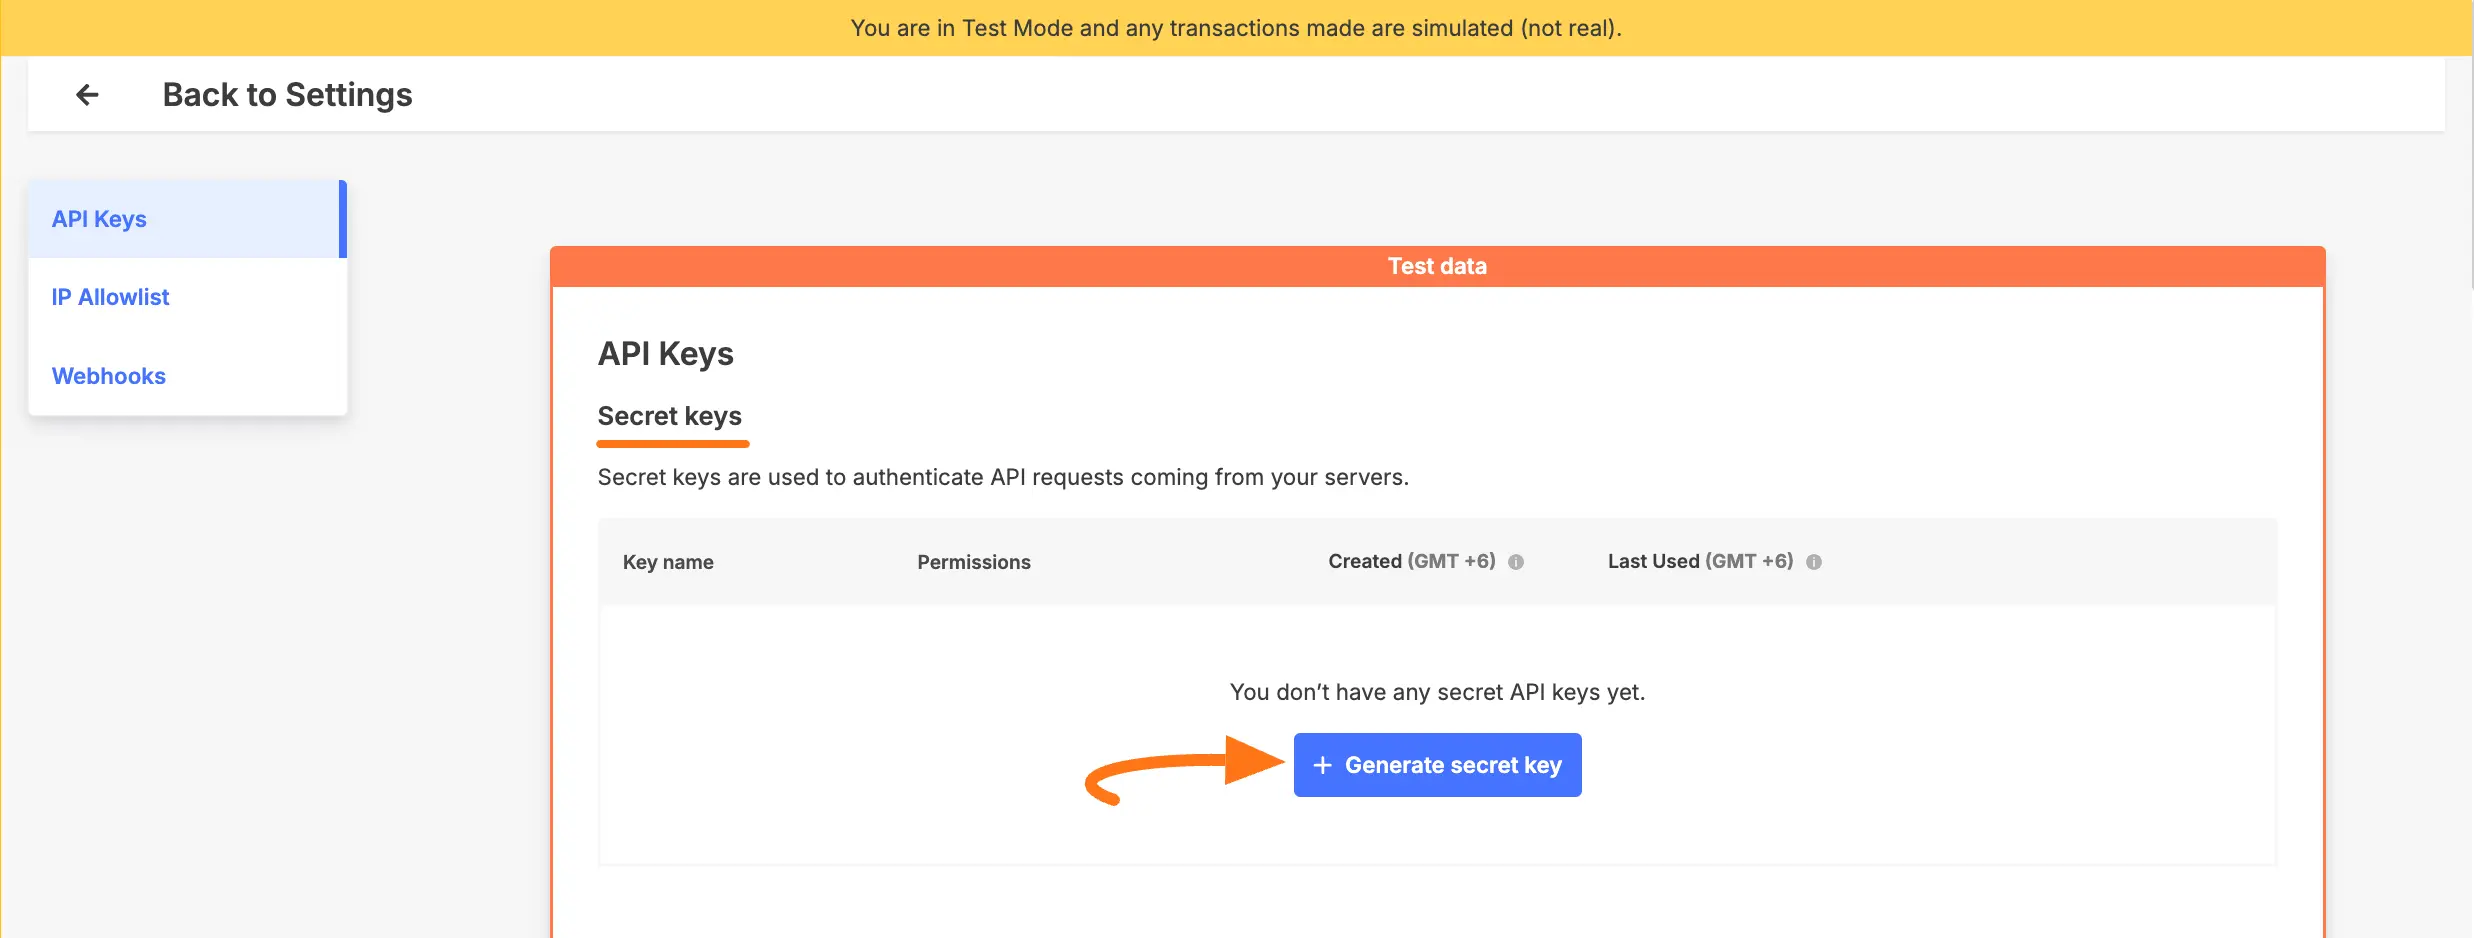
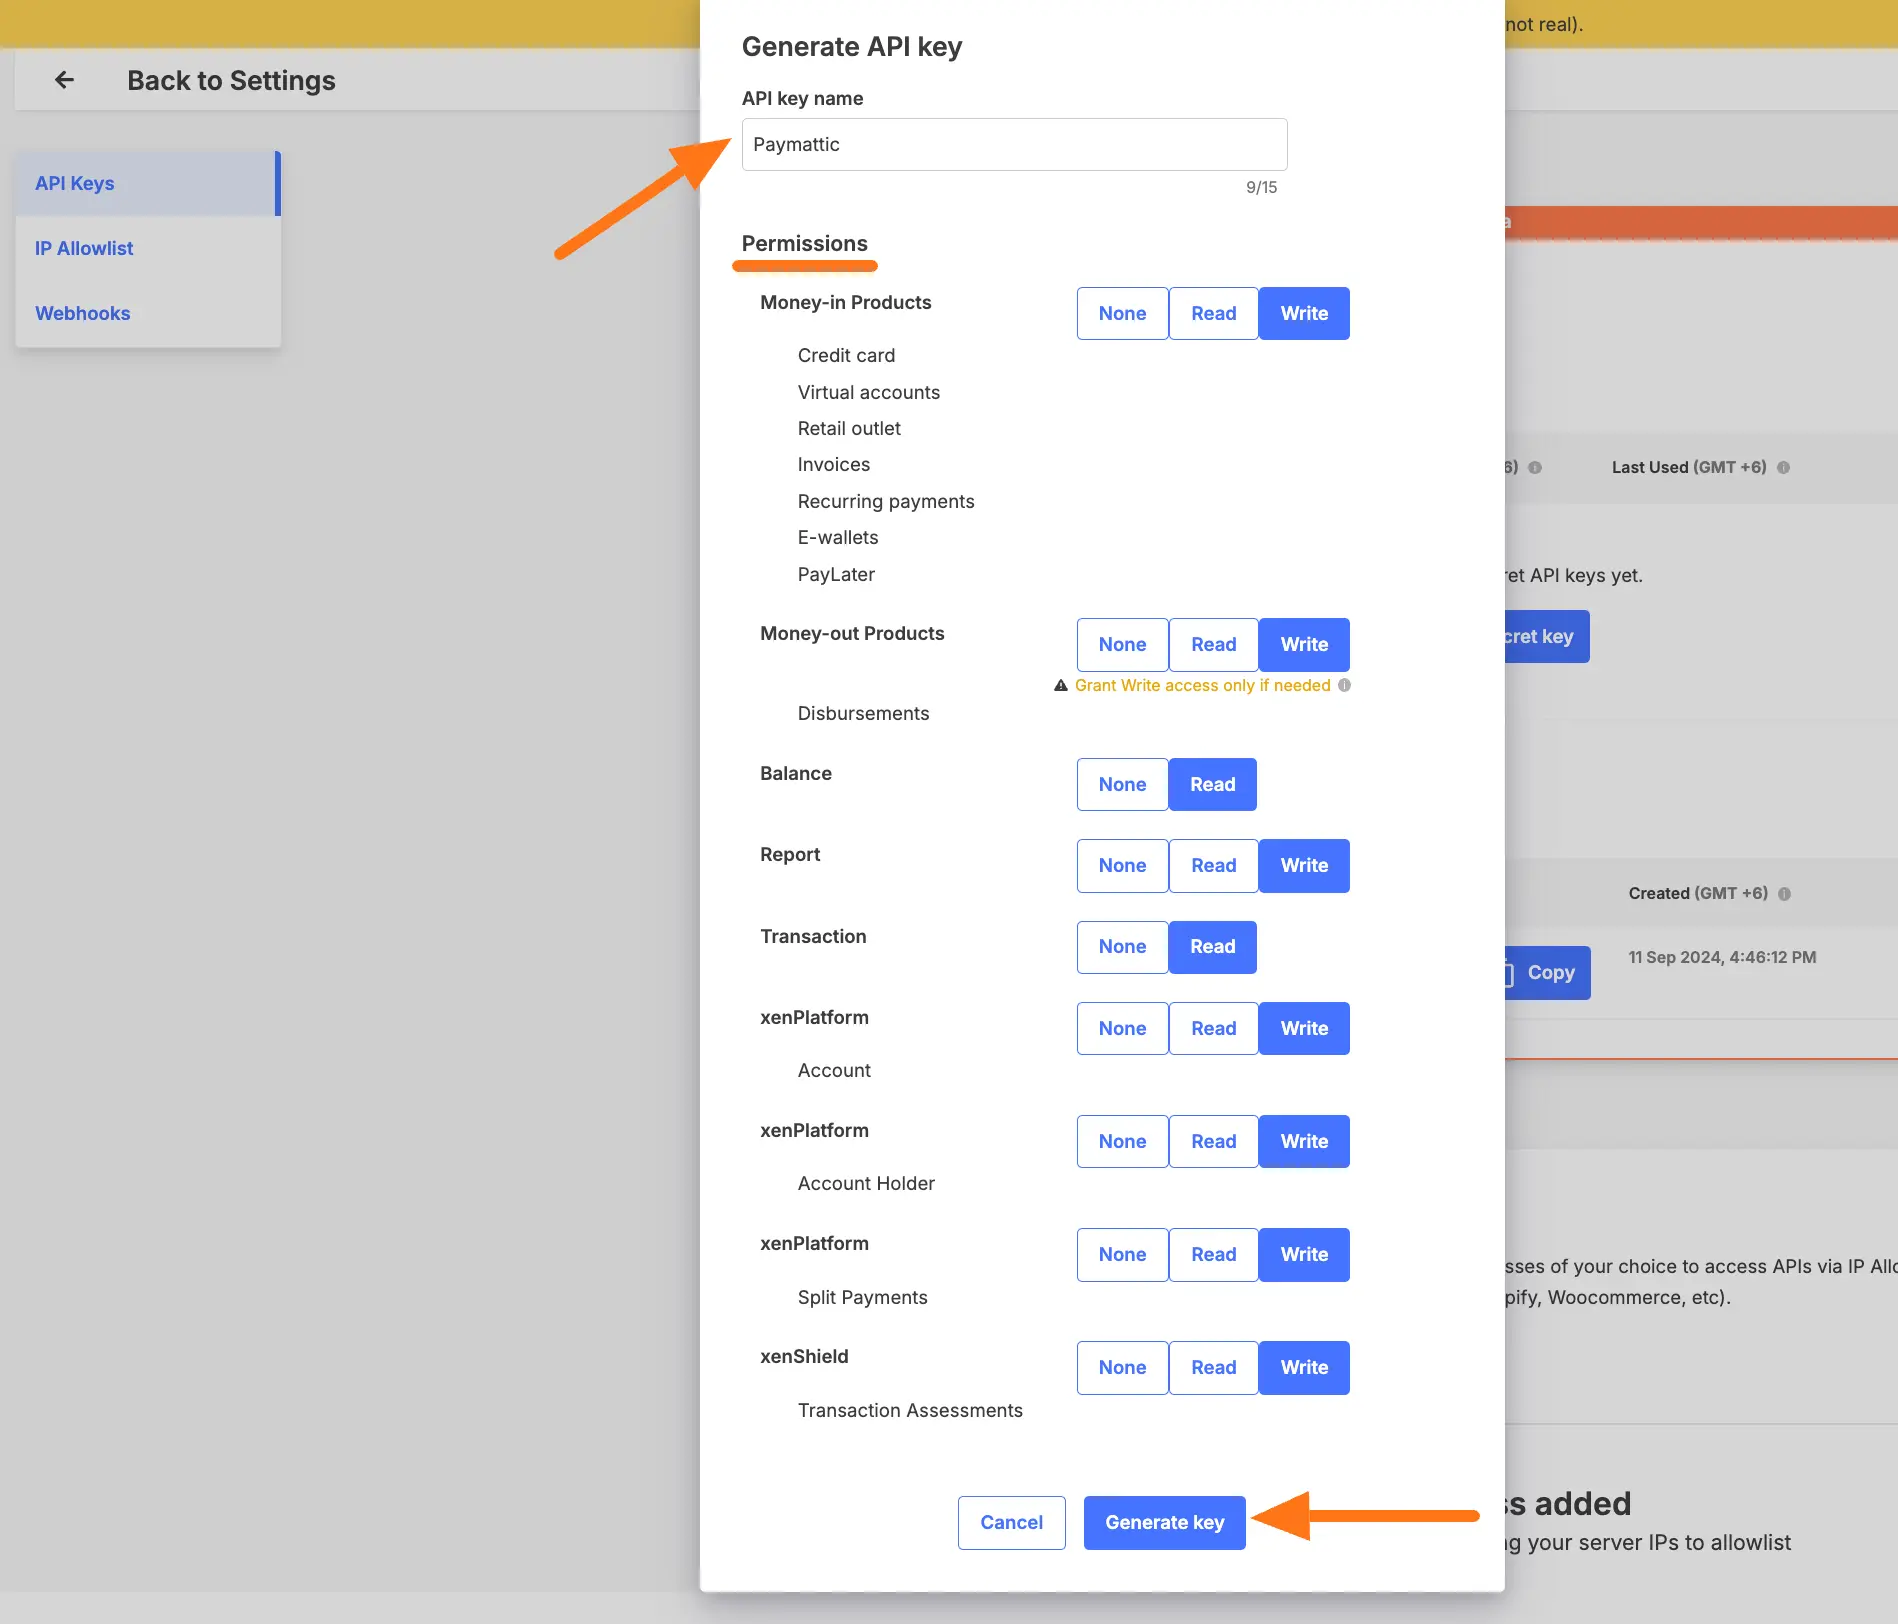
Click the + Generate secret key button and a pop-up page will appear.
Here, give a Name for your API key and set some Permissions for your API. Set the permissions like below:
- Money-in Products – Write
- Money-out Products – Write
- Balance – Read
- Report – Write
- Transaction – Read
- xenPlatform (Account) – Write
- xenPlatform (Account Holder) – Write
- xenPlatform (Split Payments) – Write
- xenShield (Transaction Assessments) – Write
After setting all permissions, click the Generate Key button.
Now another popup will appear confirming the successful generation of your API key.
Click on the Copy button to copy your Secret API Key and save it for future use.
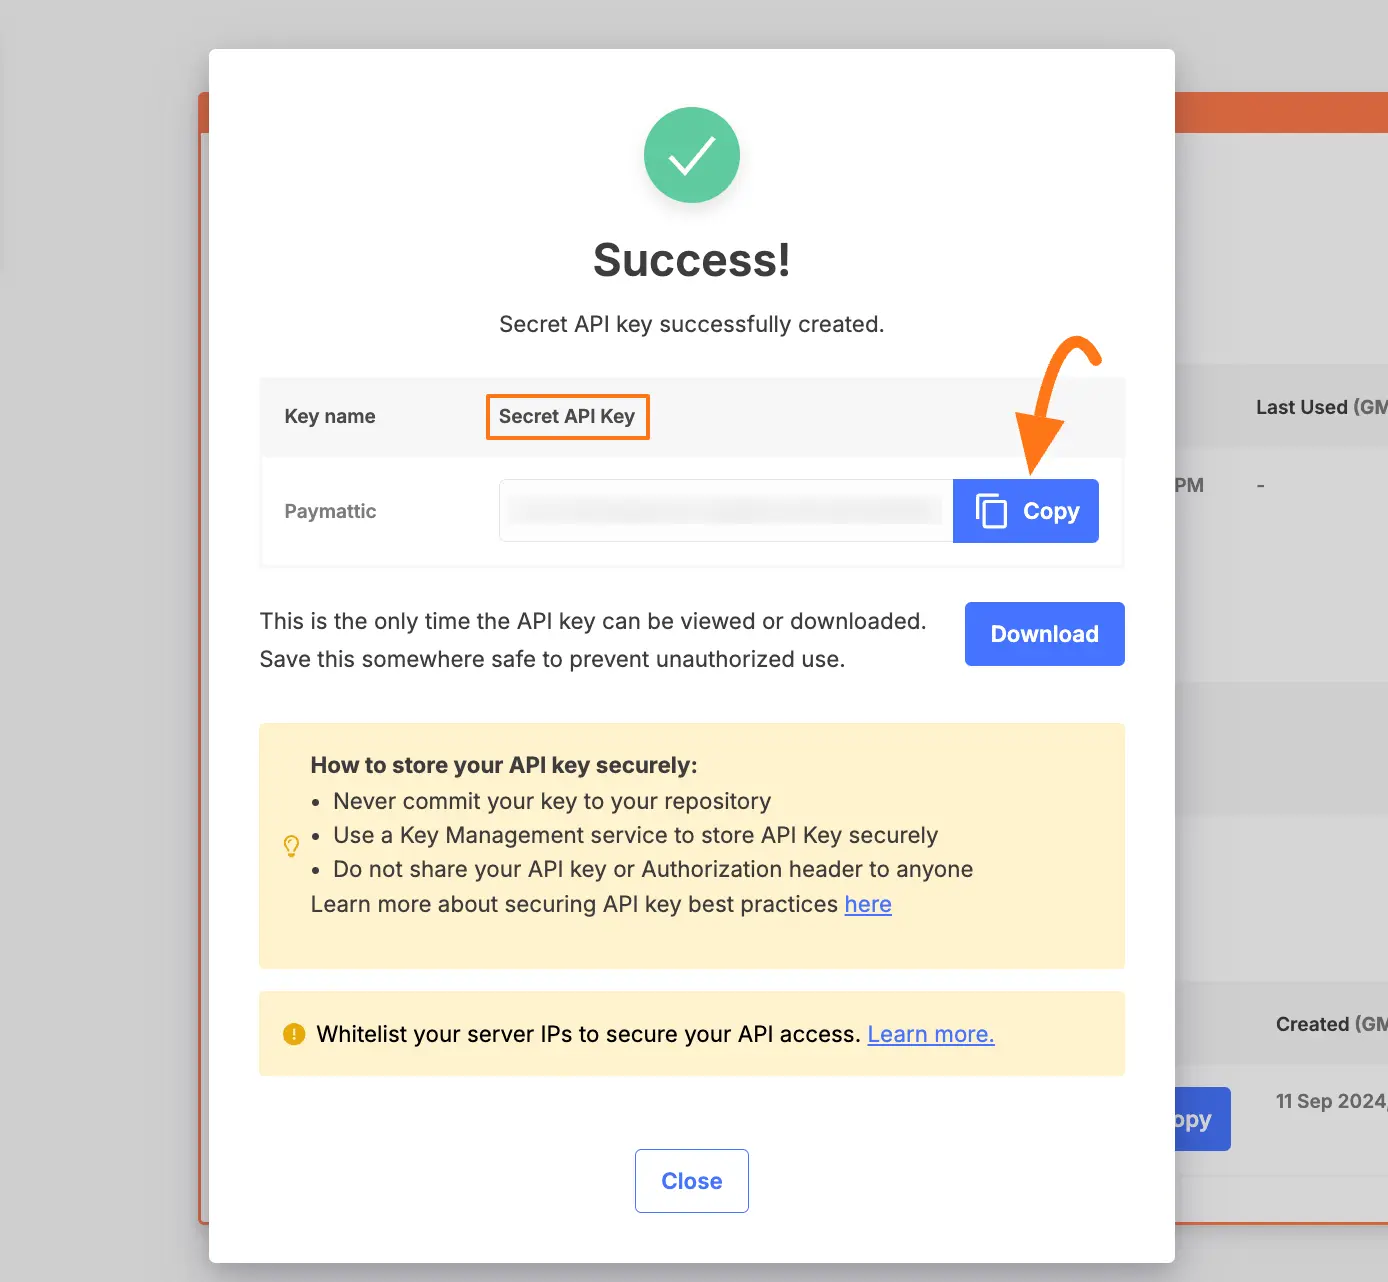
Return to Payment Gateway from the Paymattic Navbar, click the Xendit tab, and paste the copied Secret key into the respective field.
Finally, press the Save Settings button and your Xendit account will be integrated with Paymattic for your WordPress Site.
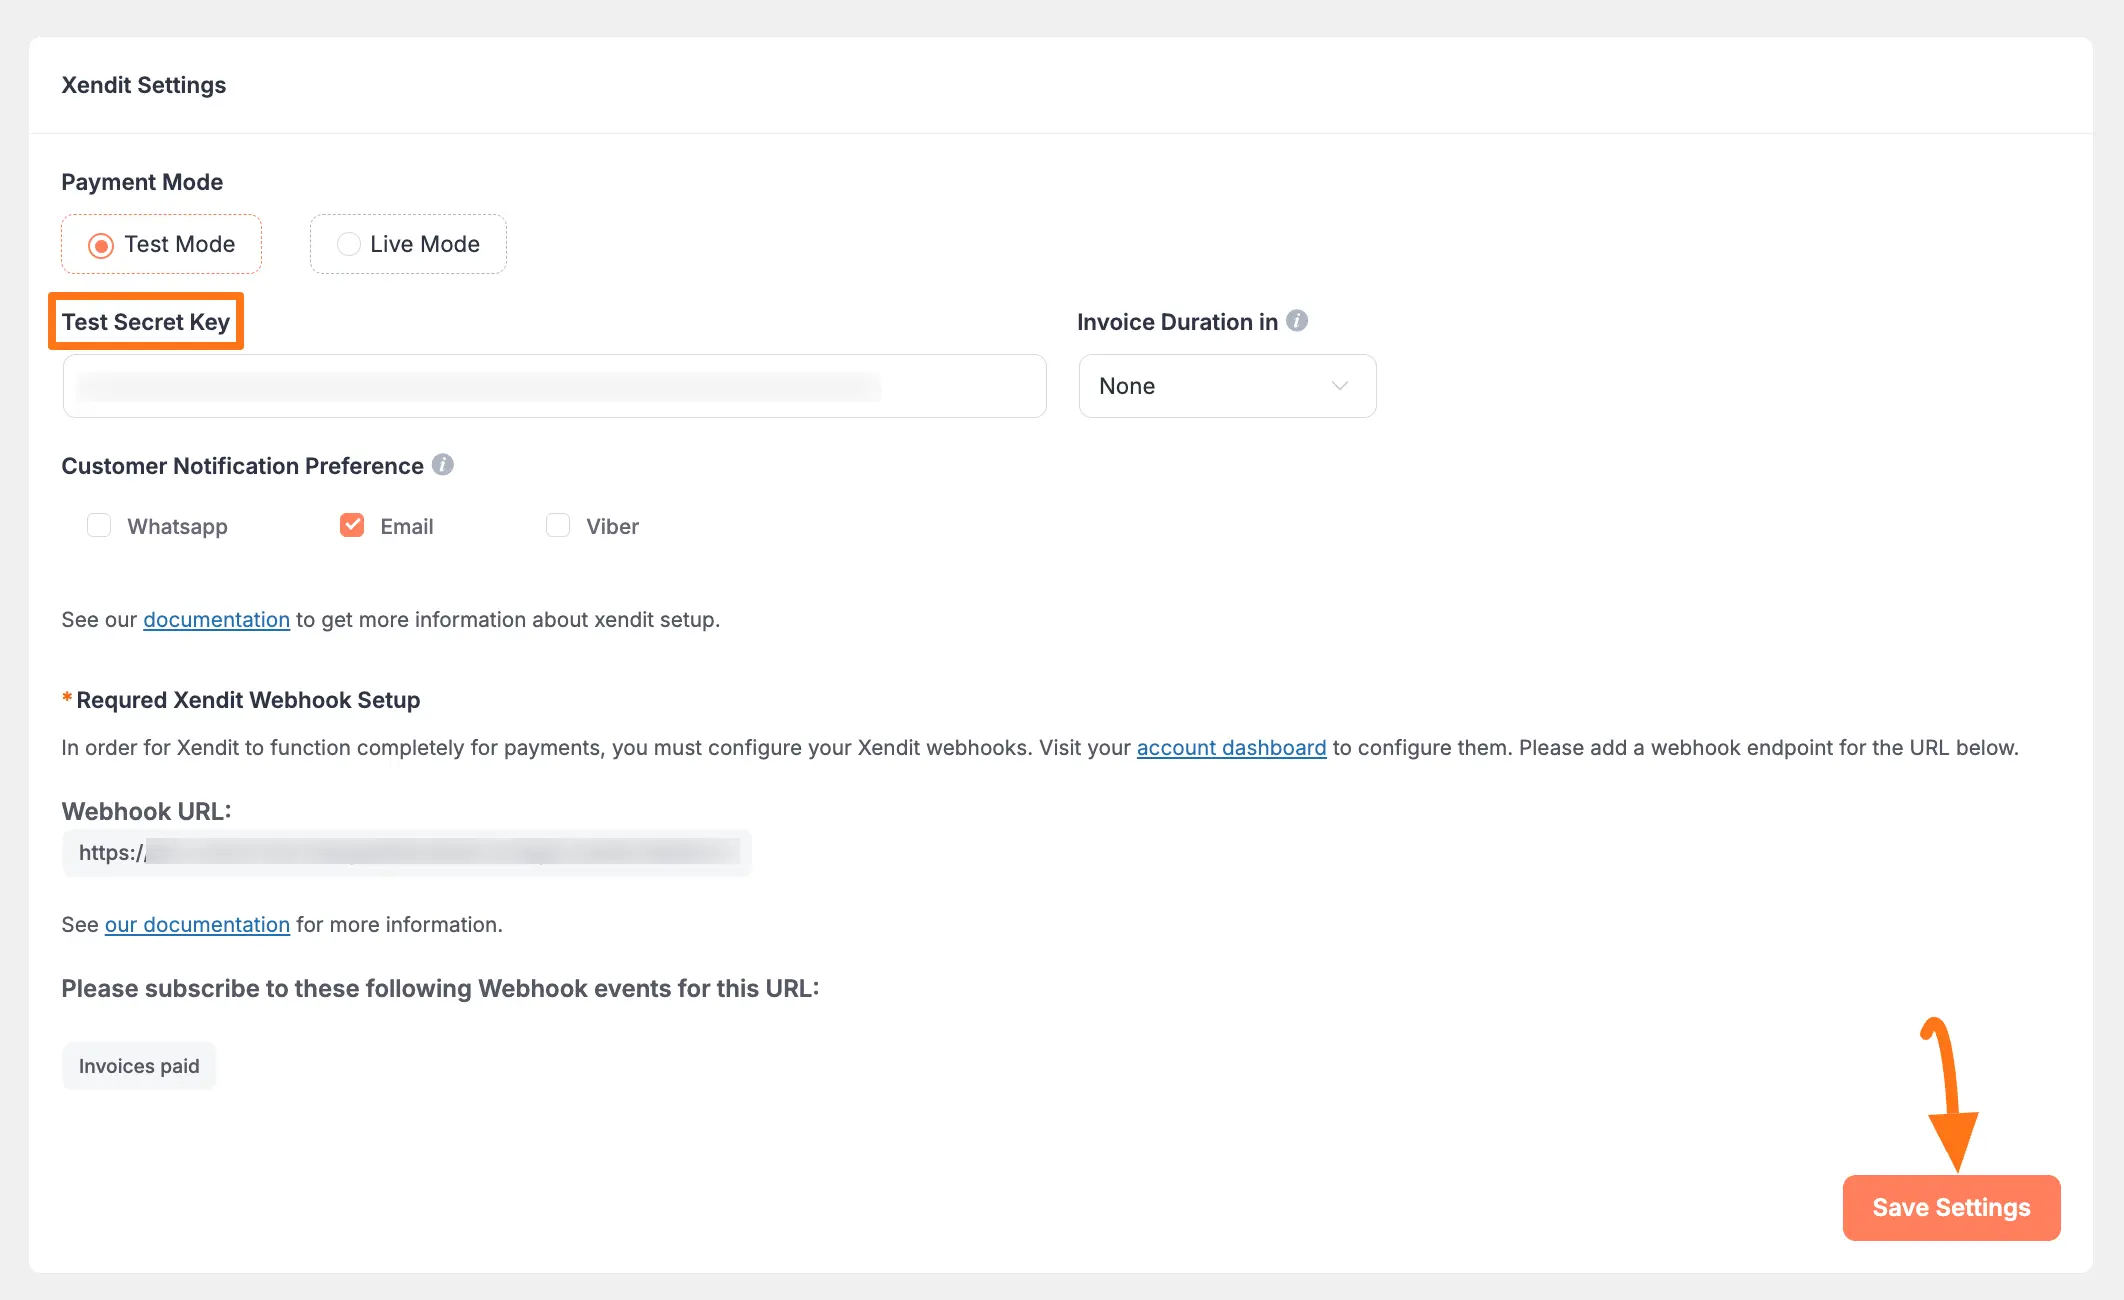
Invoice Duration & Customer Notification Preference #
Once you configure Xendit, you can set up the Invoice Duration in and Customer Notification Preference if needed.
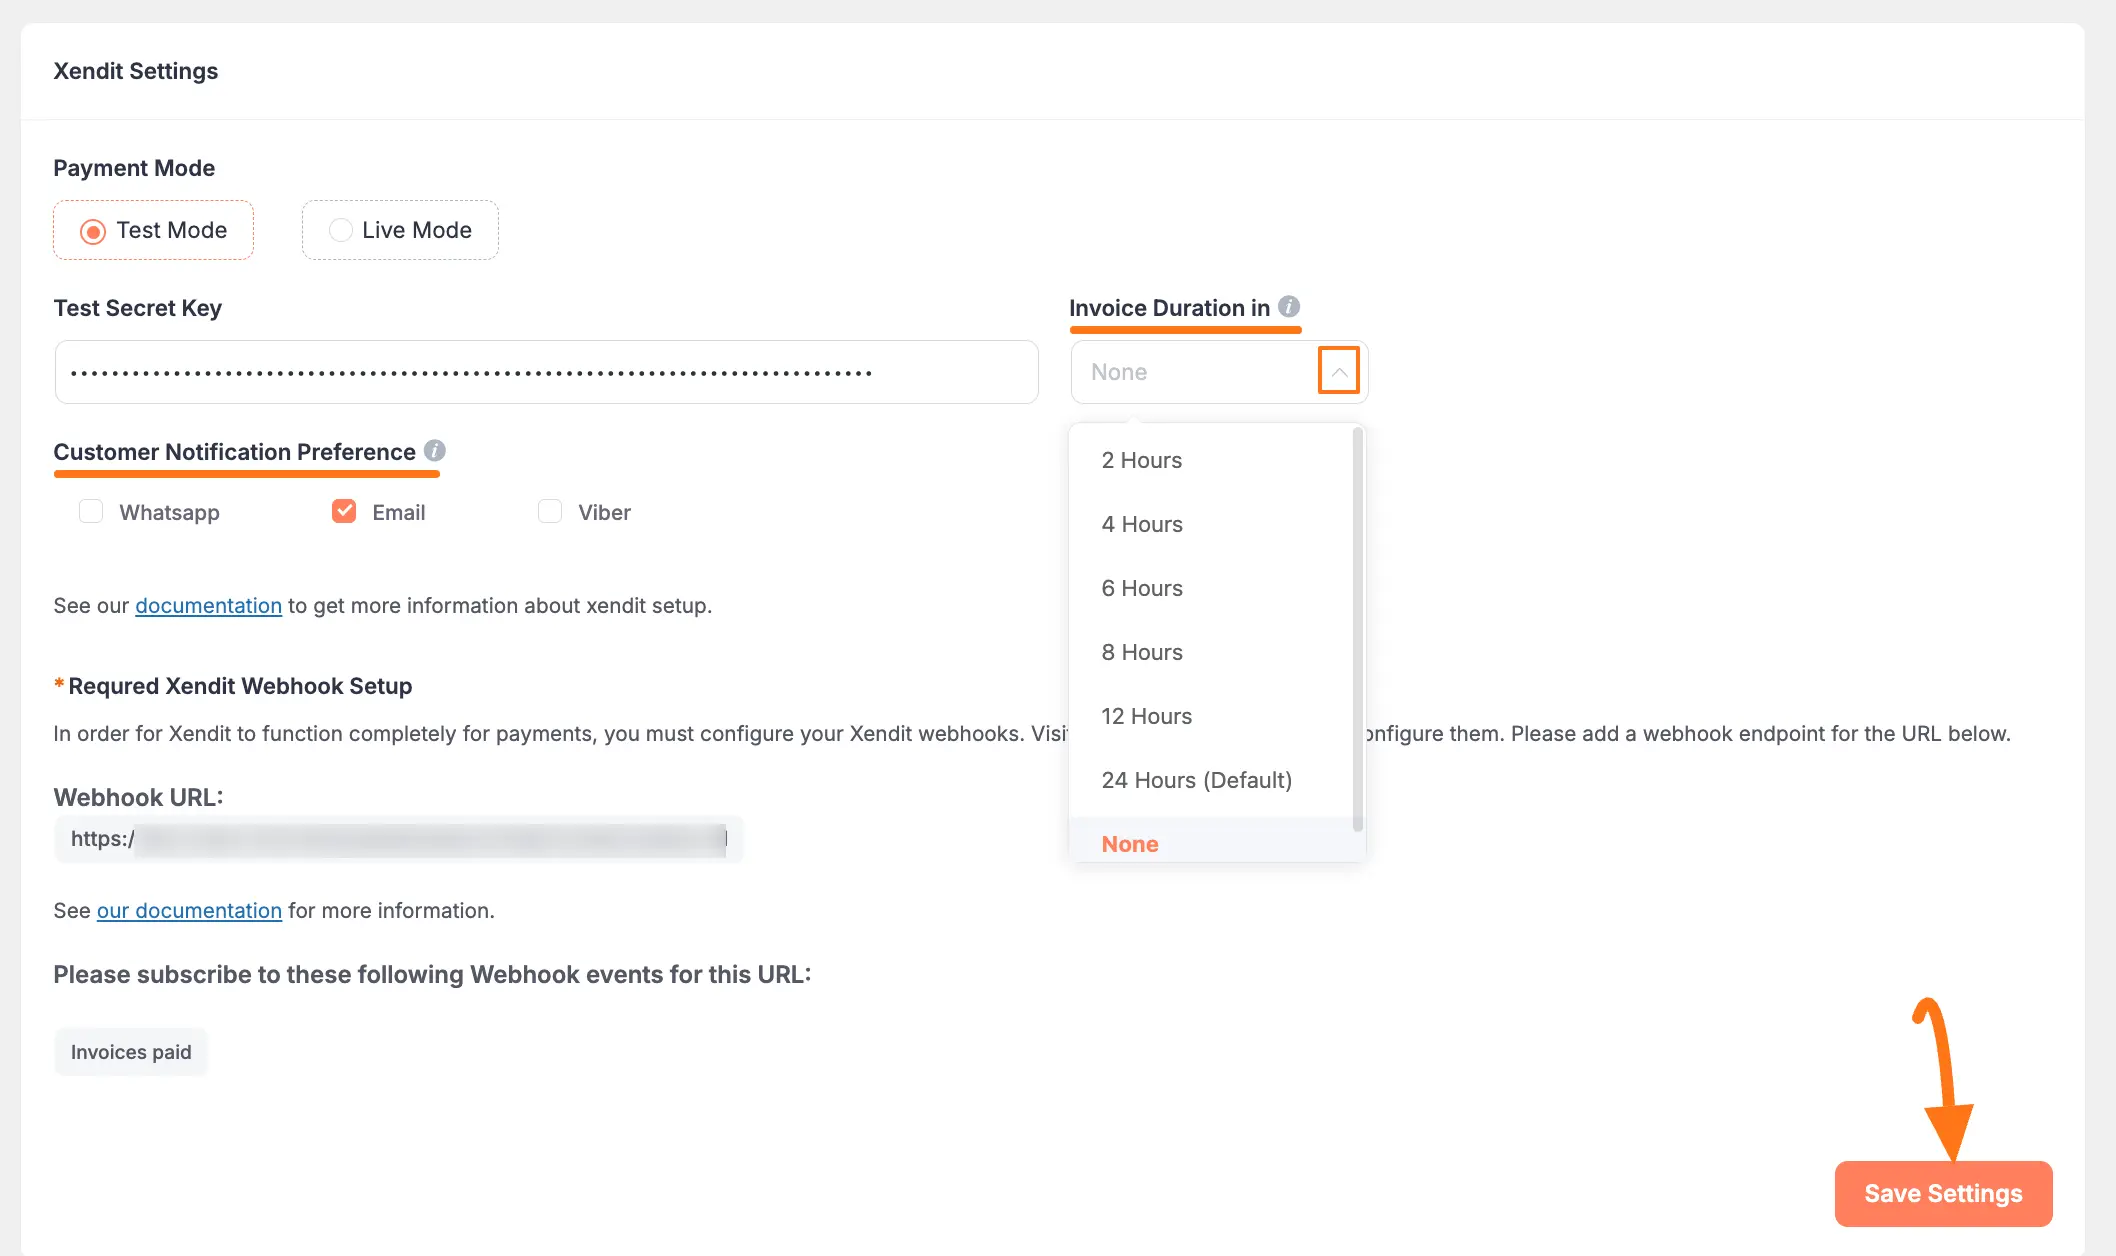
- Invoice Duration: Select the duration from the dropdown list according to your requirements or select None if you want to keep the configuration in the Xendit dashboard for invoice duration. By the way, this setting is optional.
- Customer Notification Preference: Select the notification preference of your choice for the customer.
Remember, always press the Save Settings button to save the changes you made on your Xendit Settings page.
Add Xendit Webhooks #
To learn how to configure the Xendit Webhooks to your WordPress Site, follow the steps with the screenshots below –
To ensure your Xendit dashboard and Paymattic dashboard are in sync, you must configure the Xendit Webhooks.
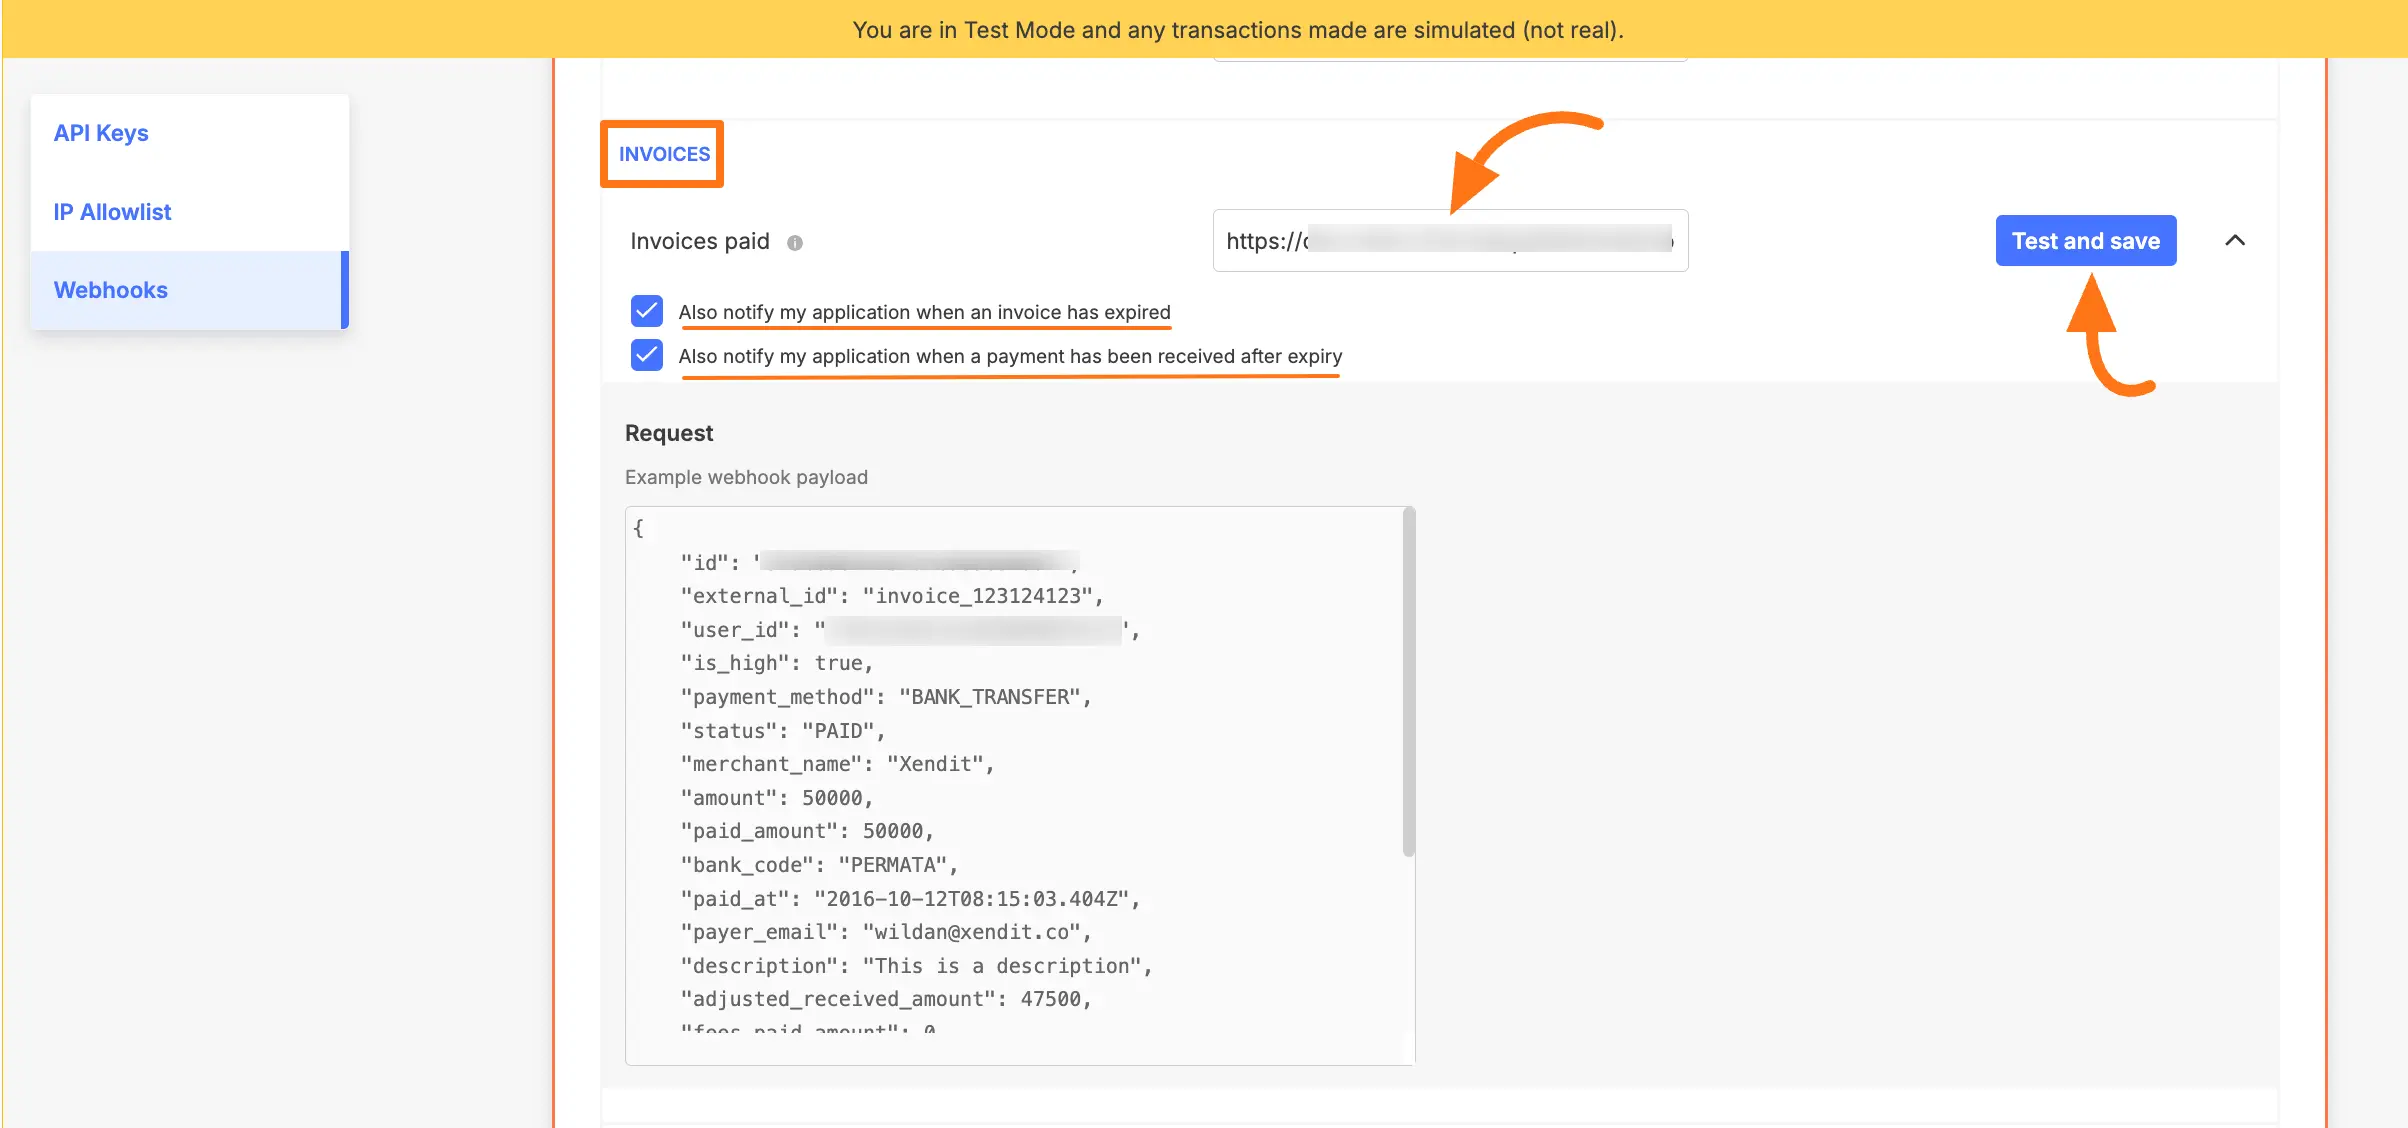
First, copy the Webhook URL and paste it to the suggested Webhook Event of Xendit for smooth transactions based on Xendit Data.
Now, visit your Xendit Dashboard, go to the Settings section from the left sidebar, and click the Webhooks under the Developers tab.
Now, scroll down to Invoices section and paste the Webhook URL you have copied from the Xendit Settings in Paymattic.
Finally, check heck the Notification Boxes and click the Test and Save button. And, the Xendit Webhooks will be configured with your WordPress Site!
Add Xendit in Forms #
Once you finish setting up your Xendit payment gateway, you can easily add this payment method to any of your existing Payment Form.
If you do not have any existing forms, read Create a Form from Scratch or Create a Form using Templates documentation.
To learn the detailed process of adding a payment method to an existing form, read this Documentation.
But, remember, the added Xendit payment method in your Form will not function unless you complete the configuration process properly.
If you have any further questions, concerns, or suggestions, please do not hesitate to contact our @support team. Thank you.


