Google Sheets is the best spreadsheet application built by Google. Now, you can integrate Google Sheets in WordPress with the Paymattic WordPress payment plugin.
Google Sheets integration is a pro feature of Paymattic. Upgrade to Paymattic pro to avail this feature.
Let’s dive into this simple article to learn how to integrate Google Sheets with Paymattic.
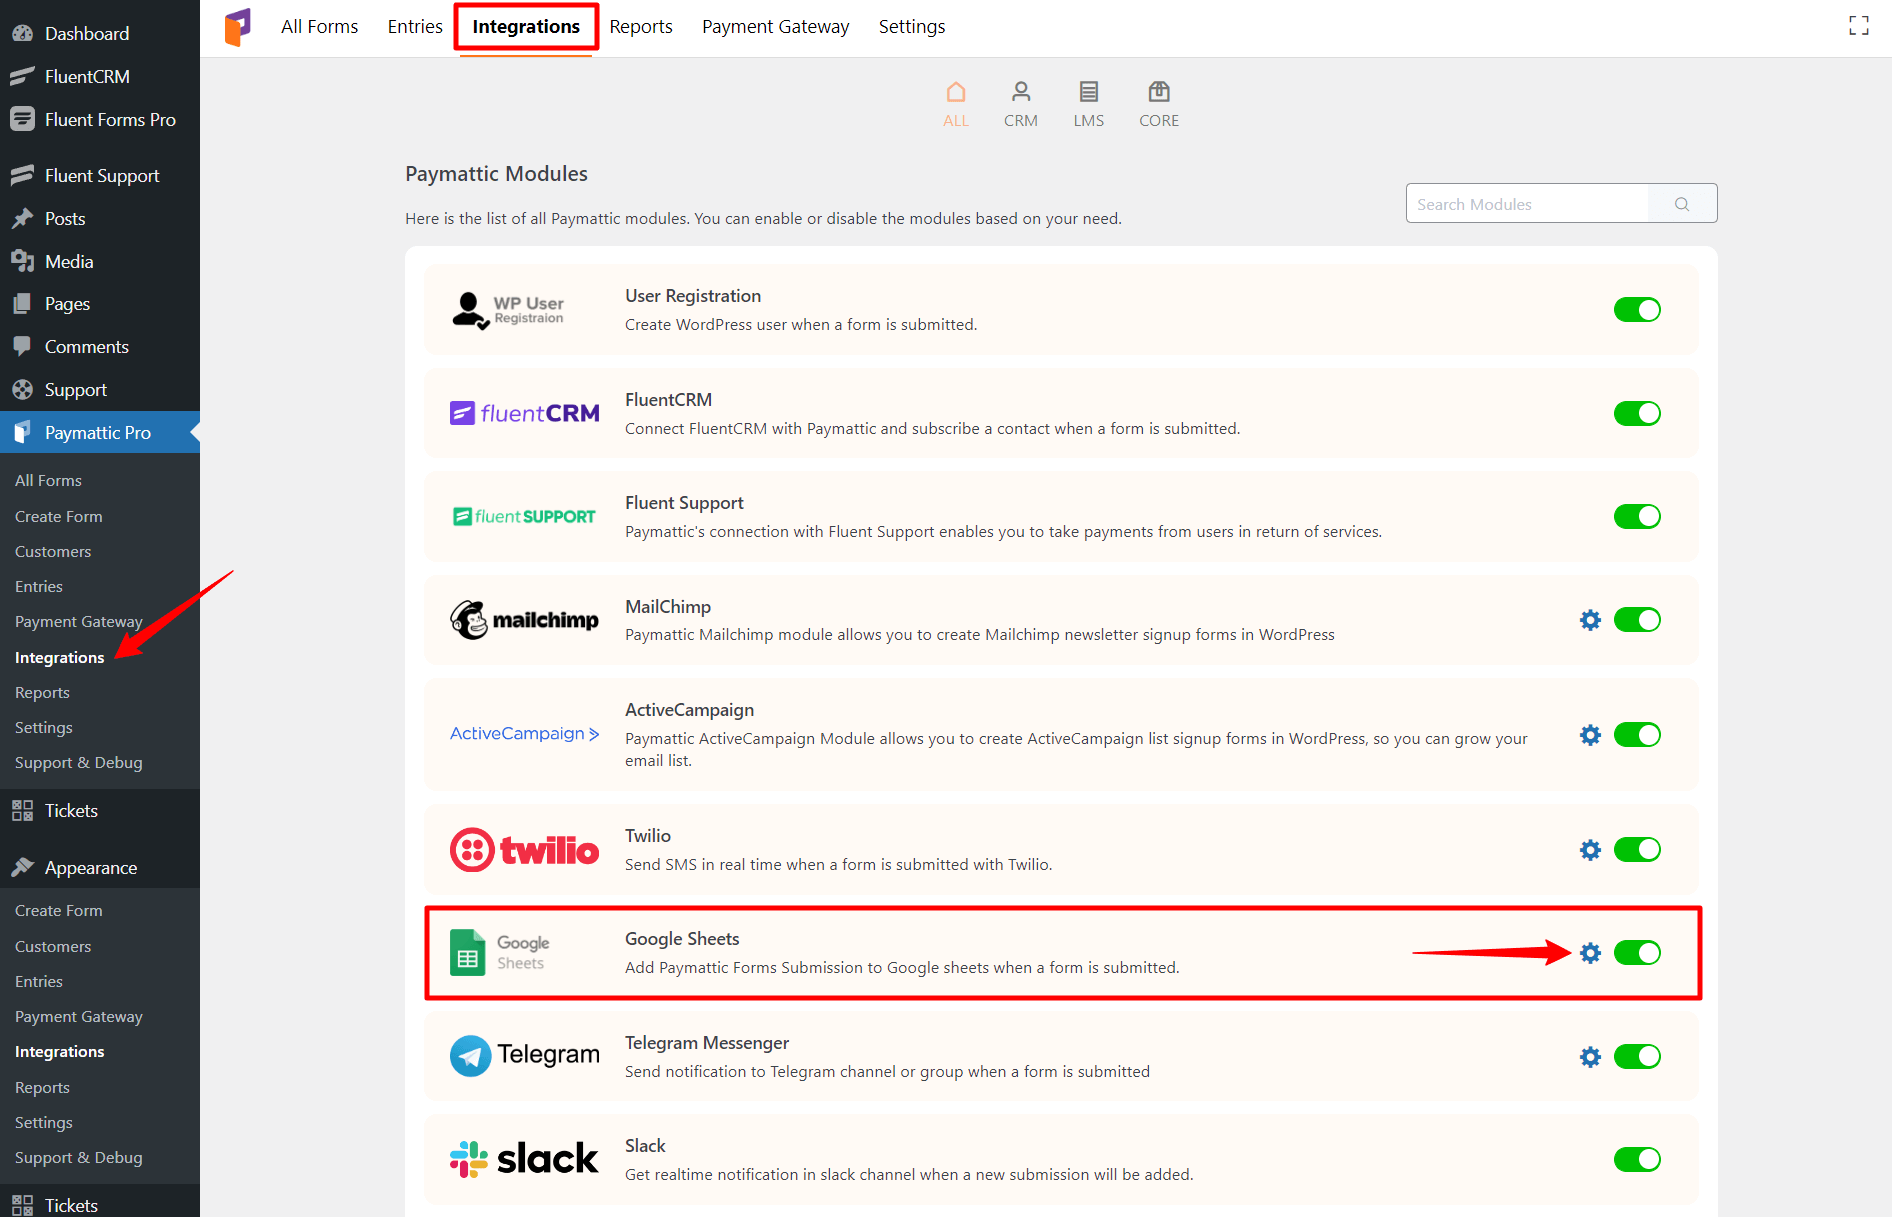
- First, go to the Paymattic Pro → Integrations from your WordPress admin dashboard & then Enable Google Sheets from the Paymattic Modules page.
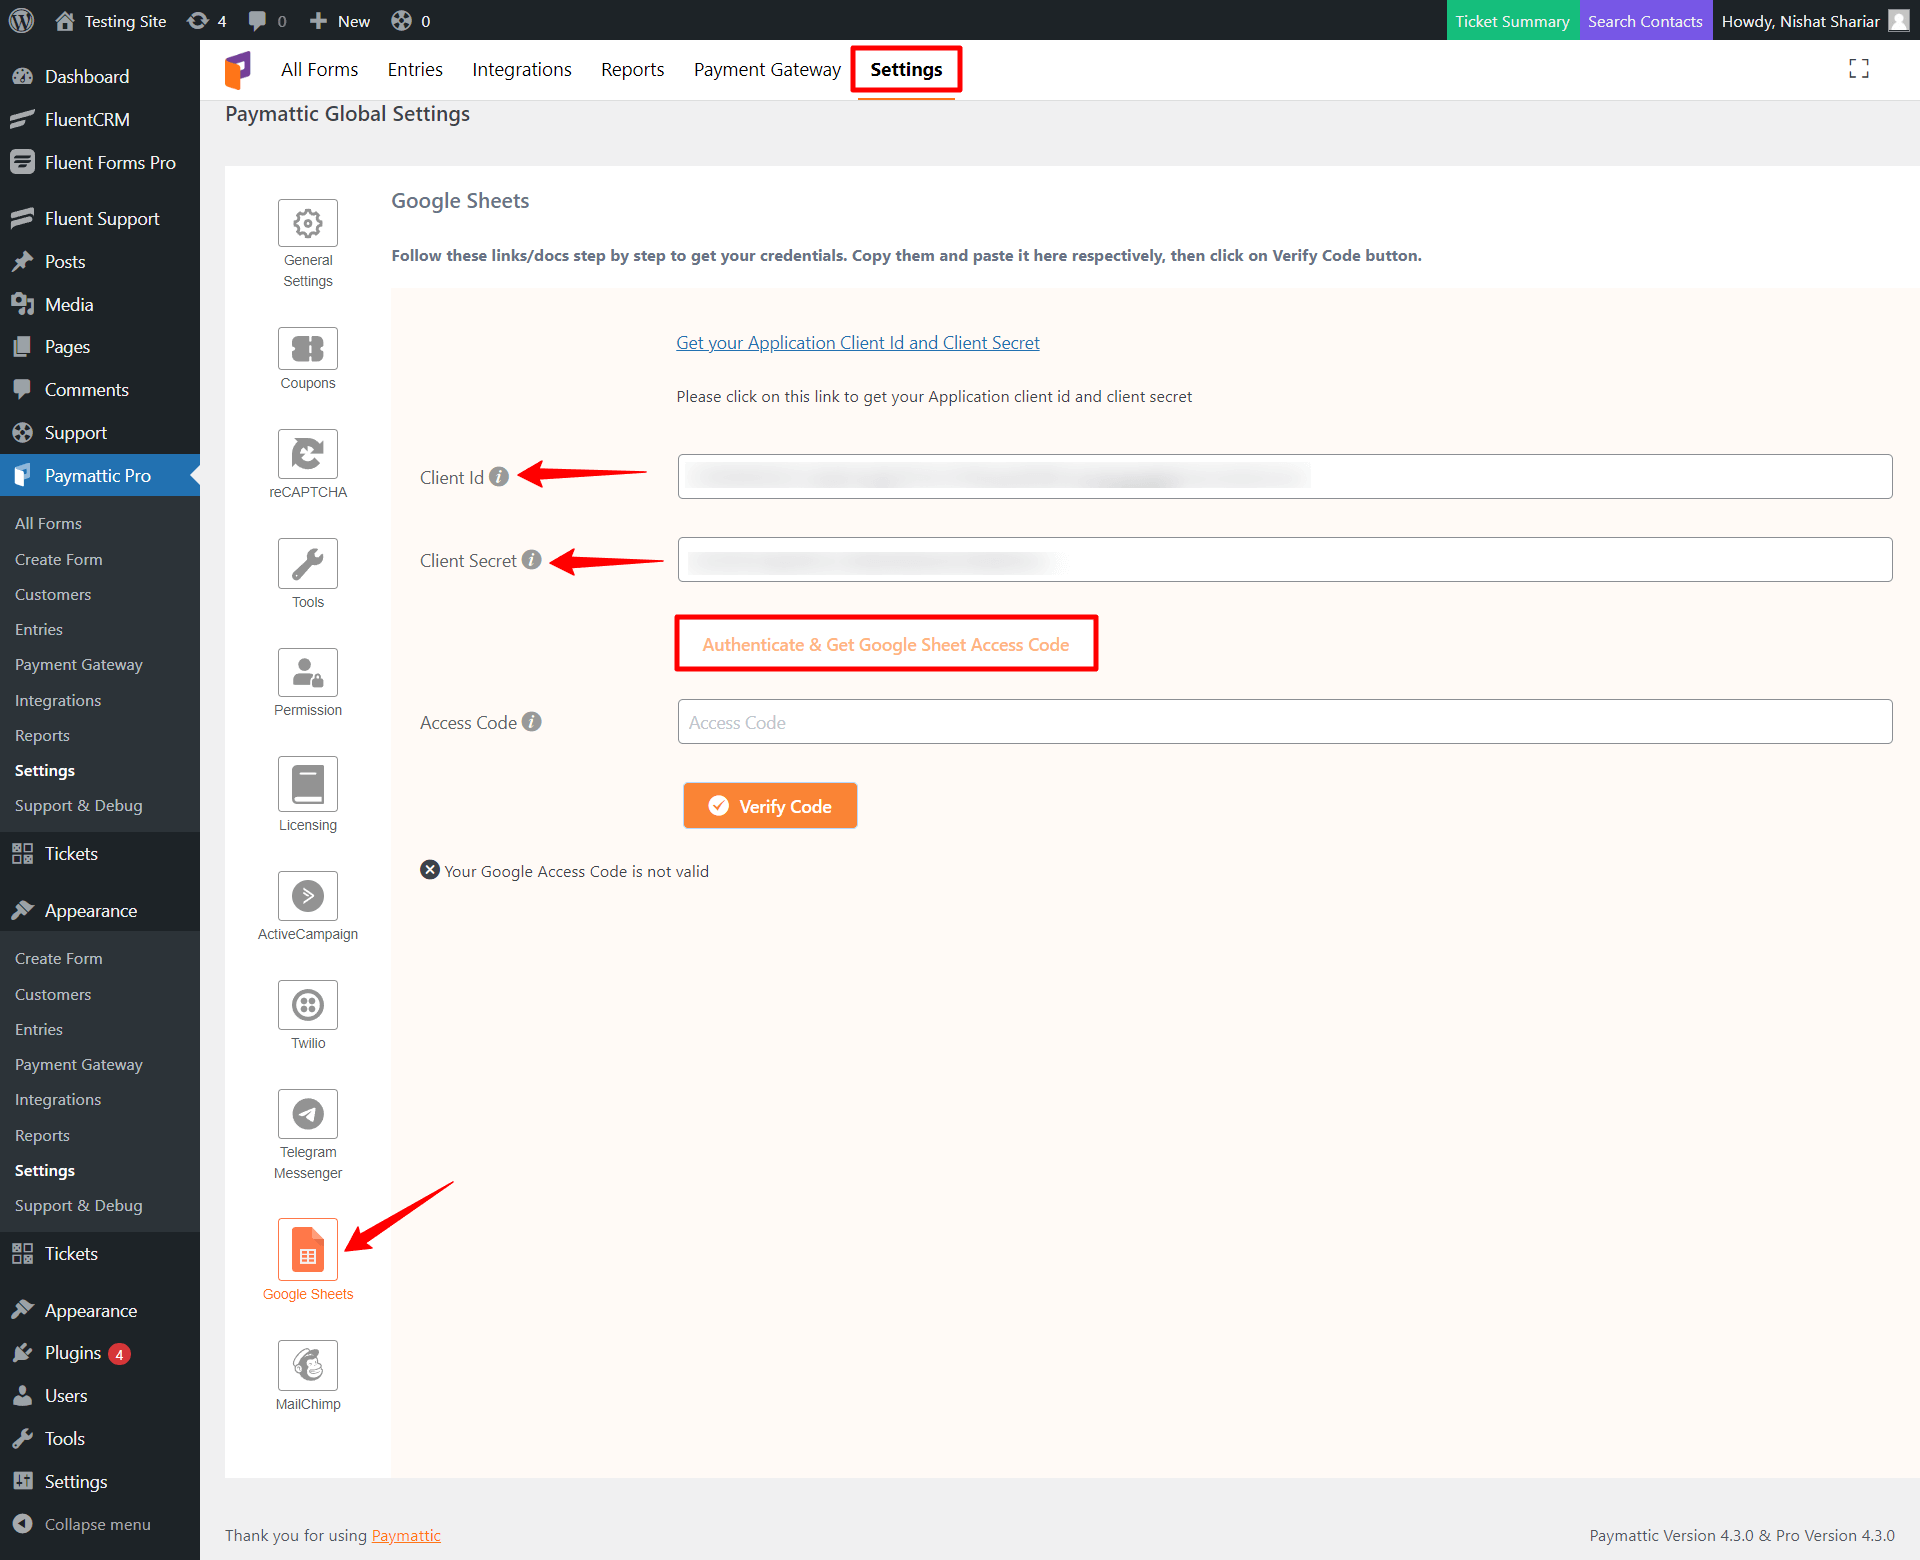
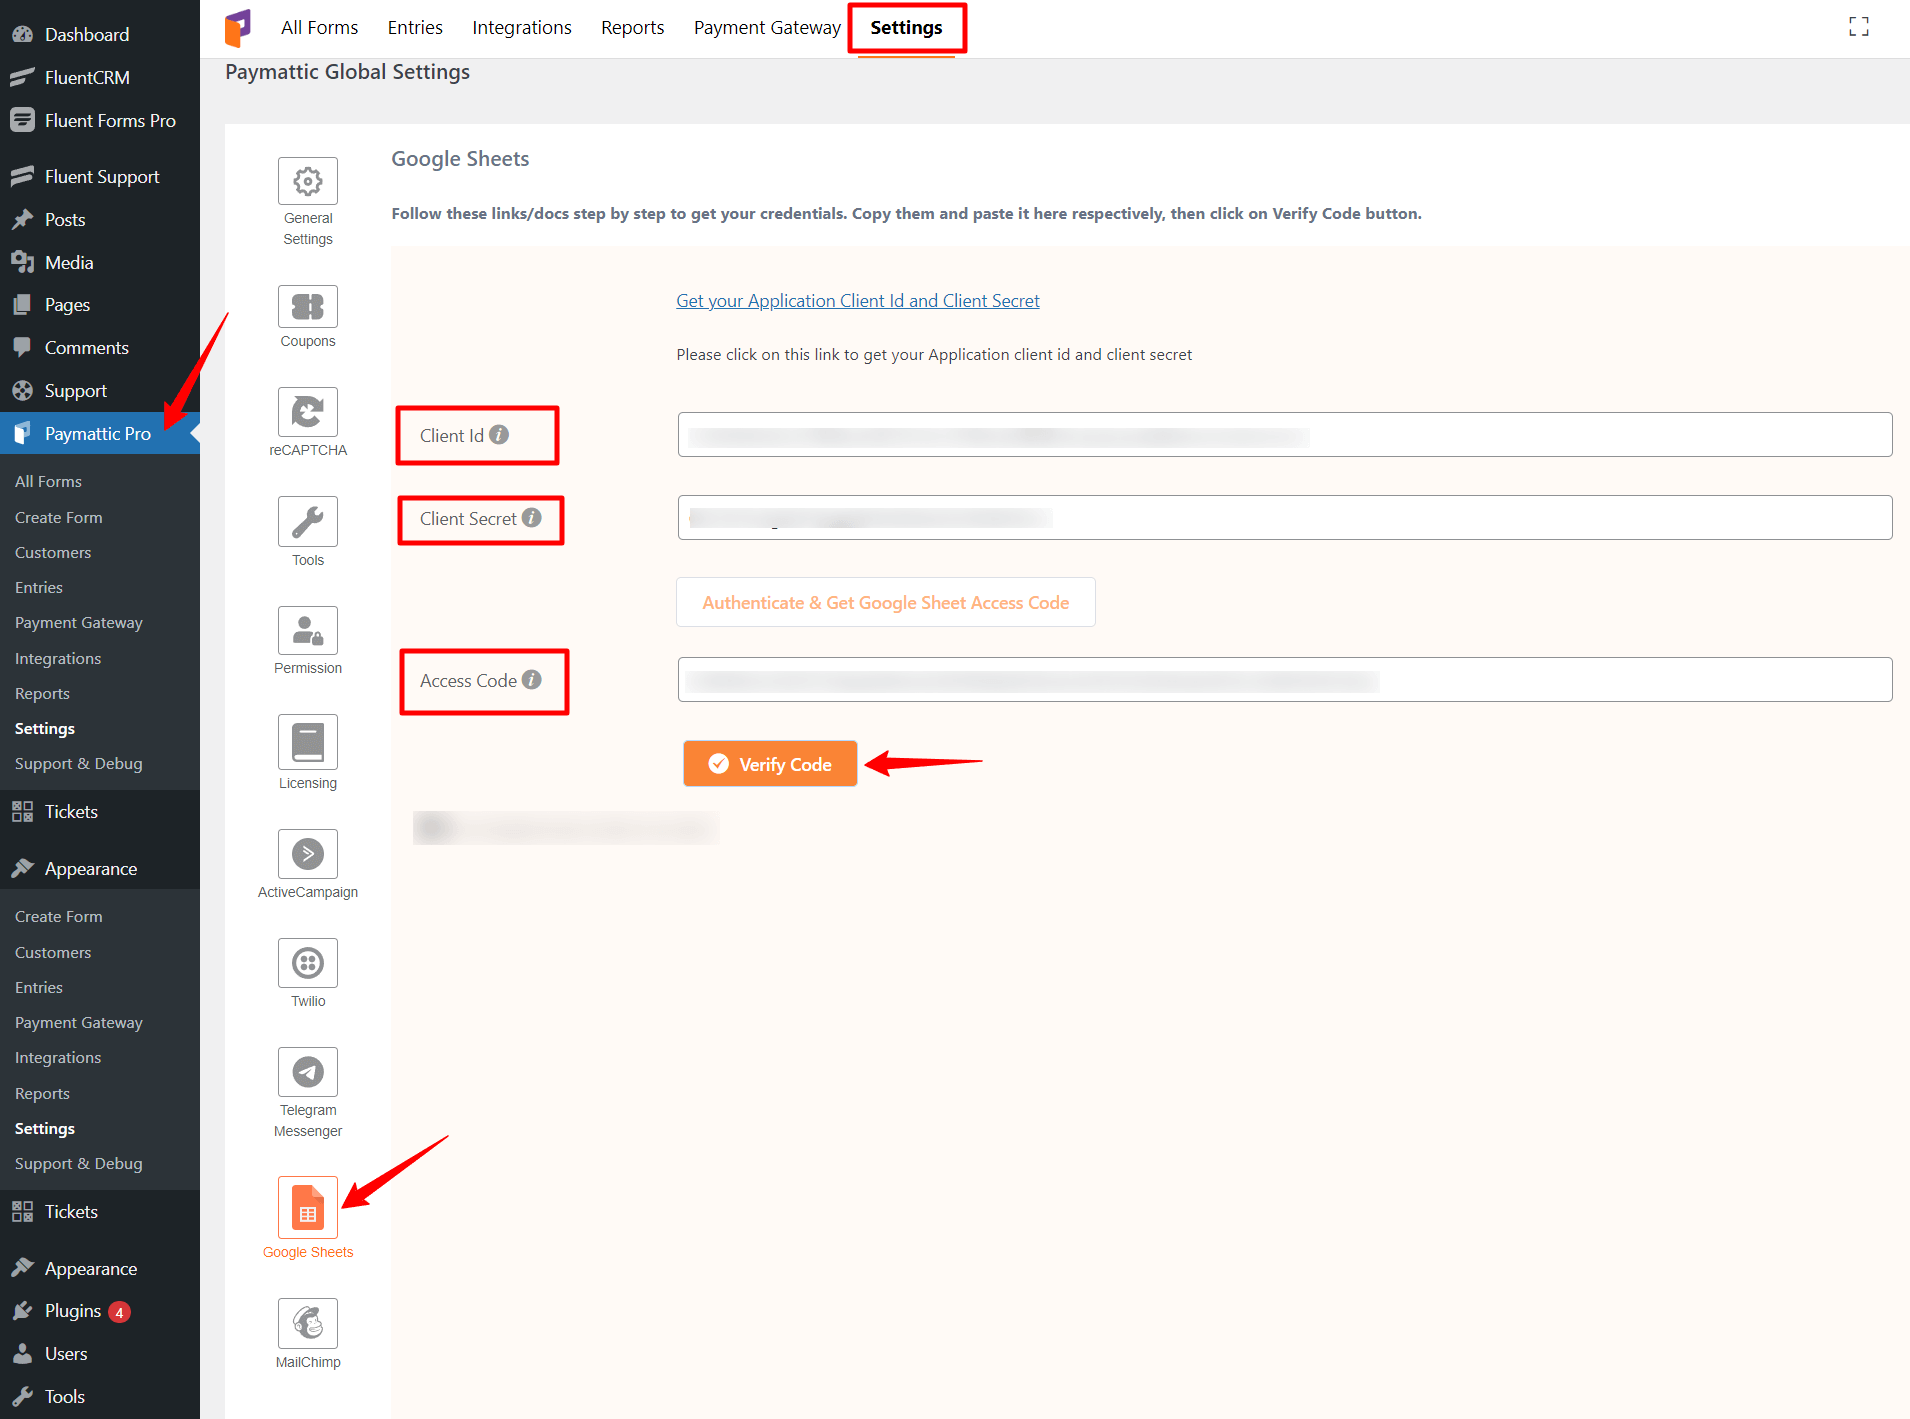
- Now, go to Paymattic (Pro) → Settings and click on Google Sheets from the left sidebar. Here, you will need the Client Id, Client Secret & Access Code to go to the further steps.
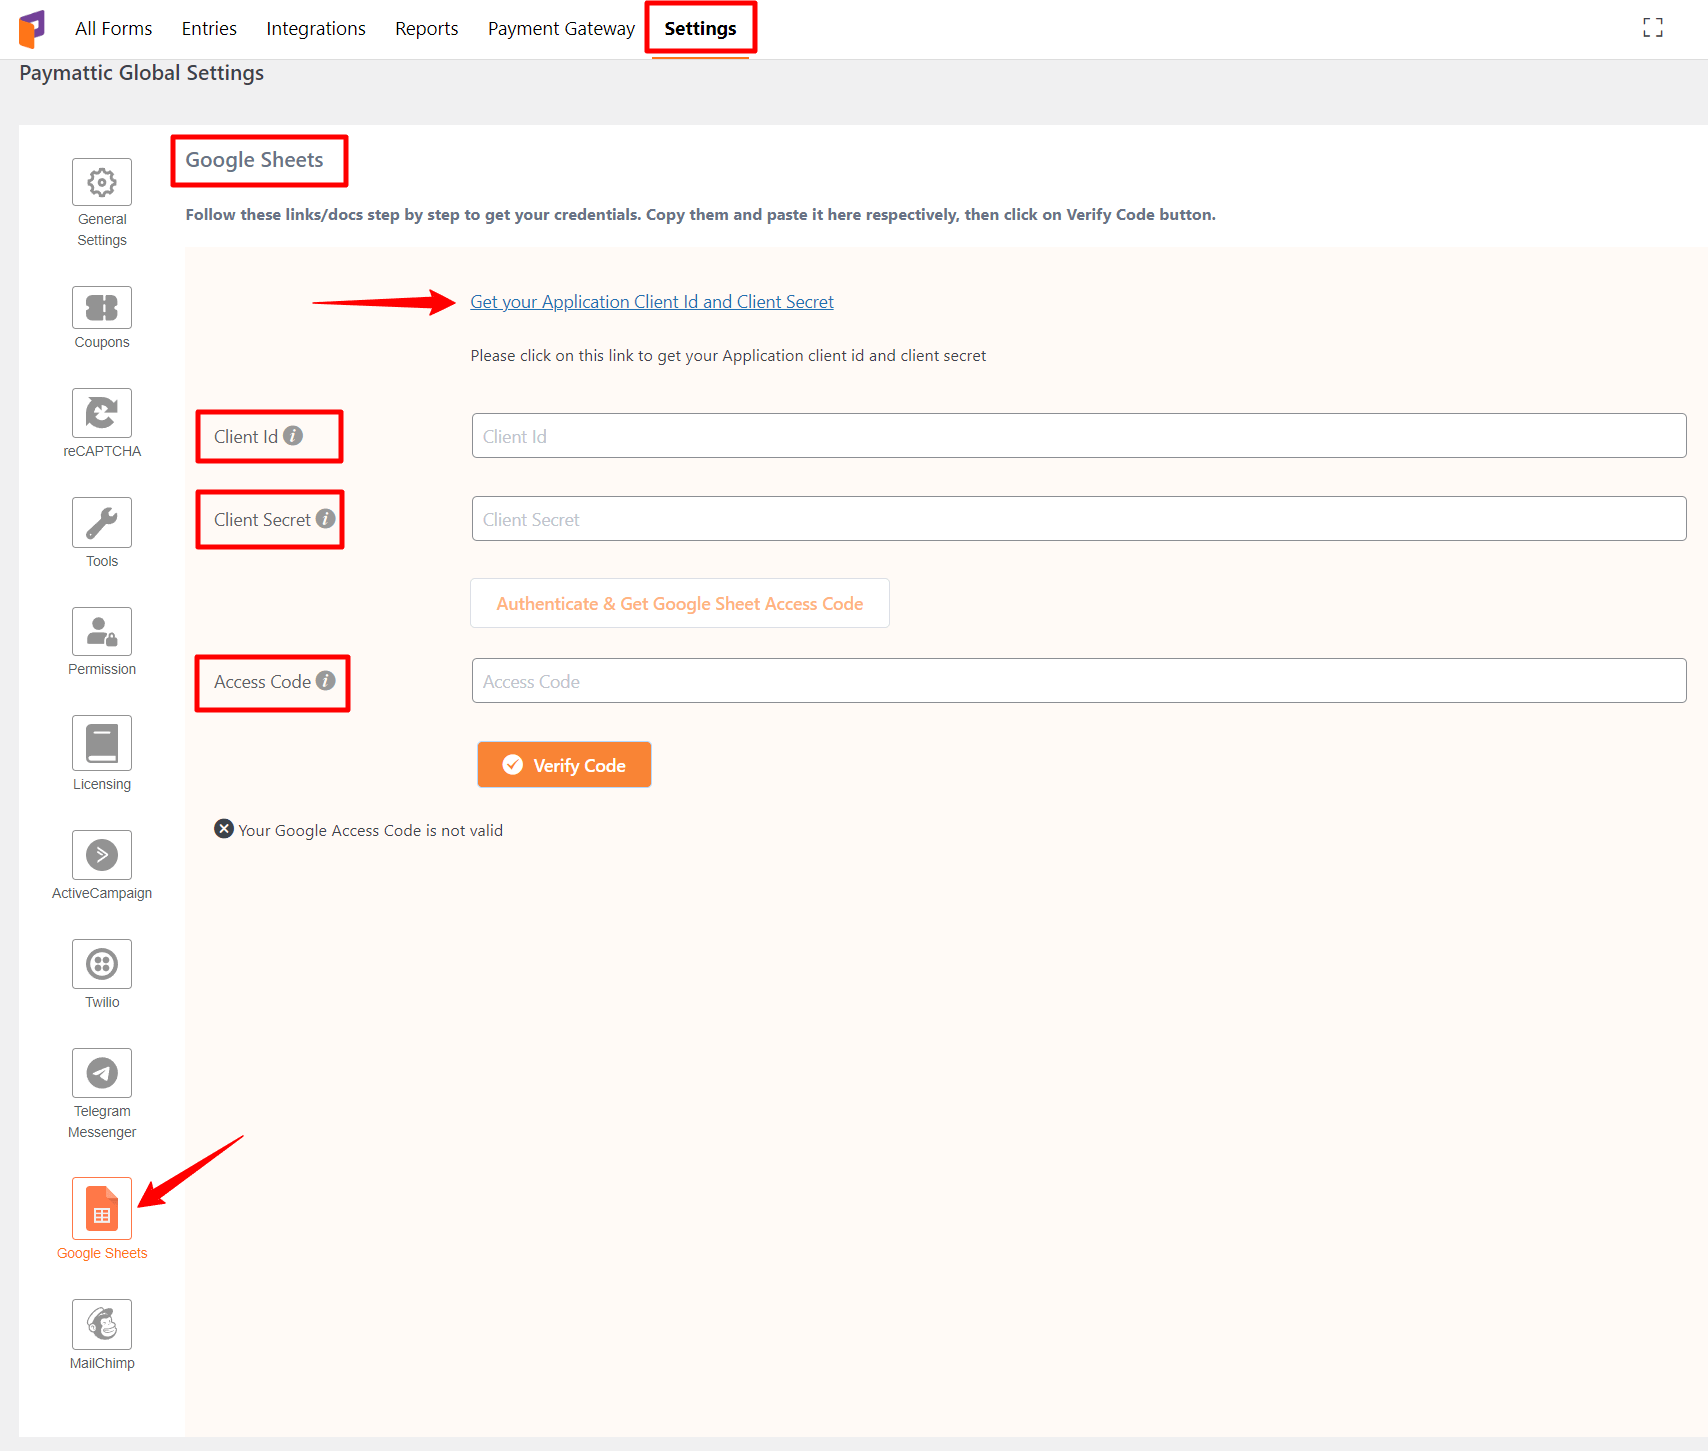
How to get Client Id, Client Secret & Access Code #
- To create credentials please go to the Google Cloud Console Dashboard.
- You might encounter a popup the first time you enter Google Cloud Console asking you to choose your Country and accept the Terms of Service. You may now proceed to the following stage by clicking on AGREE AND CONTINUE.
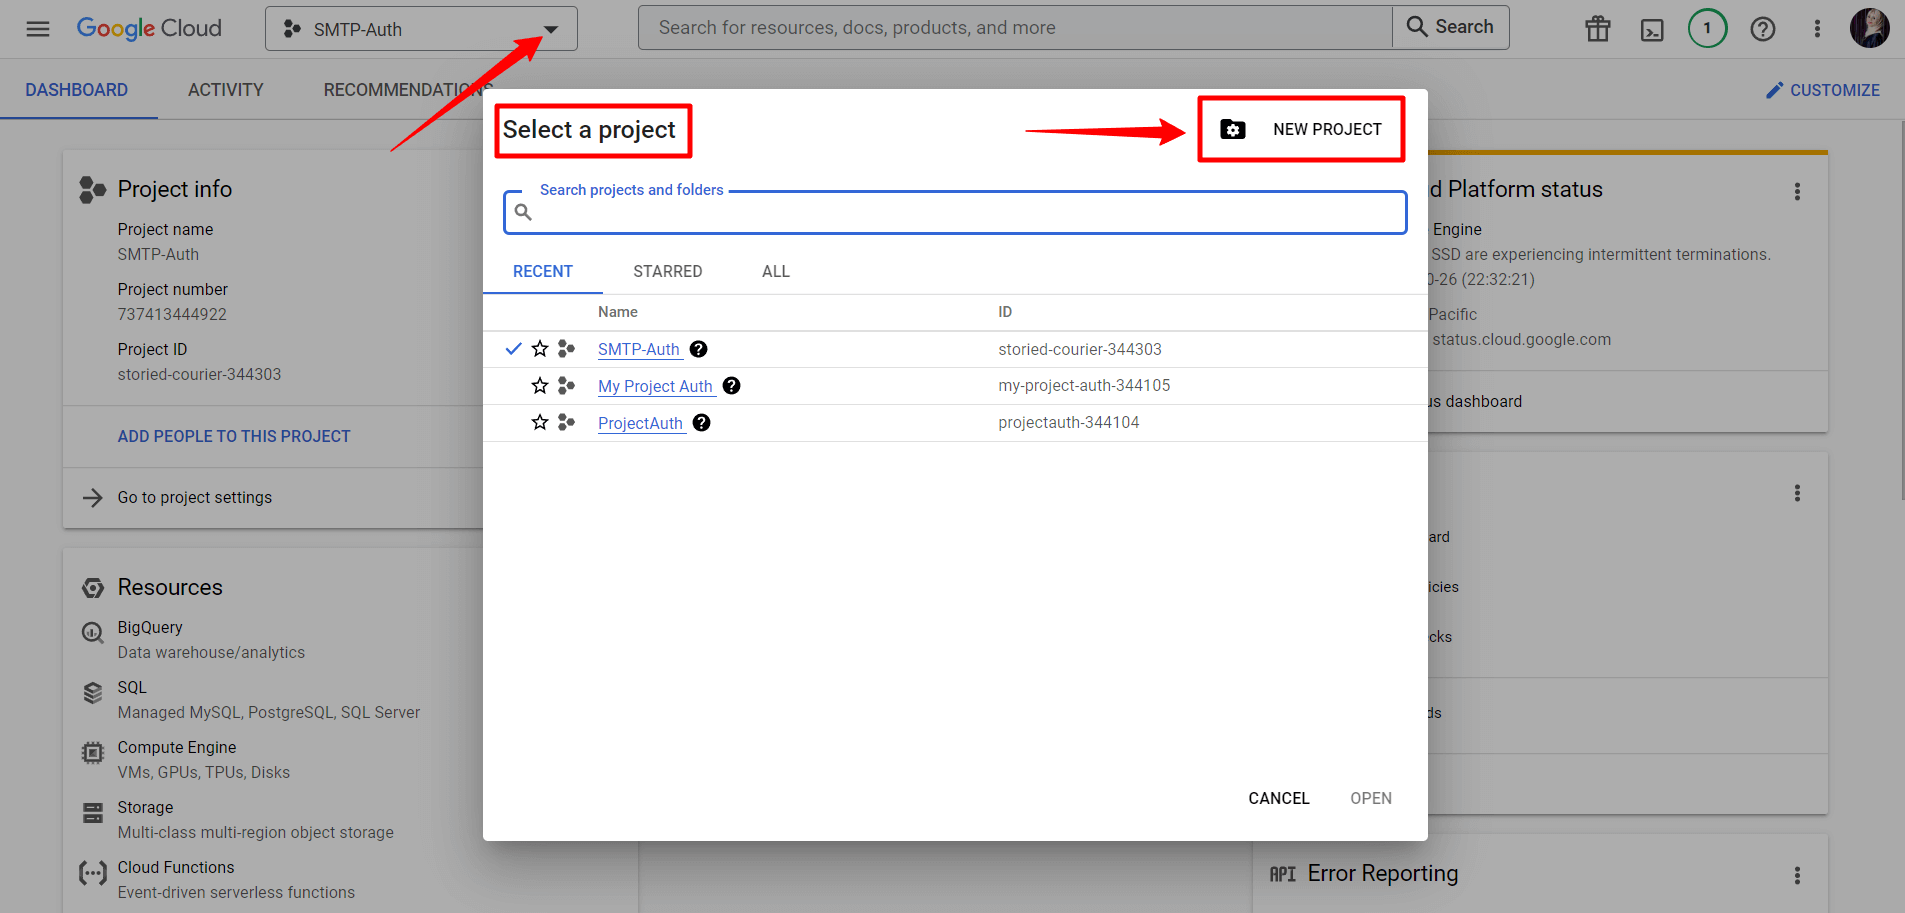
- Then we must create a project, we need to click on the dropdown field beside Google Cloud Dashboard where a popup will appear & the option to create a New Project can be found in the upper right corner beside the Select a Project.
- Click on the New Project option then.
- At this step, we need to give a name for the project. Here, Paymattic–Project is used as the name, and No Organization for the Location is used. Lastly, click on the Create button.

- Google will redirect us to the Project dashboard after we create the project. The project’s Google Sheets API must now be enabled. The option to enable APIs and Services can be found in the left sidebar under APIs & Services → Enabled API & Services, as shown in the screenshot below.
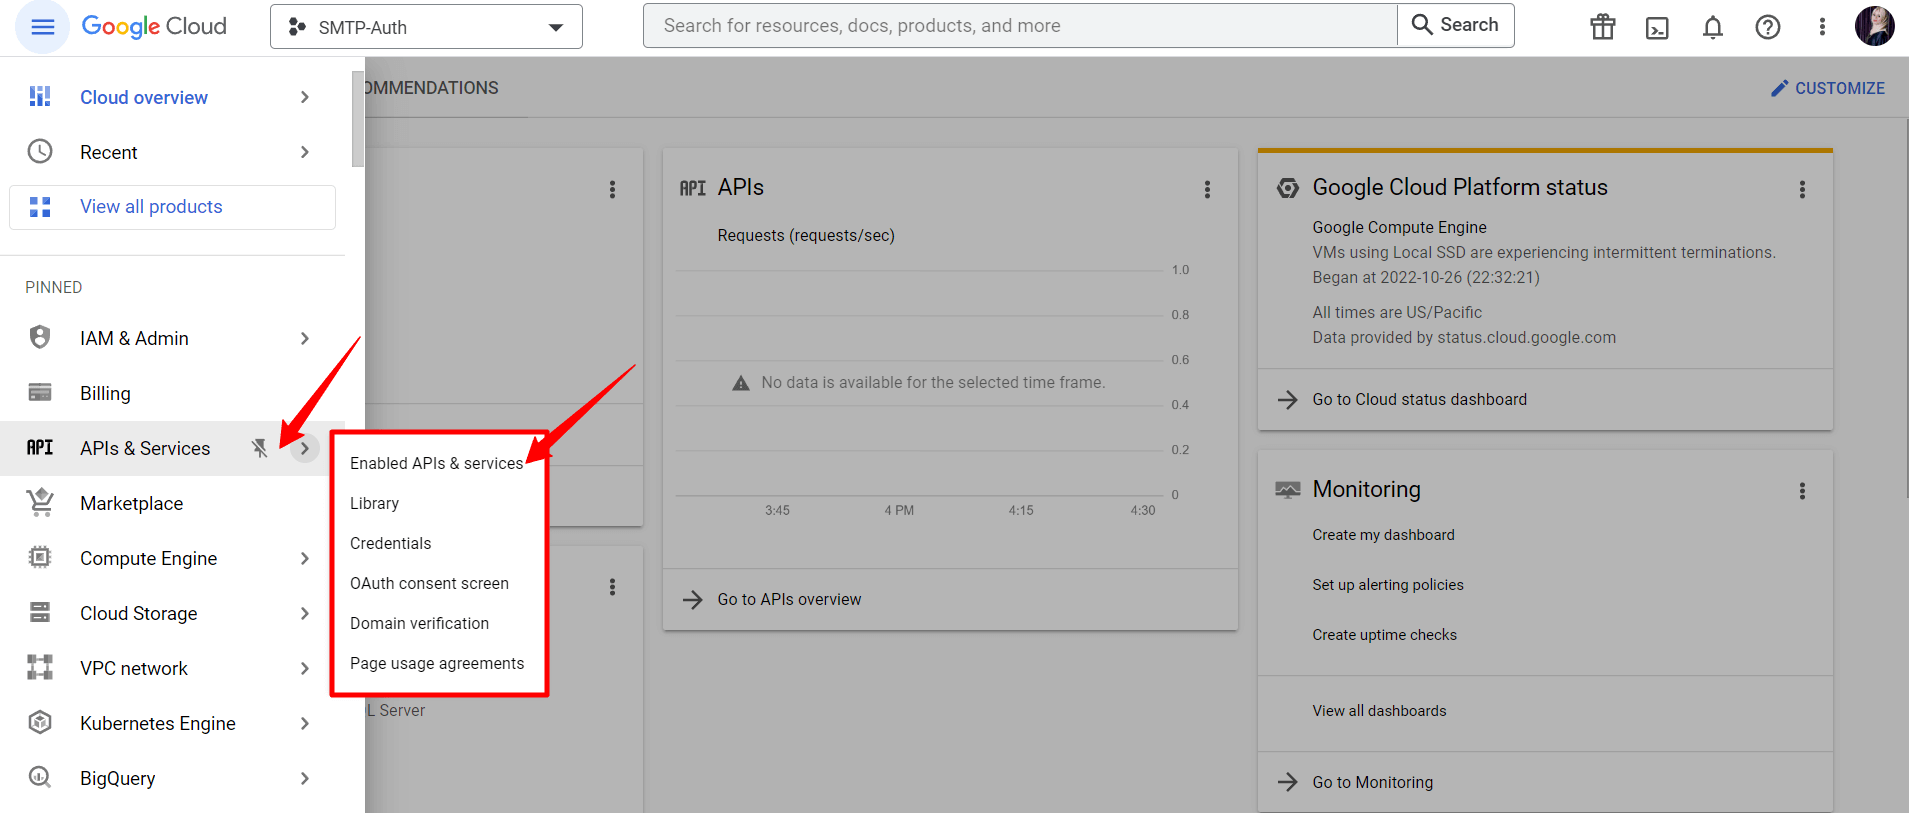
- From the APIs & Services dashboard now we need to click on ENABLE APIS & SERVICES.

- In the search bar search for Google Sheets API.
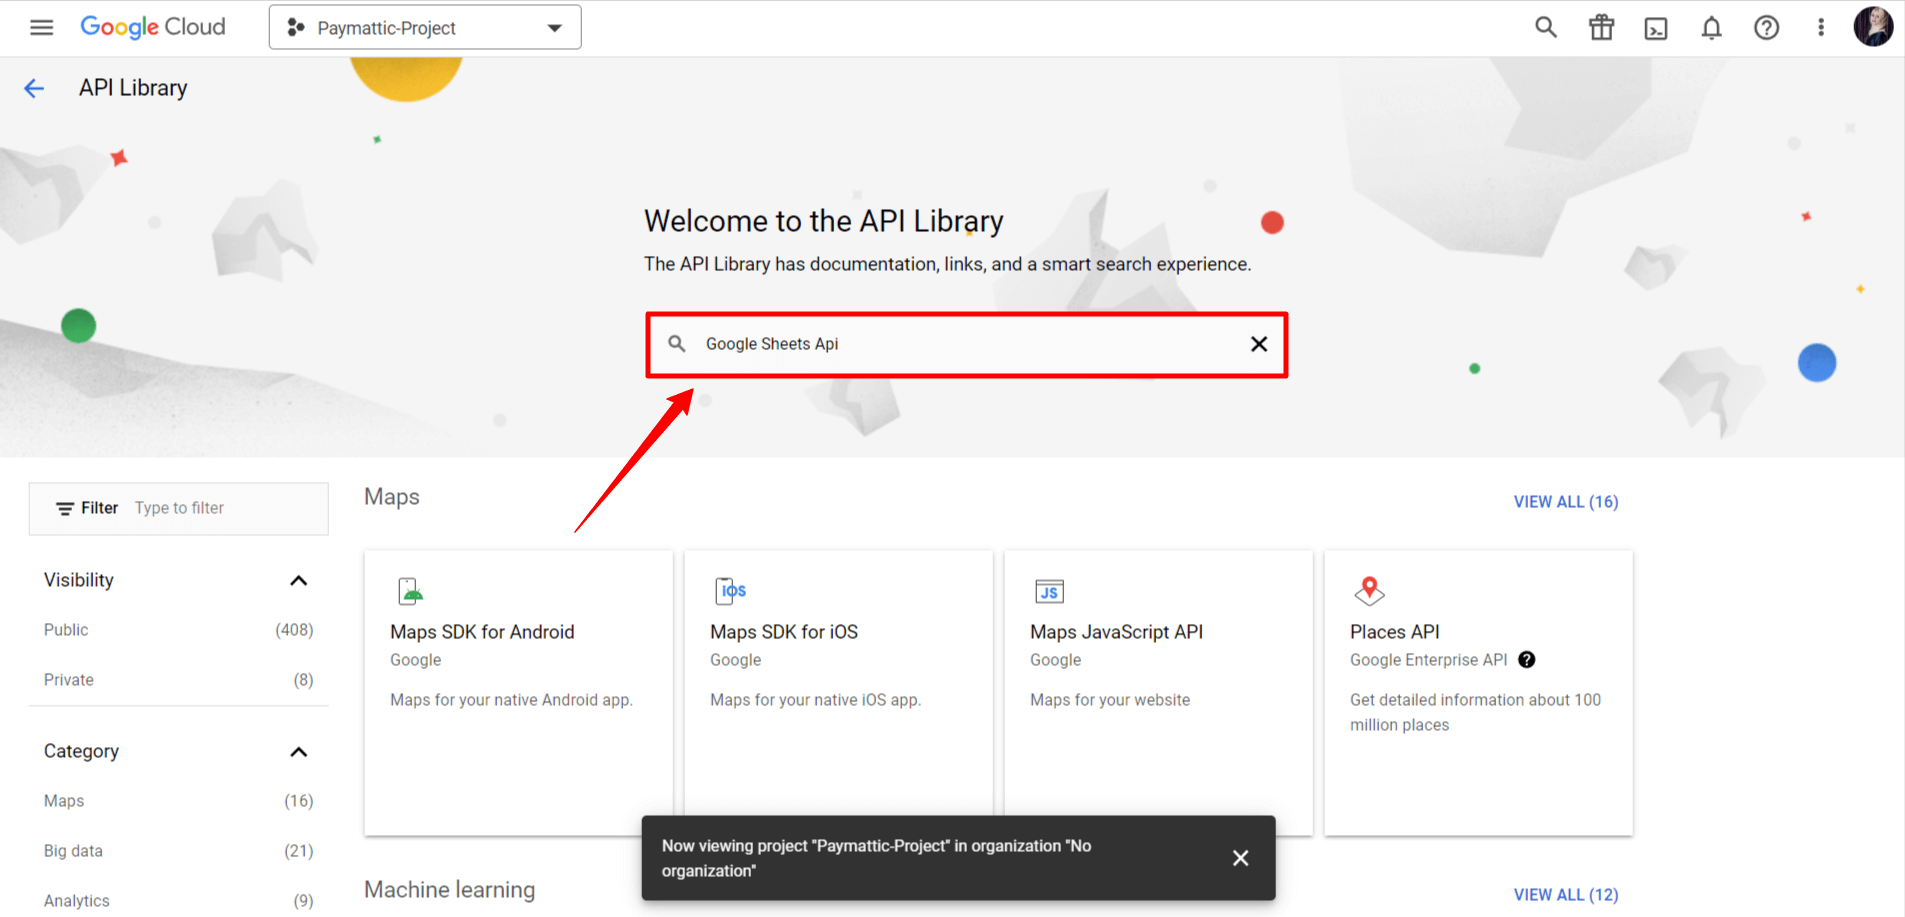
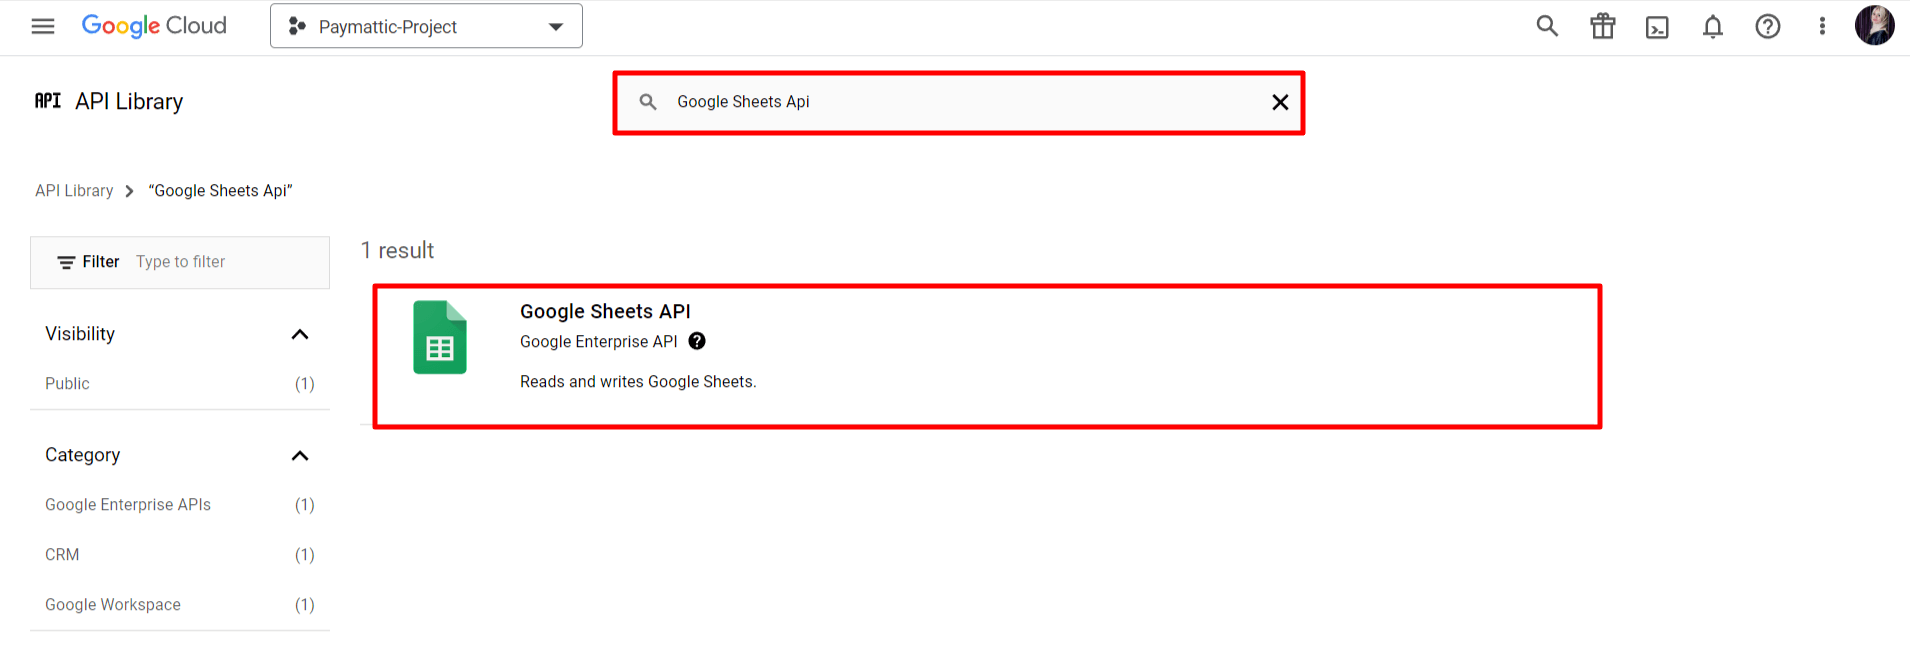
- This will list the Google Sheets-related API services. We just need the Google Sheets API. Now click on the Google Sheets API and it will take us to the Google Sheets API page.
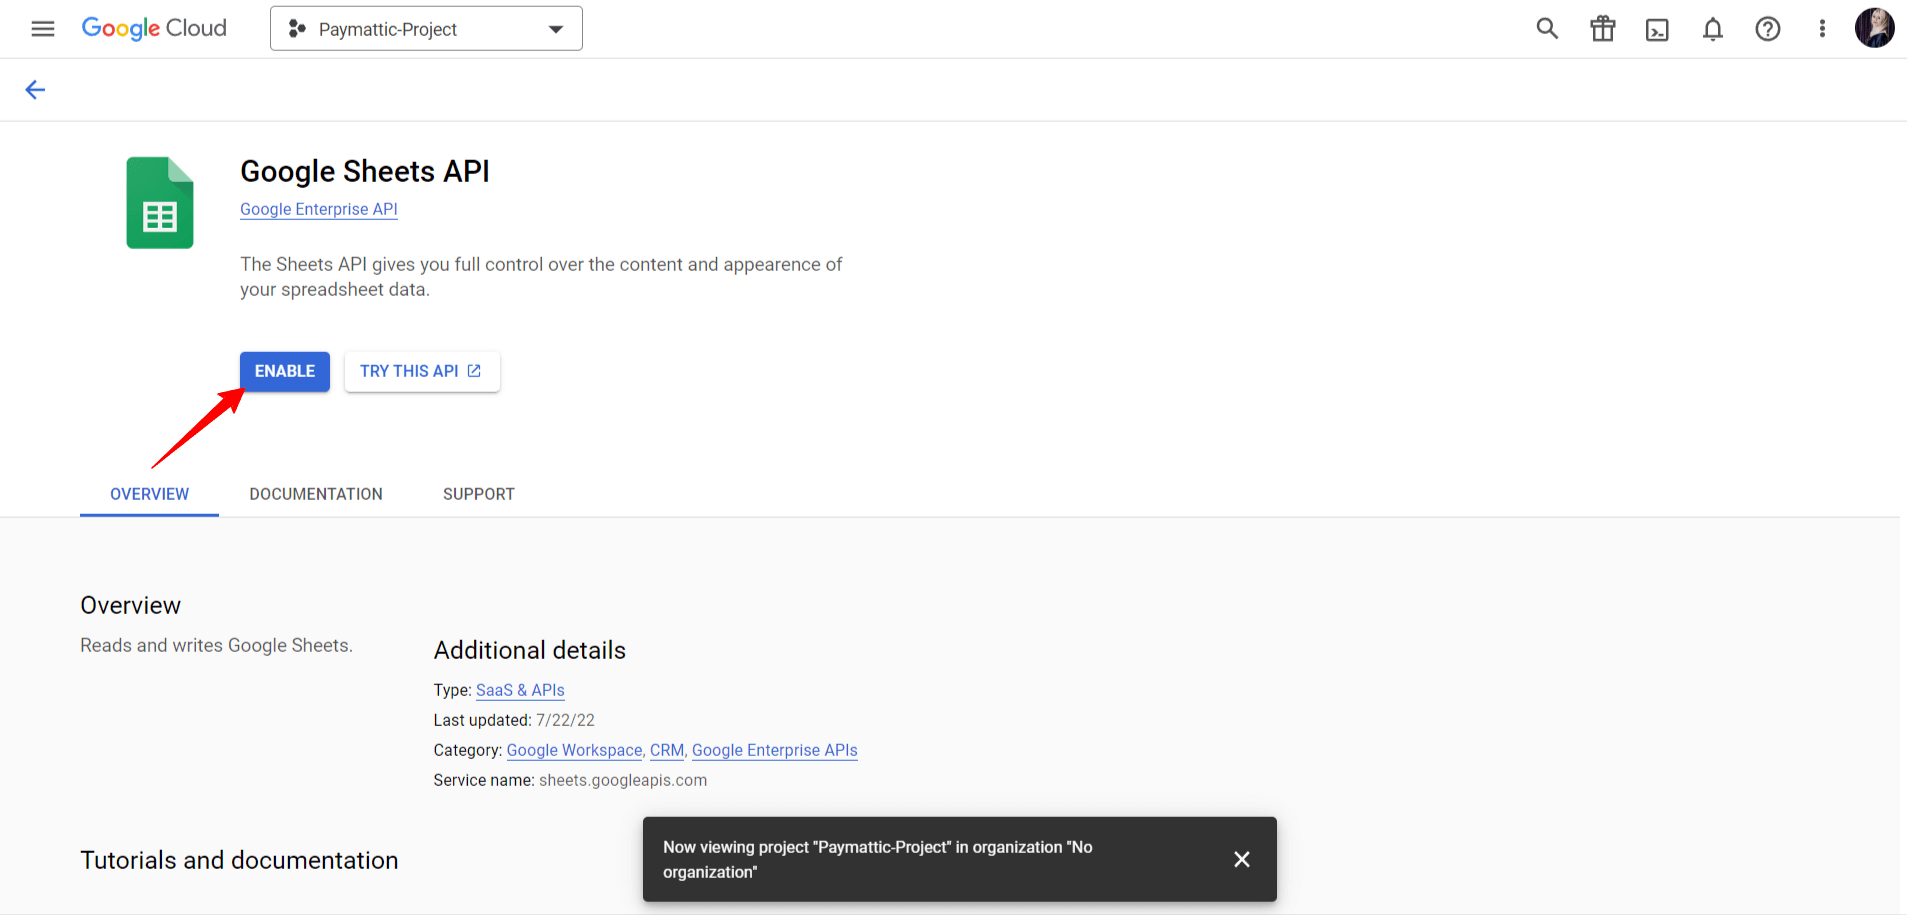
- Now, we need to Enable the API by clicking on the ENABLE button.
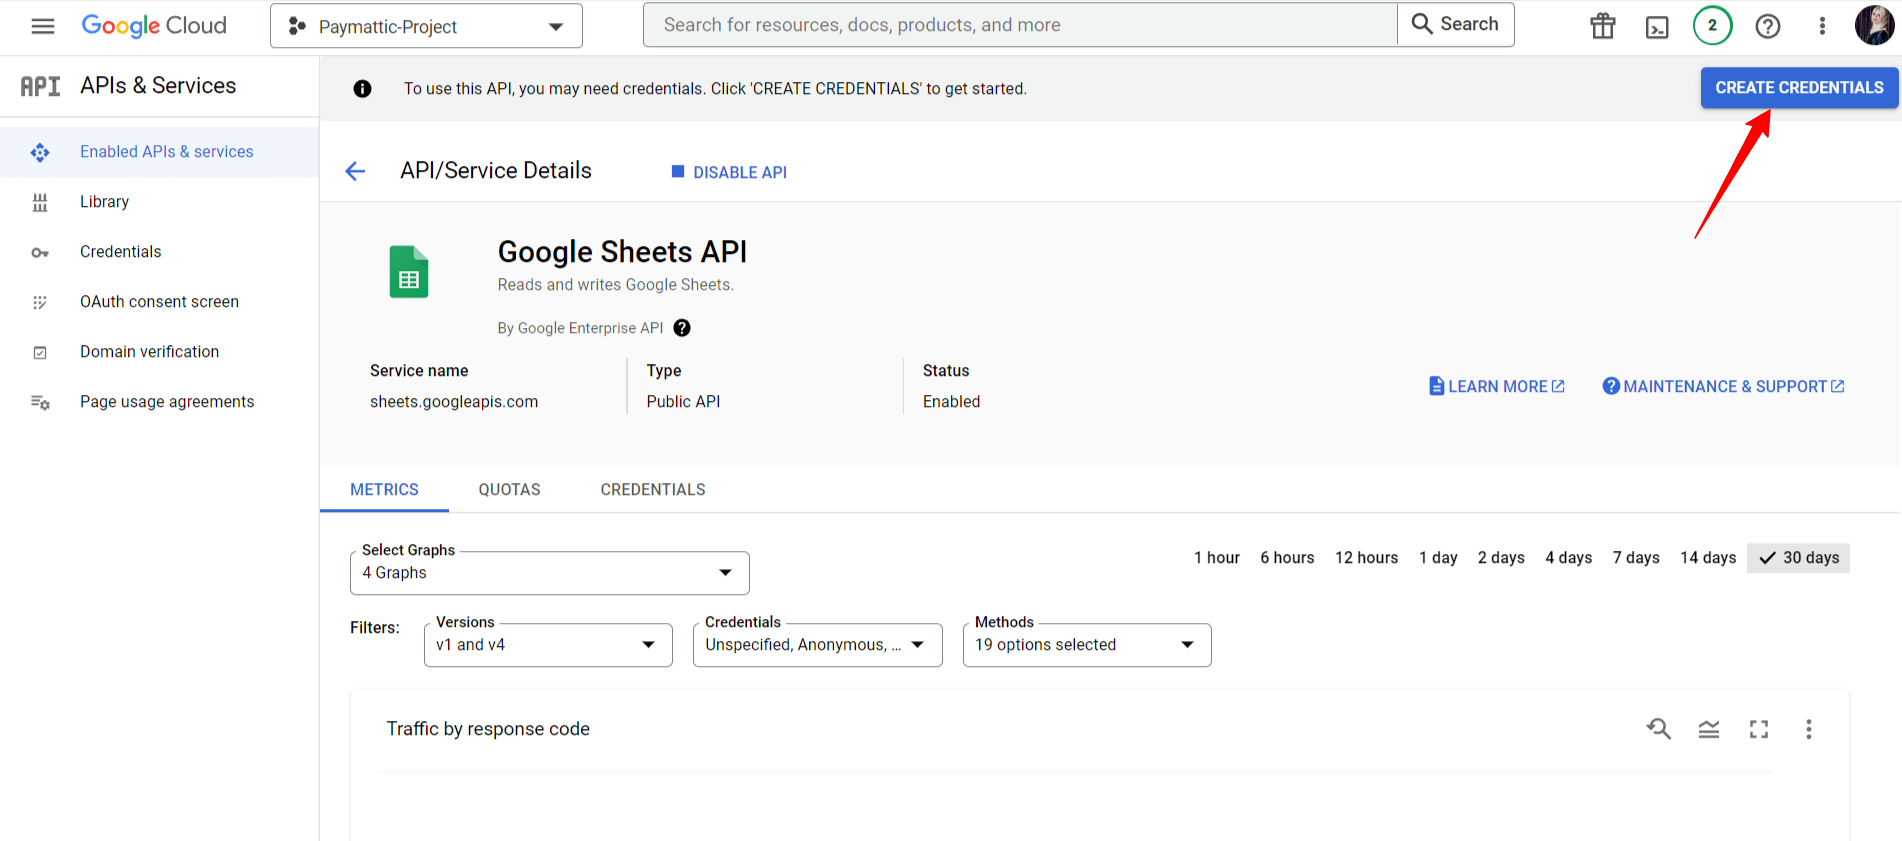
- It takes a few seconds to enable the API and then redirect us to the Google Sheets API Dashboard as below. This time we need to create the credentials for Paymattic-Project by clicking on CREATE CREDENTIALS.
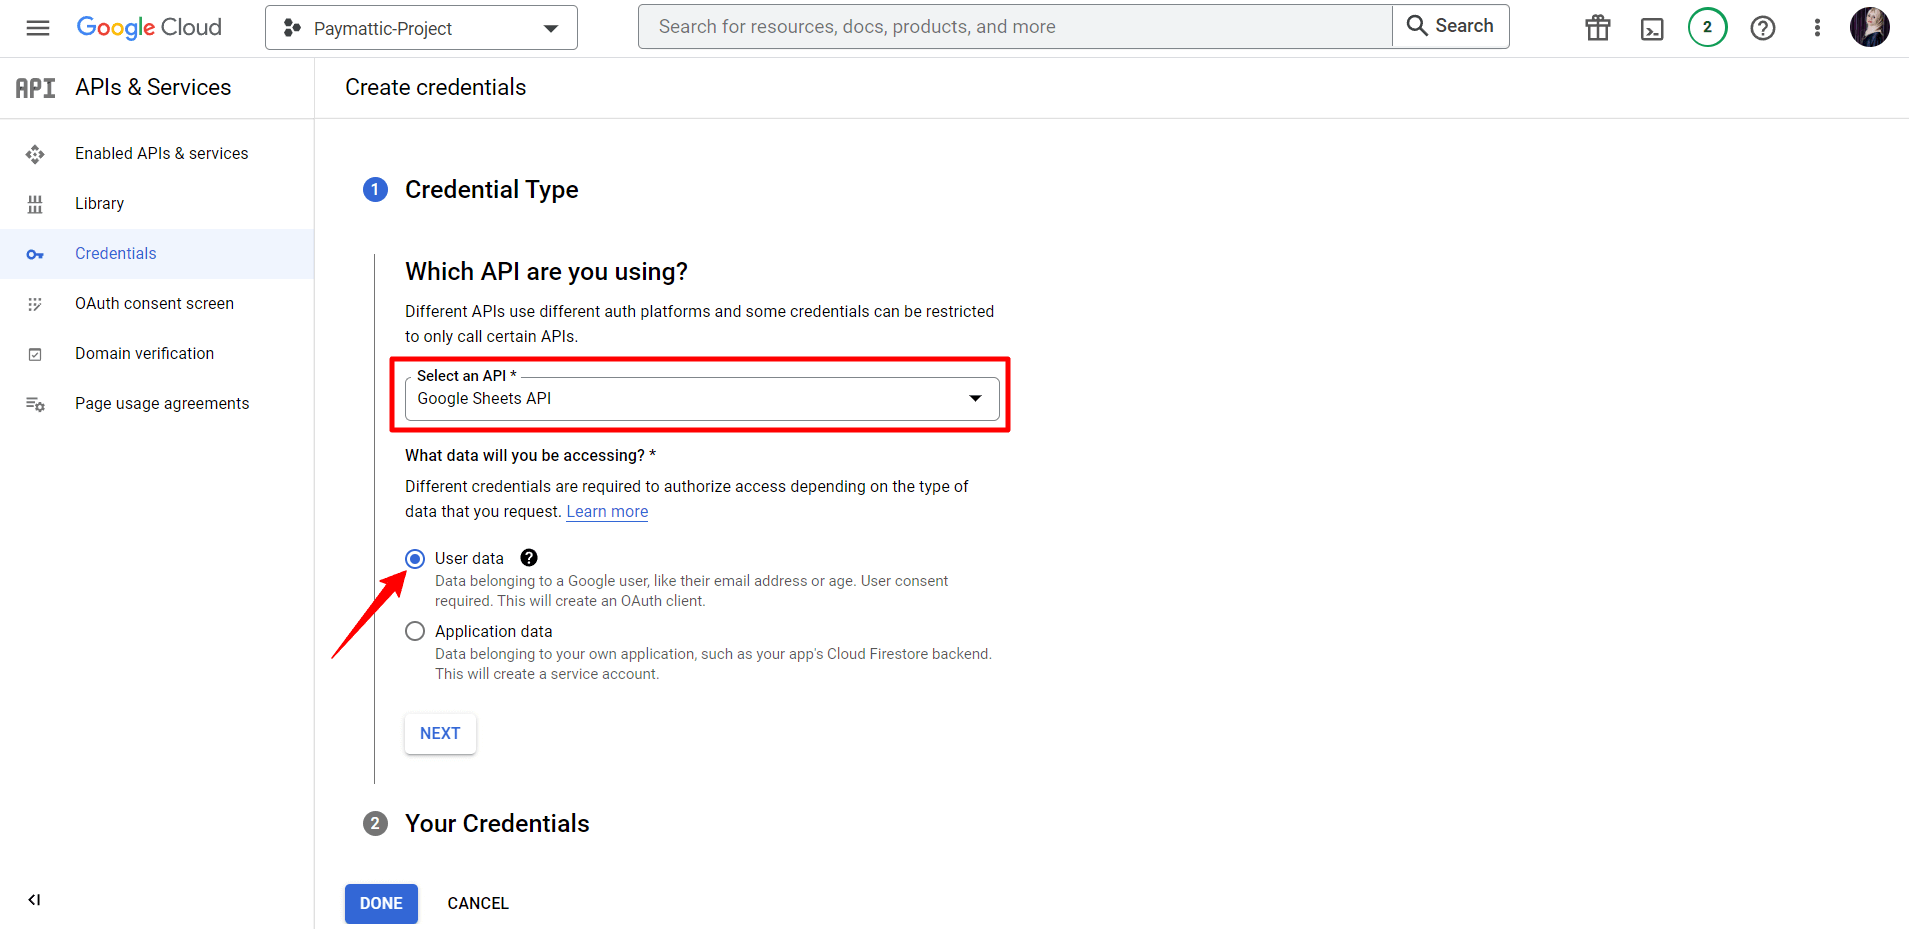
- For Credential Type, we need to select the USER DATA as the target accessible data and Google Sheets API as the target Google Sheets API that is selected by default. Click on the Next button for going to the further process.
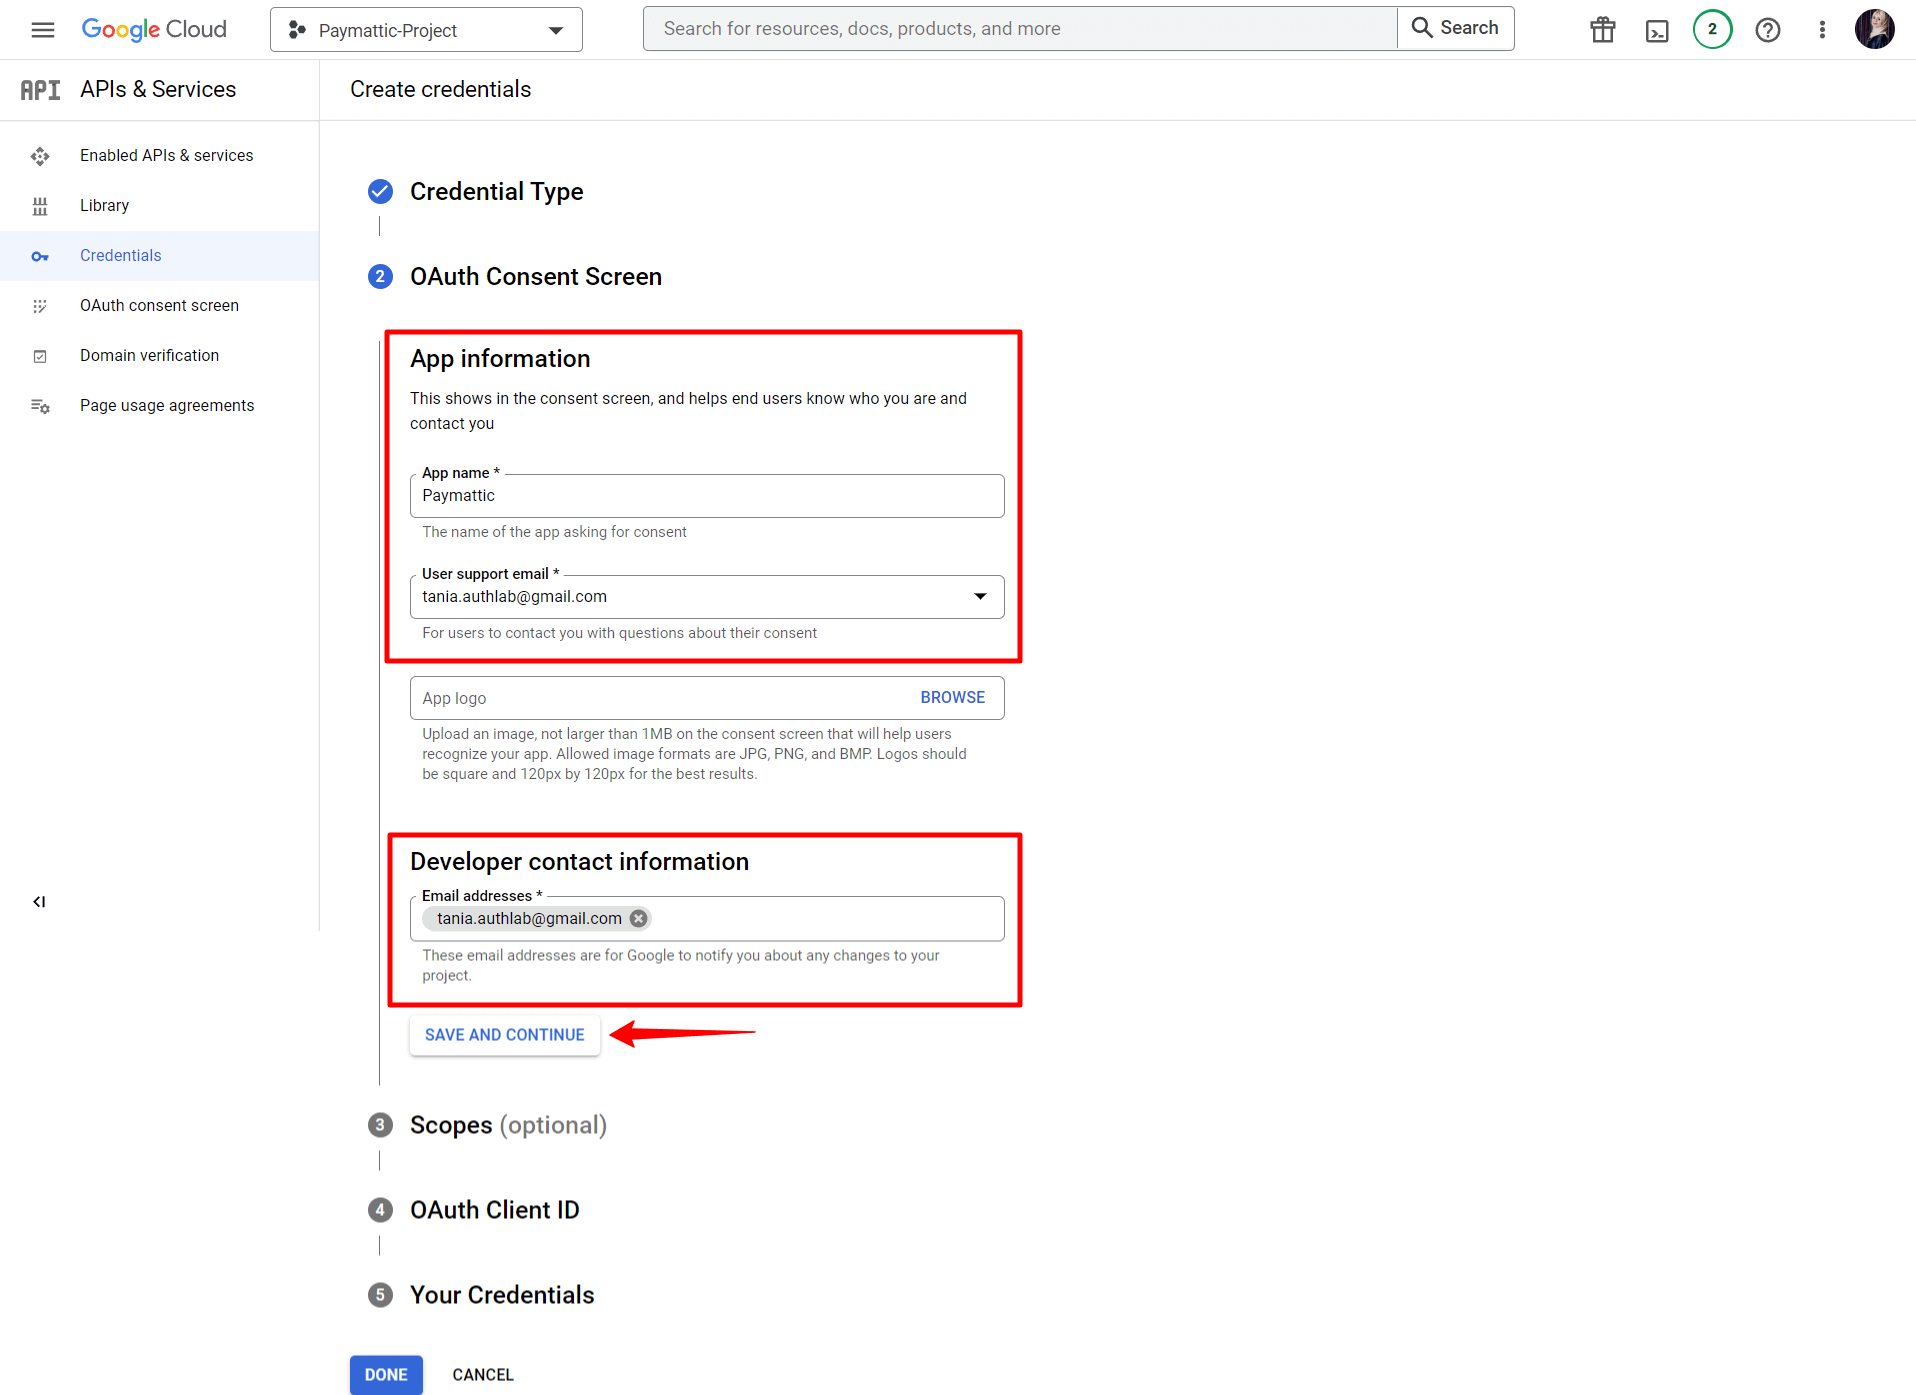
- Now, for the OAuth Consent Screen, give the App Name a name, an email address for support, and an email address for the developer’s contact information. The email addresses will be used as the Email Address for delivering emails from WordPress using the Paymattic plugin. Once you’ve completed the inputs, click SAVE AND CONTINUE.
We don’t need to do anything for Scopes options for Paymattic email delivery. If necessary, you can still configure your own requirements..
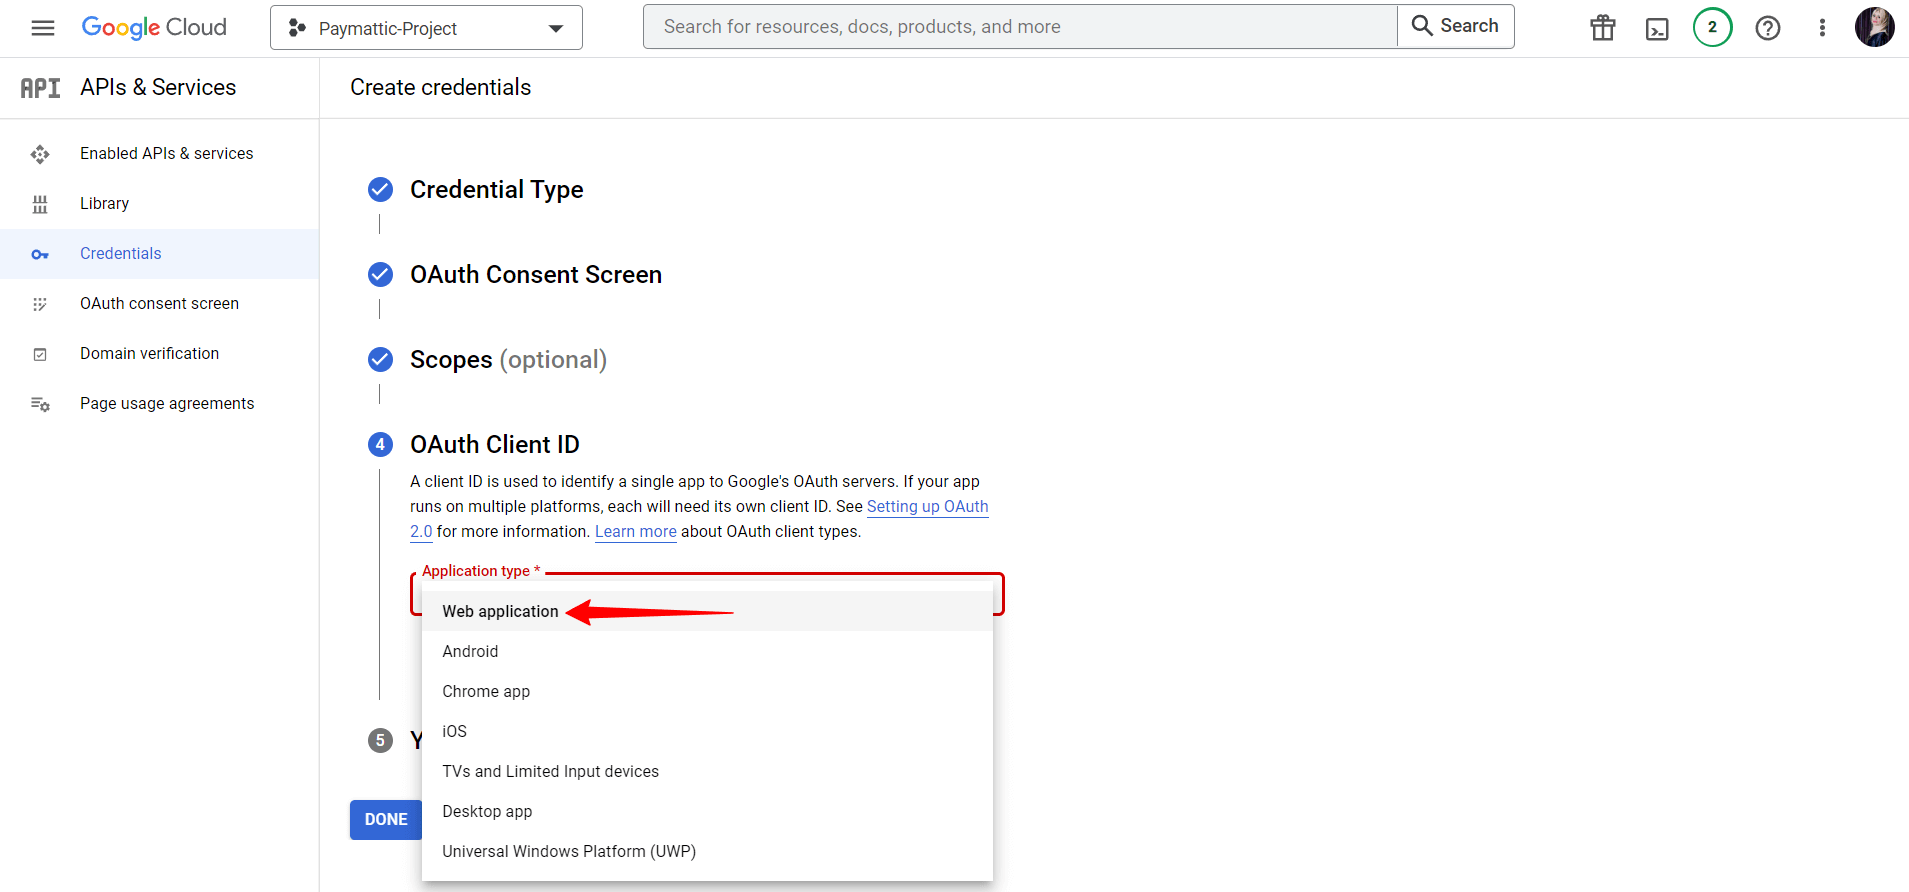
- Now for OAuth Client ID, we need to select the Application Type as Web Application.
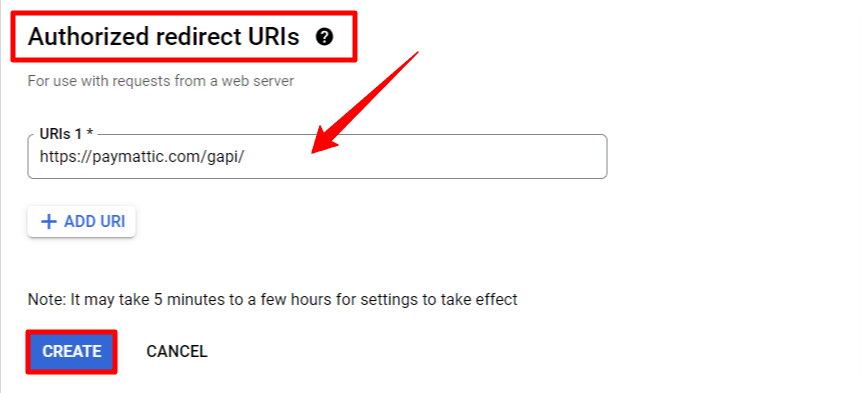
- We need to add an Authorized Redirect URI as below with the URL: https://paymattic.com/gapi/
- And, click on the Create button when you are done.
- As a next step, we will be offered a Client ID & Client Secret to use as a credential. We can skip downloading or saving it right now and just click OK because we just finished creating the Paymattic Credentials, which we will collect later in this article.
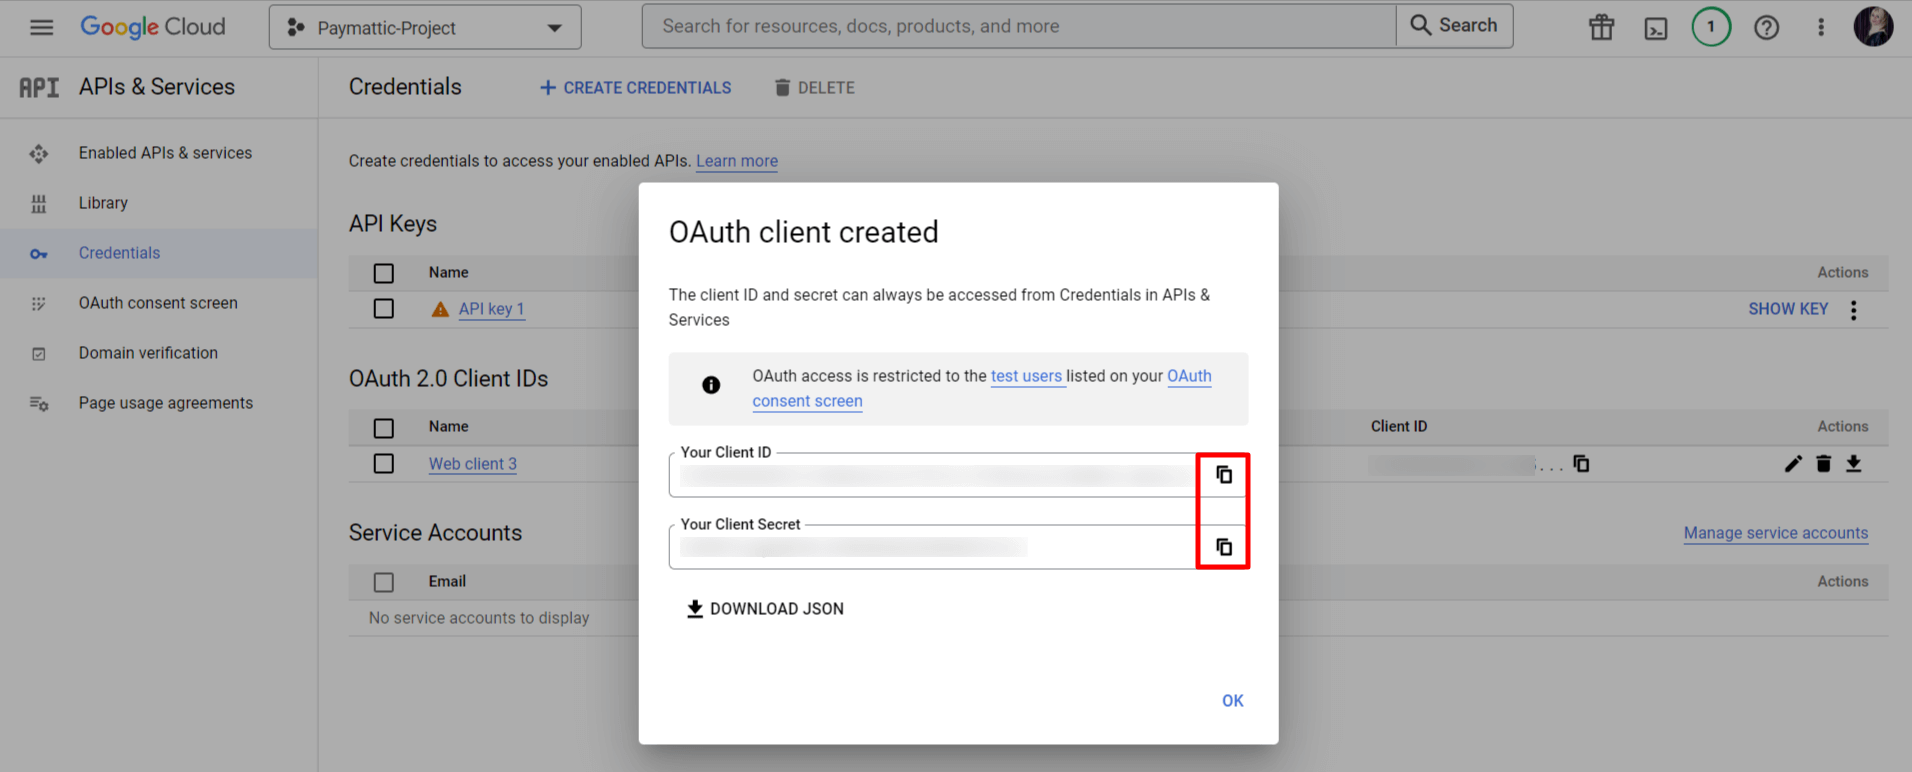
- We must now publish the app that we have just created. Go to the OAuth Consent Screen from the left sidebar and look for our app Paymattic. Now, under the Testing section, click the PUBLISH APP button.
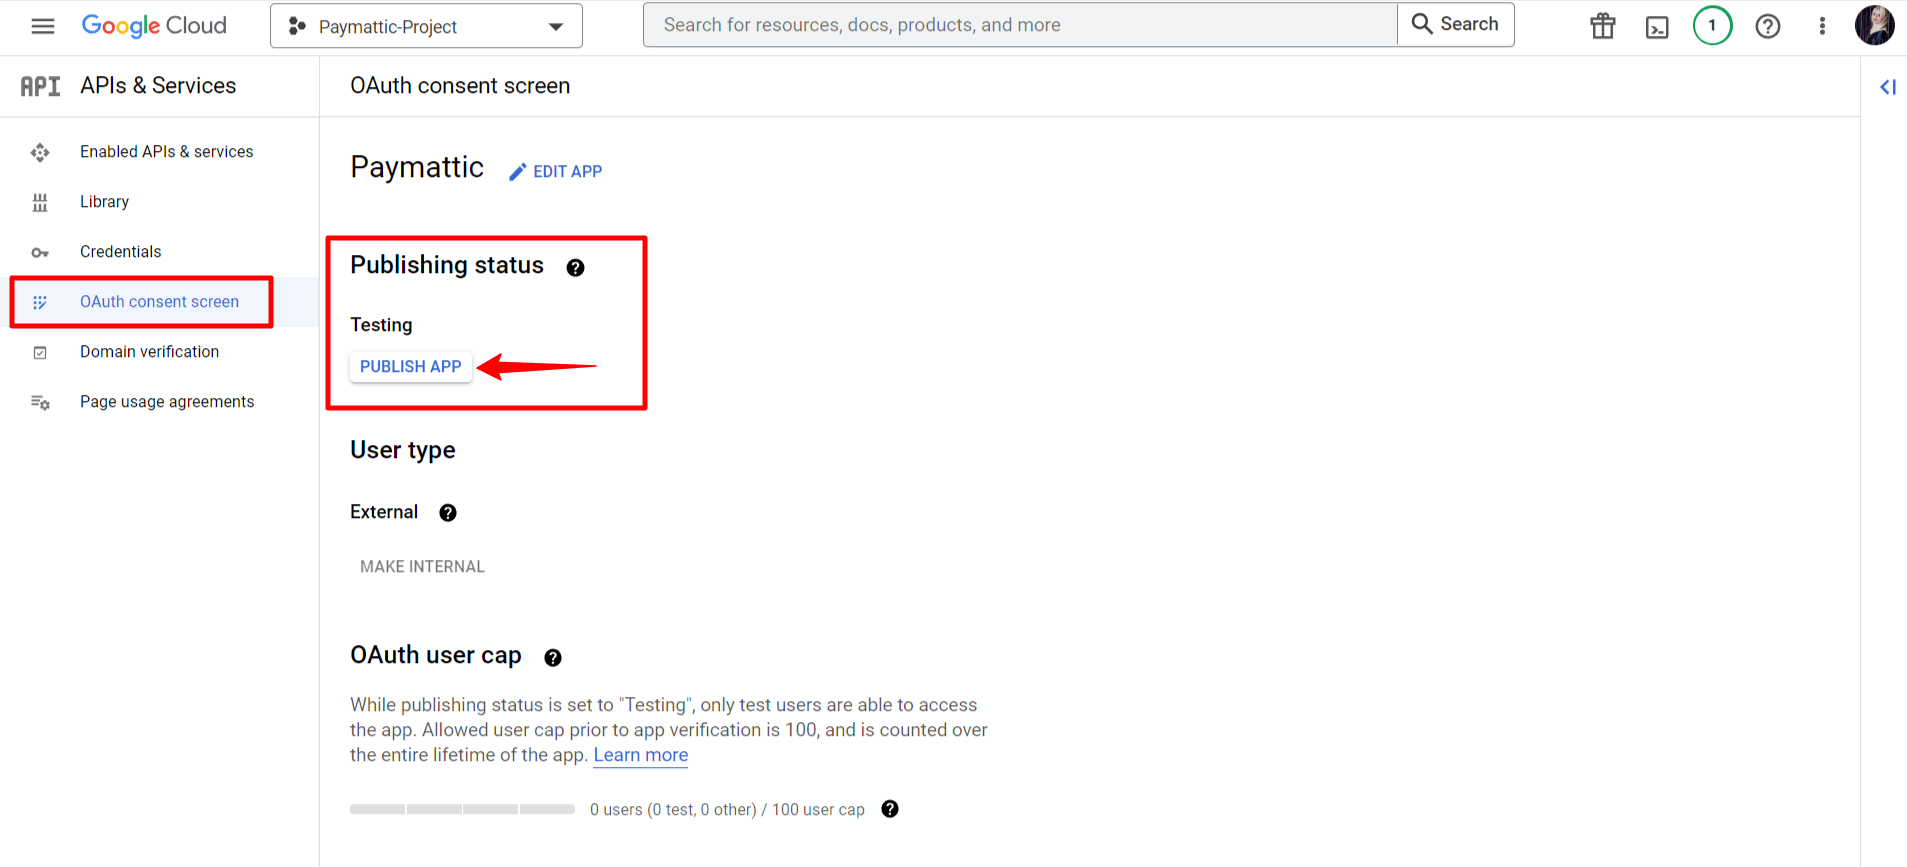
- When asked to confirm, Please click on CONFIRM from Pust to Production popup window.
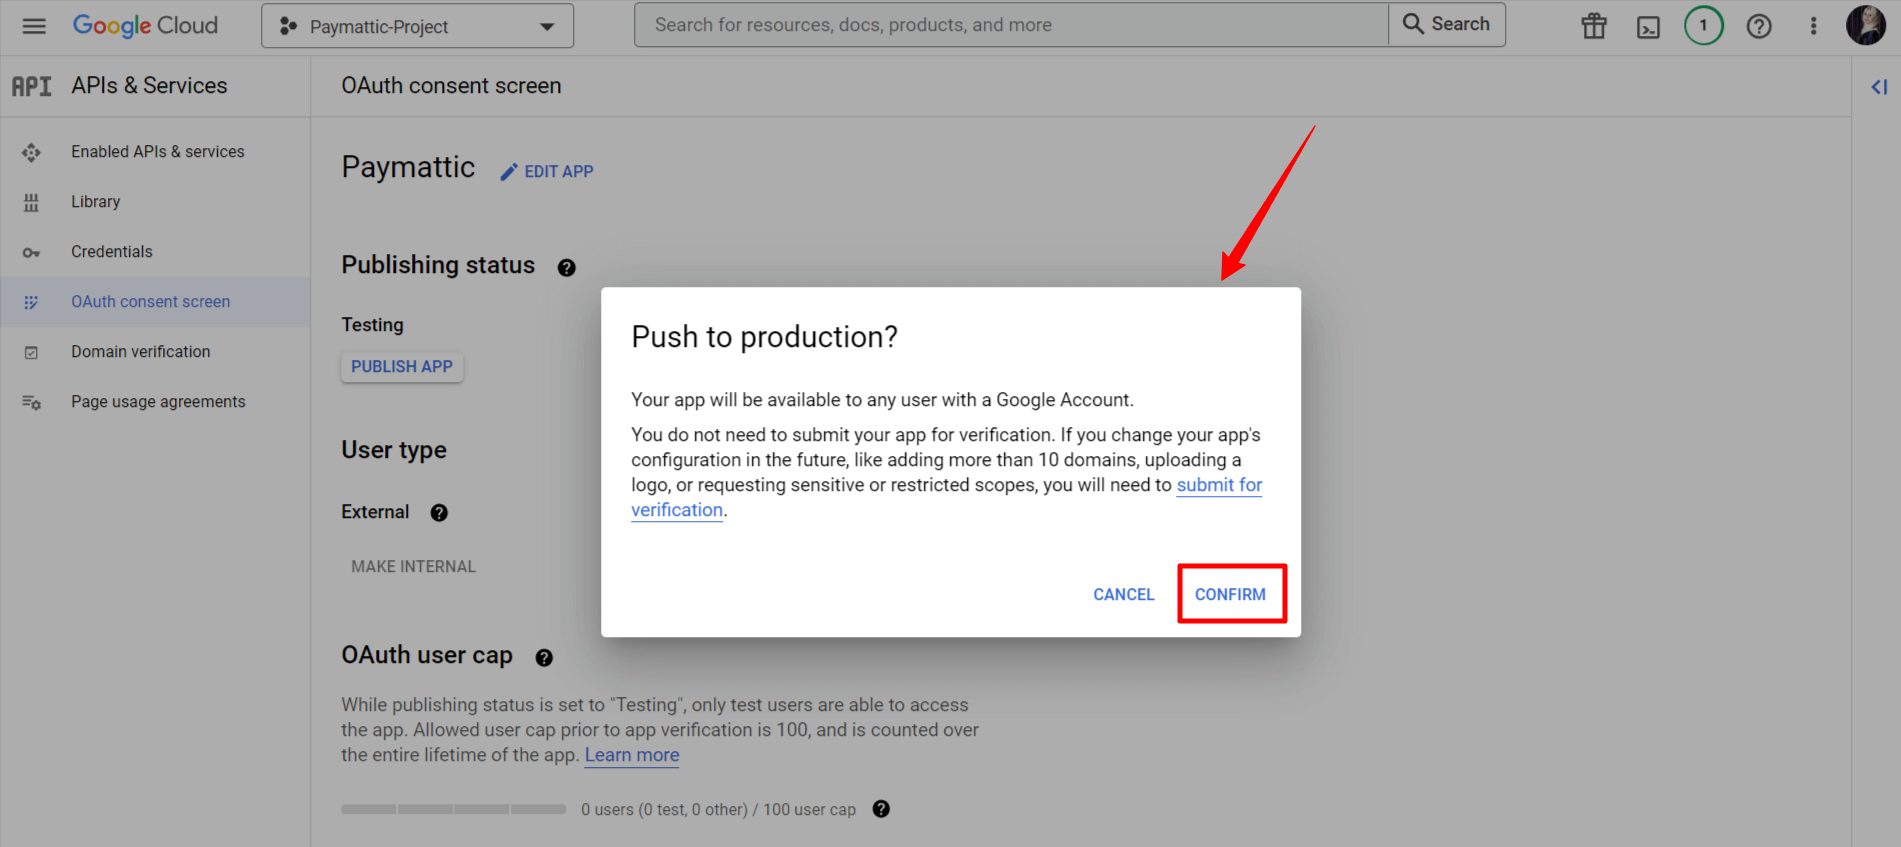
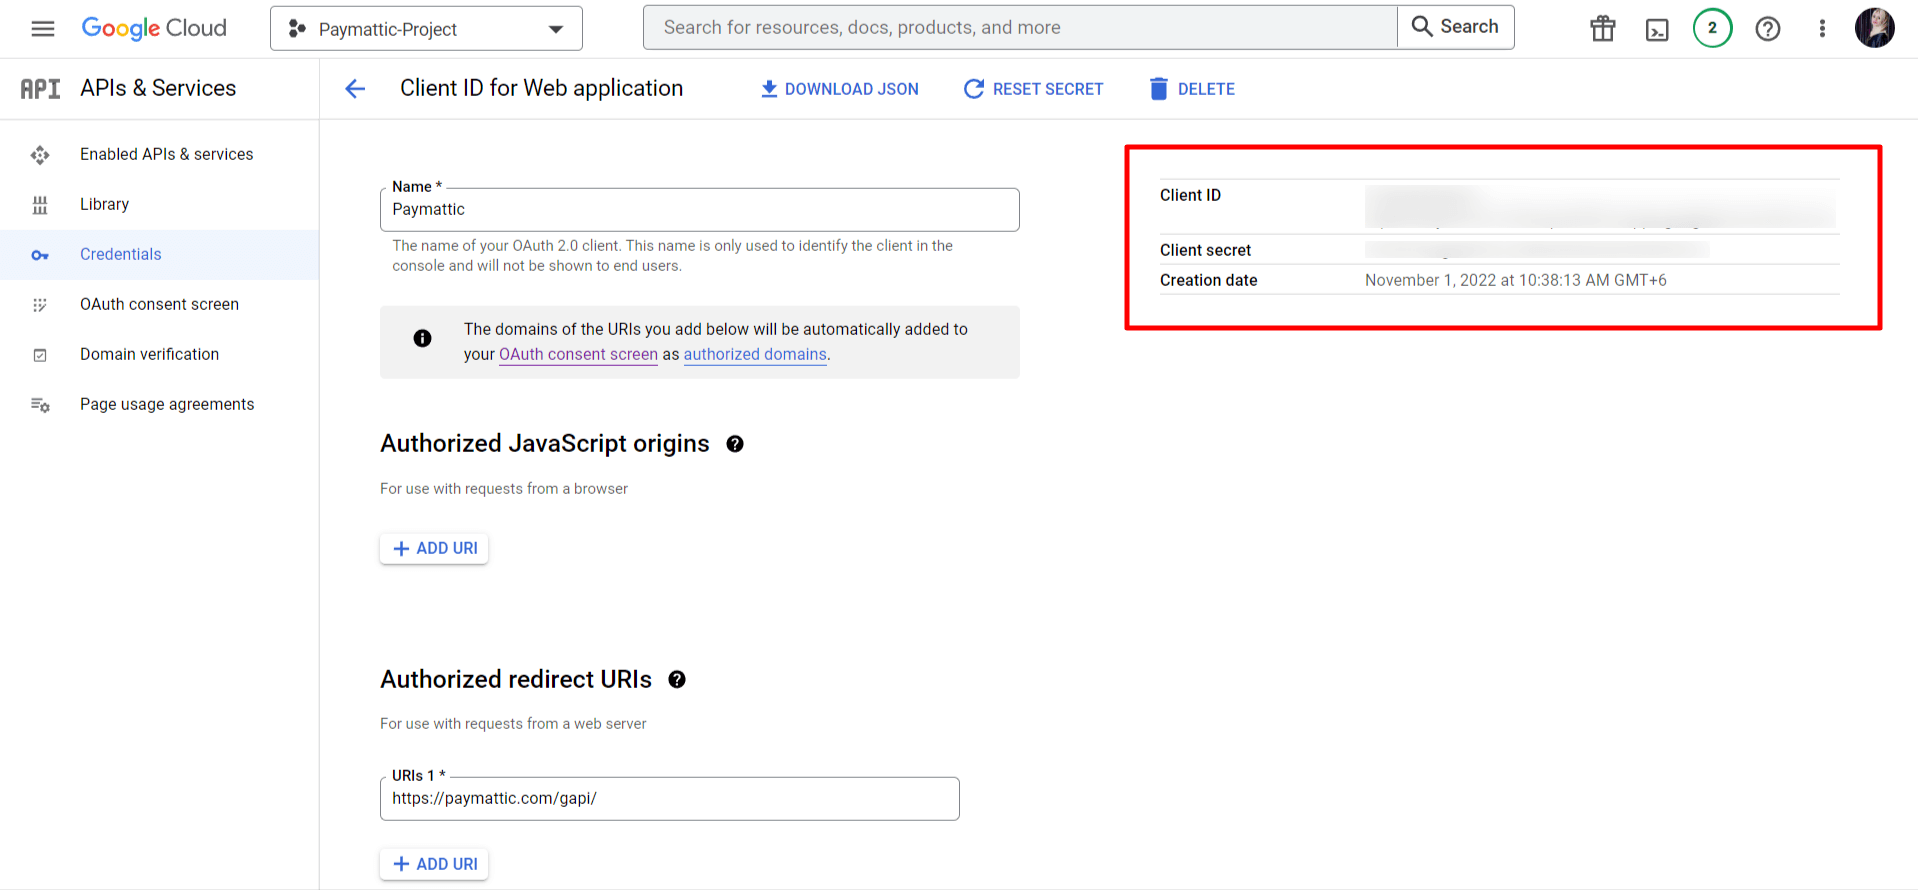
- Now we will collect the credentials we need. Go to Credentials from the left sidebar. Find the Project Name we created as Paymattic-Project and click on the Edit icon from the right side as below.
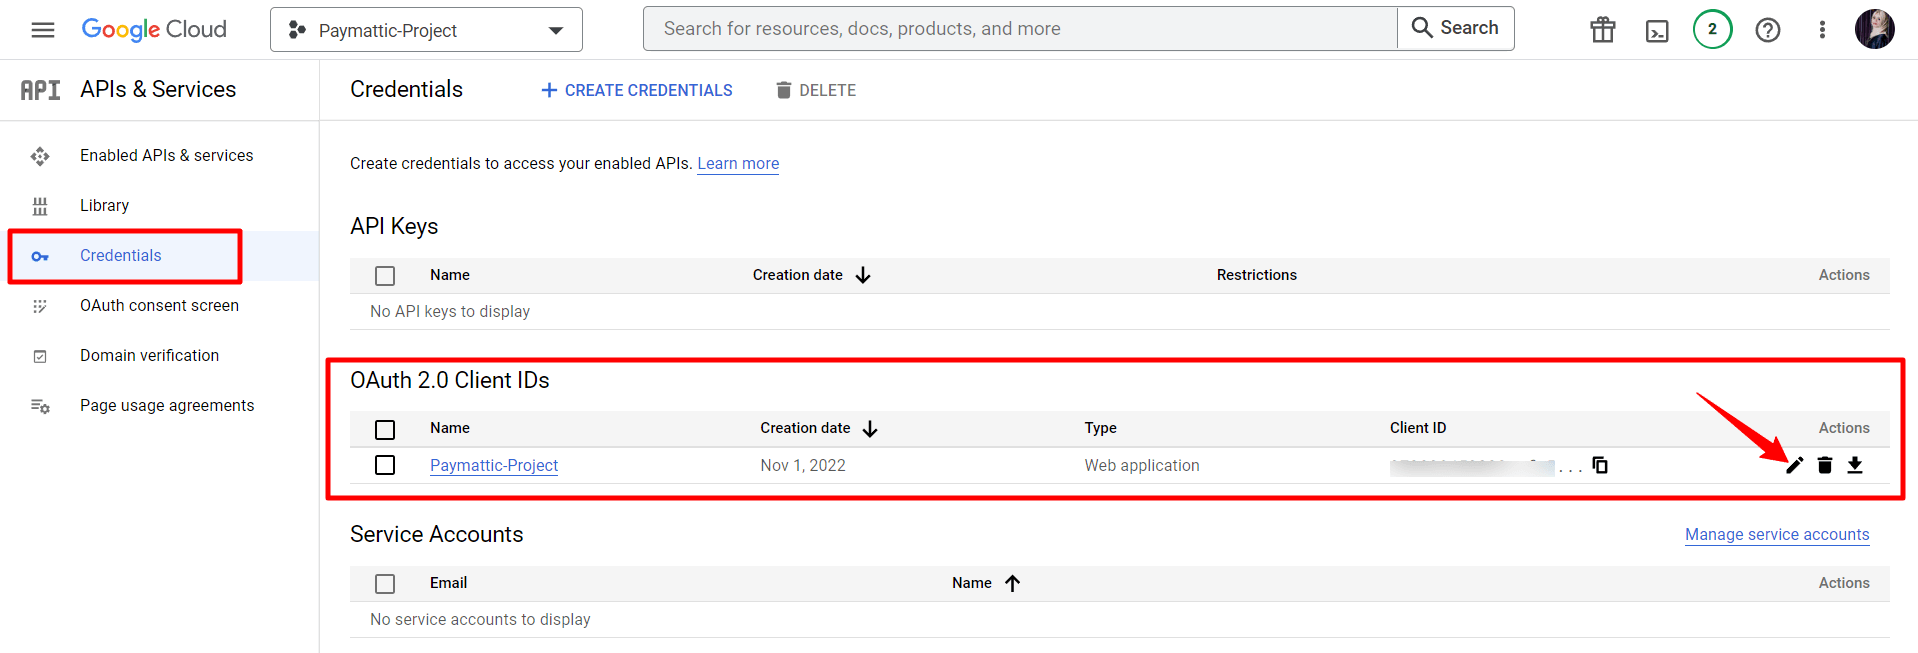
- Now the Client ID and Client Secret will be shown on the right side. We need to copy these 2 values and put them into Paymattic Global Settings in the next steps.
- Now, go to the Paymattic → Settings & click on the Google Sheets from the left sidebar.
- Put your Client ID & Client Secret in the preferred field we created and collected earlier in the previous steps. Now click on the Authenticate & Get Google Sheet Access Code.
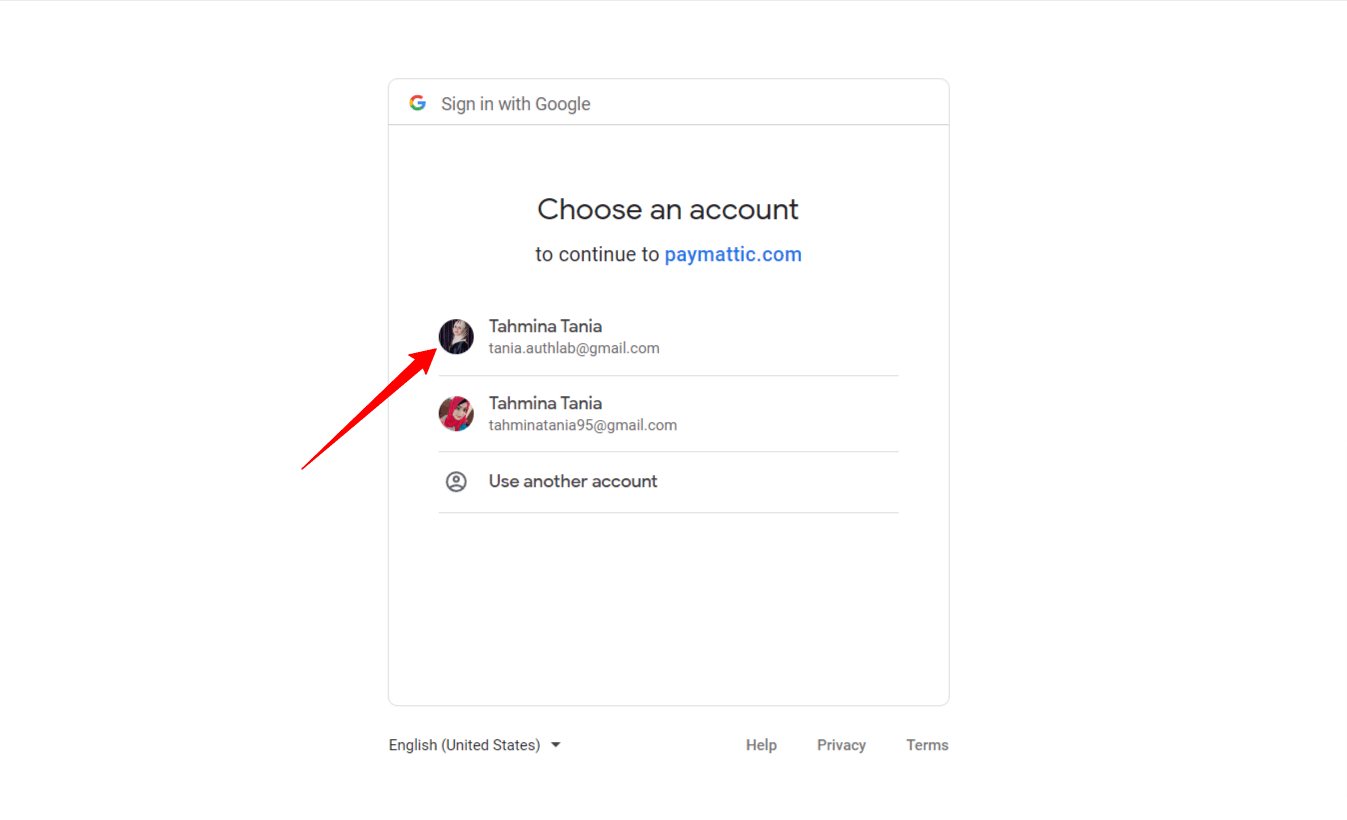
- This will redirect to our created Application server and in the process, Google will ask for the account that you want to allow access to your Gmail or Google Workspace account.
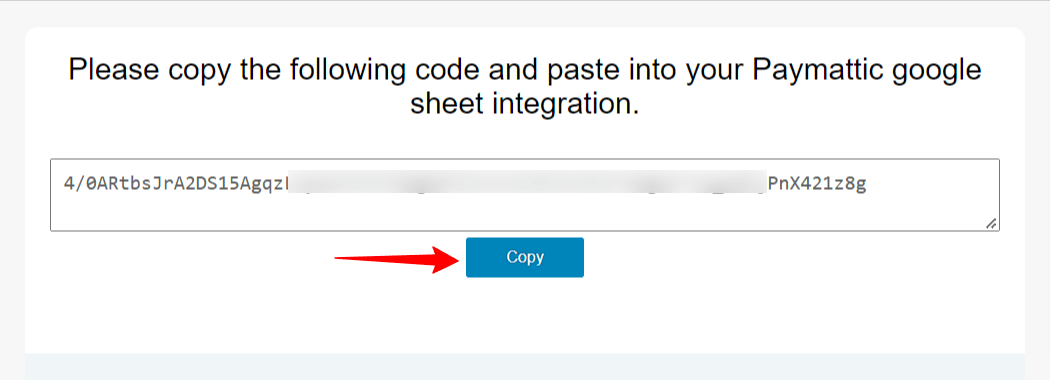
- This will take us to the Paymattic Server and generate an Access Code for us. Copy the access code that we will need in the next step by clicking on the Copy button.
- We are now in the final step of configuring Paymattic with a Google Workspace or Gmail email address. In the Paymattic Global settings, paste the copied access code from the previous step and then click on the Verify Code button.
- Now, go to the Settings of the Particular Form where you want to integrate & then navigate to the Integrations tab from the top bar. Click on the Add New Integration button & select Google Sheets Integration Feed from the list.

Spreadsheet ID #
Now you need to configure the settings according to your requirements. At first, give the feed a name and then enter the Spreadsheet ID. To get the Spreadsheet ID, Open your google sheet where you want to receive the entries or create a new one. The URL of your spreadsheet has its id. Check the below screenshot. The marked portion is the id of this particular spreadsheet.
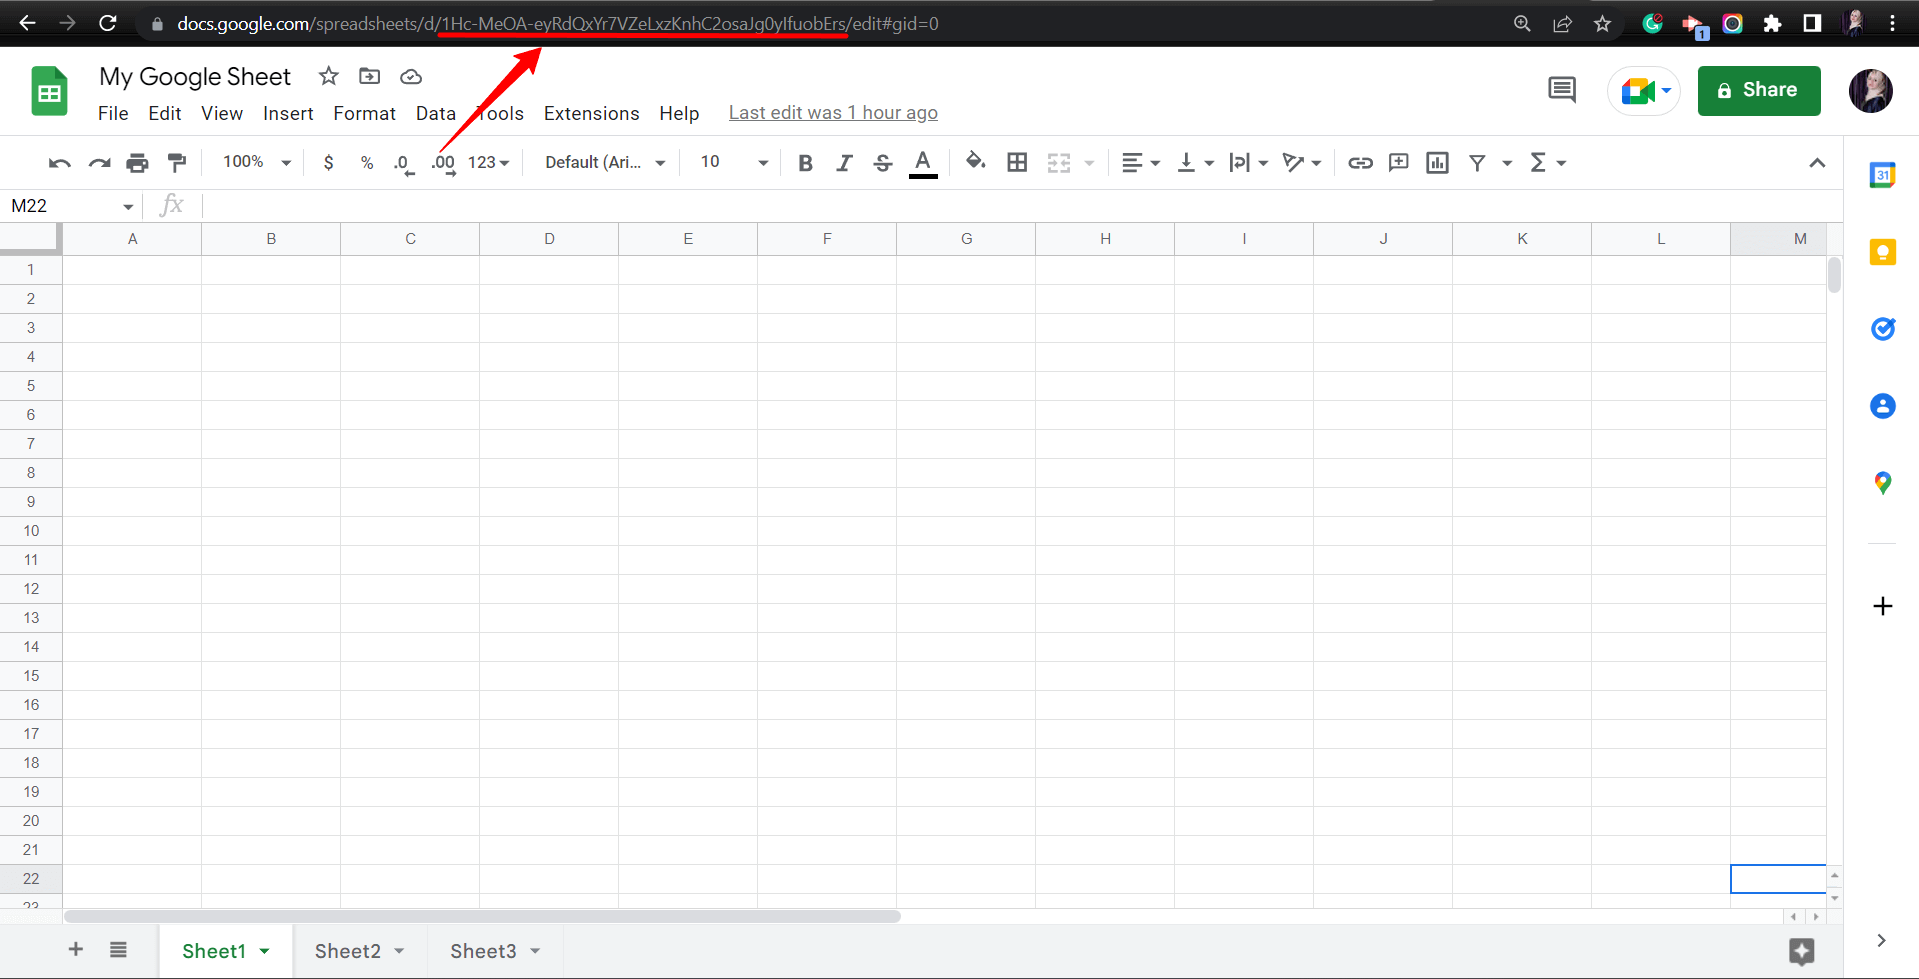
- For instance, if the spreadsheet URL is:
https://docs.google.com/spreadsheets/d/1DFuuOMFzNoFQ5EJ2JE2zB79-0uR5zVKvc0EikmvnDgk/edit#gid=0
- Then the id of the spreadsheet will be –
1DFuuOMFzNoFQ5EJ2JE2zB79-0uR5zVKvc0EikmvnDgk
Worksheet Name #
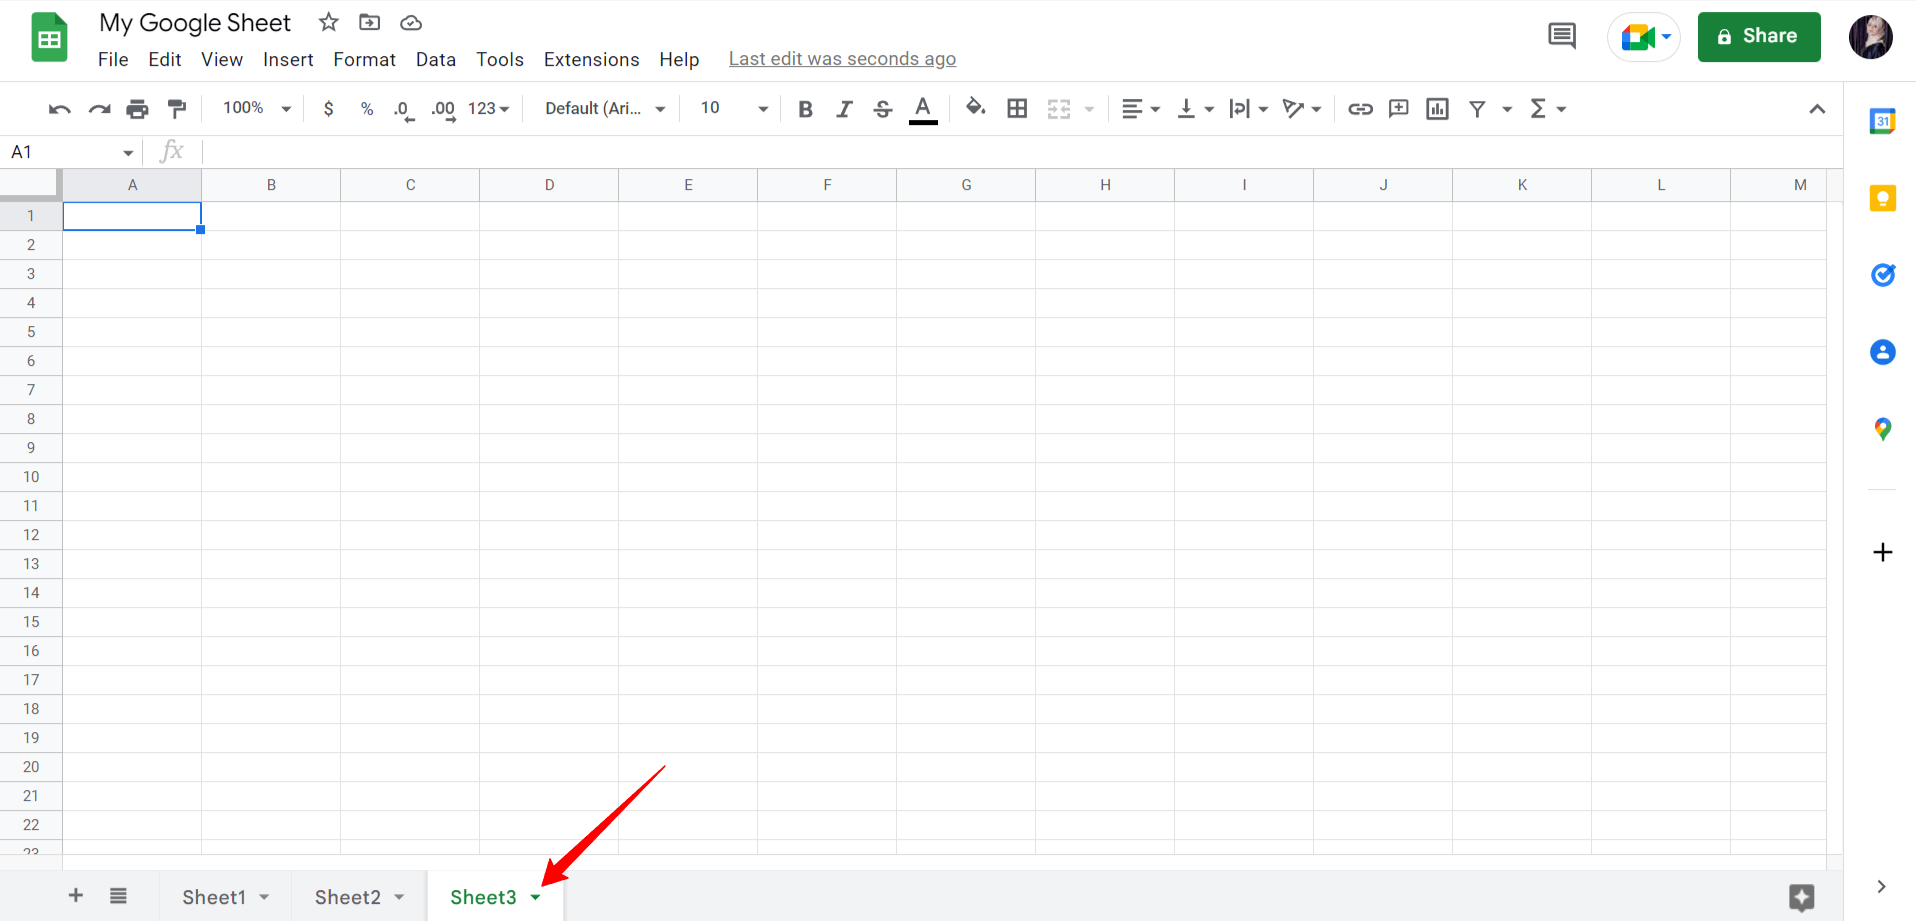
You need to enter your Worksheet Name carefully. One spreadsheet can have multiple Worksheets like Sheet1, Sheet2, Sheet3, or your defined name. See the screenshot to find the worksheet’s name.
- Now the final setting is the Spreadsheet Fields. Name the field as you want and map it with the forms field. In this case, I just wanted to send the name, email, and message inputs from the form entries to the sheet. You can have as many fields as you want.
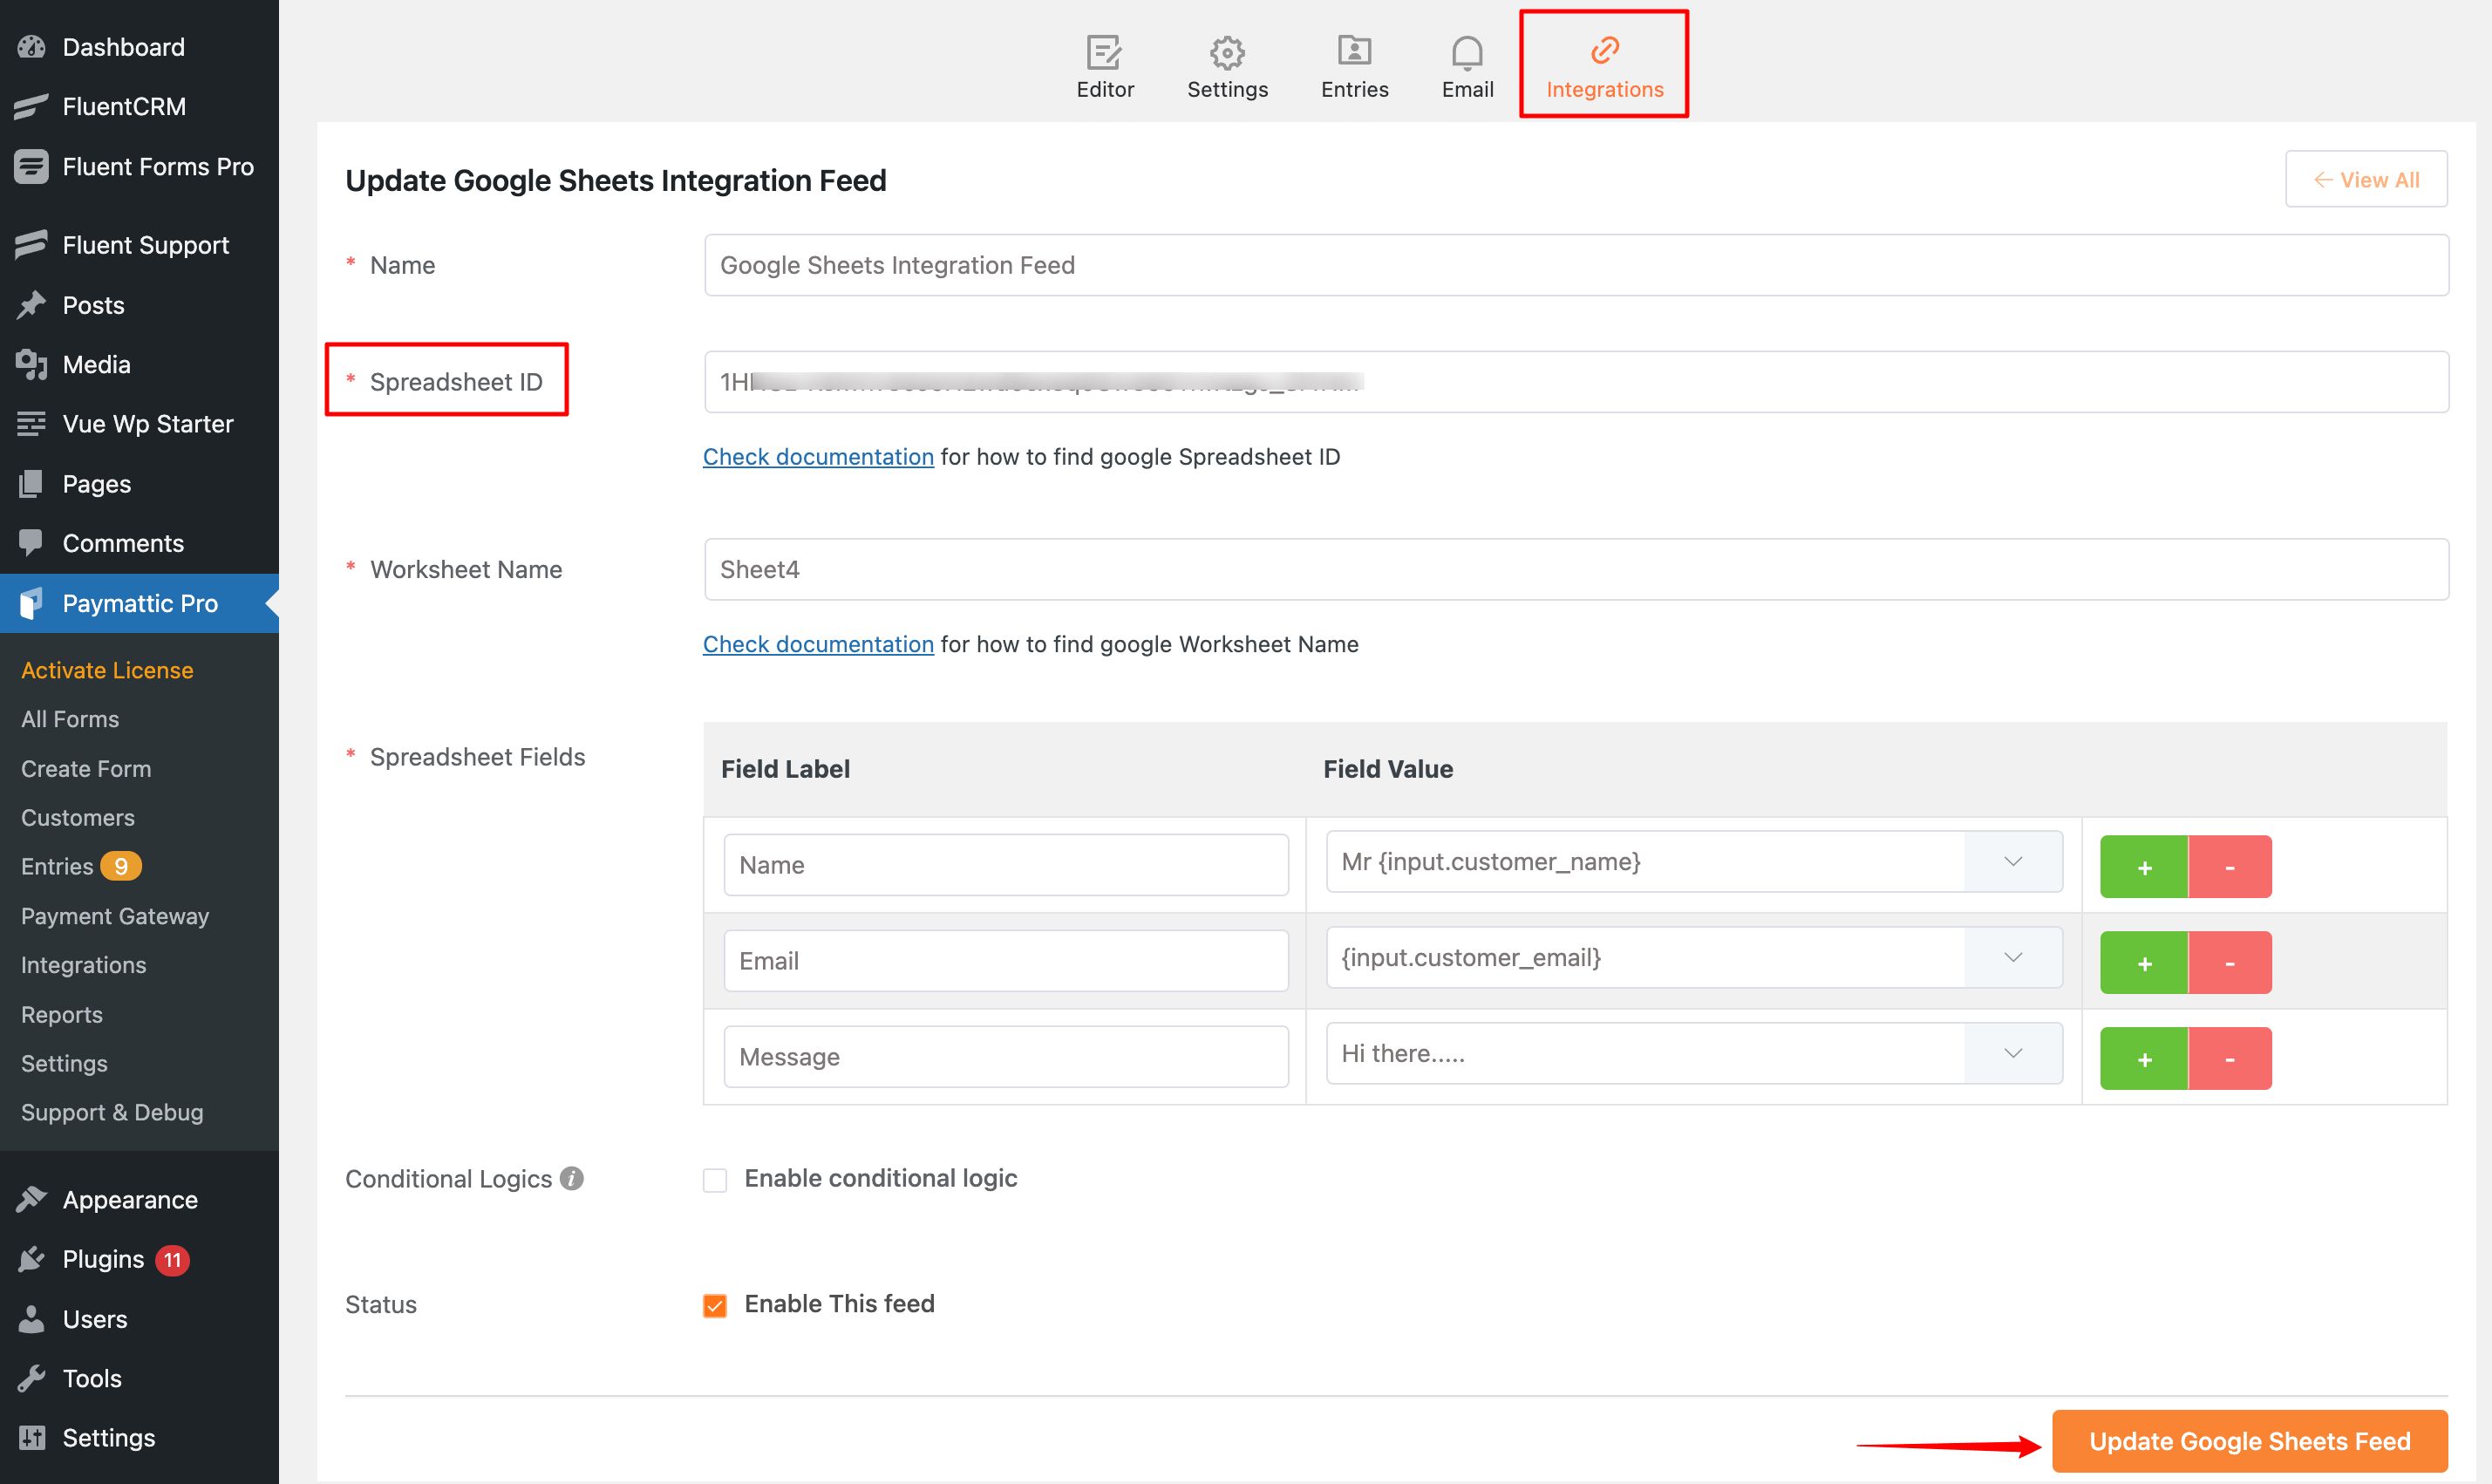
- Click on the Create/Update Google Sheets Feed button when the configuration is done!


