
Paymattic Currency Switcher: Accept Donations in Multiple Currencies


Table of Content
Download Paymattic – it’s Free!

Subscribe To Get
WordPress Guides, Tips, and Tutorials
We will never spam you. We will only send you product updates and tips.
Let’s imagine you have a donation website for Nigeria & have got a donor from the United States. When the donor visits your donation page, he might wonder how much he should donate actually, because your donation form displays all the amount in Nigerian currency and the donor will use a card in USD.
This is a common scenario when you try to receive donations globally.
The Paymattic Currency Switcher is here to help the donor switch currencies right in the donation form.
So, let’s explore how to accept donations in multiple currencies in a single donation form with Paymattic.
What is a Currency Switcher?

A Currency Switcher is a field in the Paymattic donation form that allows users to change displayed currencies right in the front-end and make donations in multiple currencies. It’s a very handy and useful tool to show the donation amount in any currency and process transactions.
Paymattic Currency Switcher converts currencies in real-time exchange rates using the currency conversion API key. This makes it easier for donors to understand the donation amount without calculating the exchange rates manually.
Why should you include a Currency Switcher field in the donation form?
If you want to receive donations from global audiences then the currency converter is a big plus for you. It’s a win-win for both the website owner and users. Let’s have a look at some of the exciting benefits of the Currency Switcher module.
Receive donations globally
Using the Currency Switcher field, you can receive donations globally and expand your non-profit operation to a wider level of audience. Donors are more likely to make donations when the amount shows in their local currency.
The Currency Switcher module eliminates the uncertainty of actual donation cost and helps donors to make decisions faster when they think of donating to your charity.
Better user-experience
A better user experience is a must to retain your existing donors. Chances are there to lose potential donors if they face complexity while donating. The donation amount is the most important part of the process and Currency Switcher ensures that donors do not get confused about the cost.
Reduce form abandonment rate
Let’s say a donor wants to donate in GBP currency but the payment gateway on your site doesn’t support the currency. In such a case, the donor can switch to the supported currency and reduce the form abandonment rate.
Thus, you can easily reach your donation goal and grow your non-profit.
Subscribe Newsletter
Subscribe to our newsletter for updates, exclusive offers, and news you won’t miss!

How to add Currency Switcher in WordPress donation form
Adding Currency Switcher in the WordPress donation form is so easy that you can do it in a few clicks. You only need the Paymattic Pro WordPress donation plugin to add Currency Switcher to your donation form. Follow the step-by-step process to enable the Currency Switcher in your donation form.
Install & activate Paymattic Pro
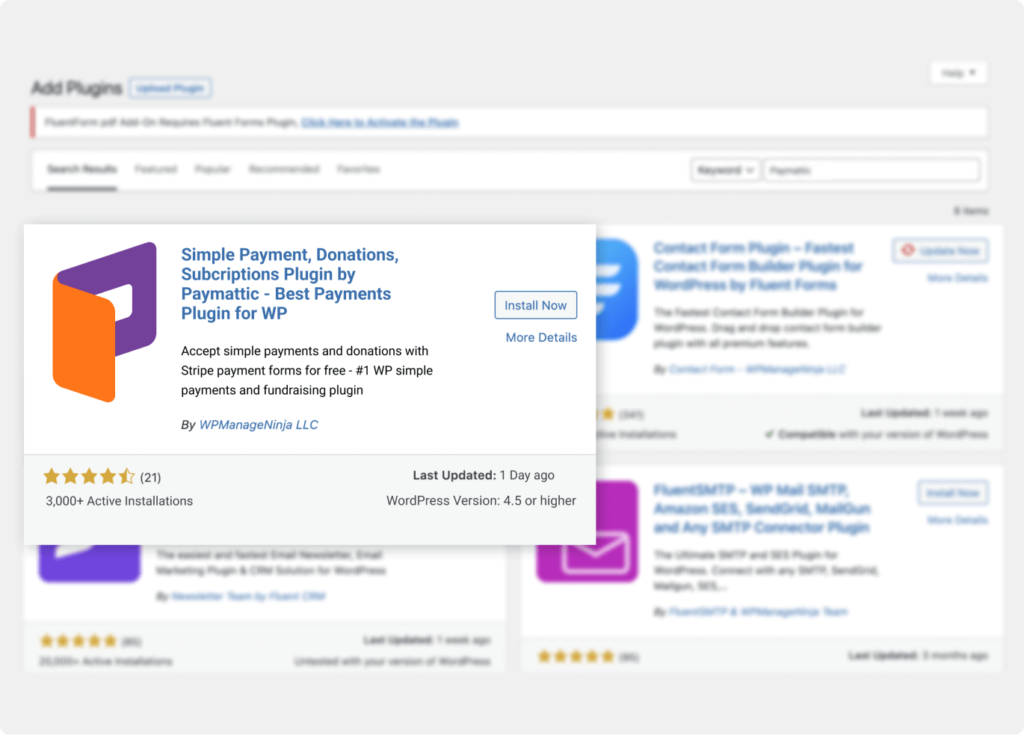
First of all, you need the Paymattic Pro WordPress plugin. Go to your WordPress admin dashboard and click on Plugins → Add New. Search for the Paymattic plugin and install it, then activate the plugin.
Currency Switcher is a pro feature of Paymattic. So, upgrade to the premium version to use this feature
Configure API Key
You need to configure the API key to properly function the Currency Switcher module. To do so –
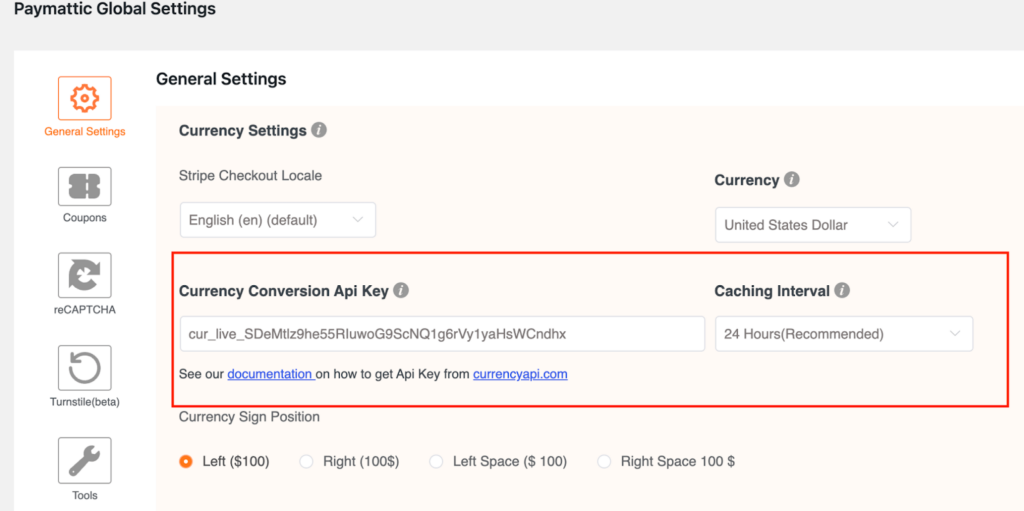
- Go to Paymattic (Pro) → Settings → General Settings. Then, select a base currency in the Currency field that will be the default currency for your donation form.
- Now, you need to set the currency conversion API key. You will get your API key from the Currency API dashboard.
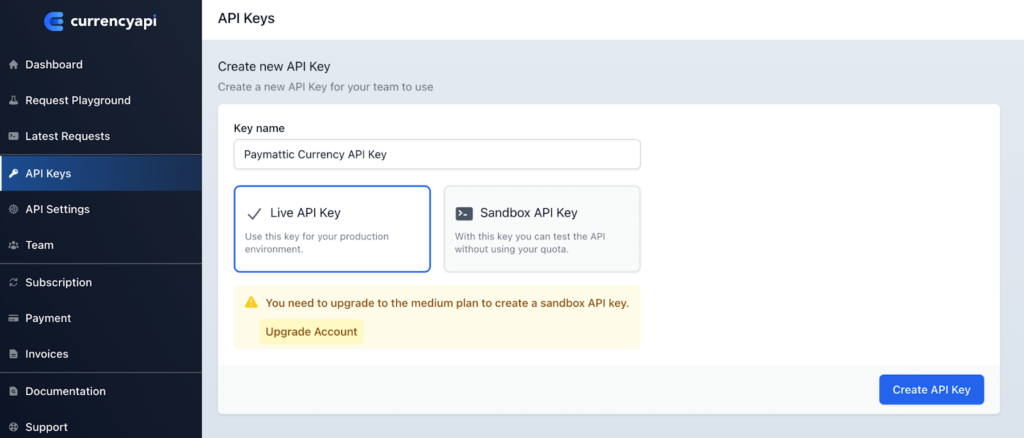
To get your API key, log in to your Currency API dashboard. Then go to the API keys option and create a new API key.
- Copy the API key that you have created and paste it into the Paymattic (Pro) → Settings → General Settings from your WordPress dashboard.
- We recommend you set the Caching Interval – 24 hours. Caching Interval is used to update the currency rate for your donation form. For example, if you set 24 hours Caching Interval then the API will update the currency rate once every 24 hours.
- A higher caching interval will reduce the API request amount. You can get 300 API requests for free per month. However, you can extend your API request limits here.
At last, click on the Save Settings button and you are ready to add Currency Switcher to your donation form.
Ready to get started?
Experience payments and donations for WordPress like never before. Try Paymattic now!
Create donation form
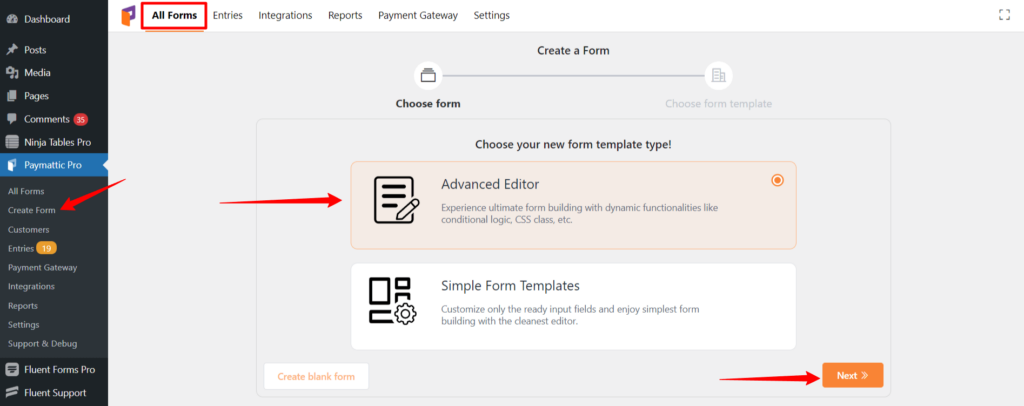
Then, you need to create a donation form by navigating to Paymattic (Pro) → Create Form → Advanced Editor.
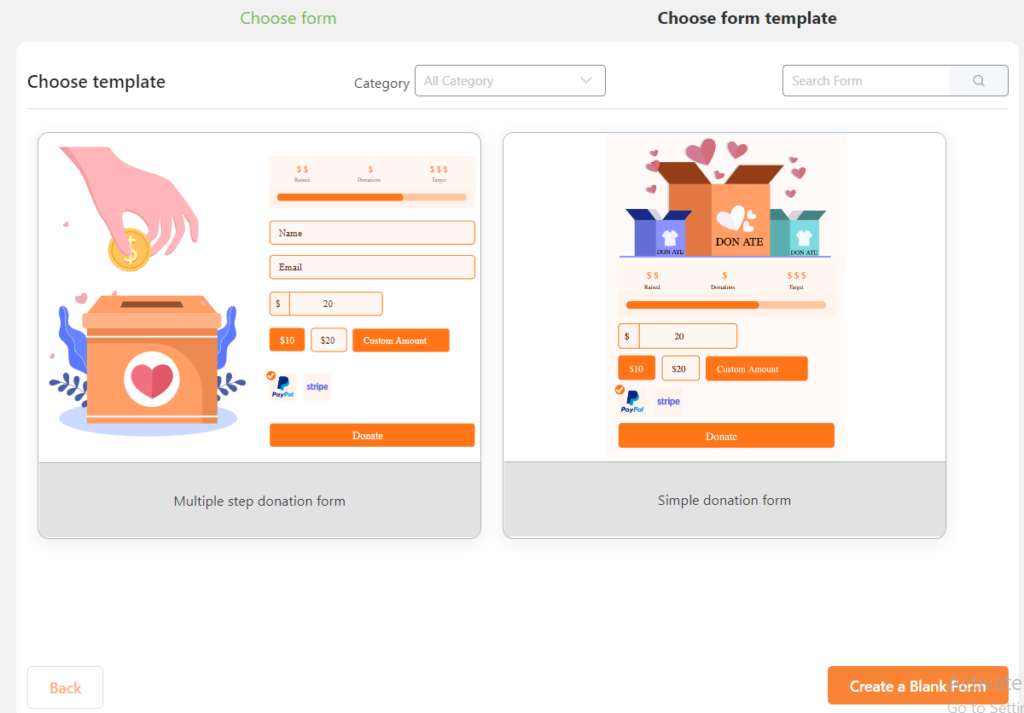
- If you want to use a pre-built template then select Simple Form Templates → Select horizontal or vertical template.
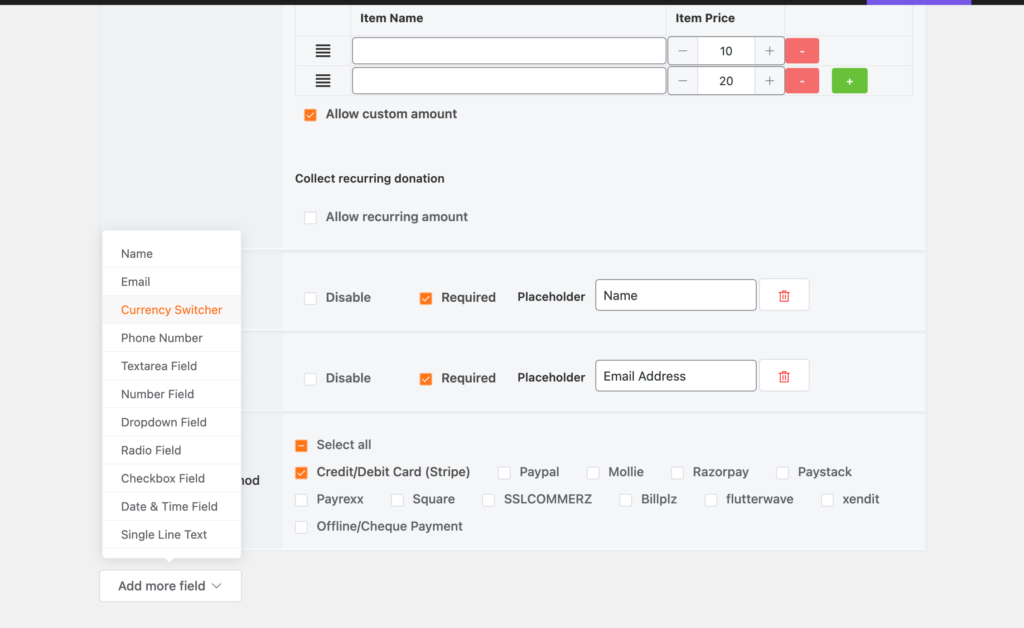
- It will open up a ready-to-use donation form. Here, click the Add more fields button and select Currency Switcher.
Add donation progress item & Currency Switcher
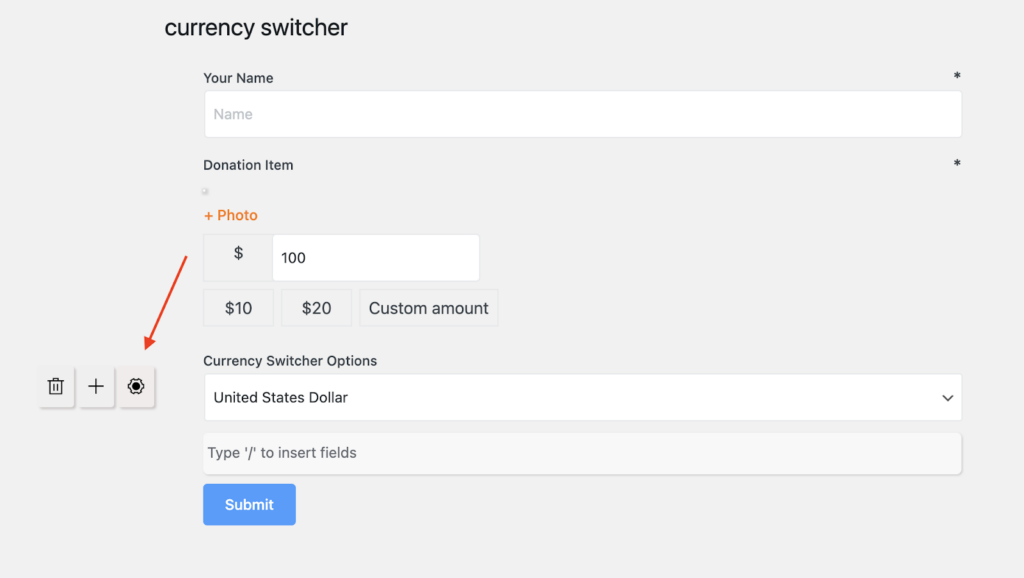
The Currency Switcher module only works for the donation progress item field. So, add a donation progress item field to your WordPress donation form and set prices for donation items.

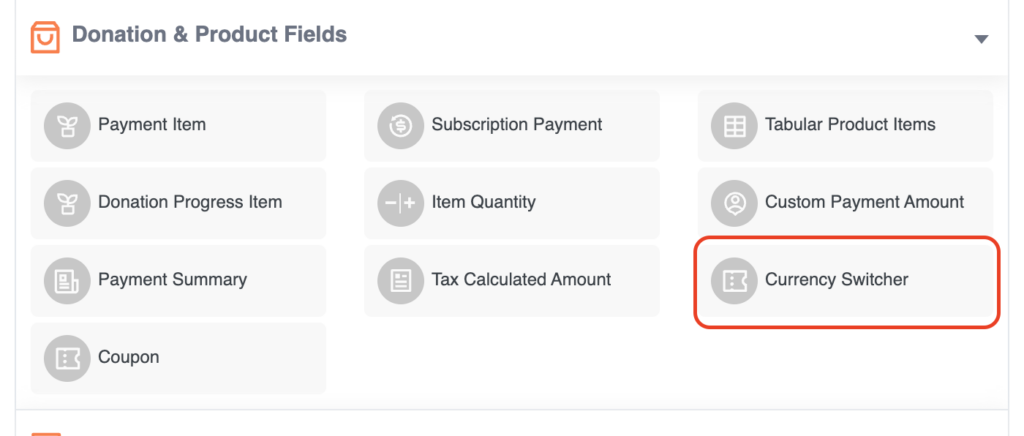
- Now, press the ‘+’ icon and add the Currency Switcher as we have shown in the screenshot below.
- Once you have added the Currency Switcher you can configure it by clicking on the gear icon.
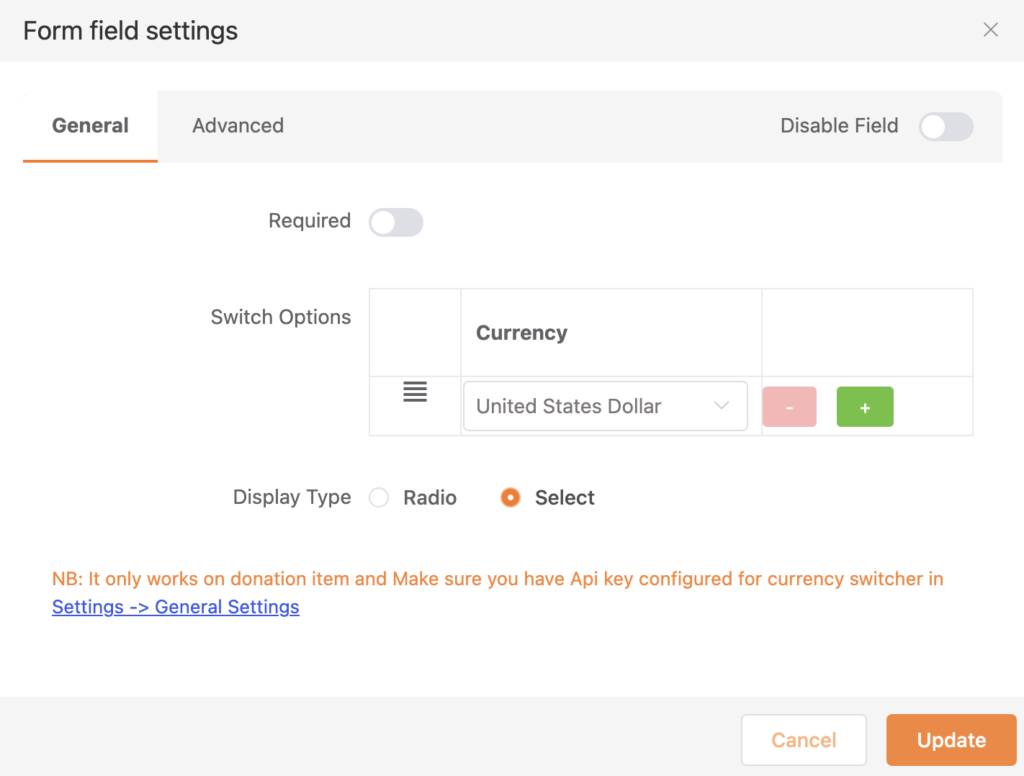
- It will pop-up the Form Field Setting box. Here, you can add or delete the currency option that you want to show on the form by clicking on the ‘ + ’/ ‘ – ’ button.
- You can make the field required by switching the Required button on. Besides, you can choose the currency display type by selecting Radio or Select option.
- Toggle the Disable Field button to disable the Currency Switcher field.
- You can find the advanced settings such as Admin Label, Conditional Rendering, CSS class and Field ID in the Advanced tab.
Finally, click on the Update button to update the field & Save button in the form editor to save the changes.
That is the simple process of adding a Currency Switcher to your donation form in WordPress.
Final words
So, I hope now you clearly understand how to add the Currency Switcher field in your donation form. This awesome feature is going to take you to global donors. Try the Paymattic WordPress donation plugin today and explore more magical features.
If you already loved Paymattic let us know which feature you liked the most and consider sharing this article if you have enjoyed it.
Adios!
Join the thousands already enjoying Paymattic Pro!

Shuyeb Ahmed
Hi, This is Shuyeb. I am a digital marketing enthusiast, love to write about WordPress products and new updates. At the weekend, you will find me exploring nature & beautiful places.


Leave a Reply