

Integrate Flutterwave Payment Gateway in WordPress


Table of Content
Download Paymattic – it’s Free!

Subscribe To Get
WordPress Guides, Tips, and Tutorials
We will never spam you. We will only send you product updates and tips.
Hello good people! Have you been waiting for another exciting feature from Paymattic? If so, it’s time to embrace something new from your beloved WordPress plugin Paymattic.
After the Xendit payment gateway, Paymattic adds another great payment gateway to its fleet, guess what? Yes, it’s Flutterwave!
Today, we will tell you in-depth about the Flutterwave payment gateway and you will learn how to integrate Flutterwave in WordPress with Paymattic.
What is the Flutterwave payment gateway?

Flutterwave is a popular fintech company based in Nigeria providing payment services to Nigeria, Ghana, Kenya, South Africa, Uganda, Tanzania, the United Kingdom, USA, and Europe. It supports Master Card, Visa Card, Bank Account, USSD, QR codes, Mobile Money and Kenyan Mpesa.
With Flutterwave’s payment gateway, businesses can accept payments from customers globally, making it easier to transact across borders. The platform also offers fraud prevention measures, security features, and real-time transaction monitoring to ensure secure and reliable payment processing.
Flutterwave has gained popularity in Africa and beyond, and it has been adopted by numerous businesses, including e-commerce platforms, marketplaces, and service providers. It has helped simplify the payment process and enable financial inclusion by providing convenient and efficient payment solutions.
Paymattic payment plugin for WordPress
Paymattic is the best WordPress plugin for accepting online payments. It is very easy to accept donations and create payment forms with Paymattic in just a few clicks. Besides, it comes with various donation features so that you can run a full-fledged donation website with a single plugin.
Besides, Flutterwave Paymattic has some more exciting features. These are –
- 13 payment gateways
- Advanced editor
- Subscription and one-time payment
- Donation templates
- 40 form fields
- Customer profile
- 14 integrations
- Donation progress bar
- Highly secured
- Import-export
- Scheduling & restrictions
- Currency switcher
Are you wondering what about taking donations through direct bank transfer or offline payment method? You can do it too with Paymattic. Users can submit a form without making any online payments if they choose the offline payment method.
Ready to get started?
Experience payments and donations for WordPress like never before. Try Paymattic now!
Integrate Flutterwave payment gateway in WordPress
It’s so easy to add Flutterwave in WordPress with Paymattic. It just takes a few clicks to enable Flutterwave payment gateway in your website using Paymattic. Without any further ado, let’s jump into the process and see how you can configure Flutterwave –
- First, go to Paymattic (Pro) → Payment Gateway from your WordPress dashboard.
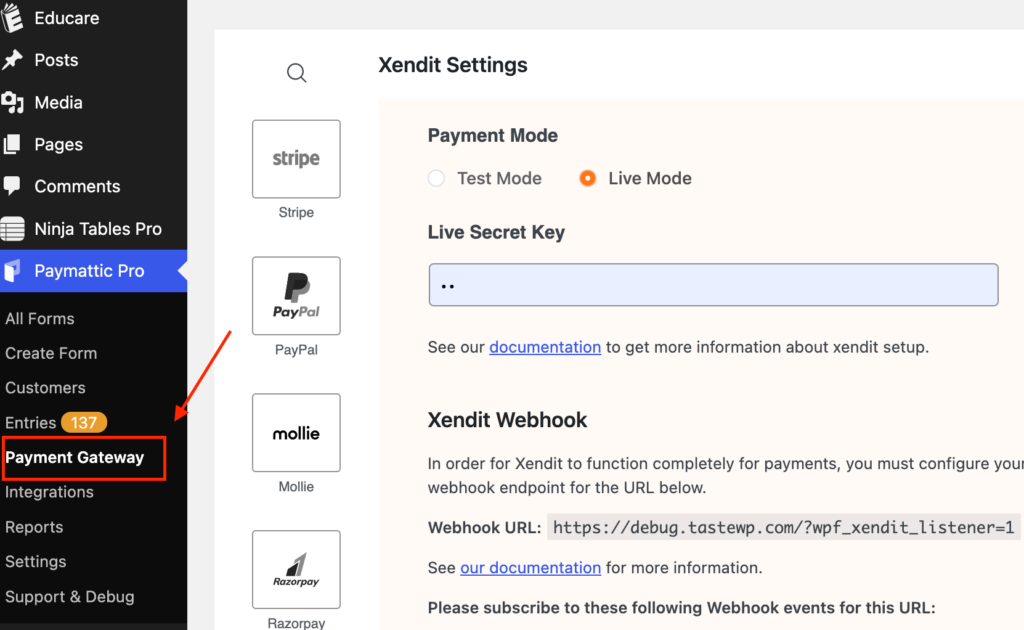
- Next, click the Flutterwave icon from the left sidebar.
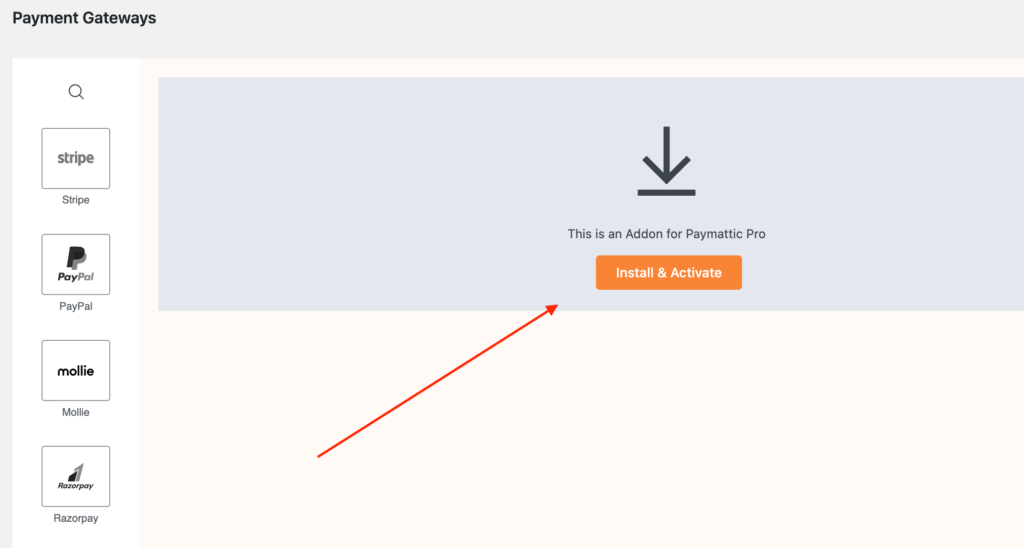
- Now, press the Install & Activate button to activate the Flutterwave for Paymattic add-on.
How to configure Flutterwave Live Mode / Test Mode
You will find two types of modes that can be selected by the radio buttons on the Flutterwave settings page. Select the Test mode only for test payments and select Live mode when you want to accept live payments. You can use any test card number issued by Flutterwave in the Test mode.
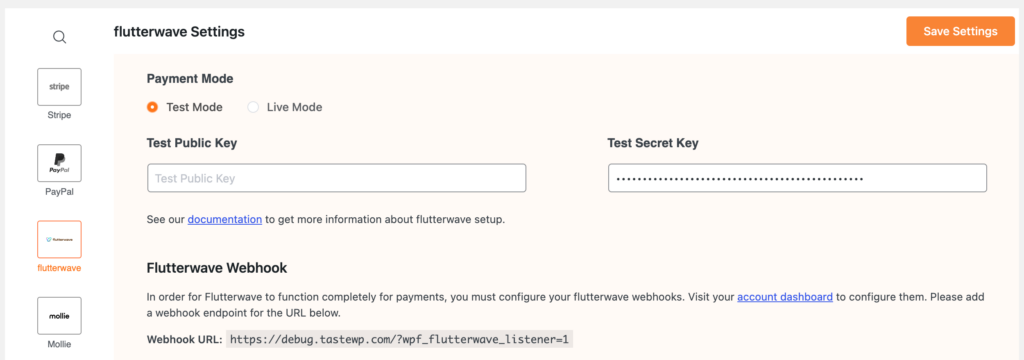
How to configure Flutterwave Public Key & Secret Key
You must set up Flutterwave public key and secret key to make the integration work properly. If you do not configure the API credentials Flutterwave won’t authenticate the payment.
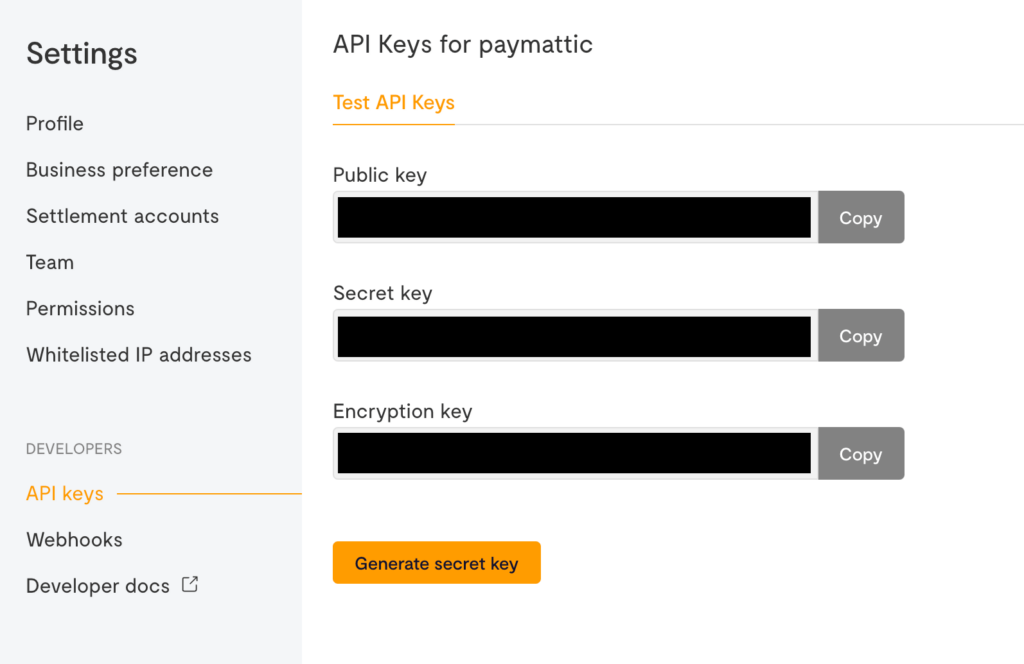
- To do so, first, log in to your Flutterwave account to obtain your API keys.
- Once you log in, go to Settings > API Keys from the account dashboard.
- Then press the Generate Secret Key button to get new API Keys.
- Copy your API credentials and paste them into Paymattic (Pro) > Payment Gateway > Flutterwave.
- Next, click the Save Settings button to save the API keys.
Subscribe Newsletter
Subscribe to our newsletter for updates, exclusive offers, and news you won’t miss!

How to configure Flutterwave Webhook
Webhook configuration is a must for real-time payment status update in your website dashboard.
Copy the Flutterwave Webhook URL from Paymattic (Pro) > Payment Gateways > Flutterwave settings page in your WordPress dashboard.
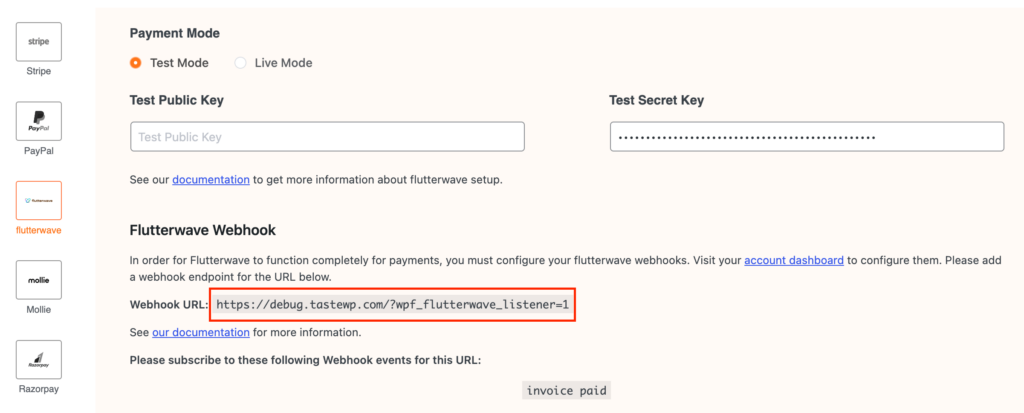
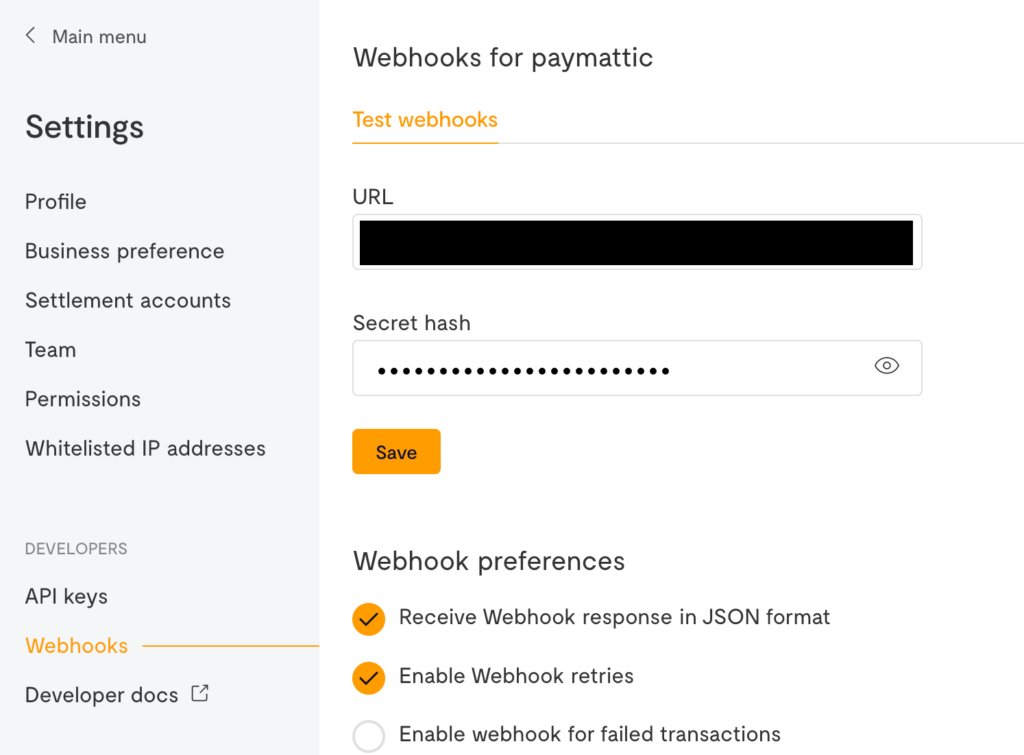
- Log in to your Flutterwave dashboard and go to Settings > Webhooks.
- Paste your Webhook URL here and wpf_flutterwave_listener as the secret hash.
- Finally, click the Save button.
That’s all you need to do to configure Flutterwave in your site. Once, you are done with this simple setup, you can create new form and add Flutterwave payment gateway in your form. Easy peasy, right?
Read this blog to learn how to enable Stripe payment gateway in WordPress [Free]
Last words
Hopefully, the Flutterwave payment gateway will be a game-changer for your business. No doubt, Flutterwave has gained popularity, especially in African region and it has gone beyond. Being a top-notch & user-friendly payment gateway, Flutterwave has bridged the gap between buyers and sellers, facilitating swift, reliable, and transparent transactions.
So, try Paymattic today & make the best of online payment with the simple Flutterwave integration.
Have a good day!
Join the thousands already enjoying Paymattic Pro!

Shuyeb Ahmed
Hi, This is Shuyeb. I am a digital marketing enthusiast, love to write about WordPress products and new updates. At the weekend, you will find me exploring nature & beautiful places.


Leave a Reply