

How to Create eLearning Websites in WordPress


Table of Content
Download Paymattic – it’s Free!

Subscribe To Get
WordPress Guides, Tips, and Tutorials
We will never spam you. We will only send you product updates and tips.
In the modern age of digitalization and technology, education is no longer limited to classrooms. People can learn anything over the internet from the comfort of their homes, on their own schedule and pace.
If you have a special skill and want to share it with others, an eLearning website is the best solution. It saves a lot of money and time that you would spend in setting up a learning center. Besides, you can reach any corner of the world and teach a large audience.
In this blog, we will show you how to create eLearning websites in WordPress step by step. Well, let’s find out.
Why you should create eLearning websites in WordPress
You may have created many blog sites with WordPress and now you are wondering if it is the right call to create eLearning websites in WordPress.
The answer is, absolutely yes!
WordPress is the best CMS platform for building EdTech websites. Scalability, customization, smooth user interface, easy setup – it has everything you need to run an online education website. On top of that, WordPress is the most affordable platform compared to other CMS or SaaS platforms.
It is a highly SEO-optimized platform that is perfect for beginners. You do not need to lose your wallet for any monthly maintenance fees. It is very easy to manage and requires zero coding skills to build simple online learning websites.
So, WordPress is the perfect option if you want to develop an EdTech website on your own.
Ready to get started?
Experience payments and donations for WordPress like never before. Try Paymattic now!
How to create eLearning website
Creating an eLearning website is simpler than you may think. Follow these step-by-step guide to build your own EduTech website.
Choose a domain name
You need to get a domain name first to create your online presence. In simple words, your domain name is your website address and it can be your brand name. Register a domain name that is easy to spell and users can memorize easily. Your domain name should be short, precise and reflect your niche.
You can check the availability of a domain using a domain checker on any domain registrar website. Popular domain registration websites are NameCheap, GoDaddy, Bluehost, Dreamhost etc. Do not use any symbol and number in your domain name so that it sounds more universal and professional.
Buy a hosting plan
Once you have registered a domain, you will require a hosting platform where you will host your online learning website. Make sure your hosting provider supports WordPress installation and other core features.
You can buy a hosting plan from popular hosting platforms such as GoDaddy, Bluehost, Dreamhost, Hostinger, HostGator etc. You will need to install WordPress on your hosting site and activate your desired theme.
Subscribe Newsletter
Subscribe to our newsletter for updates, exclusive offers, and news you won’t miss!

Configure hosting server with domain
Your hosting provider will give you the nameserver information that you need to configure in your registered domain account. Log in to your domain account dashboard, where you have registered your domain from. Set the hosting provider’s nameservers with your registered domain.
For demonstration purposes, we are going to show you how to configure your nameserver with a domain in NameCheap.
- Log in to your NameCheap account.
- Navigate to Account → Dashboard → Domain List
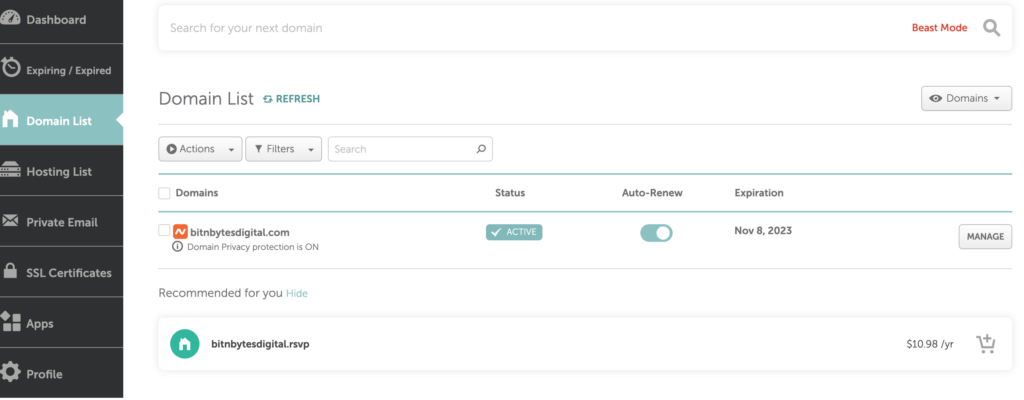
Here you will find the list of your registered domain. Select your domain and click the Manage button.
It will take you to the domain management page. Go to the Nameserver section and select Custom DNS from the dropdown. Put your nameserver information in the required field. Save the settings. Great! You have configured the nameserver with your domain.
A new domain usually takes 24-72 hours to propagate properly. Once your nameserver configuration is successful, you can access your website using the domain URL.
Design eLearning website
You have configured your domain, hosting and installed WordPress on your hosting server. Now, its time to access your WordPress dashboard and start designing your own EdTech website.
You can log in to your WordPress dashboard using the hosting provider’s account or using the default URL. The default URL of your WordPress dashboard would be your domain URL and “/wp-admin” added to the end of it. For example, if your website address is www.example.com then the WordPress dashboard URL will be www.example.com/wp-admin to access the login panel.
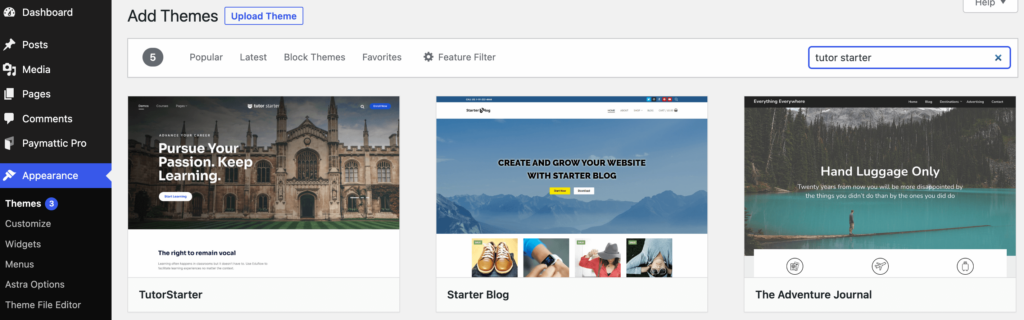
You are ready to design your online learning website with WordPress design tools after logging into the WordPress dashboard. First, you need to choose a theme suitable for the eLearning website. If you are looking for a free theme we suggest you Tutor Starter theme. This theme is very simple to handle an online learning website.
To install the Tutor Starter theme, go to the Appearance tab from the dashboard and navigate to Theme → Add New. Here, search for the Tutor Starter theme. Click on the Install button and then activate the theme.
Now, customize the theme to your own taste and start designing web pages. You can use the TutorMate plugin if you want to import some demo design templates.
Install a WordPress LMS plugin
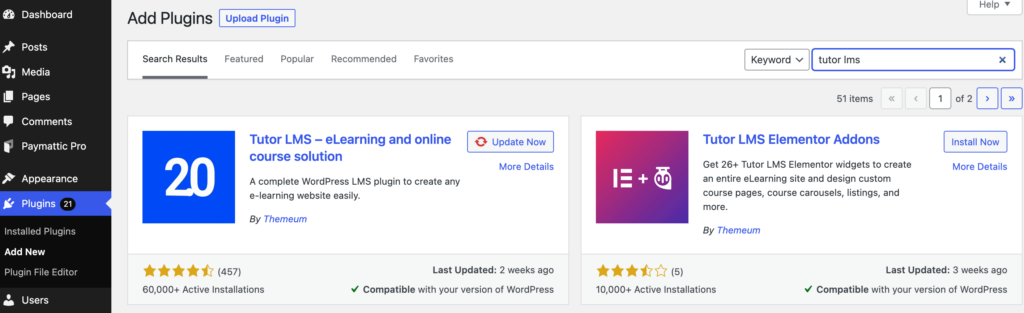
You will require a Learning Management System plugin to create and publish courses on your online education website. Popular LMS plugins available in the market are LearnDash, Tutor LMS and LifterLMS. You can use any LMS plugin with your WordPress website.
If you have already installed the Tutor Starter theme, we suggest you use the Tutor LMS plugin. Tutor LMS works best with the Tutor Starter theme.
To install a plugin, go to Plugin → Add New from your WordPress admin panel. Search for Tutor LMS or any other WordPress LMS plugin that meets your need and activate it.
Create eLearning courses with an LMS plugin
Excellent! You got your website and LMS plugin ready. Now, it’s time to move forward and start creating eLearning courses for your LMS website. Let’s see how to create an online course using the Tutor LMS plugin.
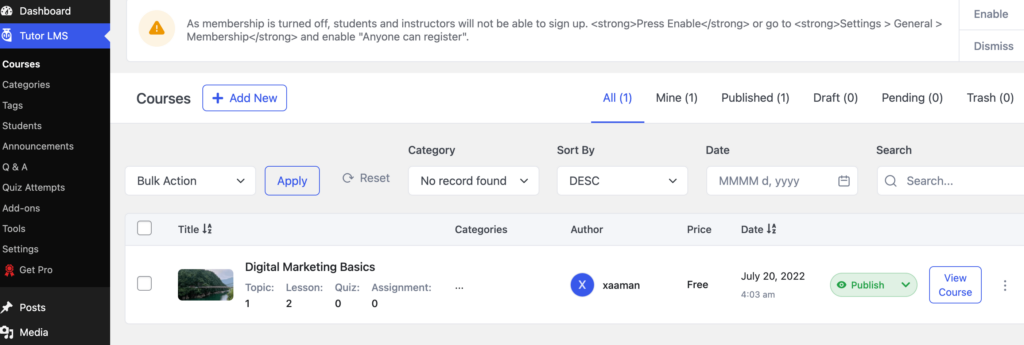
To create new eLearning courses go to the Tutor LMS tab and hit the Courses menu. Click on the Add New button to create a new course for your site.
Next, you will be landed on the course builder page. Here you can add the title, description and content of the course. You can limit the number of students for any specific course and set the difficulty level of the course. Besides, you can add quizzes to your course and evaluate students.
Sell courses online with Paymattic
So, what’s next? The most important part – selling online courses and making money through your eLearning website. Install the Paymattic payment plugin for WordPress to add payment methods to your website and start enrolling students.
You can integrate Paymattic with Tutor LMS, LearnDash and LifterLMS. Create payment forms with Paymattic and integrate it with your LMS plugin. So, a student who fills up the payment form and makes online payments will automatically enroll in the course.
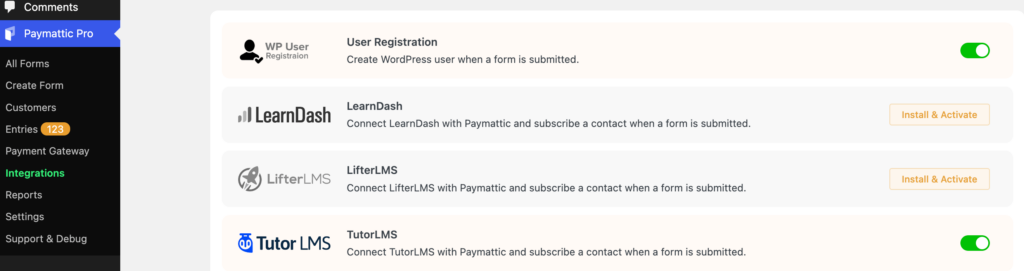
It saves you from the hassle of assigning courses manually to each student after payment is complete. Paymattic is the best WordPress plugin for accepting payments on any website. It supports 14+ payment gateways and 14+ integrations with its pro version. Paymattic also offers Stripe payment method with the free version. Paymattic includes the following payment methods –
- Stripe (free)
- PayPal
- Payrexx
- Paystack
- Xendit
- Square
- Mollie
- Razorpay
- Billplz
- SSLCOMMERZ
- Moneris
- Viva Wallet
- Flutterwave
So, with Paymattic you are not bound to any specific boundary. You can sell online courses to any corner of the world. That’s great!
Paymattic is not just a payment plugin. You can go beyond the payment facility and add many more exciting features to your website using Paymattic. It lets you create various types of forms on your website so that you can collect valuable data from students. It integrates with multiple platforms such as FluentCRM, Fluent Support, Mailchimp, Google Sheets, Slack, Zapier and many more.
Try the Paymattic payment plugin for WordPress without any delay and start selling your online courses right away.
Join the thousands already enjoying Paymattic Pro!
Wrapping up
Well, this is the simple story to create eLearning websites in WordPress. This guide is enough to create a beautiful online education website completely on your own without any coding.
So, no more delay. Launch your EdTech website with Paymattic and start teaching. Share us in the comment section below, what type of websites you built and how Paymattic helped you to grow.

Shuyeb Ahmed
Hi, This is Shuyeb. I am a digital marketing enthusiast, love to write about WordPress products and new updates. At the weekend, you will find me exploring nature & beautiful places.


Leave a Reply