

How to Accept Donations in WordPress with Multiple Payment Gateways?


Table of Content
Download Paymattic – it’s Free!

Subscribe To Get
WordPress Guides, Tips, and Tutorials
We will never spam you. We will only send you product updates and tips.
Have you done a kickass website design for your donation campaign?
Now, all that you need is to integrate payment gateways to accept online donations in WordPress.
As per a study by the researchers, online fundraising increased by 23% over the past year. So, boost up your donation campaign with an online fundraising tool. Paymattic WordPress donation plugin is a powerful bullet for your donation campaign. Installing Paymattic on your WordPress fundraising website will reveal a lot of opportunities to accept donations in WordPress for your great cause.
With the Paymattic WordPress payment and fundraising plugin, you can add some magical features to your WordPress fundraising site. You can create forms that can collect donations and payments with a wide combo of payment gateways.
Check out this blog about GiveWP vs Paymattic and learn the differences.
How to Accept Donations in WordPress
Though a bunch of donation plugins are available in the market, this blog will cover the most easy-going method to accept donations in WordPress with Paymattic. Follow the steps below to learn how to accept donations in WordPress –
Ready to get started?
Experience payments and donations for WordPress like never before. Try Paymattic now!
Configure payment gateways
After activating the plugin, you need to configure the payment gateways to receive funds in your merchant account.
- To configure the payment gateways navigate to Paymattic (Pro) > Payment Gateway from the top bar.
- Here, you can see all available payment gateways. Select your preferred payment gateway and put the required API credentials for your merchant account.
For example, we will demonstrate how you can set up the Stripe payment gateway for free.
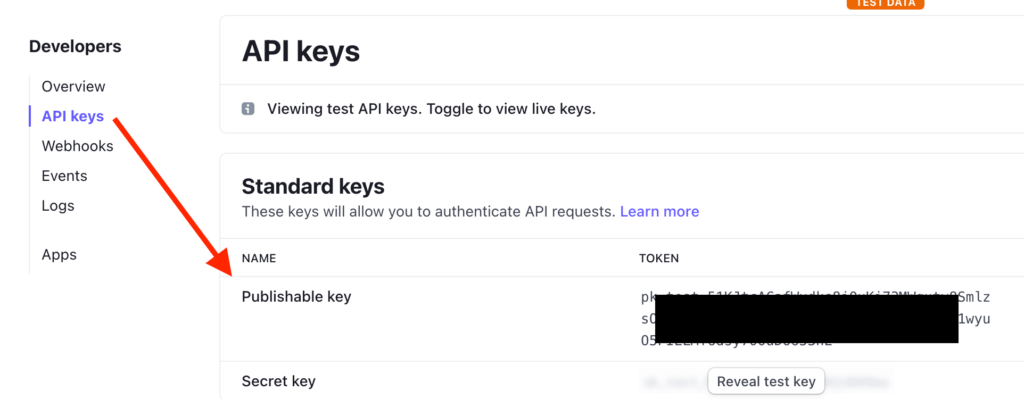
- First, log in to your Stripe dashboard and navigate to the Developer section.

- Then, navigate to API Keys and toggle the switch Viewing test data on. Keep the switch turned off if you want to access live data.
- Here, you will get your publishable key and the secret key.
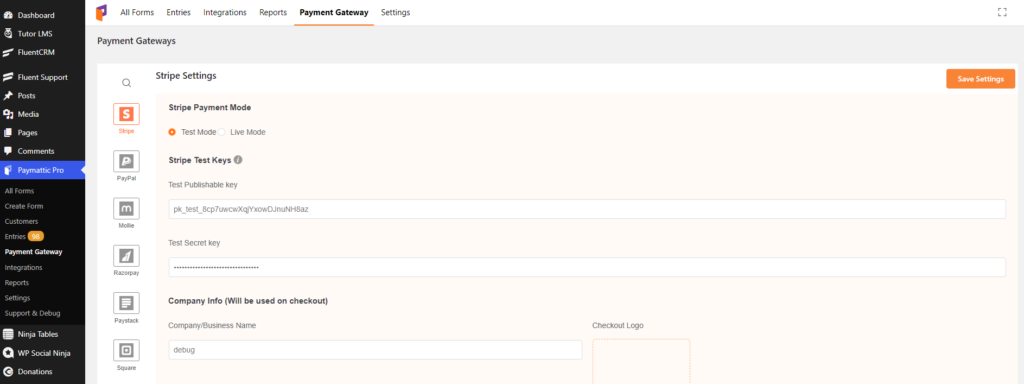
- Copy and paste the keys in the required fields from Paymattic (Pro) > Payment Gateway > Stripe.
- Click on the Save Settings button to save the changes.
You can set up other payment gateways following the same procedure. Just provide the required API credentials of the payment method you want to integrate.
Create a donation form
Now, you will be able to create donation forms in Paymattic (Pro). It comes with two pre-built donation templates so that you can create your donation form swiftly.
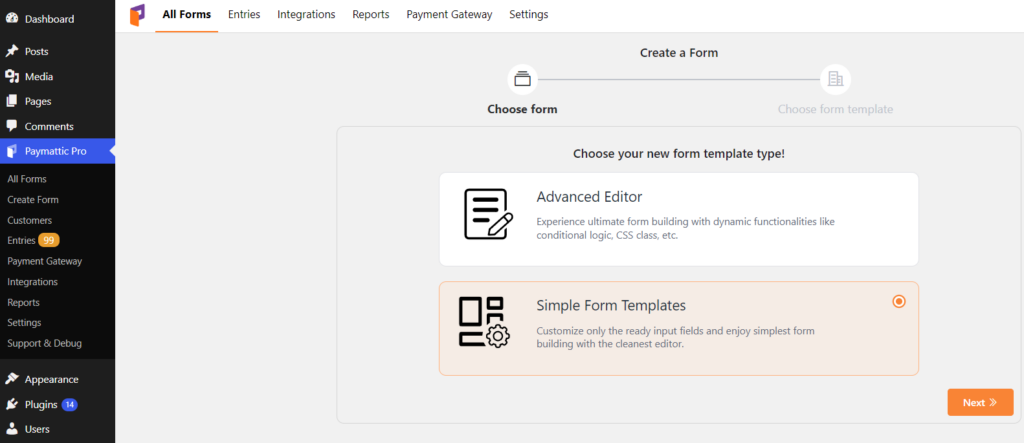
- To create your donation form, go to Paymattic (Pro) > Create Form from your WordPress dashboard.
- Select the Simple Form Templates option to quickly create a donation form. The Donation template is a pro feature of Paymattic. Upgrade to Paymattic Pro to use all the premium features.
- Here you can view two donation templates. Select a template of your choice.
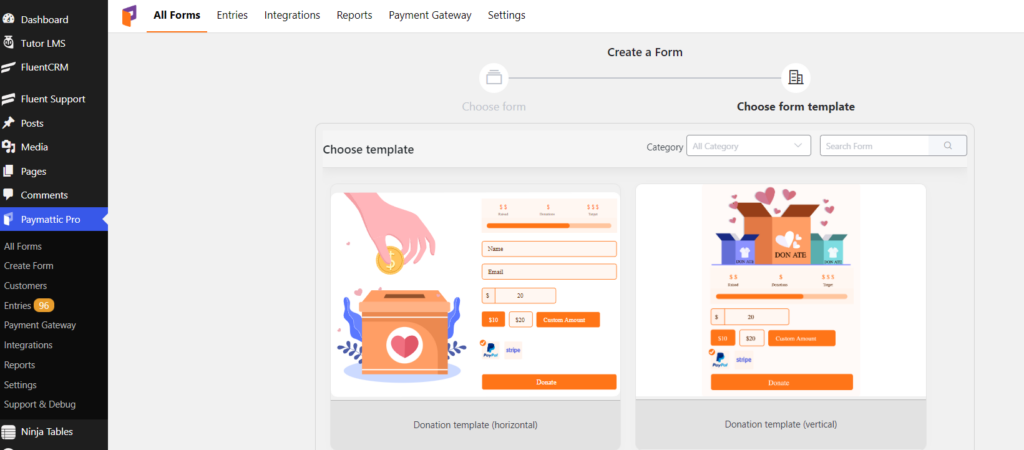
- Once you select the template, it will take you to the custom form fields page.
- Configure all the form fields as per your need.
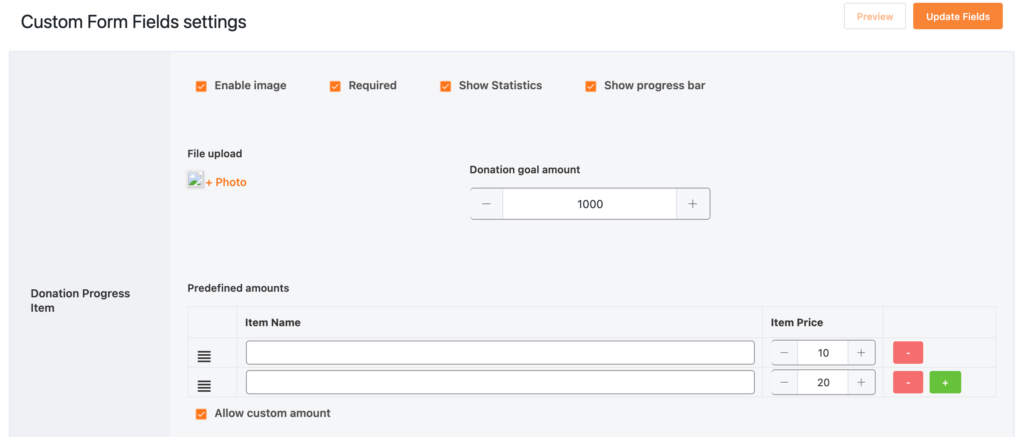
- Finally, you have to add a Payment Method to your form to receive funds from the donors’ accounts. You can add a single payment gateway or multiple payment gateways in the same form.
- In this case, users can select any payment gateway of their choice while submitting the form.
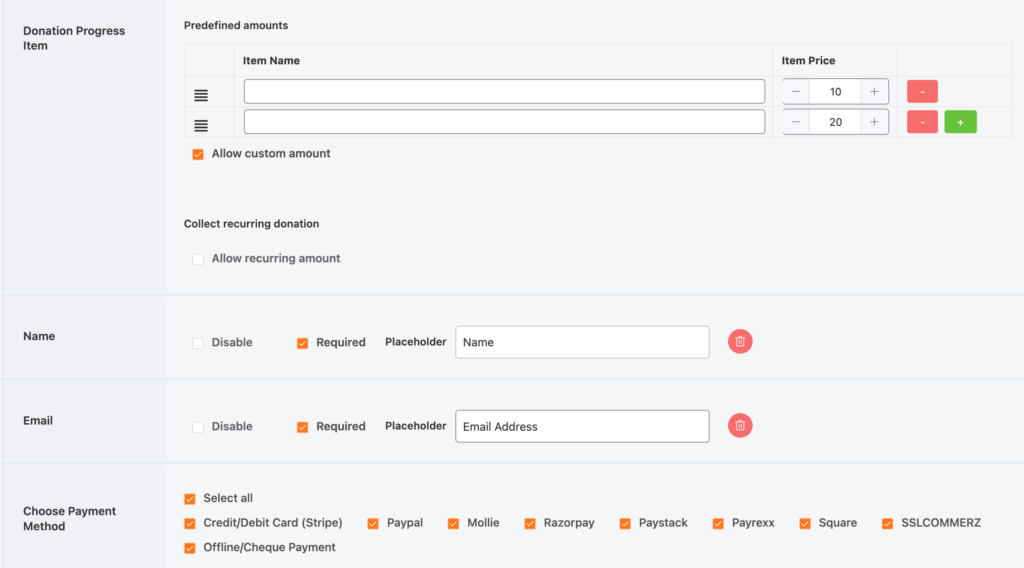
- Click on the Update fields button and save the changes.
That’s all! You have created a donation form with multiple payment gateways. Here is the preview of how your donation form might look like.

Publish the form to accept donations in WordPress
After successfully creating a form, you need to publish the form on a specific webpage of your WordPress website.
- To publish the donation form, go to Paymattic (Pro) > All Forms.
- Copy the shortcode located on the right side of each form name.
- Create a donation page from your WordPress dashboard and paste the shortcode on the webpage where you want to place the form.
Publish the page and you are all set to collect donations on your WordPress website.

Final words
In this post, you have learned to accept donations in WordPress with the Paymattic WordPress payment and donation plugin. You can use this WordPress fundraiser plugin for many other purposes as well.
You can create a hotel booking form, tabular product form, school fee payment form, restaurant order form and WordPress donor registration form for your businesses or non-profit donation website. On top of that, using Paymattic, you can connect your forms with several email marketing softwares to better engage with your audiences.
So, if you are in search of a smooth and faster form builder plugin with a payment collection feature, then there is no other choice better than the Paymattic WordPress donation plugin. Try Paymattic today and start building your own fundraising website.
Feel free to share your thoughts in the comment section below to let us deliver more useful tricks and tips.
Join the thousands already enjoying Paymattic Pro!

Shuyeb Ahmed
Hi, This is Shuyeb. I am a digital marketing enthusiast, love to write about WordPress products and new updates. At the weekend, you will find me exploring nature & beautiful places.


Leave a Reply