
How to Set Up Your WooCommerce Store Using WordPress


Table of Content
Download Paymattic – it’s Free!

Subscribe To Get
WordPress Guides, Tips, and Tutorials
We will never spam you. We will only send you product updates and tips.
WooCommerce is one of the most popular and widely used WordPress plugins for creating and managing online stores.
With a 38.74% market share and a staggering 6.5 million active sites, WooCommerce reigns supreme in the realm of eCommerce.
Unlimited scalability, a diverse array of eCommerce features, flexibility, and support for a large number of third-party plugins are what make WooCommerce the undisputed king in the eCommerce landscape.
In this article, we will walk you through how to set up WooCommerce store and suggest the best plugins that enhance your store’s performance and growth.
Let’s get started.
How to set up WooCommerce store
Setting up a WooCommerce store is pretty straightforward. To create WooCommerce store, you need to begin with installing the plugin.
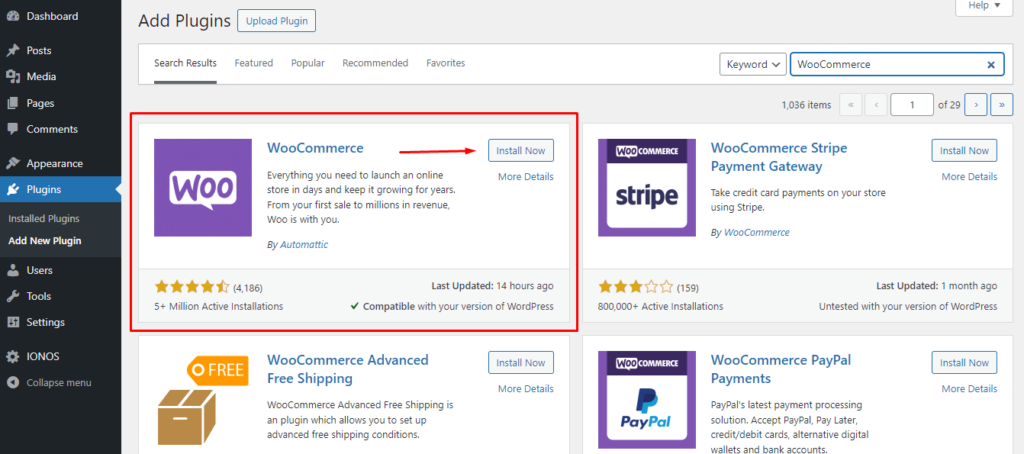
The WooCommerce plugin is freely available on the WordPress plugin repository. Log in to your WordPress admin panel and jump to the Plugins directory.
Search, find, install, and activate the WooCommerce plugin.
After activation, it will take you to the WooCommerce store setup wizard. You can also set up a WooCommerce store manually if you know your way around.
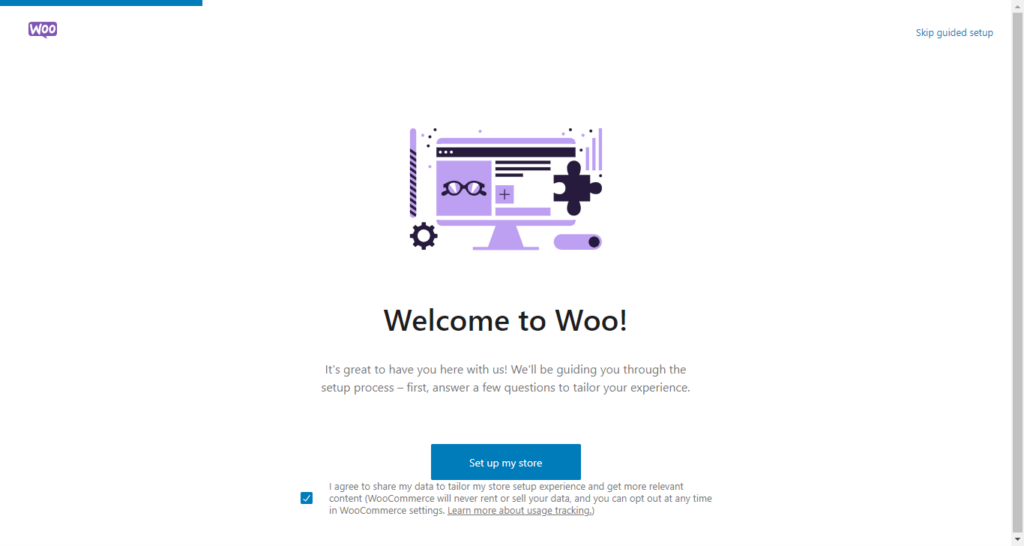
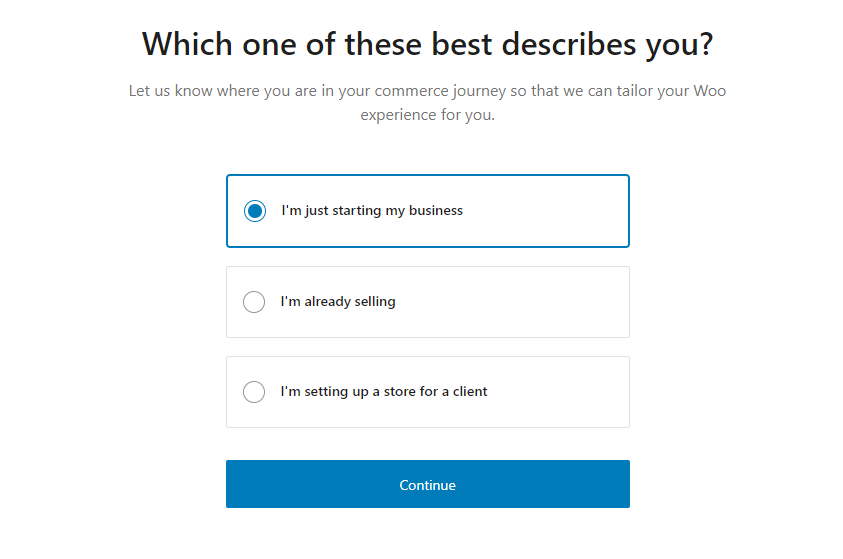
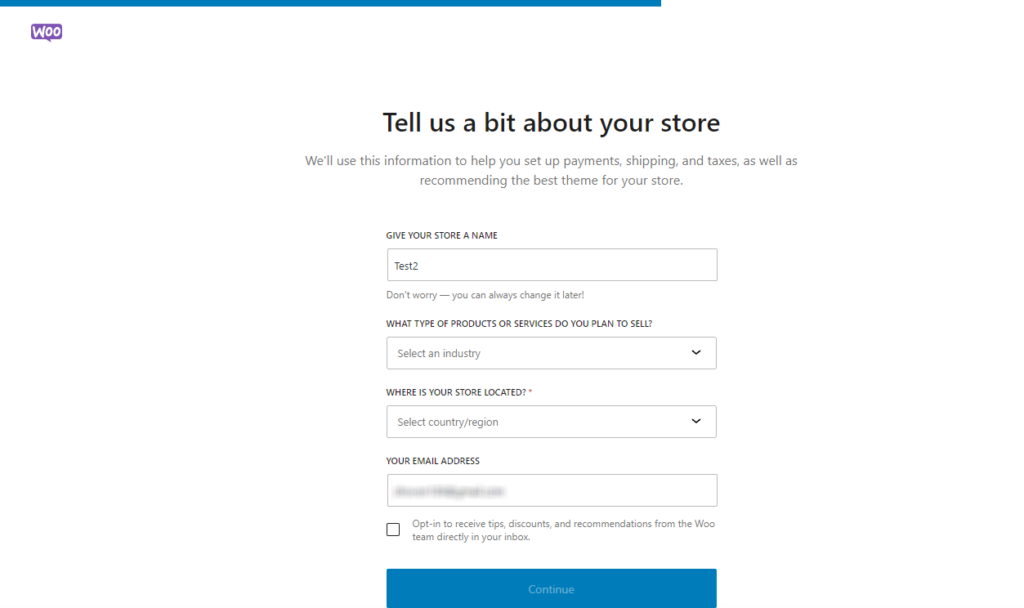
Click the Set up My Store to start the wizard process. Next, you need to select in which state your business is in.
Now, you need to input some details about your business, such as your store name, product niche or industry, location, and email address.
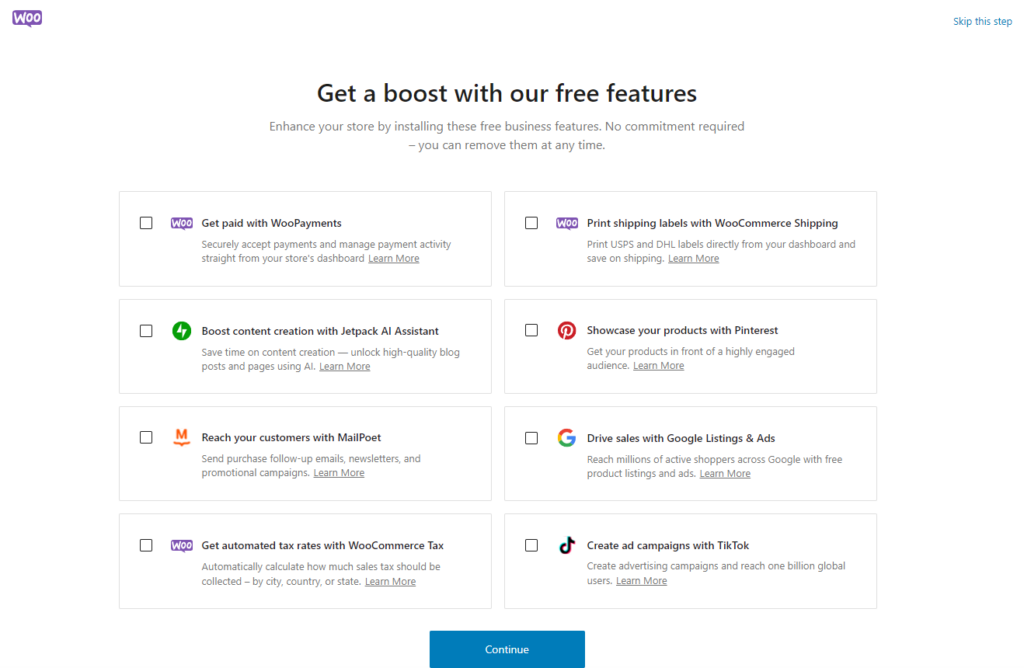
On the next screen, WooCommerce will offer you the option to install some useful plugins that can enhance your WooCommerce store’s functionalities. You can skip them for now or install the ones you need.
After you go through the above steps, the system will take some time to set up WooCommerce store.
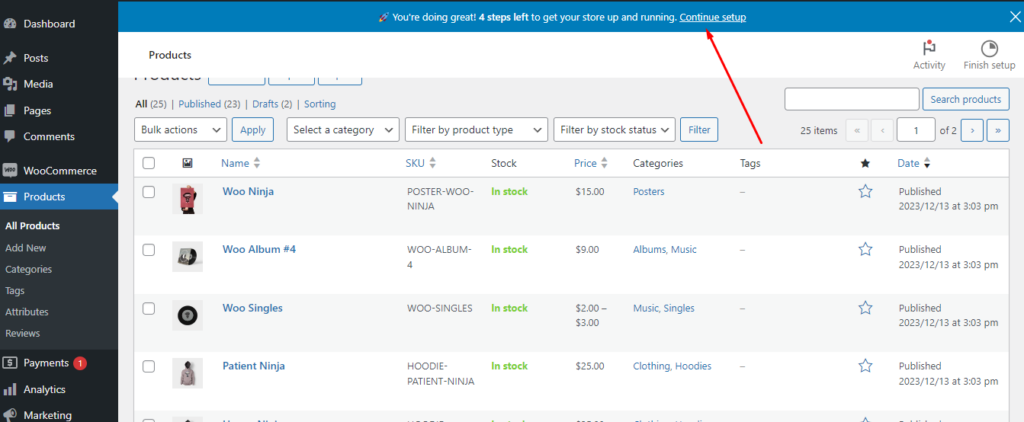
After you complete the wizard, it will take you to the following window.
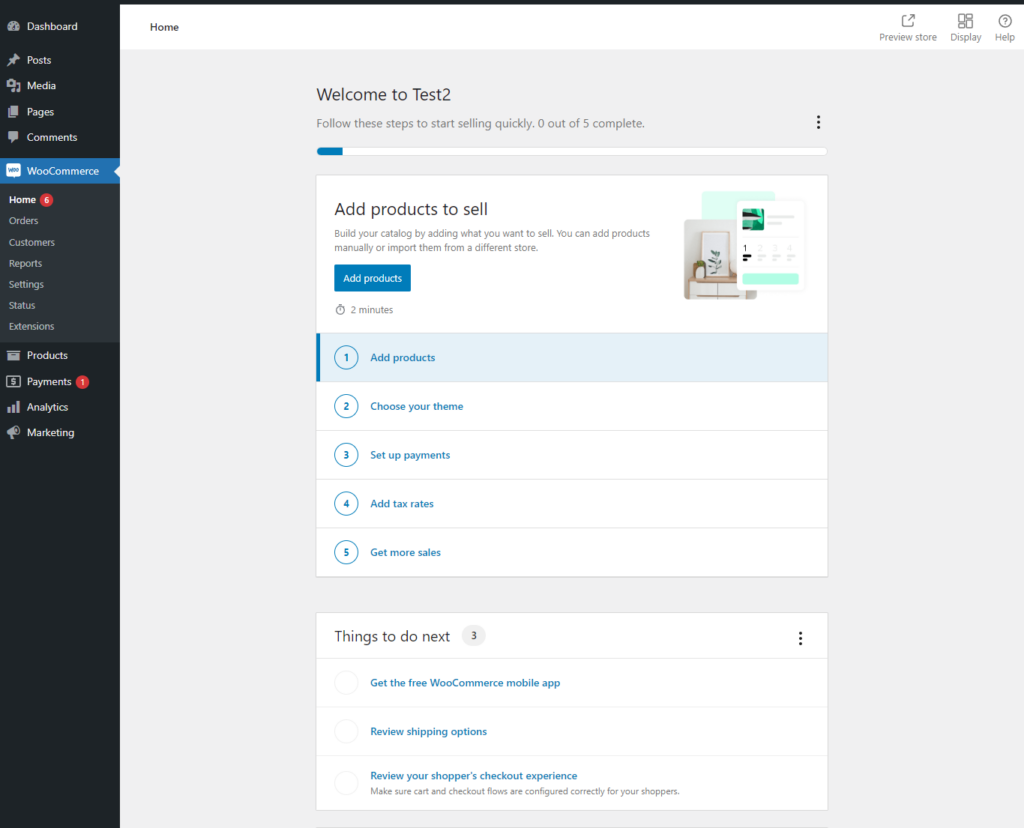
WooCommerce will point out the steps you need to complete for WooCommerce store integration on WordPress.
Set up WooCommerce store – Adding products
As can be seen in the image above, the next step to set up WooCommerce store is adding your products to your online store. WooCommerce supports a wide range of product types.
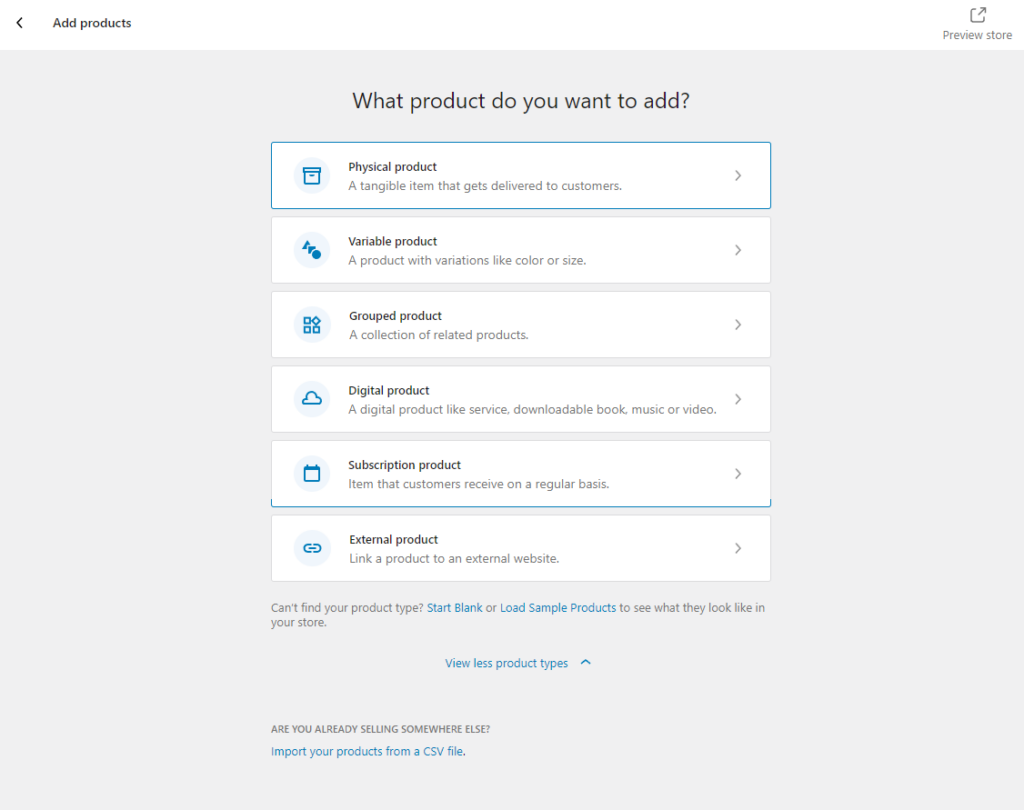
Let’s go with the most common one – physical products. Here’s what a product edit page looks like.
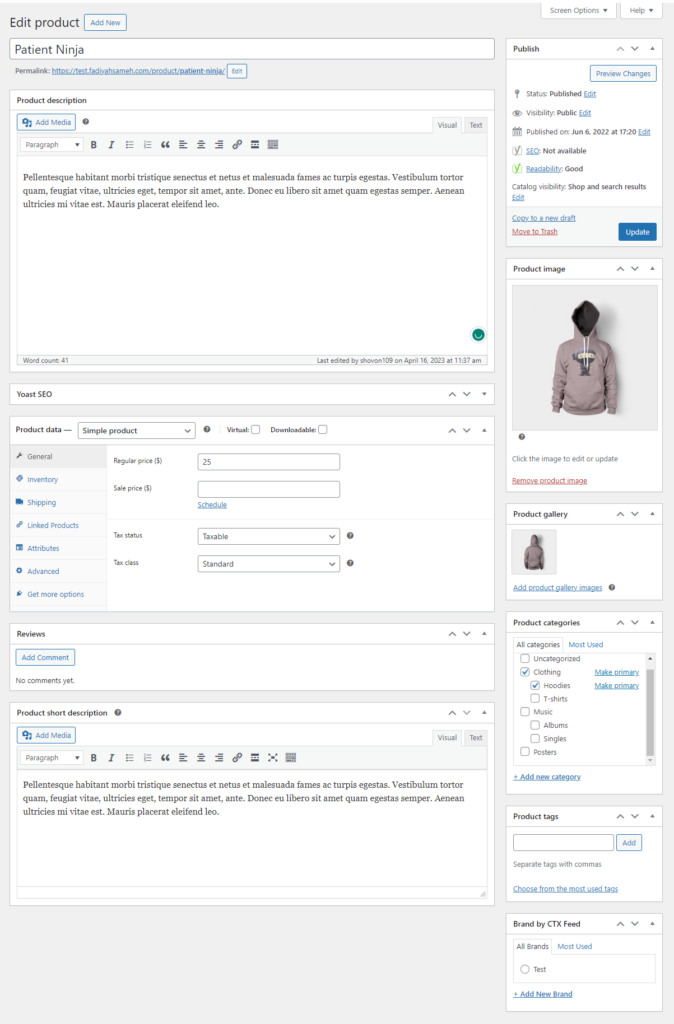
You can input a title, description, short description, prices, sale prices, tax and shipping information, image gallery along with the featured image, etc., from the product page. One important element of your store is the category of your products.
Subscribe Newsletter
Subscribe to our newsletter for updates, exclusive offers, and news you won’t miss!

Effectively categorizing products is crucial for an online store. It not only organizes your products but also streamlines navigation, elevates user experience, and boosts SEO by aiding customers in easily locating their desired items.
You can create categories from the Products > Categories page or from individual product pages.
You can create categories from the above page and assign them to each product from individual product edit pages.
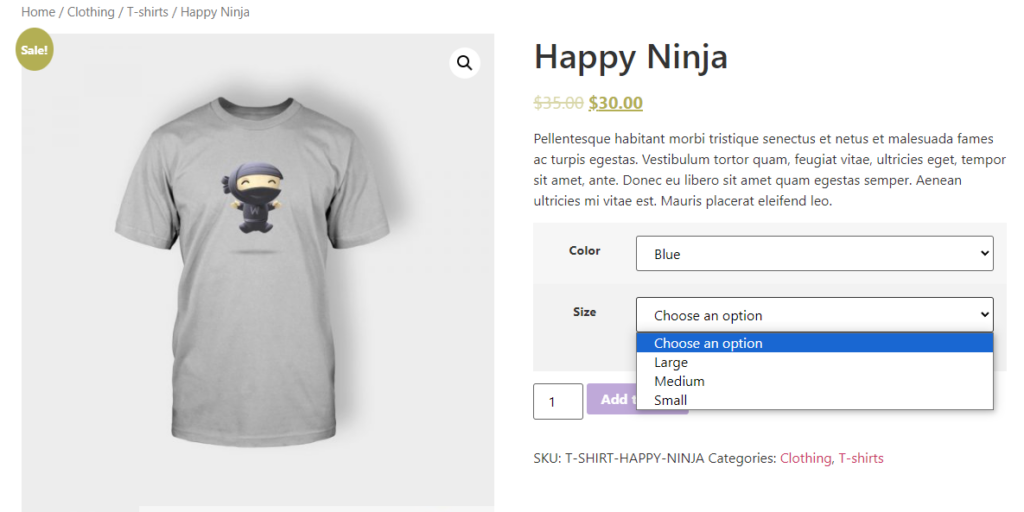
Creating variable products
Variable products are those products that come in different variations, such as colors, sizes, etc. For example, a T-shirt can have different sizes and colors.
Let’s say you have a T-shirt that comes in blue and grey color. You cannot expect a single size to fit all your customers. Therefore, you are offering small, medium, and large sizes for both blue and grey t-shirts.
These are called product variations. The product that comes in such variations is known as a variable product. So, how do you create such a product on WooCommerce?
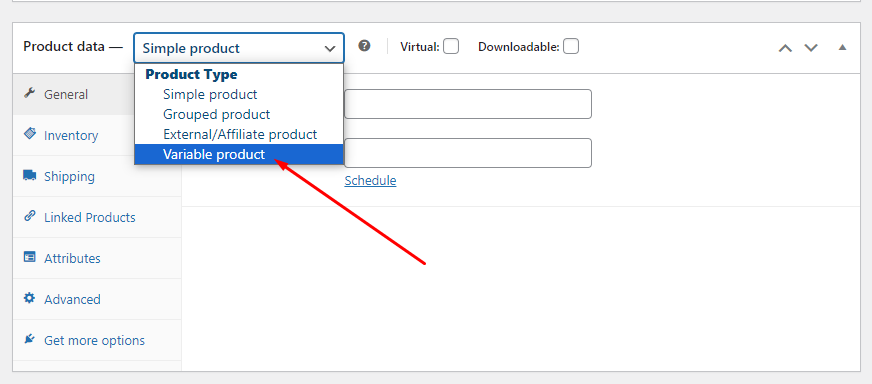
Let’s find out. Create a new product page and scroll down to the Product Data section. At the top of the section, there’s a product data dropdown. Select the Variable product option from there.
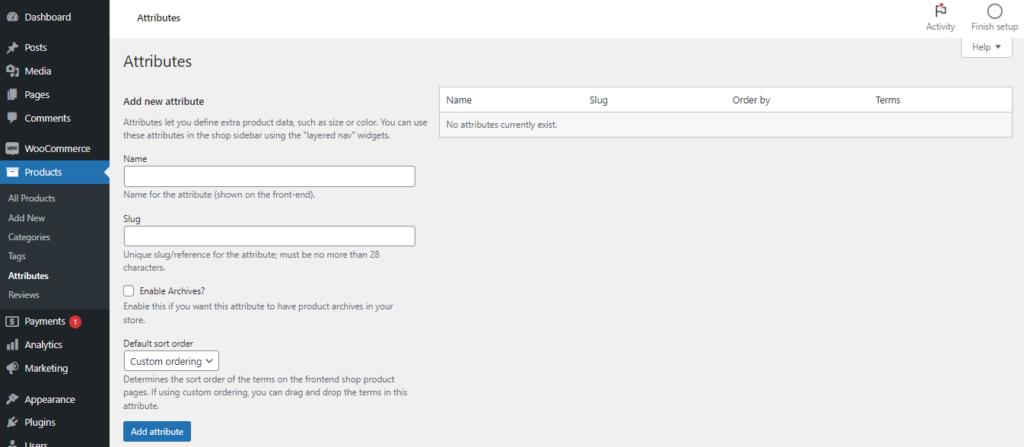
Next, click on the Attributes tab and Add New.
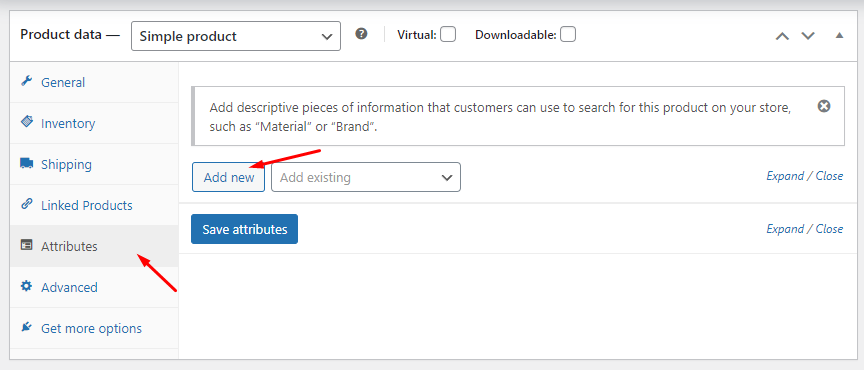
We are creating the same variable product we mentioned above. Therefore, we will add two attributes, color, and size, and then add the values.
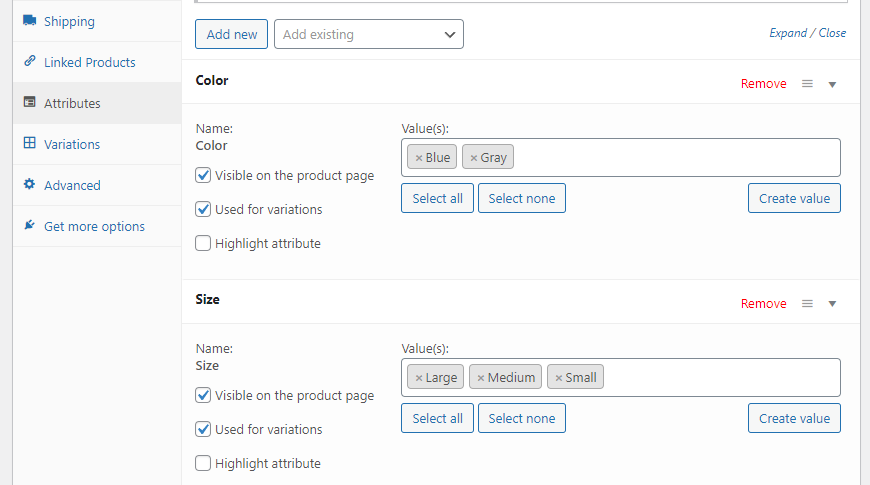
Different customers may want to buy different variations of that product. For example, a customer may ask for a large-size grey T-shirt while another may ask for a medium T-shirt.
Therefore, you need to create all possible variations for that product so that your customers are able to choose whatever variation they need. To do so, go to the Variations tab.
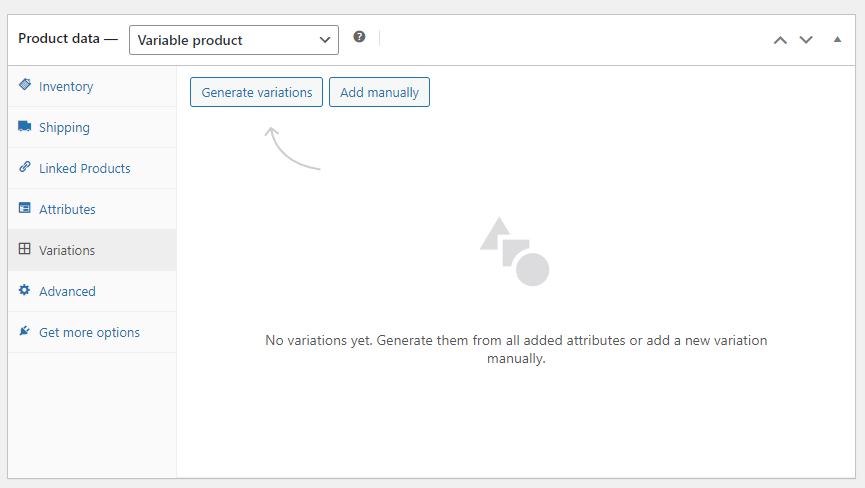
You can add variations manually. However, we recommend you click the Generate Variations button to generate them automatically.
Here’re the variations.
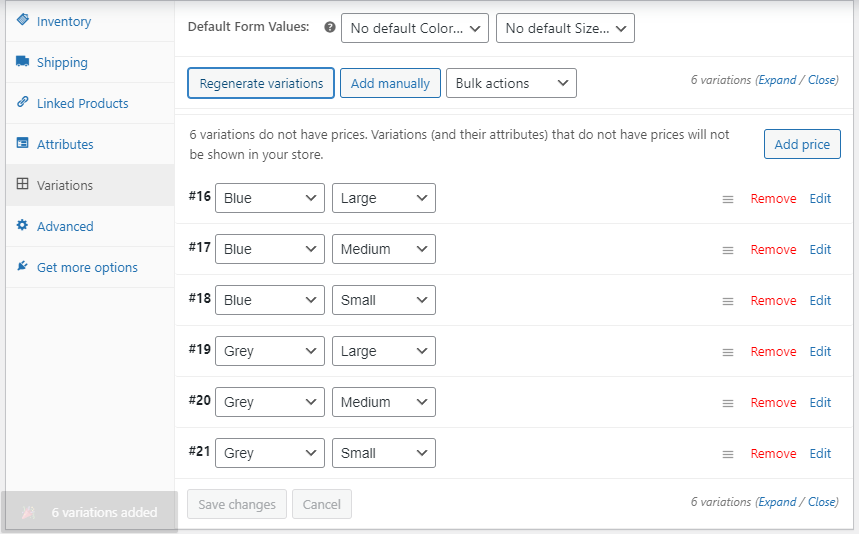
Now, your customers can pick their required variation from the front end.
WooCommerce also has an Attribute page under the Products menu.
In addition to adding products one by one, WooCommerce also allows you to upload your products in CSV files in bulk.
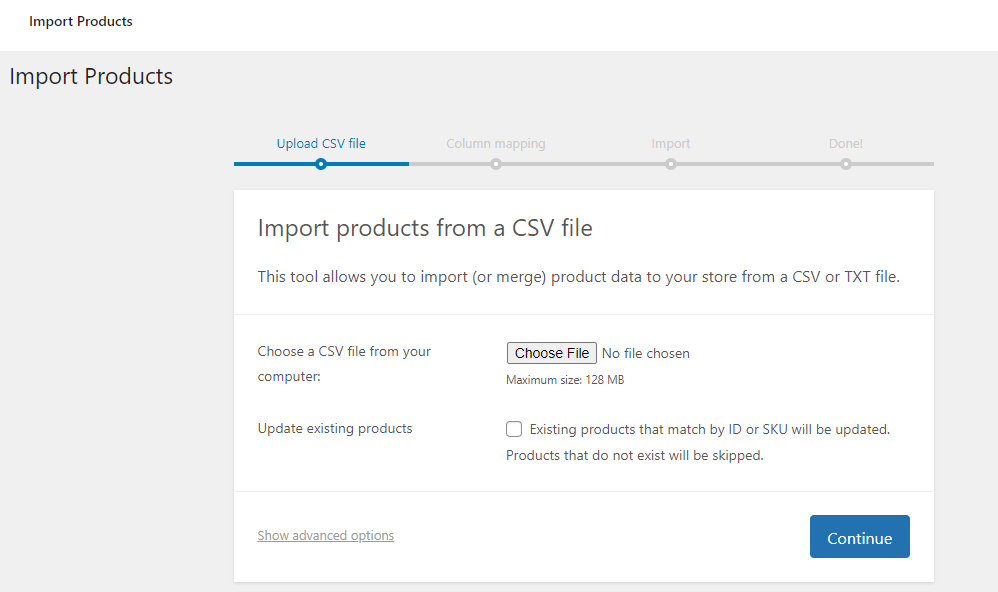
Click the following link to move to the next step of WordPress WooCommerce setup.

Set up WooCommerce store theme and payment gateway
The next step of WordPress eCommerce setup is selecting a theme. You can select a free theme from the WordPress theme directory.

There are also a vast number of premium paid plugins available for WooCommerce. Research different theme features before finalizing one.
Once you’ve chosen your theme, the next critical step is configuring payments.
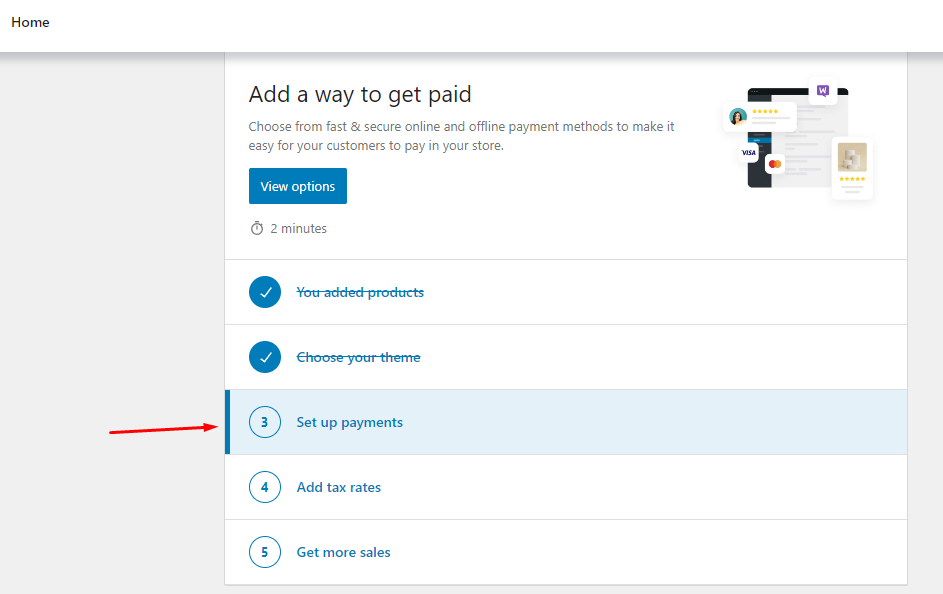
WooCommerce is the number one platform when it comes to accepting payments. It supports a wide range of payment gateways.
No matter what part of the world you are from, you will find a supported payment gateway on WooCommerce through which you can accept payments. In addition to Stripe, PayPal, and other well-known gateways, WooCommerce has introduced its own payment processor called Woo Payments.
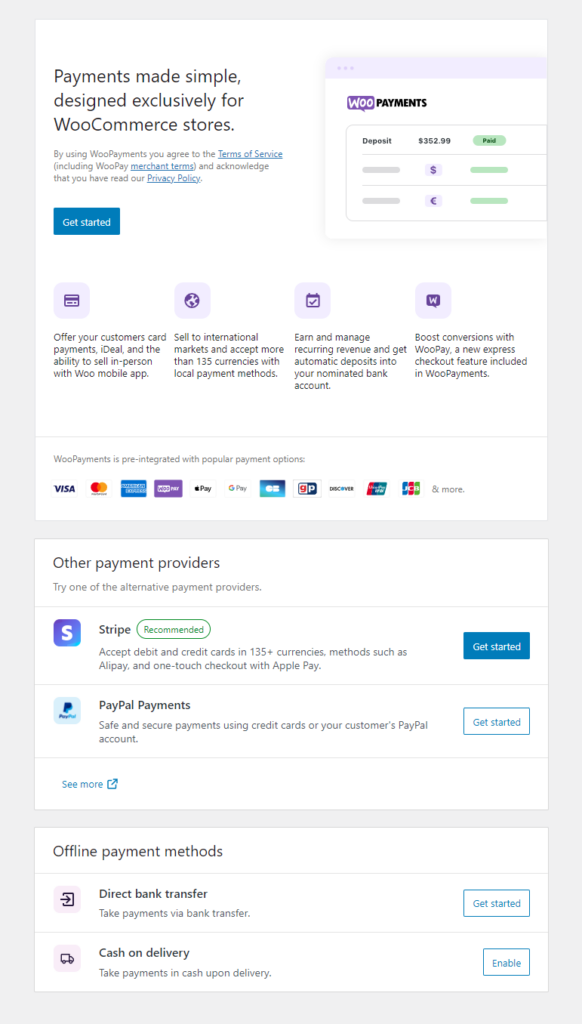
Moreover, if necessary, you have the flexibility to integrate your custom payment gateway. This gives you even more options to tailor payment processing to your specific needs.
Set up WooCommerce store tax
Next up, configuring tax settings. This is something that requires long discussions and explanations. Setting up taxes in WooCommerce can get a bit intricate, mainly because it varies depending on where you and your customers are located.
However, let’s quickly walk you through the basics. To enable tax on WooCommerce, go to WooCommerce >> Settings >> General and checkmark the following box.
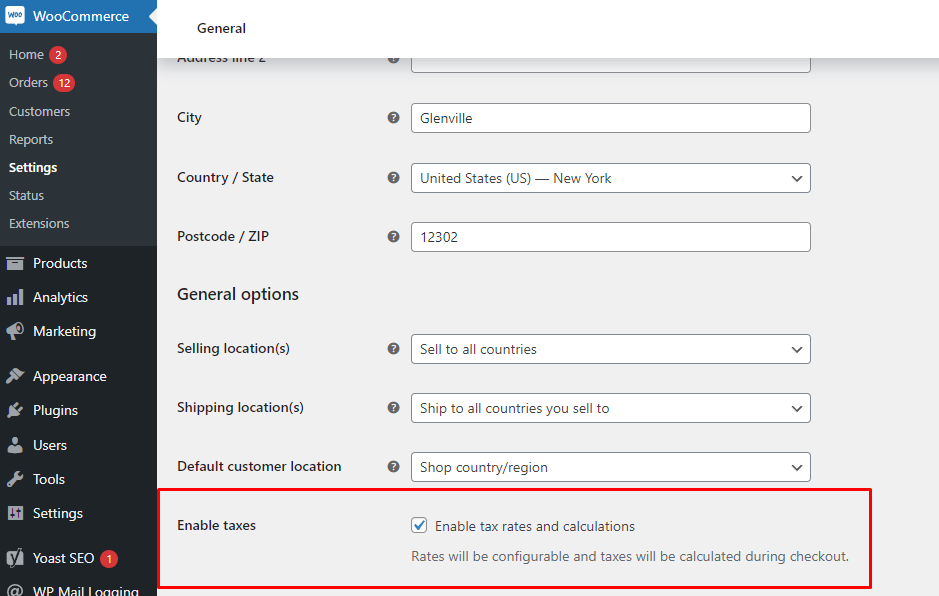
Here are the key steps involved in set up WooCommerce store taxes.
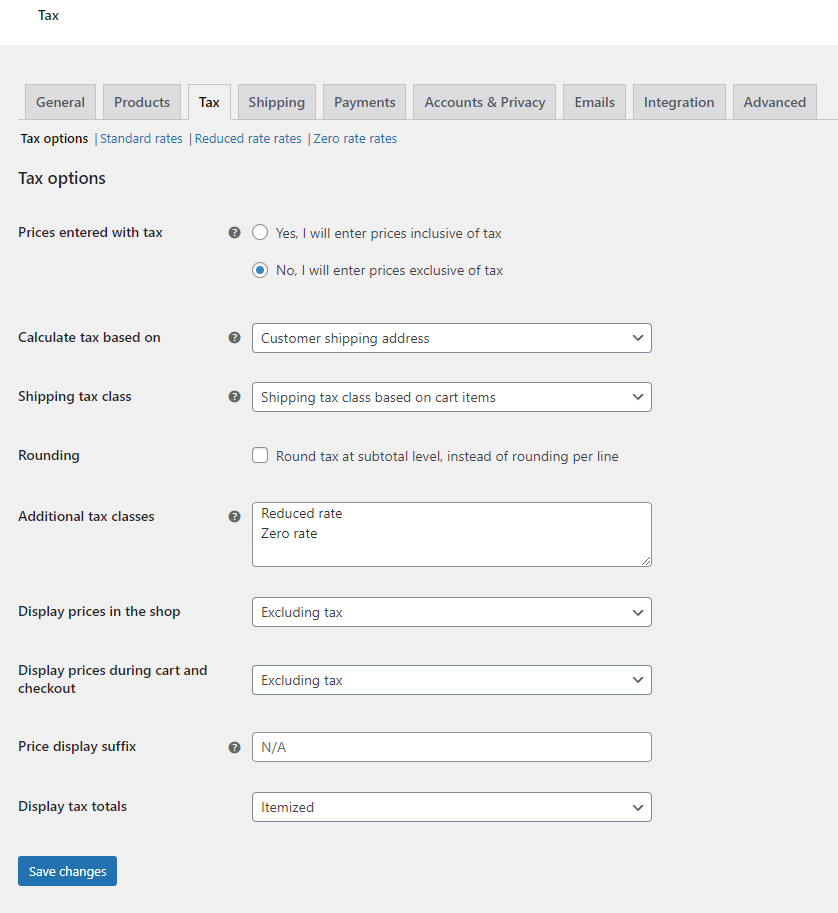
1. Organize your tax charges with classes:
- Create different tax classes (e.g., “Standard Rate,” “Reduced Rate,” “Zero Rate”) to match the tax rates applicable to your products or services.
2. Set accurate tax rates:
- Find the tax settings under WooCommerce >> Settings >> Tax >> Standard Rates.
- Input the correct tax rates for your business location and assign them to the corresponding tax classes.
3. Determine shipping tax:
- Decide whether shipping should be taxed and, if so, select the appropriate tax class for it.
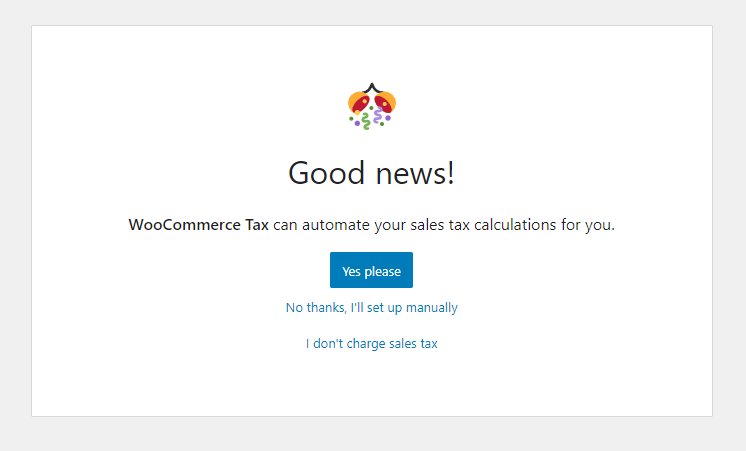
Sounds complicated? No worries, WooCommerce has a free extension that can simplify and automate the tax calculation process. WooCommerce also recommends this plugin in the setup wizard.
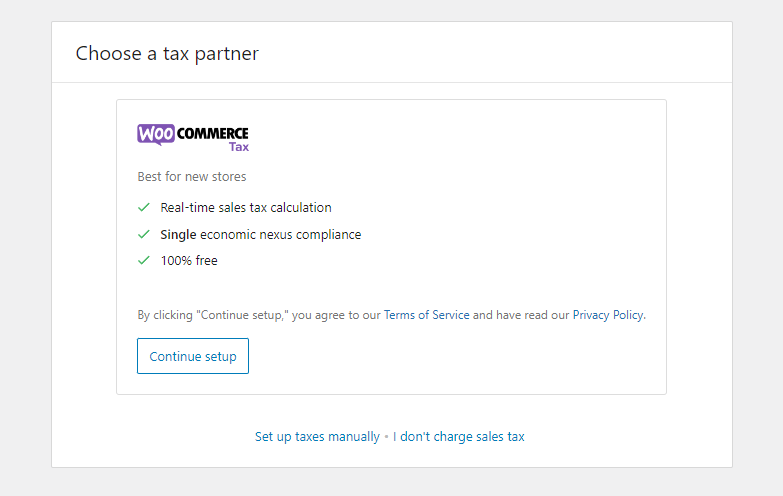
After installing the plugin, connect it with your WordPress.com account.
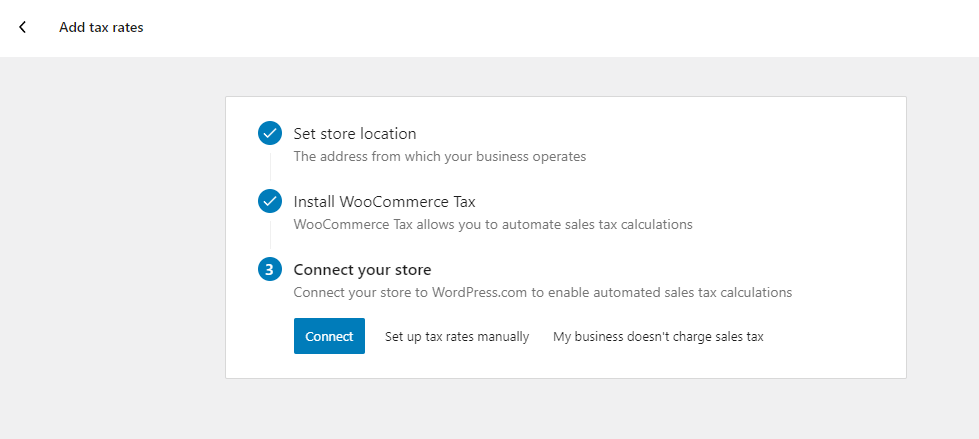
Click the Yes Please button for the extension to calculate your taxes automatically.
With tax settings, the initial steps to set up WooCommerce store will be complete.
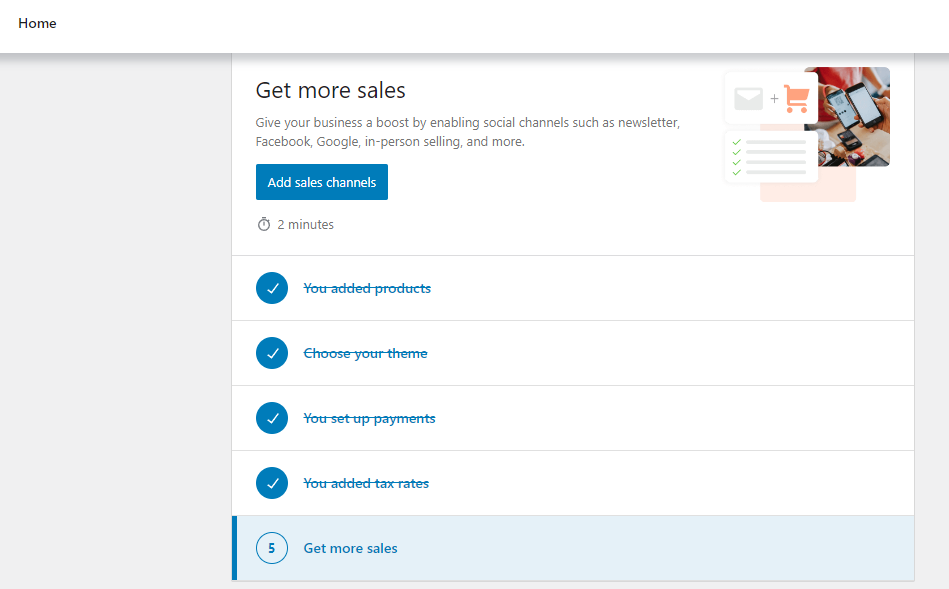
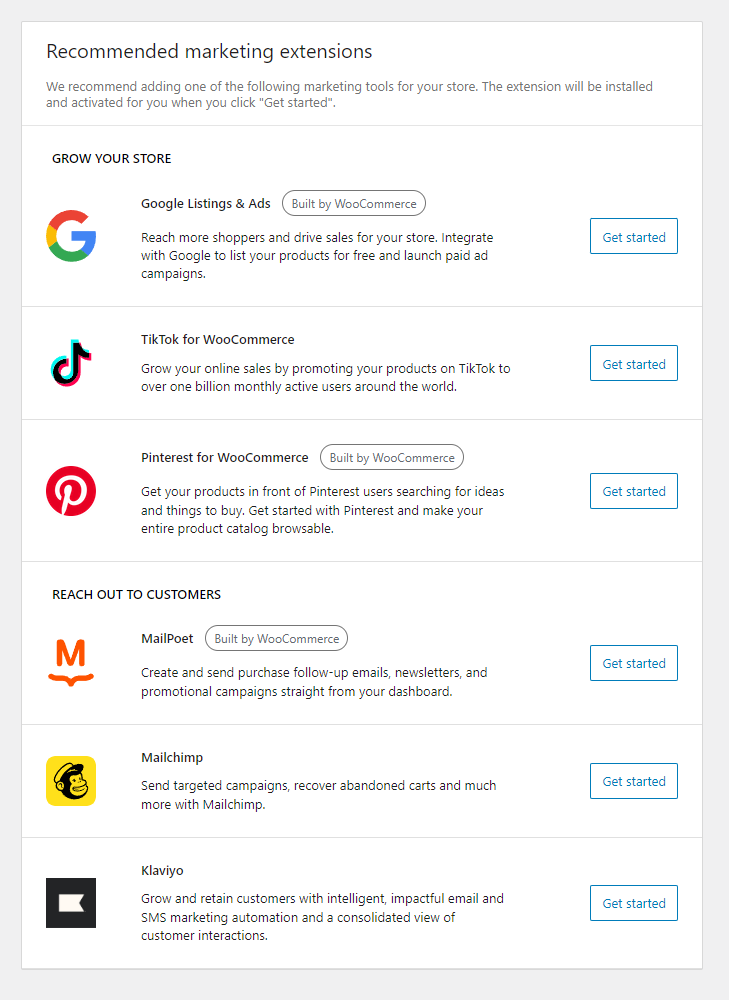
The last option recommends you to install some helpful plugins.
Best Plugins for WooCommerce Store
WooCommerce supports an extensive range of plugins and extensions that can help boost your online store’s functionality and productivity. Here are some of the best ones.
CTX Feed – WooCommerce product feed management plugin
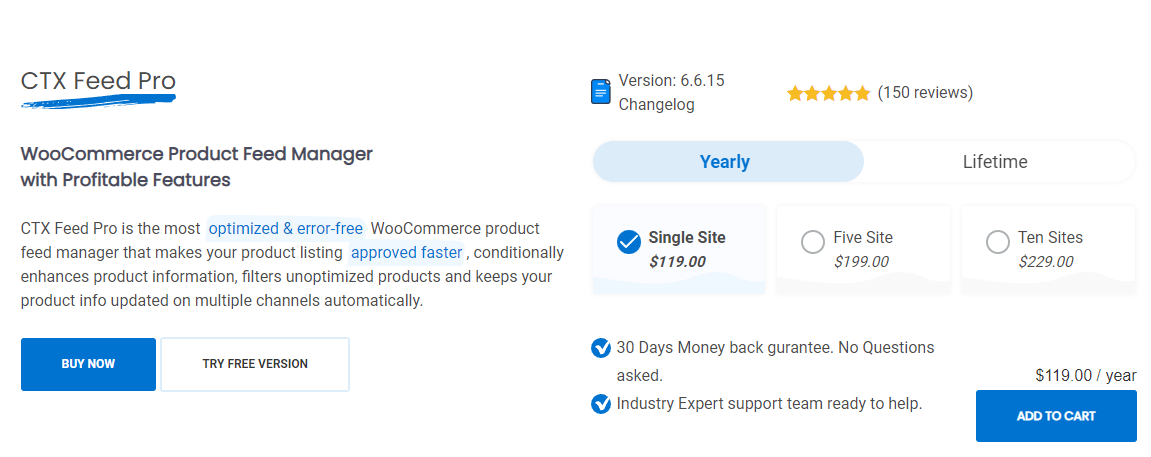
With CTX Feed, you can create woocommerce product feed files and display your WooCommerce products simultaneously on 130+ channels. As a result, you can reach millions of potential customers and grow your sales and revenue manifold.
CTX Feed makes it incredibly easy to create feed files for marketplaces, affiliate sites, social media sites, and price comparison engines. The plugin has over 130 channel templates.
These templates come integrated with necessary guidelines and formats. You simply need to select the template and hit the generate button. CTX Feed will automatically collect all your WooCommerce product data and generate the feed according to the recommended channel format.
The plugin also supports FTP/URL/HTTP/SFTP connections. This means you won’t need to manually download and upload the feed files. You can host the feed on your Woo store and connect to the channel through the feed link.
CTX Feed has an automatic update feature at set intervals. Through automatic updates and URL connection features, you can always display accurate and consistent information across all your channels without any manual effort.
This incredible plugin can help display and sell your WooCommerce products on Google Shopping, Amazon, Facebook, Instagram, PriceGrabber, eBay, Walmart, Target, Bing Shopping, etc., basically all over the internet.
Key features
- Supports 130+ channels including Google Shopping, Facebook Catalog, eBay Ads, and more.
- Creates optimized feeds for different marketing channels effortlessly.
- Provides pre-configured templates for quick feed creation.
- Generates feed files in XML, CSV, TSV, XLS, TXT, and JSON formats.
- User-friendly interface for easy feed customization without technical expertise.
- Compatible with all WooCommerce product types and plugins.
- Manages variable and variation features comprehensively.
- Allows custom templates, attributes, and precise output formatting.
- Enables batch feed creation for handling large inventories.
- The Pro version offers features for brand integration, dynamic attributes, and multi-language/currency support.
WooCommerce Multilingual plugin
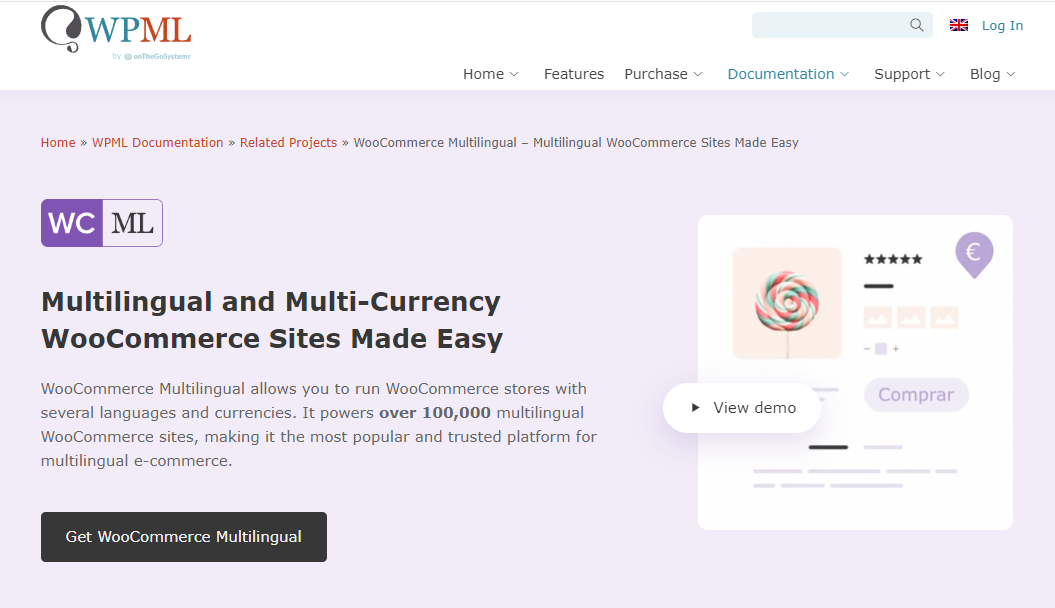
WooCommerce Multilingual is a powerful tool if you run an online store using WooCommerce on WordPress and want to cater to customers in different languages. It simplifies the whole process in a few key ways.
Firstly, it makes translating your store content a breeze. Whether it’s product names, descriptions, categories, or more, this plugin offers an easy way to convert everything into various languages.
The best part? It works seamlessly with its mothership – WordPress Multilingual (WPML), fitting right in with other WPML features. This makes the translation of your entire website, including all the WooCommerce bits, super straightforward.
Apart from language translation, it also handles different currencies. This means you can display prices and manage transactions in various currencies. This feature facilitates seamless transactions regardless of geographic location or preferred currency.
Moreover, it ensures that when you make changes to something in one language, like a product description, those changes automatically update across all the other language versions. This keeps everything consistent and saves you time.
When it comes to being visible online, WooCommerce Multilingual helps by optimizing your translated pages for search engines. This means better chances for people to find your store in different languages, boosting your online presence.
It also comes with a customizable language switcher. This tool makes it easy for visitors to navigate between different languages on your site. This enhances the user experience and accessibility for your diverse audience.
Key features
- Effortless translation of product details, categories, and descriptions into multiple languages.
- Seamless integration with WordPress Multilingual for comprehensive site translation.
- Support for multiple currencies, accommodating diverse global transactions.
- Automatic synchronization of content across different language versions.
- SEO optimization for better visibility in translated pages.
- Customizable language switcher for easy navigation.
- Smooth compatibility with various WooCommerce extensions.
Customizer for WooCommerce
The Customizer for WooCommerce by SkyVerge is a nifty tool for making quick tweaks to your online store without diving into any complex coding.
Imagine having the power to change button texts, labels, and more within your WooCommerce store without needing to fiddle with PHP code or template modifications.
That’s exactly what this plugin offers! It provides a simple settings page where you can effortlessly add your customizations and save them in a jiffy. From altering Add to Cart button texts for different product types to tweaking sales badge text or adjusting the number of products displayed per page, this plugin’s got your back.
Even fine-tuning details like heading texts for product description tabs or modifying checkout page elements like coupon text or button labels becomes a breeze.
To make these changes, all you need to do is head over to WooCommerce > Settings and click on the “Customizer” tab. It’s that straightforward!
It’s a handy tool, especially if you want to make swift adjustments and test out different looks and texts on your WooCommerce store without wrestling with code or templates.
Key features
- Easy customization of button text, labels, and various elements without coding.
- Settings page for quick changes without modifying templates or PHP code.
- Tweaks for Add to Cart button text, sales badge text, displayed product count, and more.
- Simple adjustments for checkout page elements like coupon text and button labels.
Mini Ajax Cart for WooCommerce
This cart conveniently lets potential customers to make alterations to the items they have added to the basket. Add, edit, remove, or check out items directly from the page
You can enable a coupon code section to allow your customers to trigger the coupon of the currently running deals of your online store.
Designing your cart to make it presentable is a breeze. Mini Ajax Cart plugin allows you to make alterations to the cart design, popup animation, color, font, typography, and much more as per your website’s preferences.
Besides, the plugin also offers beautiful animation effects for cart entrance, cart exit, and cart hover.
Main Features:
- Selectively Display the Cart: This plugin offers you the liberty to show/hide a cart in various posts/pages.
- Complete Customization Settings: Allowing users to make changes to the cart basket with various cart customization options
- Alter the Cart Button Shapes: Choose from three different options for the cart button shapes: Round, Square, and Rounded Square.
- Create Unlimited Shopping Carts: There’s no limitation in the multiple creation of the cart baskets. There is even an option to Import/ Export once you create them.
- Animation Effects to Make Cart Engaging: There are various cart animations and effects to choose from to make the cart more engaging.
WordPress Live Chat Plugin for WooCommerce – LiveChat
The WordPress Live Chat Plugin for WooCommerce by LiveChat simplifies direct customer interaction on your WooCommerce site. Customers can ask questions, receive instant assistance, and gain confidence to complete purchases without leaving your website.
This plugin merges various functionalities into a user-friendly interface. It enables automated messages for checkout assistance, engages customers with chat invitations, and provides insights through visitor analytics and live chat surveys.
Visual customization is a highlight, allowing you to elevate your store’s aesthetics with modern chat windows, eye-catching elements, and customizable chat buttons. Personalize themes, colors, logos, and more to match your brand.
It incorporates a built-in ticketing system for managing offline communications and support after working hours without requiring extra software. You can also integrate this plugin with popular third-party apps like Mailchimp and Zendesk.
Key features
- Enables live chat functionality directly on WooCommerce websites for instant customer interaction.
- Automates messages for checkout assistance, engages customers through chat invitations, and provides visitor analytics and surveys for insights.
- Offers visual customization with modern chat windows, customizable buttons, and themes to match brand aesthetics.
- Incorporates a built-in ticketing system for managing offline communication and support after office hours.
- Integrates seamlessly with third-party apps like Mailchimp, Zendesk, and more for enhanced functionality.
- Facilitates immediate problem-solving, boosts sales, and provides convenient customer support through live chat.
- Provides easy implementation across all WooCommerce pages and ensures connectivity via desktop and mobile apps.
AffiliatePress – affiliate plugin for WooCommerce
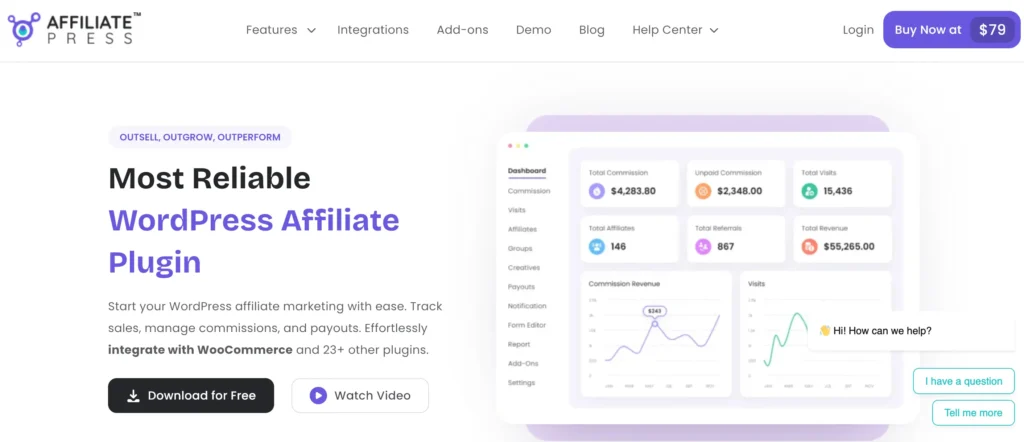
AffiliatePress is a feature-rich tool for WooCommerce store owners who want to grow their sales from day-one via affiliate marketing. This powerful WordPress affiliate plugin lets you create your own affiliate program with zero coding.
You can track your affiliate sales in real time with detailed reports and charts. The admin panel comes with advanced tools for approving affiliates, tracking their performance, and assigning custom commissions.
Besides, AffiliatePress smoothly integrates with WooCommerce to track affiliate sales and decide exactly how commissions are calculated, including or excluding shipping and tax amounts.
To encourage affiliates to promote more in a better way, you can offer them endless creatives like banners, coupon codes, QR codes, and text links, all inside their affiliate panel. You can even offer a performance bonus for more sales, and sign up bonus for attracting new affiliates.
This is the most reliable affiliate plugin for WooCommerce thanks to its smart fraud detection system. It’ll automatically monitor, detect, and prevent any kind of affiliate fraud, so you can rest assured and grow your business.
Key Features
- Seamless WooCommerce integration with shipping and tax control.
- Multiple smart commission structures like recurring, lifetime, group-wise, product-wise, multi-level affiliate, etc.
- 1-click or automatic payout via PayPal or Stripe.
- Modern and user friendly panel for both, admin and affiliates.
- Advanced commission and referral tracking in real time.
- Affiliate statistics and reports.
- Smart fraud detection.
- Endless promotional tools for affiliates like personalized landing pages, coupon and QR codes, brand assets, and more.
- Custom affiliate registration form.
- Powerful affiliate management with full appearance customization.
Paymattic WordPress payment plugin – sell products online without setting up a WooCommerce store
Paymattic is a fantastic plugin tailor-made for WordPress, perfect for anyone running a small business, fundraiser, or membership program. It’s incredibly versatile, offering features for payments, donations, subscriptions, and even educational courses.
What sets Paymattic apart is its user-friendly interface and comprehensive functionality. Whether you’re a professional seeking a simple payment solution or a nonprofit looking for custom donation options, Paymattic has you covered.
For small businesses, it simplifies payments, aids in email automation, and scales effortlessly. Nonprofits benefit from custom donation features like setting donation goals and tracking progress. For eLearning, Paymattic streamlines student enrollment, webinar registrations, and course sales. Membership programs find it easy with data segmentation, content restrictions, and updates.
The plugin ensures a smooth payment experience with a swift UI and robust features like subscription payments, one-time payments, donation goals, and advanced reporting. You can track revenue, form performance, customer profiles, and more in real-time, making informed decisions a breeze.
Ready to get started?
Experience payments and donations for WordPress like never before. Try Paymattic now!
And the pricing plans cater to various needs, from individuals to small agencies to larger businesses, offering different features and domain allocations at affordable rates. Plus, the installation is a breeze—just like any other WordPress plugin. You can create forms from scratch or choose templates, deploy them using shortcodes, and start receiving payments from around the globe.
All in all, Paymattic is a powerful yet user-friendly WordPress plugin that simplifies payments and donations. It’s an invaluable asset for any online venture.
Key features
- Supports payments, donations, subscriptions, and eLearning courses
- User-friendly interface with comprehensive functionality with 135 currency support
- Simplifies payments with 13 payment gateways and aids in email automation
- Custom donation features for nonprofits, including goal-tracking
- Enables user-dashboard management with data segmentation
- Swift UI with features like subscription and one-time payments
- Advanced reporting for revenue, form performance, and customer profiles
- Easy installation and form creation with 70+ templates and shortcodes
- Flexible pricing plans catering to various business needs
Wrap up
Hope, you have got some deep insights on how to set up your WooCommerce store. With the diverse features and endless adaptability of the above plugins, you can build, grow, and master your online presence, while keeping your customers smiling with a flawless, secure shopping experience.
We hope this article will guide you to set up a WooCommerce store and run it efficiently. Let us know if you have any questions on the topic.
Join the thousands already enjoying Paymattic Pro!

Shuyeb Ahmed
Hi, This is Shuyeb. I am a digital marketing enthusiast, love to write about WordPress products and new updates. At the weekend, you will find me exploring nature & beautiful places.


Leave a Reply