

How to Accept Apple Pay Payments in WordPress [Free]


Table of Content
Download Paymattic – it’s Free!

Subscribe To Get
WordPress Guides, Tips, and Tutorials
We will never spam you. We will only send you product updates and tips.
Isn’t it sooooo cool if your customers pay you online just with a single tap rather than manually entering all the credit card details? This is the exact reason Apple Pay is built for. With Apple Pay, your customers can make online payments easily using their Apple devices.
Apple Pay is simpler than the simplest method of paying online. It’s just take a finger’s touch. As a merchant, you have to offer the easiest way to make payments. The easier the checkout process, the higher the conversion rate.
In this blog today, we will cover how to add Apple Pay payments to the WordPress website so that you can skyrocket your website sales.
What is Apple Pay?

Apple Pay is a digital wallet system developed by the tech giant Apple Incorporation. It allows your customers to make online payments using their Apple devices, such as iPhones, iPads, Apple Watches, and Mac computers. Instead of using physical credit or debit cards, users can add their payment cards to their Apple Pay account and make payments at various outlets, online stores, and apps.
With the help of near-field communication (NFC) technology, it allows you to make contactless payments by simply holding the device near a compatible payment terminal. Besides, users need to authenticate themselves using Touch ID (fingerprint recognition), Face ID (facial recognition), or their device’s passcode. This ensures that only authorized users can make payments.
How does Apple Pay work?
Apple Pay works just like how other digital wallet app works such as Google Pay. You need to add your credit or debit card details in the Apple Pay account. Apple Pay will verify your access credentials with Touch ID, Face ID or Passcode and make payments from your credit card.
It saves you tonnes of time and makes your payment card details secure by storing all the details in a single account. You don’t need to face the hassle of putting credit card details on every website you make a purchase.
How to set up an Apple Pay account?
Setting up an Apple Pay account is like a breeze. All you need to add your credit or debit card details to the Wallet app of your compatible devices. Click here to learn step by step how you can set up your own Apple Pay account.
Accept Apple Pay Payments in WordPress
If you are using a WordPress website, then accepting Apple Pay payment is a few clicks away. Let’s see how you can receive Apple Pay payment on the WordPress website without any coding using Paymattic.
Install & Activate Paymattic
First of all, you only need the free version of the Paymattic WordPress plugin to accept Apple Pay payment in WordPress. To install the plugin –
- Go to your WordPress admin dashboard and click on Plugins → Add New. Search for the Paymattic plugin and install it, then activate the plugin.
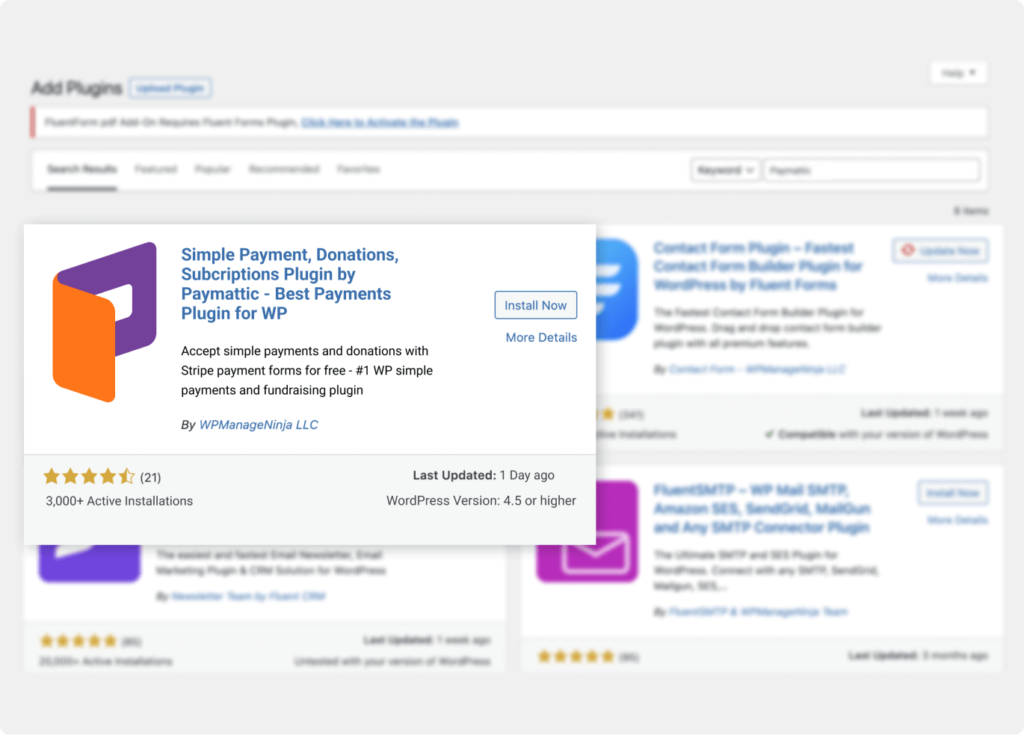
The Paymattic free version is enough to take payments through Apple Pay using Stripe but we recommend you to upgrade to the pro version for more premium features.
Besides, the pro version of Paymattic offers you a bundle of 13 payment gateways that allow you to receive payments in 135 currencies worldwide.
Ready to get started?
Experience payments and donations for WordPress like never before. Try Paymattic now!
Create a payment form
Once you have activated the plugin you need to create a payment form to receive payment. You can use this payment form as a checkout form. Let’s see how to create a payment form in a blink.
Add payment method
Adding a payment method in Paymattic is simple like adding a form field. Just click the “+” icon and select the payment method. You can select a single or multiple payment method to receive payments with Apple Pay. You can accept Apple Pay payments through Stripe (free), Square and Paystack using the Paymattic plugin.
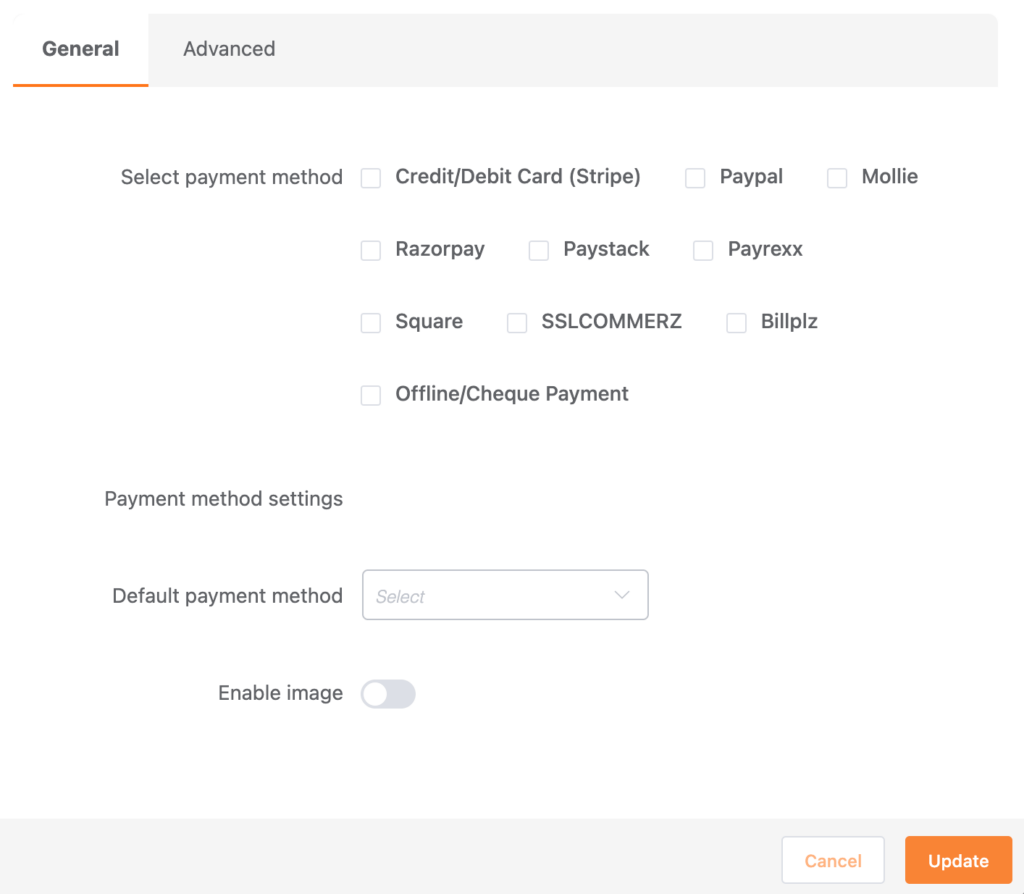
For demonstration purposes, we are choosing Stripe here to receive Apple Pay payments. You can add other payment methods in the same way we added Stripe here. However, the Stripe payment gateway is a free feature of Paymattic, so you can add this payment gateway in the free version.
You have to upgrade to the pro version in case you want to use all the other available payment methods along with Stripe.
Remember, it’s important to configure Stripe with Paymattic to function all the payment processing properly. Check this blog to learn how to integrate your Stripe account with Paymattic
You also need to turn on the Apple Pay module in your Stripe dashboard to enable Apple Pay on the checkout page.
Subscribe Newsletter
Subscribe to our newsletter for updates, exclusive offers, and news you won’t miss!

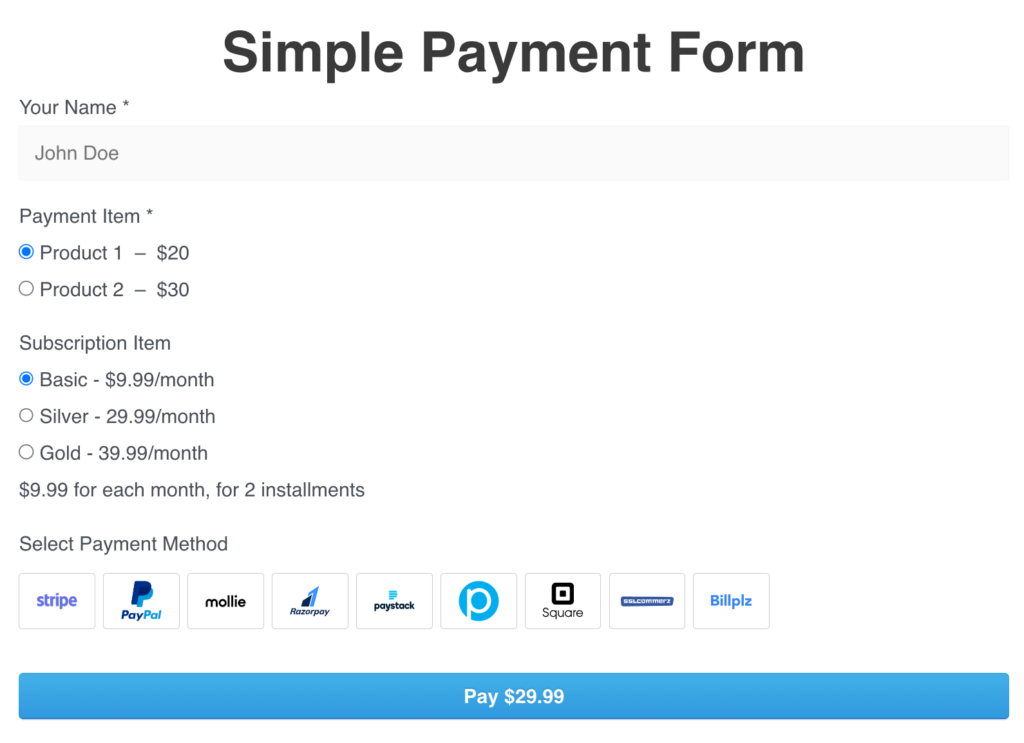
Publish the payment form
You are nearly finished! You have created the payment form & added the payment gateway too. Now, you have to publish the form on your checkout page.
- Go to Paymattic → All Forms & select the form you want to publish on your payment page.
- Copy the shortcode of the payment form & paste it on the payment page.

- Finally, publish the page & you are ready to accept payment with Apple Pay! Here is a sample preview of how your payment form may look like.
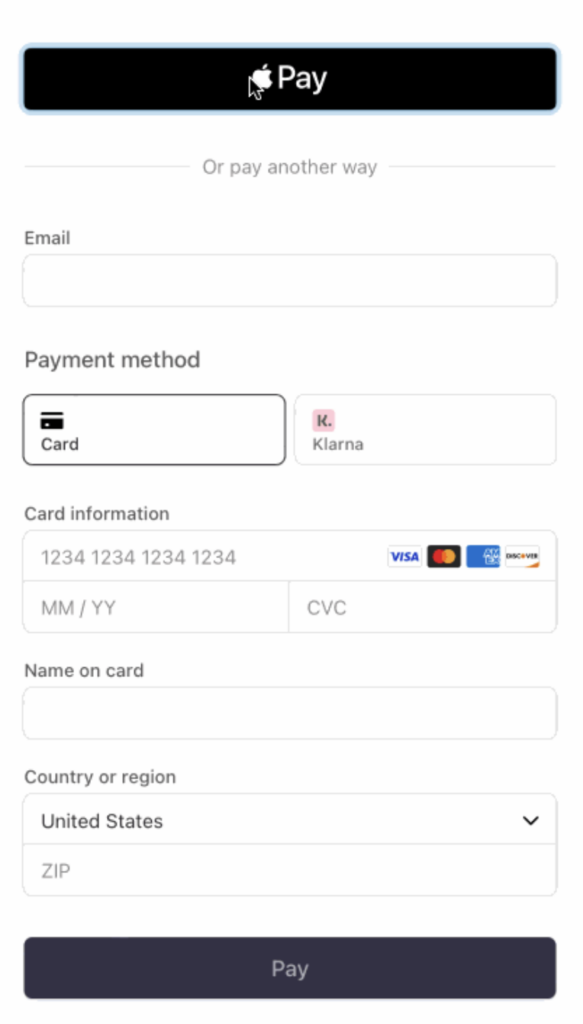
- Now, your customer can view the Apple Pay payment option on the Stripe checkout page.
Final words
Apple Pay has revolutionized the way we make transactions. The growth of digital wallet payments such as Apple Pay and Google Pay continue to reshape the landscape of online payment.
Paymattic WordPress plugin is the easiest tool to accept Apple Pay payments on your website. If you are already using Paymattic share with us your experience of using Apple Pay with Paymattic.
Good luck.
Join the thousands already enjoying Paymattic Pro!

Shuyeb Ahmed
Hi, This is Shuyeb. I am a digital marketing enthusiast, love to write about WordPress products and new updates. At the weekend, you will find me exploring nature & beautiful places.


Leave a Reply