
How to Integrate Xendit Payment Gateway in WordPress?


Table of Content
Download Paymattic – it’s Free!

Subscribe To Get
WordPress Guides, Tips, and Tutorials
We will never spam you. We will only send you product updates and tips.
Great news buddies! Paymattic has come up with another great payment gateway that is Xendit payment gateway. Xendit is one of the most popular payment gateways for online payment particularly in the South East Asia region.
In this blog, we will tell you about this long-awaited payment gateway and how you can integrate the Xendit payment gateway into the WordPress website.
What is the Xendit payment gateway?

Xendit is a payment gateway that allows businesses to accept payments from customers through various payment methods such as credit cards, bank transfers, e-wallets, and more. Xendit’s platform is designed to be user-friendly, secure, and efficient, making it an ideal solution for businesses of all sizes.
Being founded in 2015, Xendit has been serving thousands of businesses across various industries such as e-commerce, travel, and fintech. It aims to simplify the payment process for businesses and consumers alike by providing a seamless and secure payment experience.
It is mostly used in Indonesia, the Philippines and some other South Asian countries. Xendit also offers features such as invoicing, recurring payments, and fraud detection to help businesses manage their payments efficiently.
You can integrate Xendit in WordPress seamlessly with the Paymattic payment plugin. It’s so simple to set up Xendit with Paymattic. You only require to configure API credentials and you are all set to receive payments with Xendit.
Paymattic WordPress payment plugin
Paymattic is a popular brand in the online payment world, particularly in the WordPress sphere. It is the best WordPress payment plugin for accepting online payments. It is very easy to accept donations and create payment forms with Paymattic in just a few clicks.
Along with Xendit, it supports 12 other popular payment gateways. These are –
- Stripe (free)
- PayPal
- Square
- Mollie
- Razorpay
- Paystack
- Payrexx
- Billplz
- SSLCOMMERZ
- Flutterwave
- Moneris
- Viva Wallet
However, you can set instructions for cheque or bank account payment in the form using the offline payment method option.
This is a multi-purpose plugin that can be used to accept payments for a product or service as well as to collect donations. The Donation Progress Item feature adds a dynamic progress bar to the form. With the Tabular Product Items field, you can create a product table in the form.
There’s more! Paymattic accepts 135+ currencies. So, you can accept payments from any corner of the world with any type of currency you wish!
Paymattic has been growing steadily fast and armed with surprising features in every release. It has launched subscription payment for Square payment gateway in its recent release.
Wow, isn’t it awesome?
Ready to get started?
Experience payments and donations for WordPress like never before. Try Paymattic now!
Integrate Xendit payment gateway in WordPress
You can configure the Xendit payment gateway with Paymattic in one go. It’s super easy for any beginner-level WordPress user. Let’s learn how to set up the Xendit payment gateway in WordPress using Paymattic.
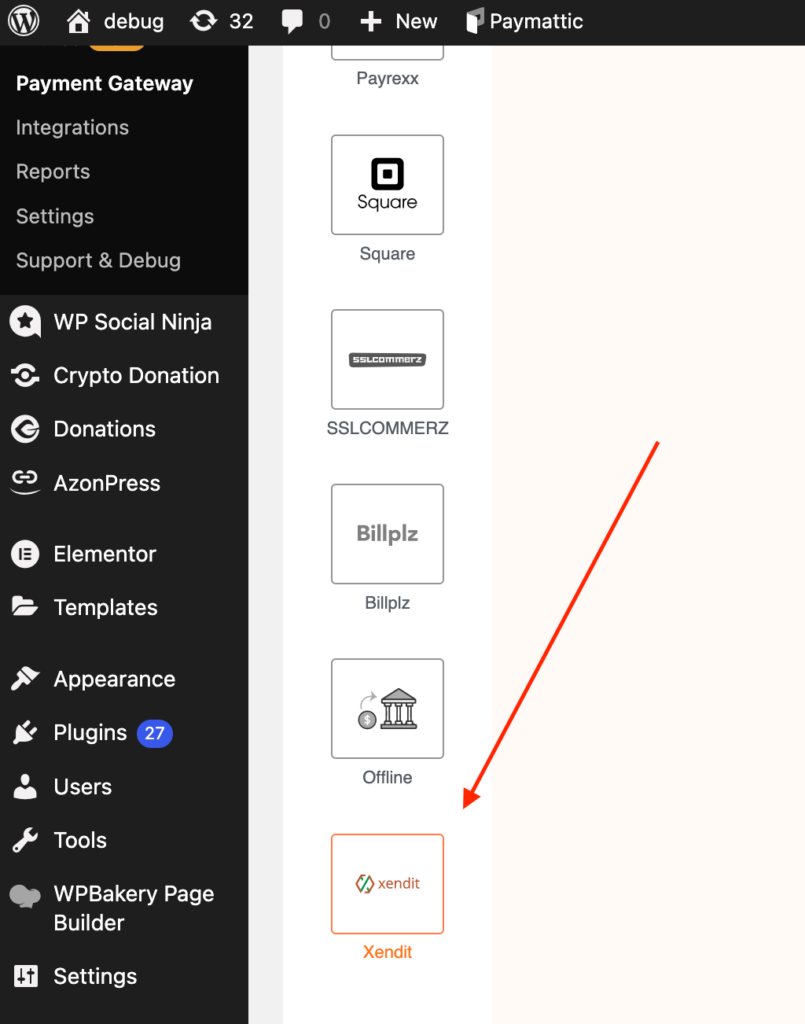
- First of all, go to Paymattic (Pro) → Payment Gateway from your WordPress dashboard.
- Next, click on the Xendit from the left navigation bar.
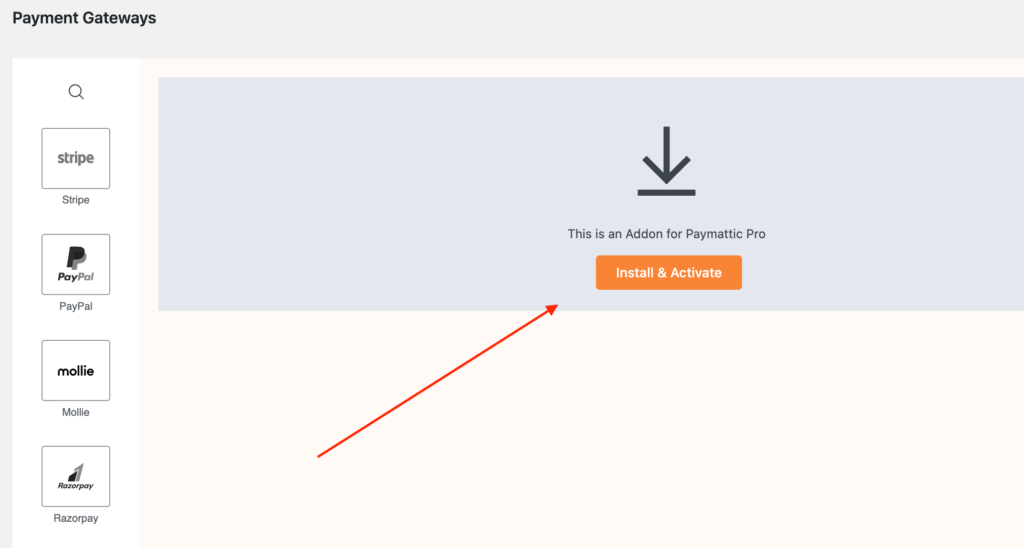
- Now, press the Install & Activate button to activate the Xendit Payment for Paymattic add-on.
- You can access the Xendit settings page to configure Xendit in WordPress.
Configure Xendit Live Mode / Test Mode
You will find two types of modes on the Xendit settings page. Select the Test mode only to test your Xendit payments and select Live mode when you want to accept real payments. While in the test mode, you can use any test card number that is issued by Xendit.
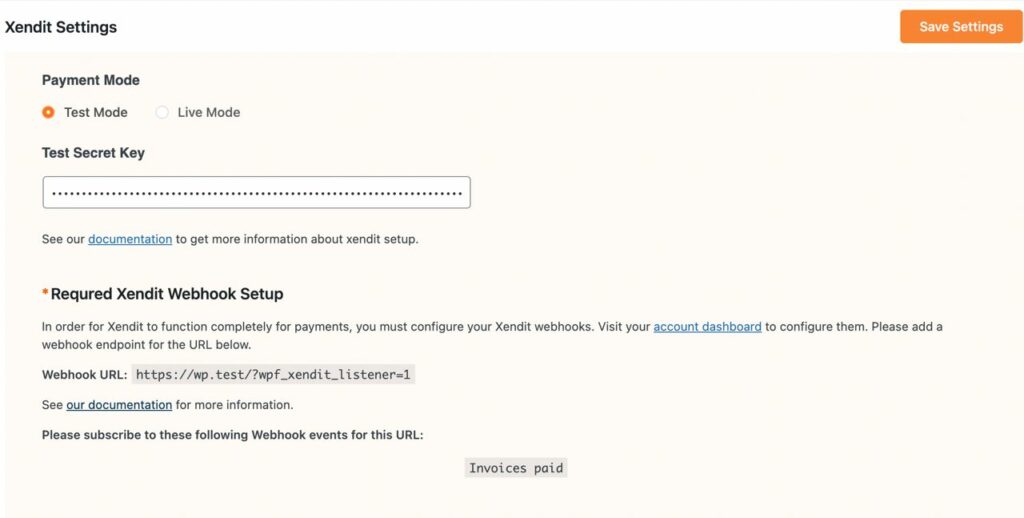
Configure Xendit Secret Key
You must set up the Xendit secret key to make the integration work for Paymattic. You will find your Xendit secret key in your Xendit account.
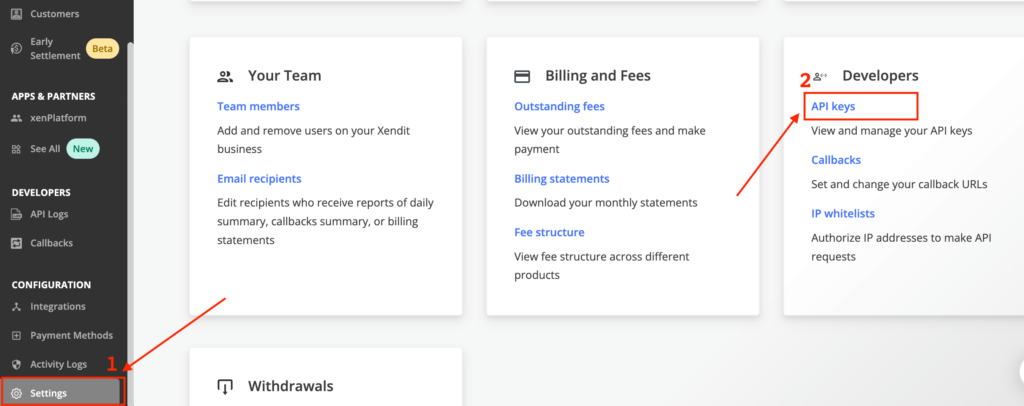
- Once you log in to your Xendit dashboard, go to Settings > API Keys from the left navigation panel.
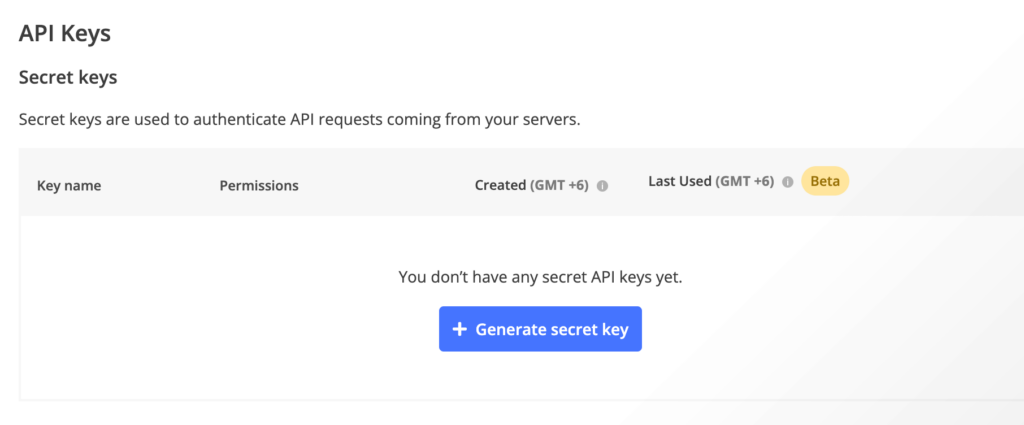
- Then, click on the Generate secret key button.
- Here, you need to set a name for the API key and give permission to your API key.
- Set the permission for your API key as per the image below.
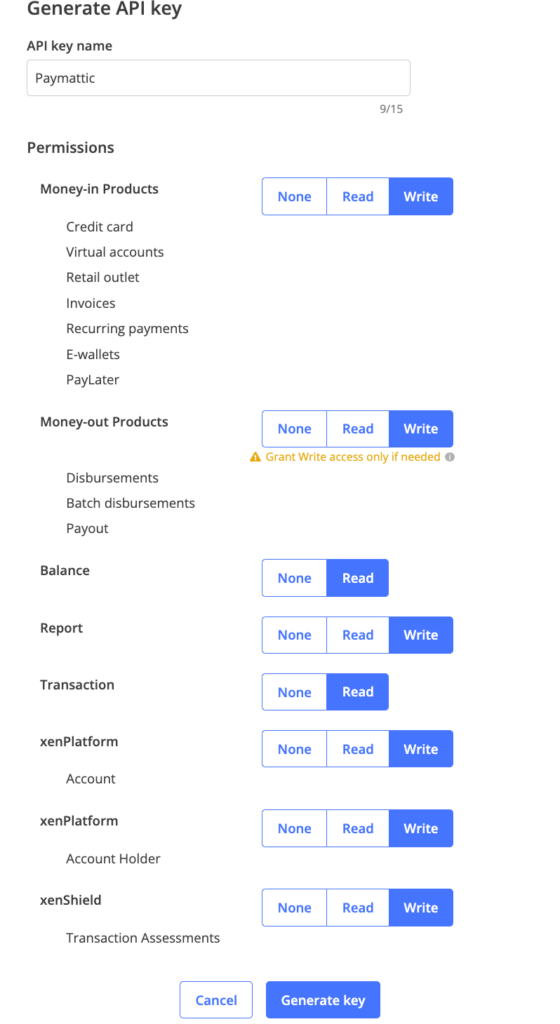
- Once you set the permission, click the Generate key button.
- Your API key will be generated and click the copy button.
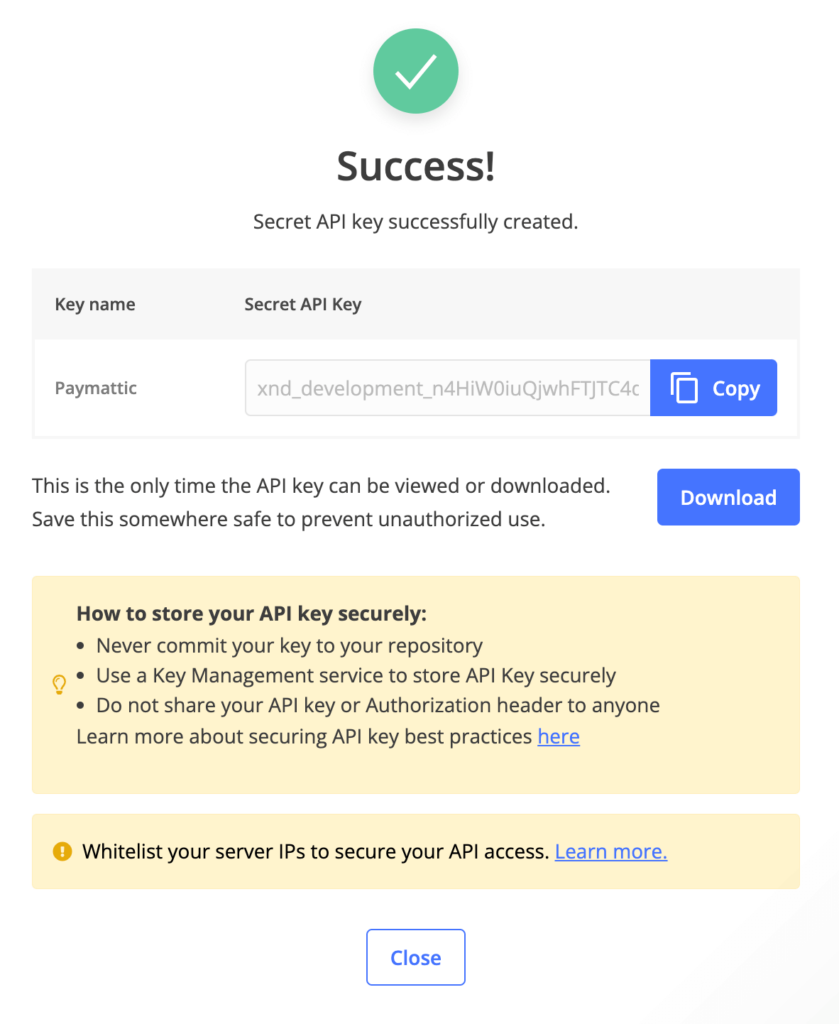
- Paste your API key in Paymattic (Pro) > Payment Gateways > Xendit from your WordPress dashboard.
- Do not forget to click the Save Settings button to save the API.
Excellent! You have successfully configured the Xendit payment gateway in WordPress. Moreover, if you want to configure webhook for Xendit simply put the webhook URL in your Xendit account.
Final notes
Xendit payment gateway is a reliable and efficient payment solution for businesses using WordPress. It’s so effortless to collect payment through Xendit in WordPress. Streamline your payment processes and improve the overall payment experience for users with simple integration with Paymattic.
So, try the Paymattic plugin yourself and reveal what other awesome features are waiting for you!
Good luck.
Join the thousands already enjoying Paymattic Pro!

Shuyeb Ahmed
Hi, This is Shuyeb. I am a digital marketing enthusiast, love to write about WordPress products and new updates. At the weekend, you will find me exploring nature & beautiful places.


Leave a Reply