
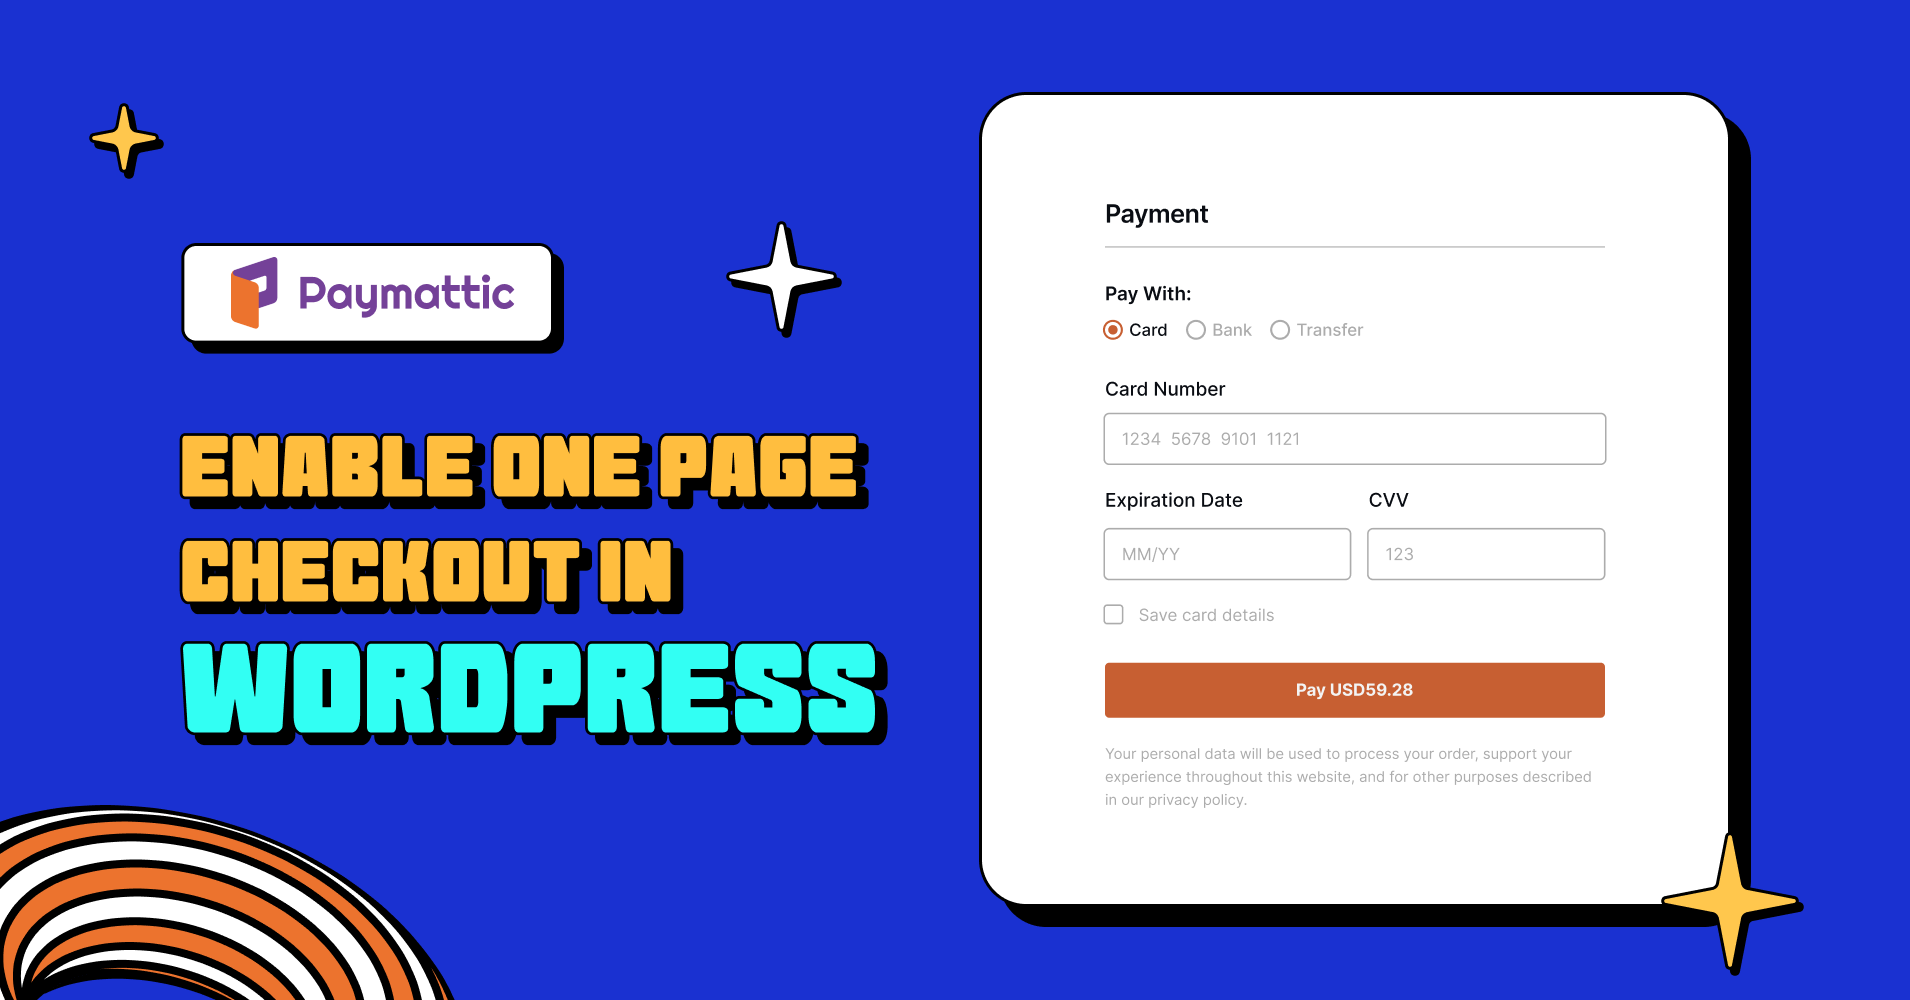
How to Enable One-Page Checkout in WordPress?


Table of Content
Download Paymattic – it’s Free!

Subscribe To Get
WordPress Guides, Tips, and Tutorials
We will never spam you. We will only send you product updates and tips.
If you’re running an online store with WordPress, you want to ensure that the checkout process is smooth and efficient. A great way to give your customer a fantastic user experience is enabling one-page checkout on your website.
A one-page checkout simplifies the checkout process by allowing customers to complete the entire checkout process on a single page. In this blog post, we’ll take you through the steps to enable one-page checkout in WordPress.
What is one-page checkout?
One-page checkout is a checkout process in e-commerce websites where all the necessary steps to complete a purchase are consolidated onto a single page. Typically, the checkout process in e-commerce websites involves several steps that can be time-consuming and confusing for customers. However, with one-page checkout, the process is streamlined and simplified, which can lead to higher conversion rates and improved customer satisfaction.
On a one-page checkout page, customers can view and fill in all the necessary information, including billing and shipping details, payment options, and order confirmation, all on a single page. This reduces the steps for customers to navigate through multiple pages. Additionally, the one-page checkout process usually has fewer distractions, such as sidebar ads or other product recommendations, which can help to keep customers focused on completing their purchase.
One-page checkout can be implemented on an e-commerce website using a variety of tools and plugins, depending on the platform. By enabling one-page checkout, businesses can reduce cart abandonment rates, increase conversion rates, and provide a better customer experience.
Paymattic for one-page checkout
If you are using WordPress then enabling one-page checkout is a breeze for you with Paymattic. The Paymattic WordPress plugin lets you add one-page checkout on your product page. Now, you don’t need to redirect your customers to another payment page. They can complete the total purchase by staying on your website.
Paymattic offers one-page checkout for Stripe, Razorpay and Payrexx payment gateways. Besides, it provides 10 other payment gateways to accept payments. All payment gateways that you get with Paymattic are –
- Stripe (free + one-page checkout)
- Razorpay (one-page checkout)
- Payrexx (one-page checkout)
- PayPal
- Square
- Mollie
- Xendit
- Paystack
- Billplz
- SSLCOMMERZ
- Moneris
- Flutterwave
- Viva Wallet
Other than payments you can do many more with Paymattic. You can create payment forms, donation forms, contact forms, shopping cart forms as well as integrate with multiple platforms.
Let’s see how you can enable WordPress one-page checkout for Stripe, Razorpay and Payrexx payment gateways using Paymattic.
Join the thousands already enjoying Paymattic Pro!
Install and activate Paymattic
First of all, install and activate the Paymattic plugin from the WordPress repository. To install the plugin –
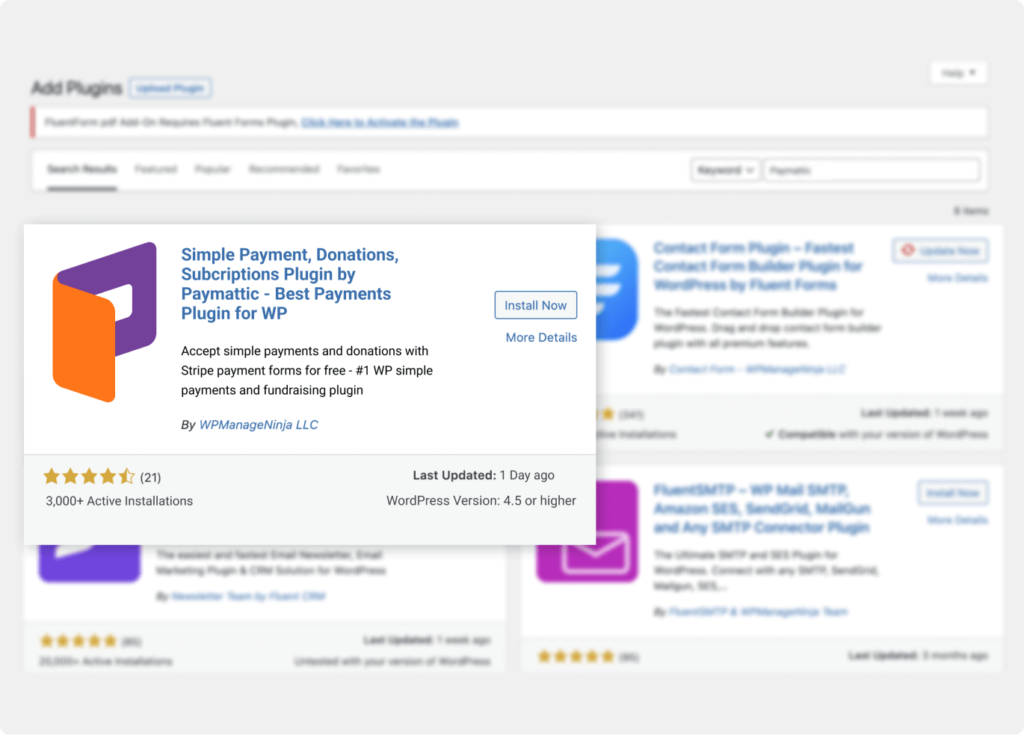
- Go to Plugins > Add New from the WordPress dashboard.
- Then search for the Paymattic plugin in the search box.
- Install the plugin and then activate it.
- Upgrade to Paymattic Pro to use all the payment gateways.
Create a form
Once you activate the plugin you need to create a form where you add the payment gateways. To create a form –
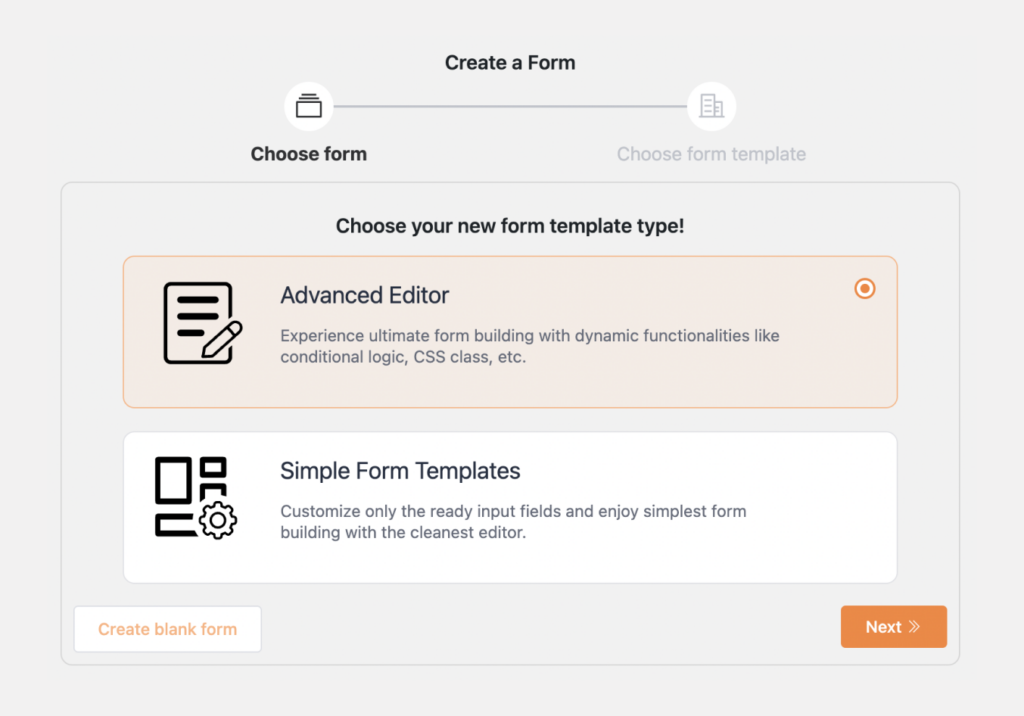
- Go to Paymattic Pro → Create Form in the WordPress dashboard.
- Then select a template or click on Advanced Editor.
- Here, you can select a blank form to start from scratch.
- Add desired form fields and click the Save button.
Stripe one-page checkout
To enable Stripe one-page checkout on your form add the Stripe payment gateway on your form. You can get the Stripe payment gateway option in the payment method fields. Make sure you have integrated Stripe with your WordPress website. If you do not integrate the payment gateway properly, it will not process payments successfully.
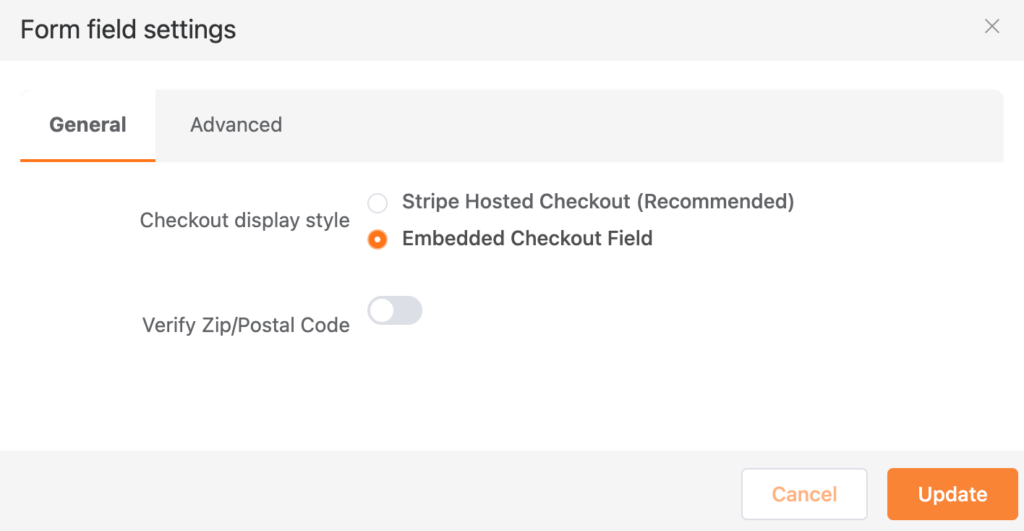
After you add the Stripe payment gateway hover the mouse over the payment method field and click the gear icon. Here, you can find two checkout display style options. Select the Embedded Checkout Field option to enable one-page checkout for Stripe.
Razorpay one-page checkout
Enabling Razorpay one-page checkout is very simple with Paymattic. First of all, you need to integrate Razorpay with your WordPress website using Paymattic.
Once you integrate the Razorpay payment gateway, you need to set the checkout style in the Razorpay settings. To set the checkout style –
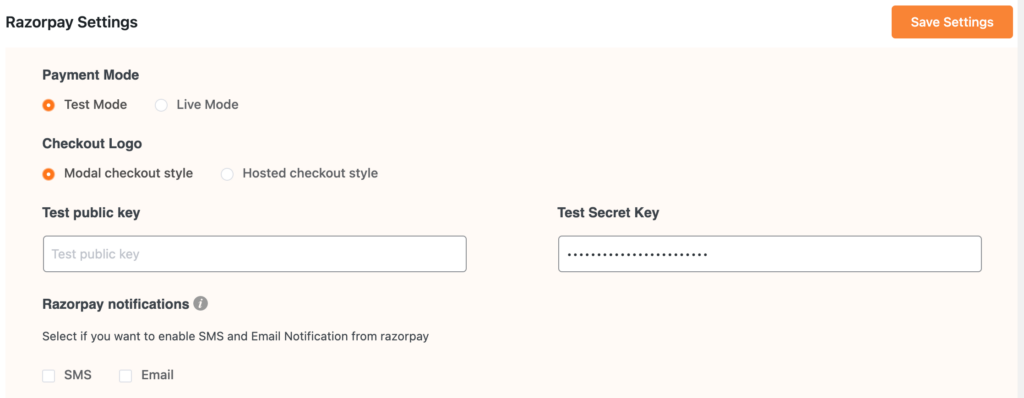
- Go to Paymattic (Pro) → Payment Gateways from the WordPress dashboard.
- Then press the Razorpay tab from the left sidebar.
- Select the Modal checkout style from the checkout style option.
- Click the Save settings button and you have enabled one-page checkout for Razorpay.
After you set the checkout style select the payment form that you created earlier or you can create a new form. After creating the form add the Razorpay payment gateway from the payment method fields. Do not forget to click the Save button.
That’s all. You have set up one-page checkout for the Razorpay payment gateway.
Payrexx one-page checkout
Payrexx one page checkout setup is as simple as pie with Paymattic. First, make sure you have integrated the Payrexx payment gateway with your WordPress website.
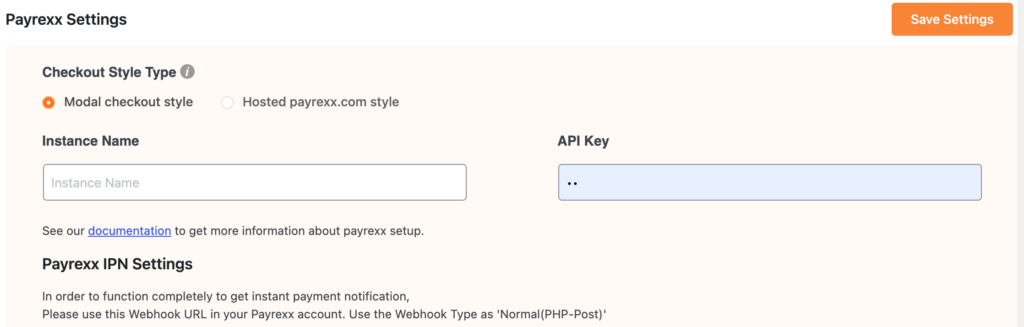
After you set up the Payrexx payment gateway, you can set the checkout style.
- Go to Paymattic (Pro) → Payment Gateways from the WordPress dashboard.
- Then click the Payrexx tab from the left sidebar.
- Select the Modal checkout style from the Checkout style type.
- Click the Save settings button and you have enabled one-page checkout for Payrexx.
After you set the checkout style, create a new form or select an existing form. After selecting the form add the Payrexx payment gateway from the payment method fields. Click the Save button to save the changes.
Well done. You have enabled one-page checkout for the Payrexx payment gateway.
Final words
One-page checkout can significantly improve the user experience for online shoppers. It simplifies the checkout process and reduces the number of steps. So, customers are more likely to complete their purchases.
Enable one-page checkout today using the Paymattic WordPress plugin and make your eCommerce sales sky-high.
Good luck!

Shuyeb Ahmed
Hi, This is Shuyeb. I am a digital marketing enthusiast, love to write about WordPress products and new updates. At the weekend, you will find me exploring nature & beautiful places.


Leave a Reply