
How to Schedule and Restrict Webforms in WordPress?


Table of Content
Download Paymattic – it’s Free!

Subscribe To Get
WordPress Guides, Tips, and Tutorials
We will never spam you. We will only send you product updates and tips.
Online forms allow us to collect a large amount of data. But too much data can also be a bit of a hassle. So if you want to stop collecting data after a specified period without removing your form, then you can do it with form scheduling and restriction features.
If you are looking for a way to limit the number of responses to your forms, then you are in the right place! In this blog, we will explore how you can easily schedule and restrict webforms in WordPress.
But before that, let’s get some idea about the scheduling and restrictions of WordPress forms.
What are the scheduling and restrictions of web forms?
Scheduling and restrictions on web forms are important features that allow users to schedule their web forms for a specific time and restrict the total number of responses.
If you want to activate your WordPress payment forms for a selected time period, then the form scheduling feature can give you a solution. It can help you by automatically activating and deactivating your form when you want. With this feature, you don’t have to worry about gathering and sorting through more information than you need.
Paymattic also allows you to put some restrictions on submitting your web forms. This feature can allow you to restrict the number of entries of web forms even on a daily /weekly/ monthly /yearly basis. If web owners want to restrict form responses for a certain period, then it can be accomplished with this feature.
Moreover, this feature has made organizing easier and responses limited.
Why form scheduling and restrictions are important?
Form scheduling is important to reduce the hassle of the users. For example, suppose Phil started collecting information for a campaign and wants to collect data for a certain period. But people still submit data after the deadline expires. It may feel like a burden for Phil. In that case, if Phil schedules the form for a specific date, then it will automatically stop collecting data after the deadline. It prevents people from trying to submit any web form that is closed for submissions or has a deadline that has transpired.
Additionally, it can generate a sense of urgency in the user’s mind. When you set a deadline for submitting your form, this sense of urgency can encourage users to fill up your form as quickly as possible. This strategy ultimately increases your form submission rate.
This feature is mainly for those users who want to restrict submissions after a specific period without removing the form.
Form restrictions feature is also important when anyone wants to limit the number of entries on your form for a short or long period. Like if you want to limit your form entry after a minimum number amount is reached then you can do so with this feature.
Best plugin to schedule and restrict web forms
Now you may wonder how you can easily schedule and restrict your form in WordPress. Well, you may find this feature in many WordPress plugins. But if you are looking for a plugin with simple functionality and ease of use, then you can go with Paymattic.
Paymattic is a fantastic WordPress plugin for building your WordPress payment and donation forms with all advanced features. Paymattic allows you to create WordPress forms with just a few clicks. 35+ input fields are available to customize your form. 70+ prebuilt templates are also available to save you time! Not just that, Paymattic also offers you all the amazing form editor features:
- Gutenburg style editor
- Custom input fields
- Detailed report analytics
- Export-import
- Prebuilt form templates
- User registration
- Unlimited customization
- Form layout
That’s huge! Just imagine Paymattic as a new plugin gives you this many facilities, what it will become when new updates come!
Ready to get started?
Experience payments and donations for WordPress like never before. Try Paymattic now!
How to schedule and restrict WordPress forms with Paymattic
To schedule and restrict your web forms with Paymattic, follow the steps below.
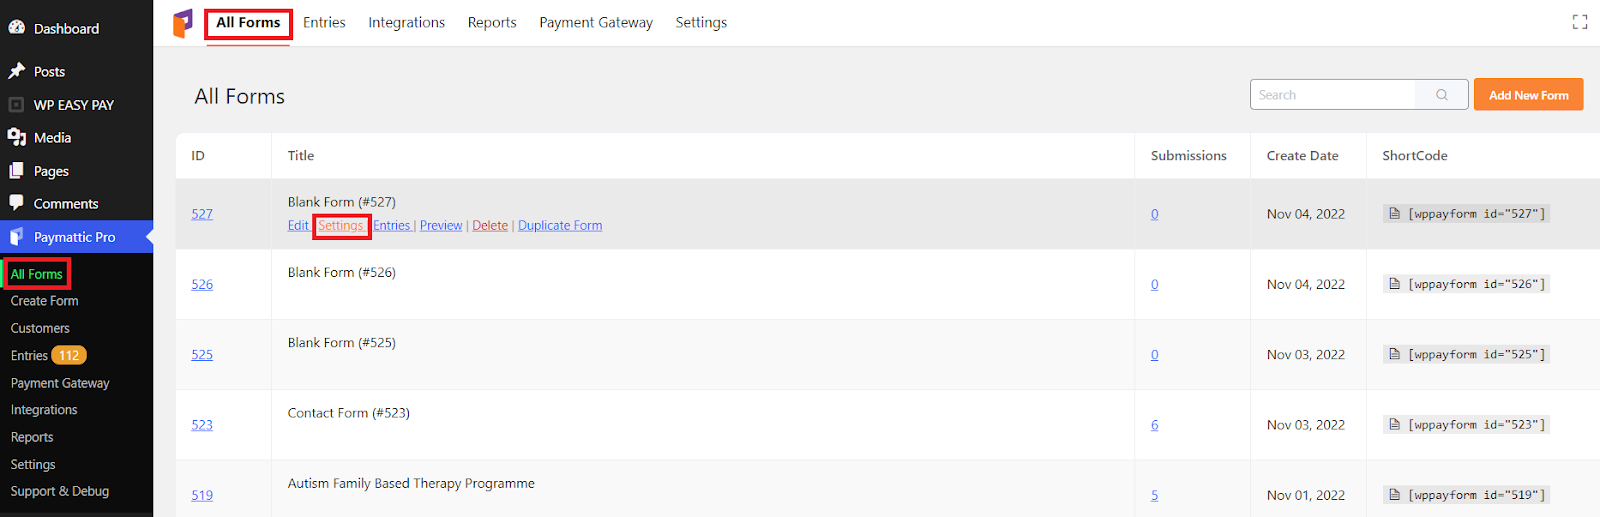
First, go to Paymattic dashboard > All Forms.
If you want to create a new form, click on the Add new form button, or if you already have one, go with it.
Now click on the Settings option below your form name.
Now from the left navigation bar, click on the Scheduling tab.
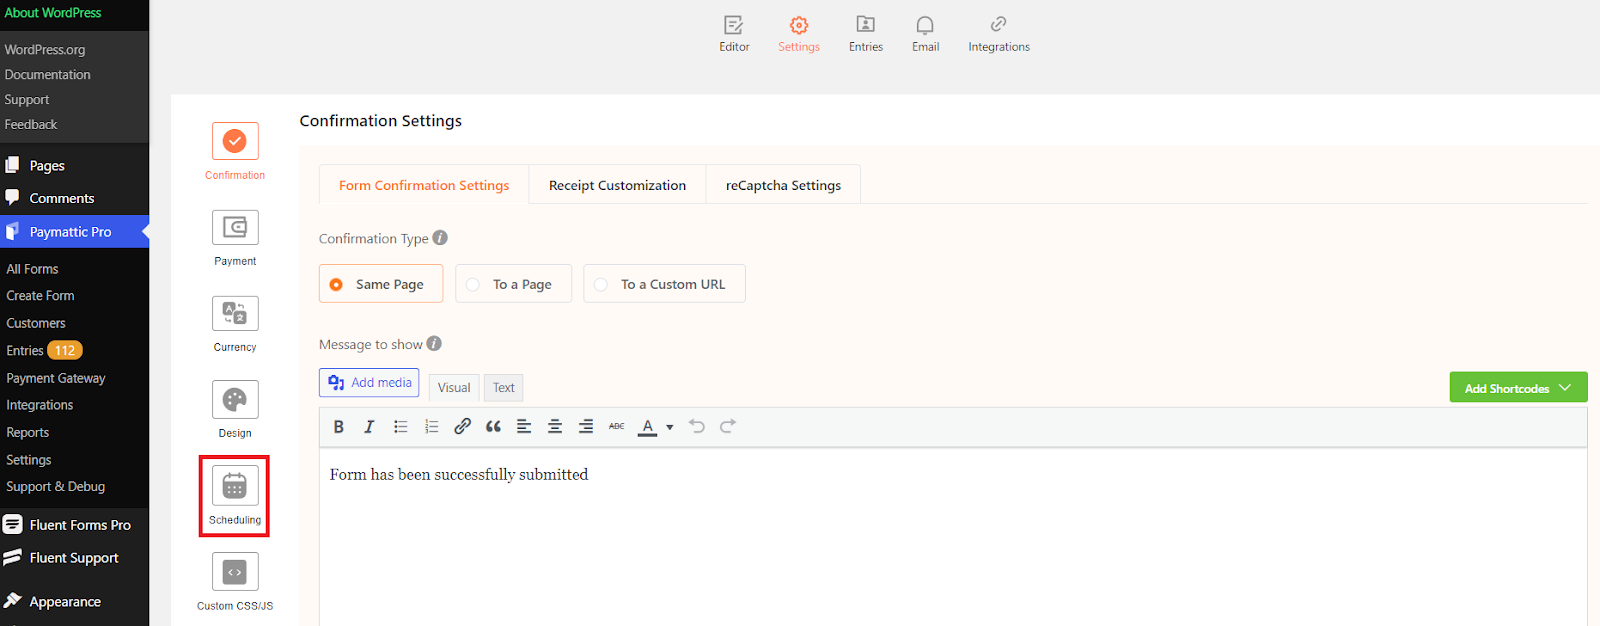
In this tab, you will find several options. We will break down all options separately for your better understanding.
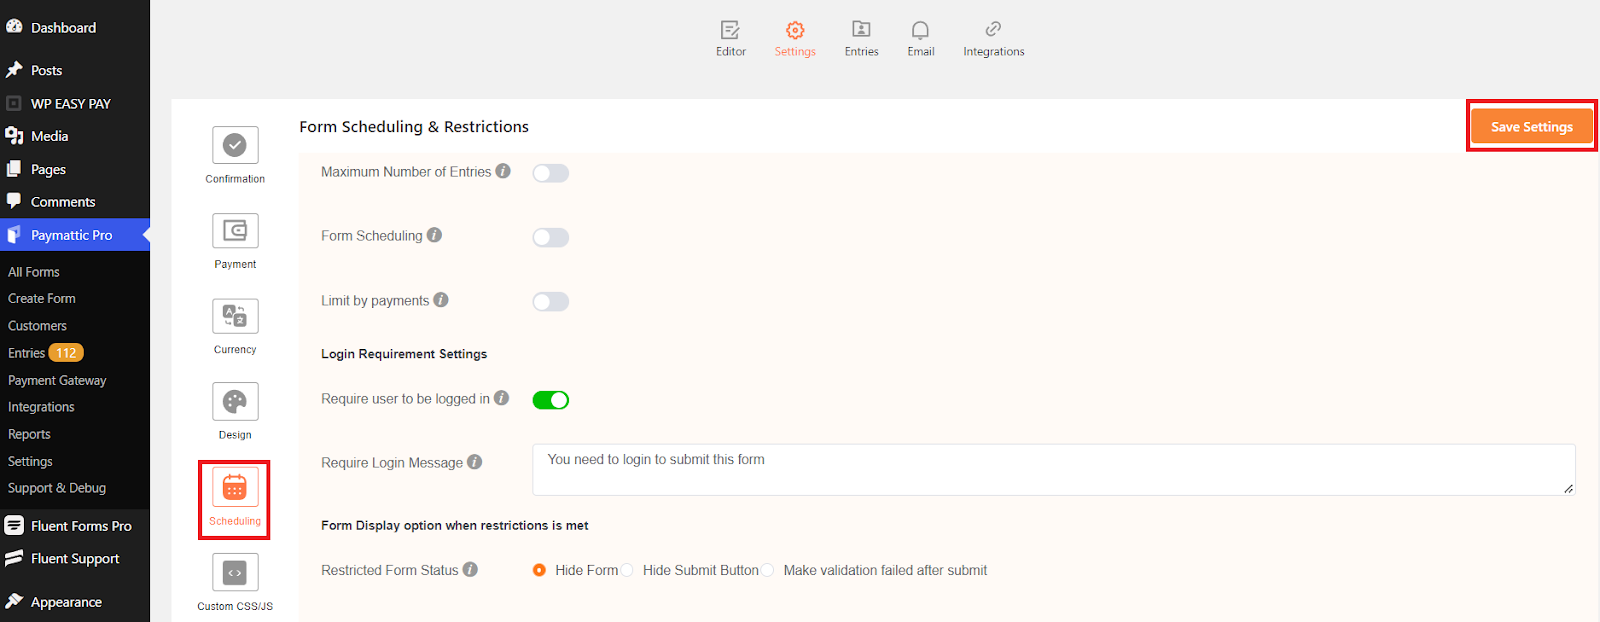
Maximum number of entries – This option lets you set a maximum number of form entries. You can put a custom message for a user when the maximum submission limit has been met. You can also set the limit based on submission type, such as paid, processing, refunded, pending, failed, or abandoned.
Form scheduling – Here, you can define the date when form submission should start and end. You can also put a waiting message for users before the form is activated and an expired message when the form submission date has expired.
Limit by payments – In this option, you can set a limit amount for your form submission and a custom message for users when the payment limit is reached.
Login requirement settings – Turn on the switch to only allow logged-in users to fill out the form.
Require login message – In this option, you can set a login message to guide users who are not logged in yet.
Form display option when the restriction is met – Here, you can set form status when the restriction is met.
Following the abovementioned process, you can set form scheduling and form restrictions with Paymattic. Very easy! isn’t it?
Final word
You must choose any plugin with all functionalities to build a web form. We know you are looking for a plugin like Paymattic, which can give you all advanced facilities. Paymattic lets you create any form with your own style.
Along with this, Paymattic also offers some amazing facilities like email notification, user registration, customer profile, SMS notification, and more. You can already see how easy scheduling or restricting a form is with Paymattic. This plugin makes everything simple for users like that.
If you find this blog helpful or for any query, comment below. You can also visit us to read more tutorial blogs like that.
Join the thousands already enjoying Paymattic Pro!

Madhobi
This is Madhobi, a content writer at WPManageNinja with expertise in technical writing and email marketing. Outside of work, she likes traveling and exploring new places.


Leave a Reply