Paymattic is a payment and donation WordPress Plugin packed with features and unlimited customizing options. This article will guide you through installing, activating, and updating Paymattic both Free and Pro versions on your WordPress website. Please follow the instructions for a successful installation.
Installing and Activating Paymattic #
To learn how to install and activate the Free Version of Paymattic Plugin directly from the WordPress Site, follow the steps with the screenshots below –
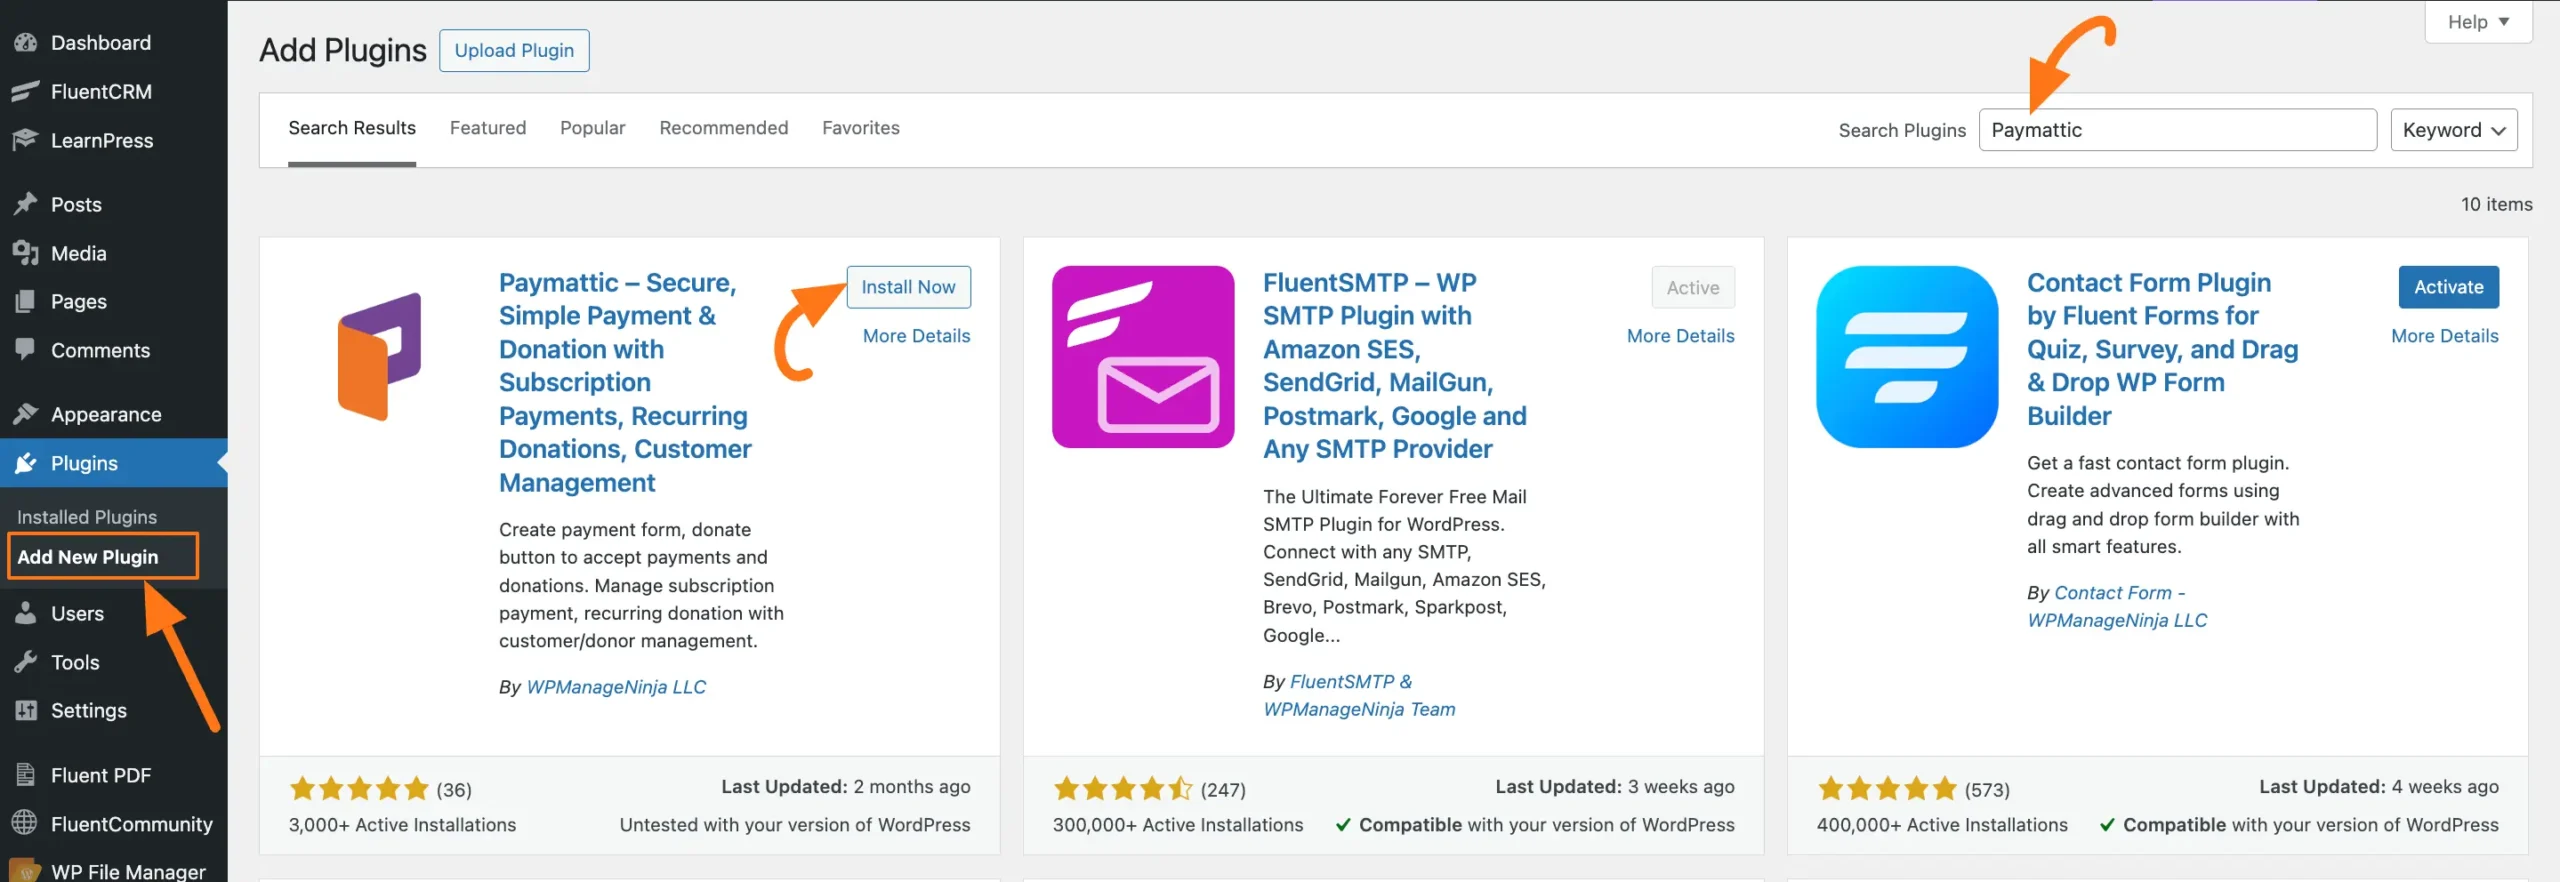
First, go to the Plugins, open the Add New Plugin page from the WordPress Dashboard, search for Paymattic through the Search Plugins field, and the plugin will appear.
Now, click the Install button and the Paymattic plugin will be successfully installed on your WordPress site.
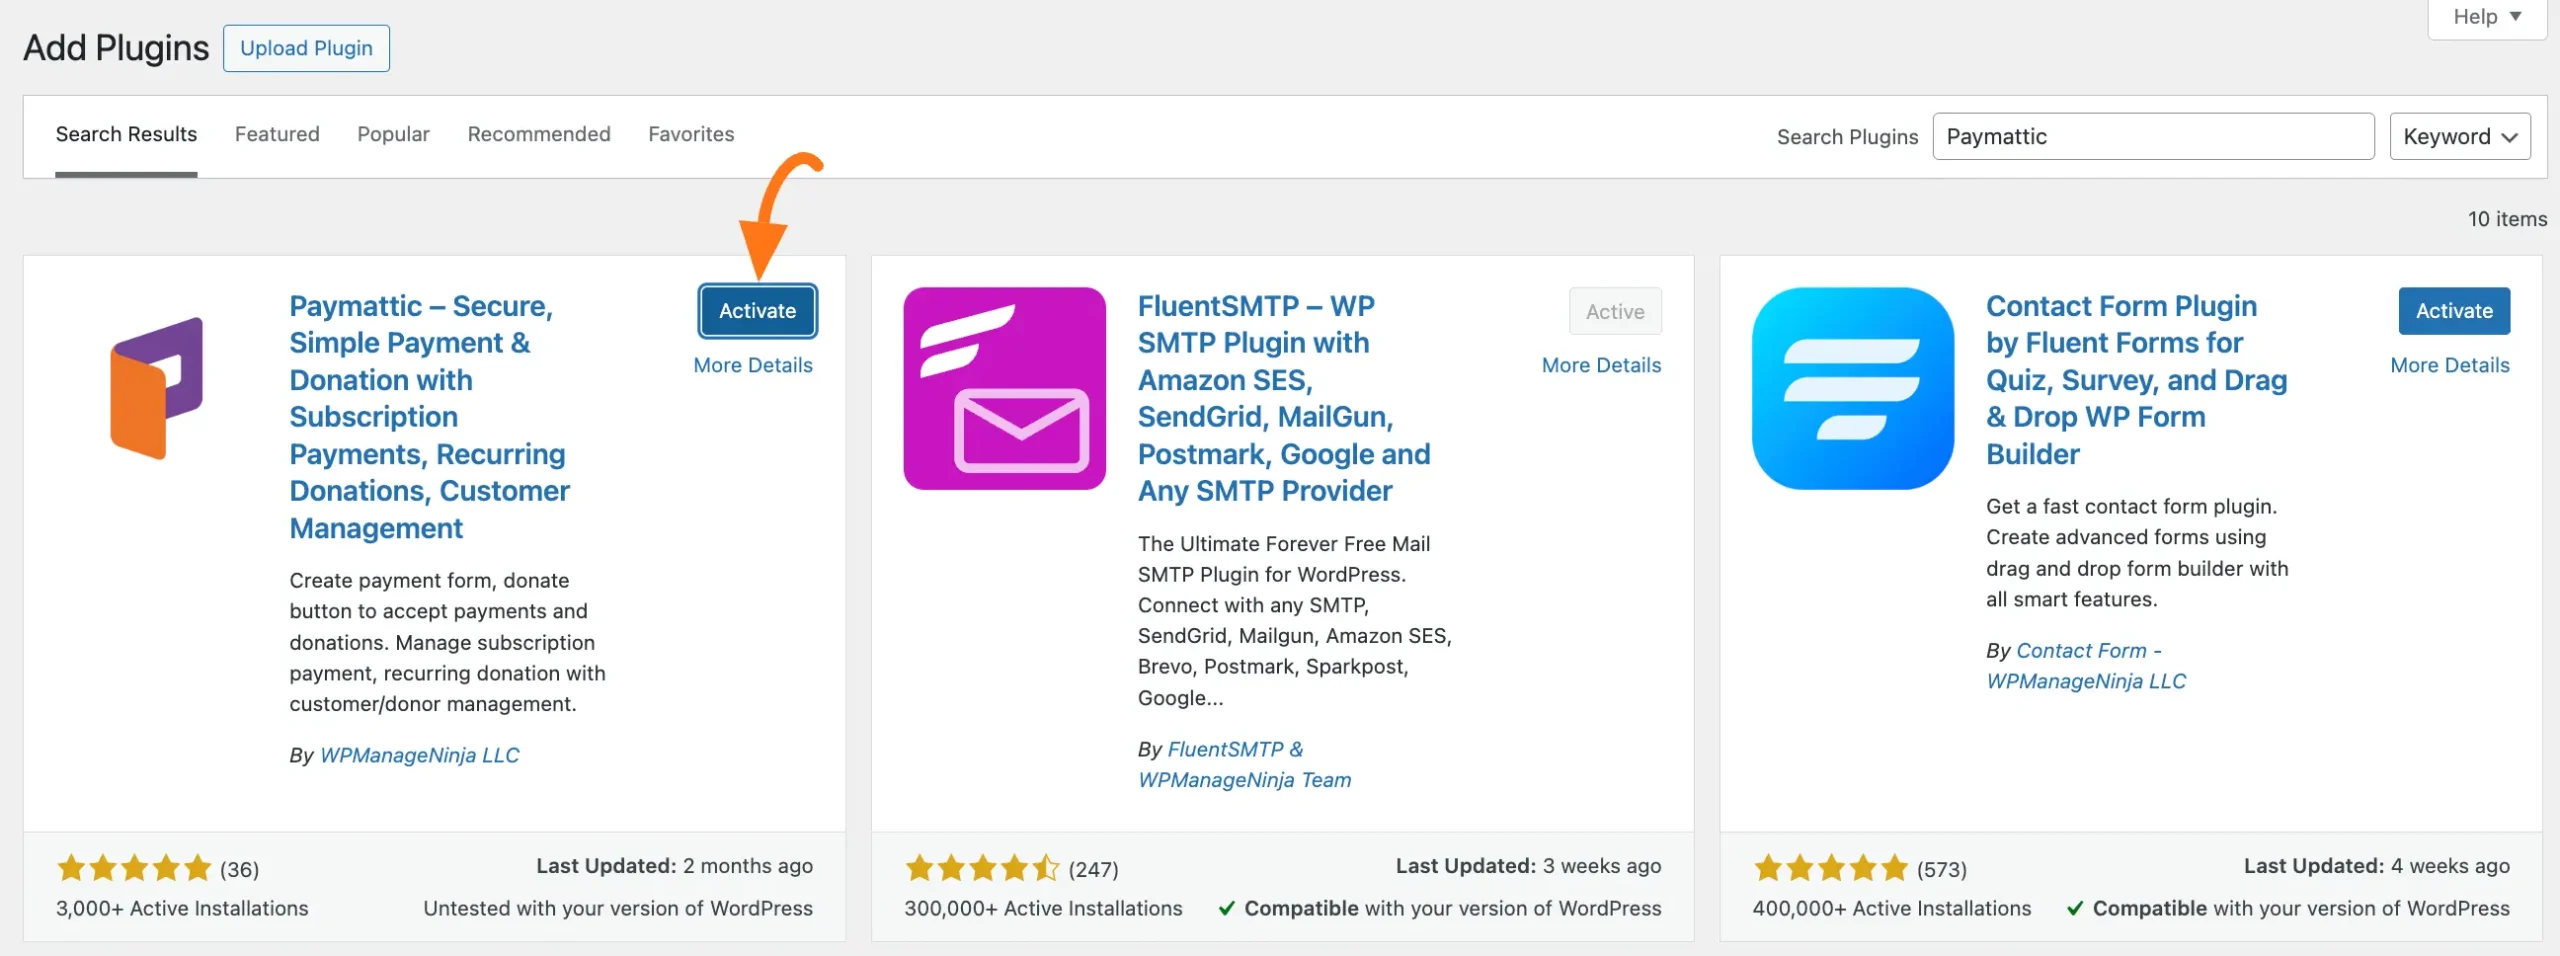
Finally, to activate the Paymattic plugin, click on the Activate button.
Installing & Activating Paymattic Pro #
Before starting to install and activate the Paymattic Pro version, you must have the .zip file of the Paymattic Pro Plugin.
Get the Zip File of Paymattic Pro #
To get the zip file, first purchase the pro plugin from here.
Or, simply go to the Dashboard of Paymatic’s free version and click on the Upgrade to Pro button to purchase the Pro version.

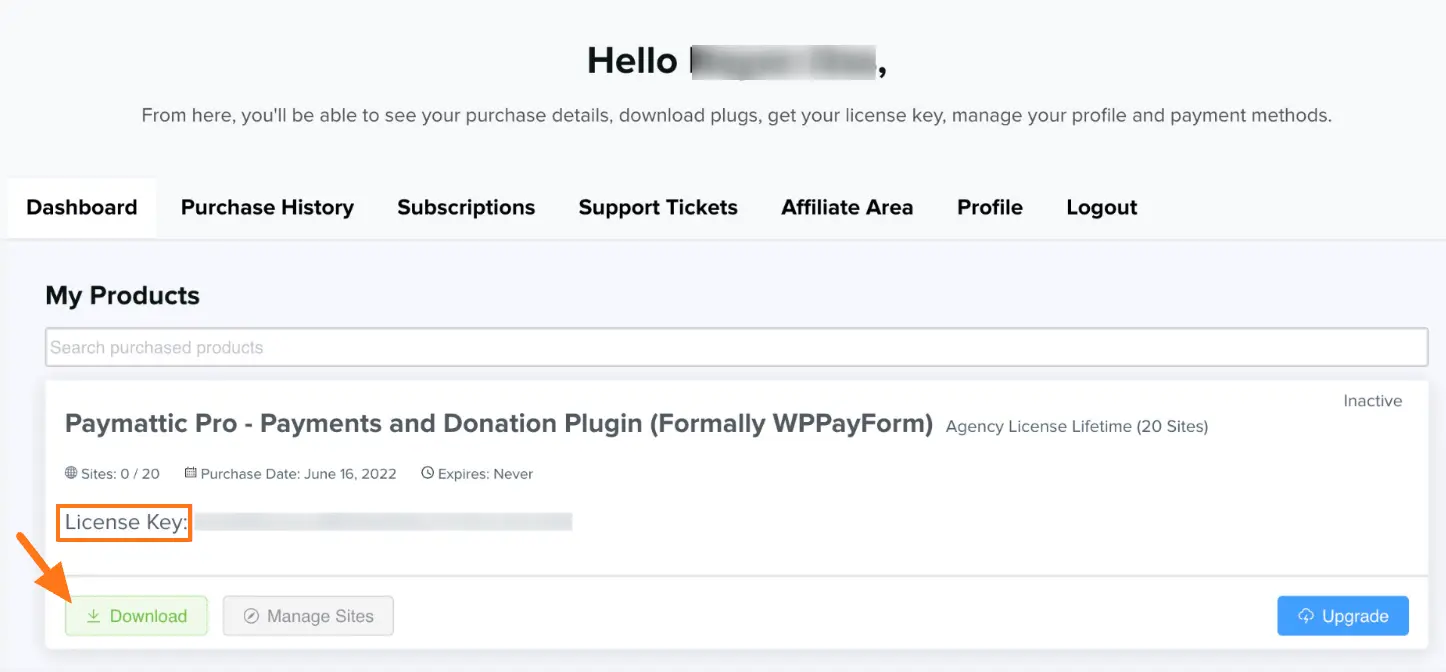
Once you have purchased the plugin, you will get access to the WP Manage Ninja Dashboard. Now, log into the account with your credentials.
Then, go to the Dashboard and you will find Paymattic under My Products.
Now, click the Download button and the Paymattic .zip file will be downloaded to your device.
You’ll also see a License Key that you can copy as you need it later to activate the plugin.
Or, you retrieve it anytime from your WP Manage Ninja Dashboard.
Install Paymattic Pro #
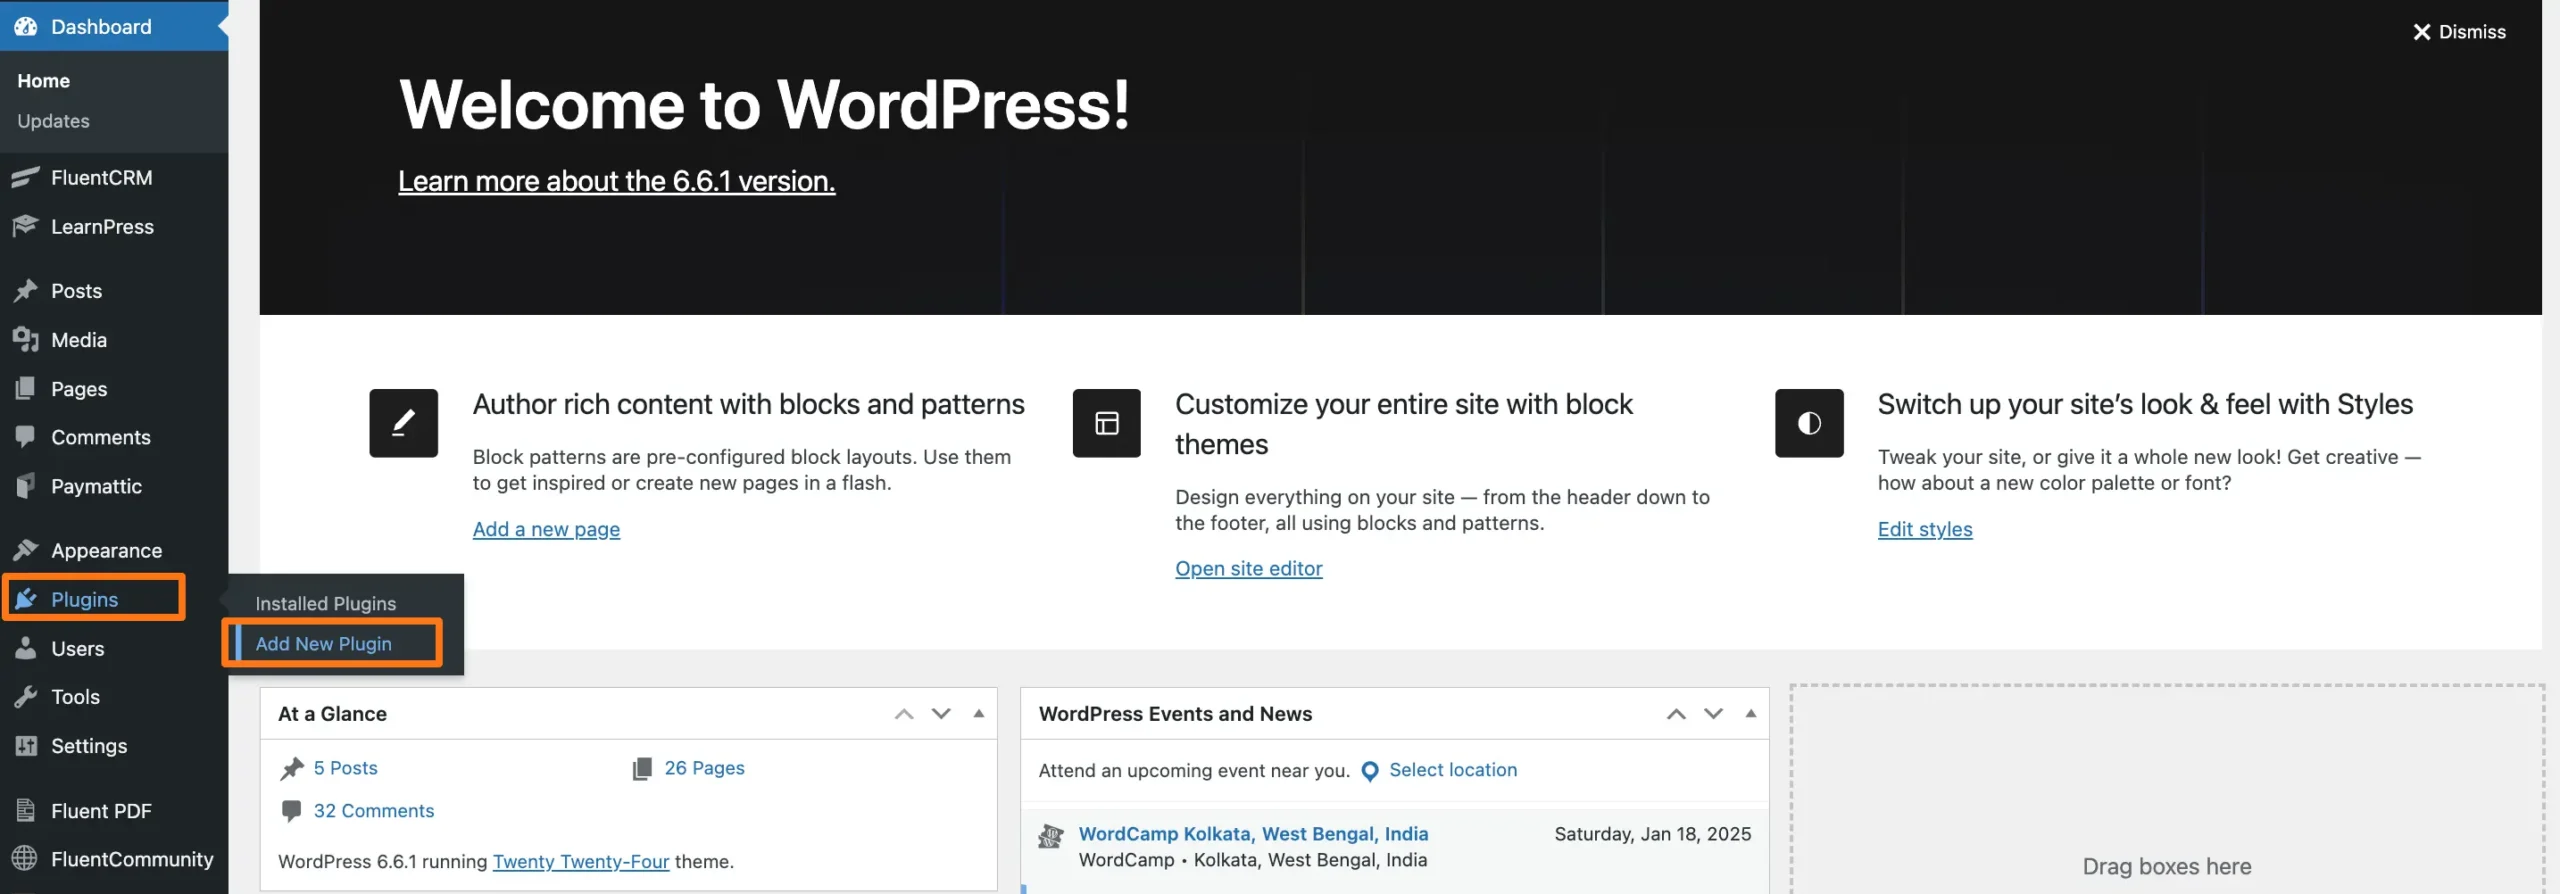
Once you get the zip file, go to the Plugins from your WordPress Dashboard, and click on Add New Plugin.
Now, click the Upload Plugin button. Then, press the Choose file to upload the Paymattic’s .zip file that you’ve downloaded before, and press the Install Now button.
The Paymattic Pro plugin will be successfully installed on your WordPress site!

Now, to activate, click on the Activate Plugin.
But, it would be best if you had the License key to successfully activate all the Premium Features and get the latest update of Paymattic. Keep reading to learn how to activate the license.

Activate the License Key #
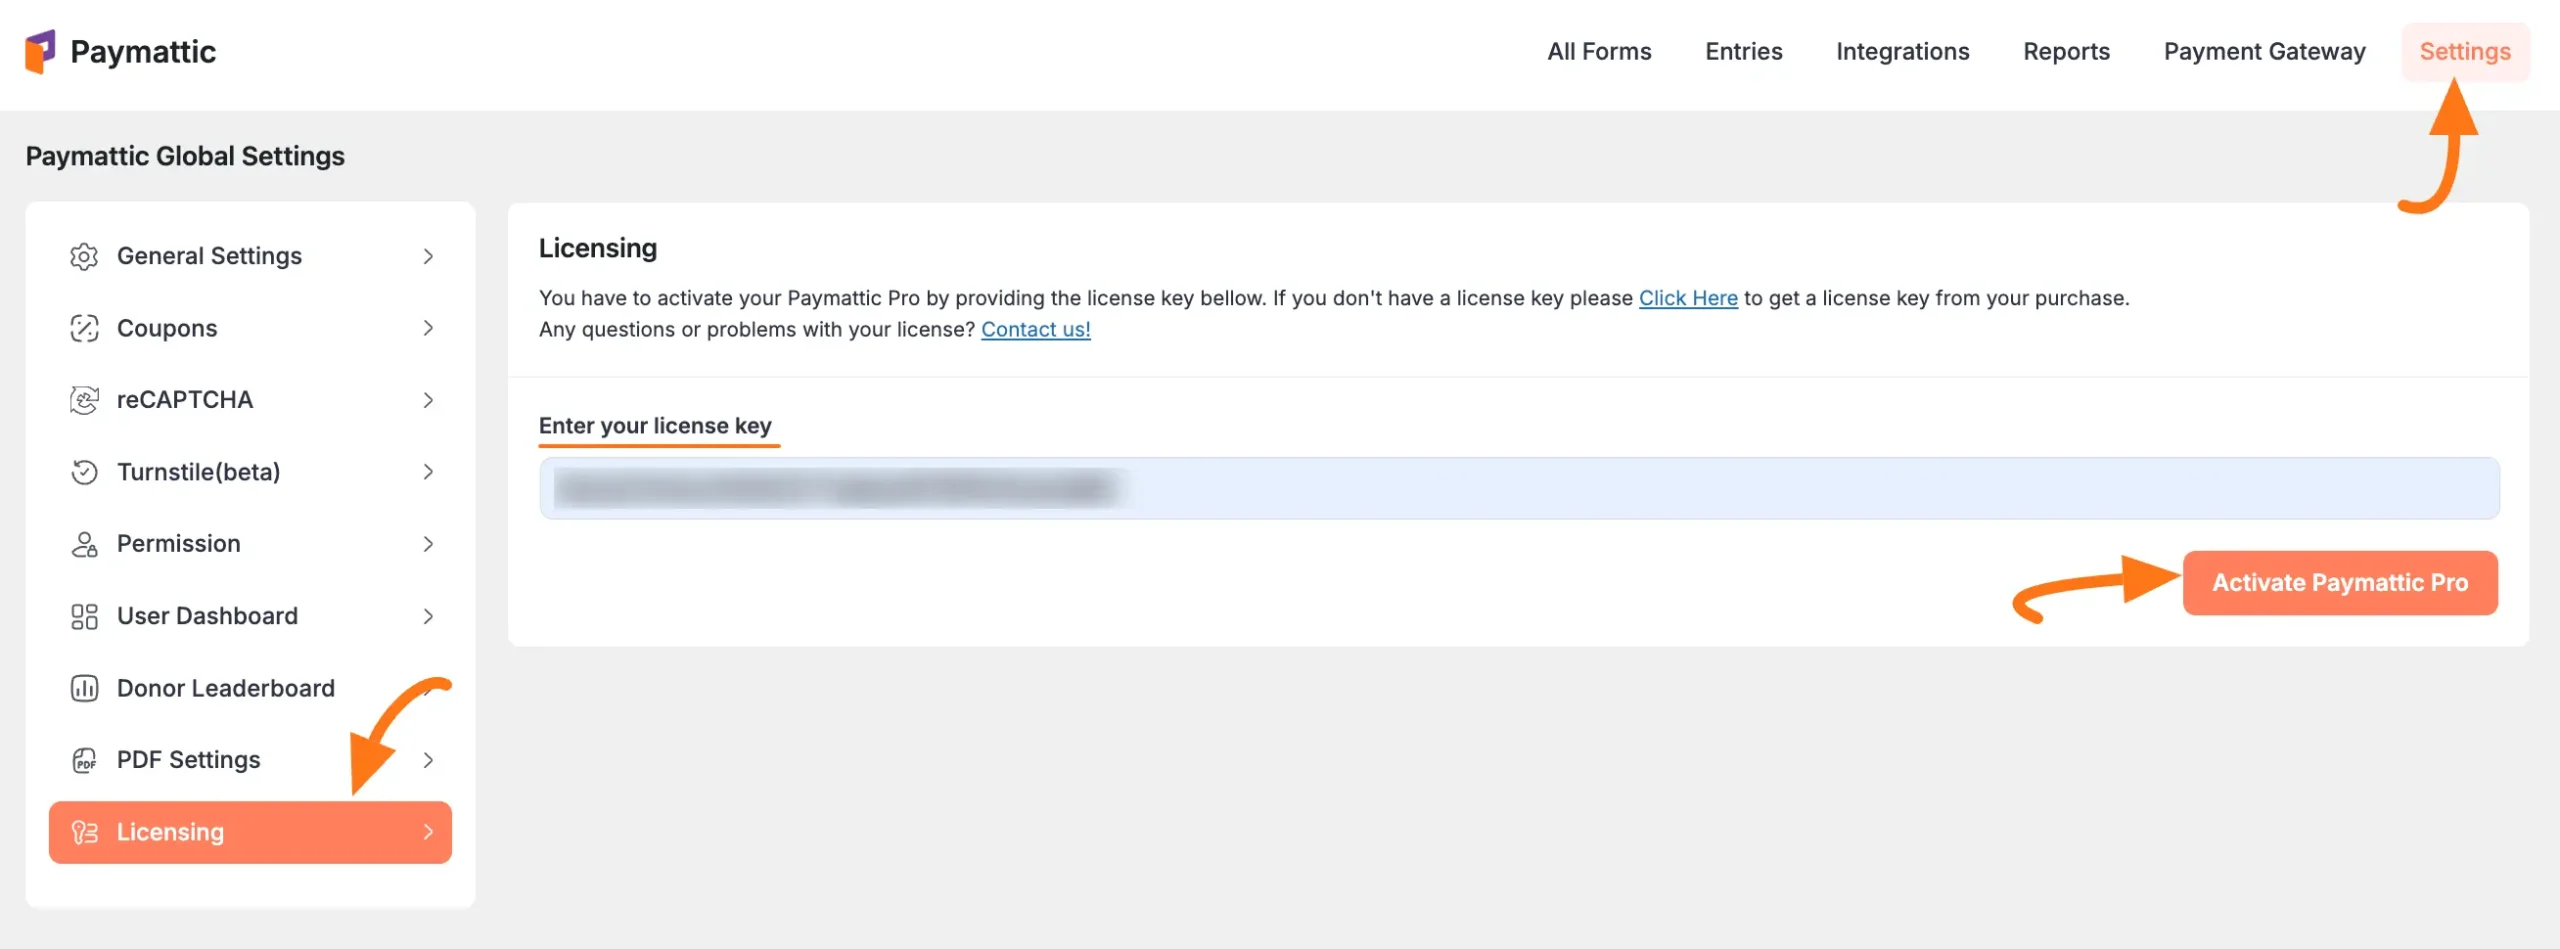
To activate all the Pro features of Paymattic with the license key, follow the steps with the screenshots below —
First, go to Settings from your Paymattic Dashboard, open Licensing from the left sidebar, and enter the License Key you’ve copied before into the input field.
And finally, click the Activate Paymattic Pro button. Your Paymattic Pro plugin will also be successfully Activated on your WordPress site!
How to Update Paymattic #
For updating with the latest version of Paymattic, we have implemented an automatic update system compatible with the previous version. Also, you can manually update it anytime if needed.
To Update the Paymattic plugin manually, follow the steps in the screenshot below —
Go to the Installed Plugins page of your WordPress Dashboard and search for Paymattic from the Search Bar in the top right corner.
Now, check if any update is available. If yes, just click on the Update button.

Congratulations now you can explore all the amazing features of Paymattic!
If you have any further questions, concerns, or suggestions, please do not hesitate to contact our @support team. Thank you.


