Paymattic offers you another cool feature that supports a new Payment Gateway- Mollie. Mollie is a fantastic payment gateway for your webshop. This powerful plugin is dedicated to making online payment processing better for your website.
Let’s learn how to integrate Mollie with Paymattic in some simple steps.
Mollie is a Pro feature!
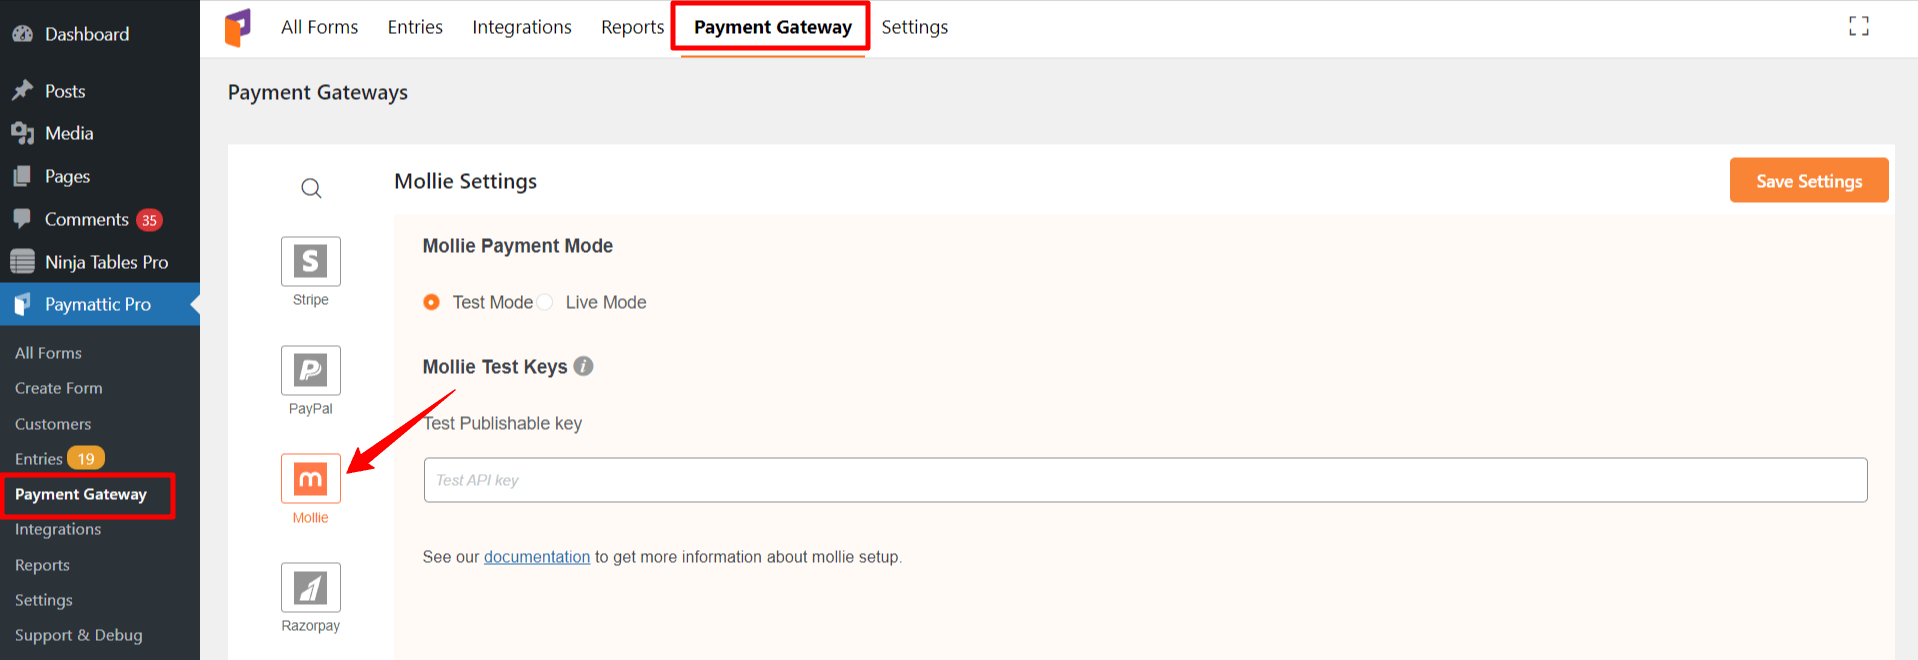
- In the beginning, go to Paymattic(Pro) → Payment Gateway from your WordPress dashboard.
- Then, Click on Mollie from the left navigation bar.

How to configure Live Mode/ Test Mode # #
On the Mollie settings page, there are two types of modes displayed by the radio button. Test mode is only for test payments and Live mode is for real payments. While in the test mode, you can use any test card number that is issued by Mollie.
You can set up the live mode in the same way the test mode is set.
Mollie Test Keys #
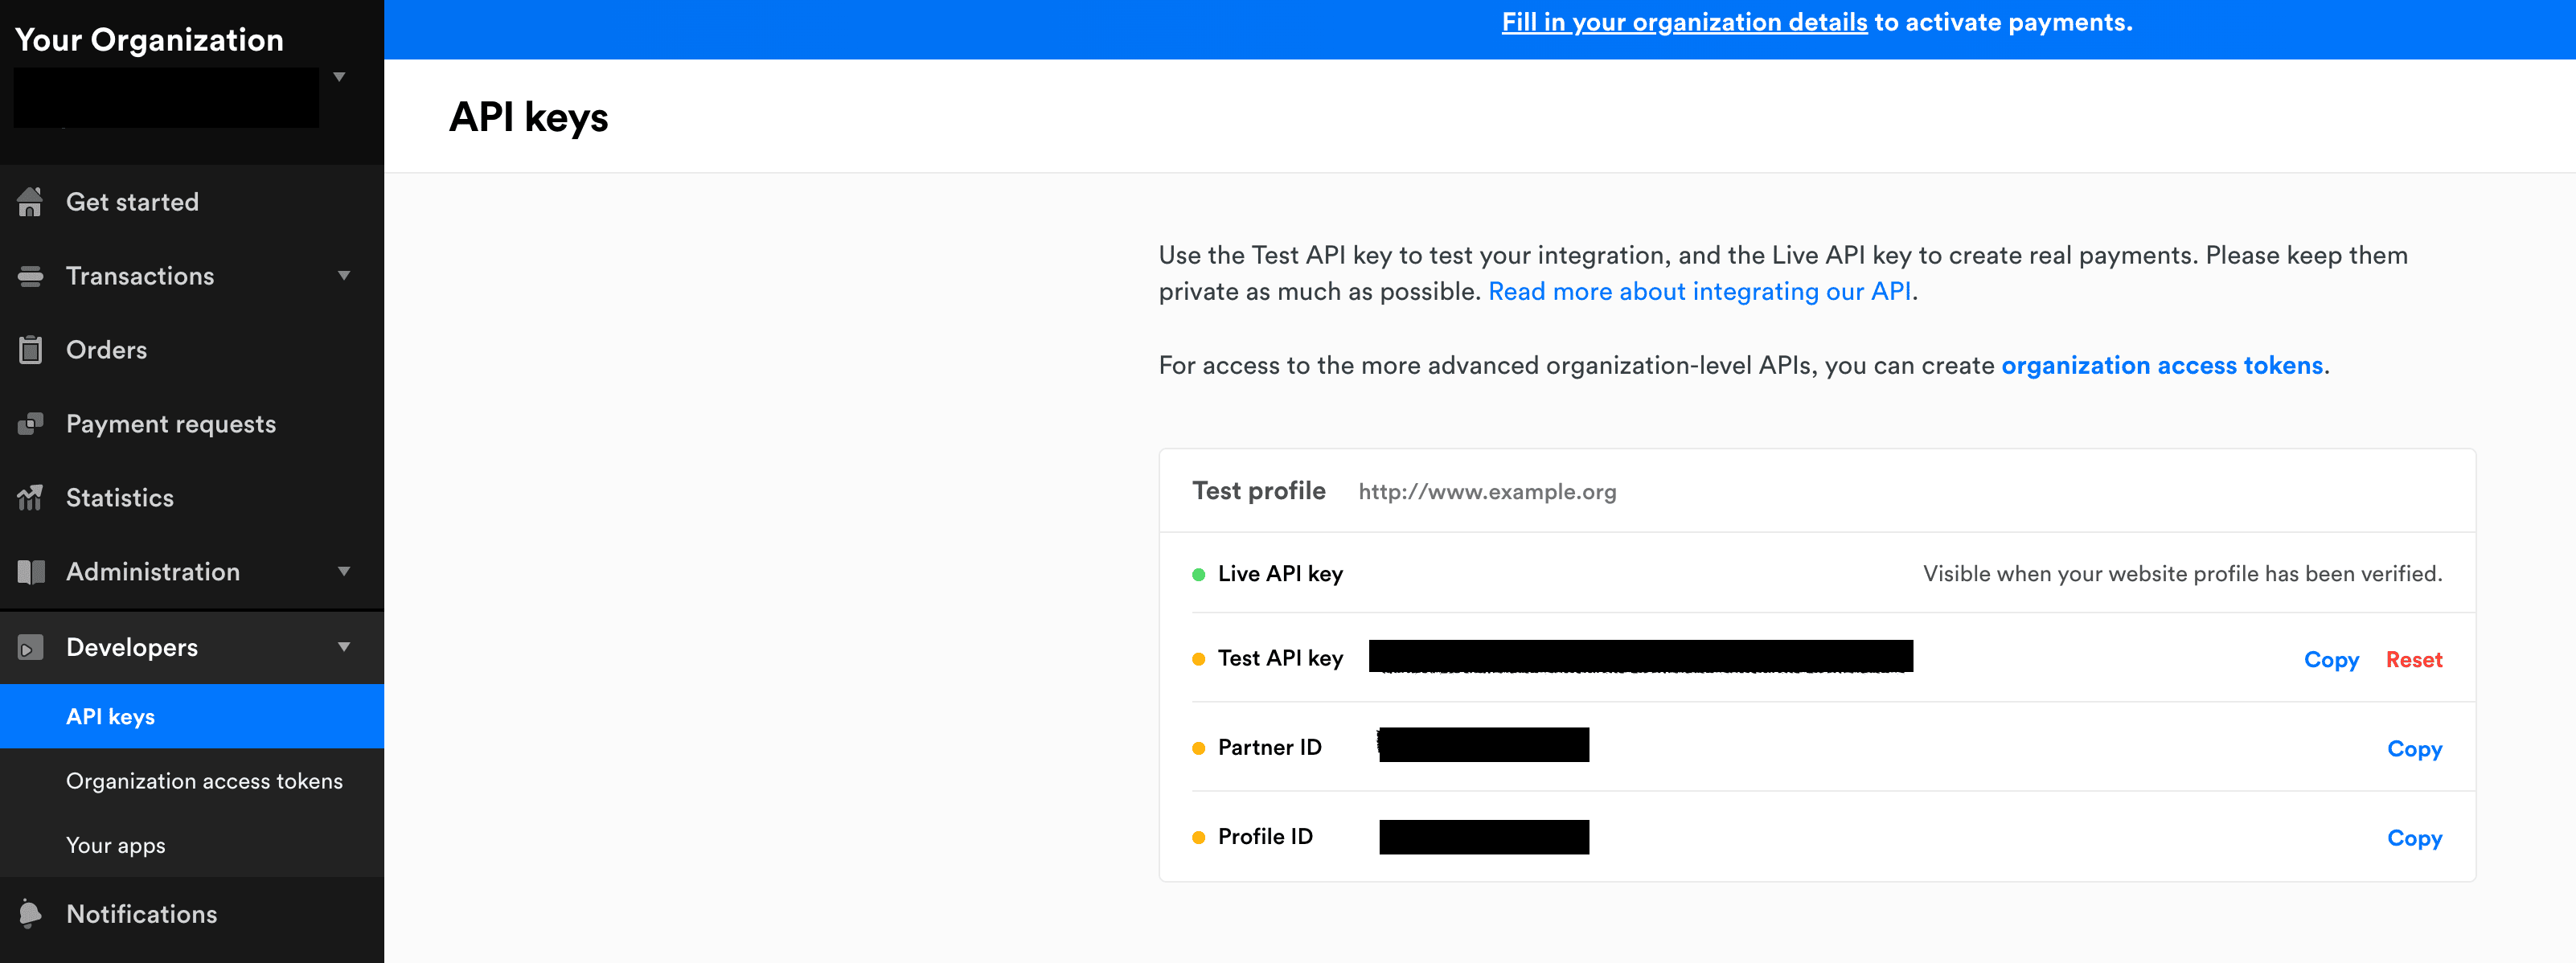
- Now, you will need an API key to integrate Mollie with Paymattic. Sign in to your Mollie account and collect your API key.
- Click on the Developers section from the left sidebar.
- Press on API Keys.
- Copy your Test API Key. (Copy the Live API Key to activate Live Mode)

- Then, head back to your WordPress dashboard and go to Paymattic(Pro) → Payment Gateway → Mollie.
- Paste your API key in the respective field.

Finally, click on the Save Settings button.
Great! You have successfully integrated Mollie with Paymattic. Now, you can create a new form or use an existing form to receive payments through Mollie. Add your desired fields with your form and select Mollie payment gateway from the Payment Method Fields section. At last, click the Save button to save your new form.
This is how you can successfully set up Mollie with Paymattic.


