In Paymattic, the Currency Switcher feature enables donors to select from over 135 currencies directly within the donation form. This article will guide you on embedding the Currency Switcher field into the WordPress Site through Paymattic.
Currency Switcher is a premium feature that only works for the Donation Form (specifically, for the Donation Progress Item field). So, you need the Paymattic Pro Plugin to use this field.
Adding Currency Switcher Field #
To learn how to add the Currency Switcher to the Paymattic Form on your WordPress site, follow the steps with the screenshots below –
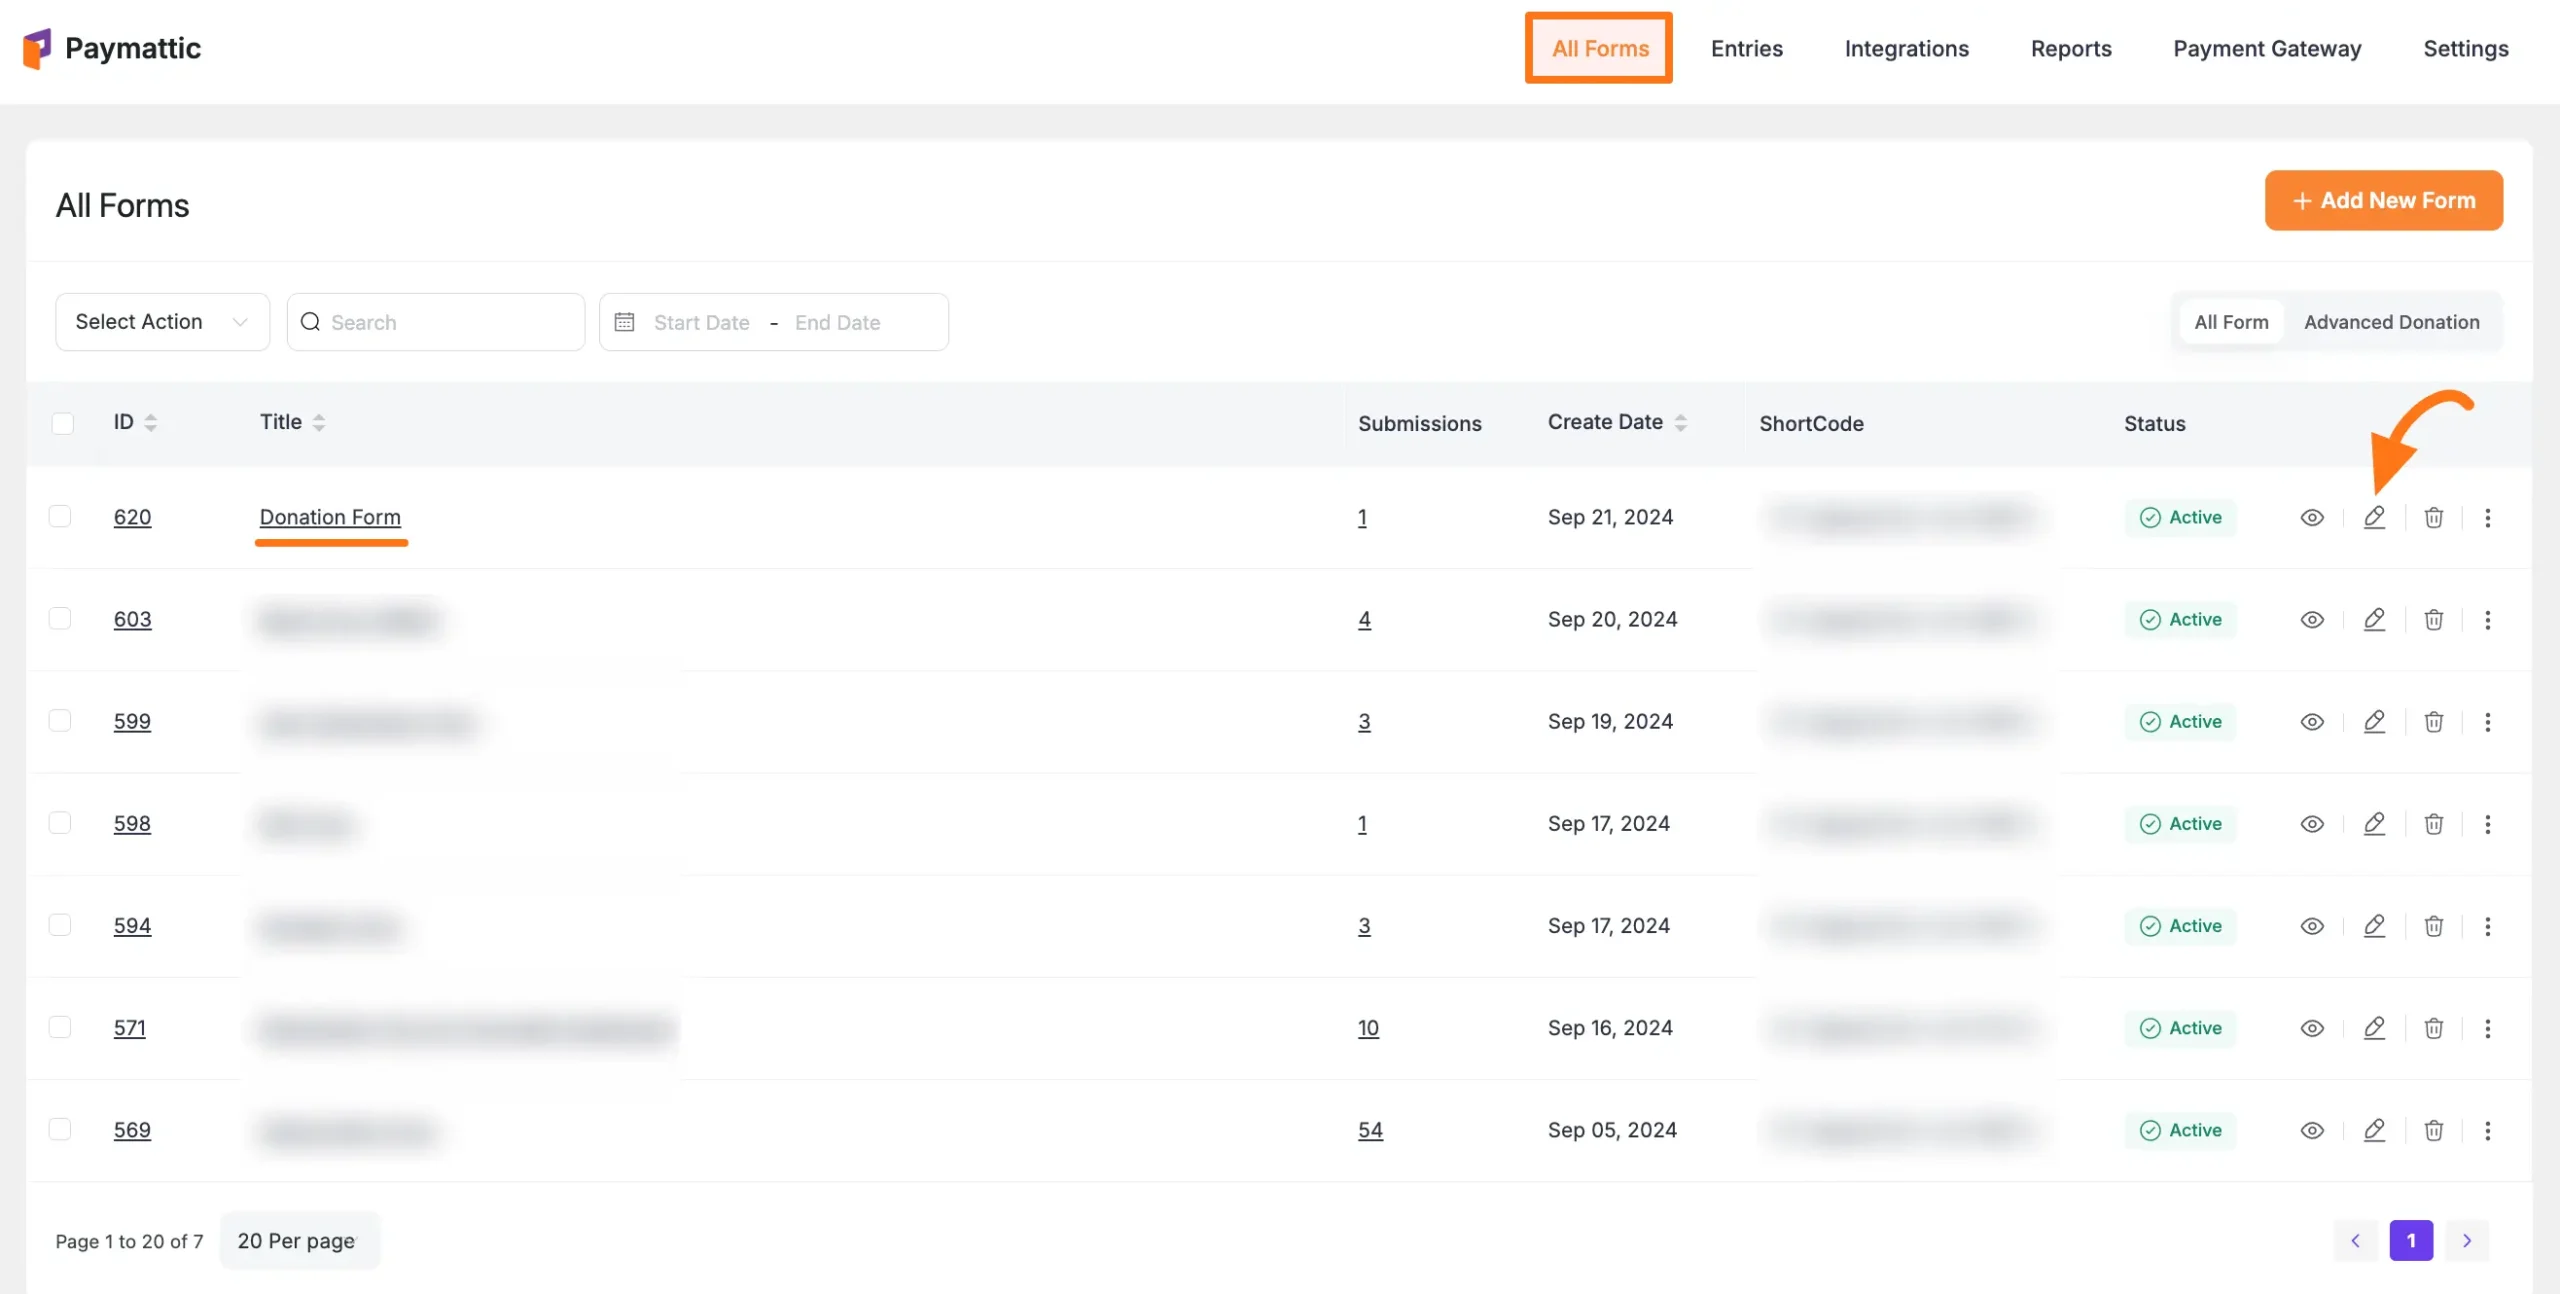
First, go to the All Forms section from the Pymattic Navbar, choose a Donation Form, and click the Pencil/Edit icon to open the Editor page of that form.
If you do not have any existing donation forms, read this Create a Form from Scratch or Create a Form using Templates documentation to create one.
For example, I choose an existing Donation Form to show the whole process.
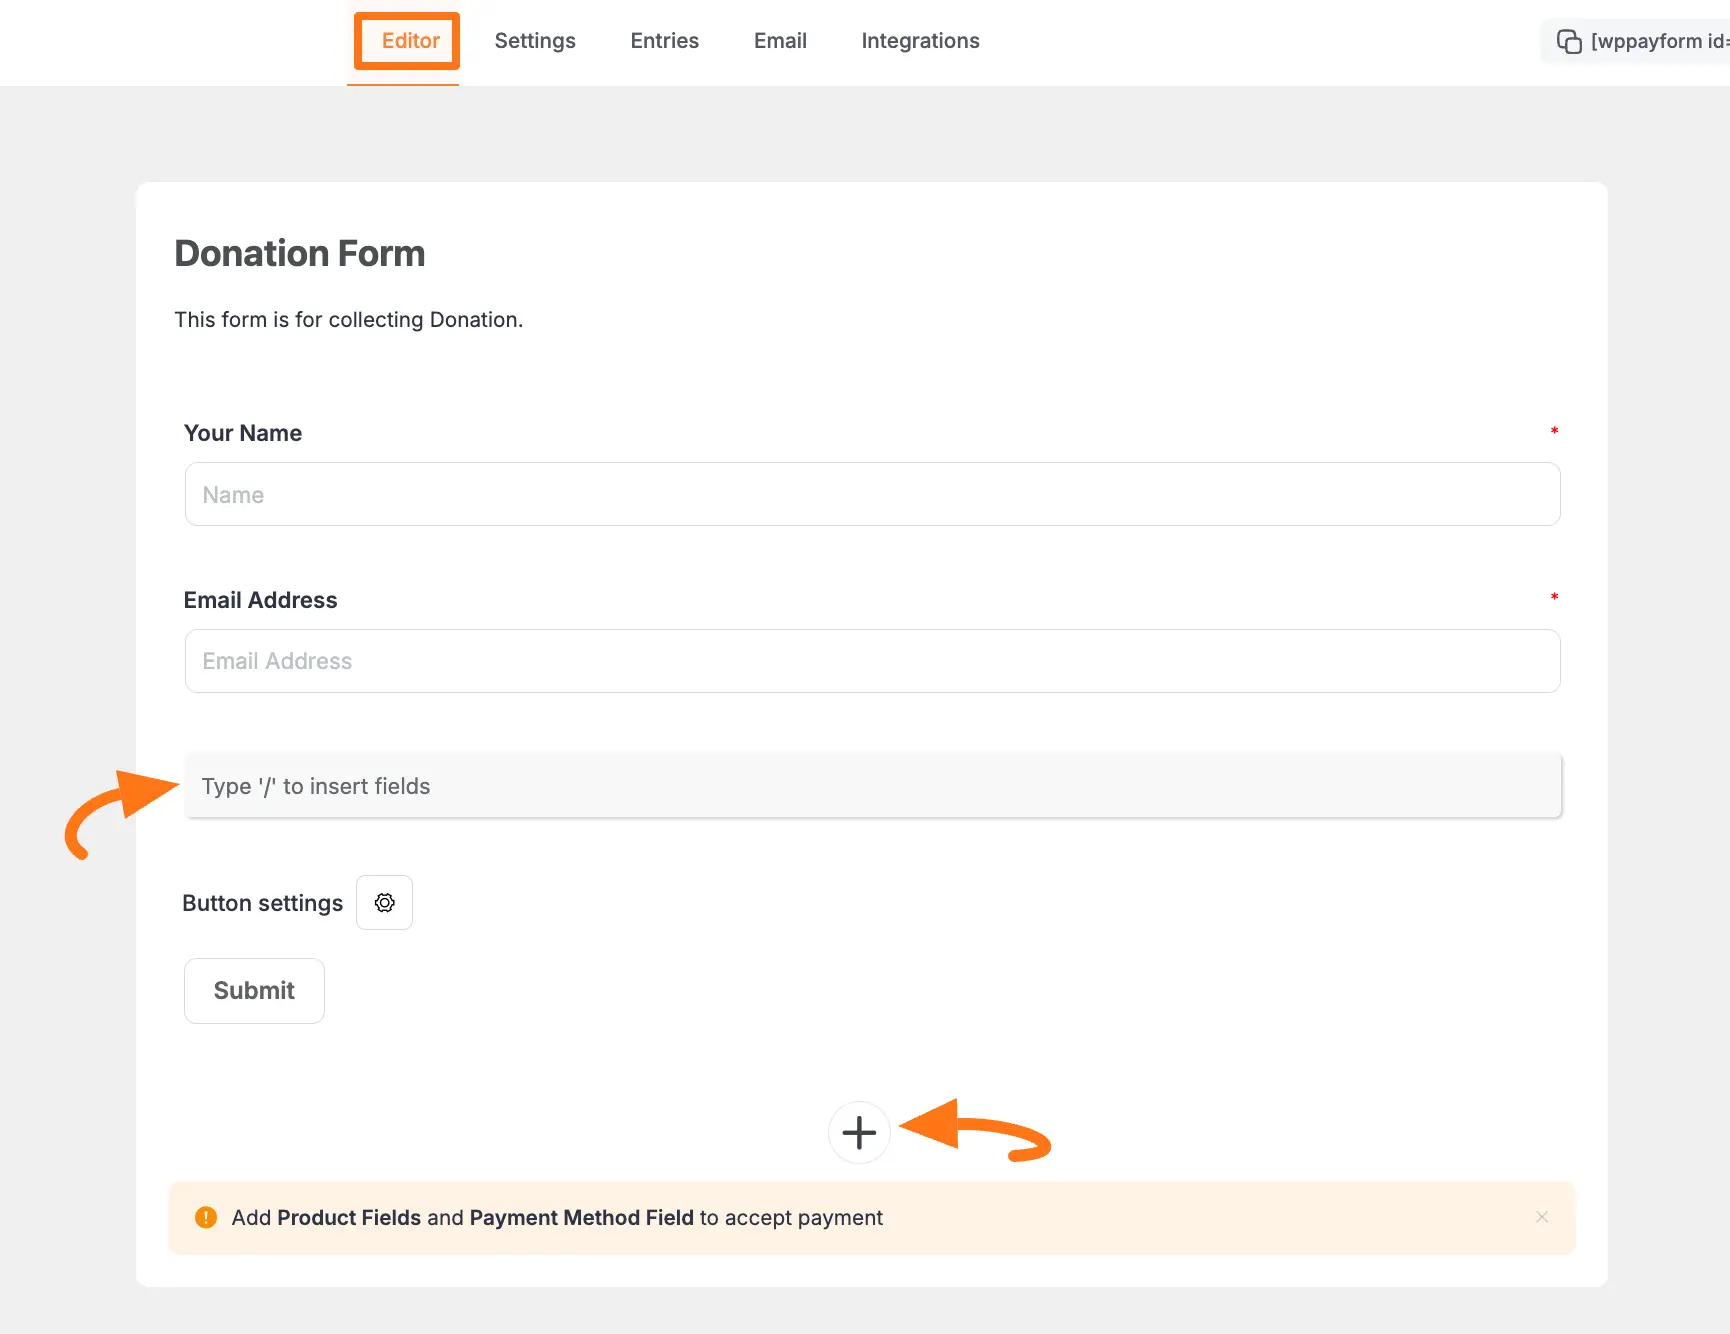
Once you open the Editor page, add the Currency Switcher field by typing the “ / ” or clicking the Plus Icon at the bottom.
We always suggest you keep the Name and Email field at the beginning of any Form.
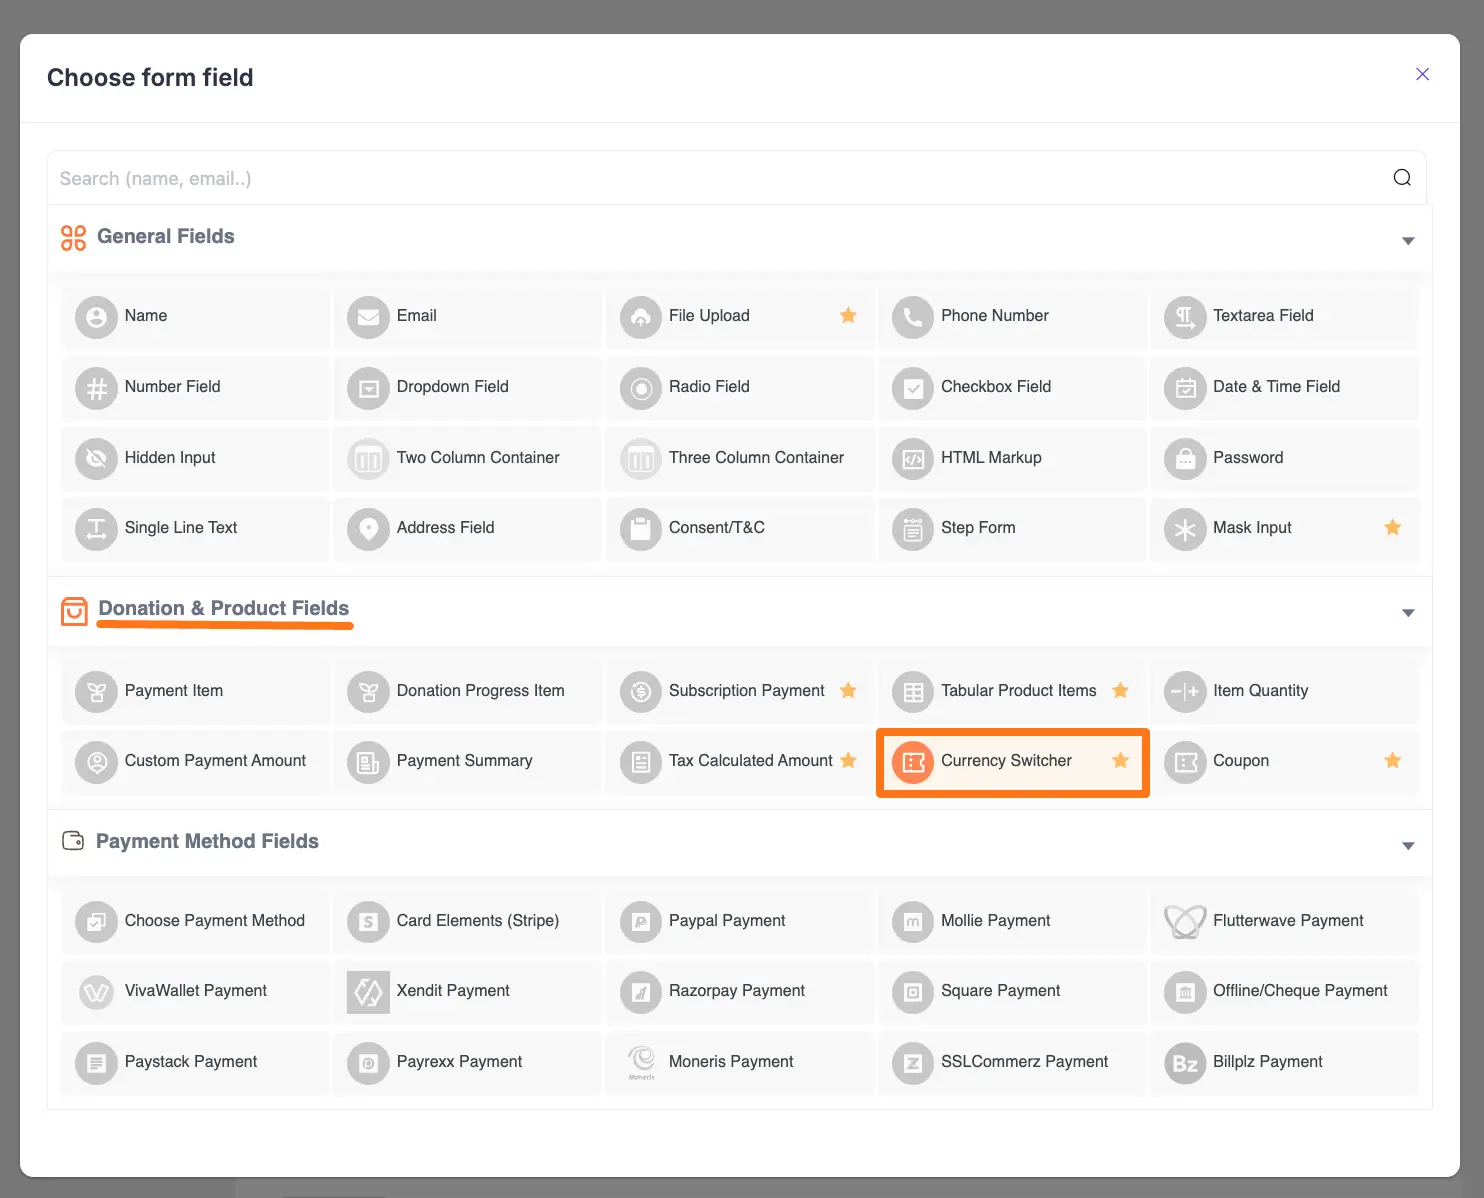
For example, I choose the Pluc Icon option to select the Tax Calculated Amount field under the Donation & Product Fields section from the Choose Form Field page.
Also, don’t forget to add a Donation Progress Item field to make the Currency Switcher field functional and a Payment Method Field to collect donations.
Editing/Customizing the Field #
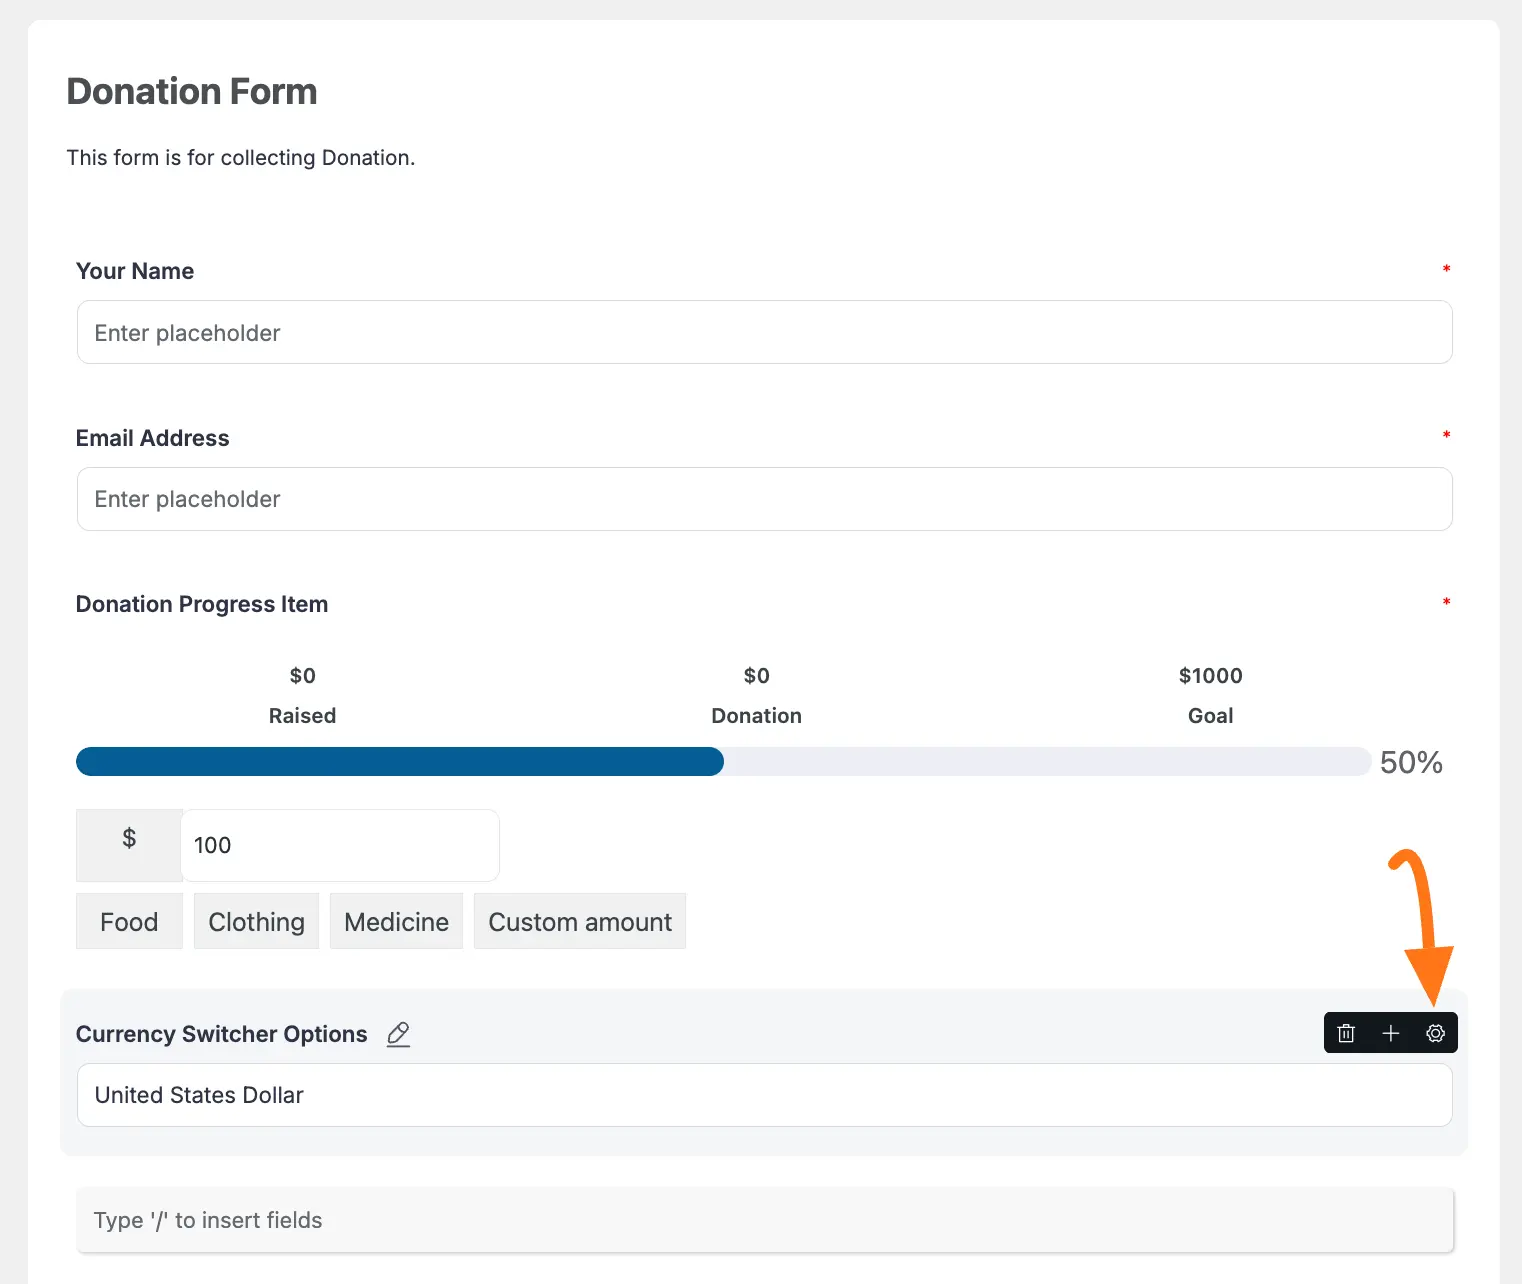
You can see the Currency Switcher and other necessary fields added to the form.
You can edit their field name and settings. To learn more about form editing, read this Documentation.”
Specifically, to edit the Currency Switcher field according to your needs, click the Settings Icon from the right-side corner.
Now, a pop-up page will appear with various settings options for customizing the field.
General Settings #
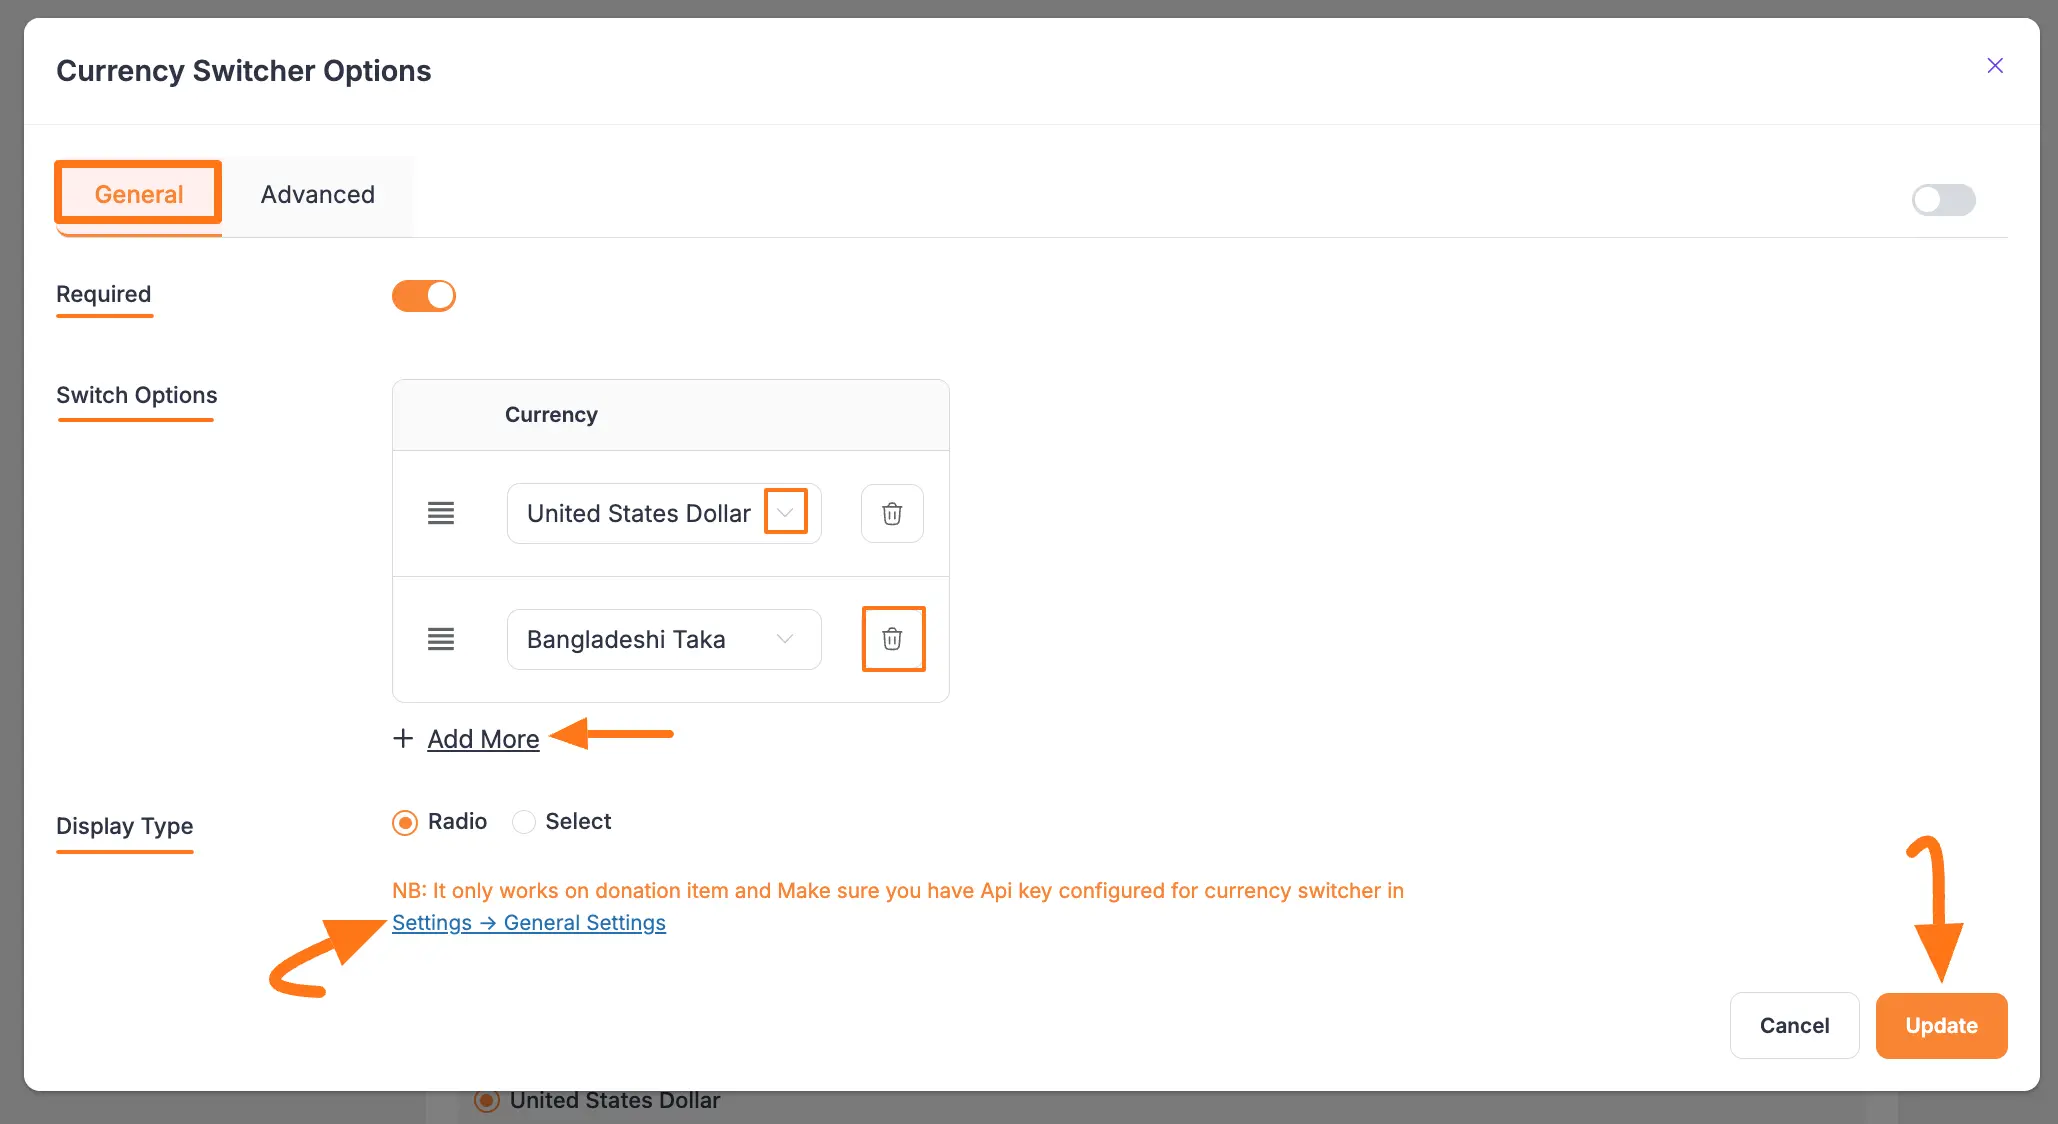
All the Settings under the General Tab mentioned in the below screenshot are briefly explained:
- Required: Enable this option to make this field mandatory for users to fill in for a successful submission.
- Switch Options: Here, you can choose the currency/currencies from the dropdown list as a switch option/according to your needs. To add as many currencies as you need, click the + Add More button, and to delete any chosen currency if required, click the Trash Icon.
- Display Type: With this option, you can set whether you want to set the currency selection type as a Radio button or Select (dropdown list).
But, to make the Currency Switcher functional, you must Configure the API Key in the General Settings of Paymattic and add the Donation Progress Item field in your form.
Once you finish, click the Update button to save all your configuration.
API Key Configuration in Paymattic’s General Settings #
To make the currency switcher field functional, you must configure your Currency API Key in the General Settings of Paymattic. To learn the process, follow the steps below –
Get the API Key from Currency API #
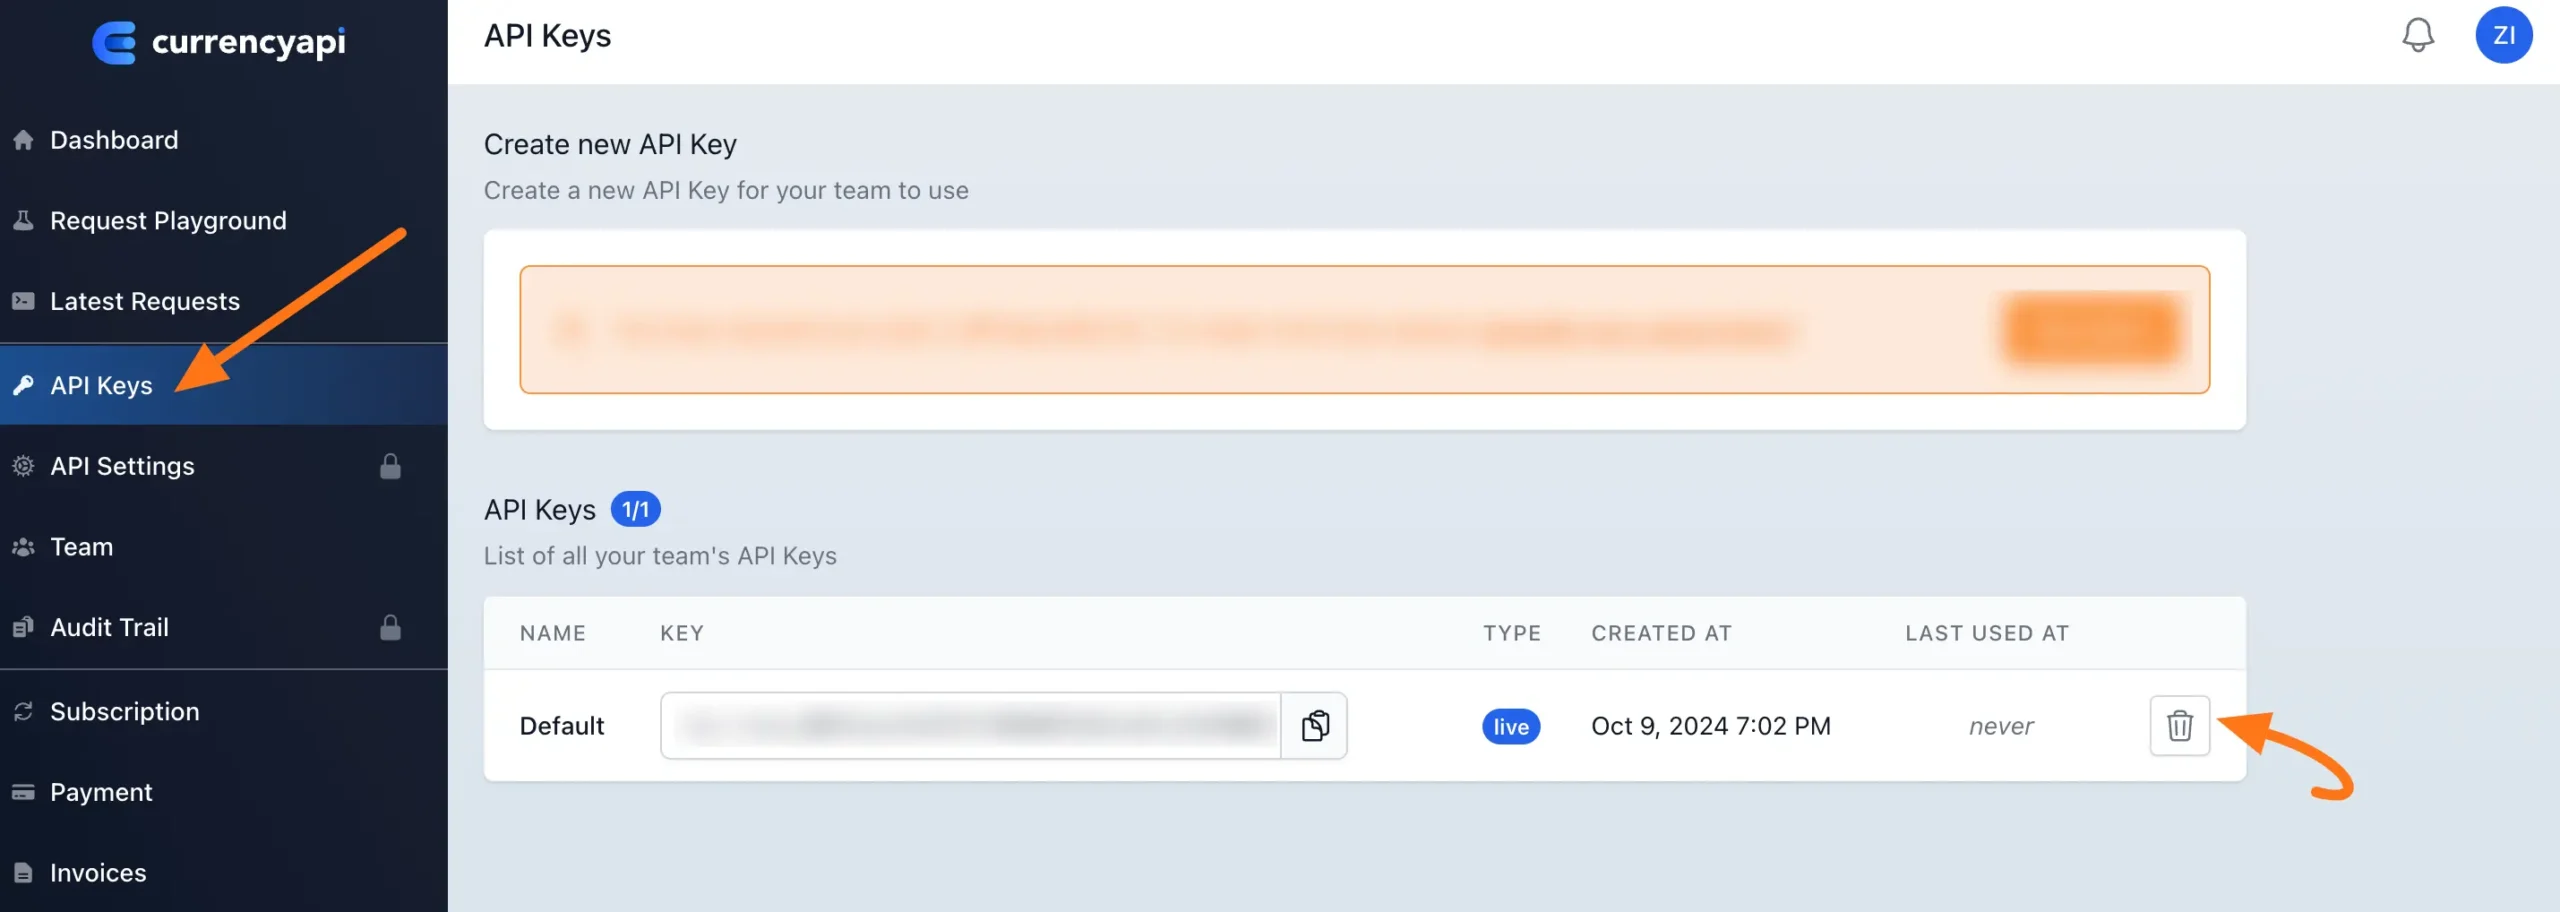
First, log in to your Currency API dashboard, go to the API Keys tab, and create a new API key.
To get the option of creating a new API key, delete the existing one by clicking the Trash Icon.
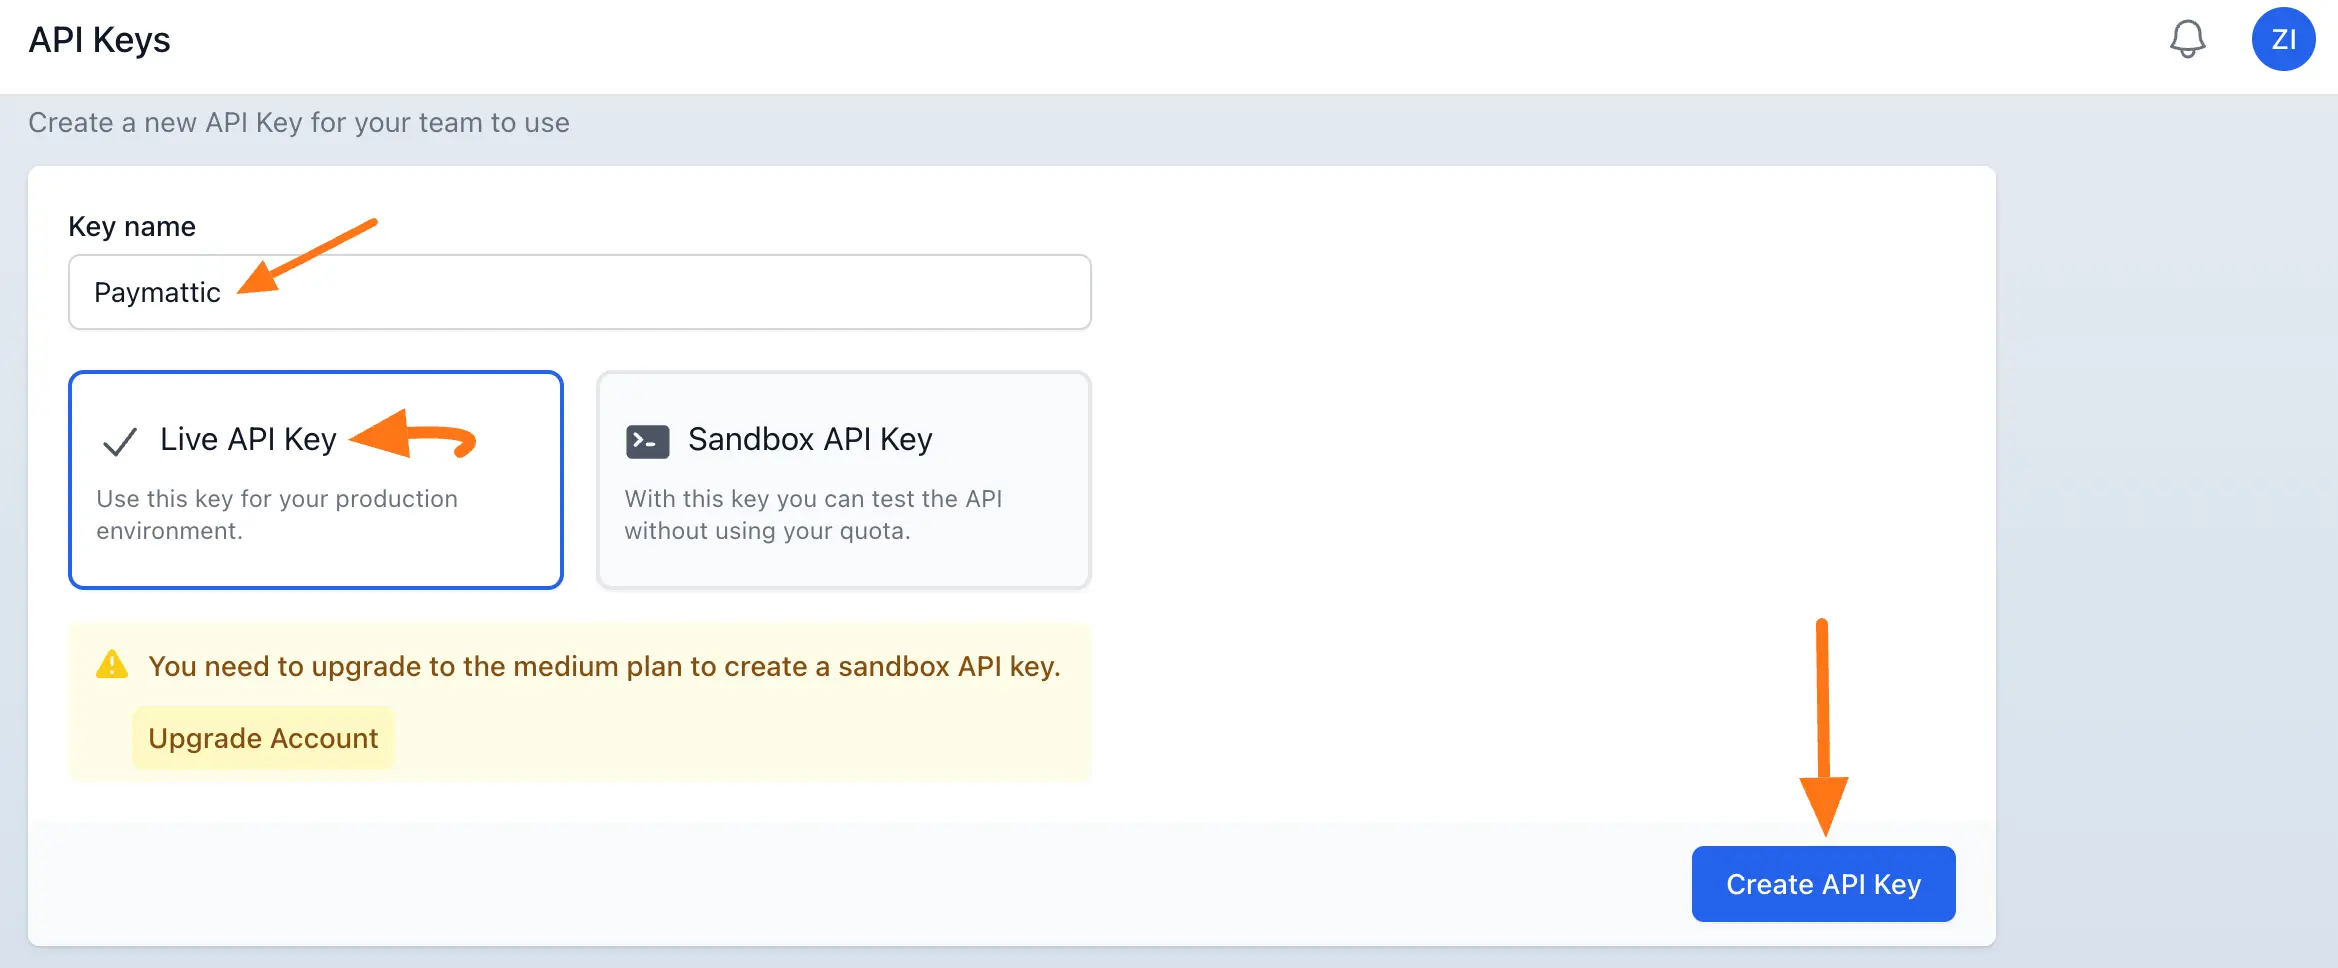
Now, name your API key, select Live API Key for real use or Sandbox API Key for testing, and click Create API Key.
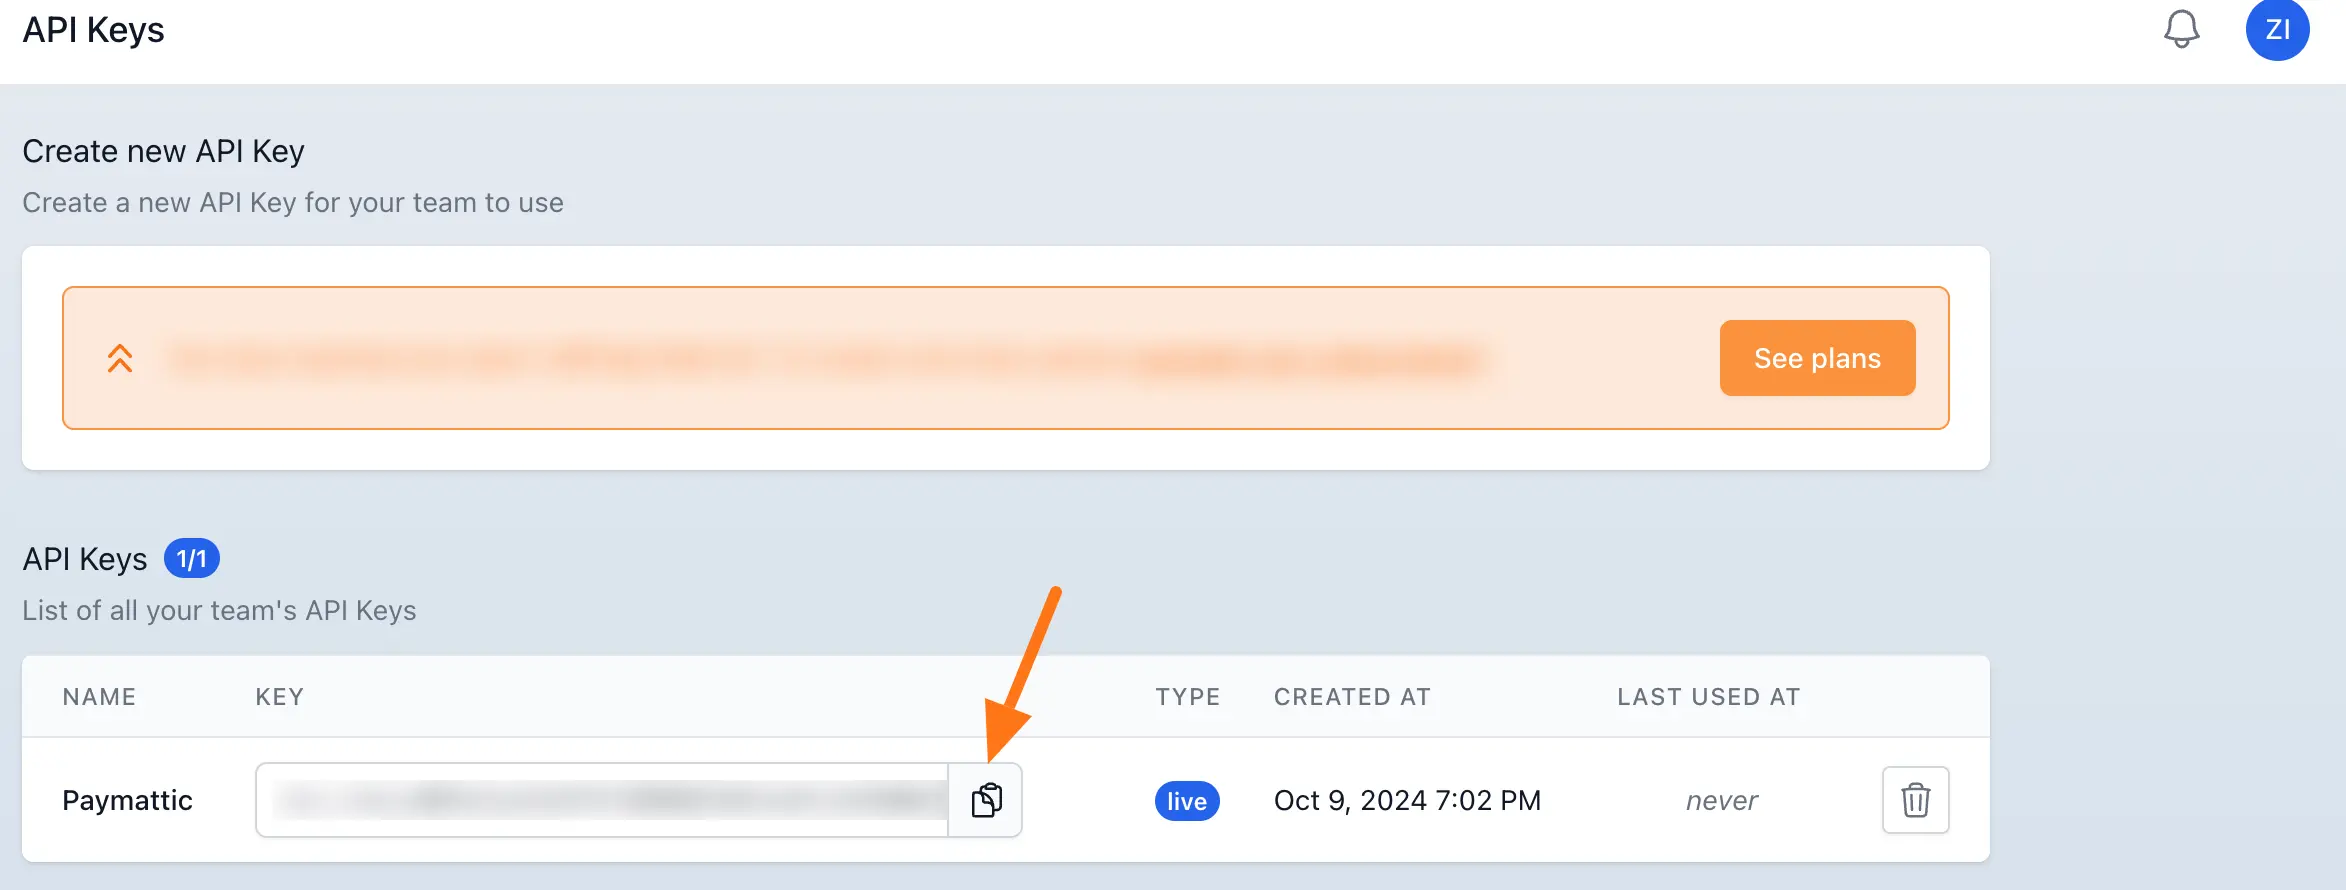
Here, you can see your newly created API key. Now, copy it.
Configure API Key in Currency Switcher Settings #
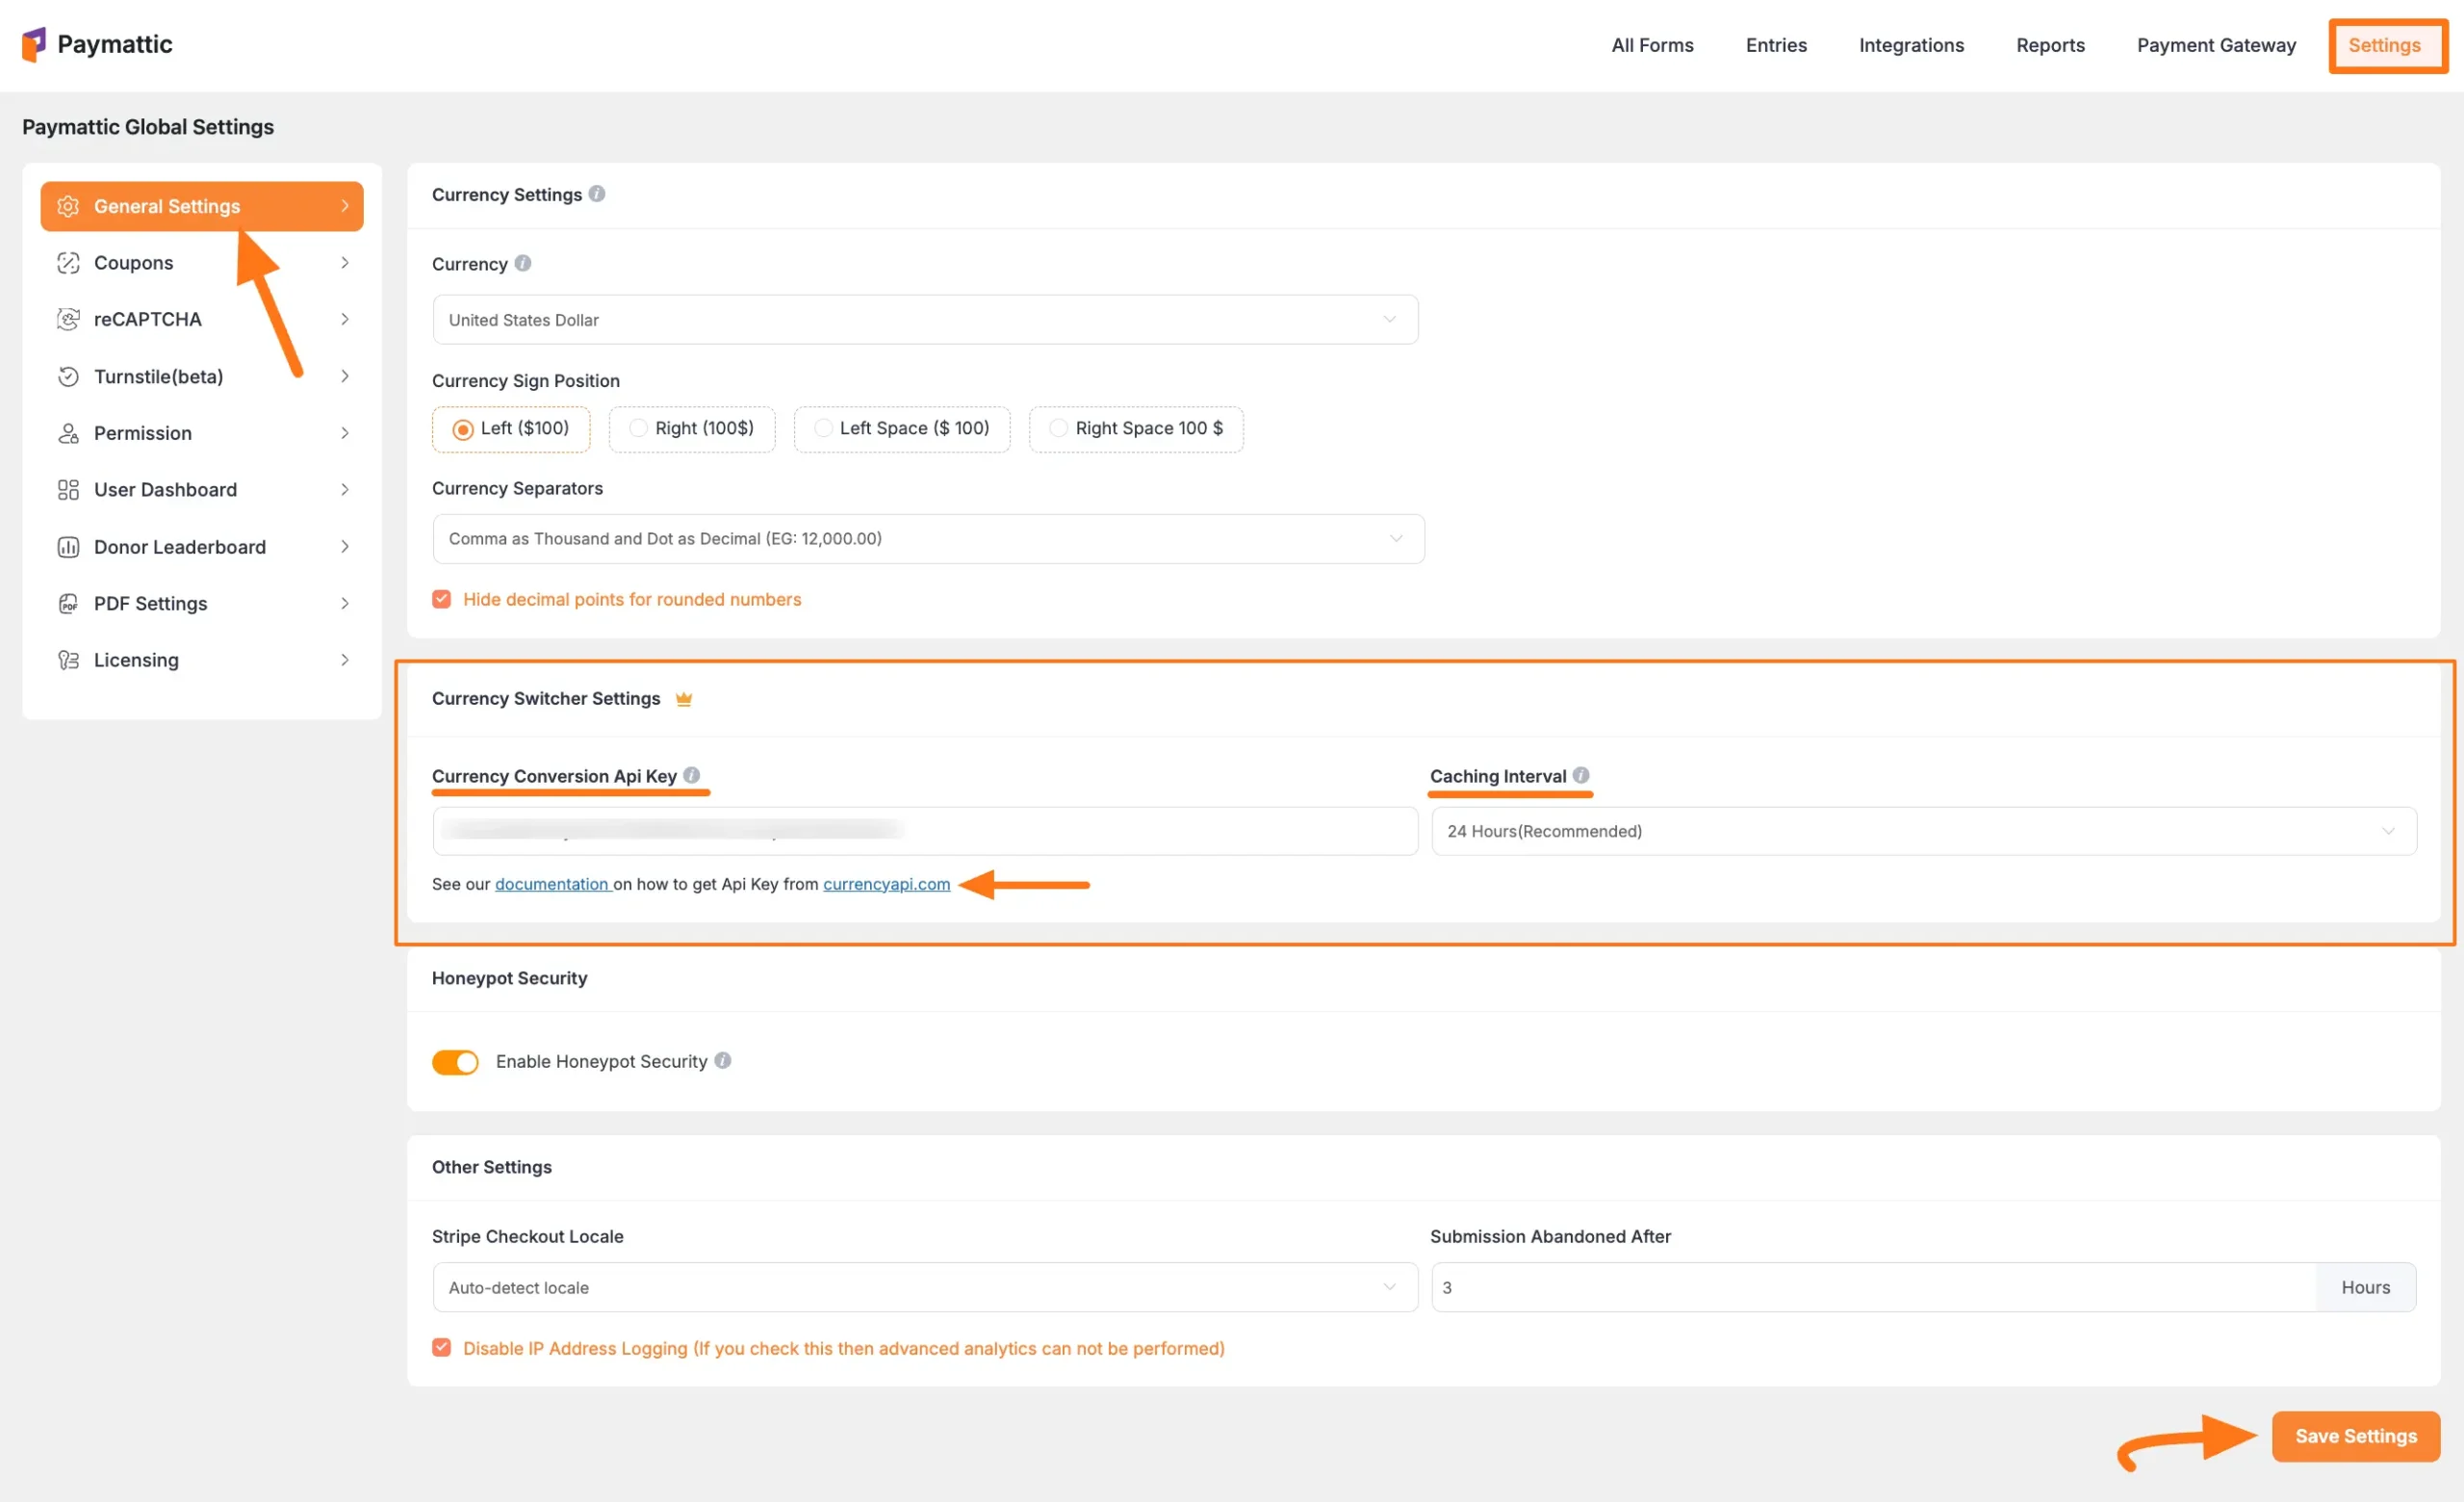
Now, go to Settings from the Paymattic Navbar, click the General Settings tab from the left sidebar, and you will get the Currency Switcher Settings section.
Here, you will get two settings options. These are:
- Currency Conversion API Key: Here, you need to paste the API Key you got from your Currency API Dashboard. Once configured, the currency switcher feature will start working for your donation forms.
- Caching Interval: Set a Caching Interval for updating the currency rates for your donation form. A higher Caching interval will reduce the amount of API requests. 300 Requests are free per month. However, you can extend your API request limits here.
We recommend you set the Caching Interval – 24 hours. For example, if you set 24 hours Caching Interval then the API will update the currency rate once every 24 hours.
Once you finish, click the Save Settings button to save your configuration.
To learn more details about Currency Settings, read this Documentation.
Advanced Settings #
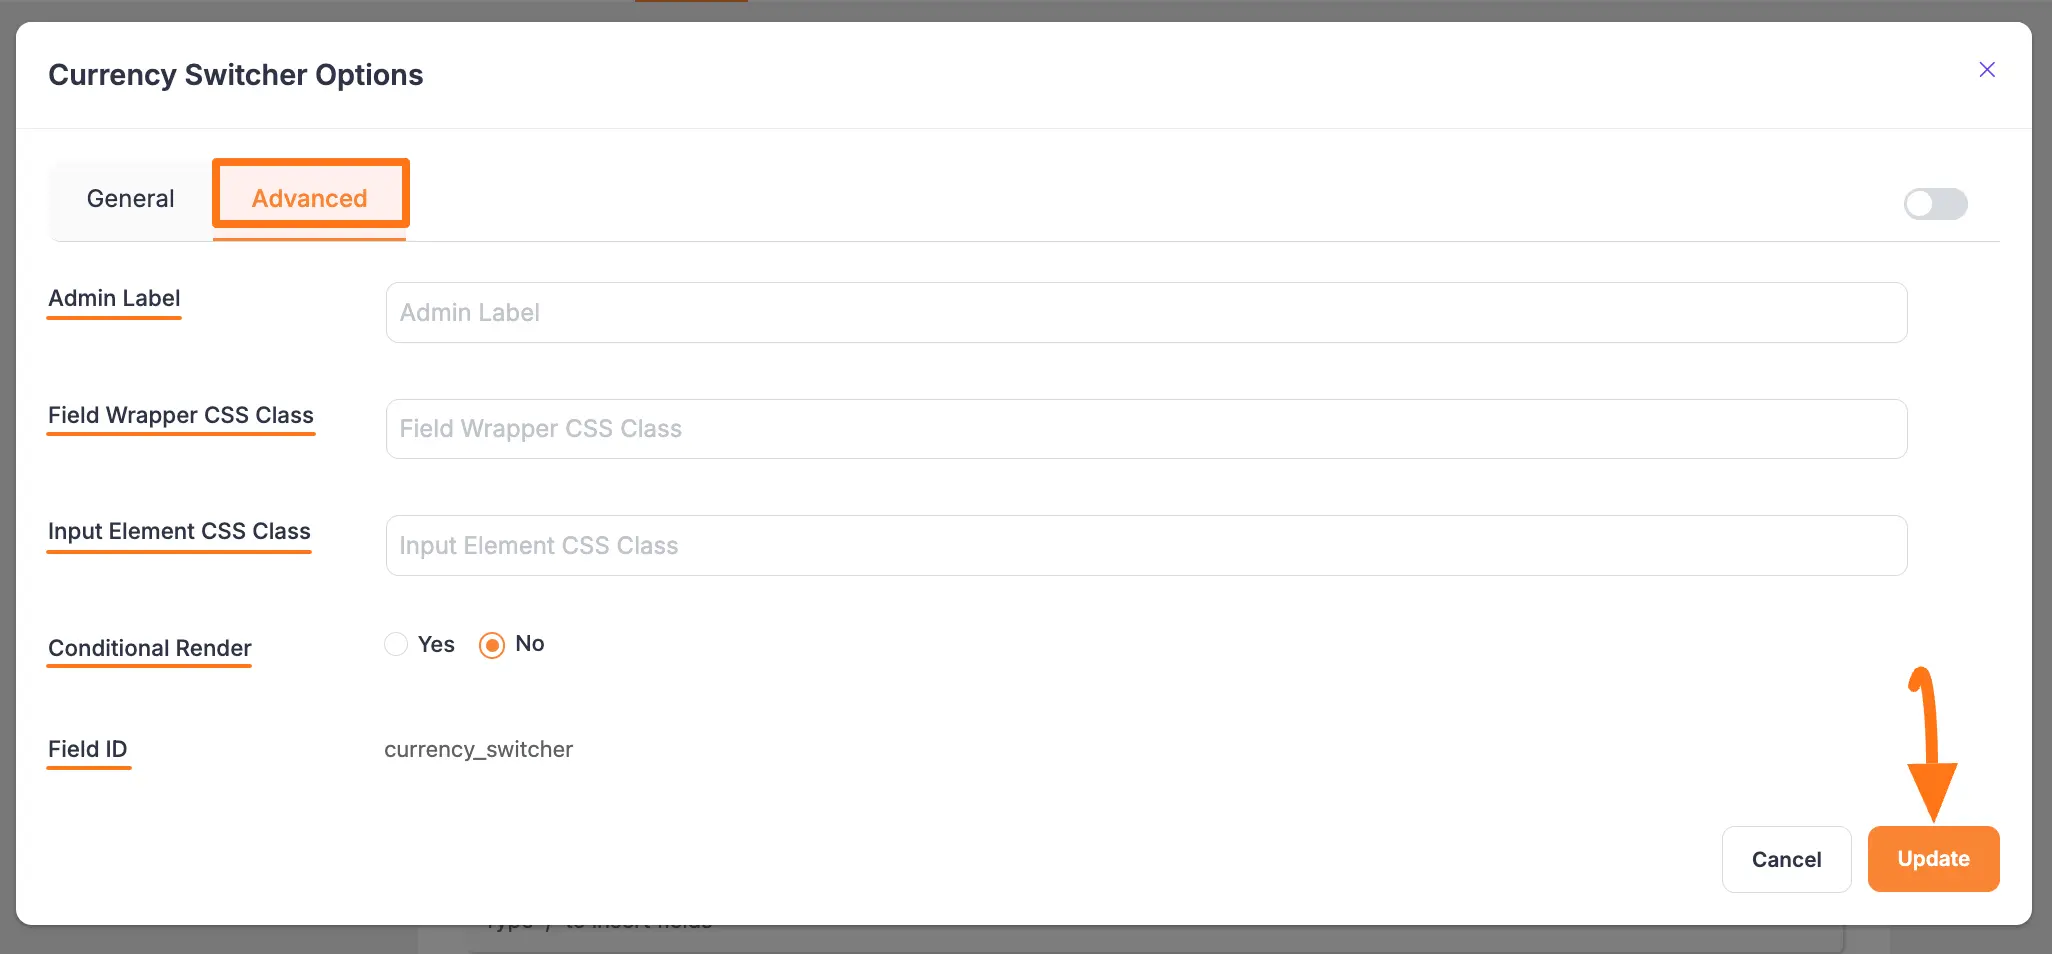
Once you complete the General settings, go to the Advanced tab, and you will find some advanced settings for your Currency Switcher field. These are:
- Admin Label: This label is used for the admin wants to see the field’s label from the back end.
- Field Wrapper CSS Class: This is used for adding a Custom CSS/JS for an entire field of a specific form using the Field Wrapper CSS Class element. To learn more, click here.
- Input Elements CSS Class: This is used for adding a Custom CSS/JS for a specific input field of a form using the Input Elements CSS Class element. To learn more, click here.
- Conditional Render: You can set conditional logic to display the field in the form that will be triggered by specific actions taken on a previous input field. To learn more about conditional renderings, click here.
- Field ID: This option is used for adding or tracking form fields. Plus, creating the custom CSS/JS for a specific form field.
Once you finish, click the Update button to save all your configuration.
Embedding Form into Frontend #
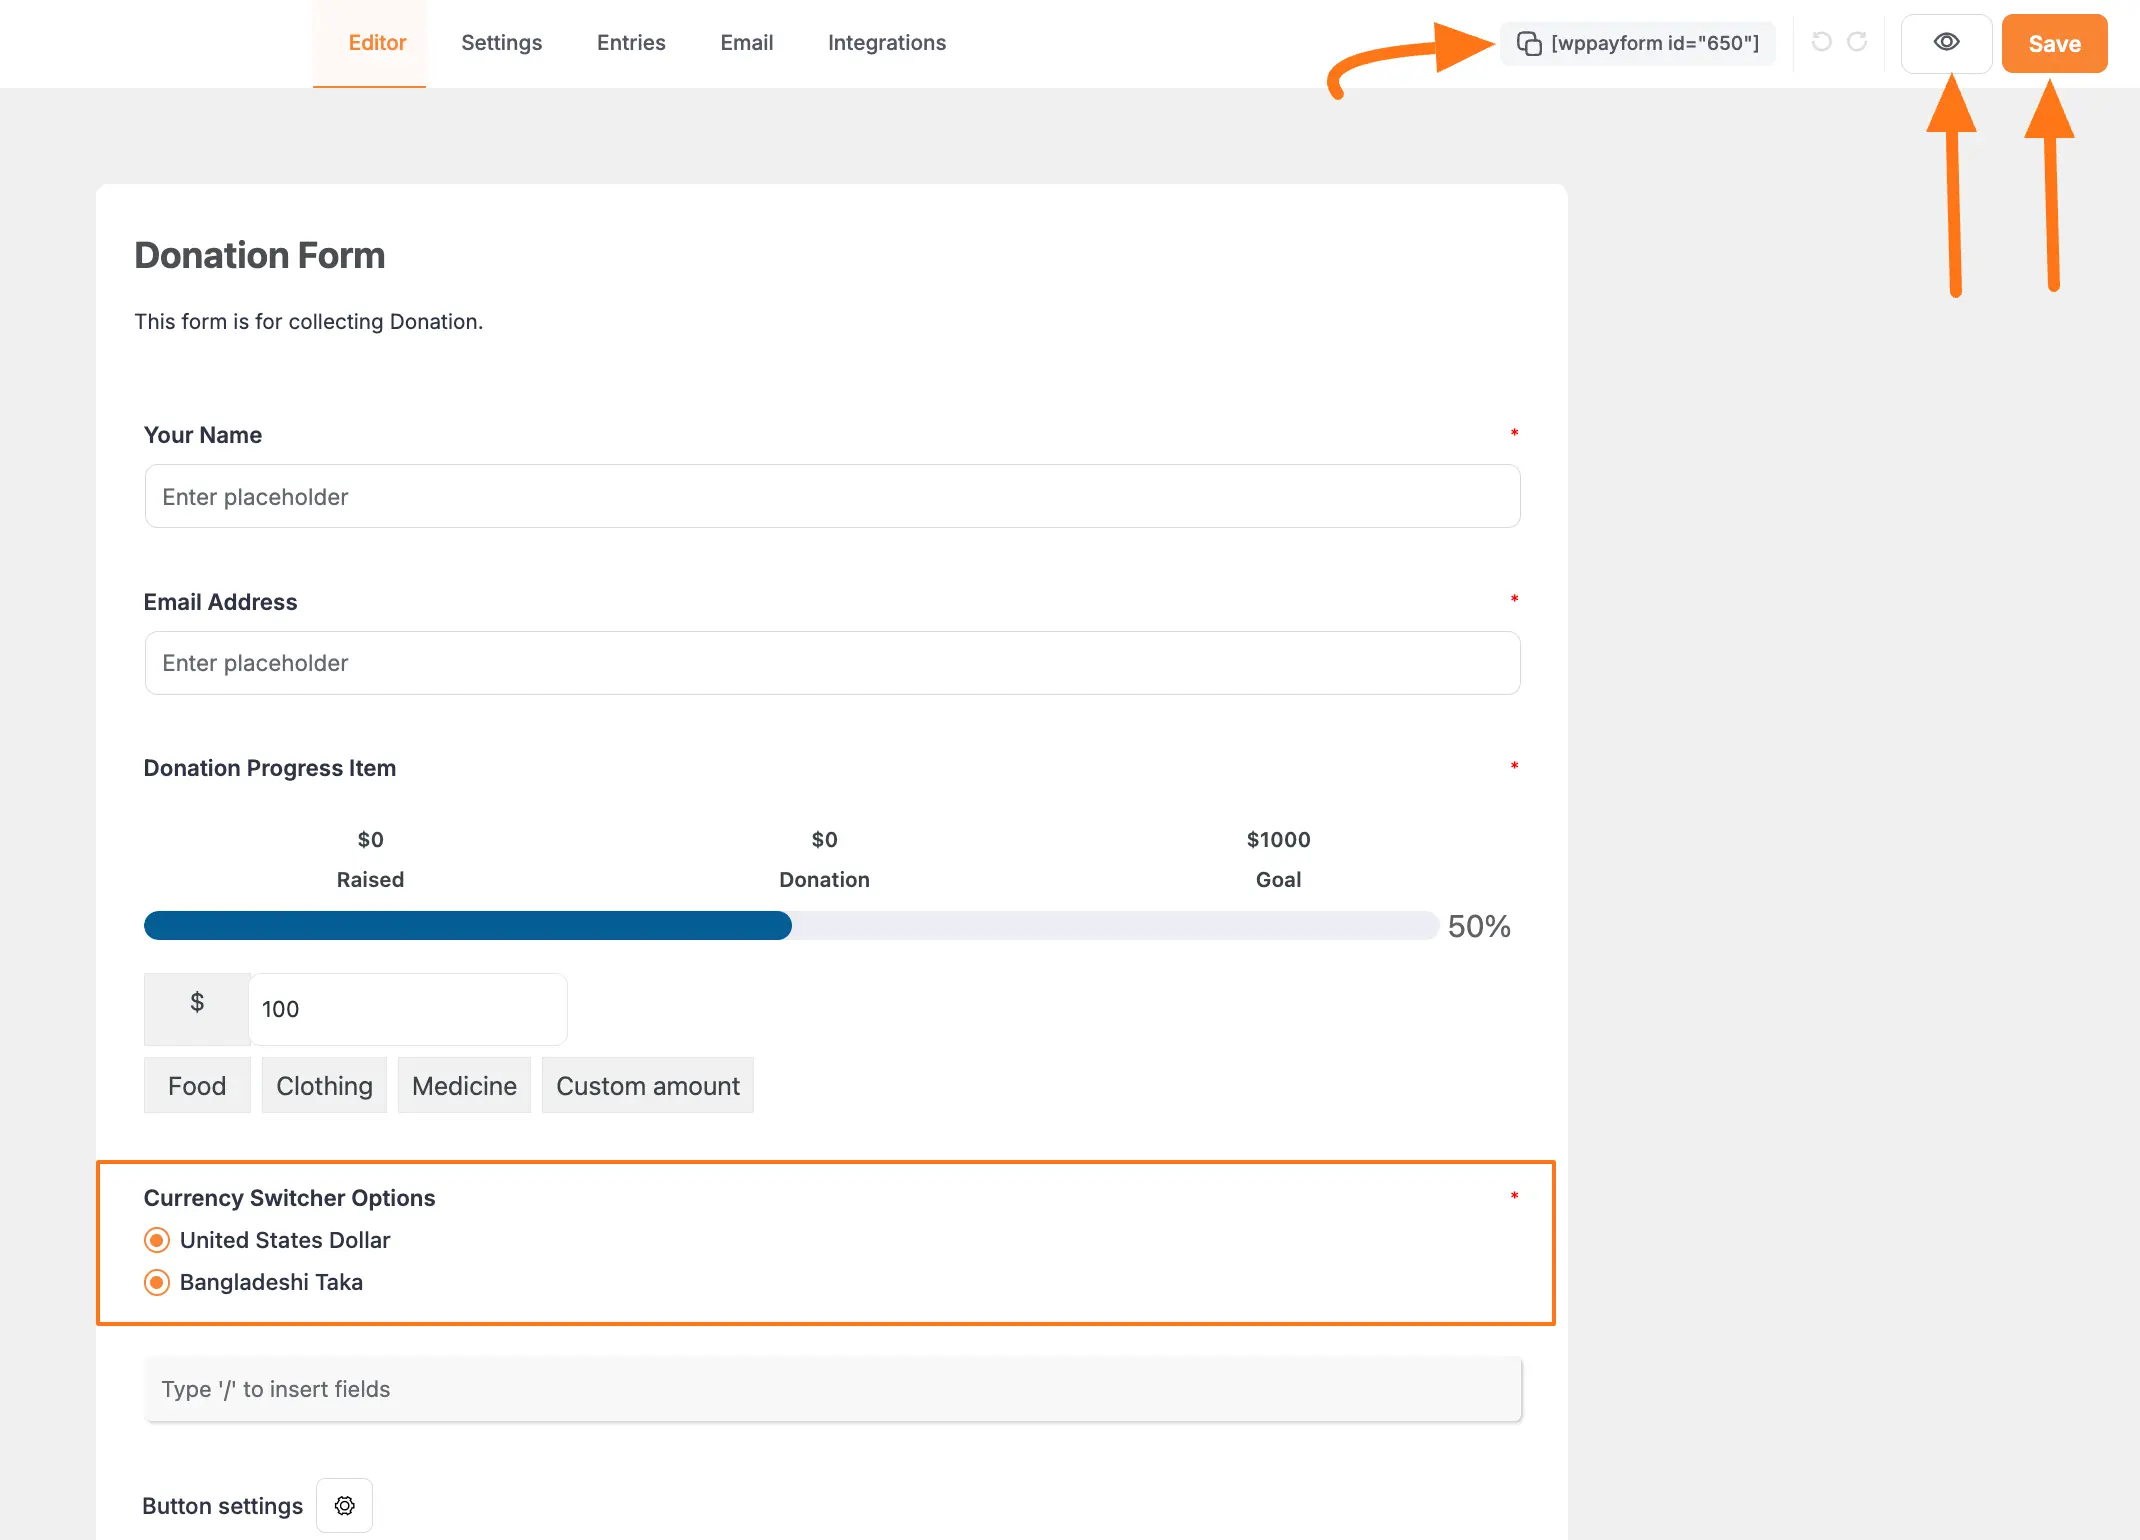
Here, you can see the Currency Switcher field and other necessary fields are added to the form.
Now, to embed and display the form on a specific Page/Post, copy this Shortcode and paste it into your desired Page/Post.
Once you complete the edit, press the Save button to save all the changes you made. And, to see the Preview of the form, click the Eye icon.
Preview of the Currency Switcher field #
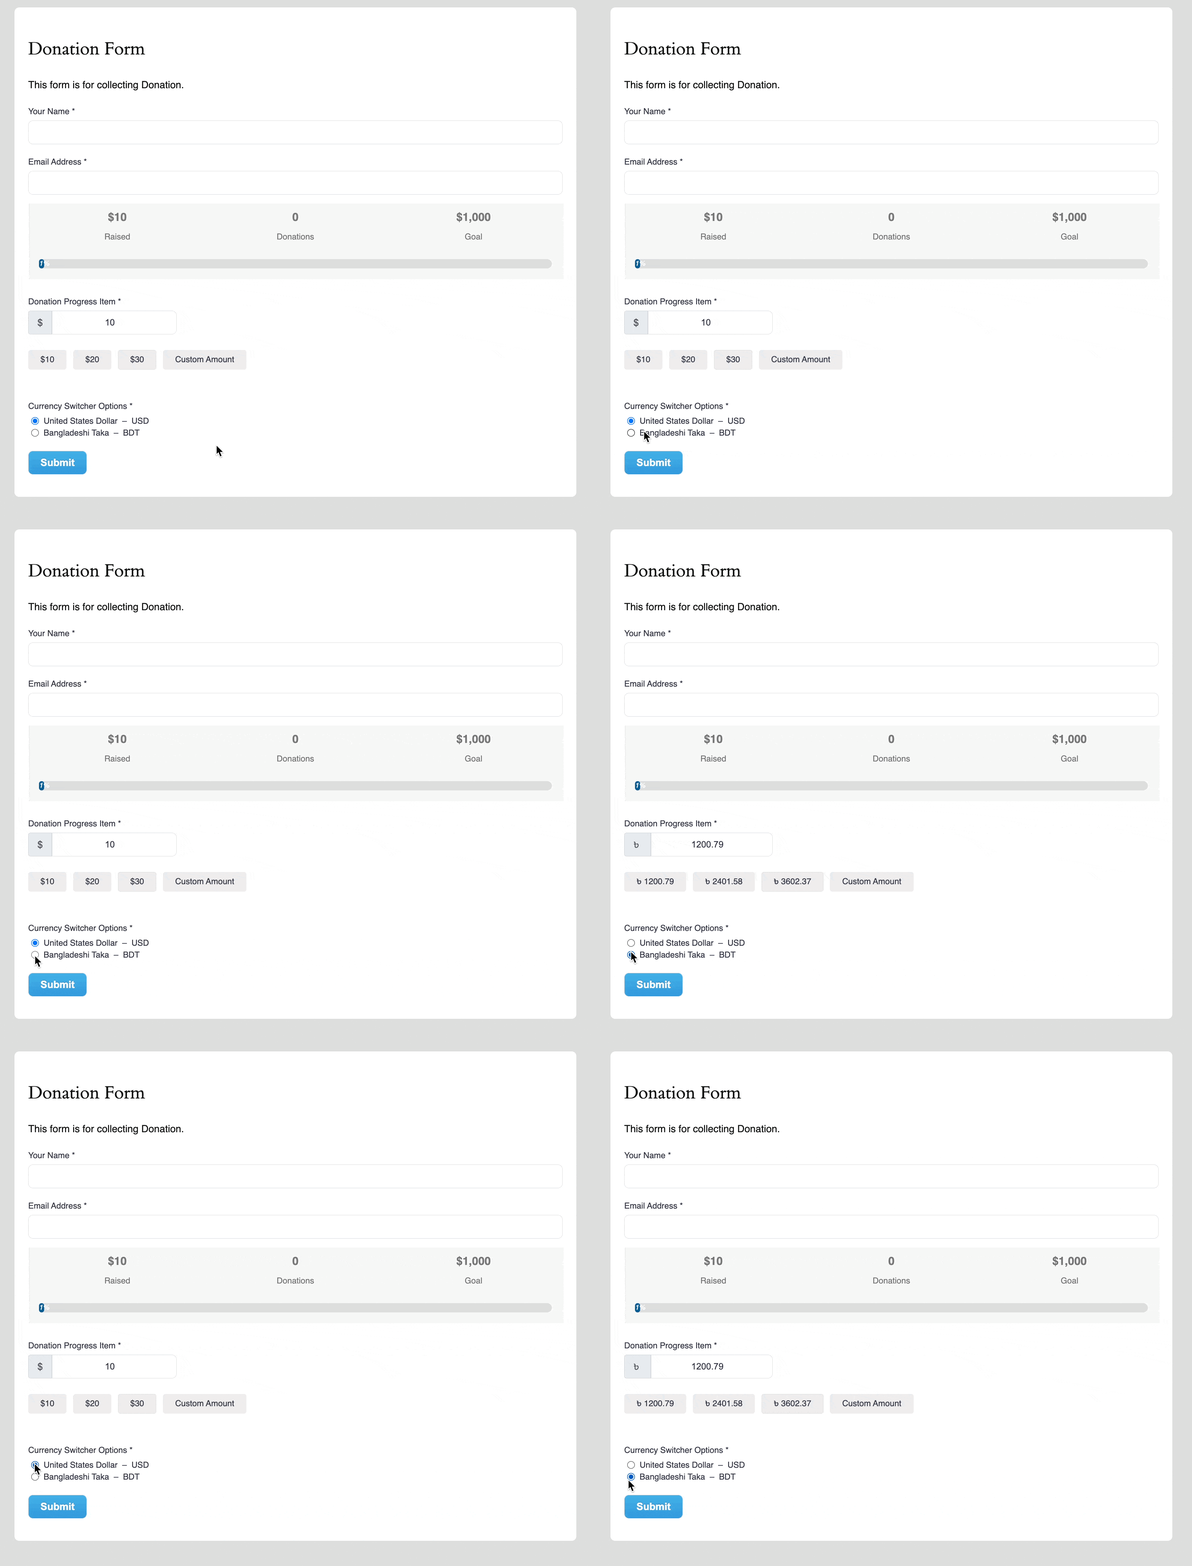
Here is the preview of the Currency Switcher field in a Form.
This way you can easily add the Currency switcher field in Paymattic Forms!
If you have any further questions, concerns, or suggestions, please do not hesitate to contact our @support team. Thank you.


