
In Paymattic, you can enable Email Notifications for your users to receive a copy of the information that they filled in the form. Besides, the admin can also receive/send custom automatic email notifications.
This article will guide you on how to set up email notifications in Paymattic.
Remember, you should configure any SMTP Plugin in your WordPress Site to ensure reliable email delivery without hassle.
We recommend using the FluentSMTP plugin for smart, secure, fast, and free email delivery on WordPress sites. Refer to this Documentation to learn how to install and activate FluentSMTP in WordPress.
.
Setup Customer Email Notifications #
To learn how you can set the email notifications, follow the steps with screenshots below –
First, go to All Forms from the Paymattic Navbar and click the Pencil/Editor Icon of your Desired Form where you want to set up the email notification/s.
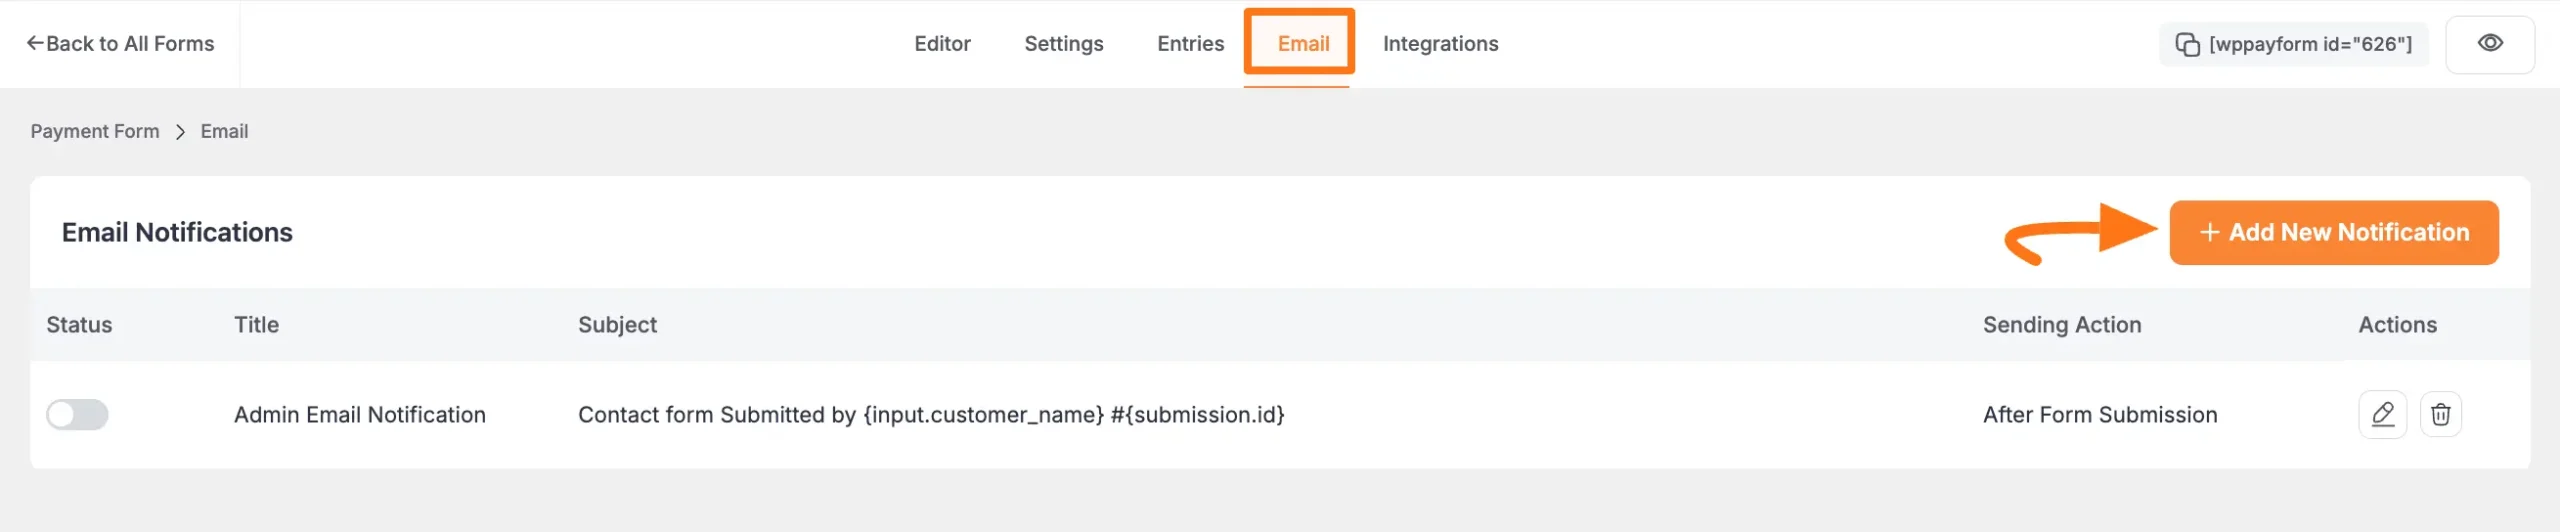
Once the Editor page opens, go to the Email tab and click the + Add New Notification button.
Now, the Email Notification page will appear with all necessary settings options for adding the email notification.
Once the setup is done, finally, click the Update button.
And, your Email Notification will be enabled for this specific form!
All the settings options mentioned above are briefly explained below:
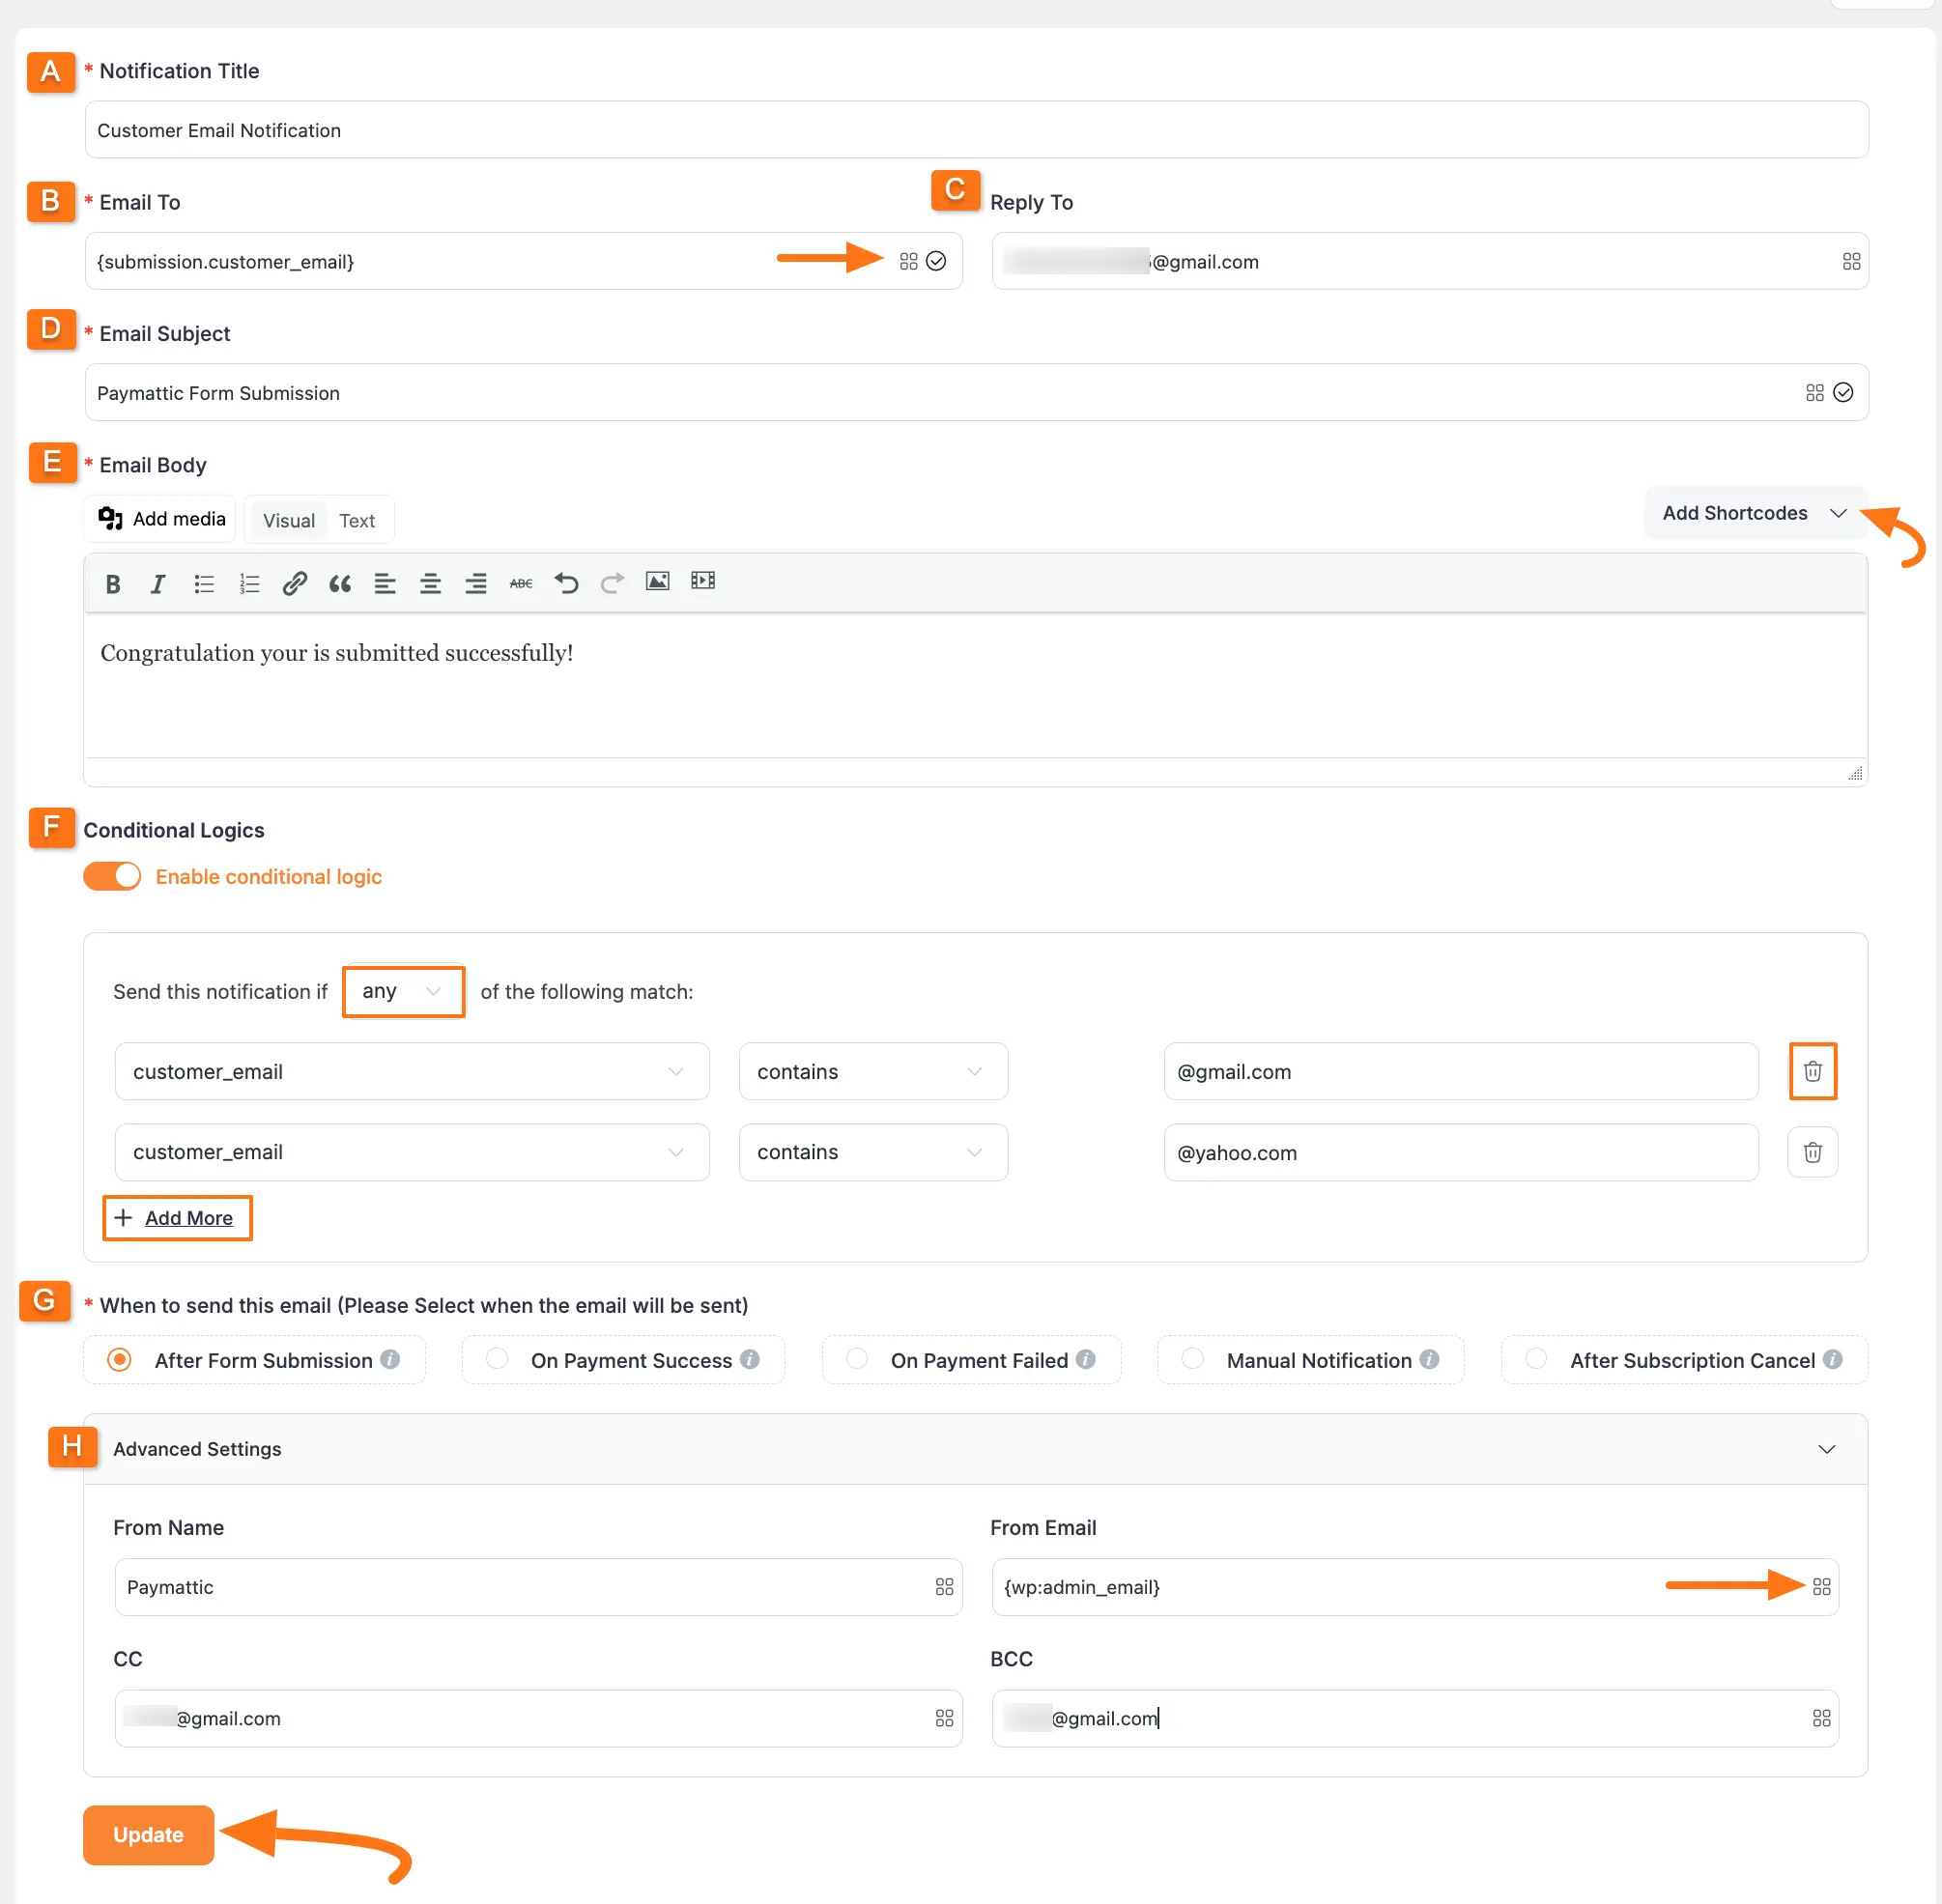
A. Notification Title #
Add a name for this Email Notification so that you can find it later easily. For example, I am naming it Customer Email Notification.
B. Email To #
In this field, specify the email address where you want to send your email notifications.
For example, if you want to send notifications to your manager, simply type the email address of your manager in this field and your manager will receive an email notification after each form submission.
Also, you can use the Shortcode options to collect dynamic information by clicking the Shortcode Icon.
C. Reply To #
Here, you can specify an email address for users to reply to the notification, ensuring you receive their responses. If you leave this field blank, the user reply will be sent to the Default Email you set for your site.
D. Email Subject #
You can set the subject for your email from here with this field. Simply, enter the subject line of the email notification in the Email Subject field.
E. Email Body #
Now, write the body text of your email notification as per your needs in this field. You can also, write the message in custom HTML in the Text tab. Plus, you can add different dynamic data in the email body by clicking the Shortcode Icon.
F. Conditional Logic #
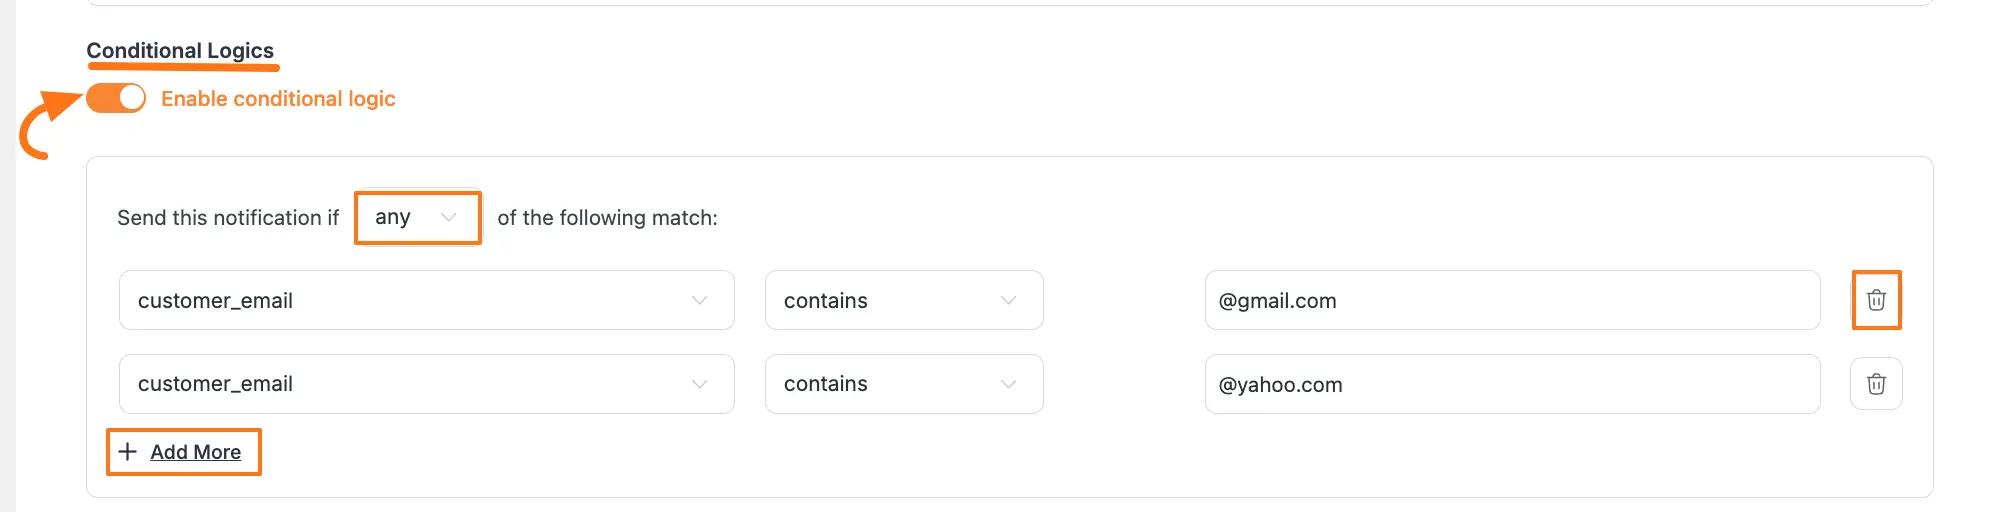
If you want to apply any conditional logic to determine when your email notifications will be sent to the users, you can enable the Conditional logic option by clicking the Toggle button.
How to Use Conditional Logic #
In the “Parameter” field (first field), select an input field that needs to be matched with a value provided in the “Value” field (last field) and set a condition in the “Condition” field (middle field). The parameter will trigger the action if the condition is met.
Plus, you can choose whether All or Any one of your conditional logic should match to trigger the actions.
For example, I chose “Customer Email” as a parameter, “Contains” as conditions, and entered “@gmail.com” and “@yahoo.com” as the respective values. And, select the “Any” option for the conditional match. As a result, only users who meet the conditions of having @gmail.com or @yahoo.com in their submission email address will get the email notification.
Additionally, you can add as many conditions as you want by clicking the + Add More button.
Also, you can delete any conditions by clicking the Trash Icon anytime if needed.
G. When to Send This Email #
Here you will get some pre-built conditions to send the email according to your wish. There are three available options:
After Form Submission #
When this option is selected, the email will be sent immediately after the form has been submitted.
On Payment Success #
If you want to send an email after the payment has been successfully submitted, then you can enable this option.
On Payment Failed #
If you want to send an email after the payment process fails, then you can enable this option.
Manual Notification #
You can also send email notifications manually for a specific form’s entries according to your needs. Let’s have a look at how this works –
First, go to the All Forms from the Paymattic Navbar and click the Pencil/Edit icon of your desired form where you already add the Email Notification.
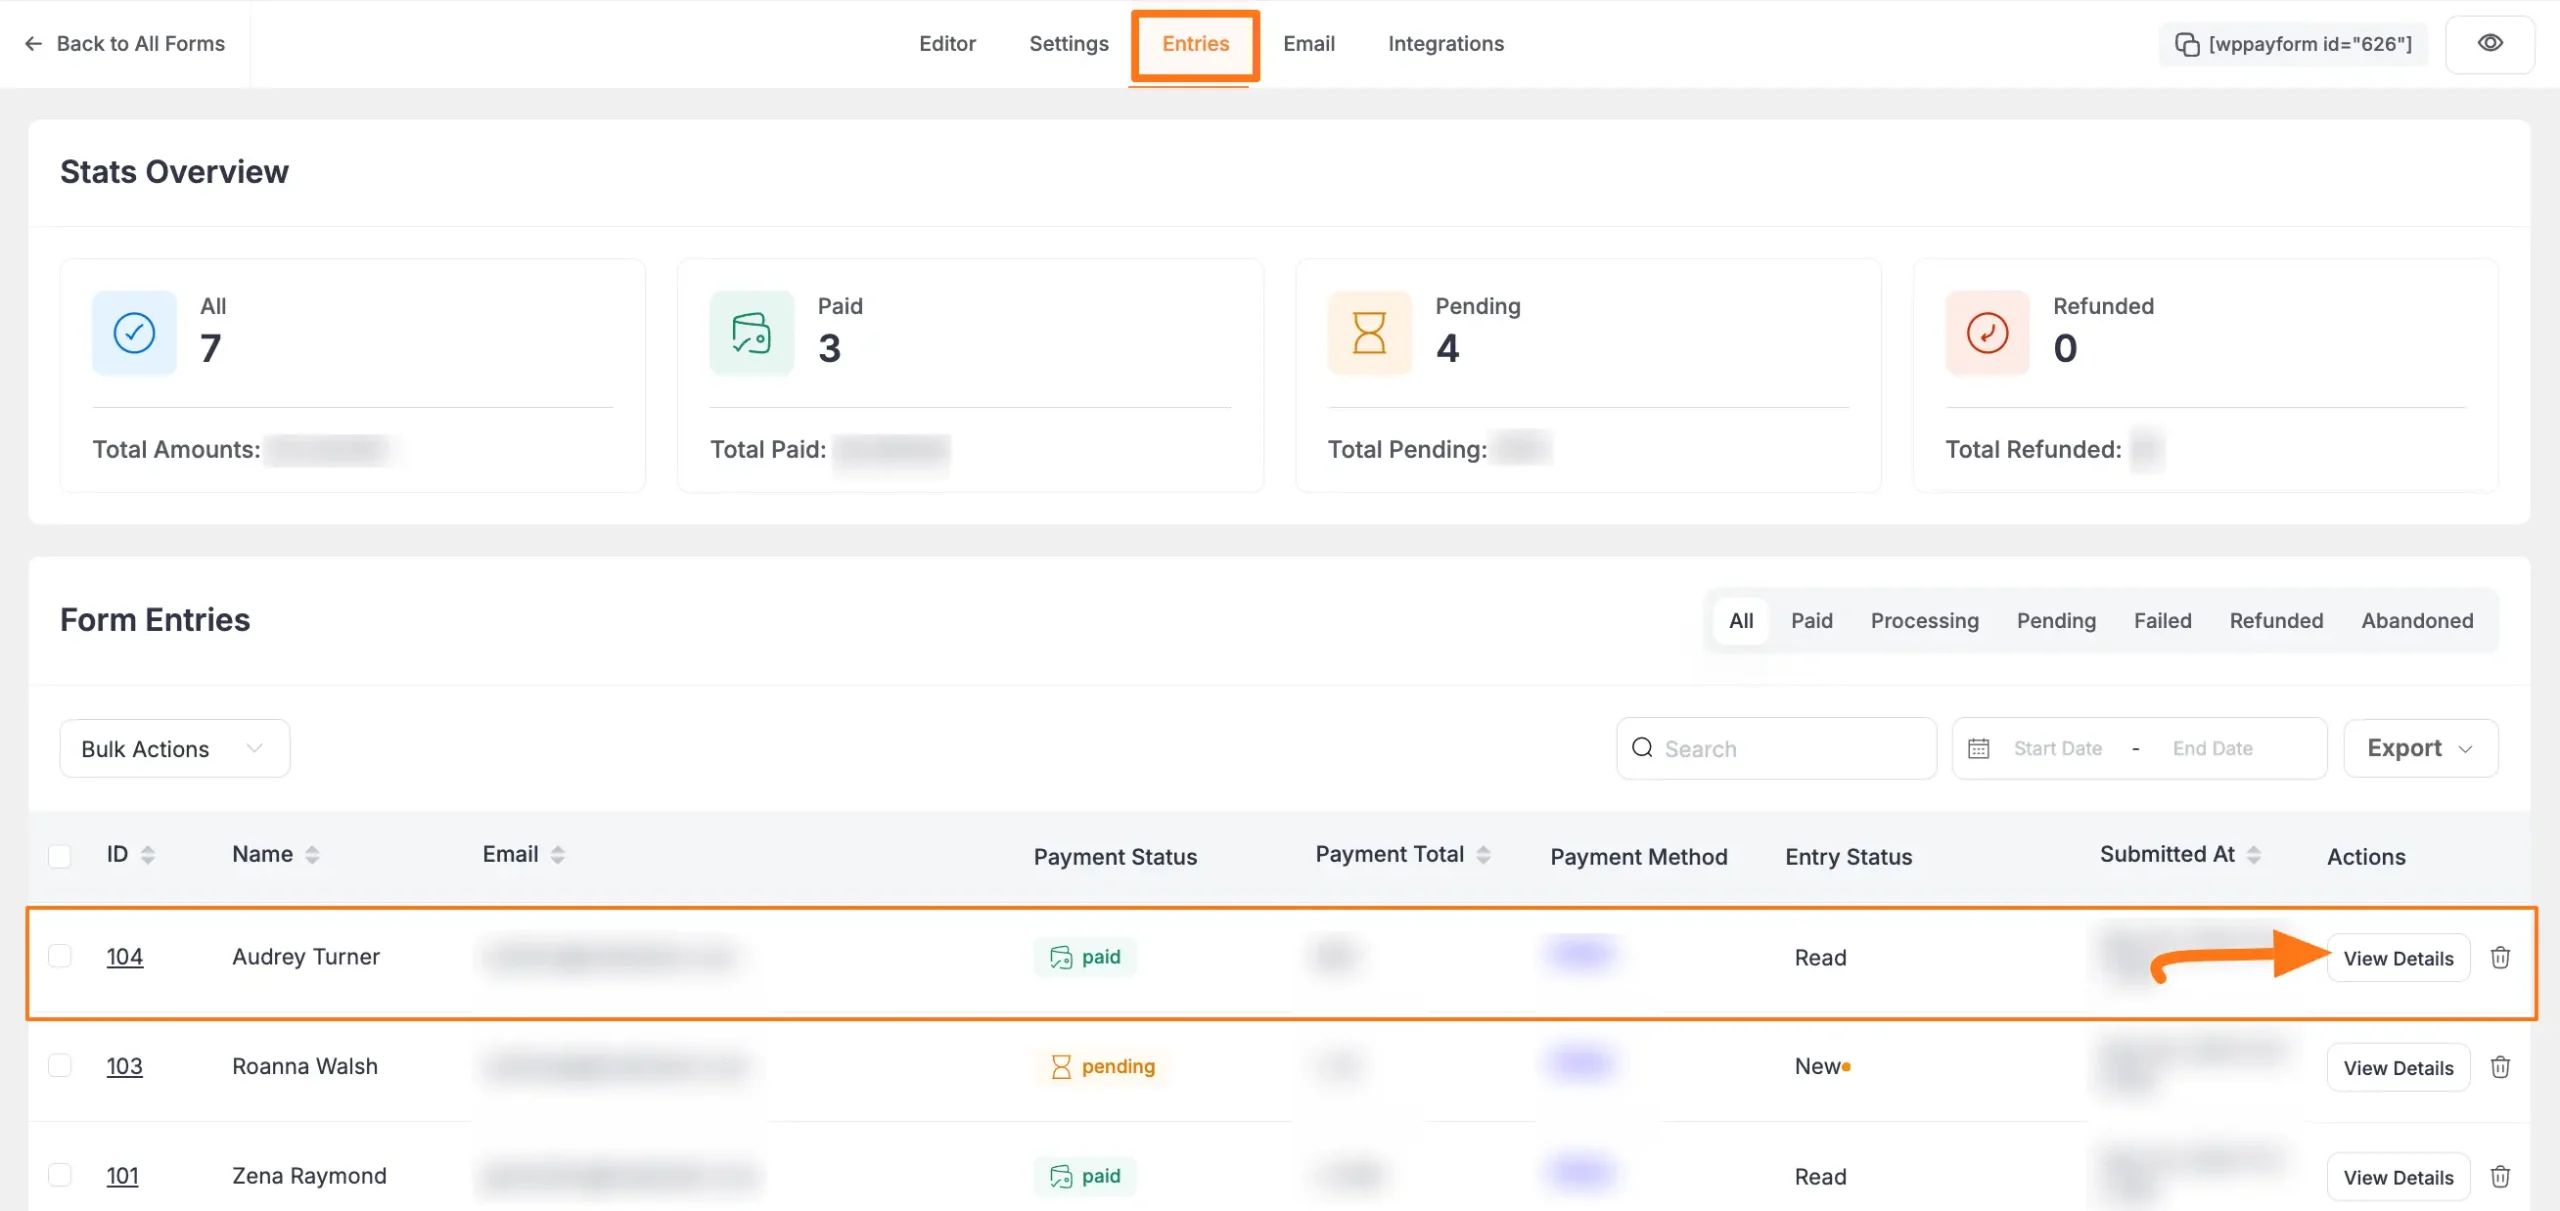
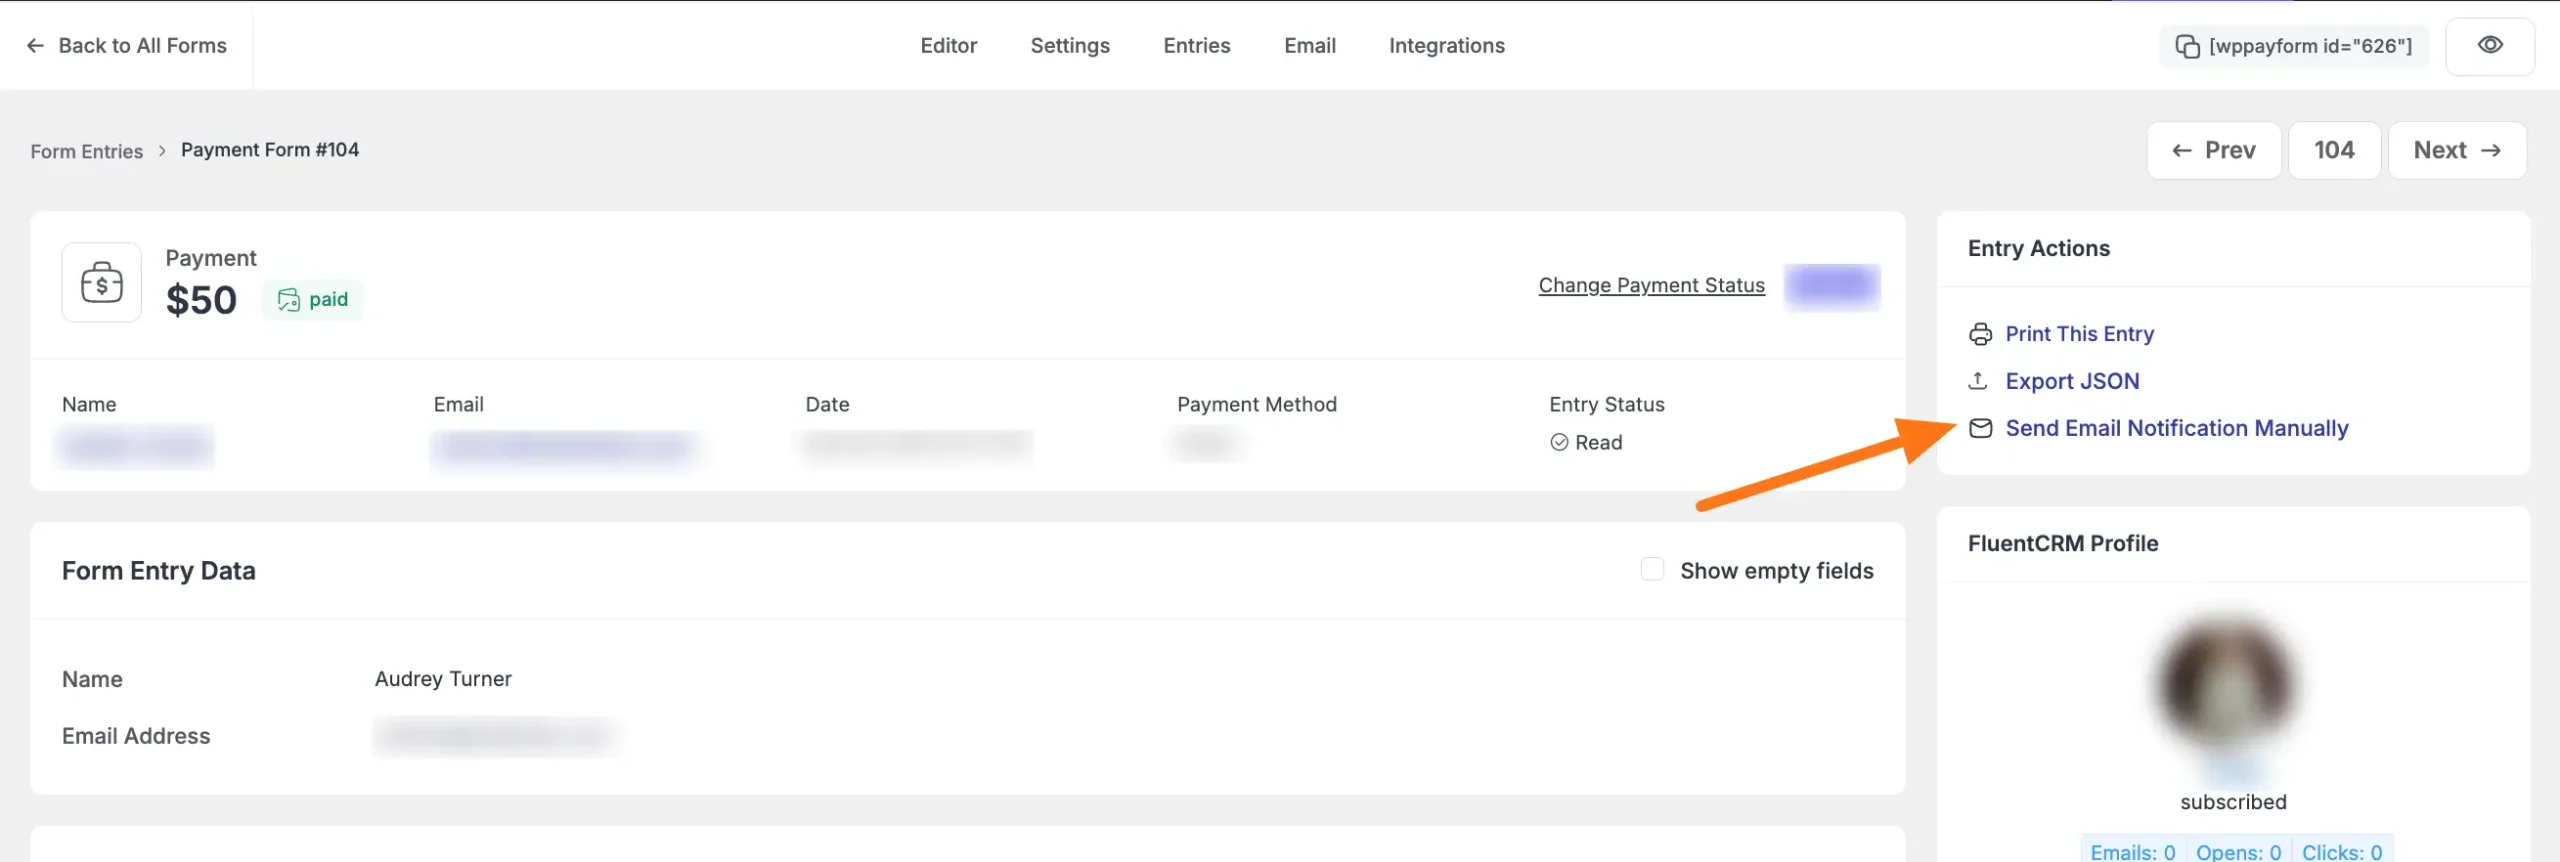
Once the Editor page opens, go to the Entries tab and click the View Details button of your desired entry where you want to send the notification manually.
Once on the detail entry page, click the Send Email Notification Manually button, and a pop-up page will appear.
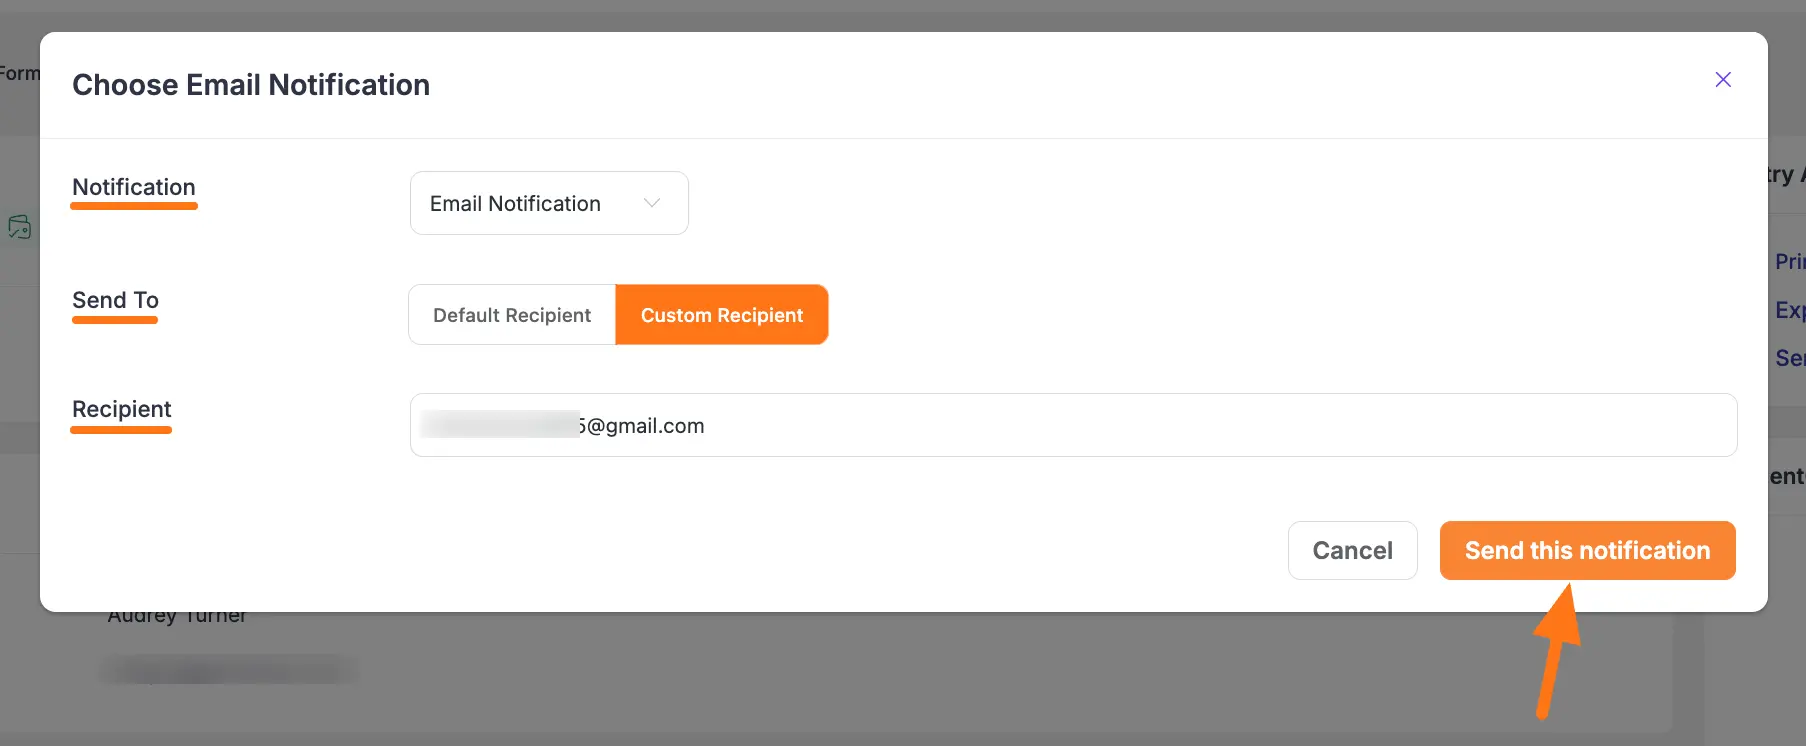
Now, select from the dropdown which Email Notification you want to send
Plus, you can select where the email should be sent; Default Recipient or Custom Recipient email address.
Once you are done, click the Send this notification button, and your email notification will be sent for this specific submission entry.
After Subscription Cancel #
When this option is selected, the email will be sent immediately after the subscription has been canceled.
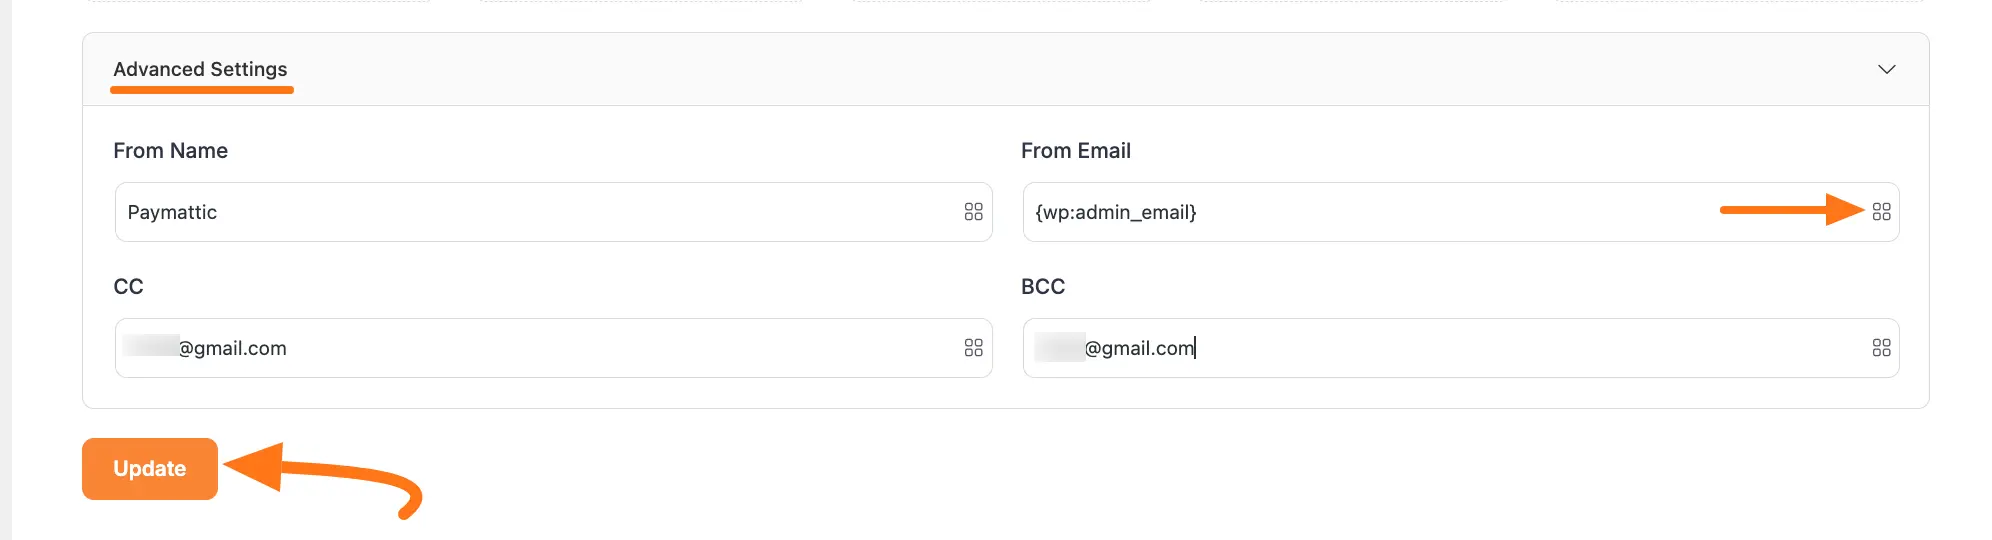
H. Advanced Settings #
Here, you can specify the sender name and email in the From Name and From Email fields respectively. Plus, you can add different dynamic data in the From Email by clicking Shortcode Icon.
Also, you can add an email address in the CC or BCC if you want to send a copy of the email to another person. Use a Comma in between each email address to add more than one receiver.
Finally, click on the Update button to save the changes.
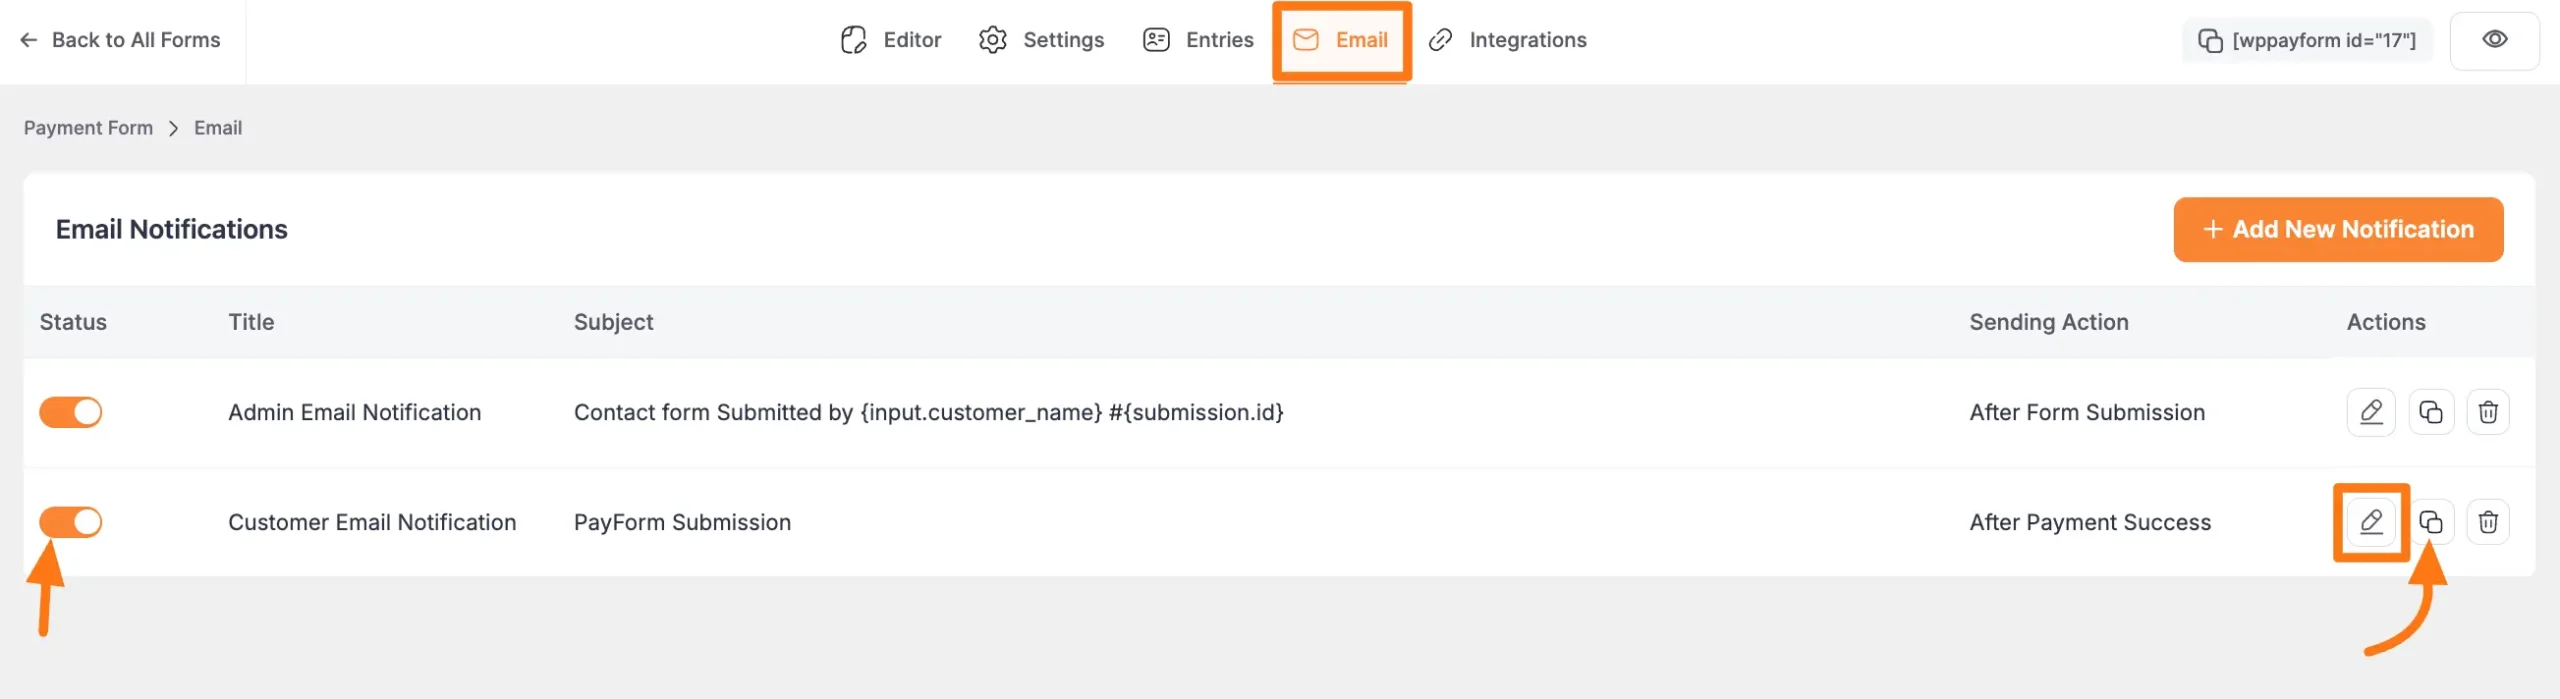
Here, you can see that the Customer Email Notification is added for sending notifications to customers based on the setup you made.
You can Disable, Edit, and Delete this notification anytime if needed by clicking the Toggle button, Edit/Pencil Icon, and Trash Icon respectively. Also, you can duplicate this existing integration feed, by clicking the Duplicate icon. This allows you to recreate similar feeds with just one click.
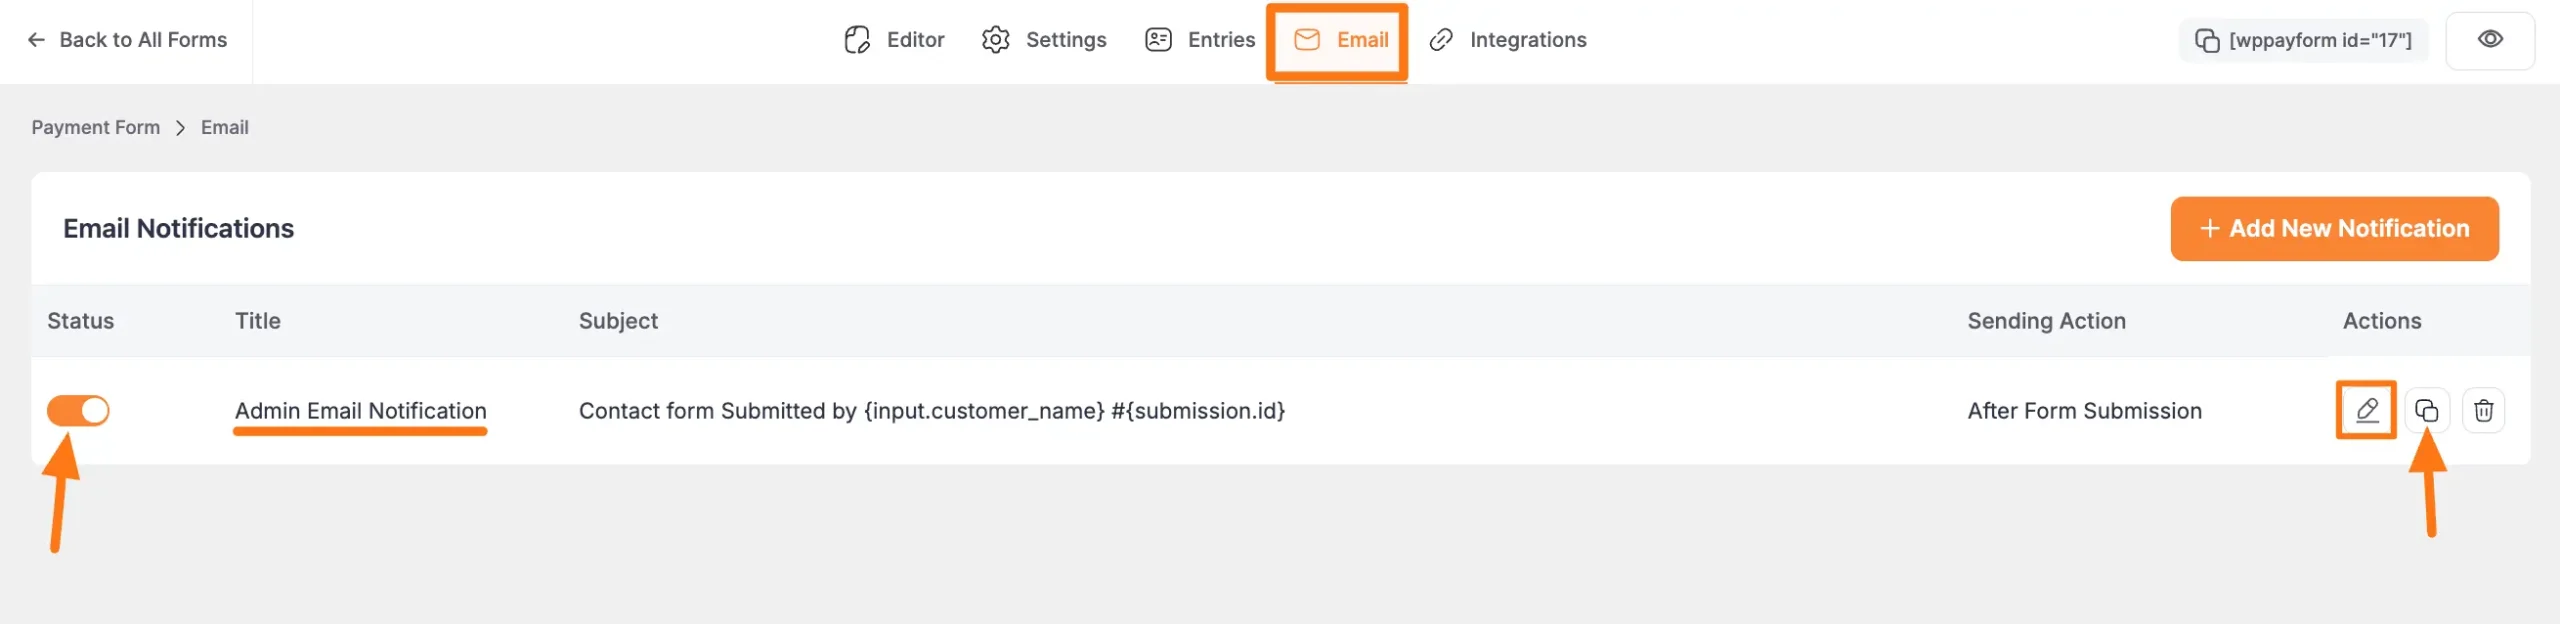
Setup Admin Email Notifications #
In every form, when you go to the Email tab, you will see that an Admin Email Notification is already made for sending email notifications to the Site Admin.
You can just simply enable this notification by clicking the Toggle button.
To set up this Admin Email Notification according to your requirements, click the Edit/Pencil Icon, and follow the same procedure shown above for the Customer Email Notification. Also, you can duplicate this existing integration feed, by clicking the Duplicate icon. This allows you to recreate similar feeds with just one click.
But, make sure you must use the {wp:admin_email} shortcode in the Email To field.
If you have any further questions, concerns, or suggestions, please do not hesitate to contact our support team. Thank you.


