
You can configure the PayPal payment method with Paymattic to securely receive payments from your users. This article will guide you through configuring PayPal on your WordPress Site with the Paymattic plugin.
Remember, to get access to the PayPal payment gateway, you need the Paymattic Pro Plugin.
Configuring PayPal Payment Method #
To learn how to configure the PayPal payment gateway through Paymattic, follow the steps with screenshots below –
First, go to Payment Gateway from the Paymattic Navbar, click the PayPal tab from the left sidebar, and the PayPal Settings page will open.

Select any Payment Mode between Sandbox (for test payments) and Live (for real payments) as both options follow the same configuration process, e.g., I choose the Sandbox Mode.
Then, enter the email you signed up with on the PayPal Account into the PayPal Email field.
Finally, press the Save Settings button and your PayPal account will be integrated with Paymattic for your WordPress Site.

Disable IPN Verification & Checkout Logo #
Once you configure PayPal, you can set up the IPN (Instant Payment Notification) Verification and Checkout Logo if needed.
- Disable IPN Verification: Check this box if Payment Data Transfer is not accessible for you and payments are not being marked as complete. This option allows the site to use a slightly less secure method of verifying purchases.
- Checkout Logo: With this option, you can set a logo from your device to display during checkout. Also, you can remove the logo by simply clicking the Cross Icon.
Remember, always press the Save Settings button to save the changes you made on your PayPal Settings page.
Confirmation Page Settings #
With this setting, you can select the page where the Payment Confirmation and Payment Failed notifications will appear after any successful or failed payments.

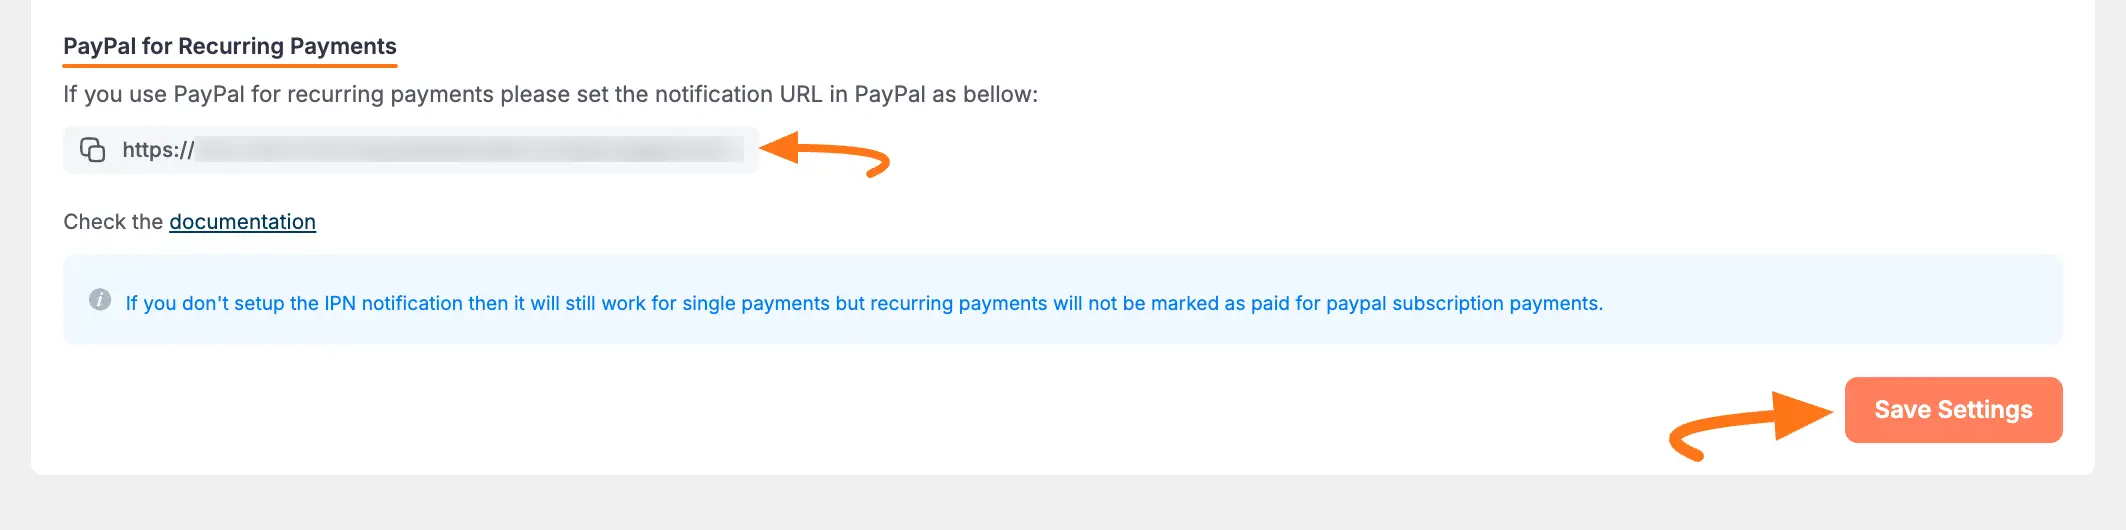
PayPal for Recurring Payments #
With this setting, you can enable notifications for recurring payments that happen in PayPal.
To set the notification, copy the provided URL and set it in PayPal to collect the information about recurring payments. To learn how to set the URL in PayPal, read this Documentation.
If you do not set up the IPN (Instant Payment Notification) notification then it will still work for single payments but recurring payments will not be marked as paid for PayPal subscription payments.
Once you are done, click the Save Settings button to save all the changes that you made.
Add PayPal in Forms #
Once you finish setting up your PayPal payment gateway, you can easily add this payment method to any of your existing Payment Form.
If you do not have any existing forms, read this Create a Form from Scratch or Create a Form using Templates documentation to create one.
To learn the detailed process of adding a payment method to an existing form, read this Documentation.
But, remember, the added PayPal payment method in your Form will not function unless you complete the configuration process properly.
Form Specific PayPal Settings #
To learn how to customize the Settings of Paypal payment method for a specific form, refer to the article below –
Form Specific Payment Settings
If you have any further questions, concerns, or suggestions, please do not hesitate to contact our @support team. Thank you.


