Paymattic has another exciting feature, which is Webhook Integration to increase the performance of your payment form. This article will guide you through integrating Webhook in your WordPress Site with Paymattic.
Enable Fluent Webhook Integration #
To learn how to enable Webhook integration, follow the steps with screenshots below –
First, go to Integrations from the Paymattic Navbar, search for Webhook through the search bar, and you will get the Webhook integration module.
Here, you will see the Webhook’s Settings Icon on the right side, click on it.

Click the Toggle button and your Webhook integration module will be enabled.

Integrate Webhook in a Form #
To learn how to integrate Webhook into any specific Form in Paymattic, follow the steps with the screenshots below –
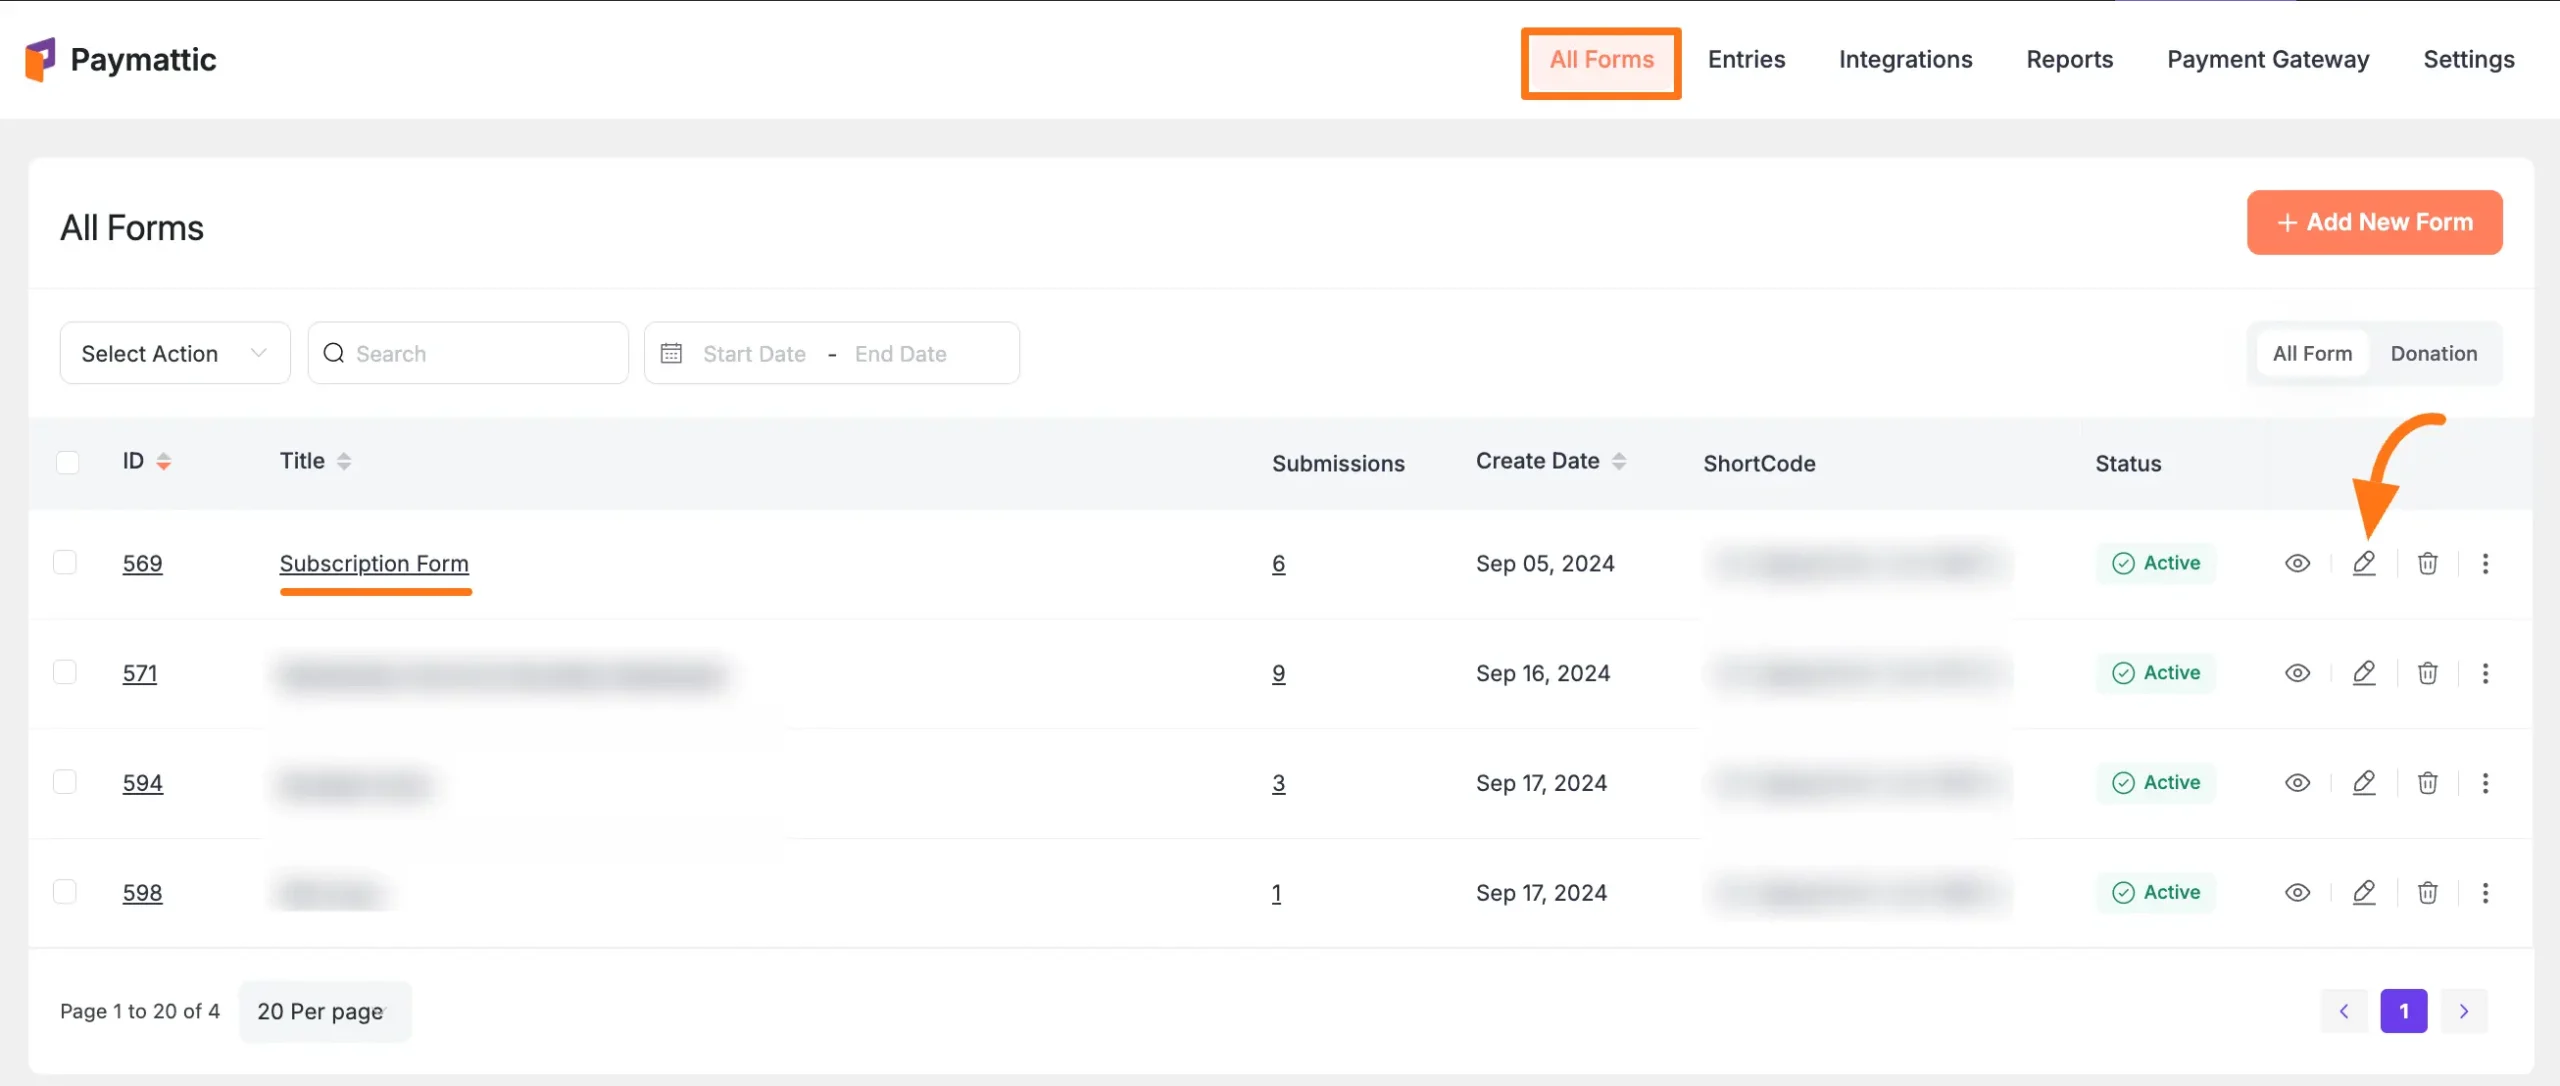
First, go to All Forms from the Paymattic Navbar, select the Desired Form where you want to integrate the Webhook and click the Pencil/Editor Icon.

Once the Editor page opens, go to the Integrations tab, click the Add New Integration button & select Webhook Integration feed from the dropdown list.

Now, a pop-up page will appear with various settings options for configuring the Webhook.
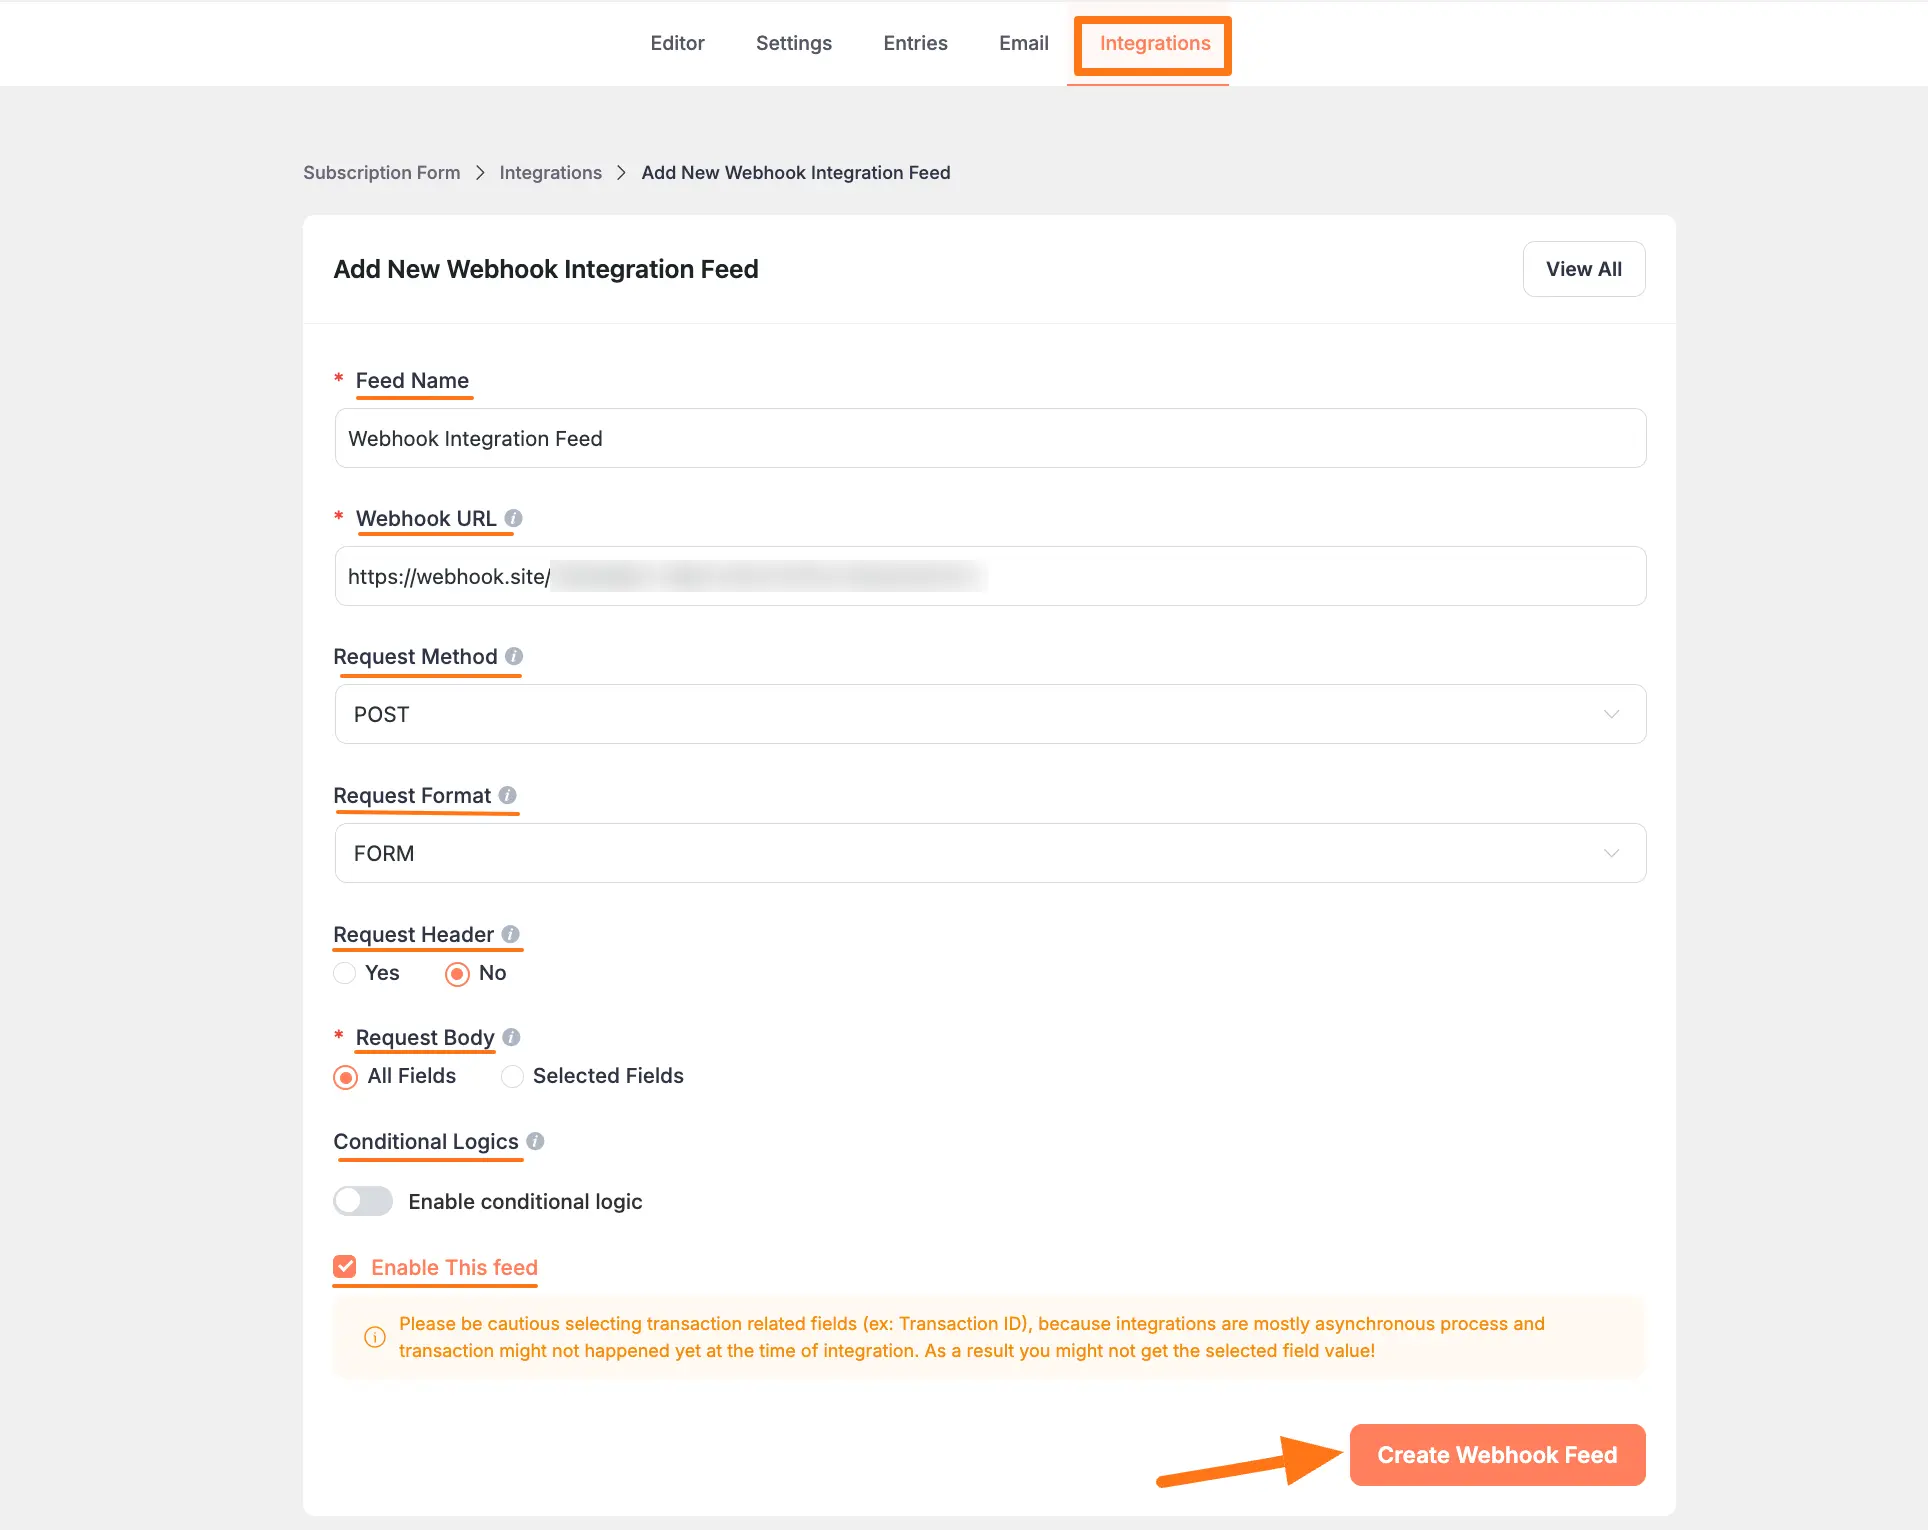
All the settings options mentioned in the screenshot below are briefly explained:
- Feed Name: Here, you can set a name according to your preference for your feed. This field is required to be filled in.
- Webhoo URL: This is also a required field. Here, provide the URL where you want to send the Paymattic submission data. More specifically, enter the URL that is provided by the Webhook recipient. To learn how to get the Webhook URL from the Webhook Site, follow the steps below –
Get the Webhook URL #
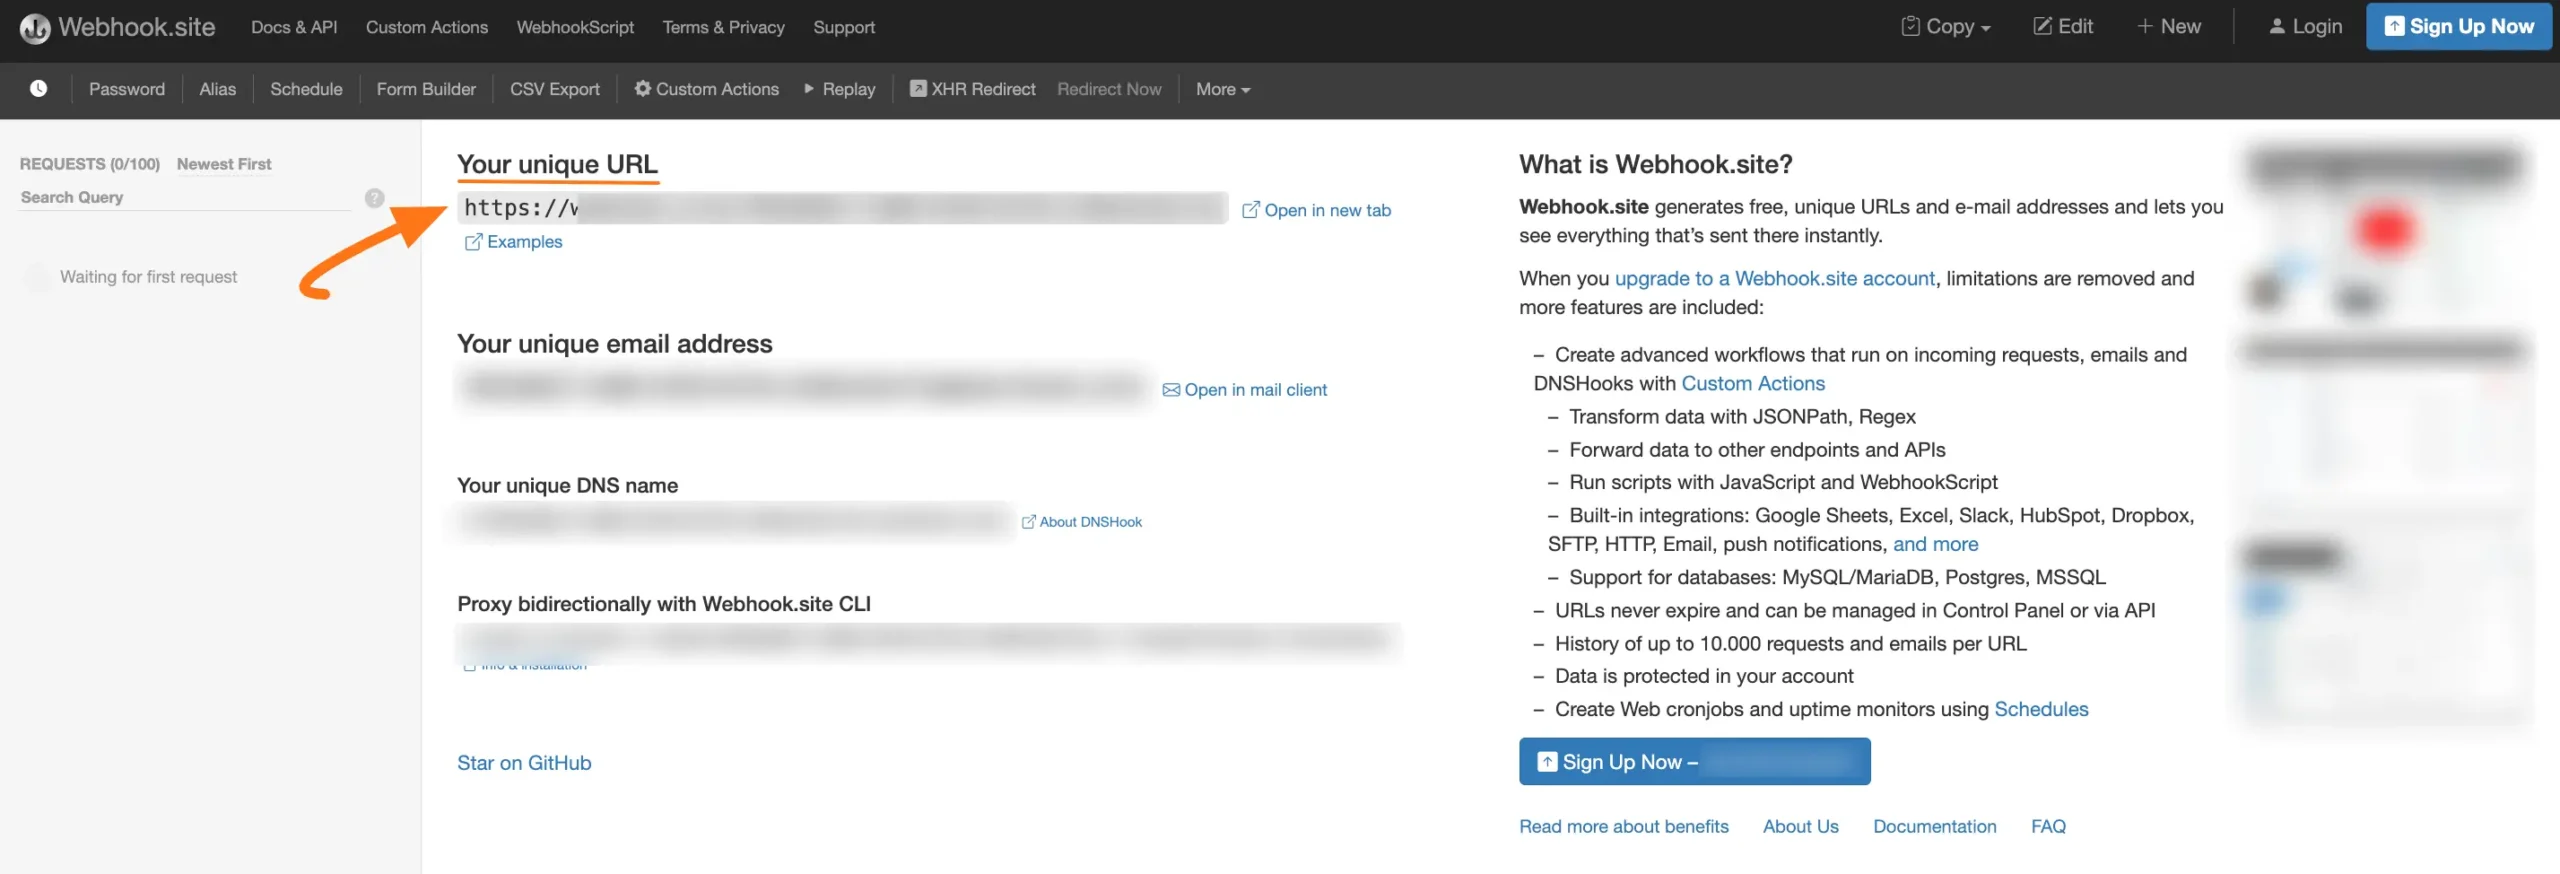
First. go to this Webhook.site and you will get your desired URL from the Your Unique URL field. Copy this URL to paste it into the Webhook URL field.

- Request Method: Here you need to select the HTTP method used for the Webhook request. Choose one method among the GET, POST, PUT, PATCH, and DELETE.
- Request Format: Select the data format for the Webhook request. You have to choose one format between JSON and FORM.
- Request Header: Choose whether you want to send any headers with the Webhook request.
- Request Body: Select body if you want to send any specific body text with the webhook request, otherwise all fields will be sent.
- Conditional Logics: This option allows Webhook integration to function conditionally based on your submission values according to your set conditional logic/s. To learn more, read this Documentation.
- Enable This Feed: Check this option, to ensure this integration feed remains enabled, and all the actions of this feed function properly.
Once the setup is done, finally, click the Create Webhook Feed button.
And, your Webhook will be integrated into this specific form!

After successful Integration, now you will see that your Zapier Integration Feed has been added here.
You can disable or enable this feed anytime by clicking the Toggle button if needed.
Also, you can modify your feed anytime by clicking the Pencil Icon and delete it by clicking the Trash Icon.

Preview of Integrated Webhook #
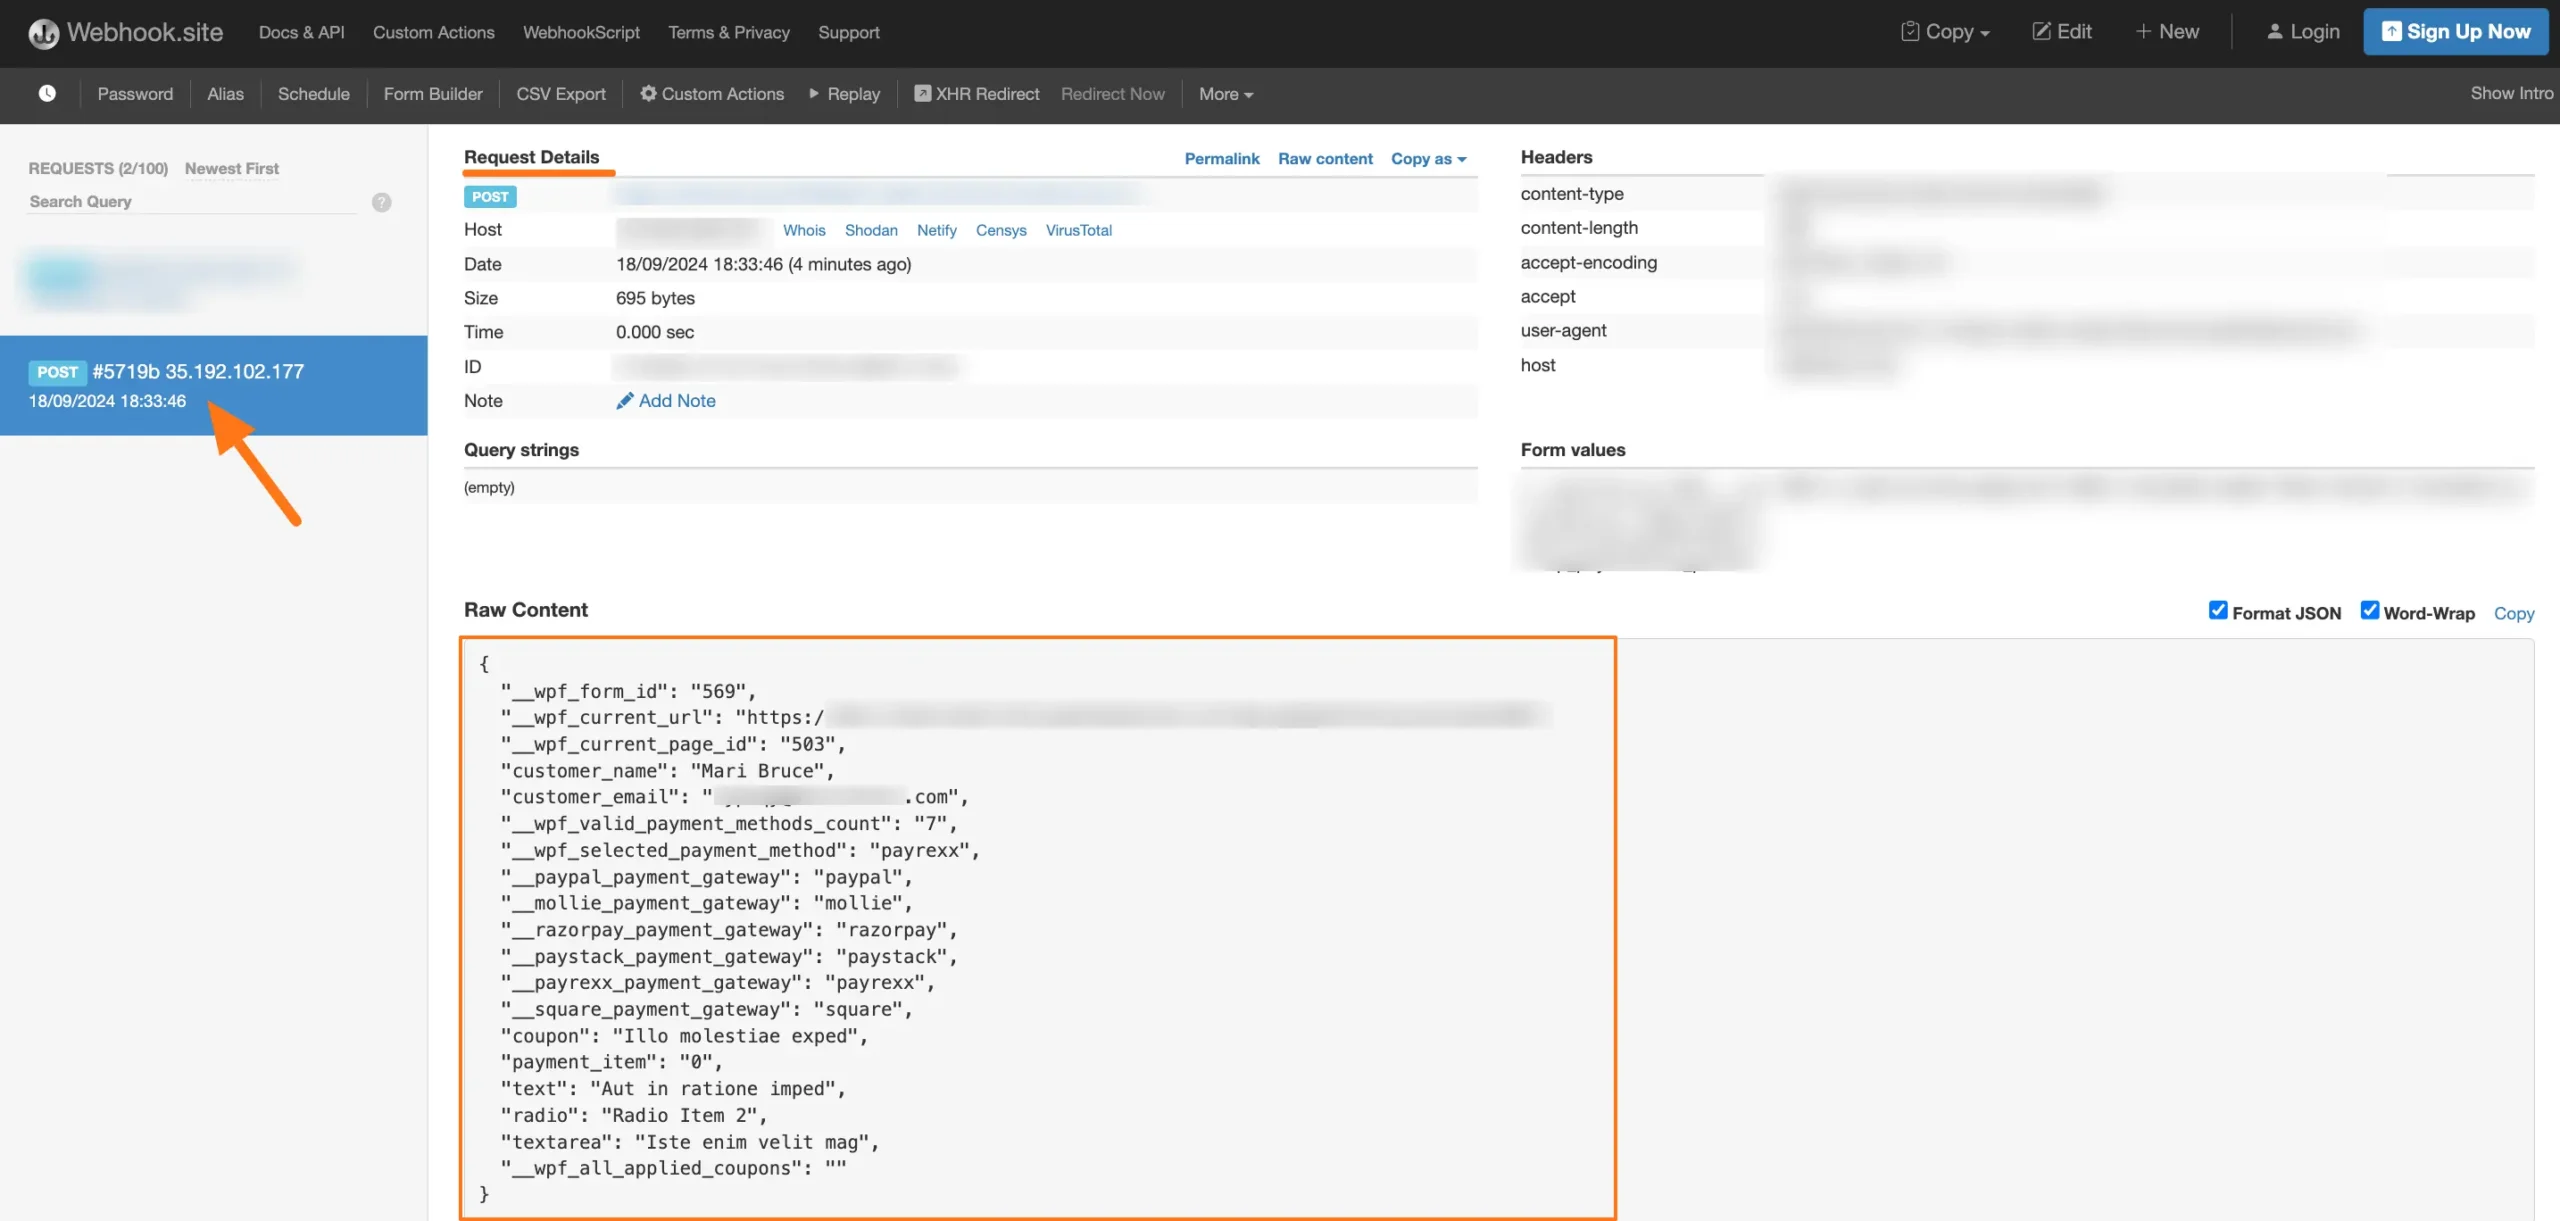
Here, you can see the preview of the opened tickets of Webhook through the Form entries that I set up during the integration.

This way you can easily integrate Webhook with Paymattic!
If you have any further questions, concerns, or suggestions, please do not hesitate to contact our @support team. Thank you.


