Paymattic allows you to connect with Fluent Support, a WordPress plugin, to enable paid customer support tickets. This article will guide you through integrating Fluent Support in your WordPress Site with Paymattic.
Enable Fluent Support Integration #
To learn how to enable Fluent Support integration, follow the steps with screenshots below –
First, go to Integrations from the Paymattic Navbar, search for Fluent Support through the search bar, and you will get the Fluent Support integration module.
Before starting the process, ensure you Installed and Activated the Fluent Support Plugin in your WordPress Site.
Learn how to install and activate the Fluent Support Free or Fluent Support Pro version.

Once you successfully install & activate the Fluent Support plugin in your WordPress Site, you will get the Fluent Support’s Settings Icon on the right side, click on it.

Click the Toggle button and your Fluent Support integration module will be enabled.

Integrate Fluent Support into Paymattic Forms #
To learn how to integrate Fluent Support into any specific Form in Paymattic, follow the steps with the screenshots below –
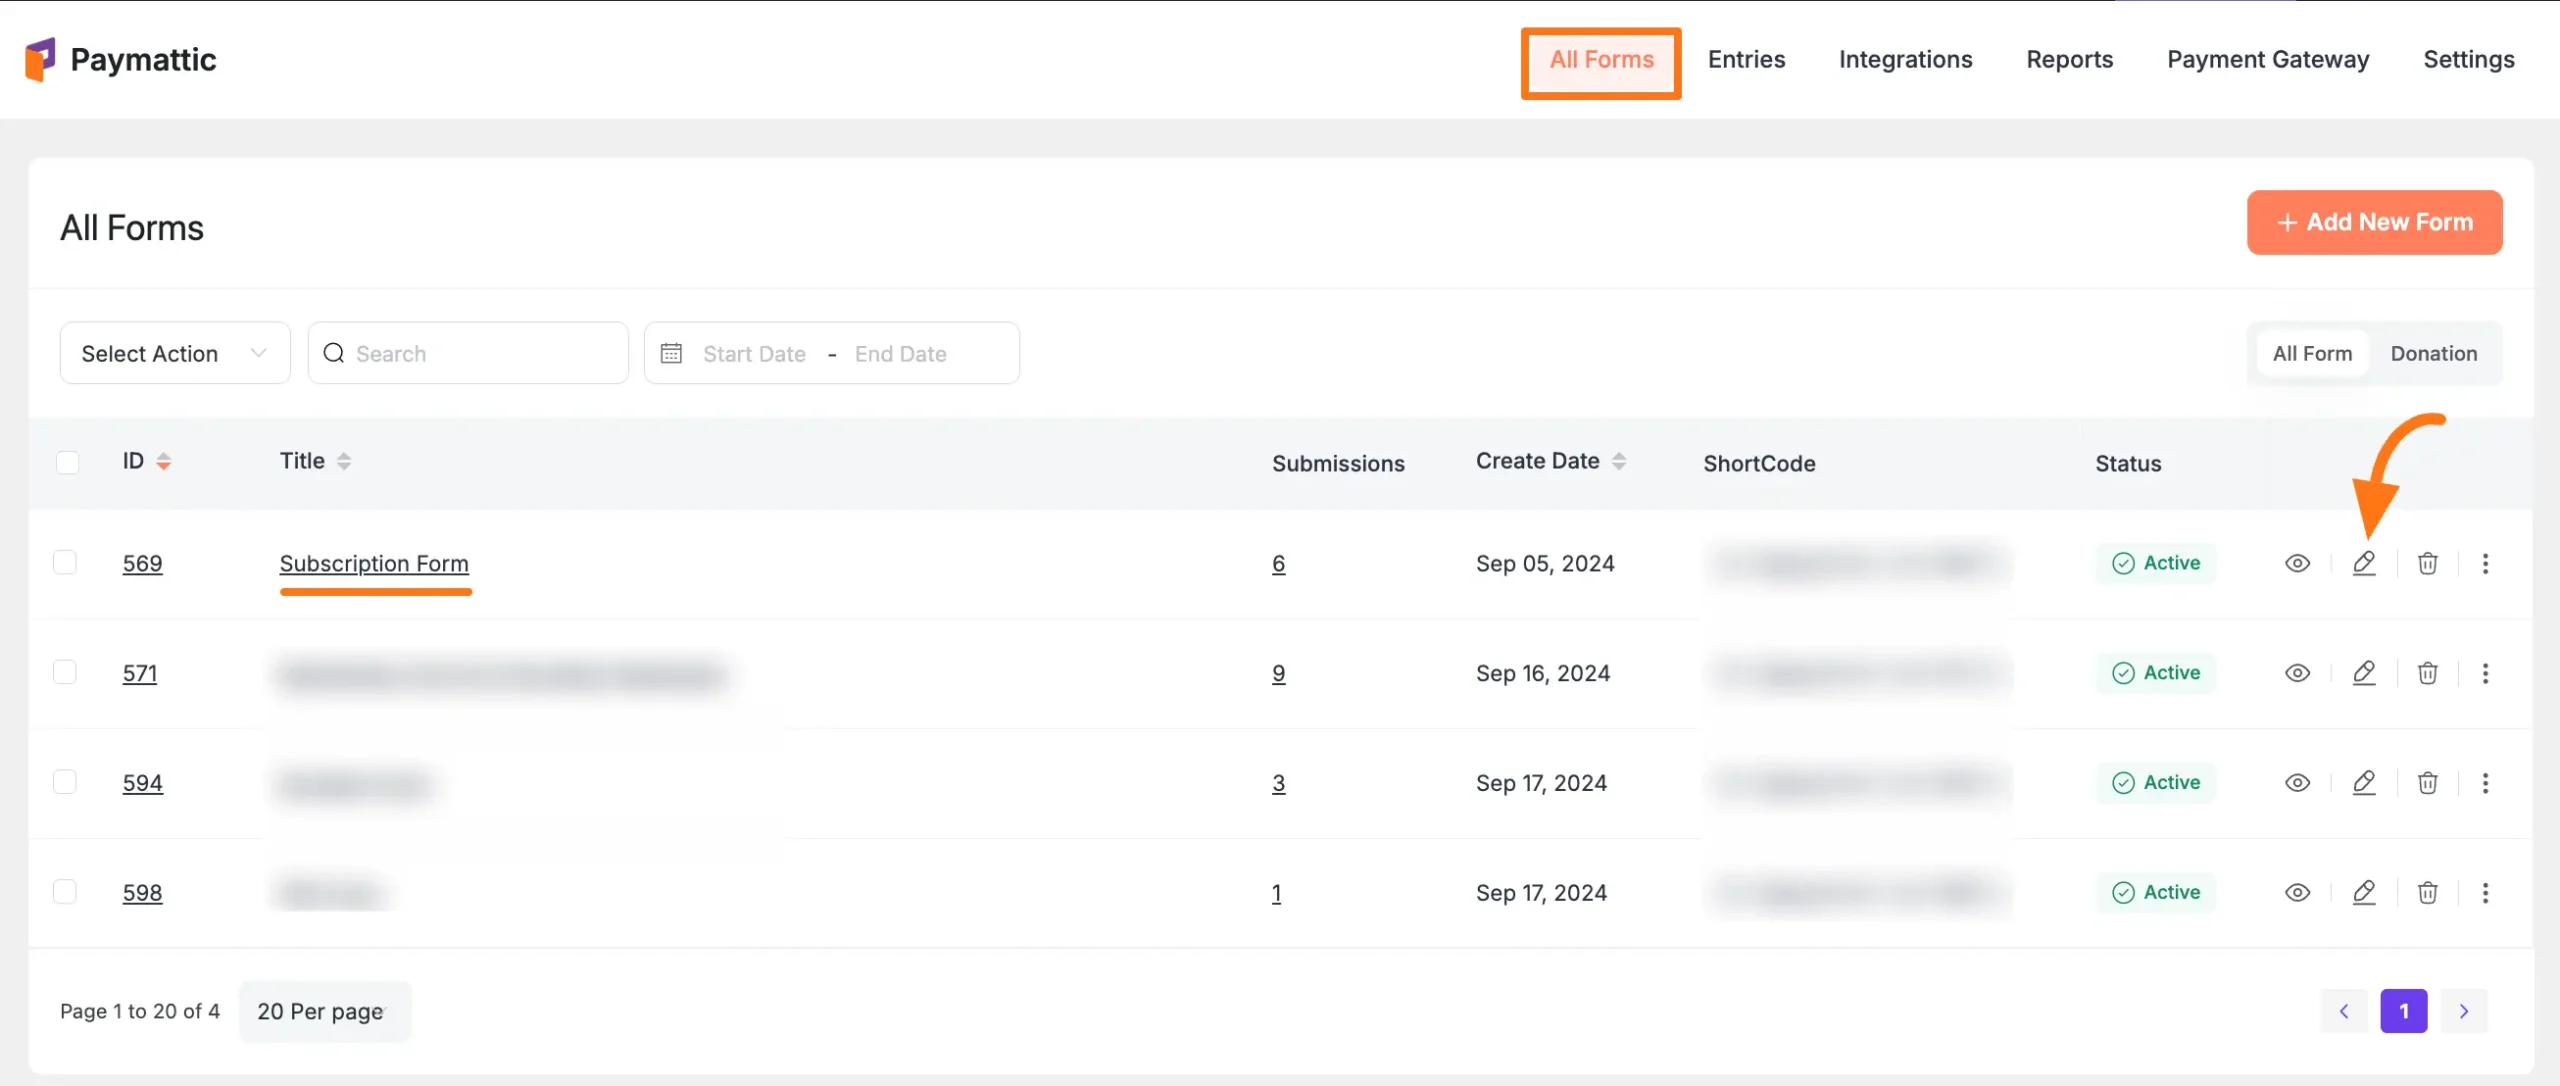
First, go to All Forms from the Paymattic Navbar, select the Desired Form where you want to integrate Fluent Support, and click the Pencil/Editor Icon.

Once the Editor page opens, go to the Integrations tab, click the Add New Integration button & select Fluent Support Integration feed from the dropdown list.

Now, a pop-up page will appear with various settings options for configuring Fluent Support.
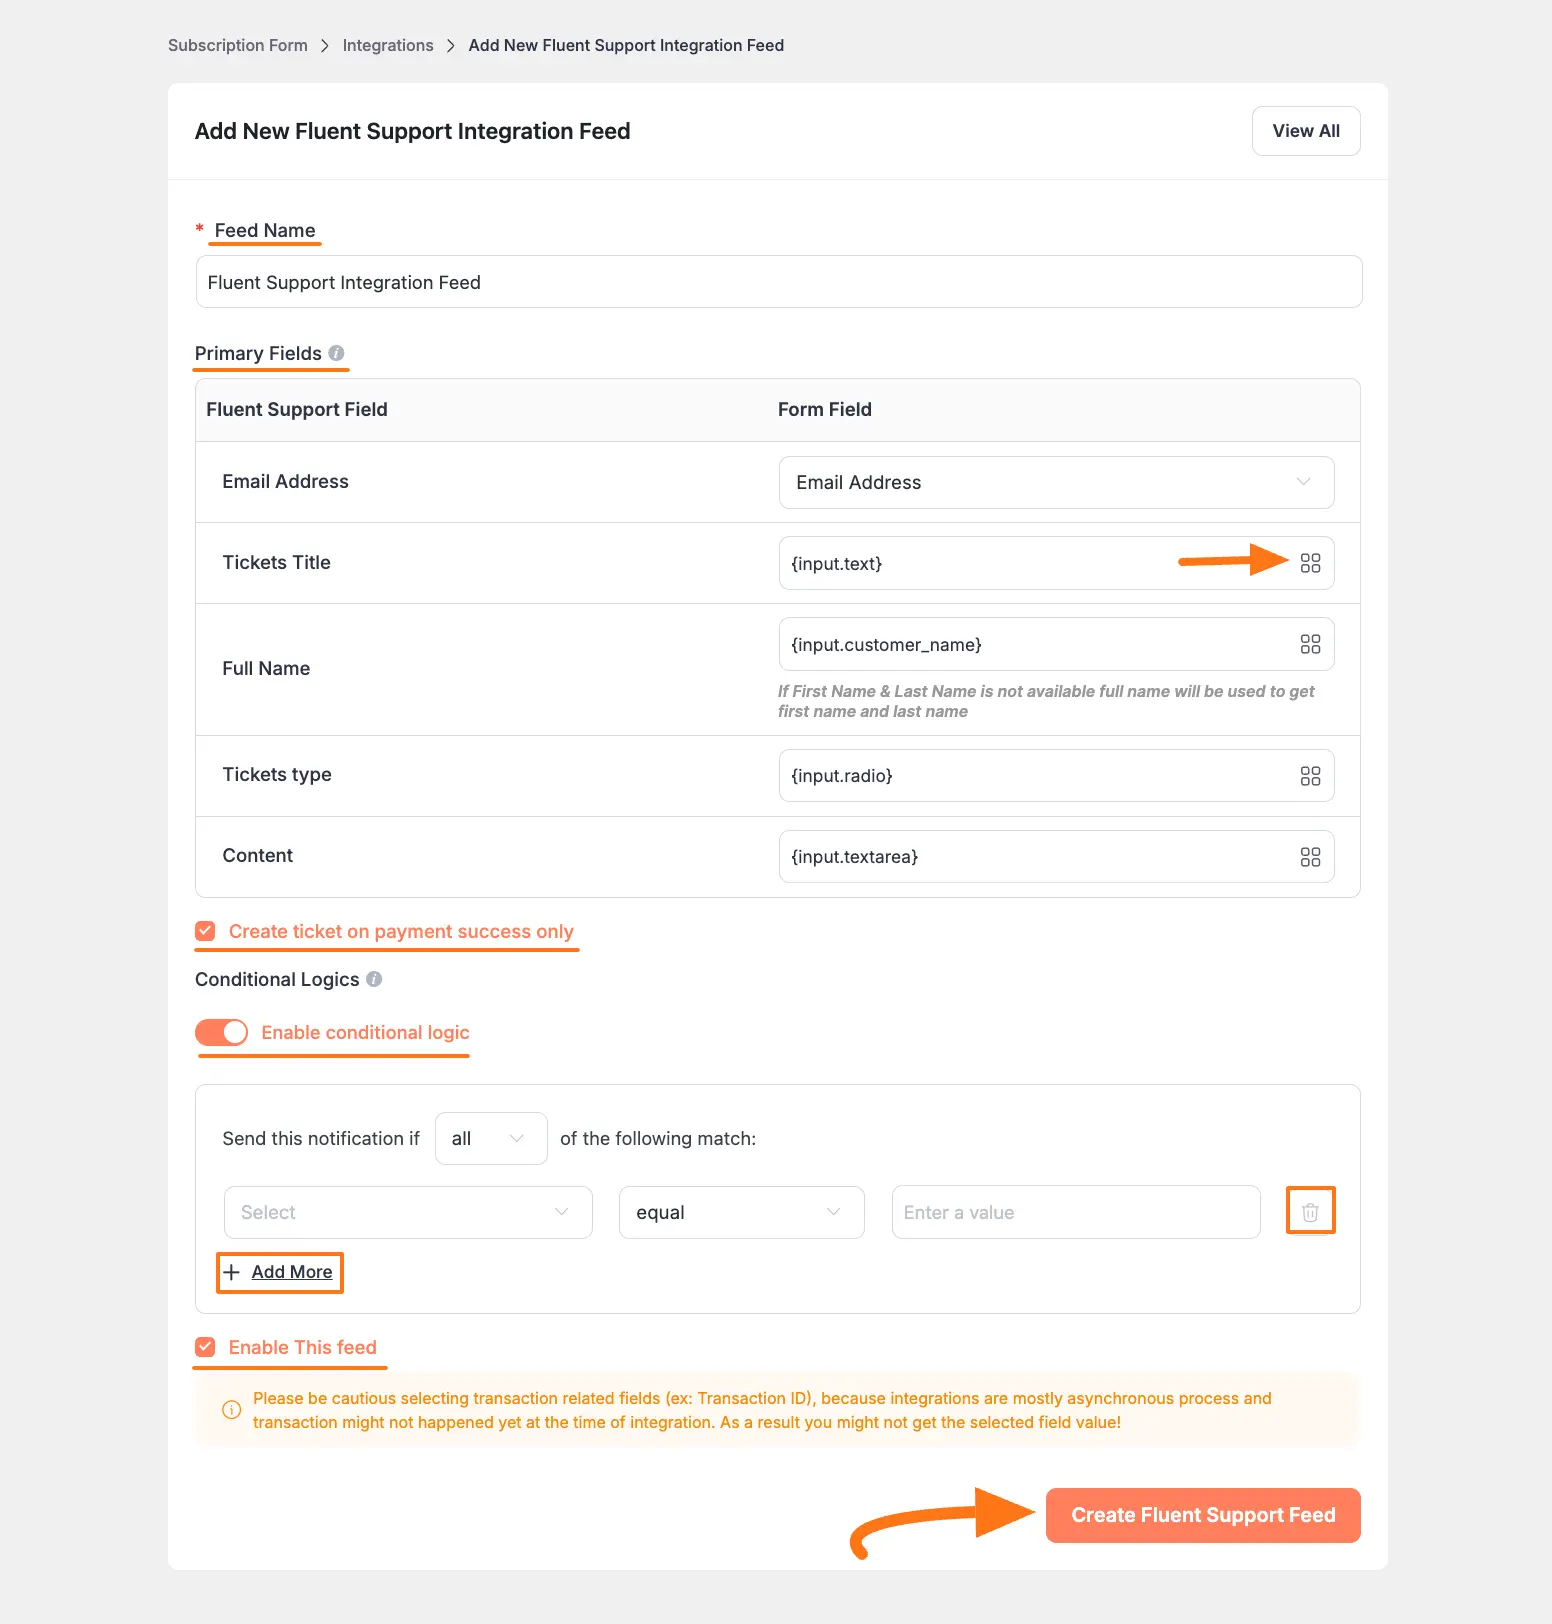
All the settings options mentioned in the screenshot below are briefly explained:
- Feed Name: Here, you can set a name according to your preference for your feed. This field is required to be filled in.
- Primary Fields: Use all the fields under this option to properly link your Fluent Support Fields with the Form Fields. Also, you can easily select the Value for the Form Fields according to the Fluent Support Fields by using the Shortcode button.
- Create Ticket on Payment Success Only: If you enable this option, the ticket will be generated only after successful payment is received, i.e., creating the support ticket as soon as the form is submitted with a successful payment. But if you do not enable this option, it will instantly create the ticket without checking the payment status.
- Conditional Logics: This option allows Fluent Support integration to function conditionally based on your submission values according to your set conditional logic/s. Also, here, you can add as much conditional logic as you need by clicking the + Add More button and delete any logic by clicking the Trash Icon if needed. To learn more, read this Documentation.
- Enable This Feed: Check this option, to ensure this integration feed remains enabled, and all the actions of this feed function properly.
Once the setup is done, finally, click the Create Fluent Support Feed button.
And, your Fluent Support will be integrated into this specific form!

After successful Integration, now you will see that your Fluent Support Integration Feed has been added here.
You can modify your feed anytime by clicking the Pencil Icon and delete it by clicking the Trash Icon.
Also, you can disable or enable this feed anytime by clicking the Toggle button if needed.

Preview of Integrated Fluent Support #
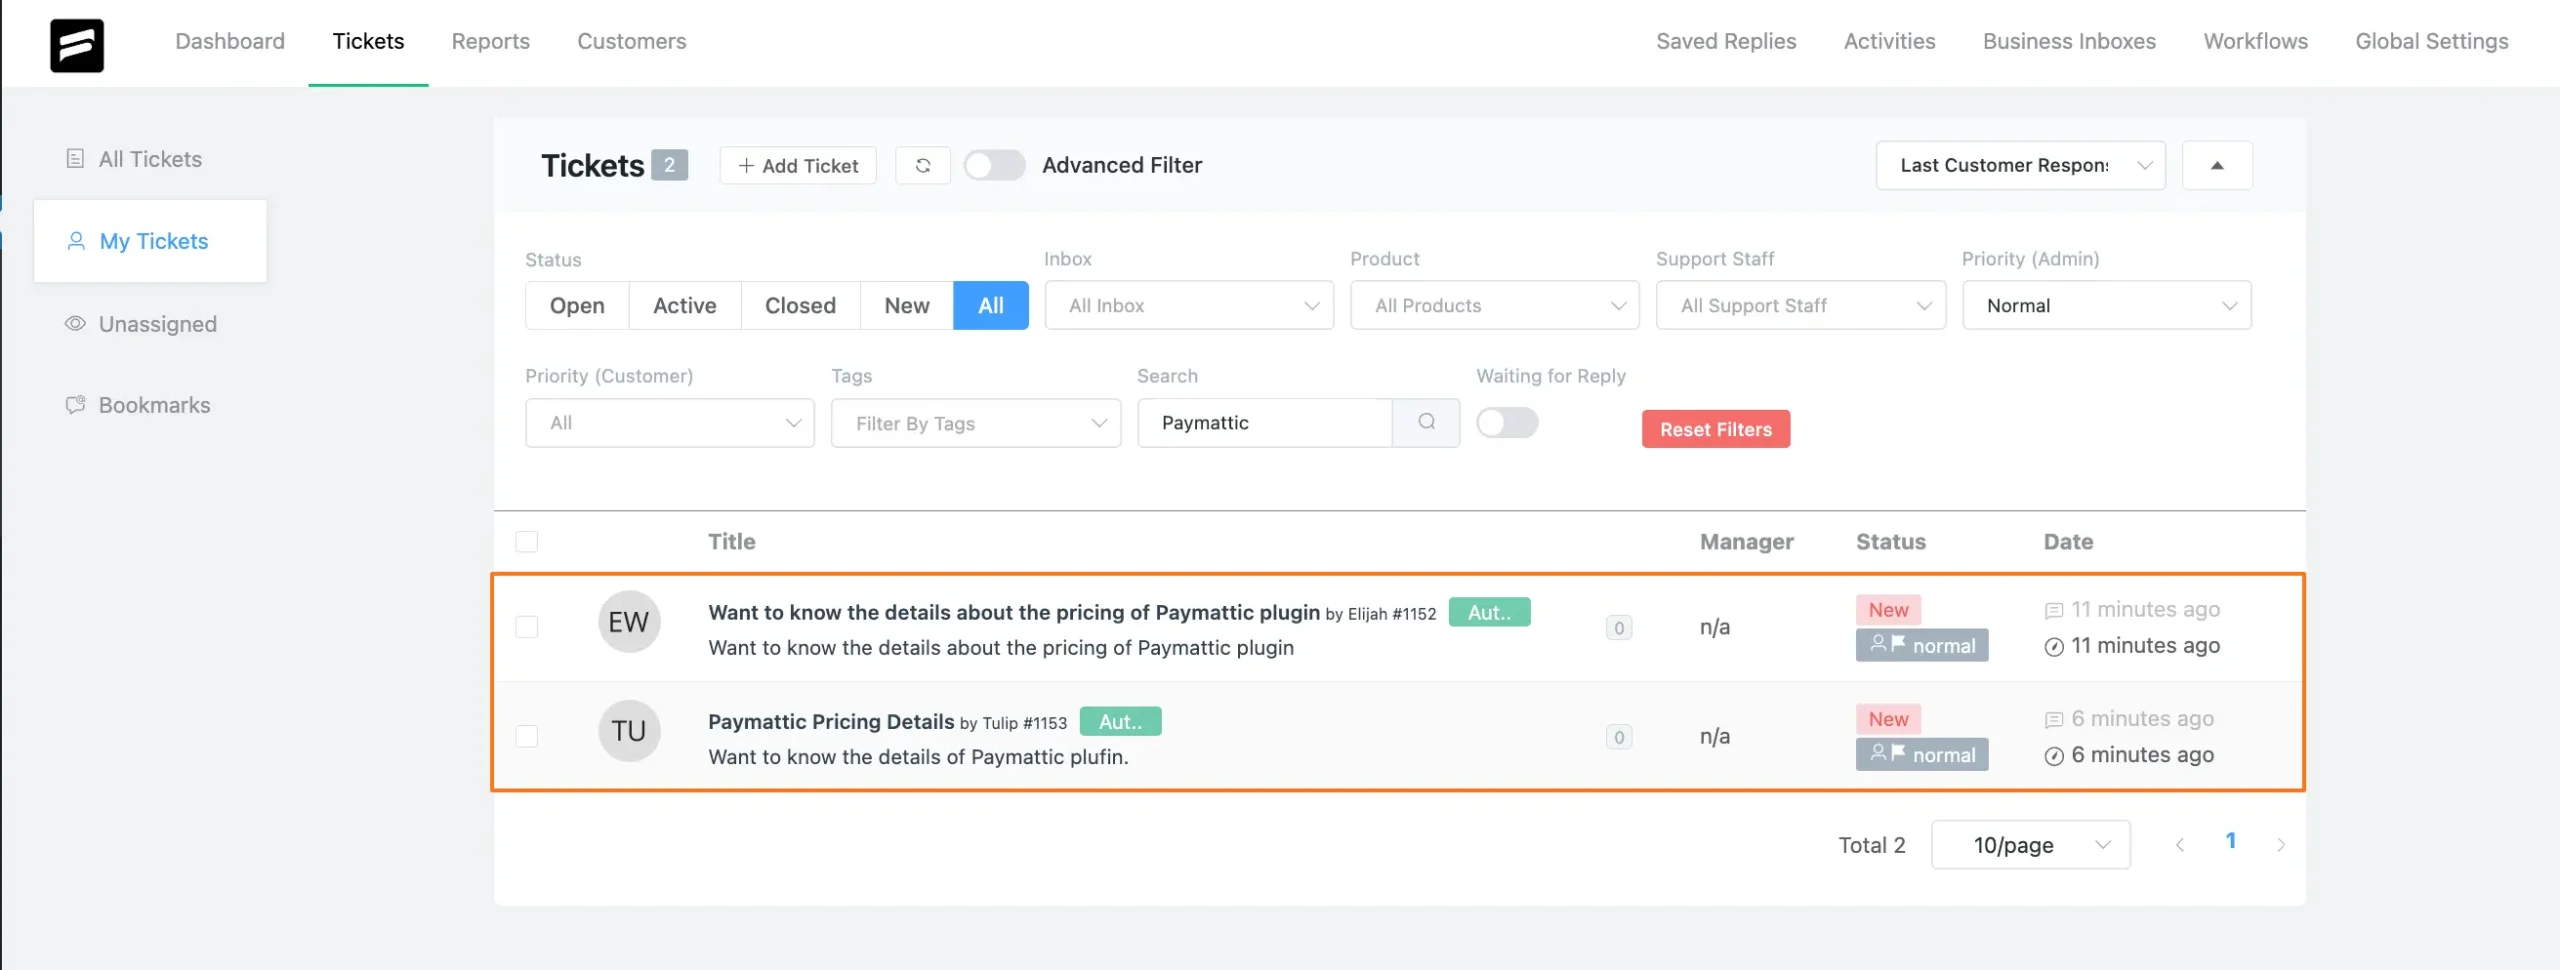
Here, you can see the preview of the opened tickets of Fluent Support through the Form entries that I set up during the integration.

This way you can easily integrate Fluent Support with Paymattic!
If you have any further questions, concerns, or suggestions, please do not hesitate to contact our @support team. Thank you.


