
In Paymattic, you can easily create Step Forms to accept payment through different platforms. This article will guide you through Creating Payment Forms to Collect Payments.
Creating A Payment Form #
To learn how to create Payment Forms with Paymattic, follow the steps with the screenshots below –
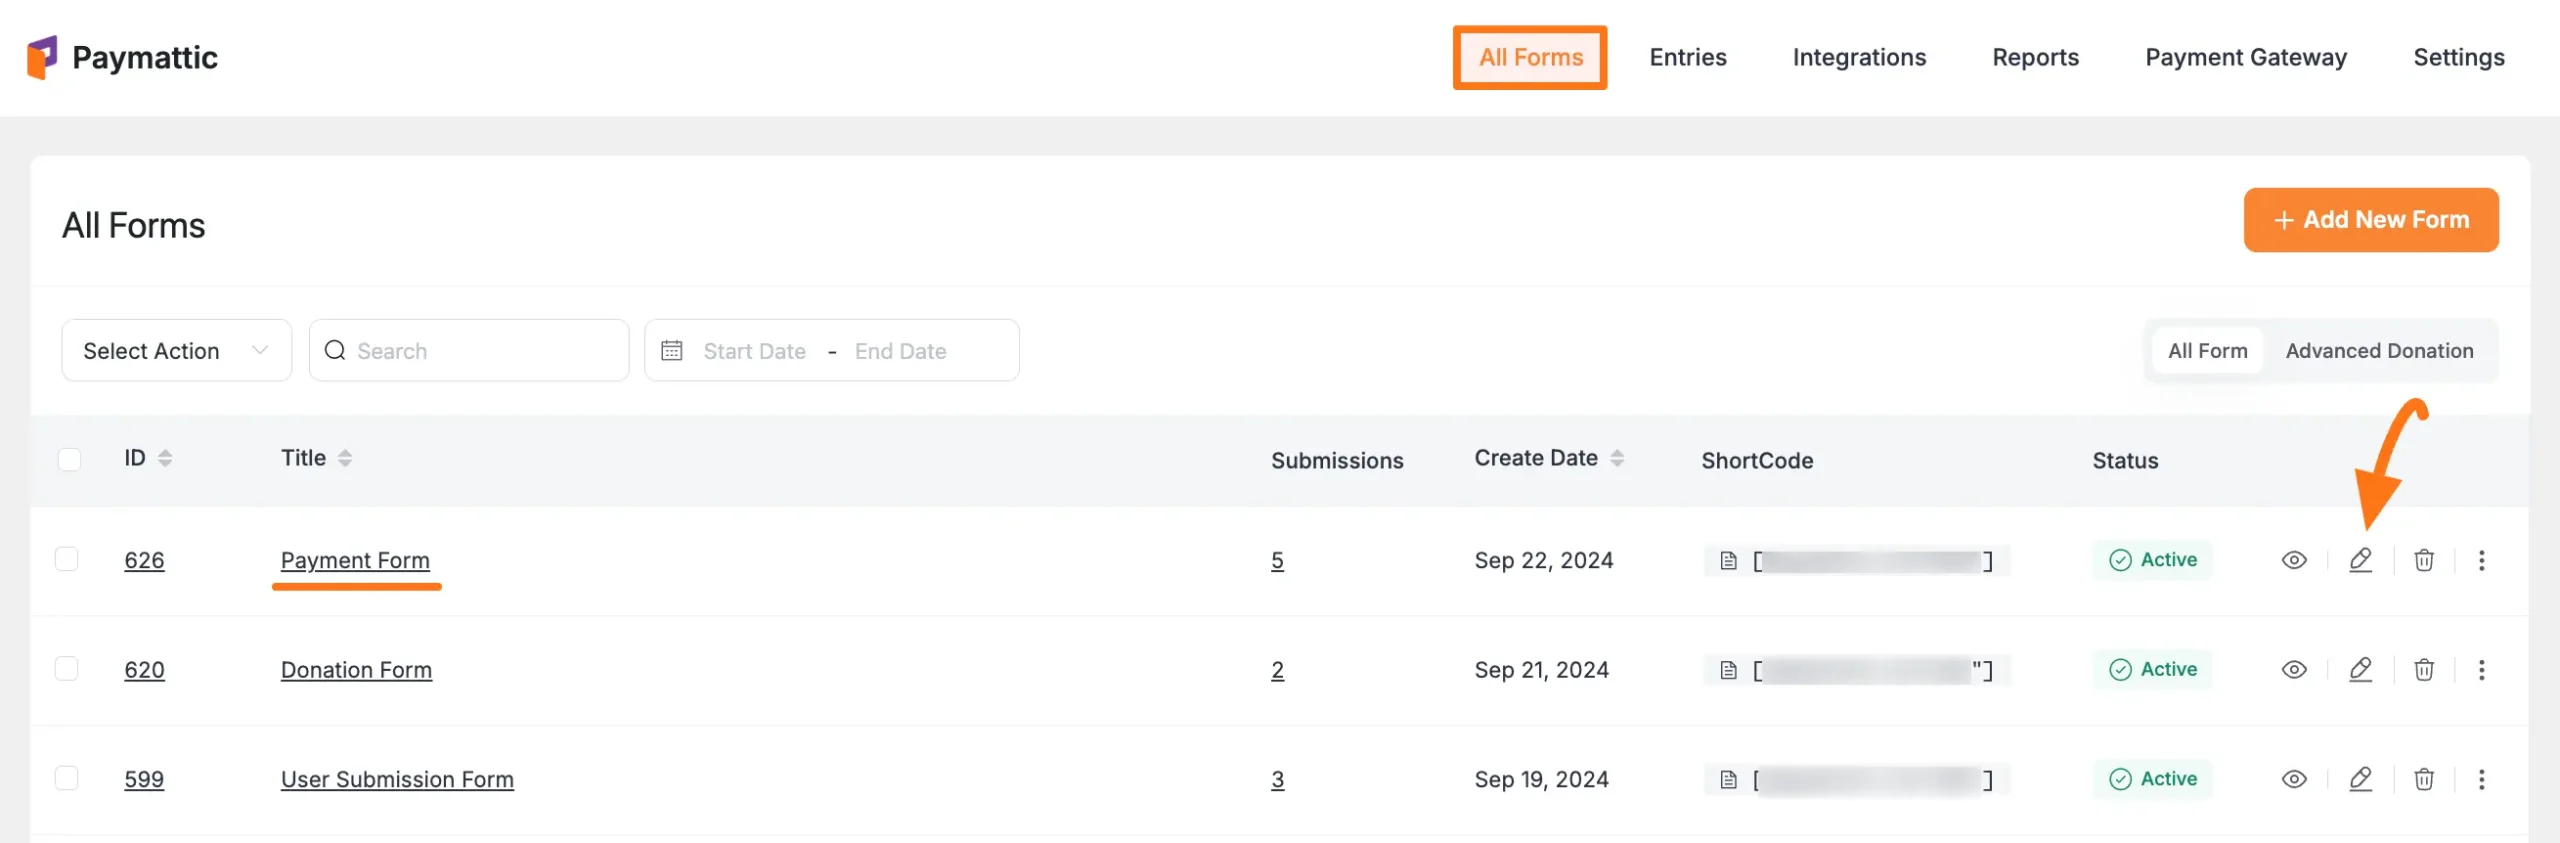
First, go to the All Forms section from the Pymattic Navbar, choose a Form, and click the Pencil/Edit icon to open the Editor page of that form.
If you do not have any existing forms, read this Create a Form from Scratch or Create a Form using Templates documentation.
For example, I choose an existing form to show the whole process.
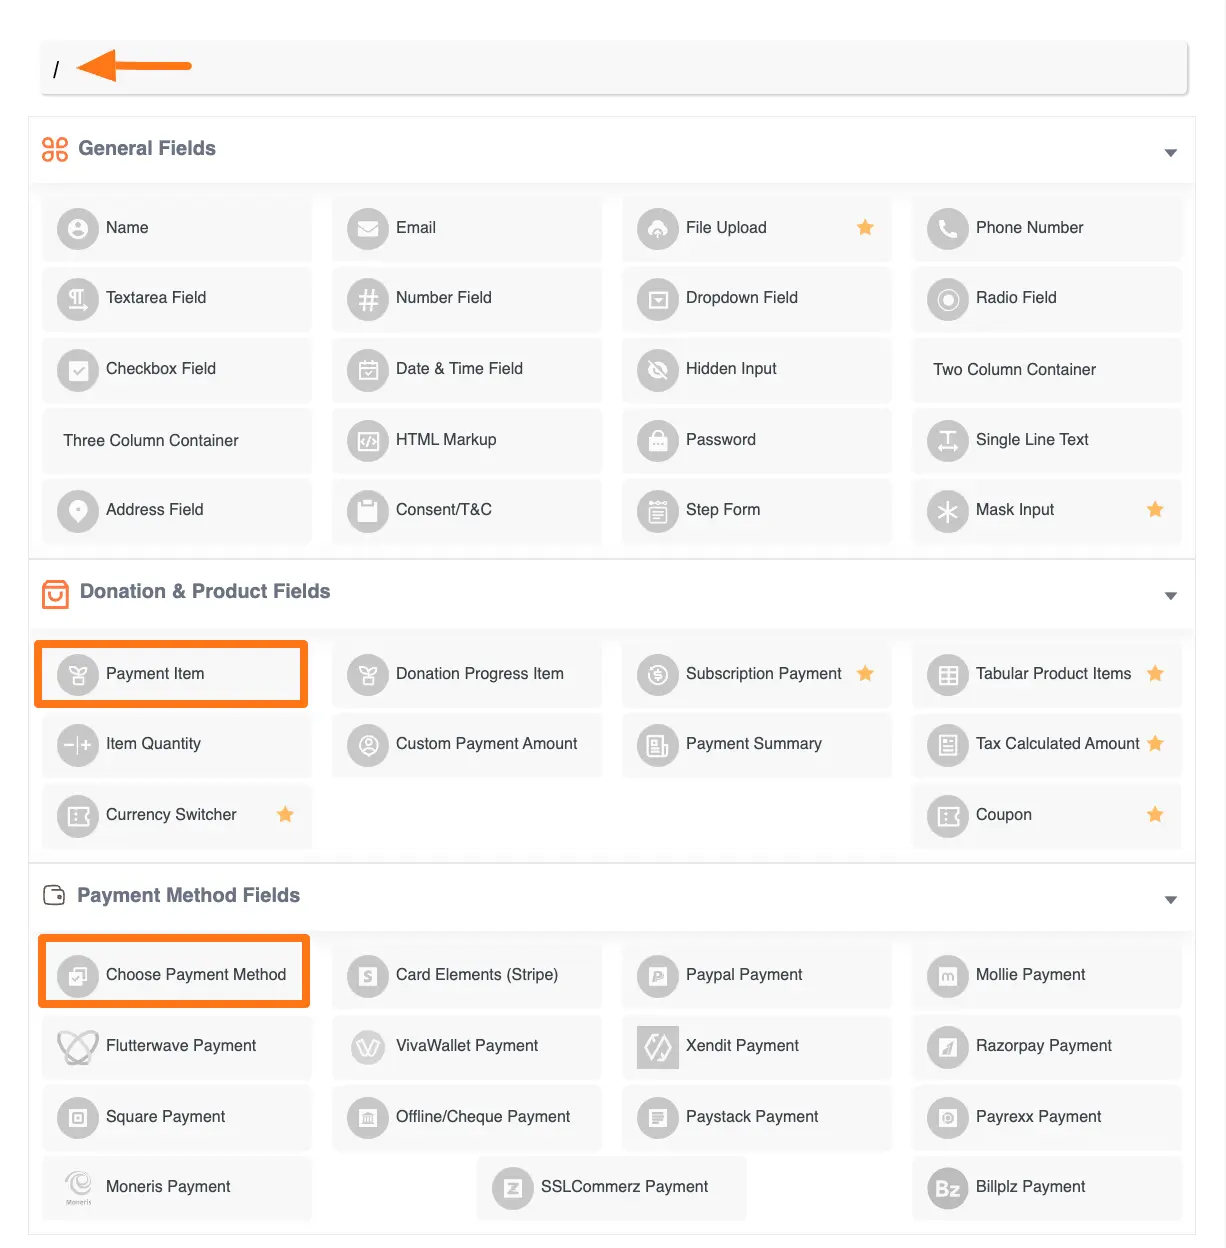
Once you open the Editor page, add the necessary fields by typing the “ / ” or clicking the Plus Icon placed at the bottom.
We always suggest you keep the Name and Email field at the beginning of any Form.
Remember, to create a Payment Form you must add at least one Product Field and Payment Method Field.
For example, the Payment Item as a Product Field and the Choose Payment Method as a Payment Method Field for demonstration purposes.
Remember, the added payment method/s in your Form will not function unless you properly complete the configuration process of payment gateways.
To learn the details of the configuration process, click here and read the documentation you selected as a payment method.
Customizing the Field #
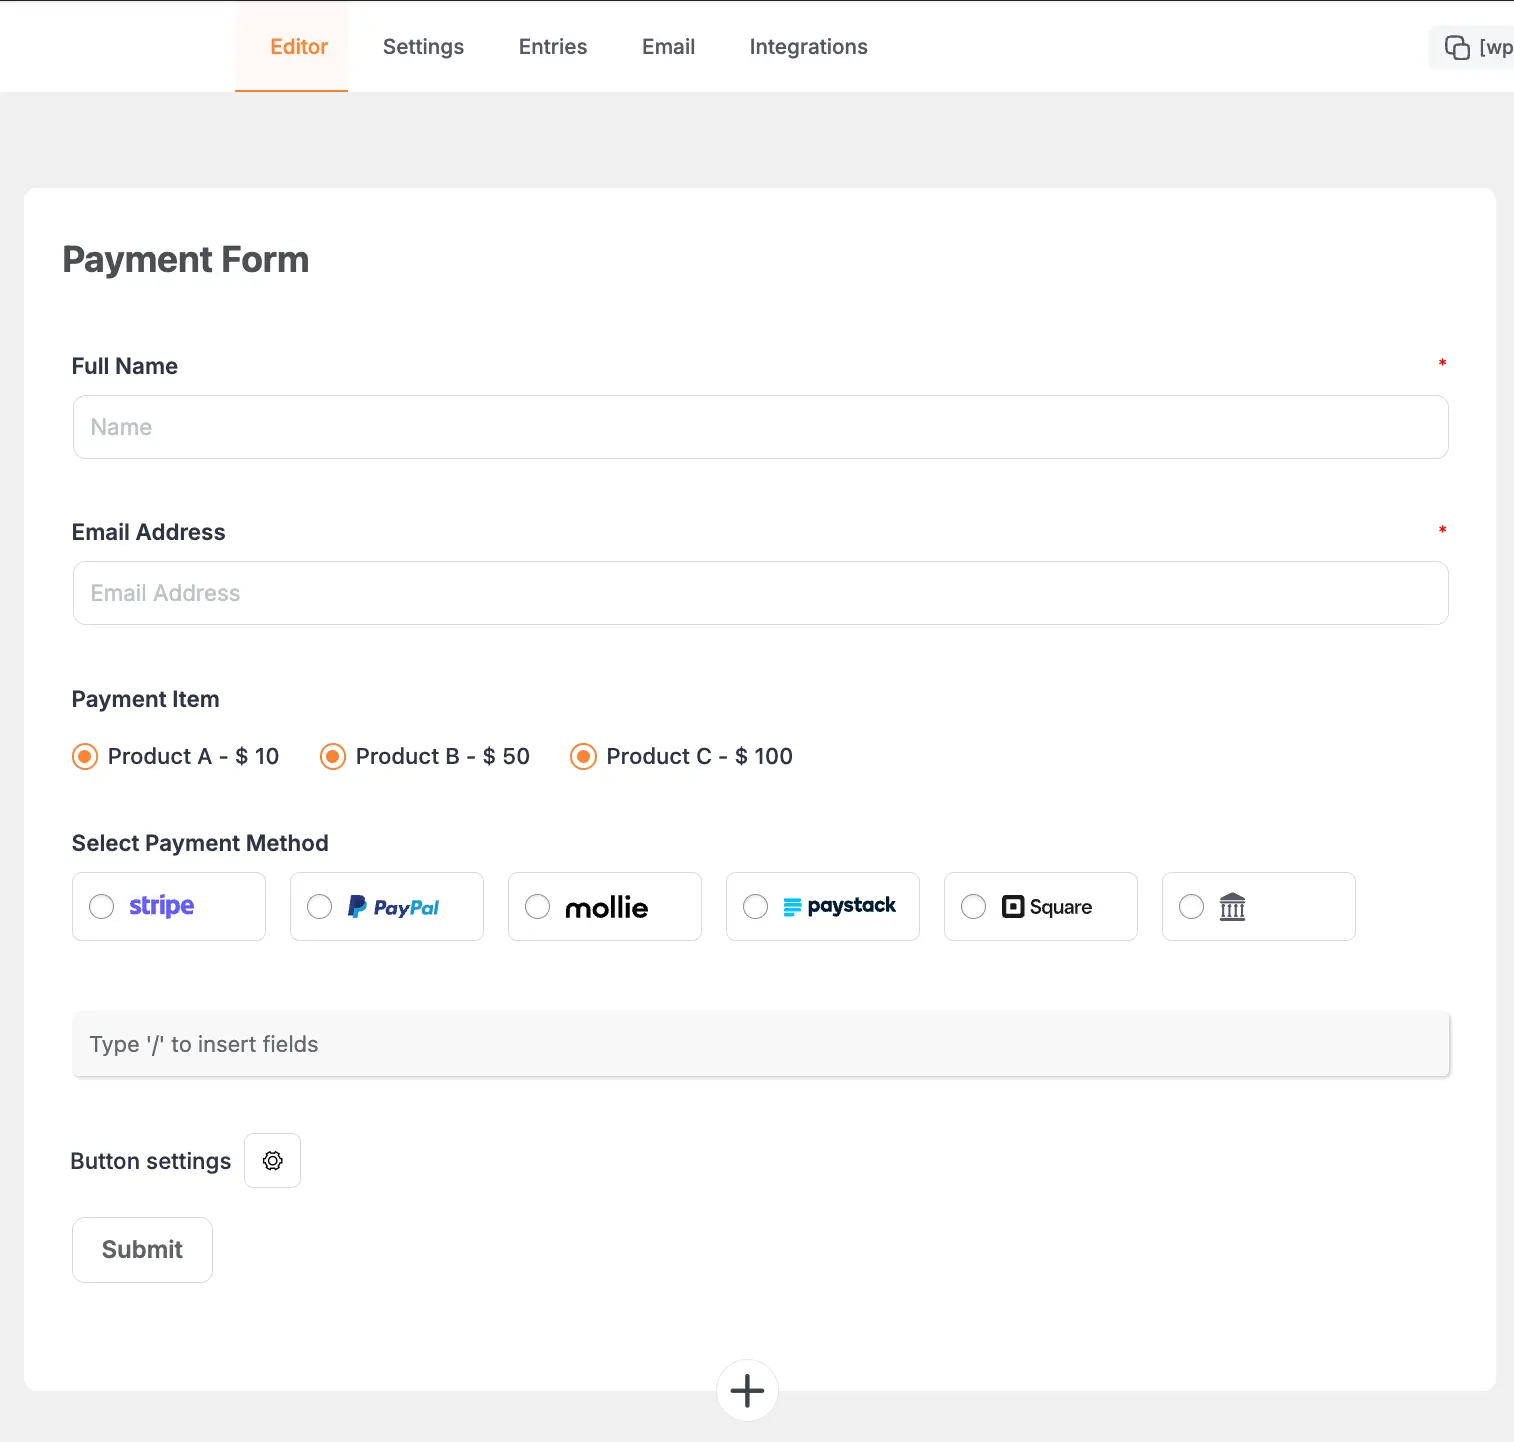
Here, you can see all the fields that are necessary for a payment form are added.
You can edit their field name and settings. To learn more about form editing, read this Documentation.
To learn how to edit the Payment Item and Choose Payment Method field specifically, refer to the Documentation below:
– Payment Item Field
– Choose Payment Method field
Remember, the process of adding and customizing every field is almost similar.
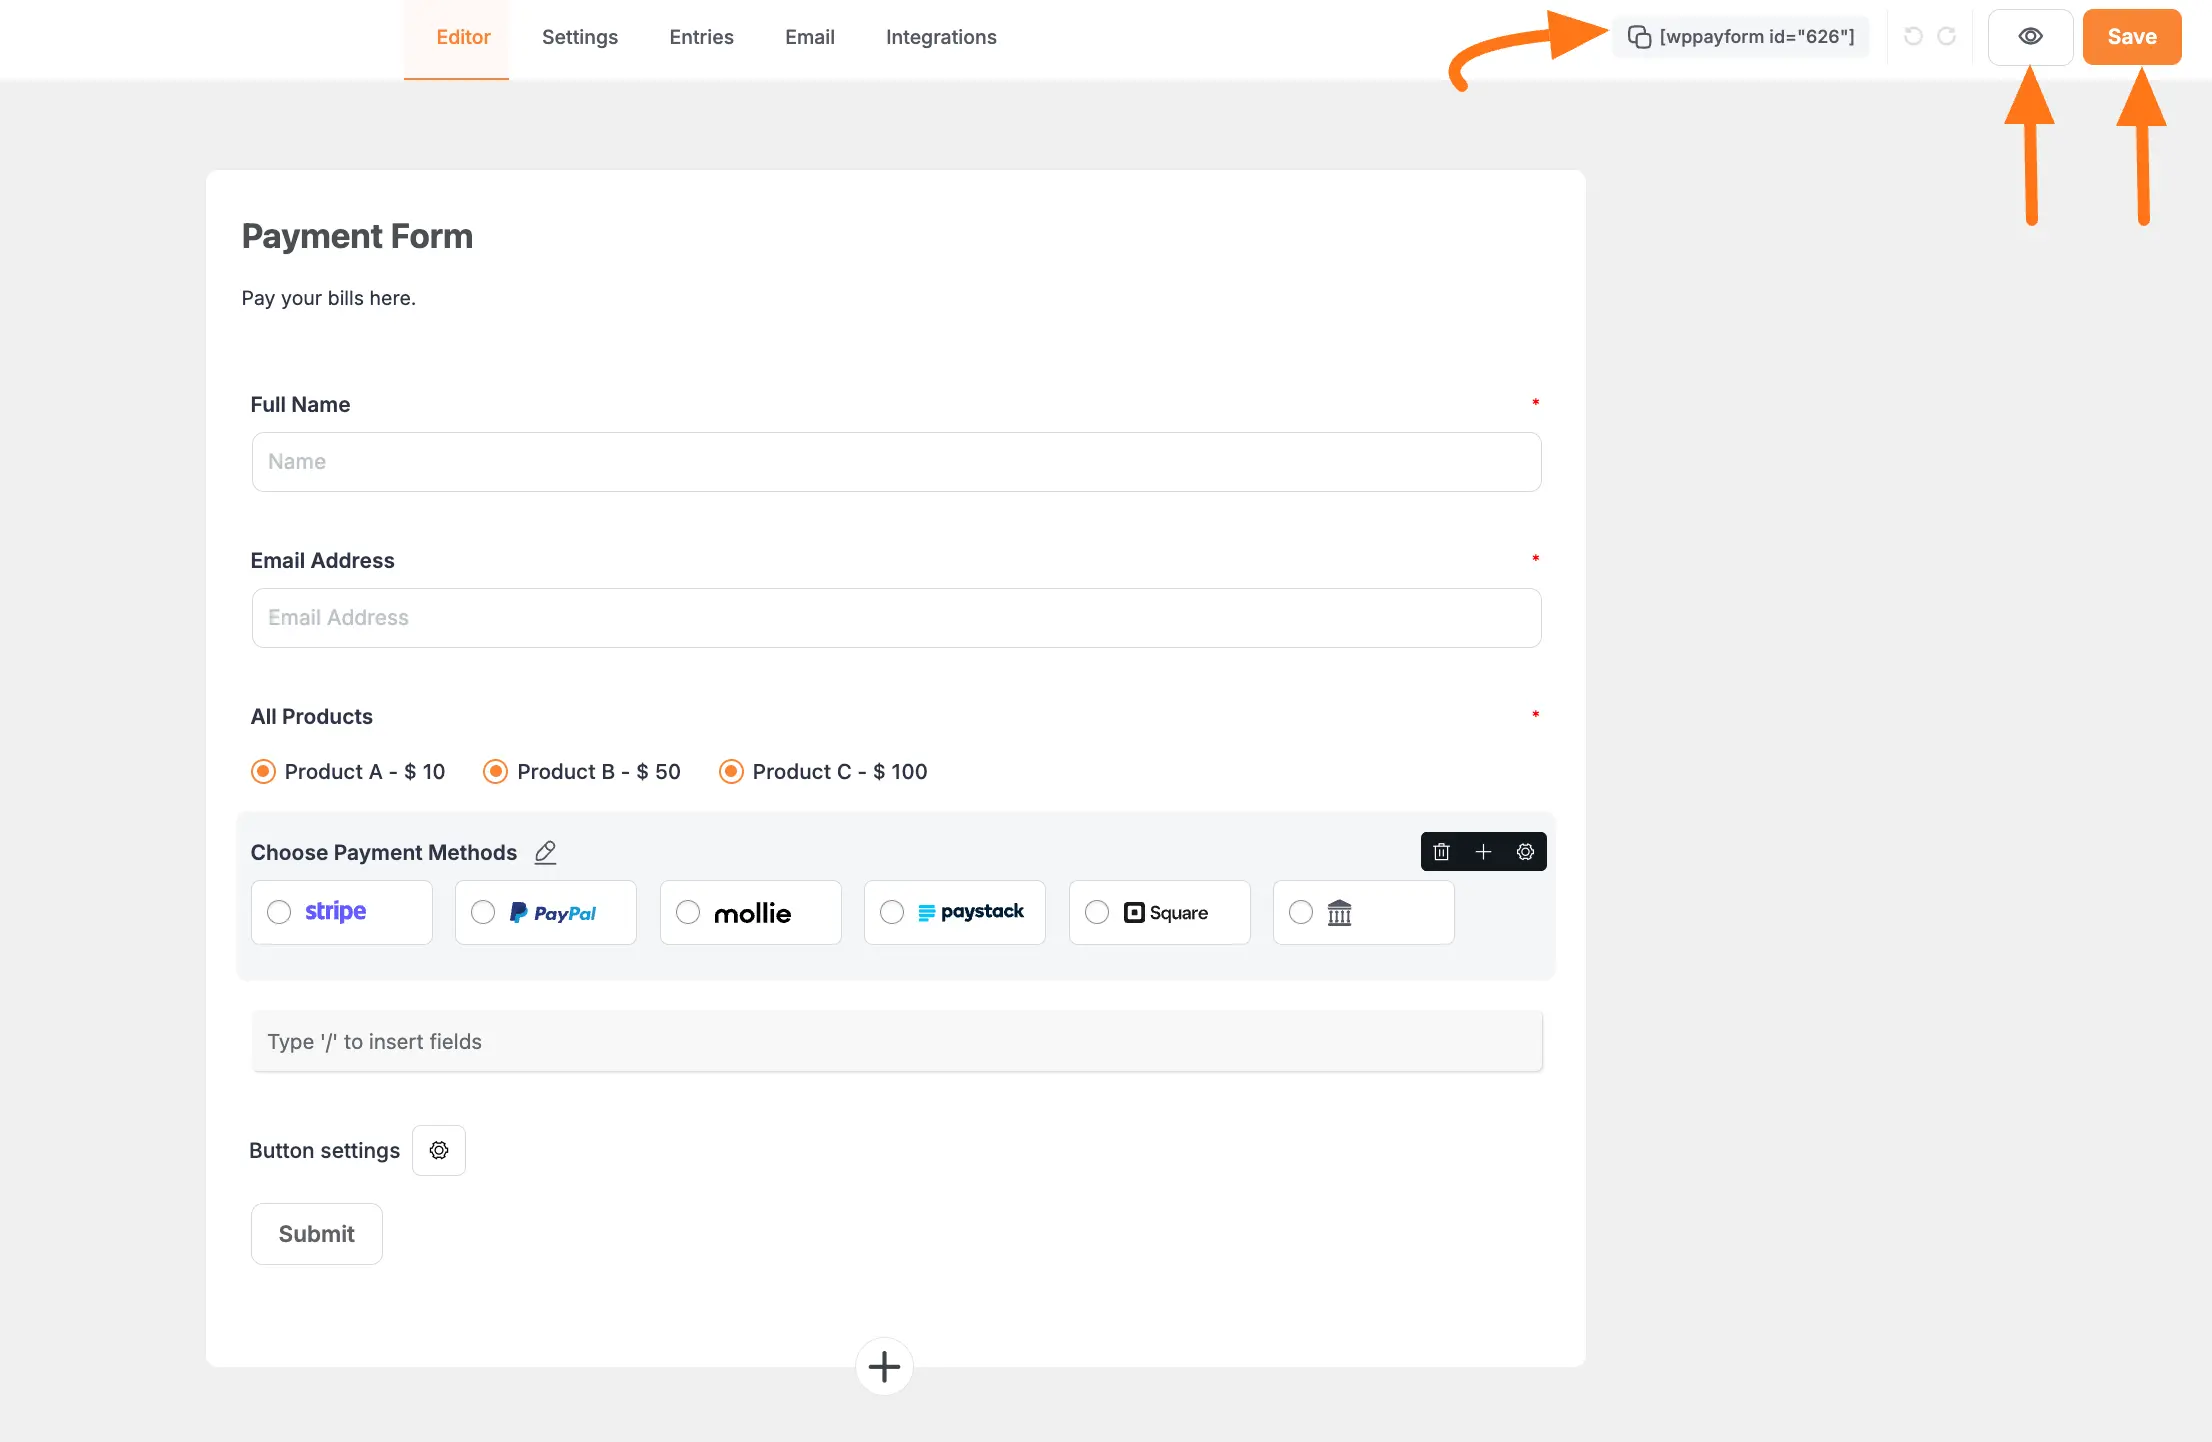
Embedding the Form into Frontend #
To embed and display the form on a specific Page/Post, copy this Shortcode and paste it into your desired Page/Post.
Once you complete the edit, press the Save button to save all the changes you made. And, to see the Preview of the form, click the Eye icon.
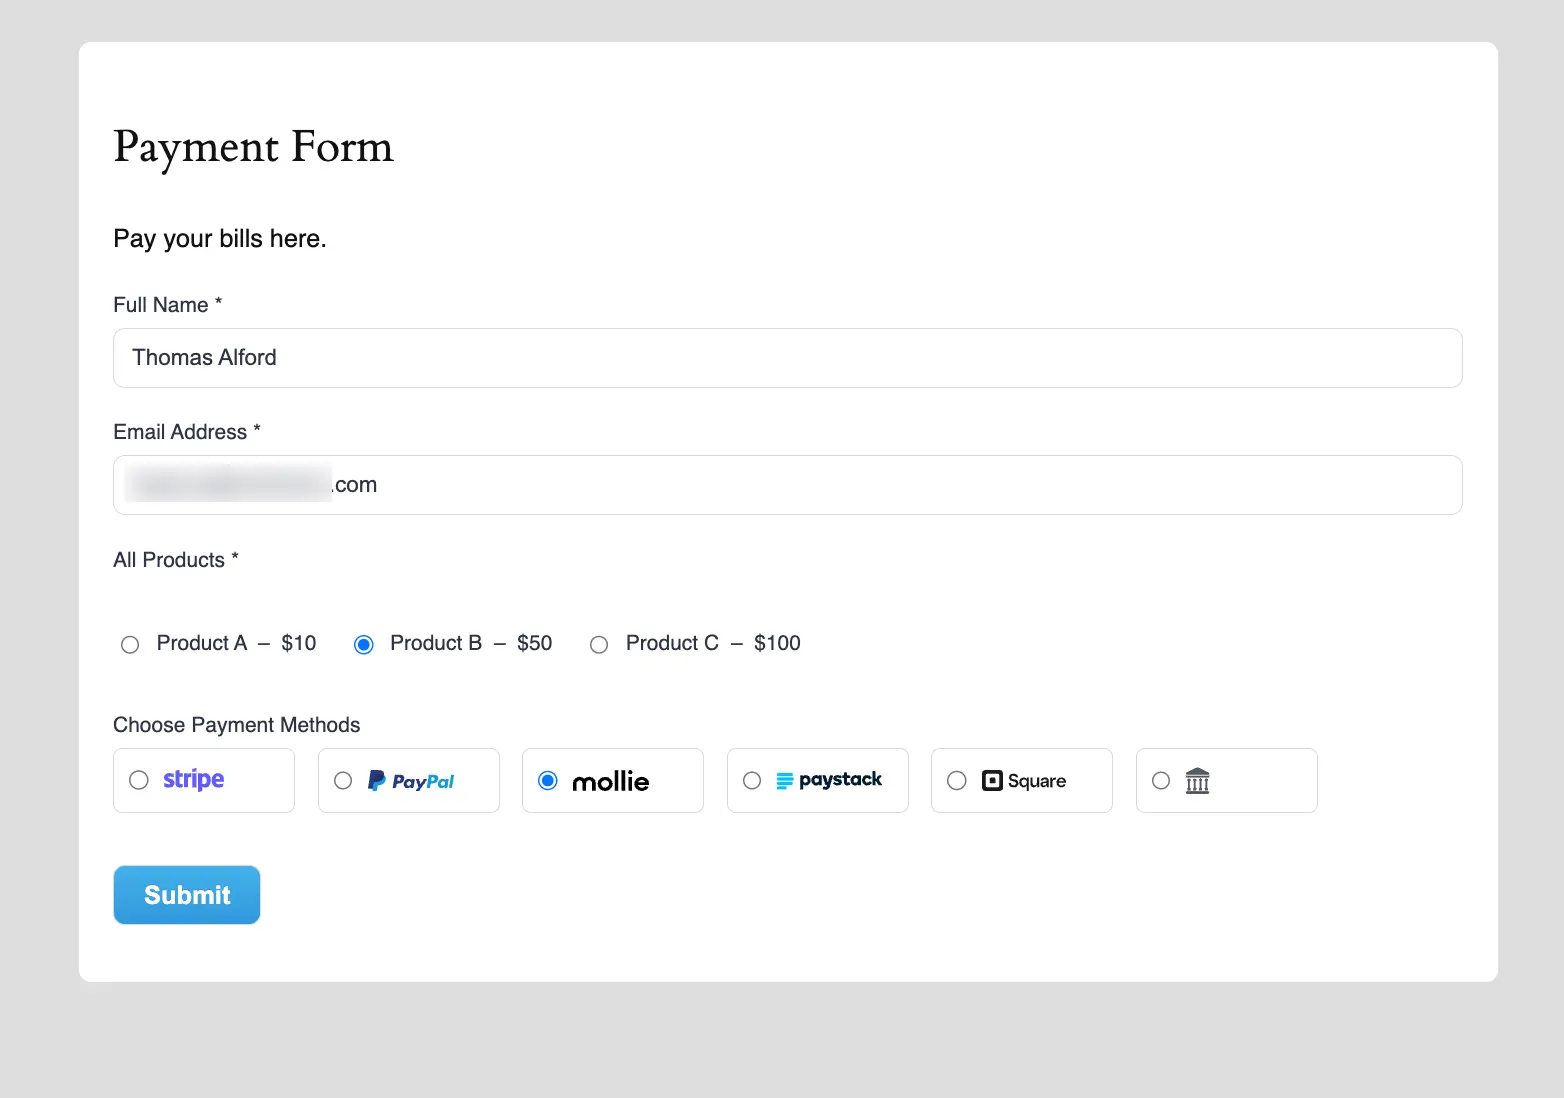
Preview of Payment Form #
Here is the preview of the Payment Form that we just created.
This way you can easily create a Payment Form in Paymattic!
If you have any further questions, concerns, or suggestions, please do not hesitate to contact our @support team. Thank you.


