Paymattic supports Flutterwave as a payment gateway. Follow these simple steps to integrate Flutterwave with Paymattic in WordPress.
Flutterwave is premium feature of Paymattic. Upgrade to Paymattic Pro to avail this feature.
Let’s jump into the process.
- First, go to Paymattic (Pro) → Payment Gateway from your WordPress dashboard.
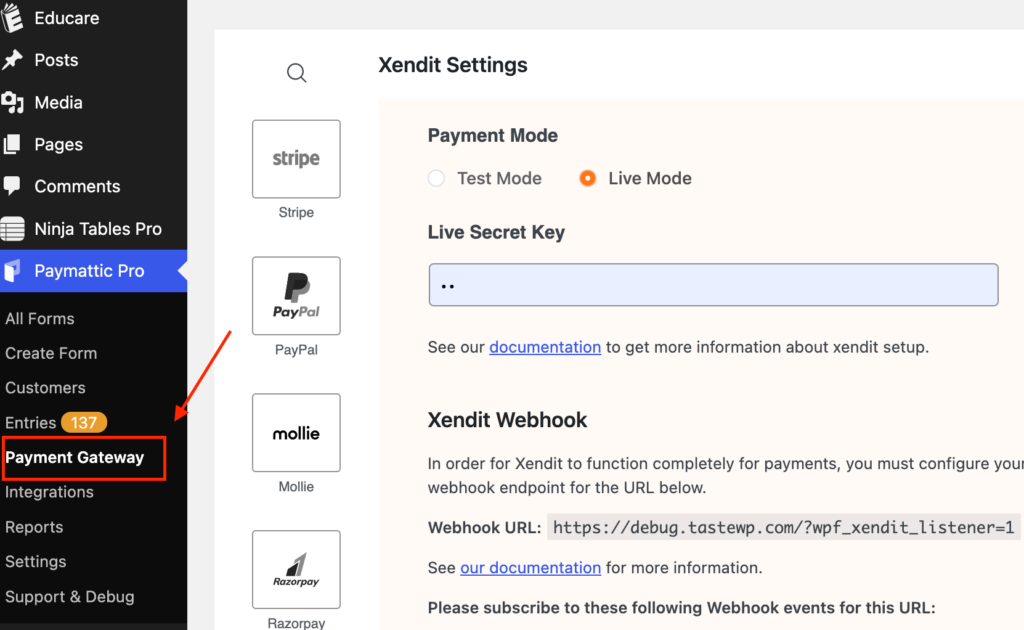
- Next, click the Flutterwave icon from the left sidebar.
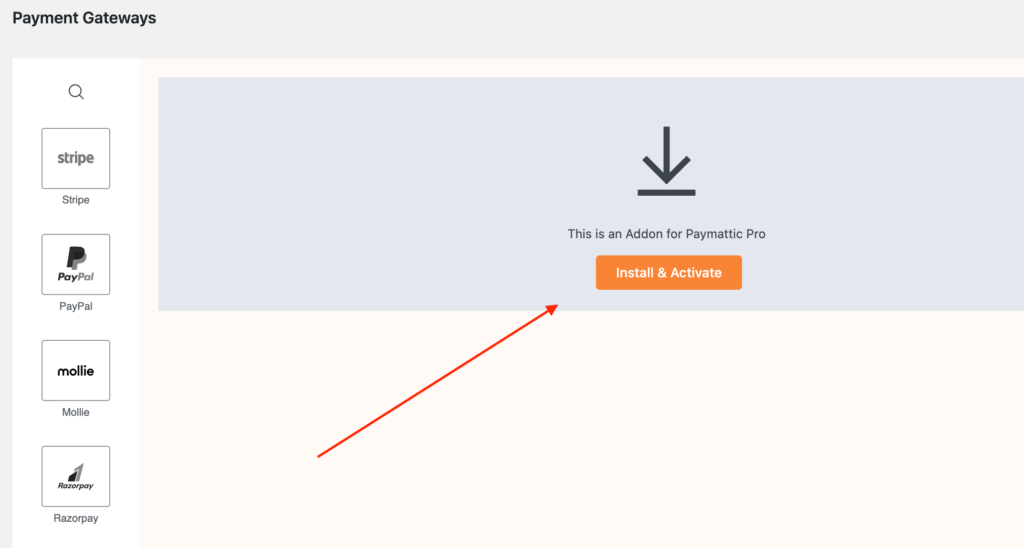
- Now, press the Install & Activate button to activate the Flutterwave for Paymattic add-on.
How to configure Flutterwave Live Mode/ Test Mode #
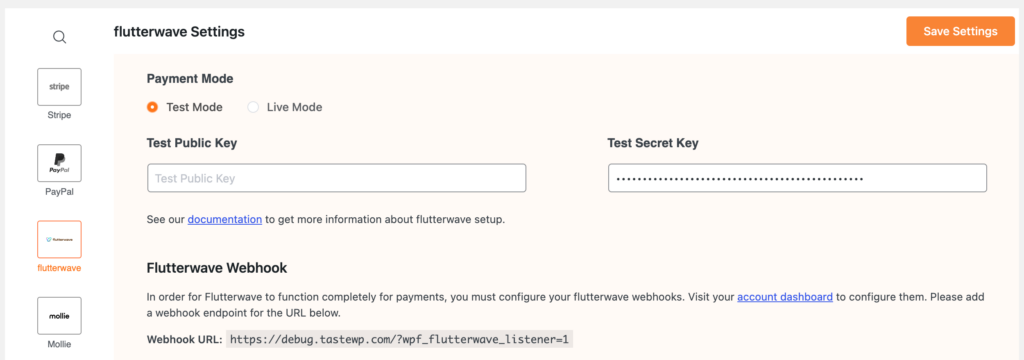
There are two types of modes that can be selected by the radio buttons on the Flutterwave settings page. Select the Test mode only for test payments and select Live mode when you want to accept live payments. While in the test mode, you can use any test card number that is issued by Flutterwave.
How to configure Flutterwave Public Key & Secret Key #
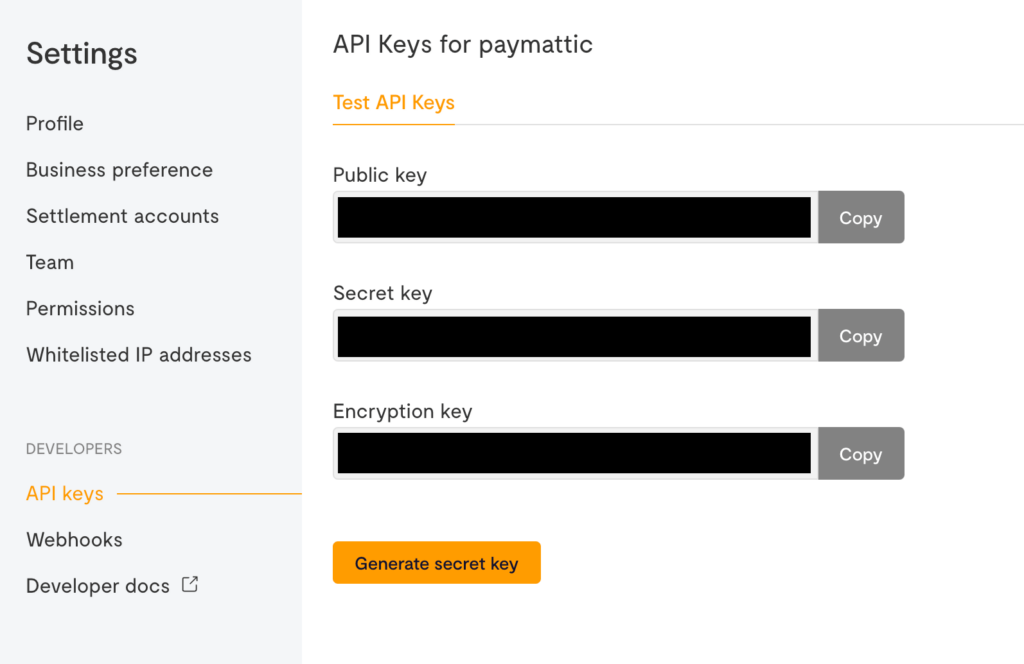
You need to set up Flutterwave public key and secret key to make the integration work for Paymattic. First, log in to your Flutterwave account to obtain your API keys.
- Once you log in to the account dashboard, go to Settings > API Keys.
- Click the Generate Secret Key button to get new API Keys.
- Copy your API credentials and paste them into Paymattic (Pro) > Payment Gateway > Flutterwave.
- Next, click the Save Settings button to save the API keys.
How to configure Flutterwave Webhook #
You will find the Flutterwave Webhook URL in Paymattic (Pro) > Payment Gateways > Flutterwave settings page in your WordPress dashboard.
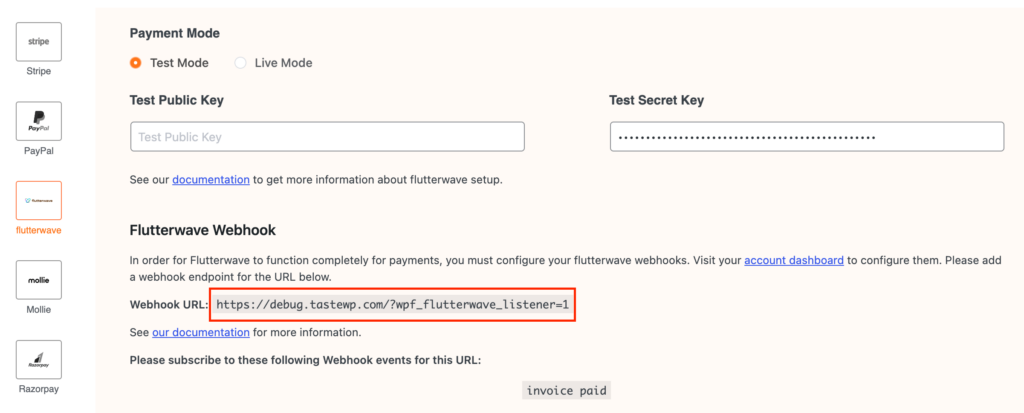
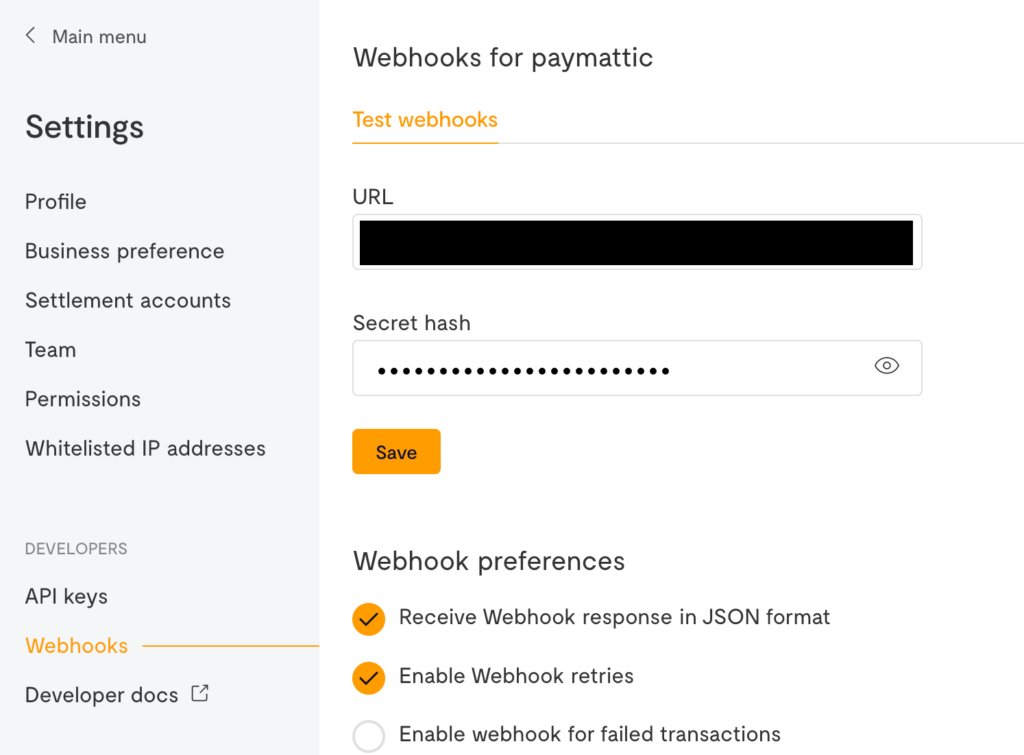
- Log in to your Flutterwave dashboard and go to Settings > Webhooks.
- Paste your Webhook URL here and wpf_flutterwave_listener as the secret hash.
- At last, click the Save button.
These are the simple steps to add Flutterwave in WordPress with Paymattic. If you face any difficulty open a support ticket and you will get a response from our support team soon.


