Paymattic has brought some of the simplest form templates. Not everyone needs extensive customization. Everything you would require when creating a form is already there.
Let’s dive into this simple article to learn how Simple Form Templates work!
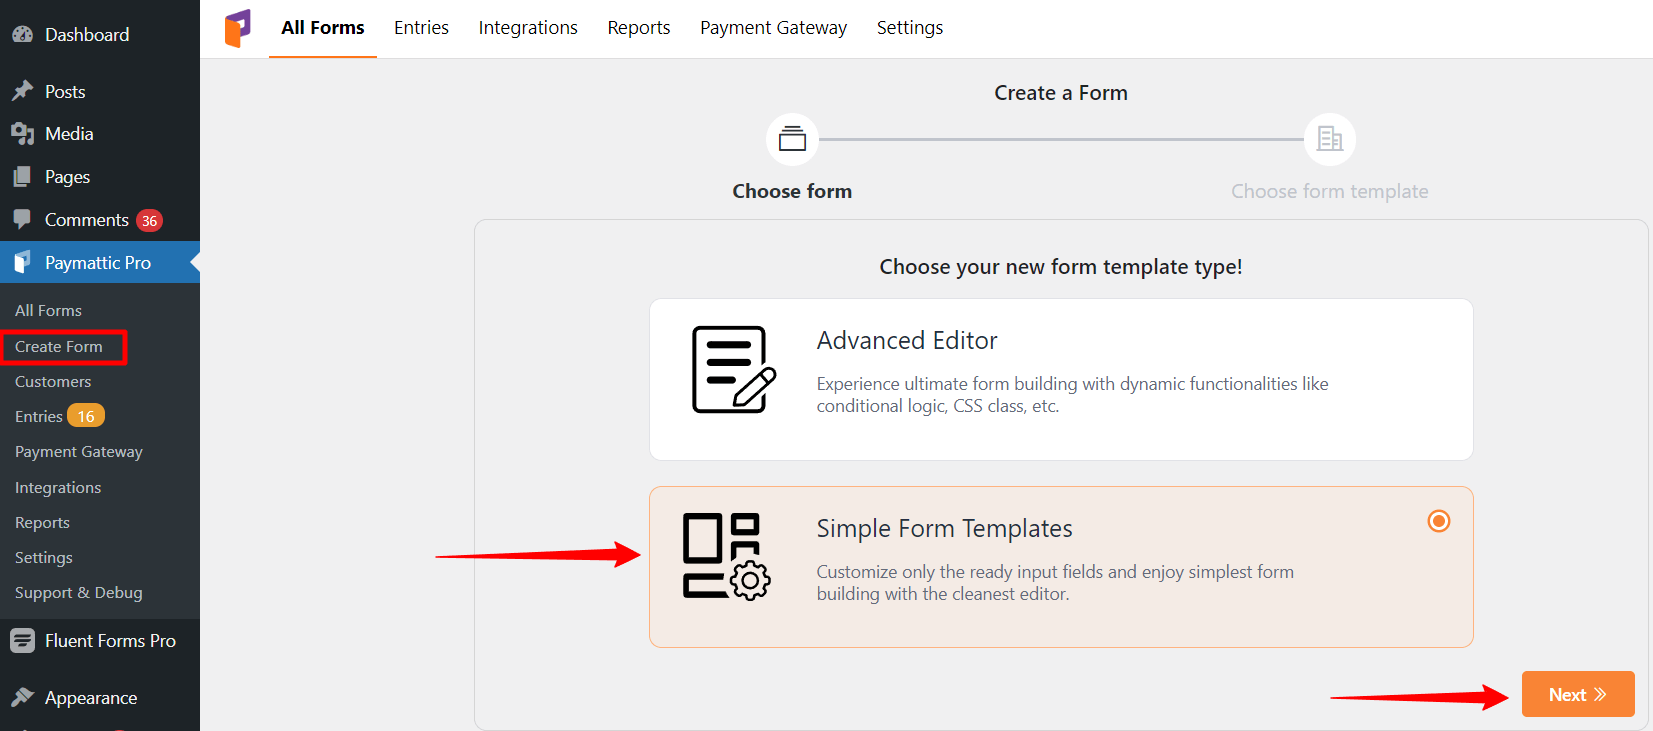
- First, go to the Create Form option → choose Simple Form Templates → click on the Next button.

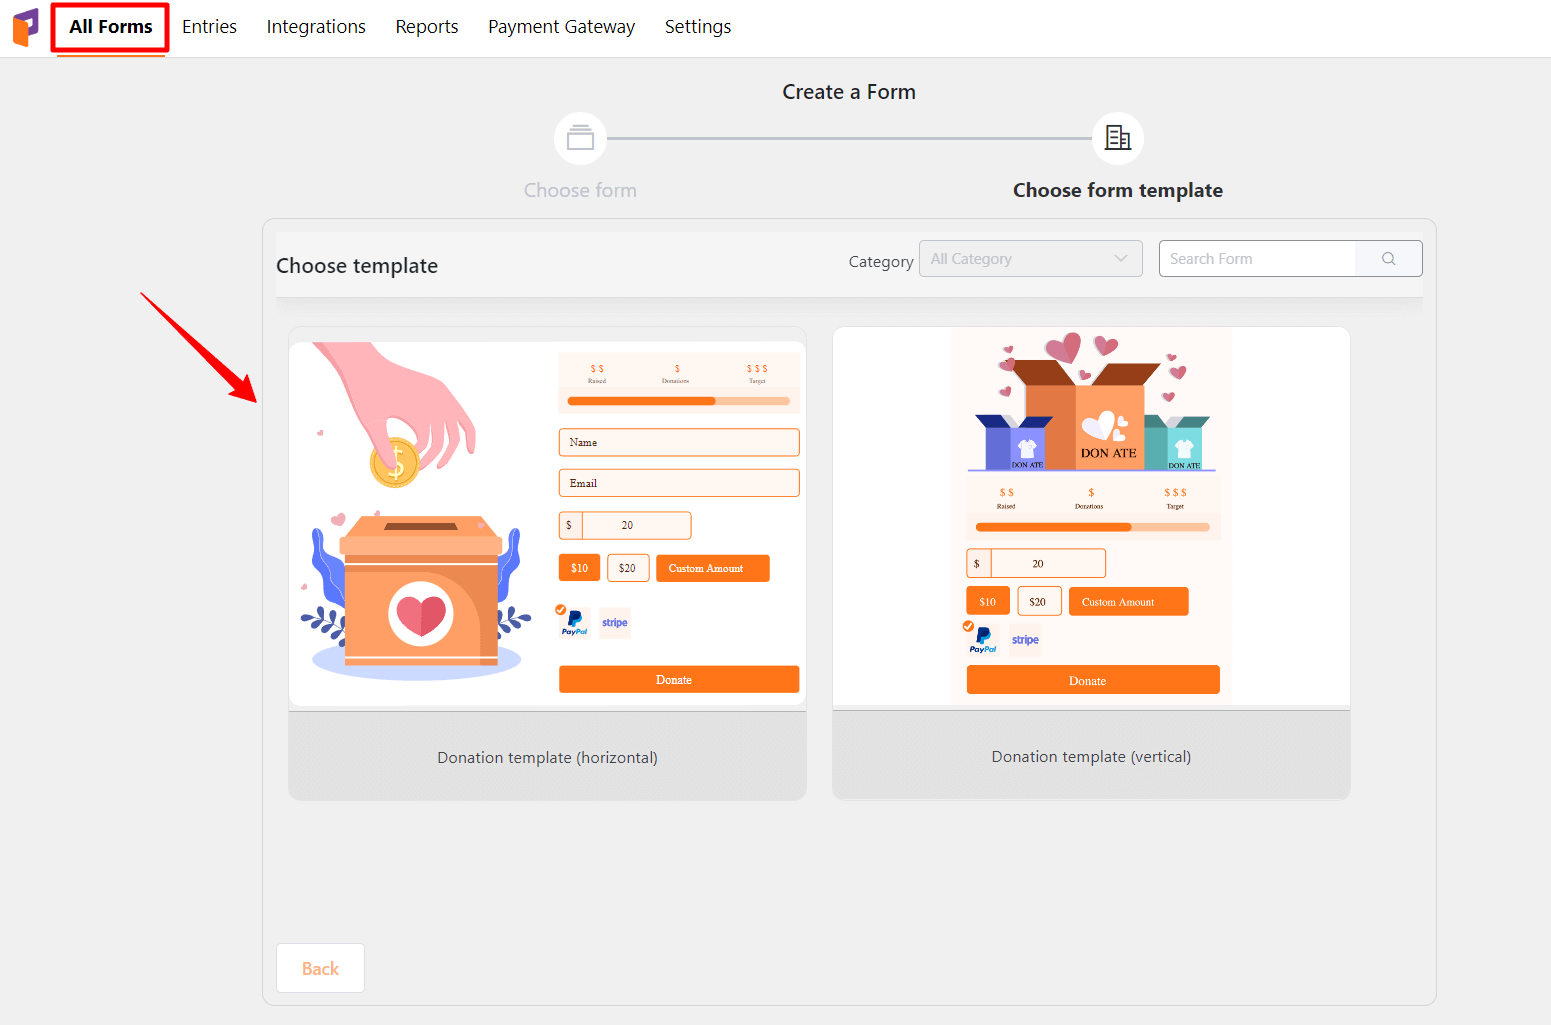
- Then you’ll be taken to a page with Donation Templates (Horizontal) and Donation Templates (Vertical). Choose a template that meets your requirements, and then proceed to the following step.

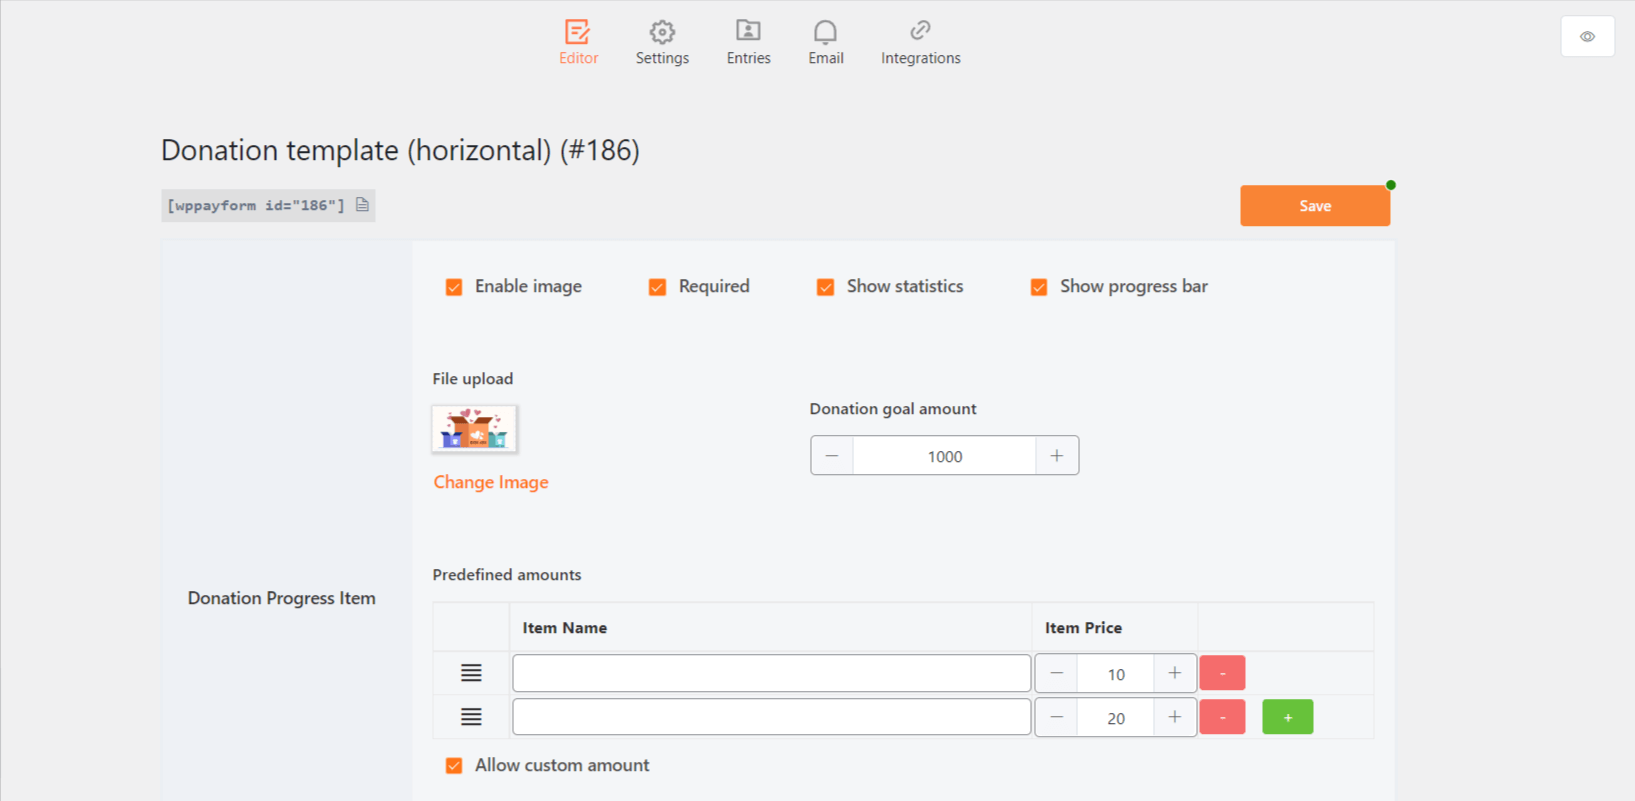
- Now, a ready template will show up.
Here, four options are available such as Enable Image, Required, Show Statistics & Show Progress bar.
- Enable Image: If you want to show the image in the frontend, you can select this option.
- Required: You can make the field mandatory by selecting this option.
- Show Statistics: Select this field if you want to show the statistics in the frontend.
- Show Progress bar: Select this option to show the progress bar on the form’s preview.

- Choose an image to upload the file & in Donation Goal Amount, you can increase or decrease the goal amount.
- Donation Progress Item: Item Name & Item Price these two are predefined amounts that you can put their value according to your needs. You can also use multiple items at once.
- Allow Custom Amount: If you Enable this option, donors can customize their amount according to their requirements.
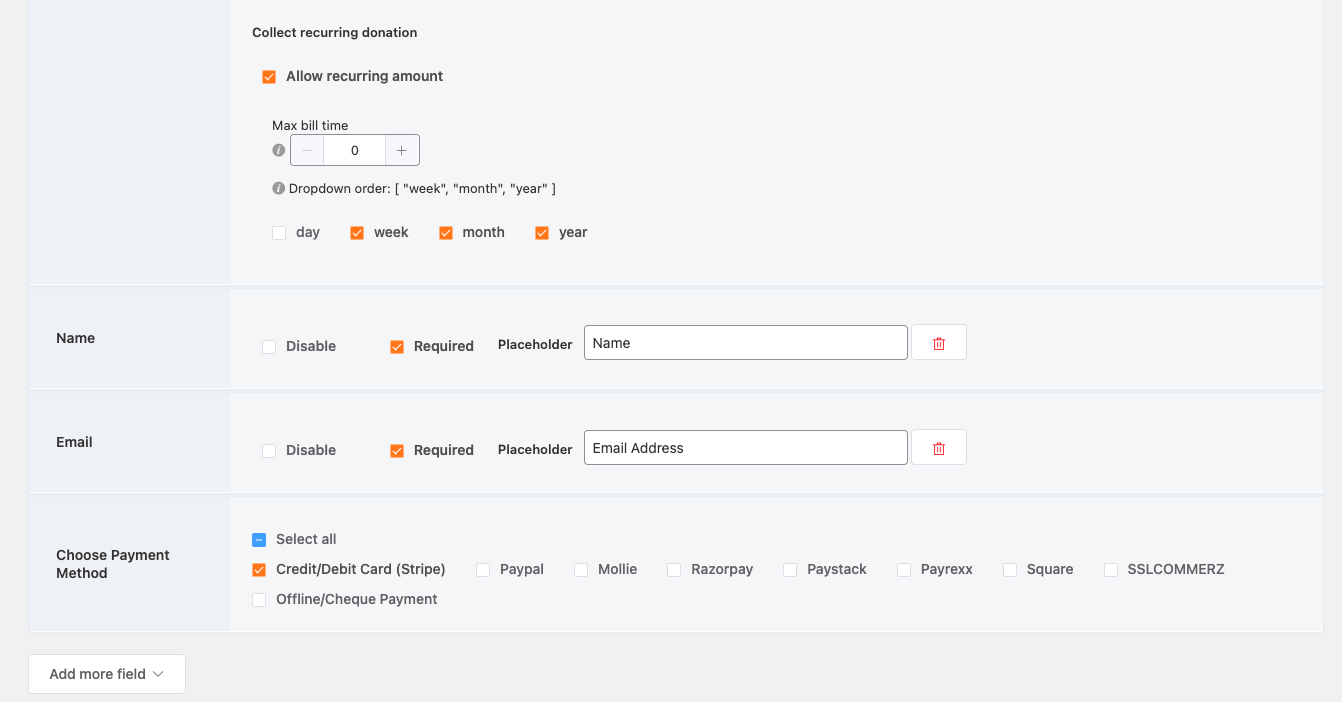
- Collect Recurring Donations: When you enable Allow Recurring Amount, donors can choose to make a continuing donation to your organization on a daily/weekly/monthly/yearly basis rather than a one-time gift.
- You can keep 0 for unlimited recurring donations in the option Max bill time, also, you can check by the order which will follow that order on the frontend in the Dropdown order option.
- You can add the default fields (For instance, Name & Email field) to show this in the frontend; you may add extra fields by using the Add more field dropdown menu.

- You can also choose the Payment Method which meets your needs. There are eight Payment methods available online as well as you can choose offline or cheque payment.
- Don’t forget to click on the Save button when your customization is done.
Let’s have a look at the preview of how it works!

That is as simple as you can create & customize your Simple Form Templates by following some easy steps.


