
IPN (Instant Payment Notification) is a post-message notification sent by PayPal after a successful transaction for standard merchant accounts, containing all the payment transaction details. Setting up PayPal IPN with Paymattic allows you to receive Instant Payment Notifications from PayPal. This article will through the process of setting up the PayPal IPN in your WordPress Site Paymattic.
Remember, to get access to the PayPal payment gateway, you need the Paymattic Pro Plugin.
Setting Up PayPal IPN #
To learn how to set up IPN with Paymattic, follow the steps with the screenshots below –
Get the URL from the PayPal Settings #
First, go to Payment Gateway from the Paymattic Navbar, click the PayPal tab from the left sidebar, and the PayPal Settings page will open.
Now, scroll down to PayPal for Recurring Payments option and copy the URL by clicking the Copy button.
To learn more about the PayPal Configuration Process, read this Documentation.

Set up PayPal IPN Using Copied URL #
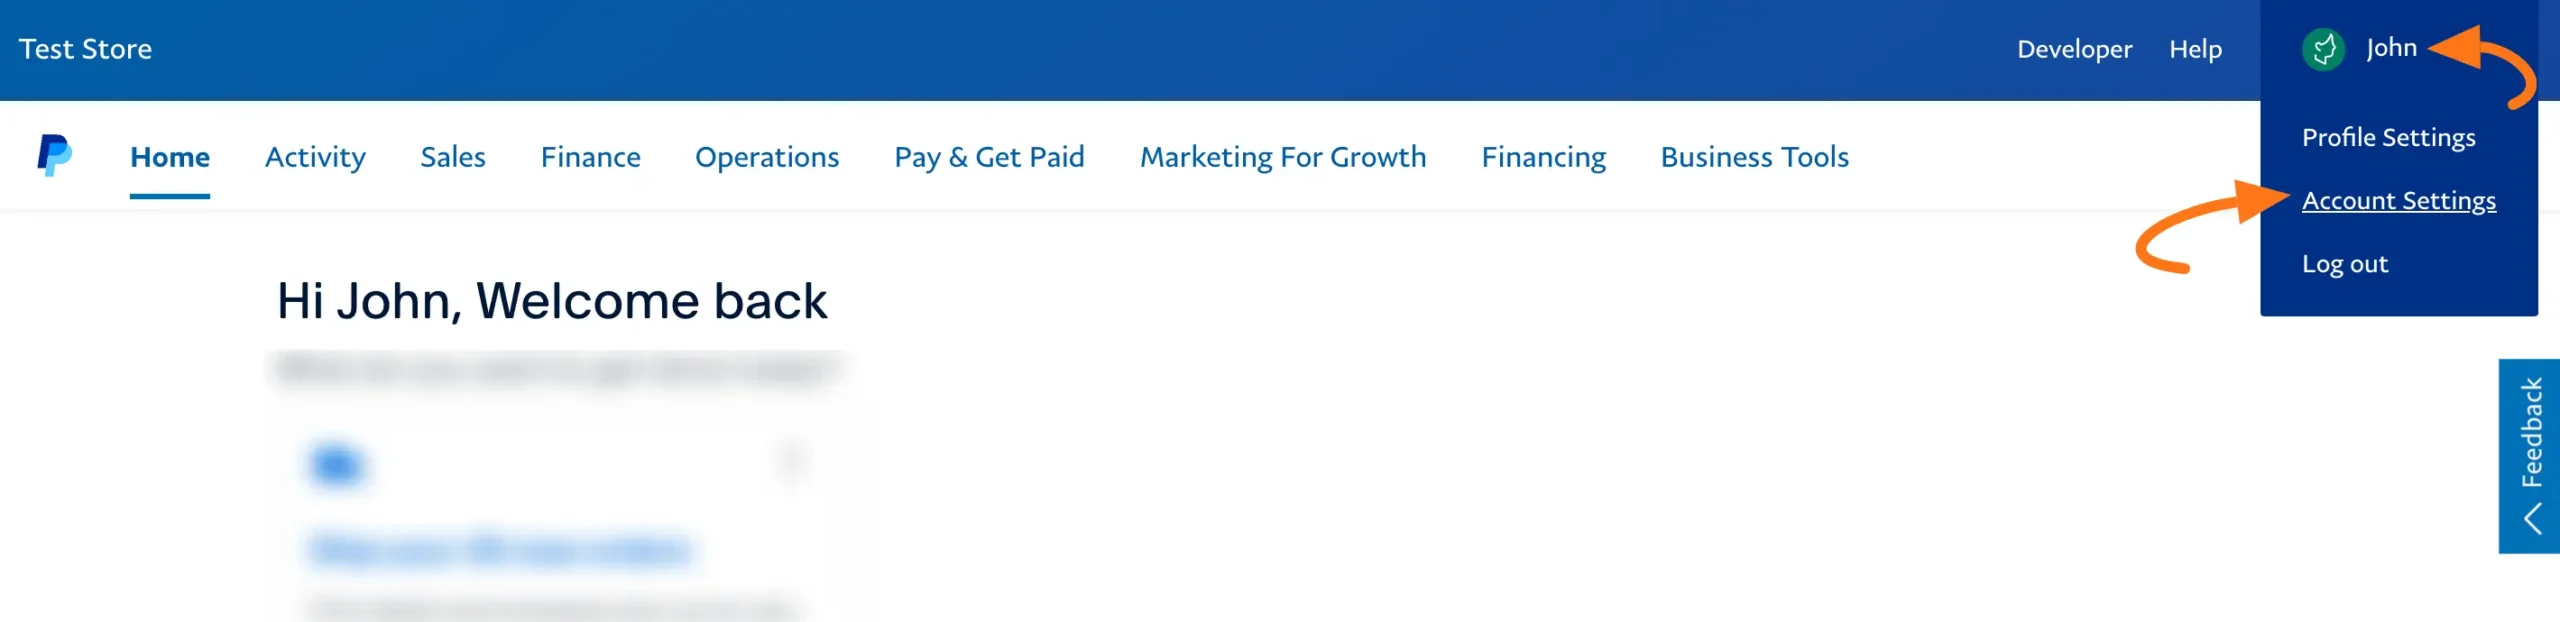
Now, login to your PayPal Business Account, hover over the Profile Icon and click the Account Settings option.
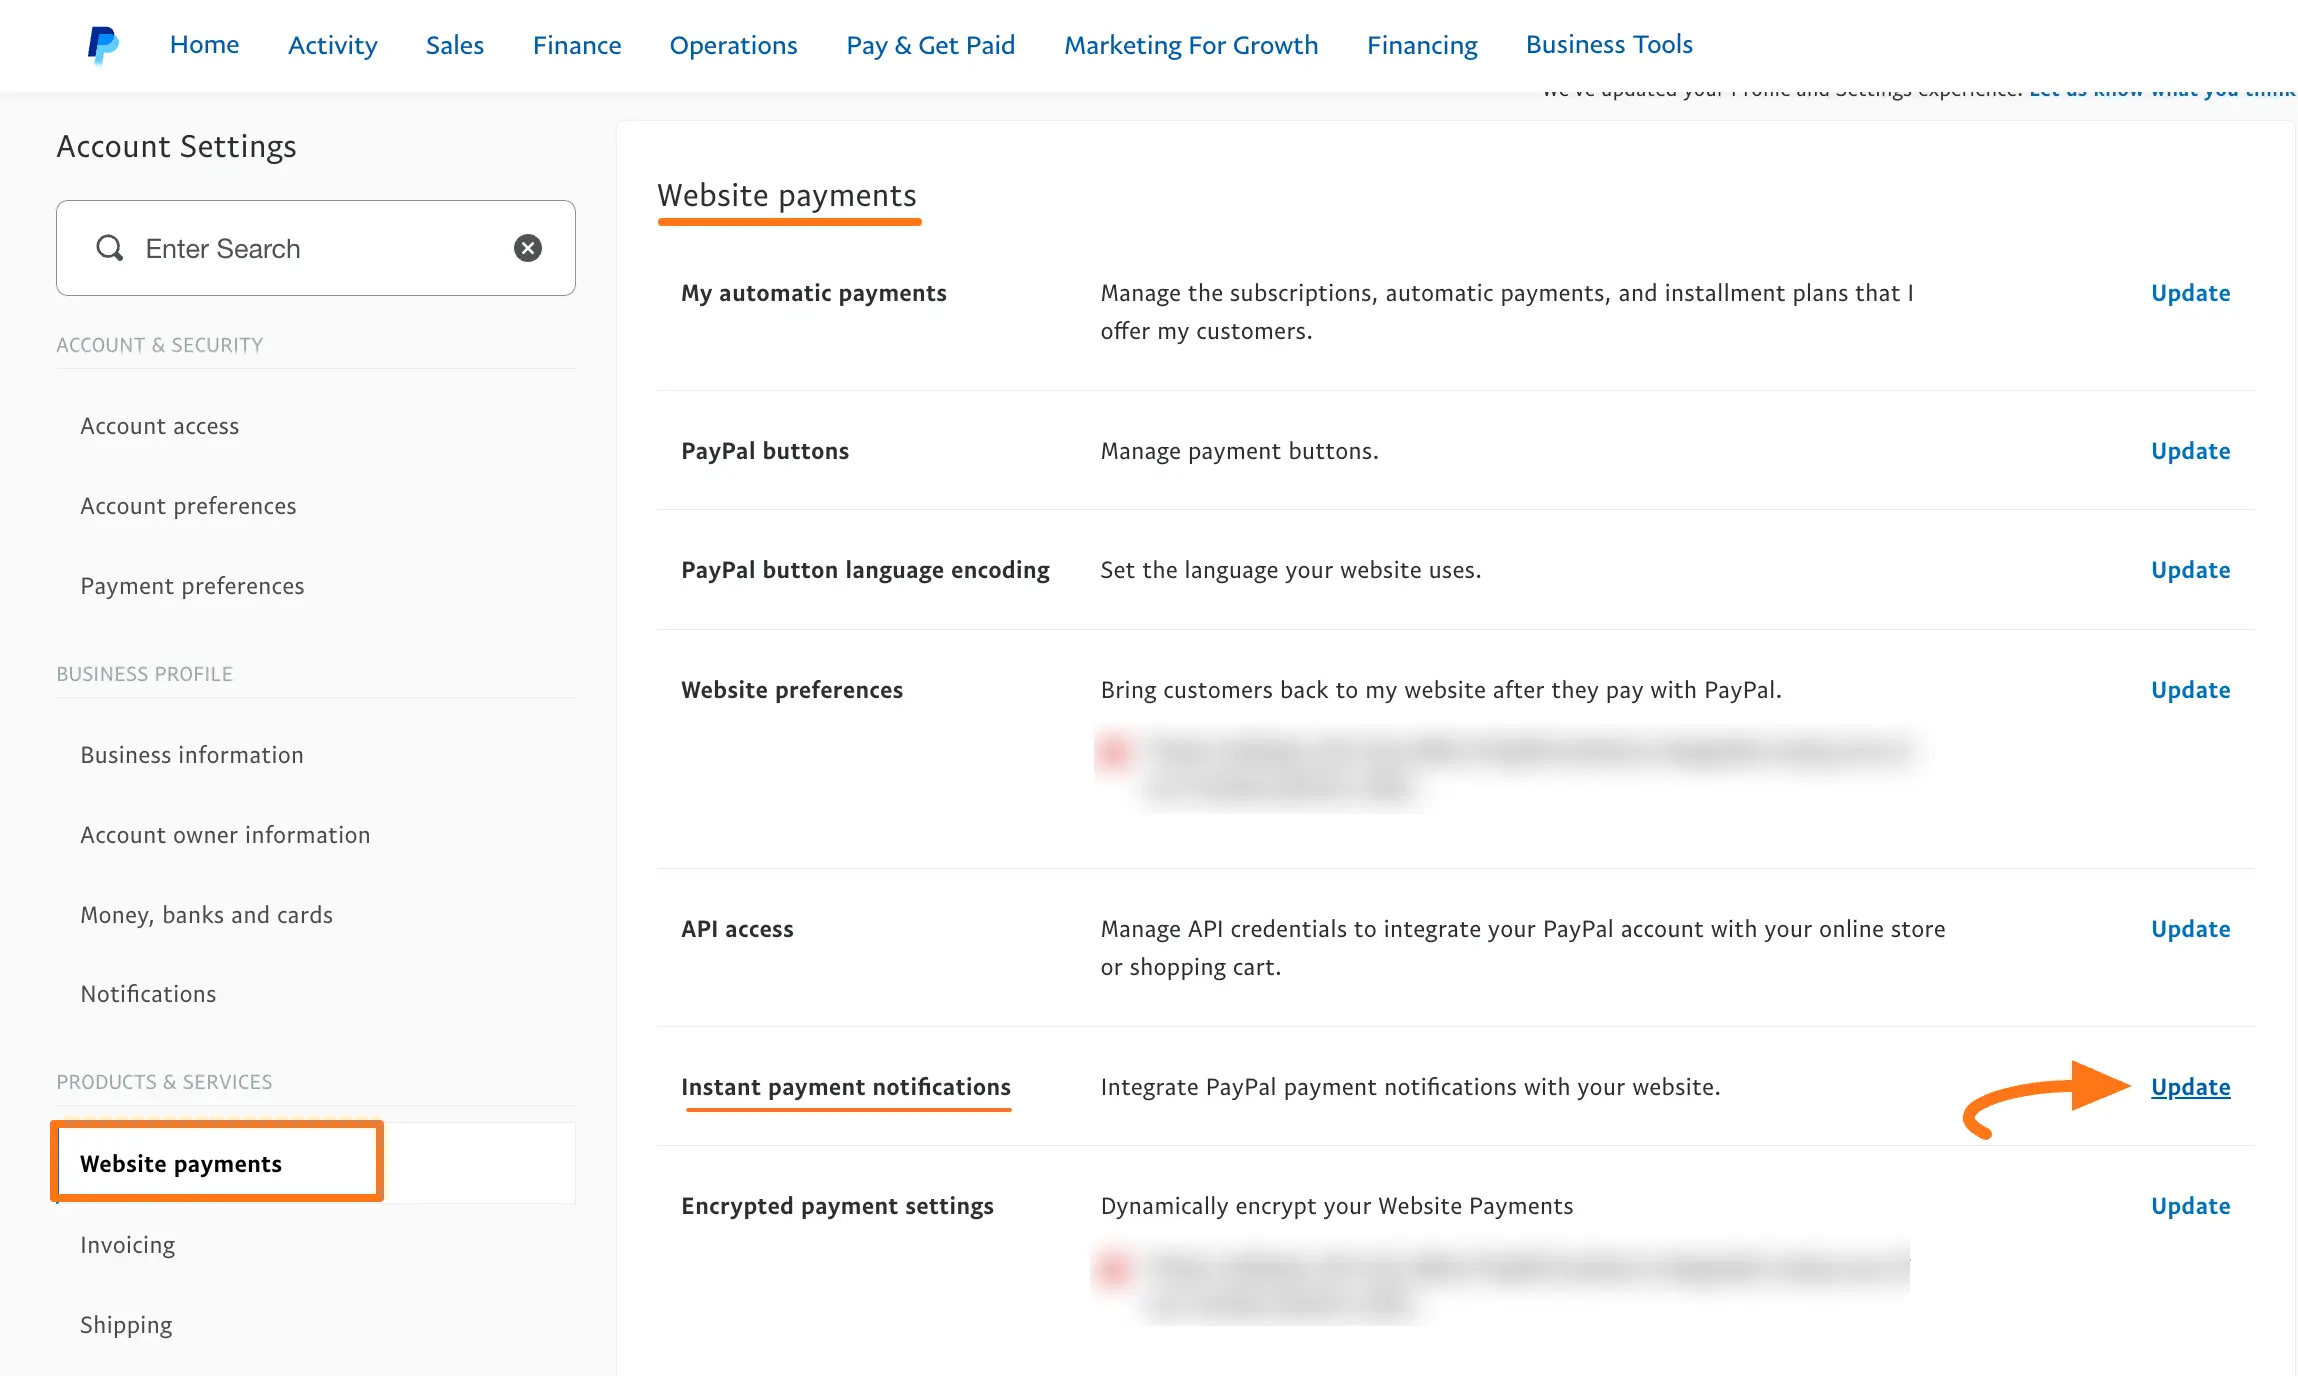
Then, scroll down and open the Website Payments tab. Go to Instant Payment Notifications and click the Update link.
Click the Edit Settings button to set up your IPN notification.

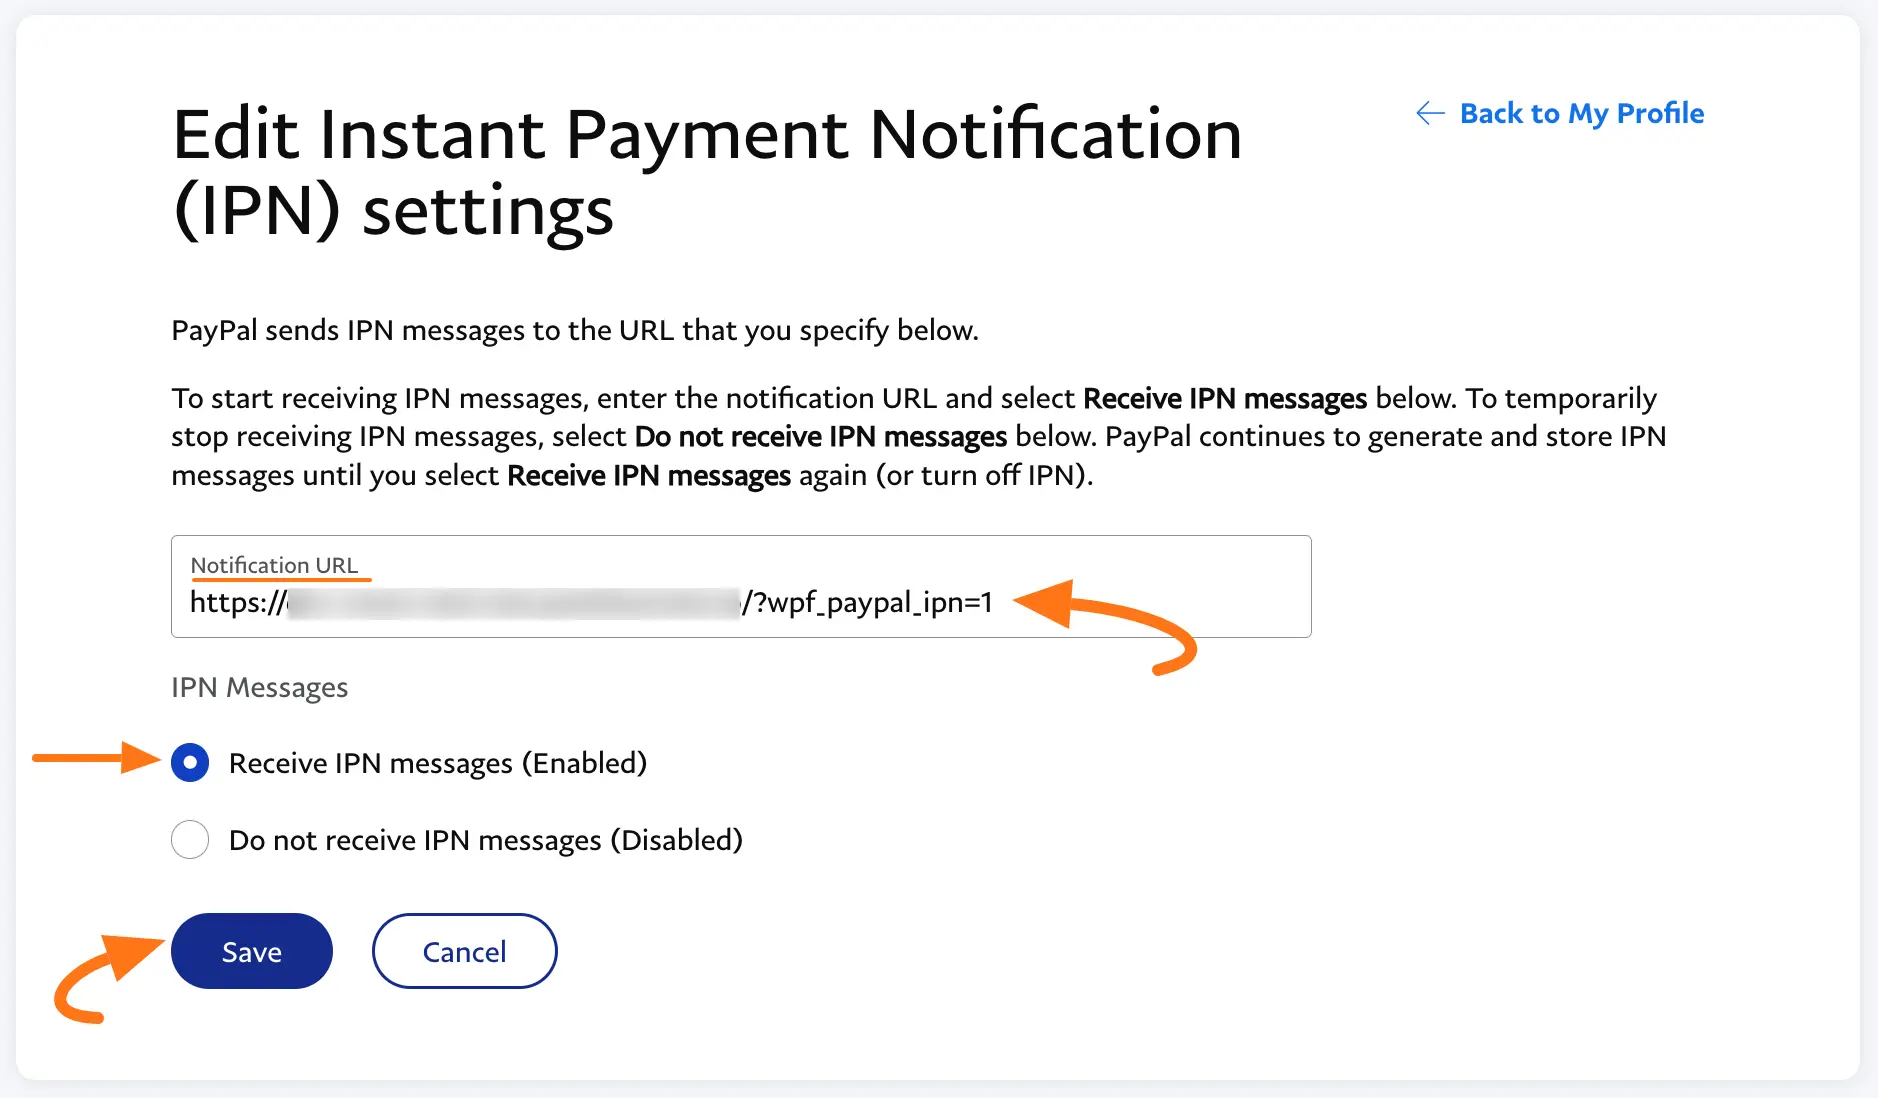
Finally, paste the URL into the Notification URL field that you copied from the Paypal Settings page under the Payment Gateway section.
After entering your Notification URL, select Receive IPN messages (Enabled) to activate the IPN messages for users.
Once you are done, click the Save button to confirm the setup.
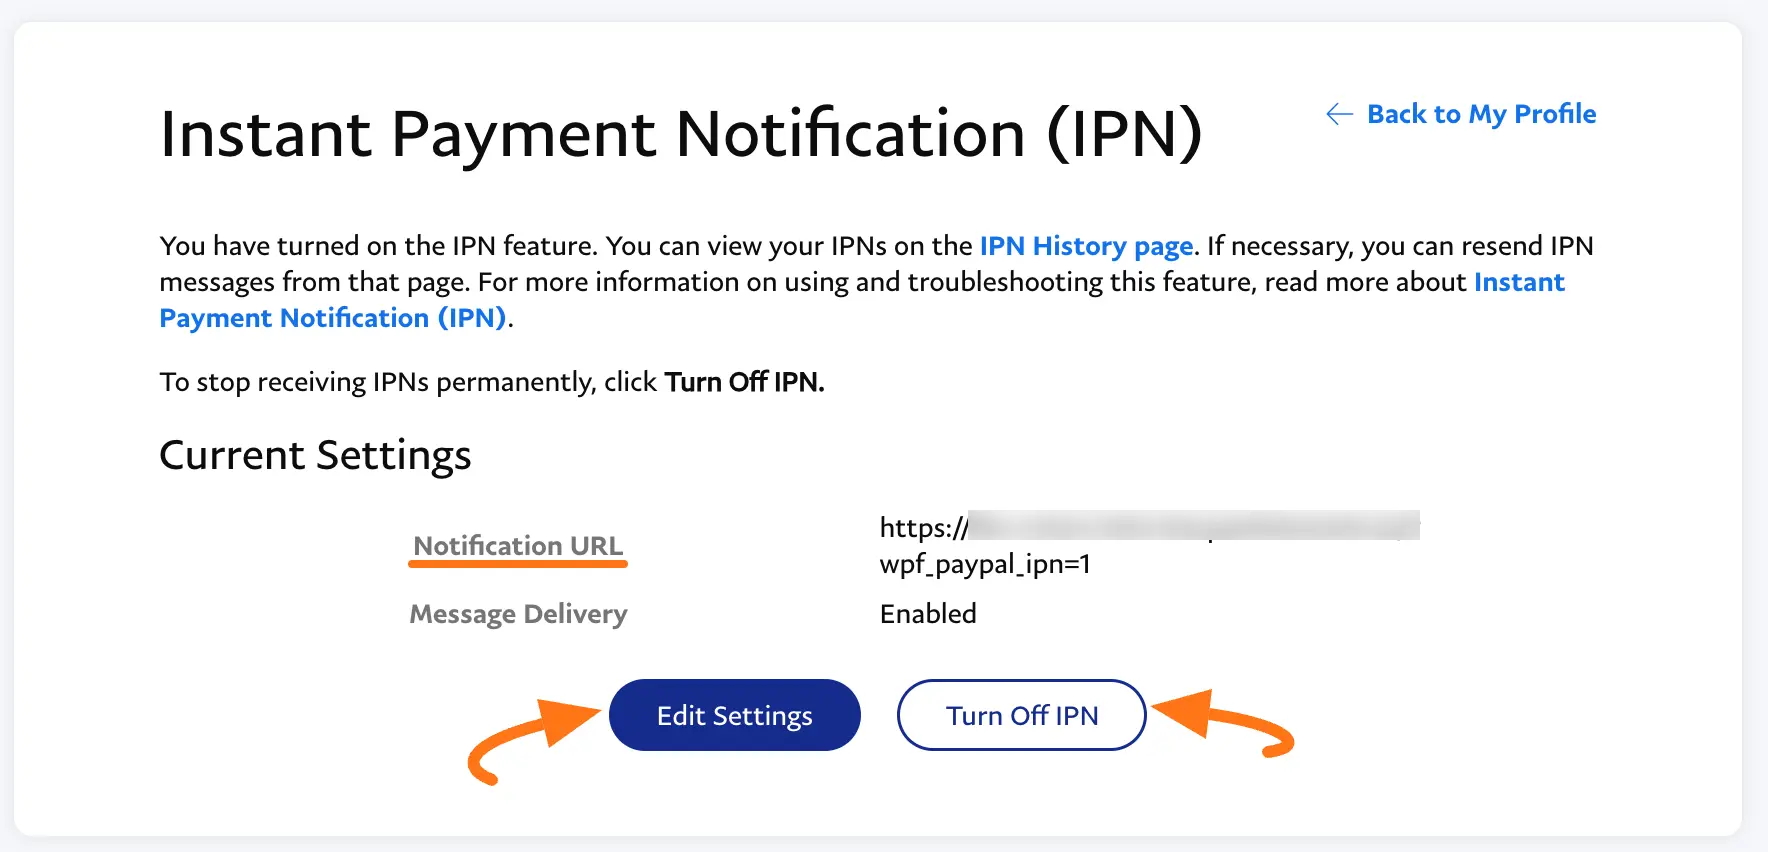
Here, you can see the notification URL is updated and the IPN is enabled for your site.
Also, you can modify your notification URL anytime by clicking the Edit Settings button.
Plus, if you want to disable the PayPal IPN, simply click the Turn Off IPN button.
This is how you can set PayPal IPN with Paymattic by following a few steps!
If you have any further questions, concerns, or suggestions, please do not hesitate to contact our @support team. Thank you.


