
Billplz is a payment gateway platform for organizations to pay and get paid the fastest at the lowest cost possible. This article will guide you through configuring Billplzz on your WordPress Site with the Paymattic plugin.
Remember, to get access to the Billplz payment gateway, you need the Paymattic Pro Plugin.
Configuring Billplz Payment Method #
To learn how to configure the Billplz payment gateway through Paymattic, follow the steps with screenshots below –
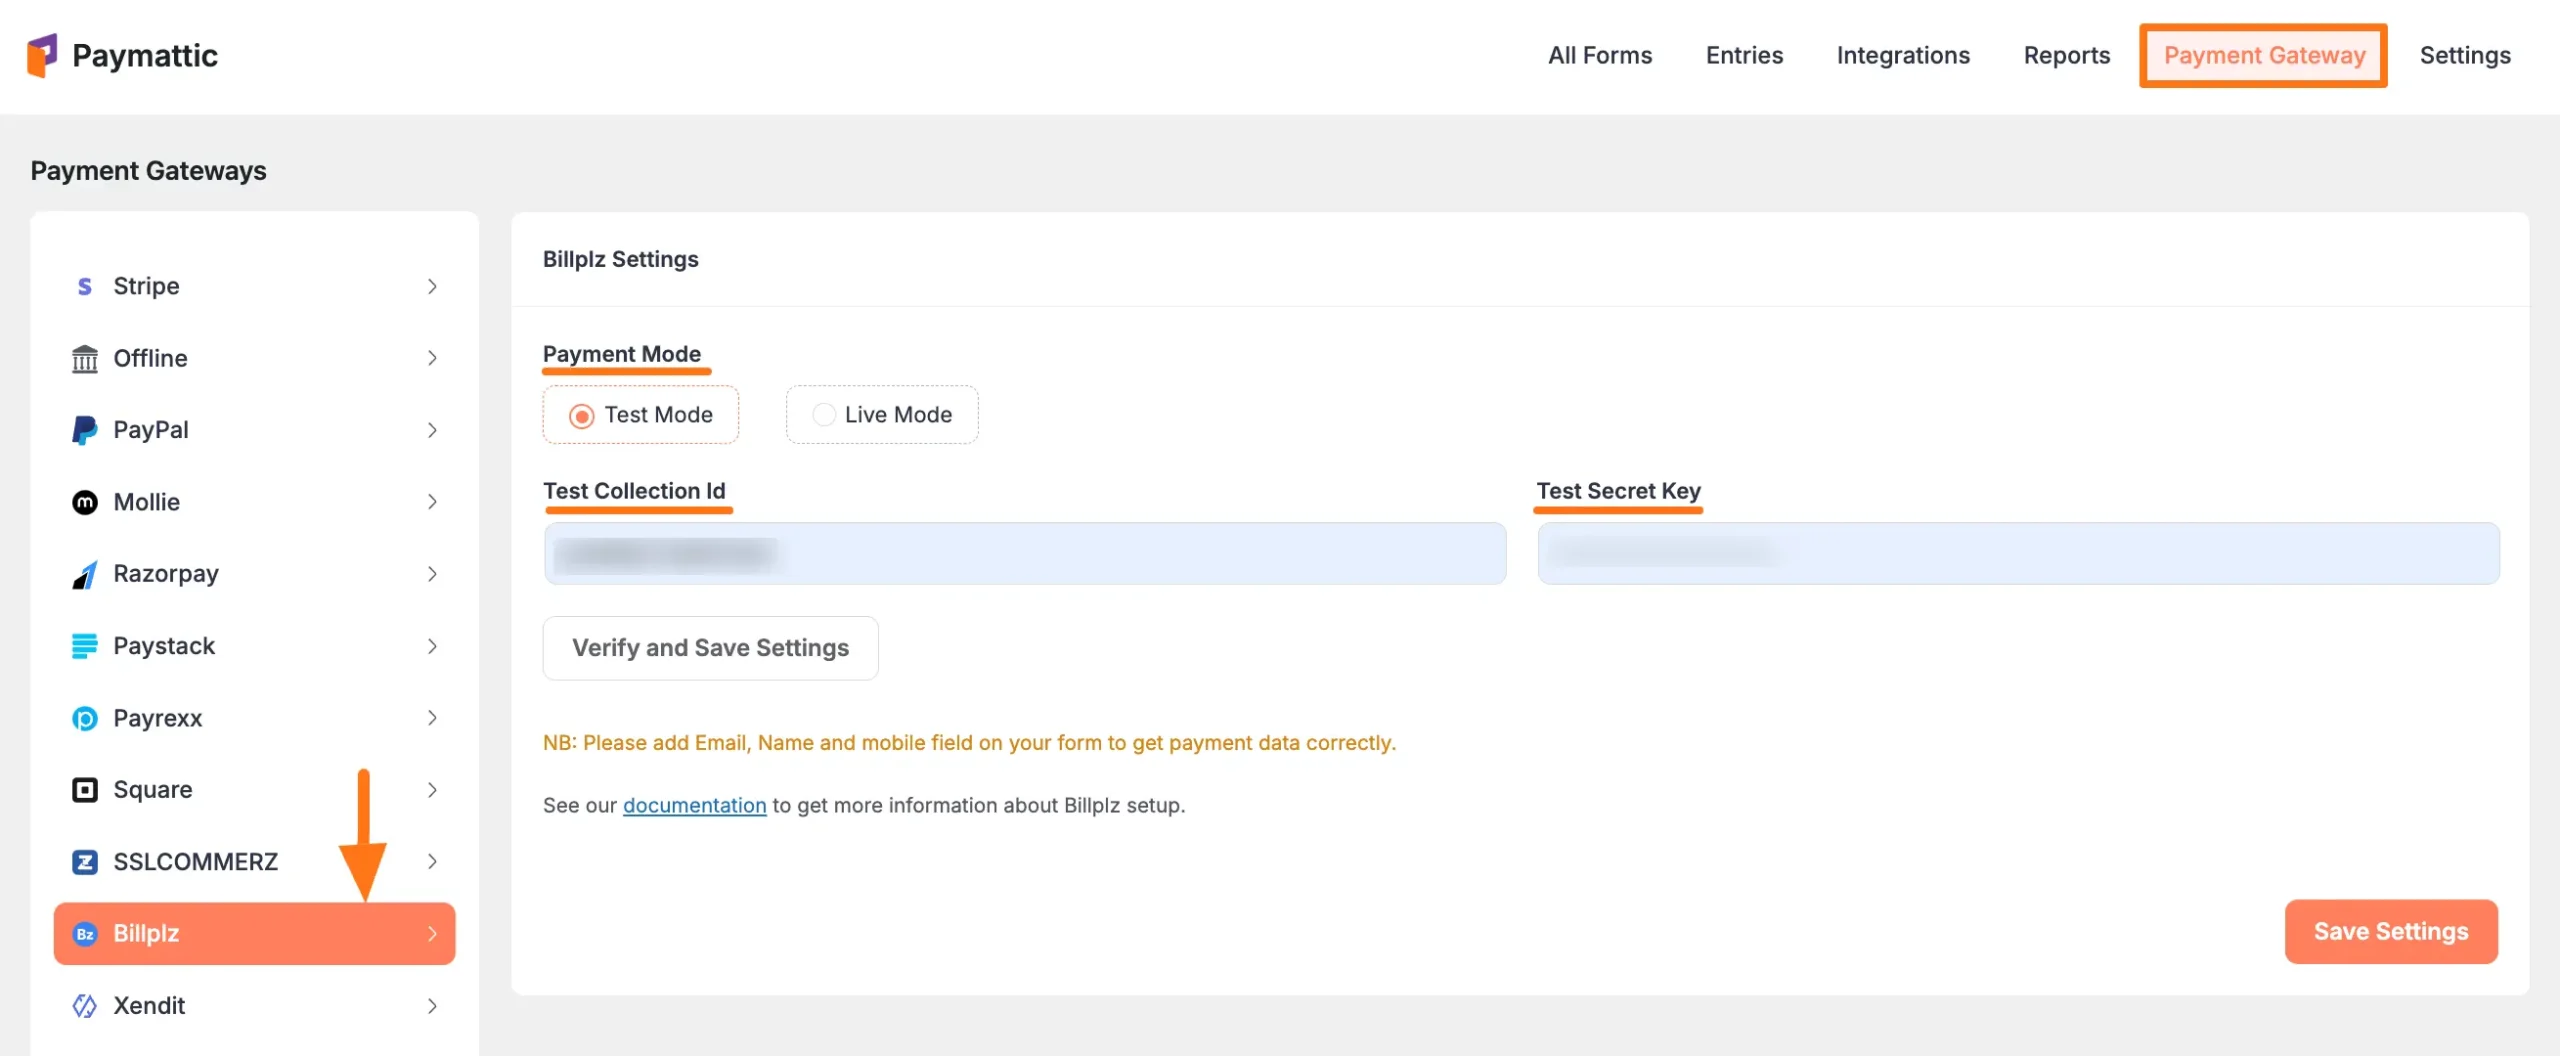
First, go to Payment Gateway from the Paymattic Navbar, click the Billplz tab from the left sidebar, and the Billplz Settings page will open.
Select any Payment Mode between Test (for test payments) and Live ( for real payments) as both options follow the same configuration process, e.g., I choose the Test Mode.
Then, you need to obtain the Collection ID and Secret Key from your Billplz Account.
Get the Collection ID and Secret key from Billplz #
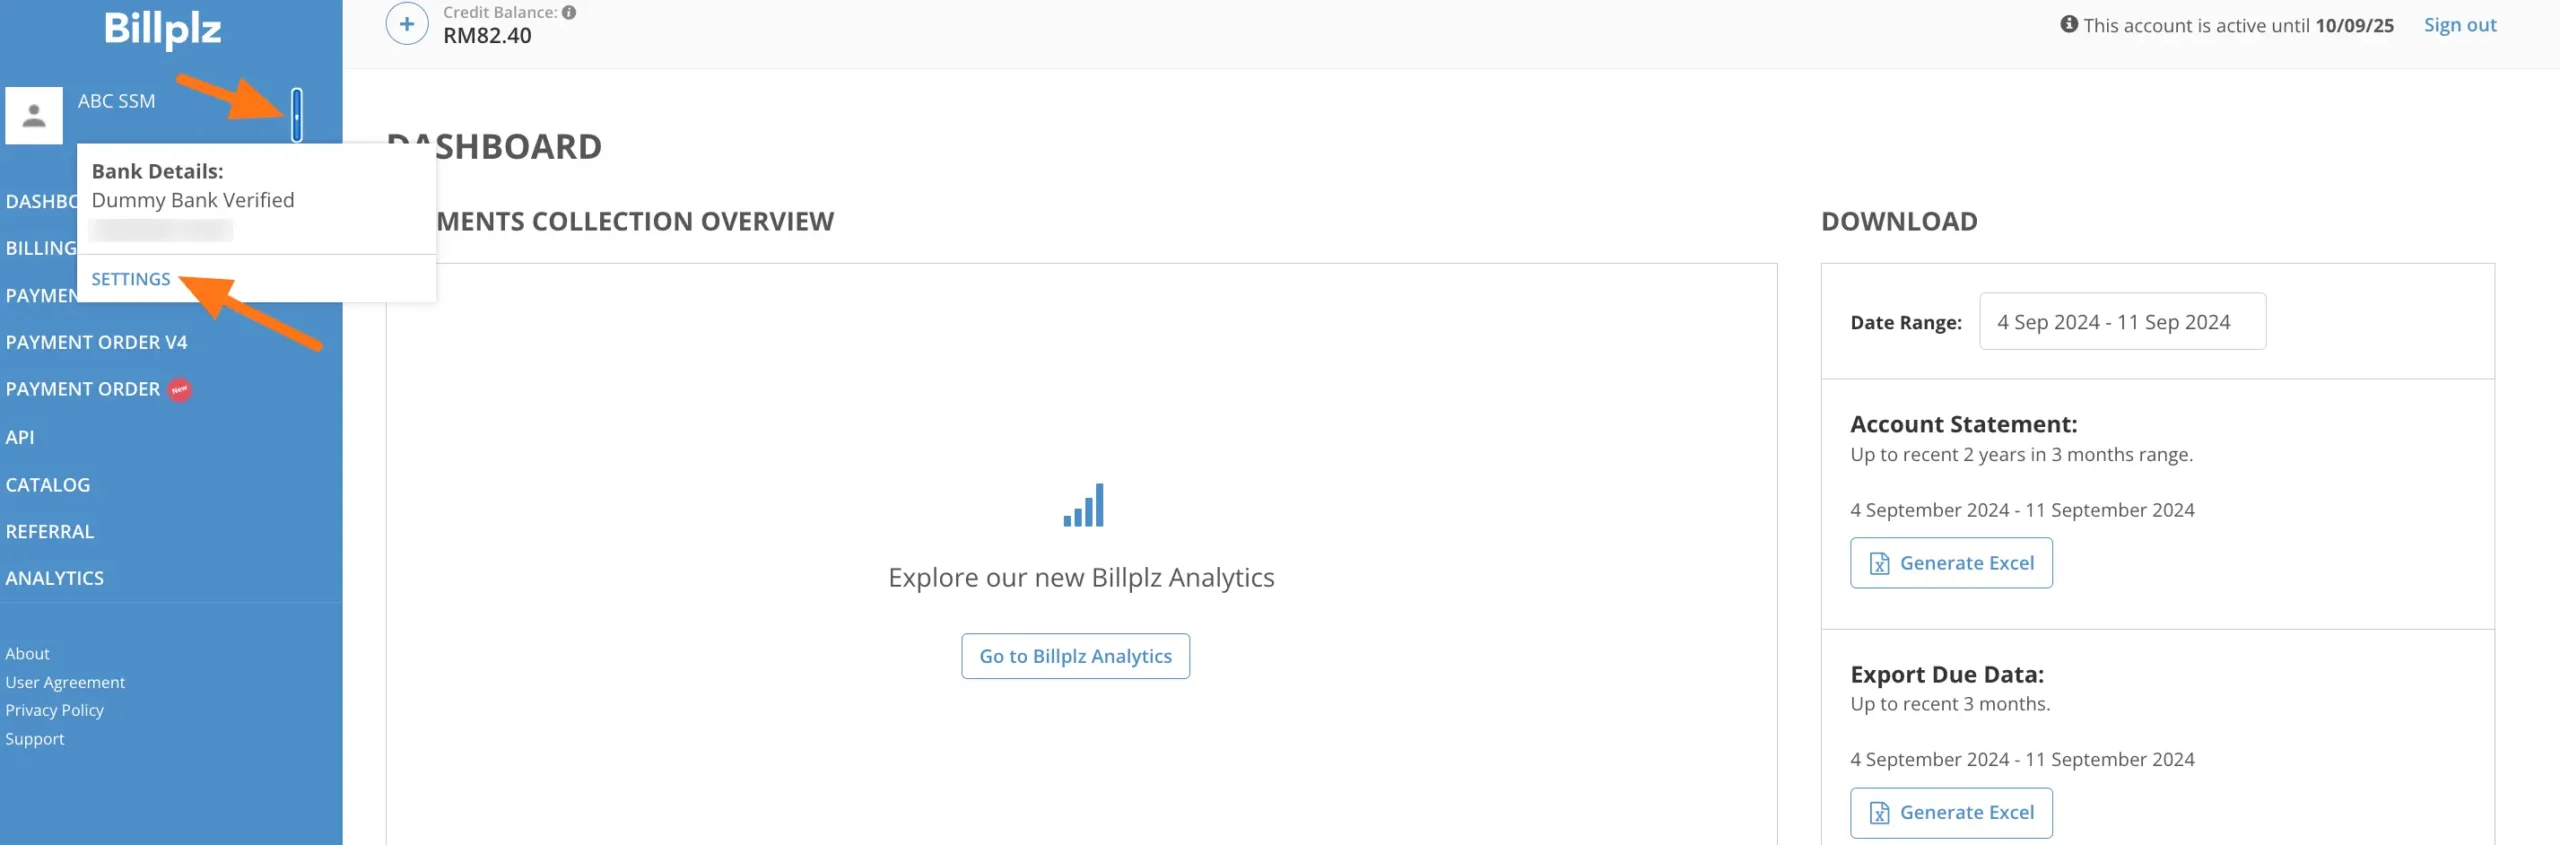
First, log in to your Billplz Account. If you do not have an account, sign up from here.
Once you log in to the Billplz Dashboard, click the Dropdown Arrow, and open the Settings section from the left sidebar.
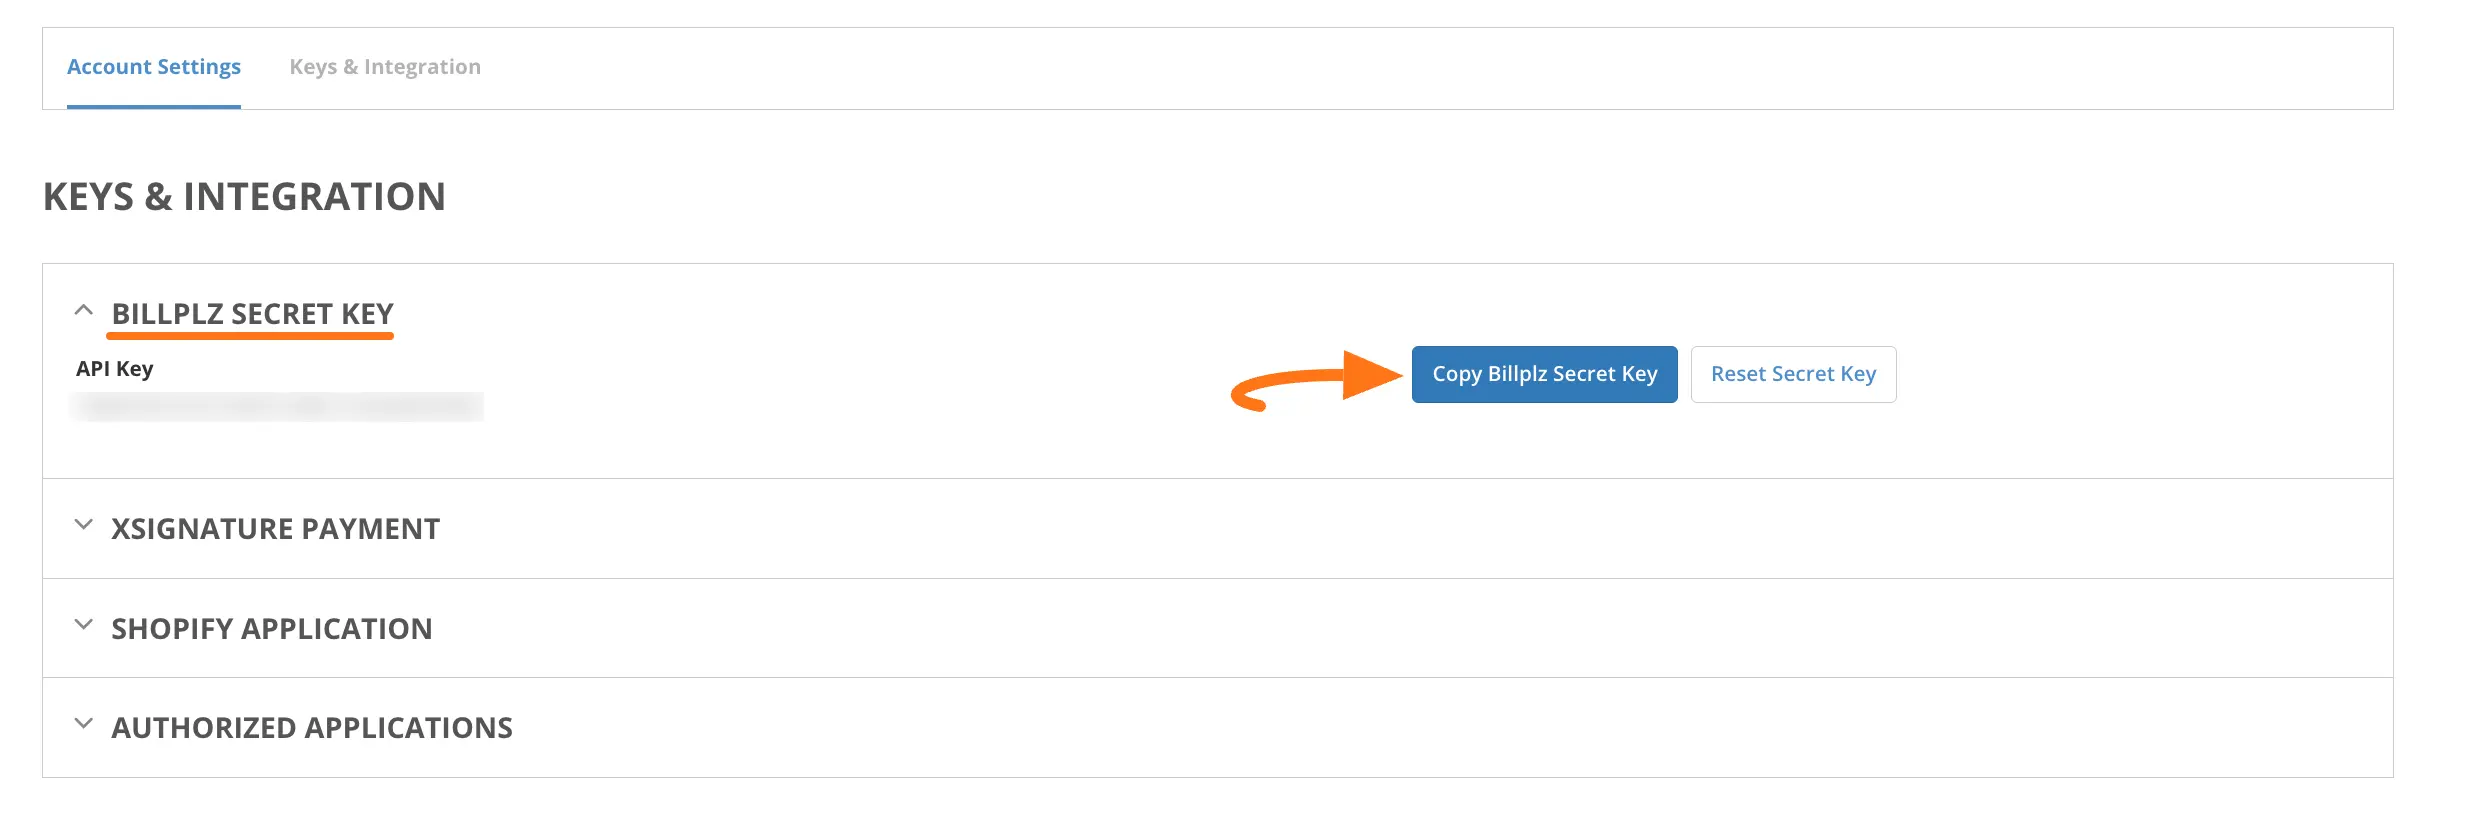
Now, scroll down to the Keys & Integration tab, expand the BILLPLZ SECRET KEY option, and you will get your Secret key. Simply, copy it.
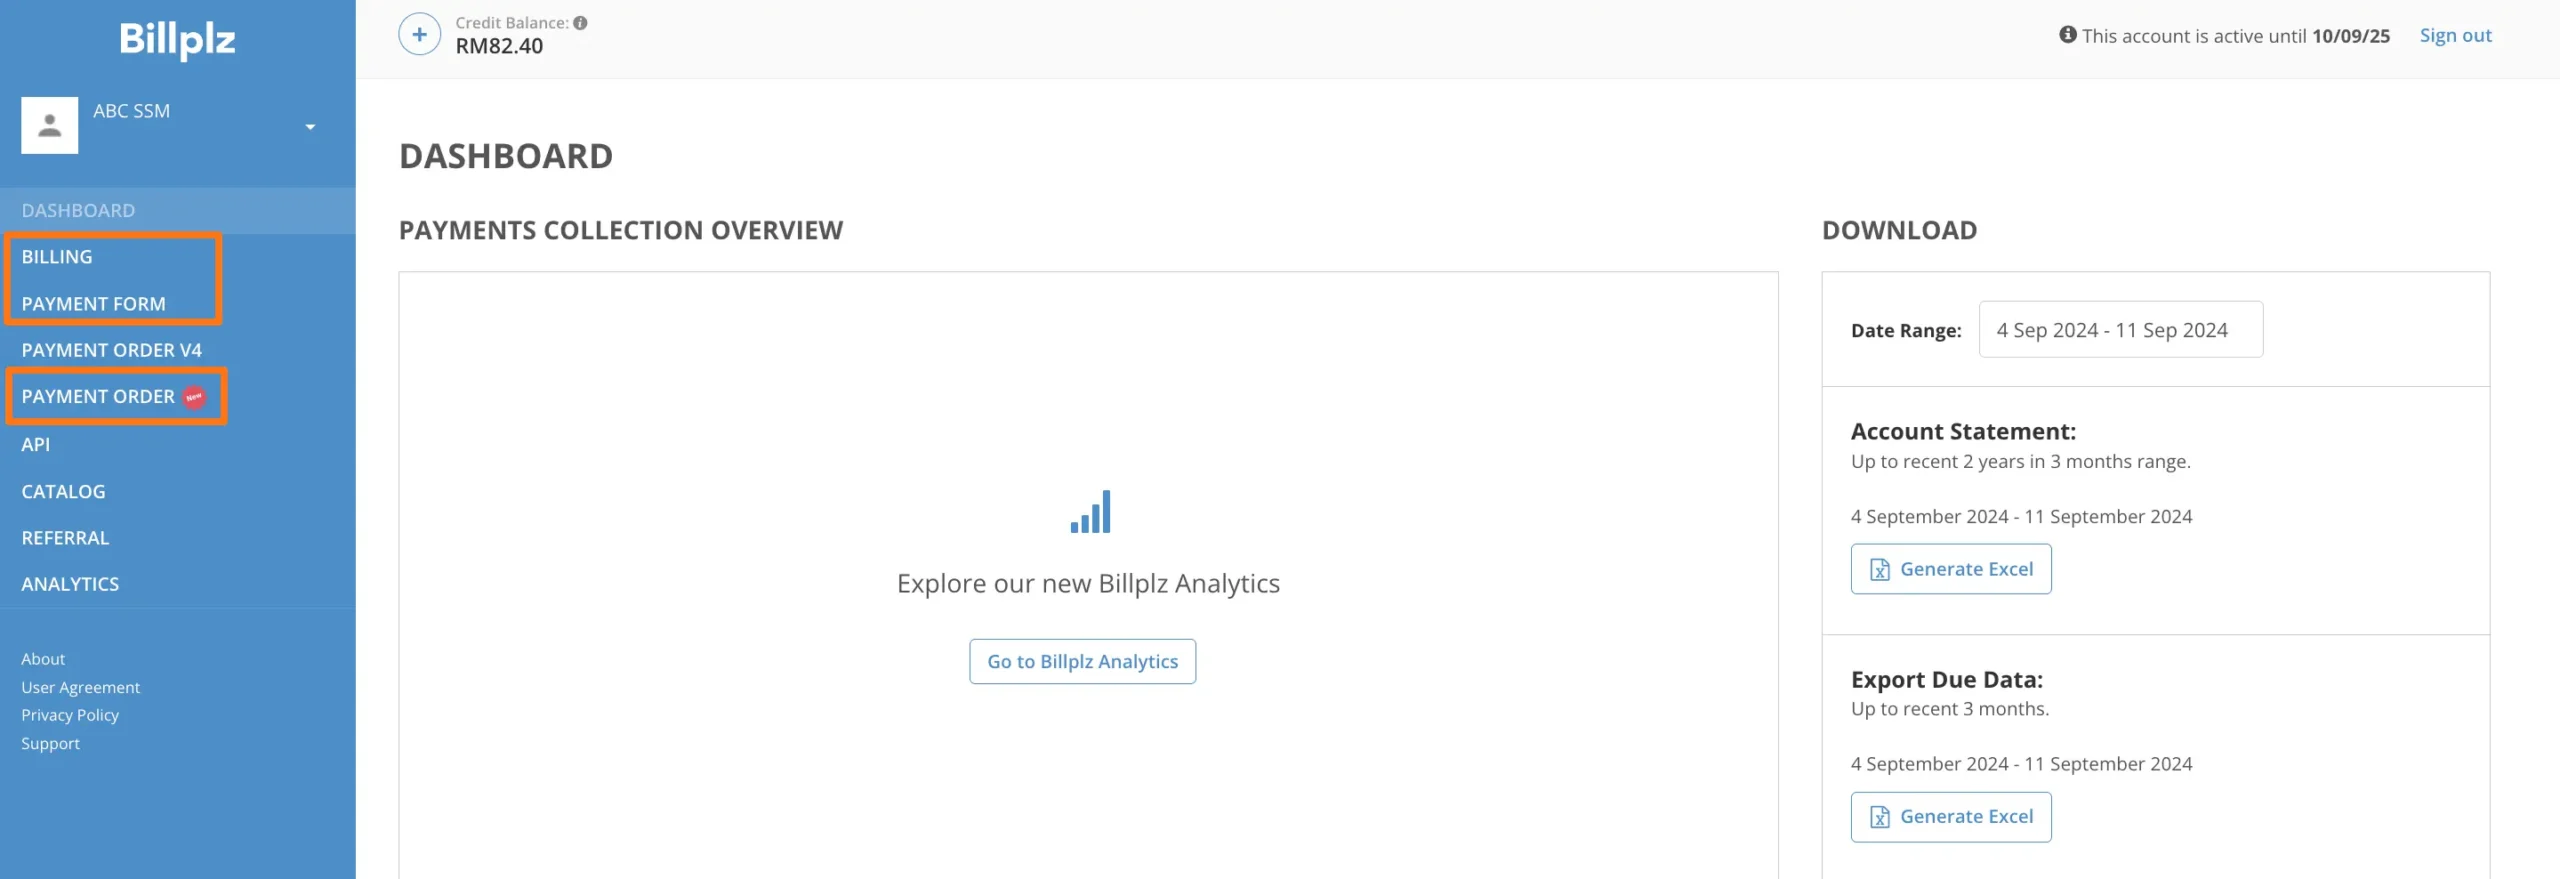
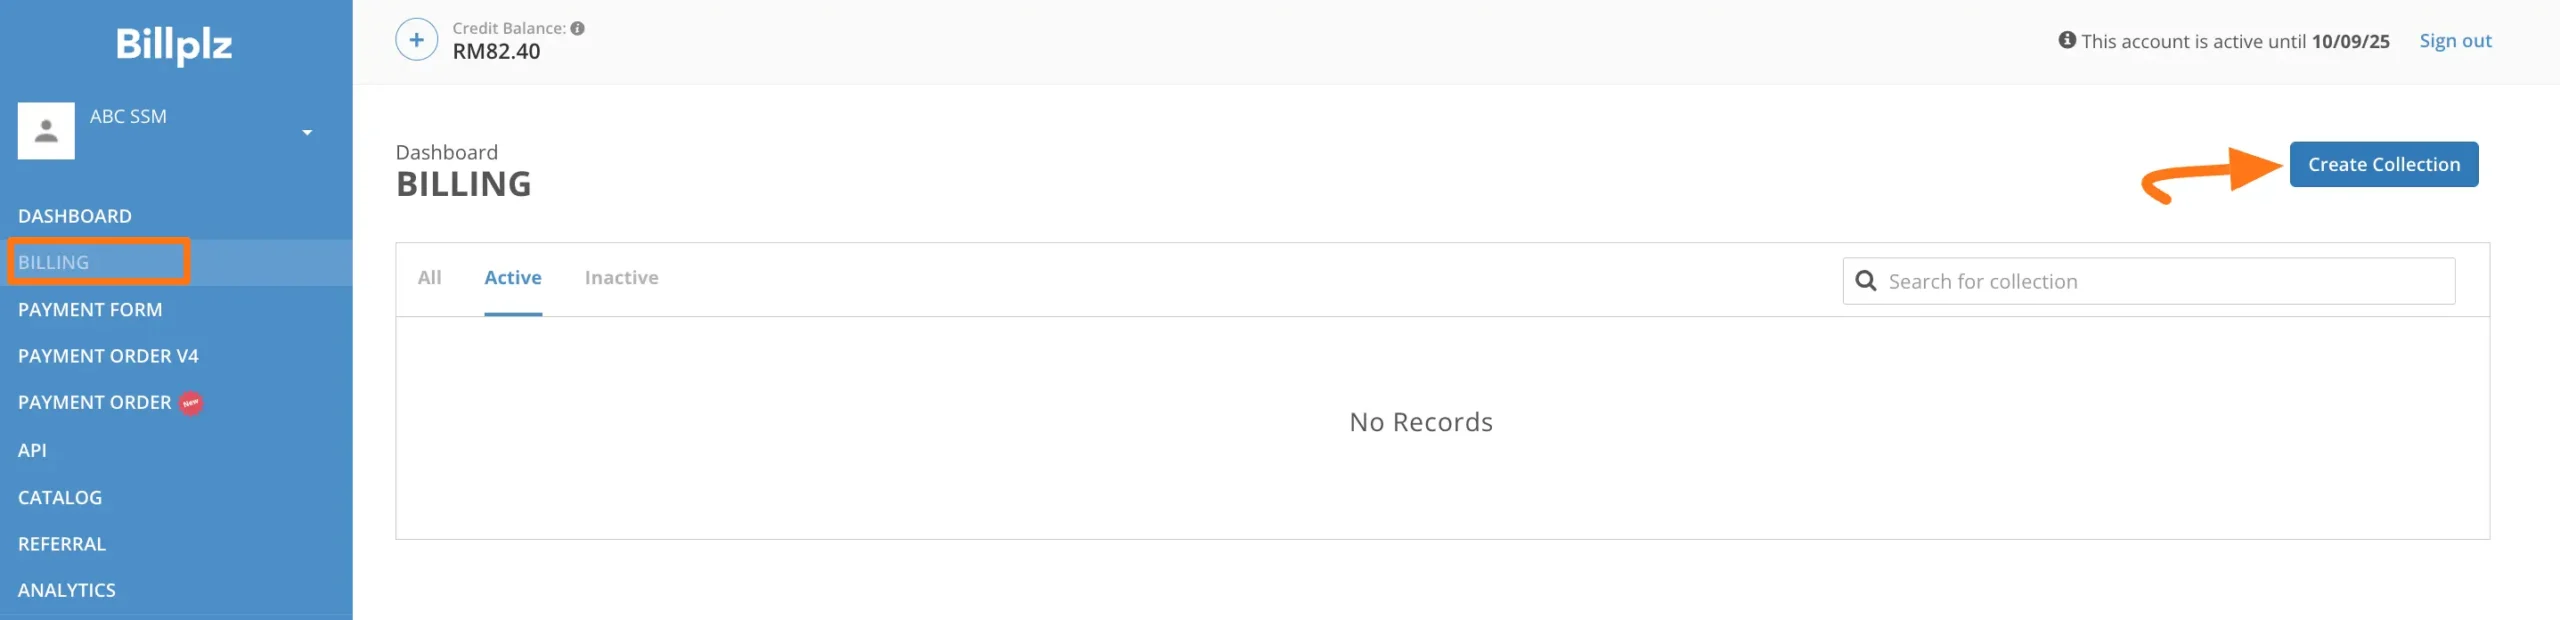
To get the Collection ID, go to the Billing/Payment Form/Payment Order New option in the left sidebar, I choose the Billing option to create a new Collection ID.
Now, click the Create Collection button.
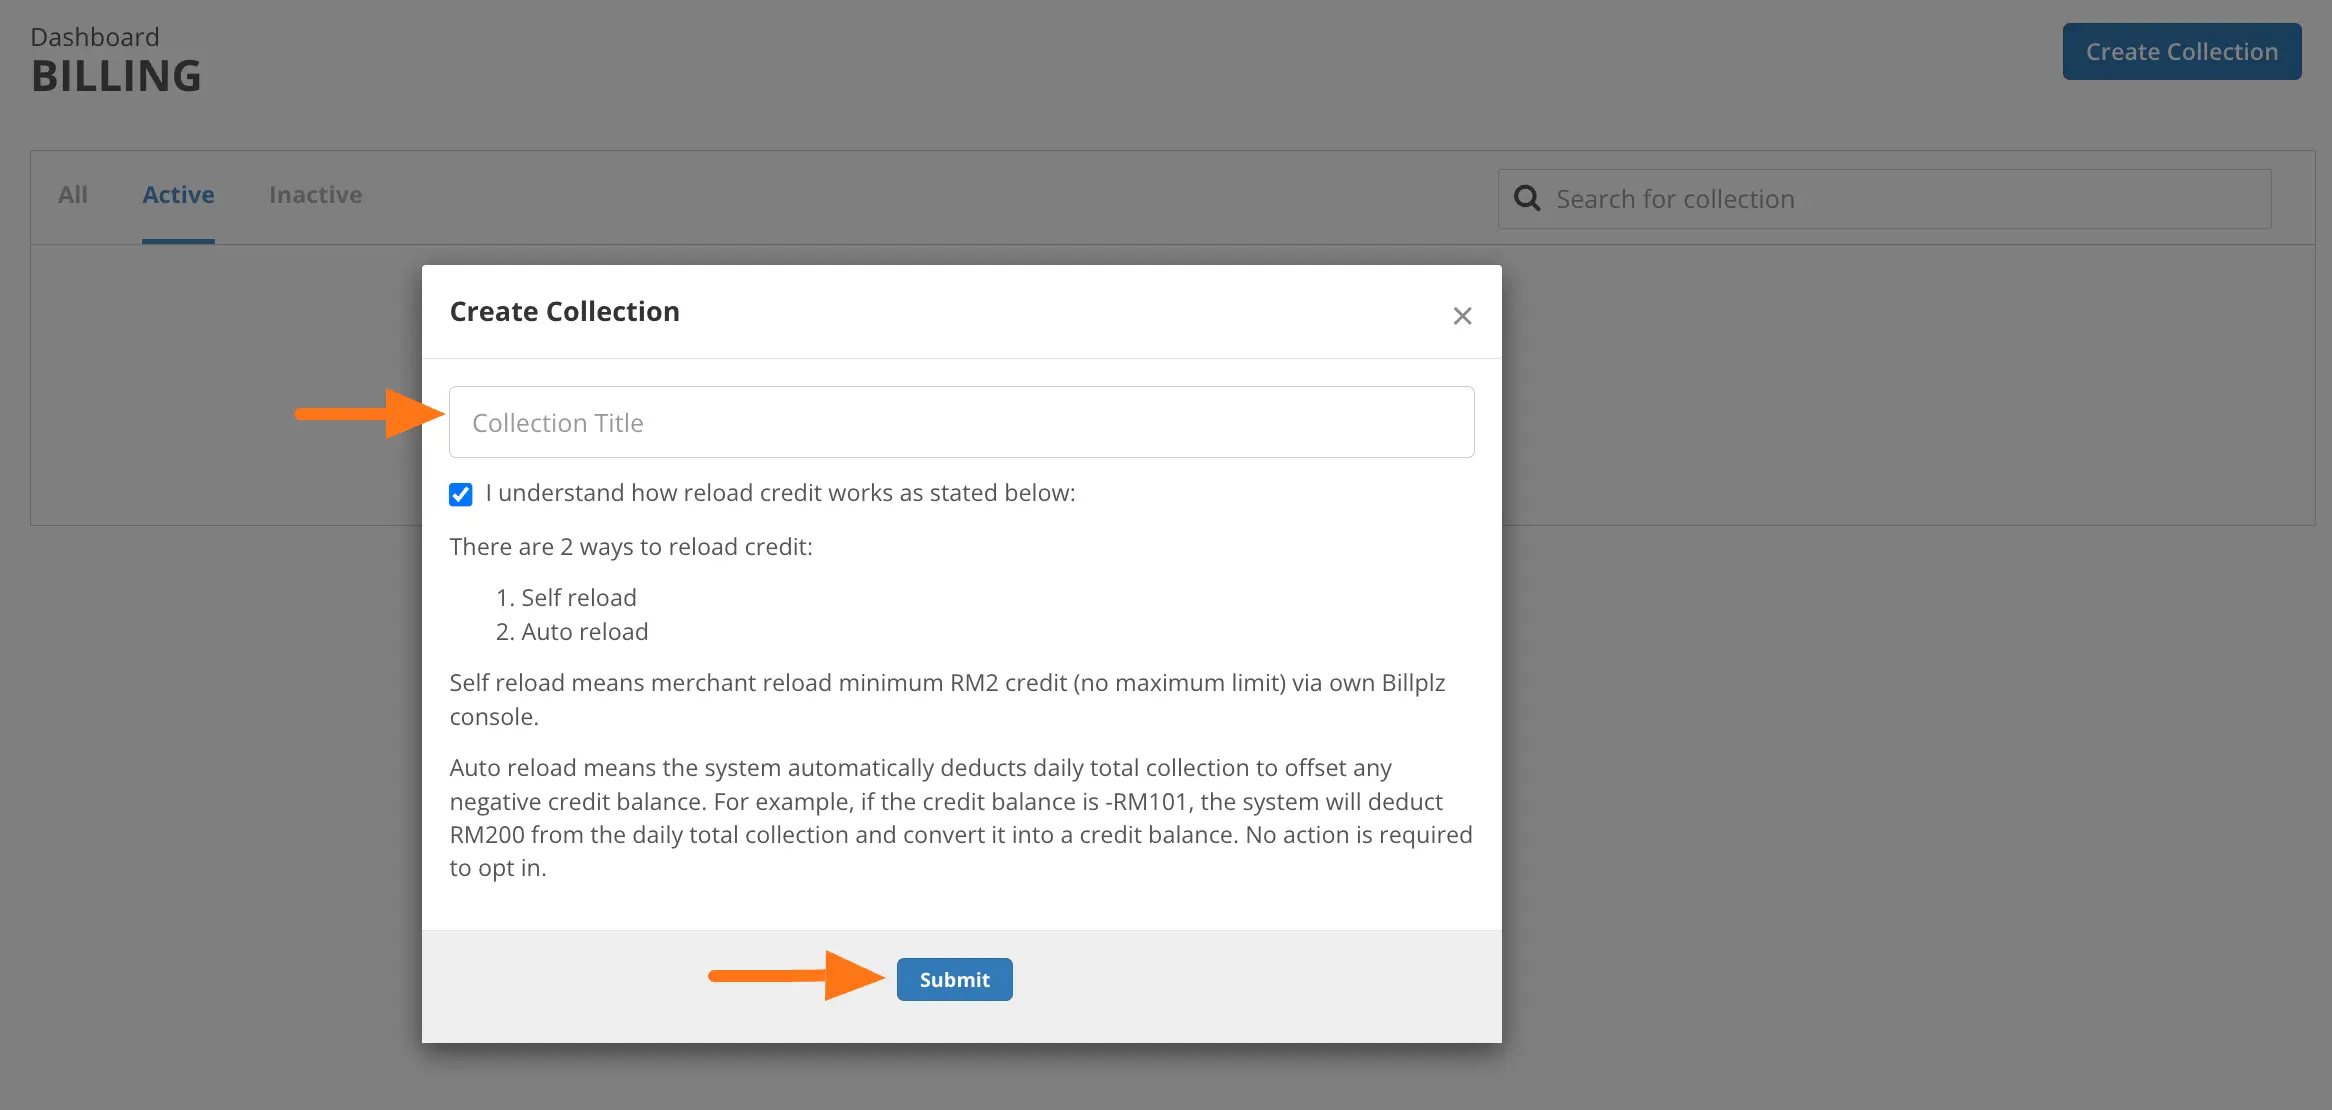
Then, provide a Name for the collection ID and click the Submit button. Your Collection ID will be created.
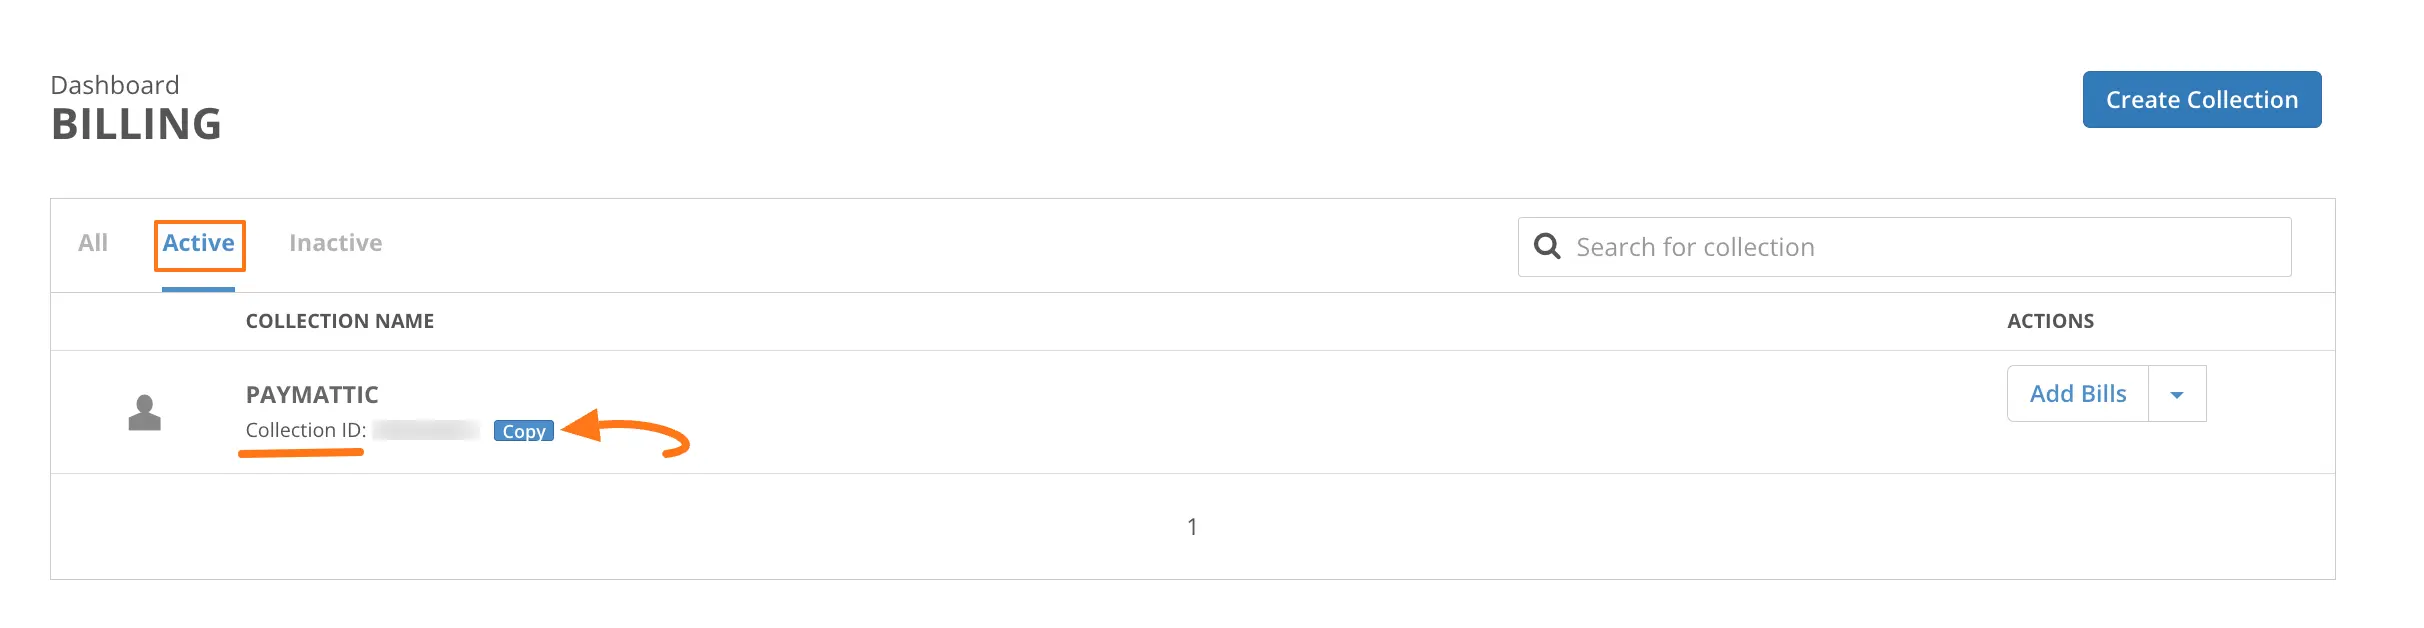
If you already have your Collection ID, go to the Active option, and you will get the Collection ID. Copy the ID by clicking on the Copy button.
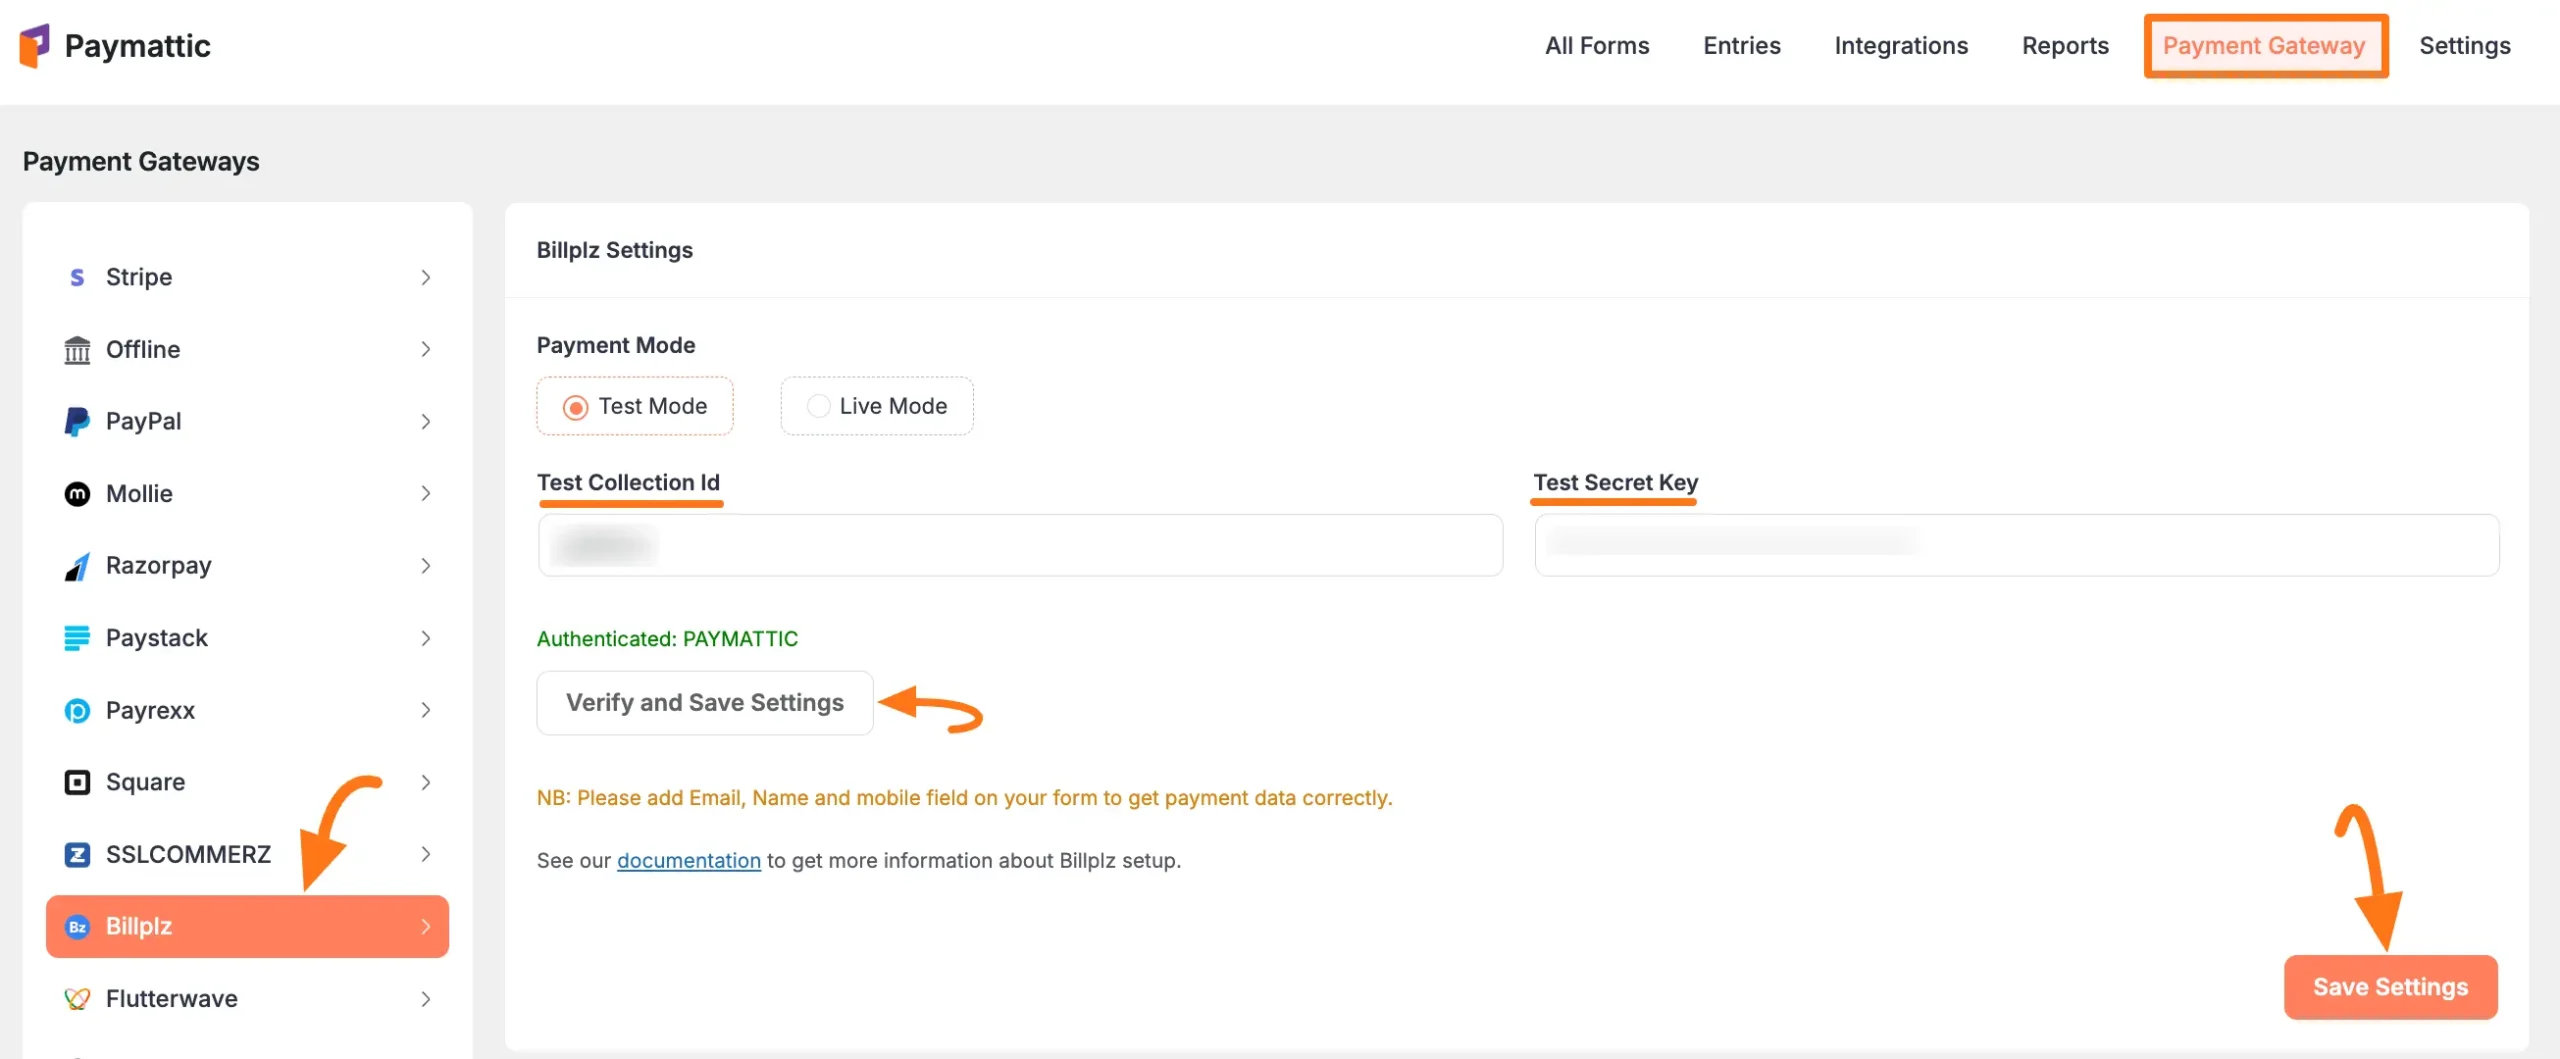
Return to Payment Gateway from the Paymattic Navbar, click the Billplz tab, and paste the copied Collection ID and Secret key into the respective fields.
Also, you have the option to check the validity of your Collection ID and Secret Key from Billplz by simply clicking the Verify and Save Settings button.
Finally, press the Save Settings button and your Billplz account will be integrated with Paymattic for your WordPress Site.
Add Billplz in Forms #
Once you finish setting up your Billplz payment gateway, you can easily add this payment method to any of your existing Payment Form.
If you do not have any existing forms, read Create a Form from Scratch or Create a Form using Templates documentation.
To learn the detailed process of adding a payment method to an existing form, read this Documentation.
But, remember, the added Billplz payment method in your Form will not function unless you complete the configuration process properly.
If you have any further questions, concerns, or suggestions, please do not hesitate to contact our @support team. Thank you.


