You can create forms with Subscription Payment Items in Paymattic. Subscription Payment Item enables your users to pay on an ongoing basis after a regular time interval automatically. This field pulls funds from your customer’s account at a scheduled time.
Let us learn how you can add a Subscription Payment Item in Paymattic with this simple guide-
Subscription payment is a premium feature of Paymattic and currently available for Stripe & PayPal. Please upgrade to Paymattic Pro to avail this feature.
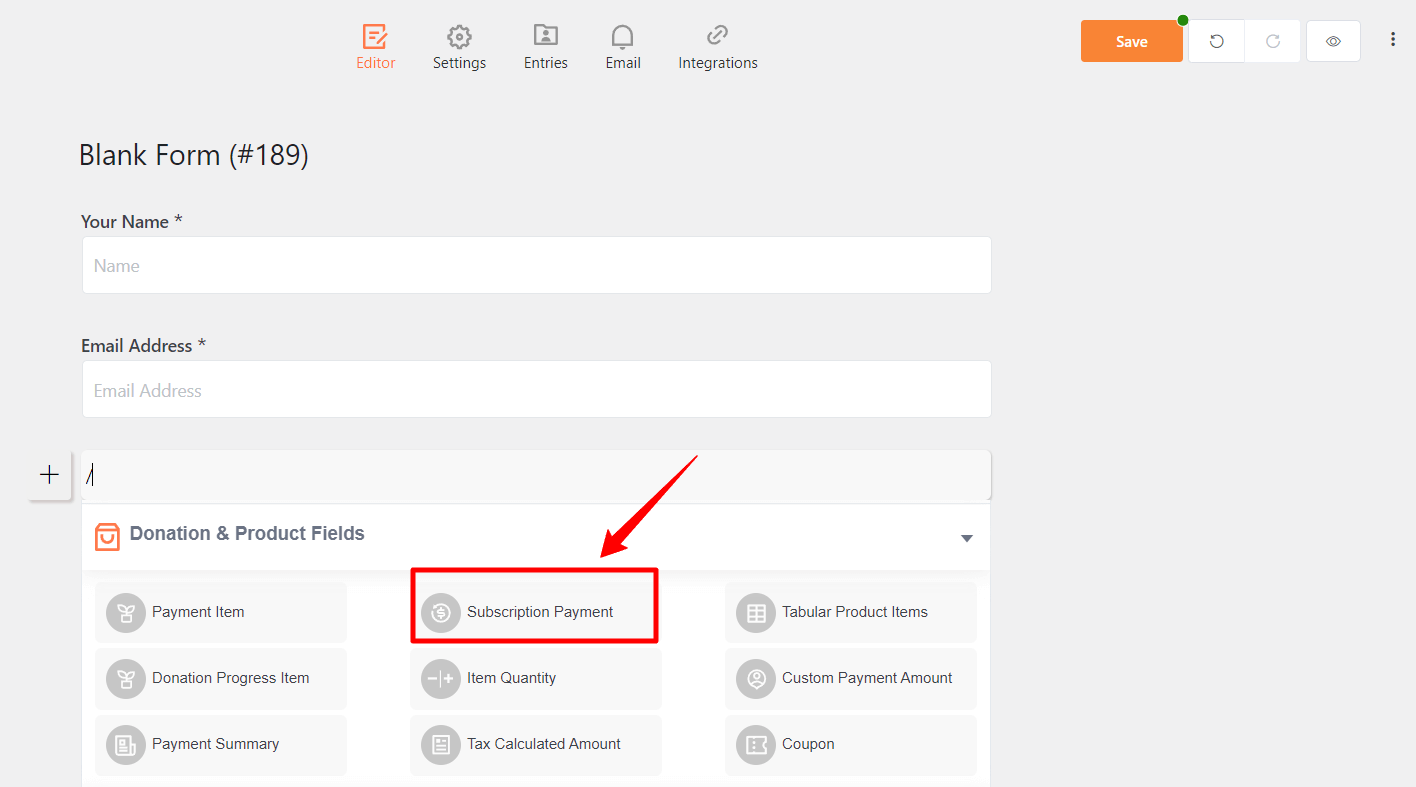
- To add a Subscription Payment Item, you must create a form. Let’s take a look at how to create a payment form.
- Add general fields as per your needs.
- We suggest you keep the Name and Email field in the beginning.
- Then, add Subscription Payment Item from the panel of Form Editor.

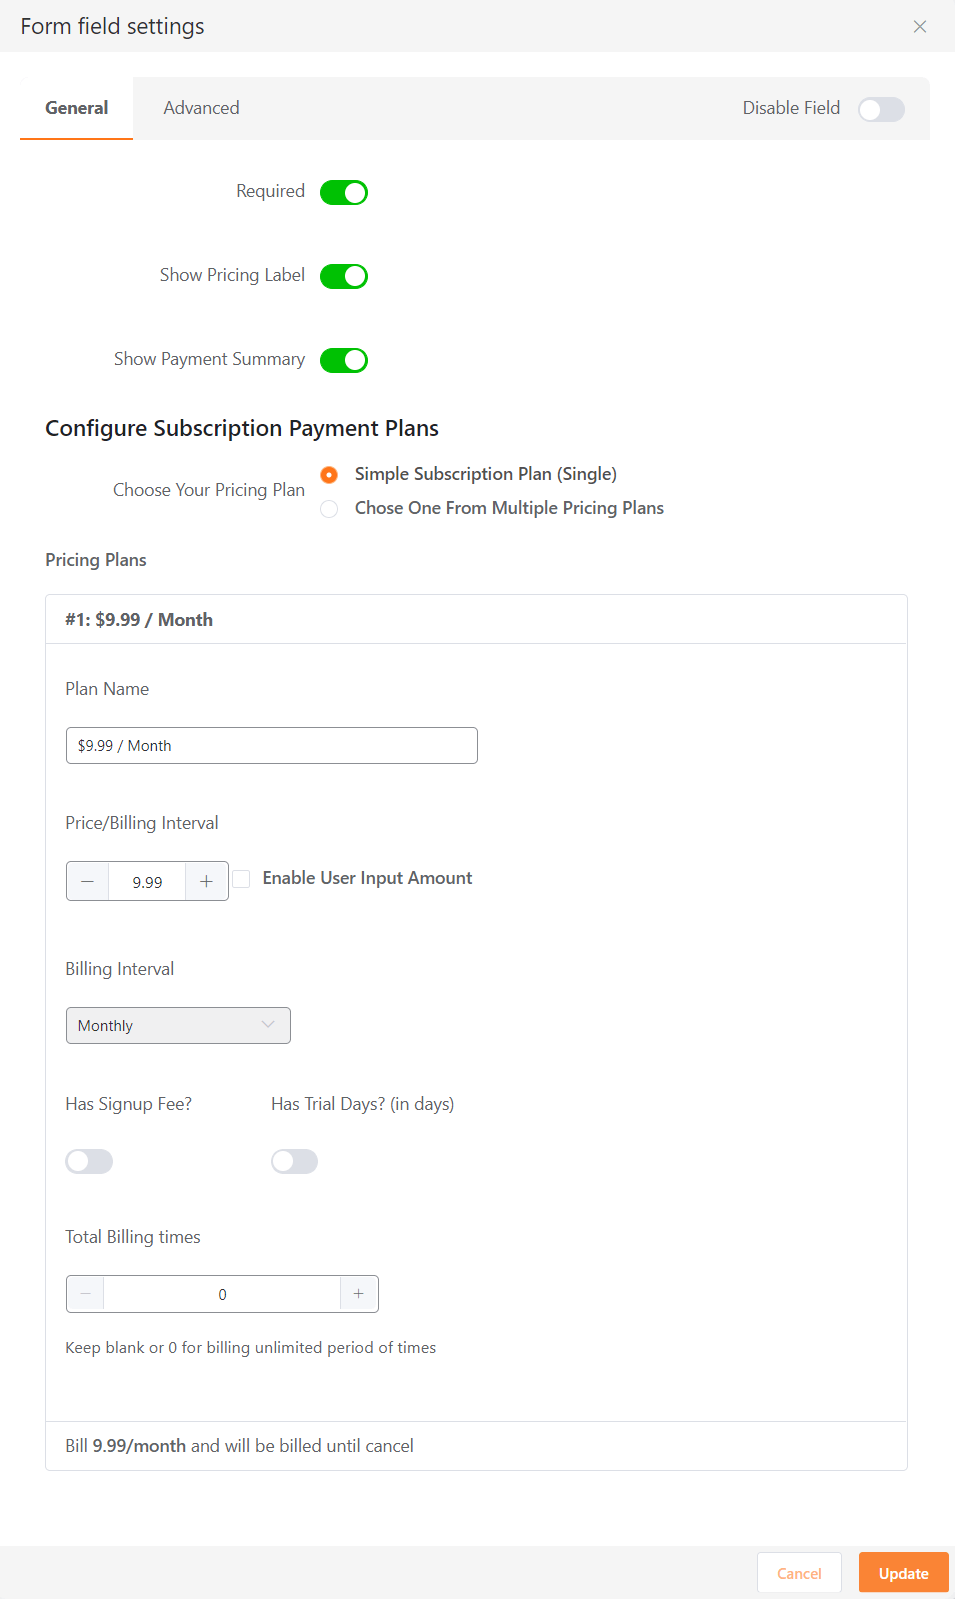
Now, you need to configure the field that best suits your need.
Subscription Payment Item offers a variety of configuration options to fine-tune your form settings. Let’s learn about the configuration options below-
Required: Enable this option if you want your users to make the field mandatory.
Show Pricing Label: Enabling this option will show the pricing label in the form.
Show Payment Summary: This option will display a summary of payment items in the form.
Pricing Plan: Here you have to select a single pricing plan or multiple pricing plans. You can create custom pricing plans. Give the name of your plan in the Plan Name field and set the Price or Billing Interval (Daily, Weekly, Monthly, Yearly) in the respective field.

Signup Fee: Switch the button if you want to set a custom amount as Signup Fee. This amount will be deducted from customers’ accounts once they signup on your website.
Trial Days: Toggle this option if you want to set a specific trial period for subscriptions.
Total Billing Times: You can set here how many times your website will pull funds from customers’ accounts. Keep the field blank or put 0 (Zero) for billing for an unlimited period of time.
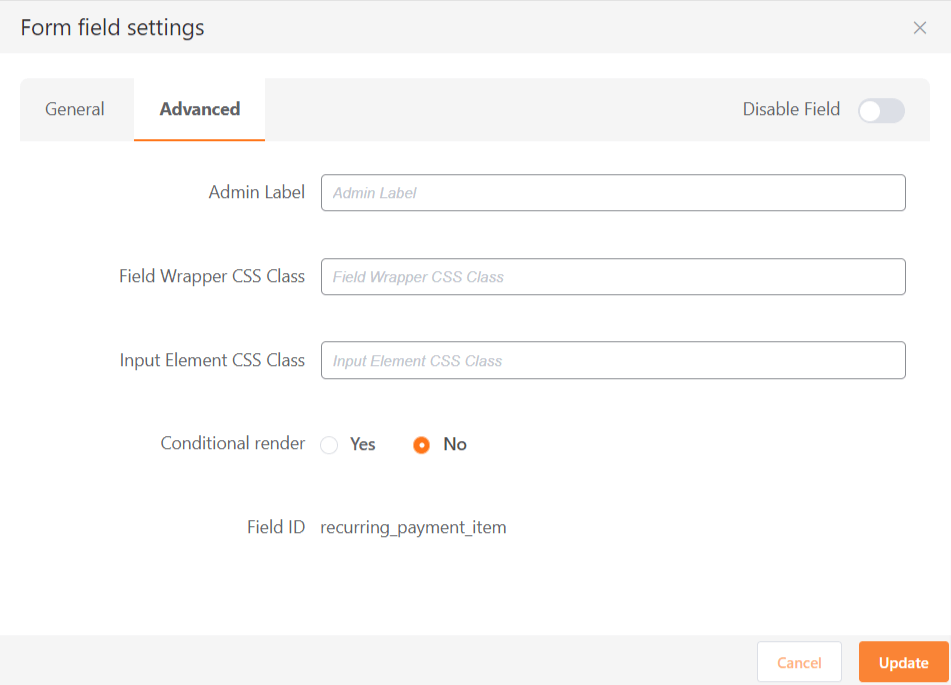
Advanced Options #
Use this feature to add a custom Admin Label, Field Wrapper CSS Class, and Input Element CSS Class.
Admin Label: This label is used if the admin wants to see the field’s label from the back-end.

Field Wrapper CSS Class: This is a field used for adding a CSS class for the field wrapper element.
Input Element CSS Class: You can add custom CSS classes to the input field element itself.
Conditional render: You can set conditional logic to display the field in the form that will be triggered by specific actions taken on a previous input field. To know more about, Conditional render, check here.
Field ID: The Field ID option in the Advanced tab is the CSS class ID for this input field, and it will be used for adding custom CSS to this field.
Finally, click on the Update button to save the configuration.
Copy and paste the shortcode of the form on a specific page and you can preview your created form.


