This article will guide you through the process of how you can easily Create a Form from scratch through Paymattic.
Creating a Form from Scratch #
To learn how to create a form from scratch with Paymattic, follow the steps with the screenshots below –
First, go to the Paymattic Dashboard from the WordPress Left Sidebar and click the Create Form section. Then, you will get three options to create forms. These are:
- Blank Form: This option allows you to create fresh forms from scratch.
- Choose Templates: Here, you can use pre-built templates to create forms to avoid the hassle of making them from scratch.
- Import From: This option lets you import your JSON format forms from other platforms to Paymattic.
To create a form from scratch, click the Blank Form option.
Adding Desired Field/s #
Once you click the Blank form, it will redirect you to the Editor page where you can build your form by adding necessary fields and edit it anytime if needed.
Here, you will have Two Options for adding your Desired Fields to the form. These are:
- Type “/” to insert fields: In this field, you can easily add your desired field/s by typing the field name with the “/” sign before it.
- Plus Icon: You can simply click the + Plus Icon and all the available fields will appear inside a pop-up page from where you can choose your desired field/s.
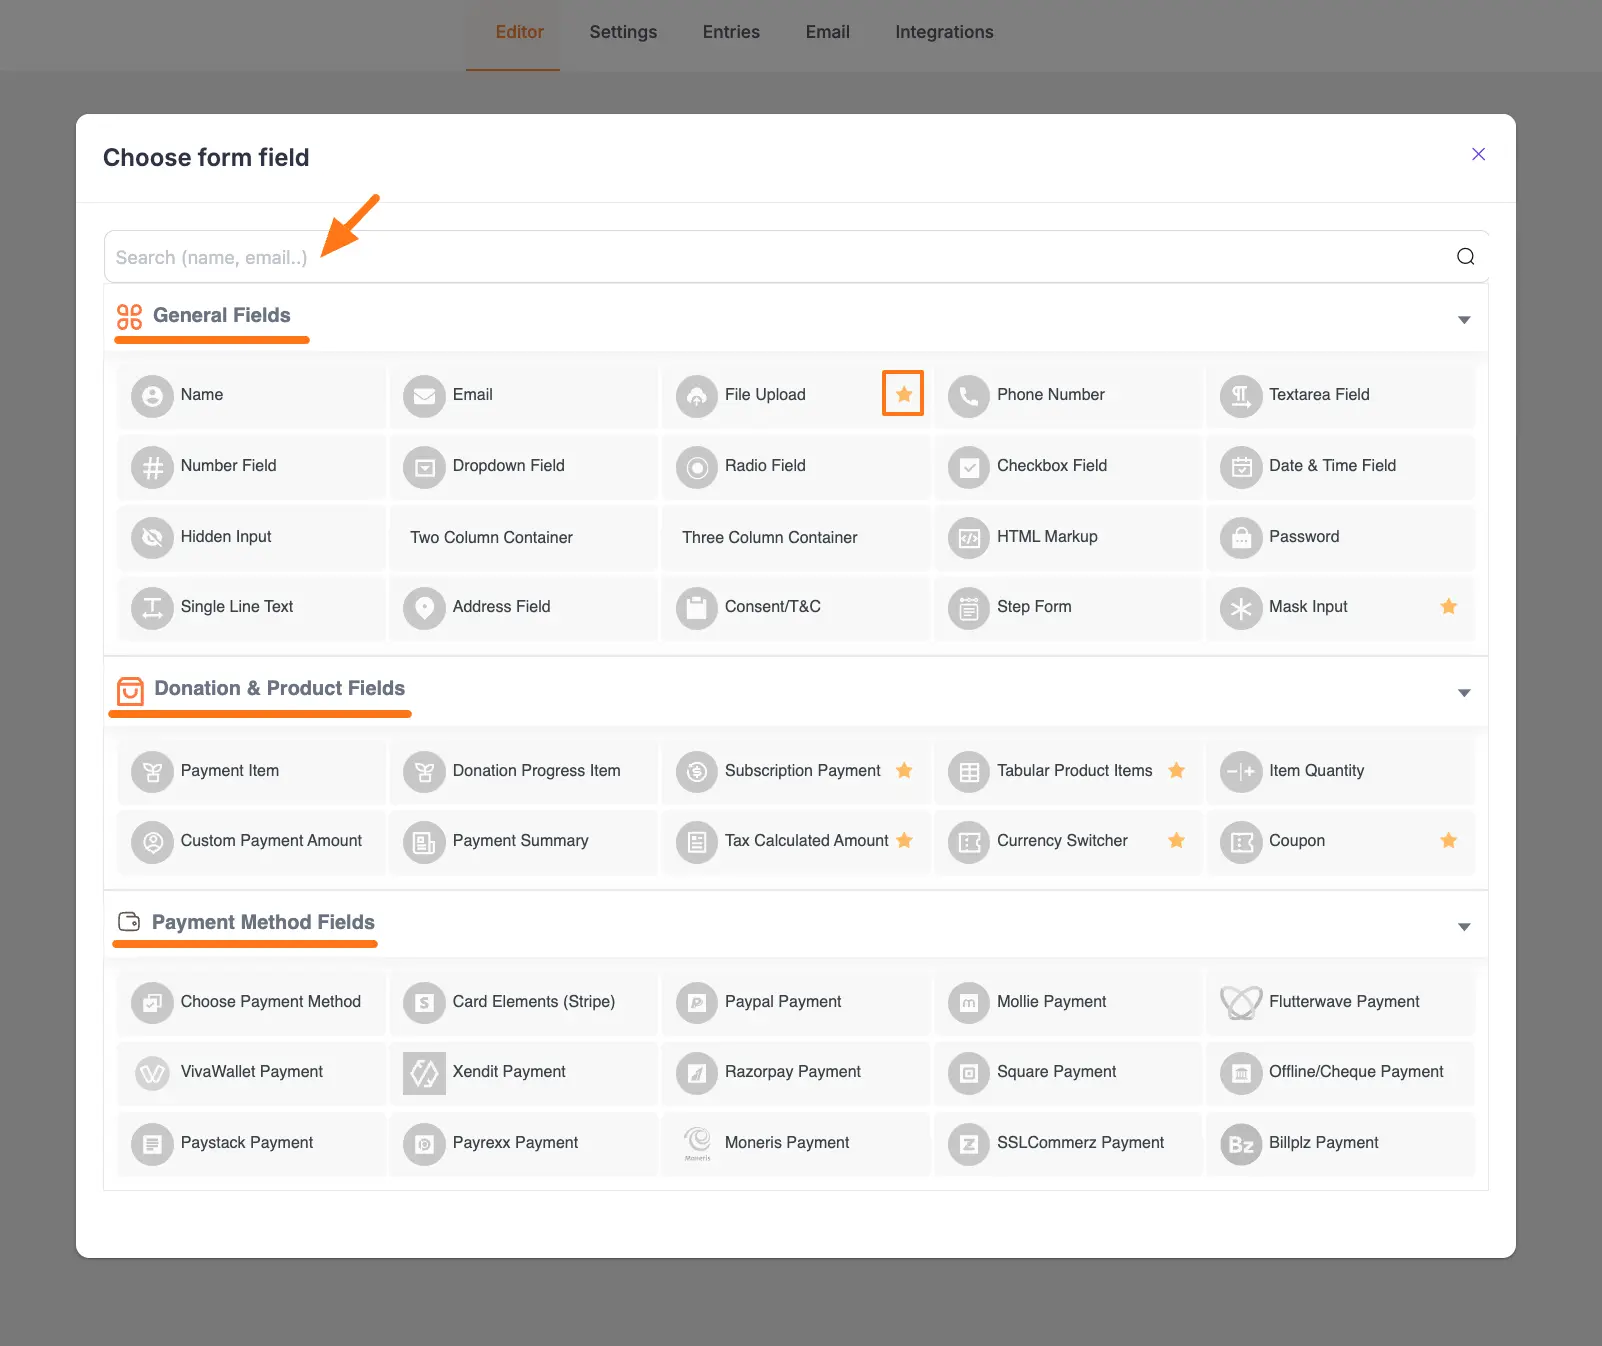
For instance, I clicked the Plus Icon to add the Payment related fields.
On the Choose form field page, you will get all the field options that Paymattic offers and you can choose anyone just by clicking on it.
You can see, Three major Sections containing all the available Fields. These are:
- General Fields
- Donation & Product Fields
- Payment Method Fields
Remember, Fields with a Star Sign in the right corner are Pro features. You need to install and activate the Paymattic Pro Plugin to use them.
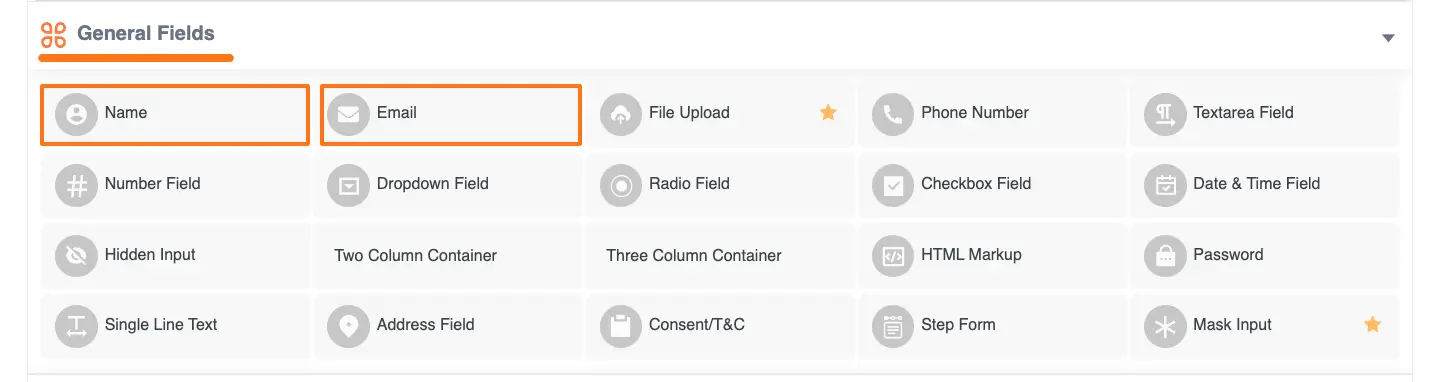
General Fields #
Here you can see all the General Fields for your form. Select anyone according to your preference by clicking on it. To learn the detailed use of all fields, read this Documentation.
But, we always suggest you keep the Name and Email field at the beginning of any Form.
Donation & Product Fields #
Now, scroll down and you will find the Donation & Product Fields area. Select anyone according to your preference by clicking on it. To learn the detailed use of all fields, read this Documentation.
For example, I am adding the Payment Item field for demonstration purposes.

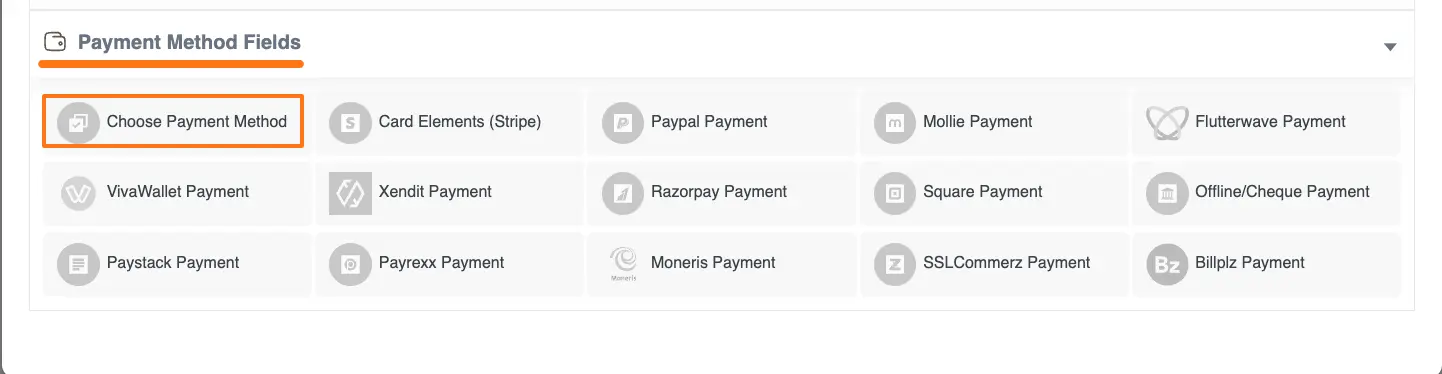
Payment Method Fields #
Now, go down and you will find all the payment gateways under the Payment Method Fields area. Select anyone according to your preference by clicking on it. To learn the detailed use of all fields, read this Documentation.
Remember, the added payment method/s in your Form will not function unless you properly complete the configuration process of payment gateways. To learn the details of the configuration process, click here and read the Documentation you selected as a payment method.
You can select a Single Payment Method by clicking on the desired payment gateway name.
Or, you can select Multiple Payment Method by clicking on the Choose Payment Method field.
For example, I select the Choose Payment Method field to show the process.
Editing/Customizing the Created Forms #
Once you added all your necessary fields, you can edit them according to your needs.
To learn how to edit a form, read this Documentation.
Embedding Form into WordPress #
To embed and display the form on a specific Page/Post, copy the Shortcode and paste it into your desired Page/Post.
Once you complete the edit, press the Save button to save all the changes you made.
And, to see the Preview of the form, click the Eye icon.
Remember, the process of adding and customizing fields in every step is almost similar.
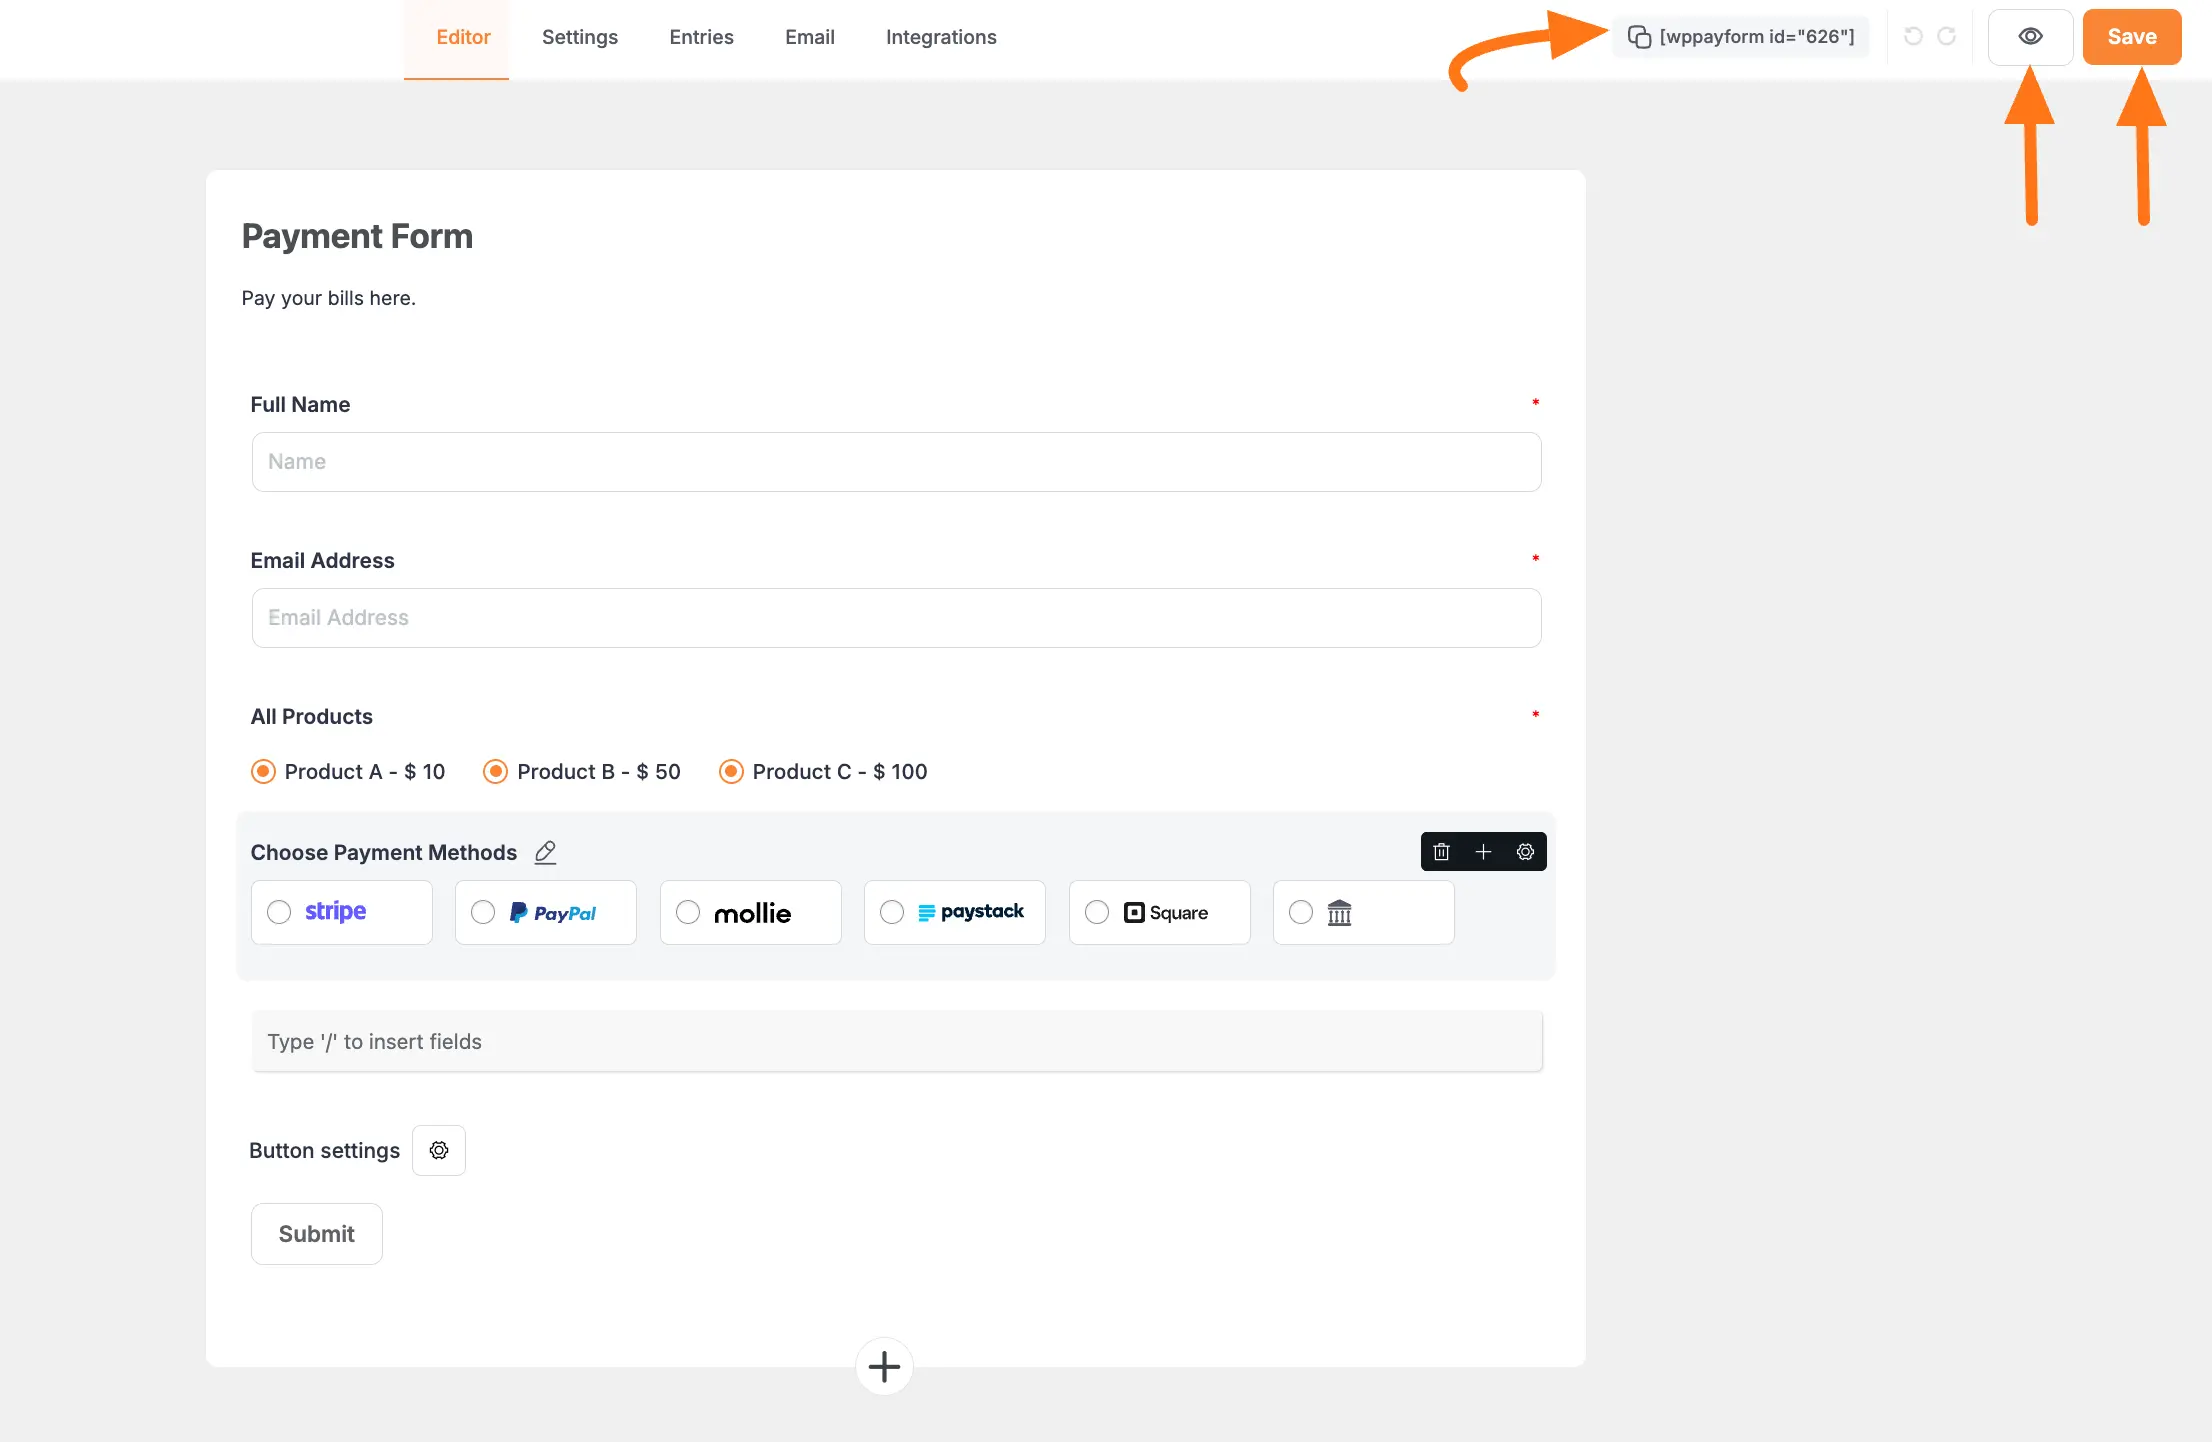
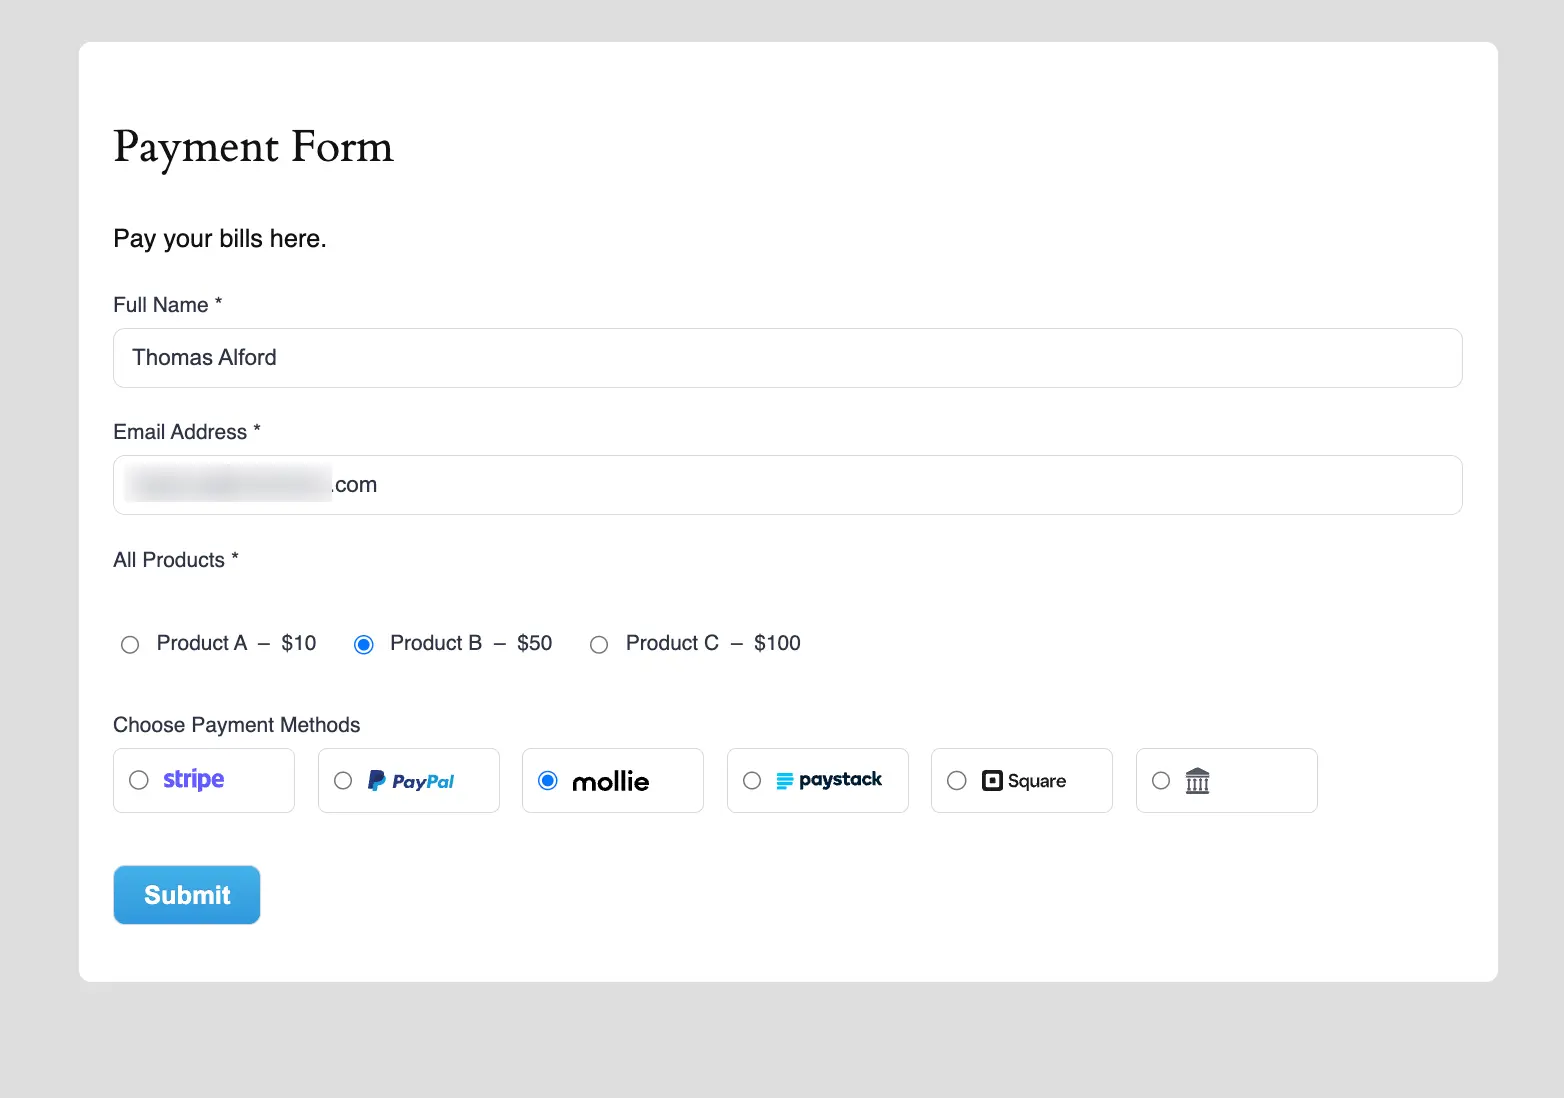
Form Preview #
Here is the preview of the Form that we created from scratch.
This way you can easily create a Form from scratch in Paymattic Forms!
If you have any further questions, concerns, or suggestions, please do not hesitate to contact our @support team. Thank you.


