In your Paymattic, you can use Moneris Payment Gateway to make your Payments. This article will guide you through configuring Moneris on your WordPress Site with the Paymattic plugin.
Remember, to get access to the Moneris payment gateway, you need the Paymattic Pro Plugin.
Enabling Moneris Payment Method #
To learn how to enable the Moneris payment gateway through Paymattic, follow the steps with screenshots below –
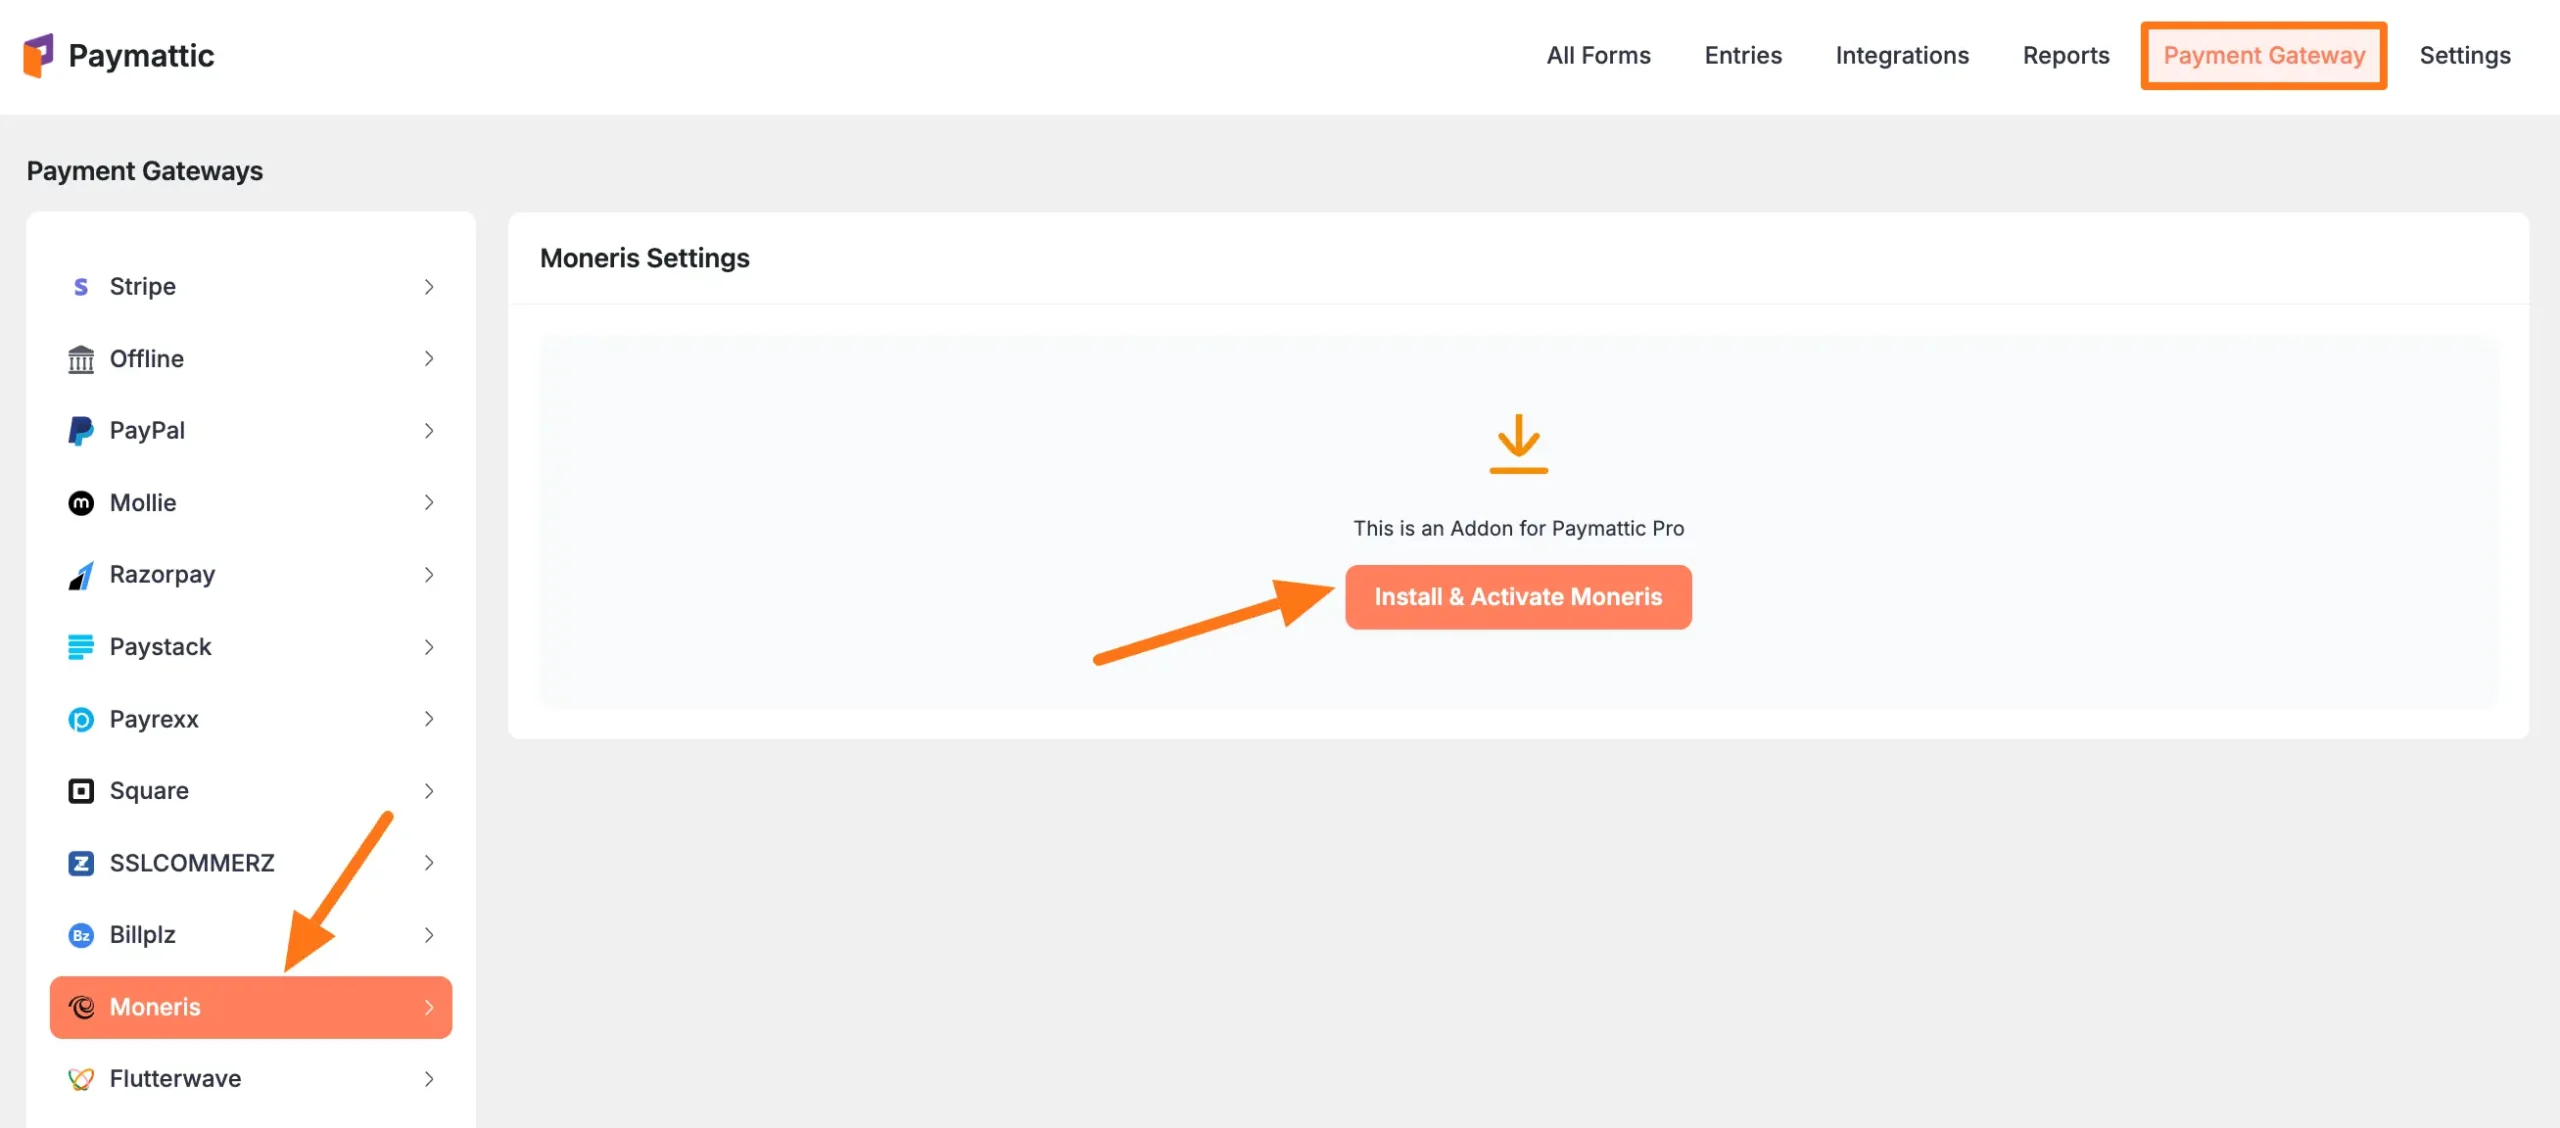
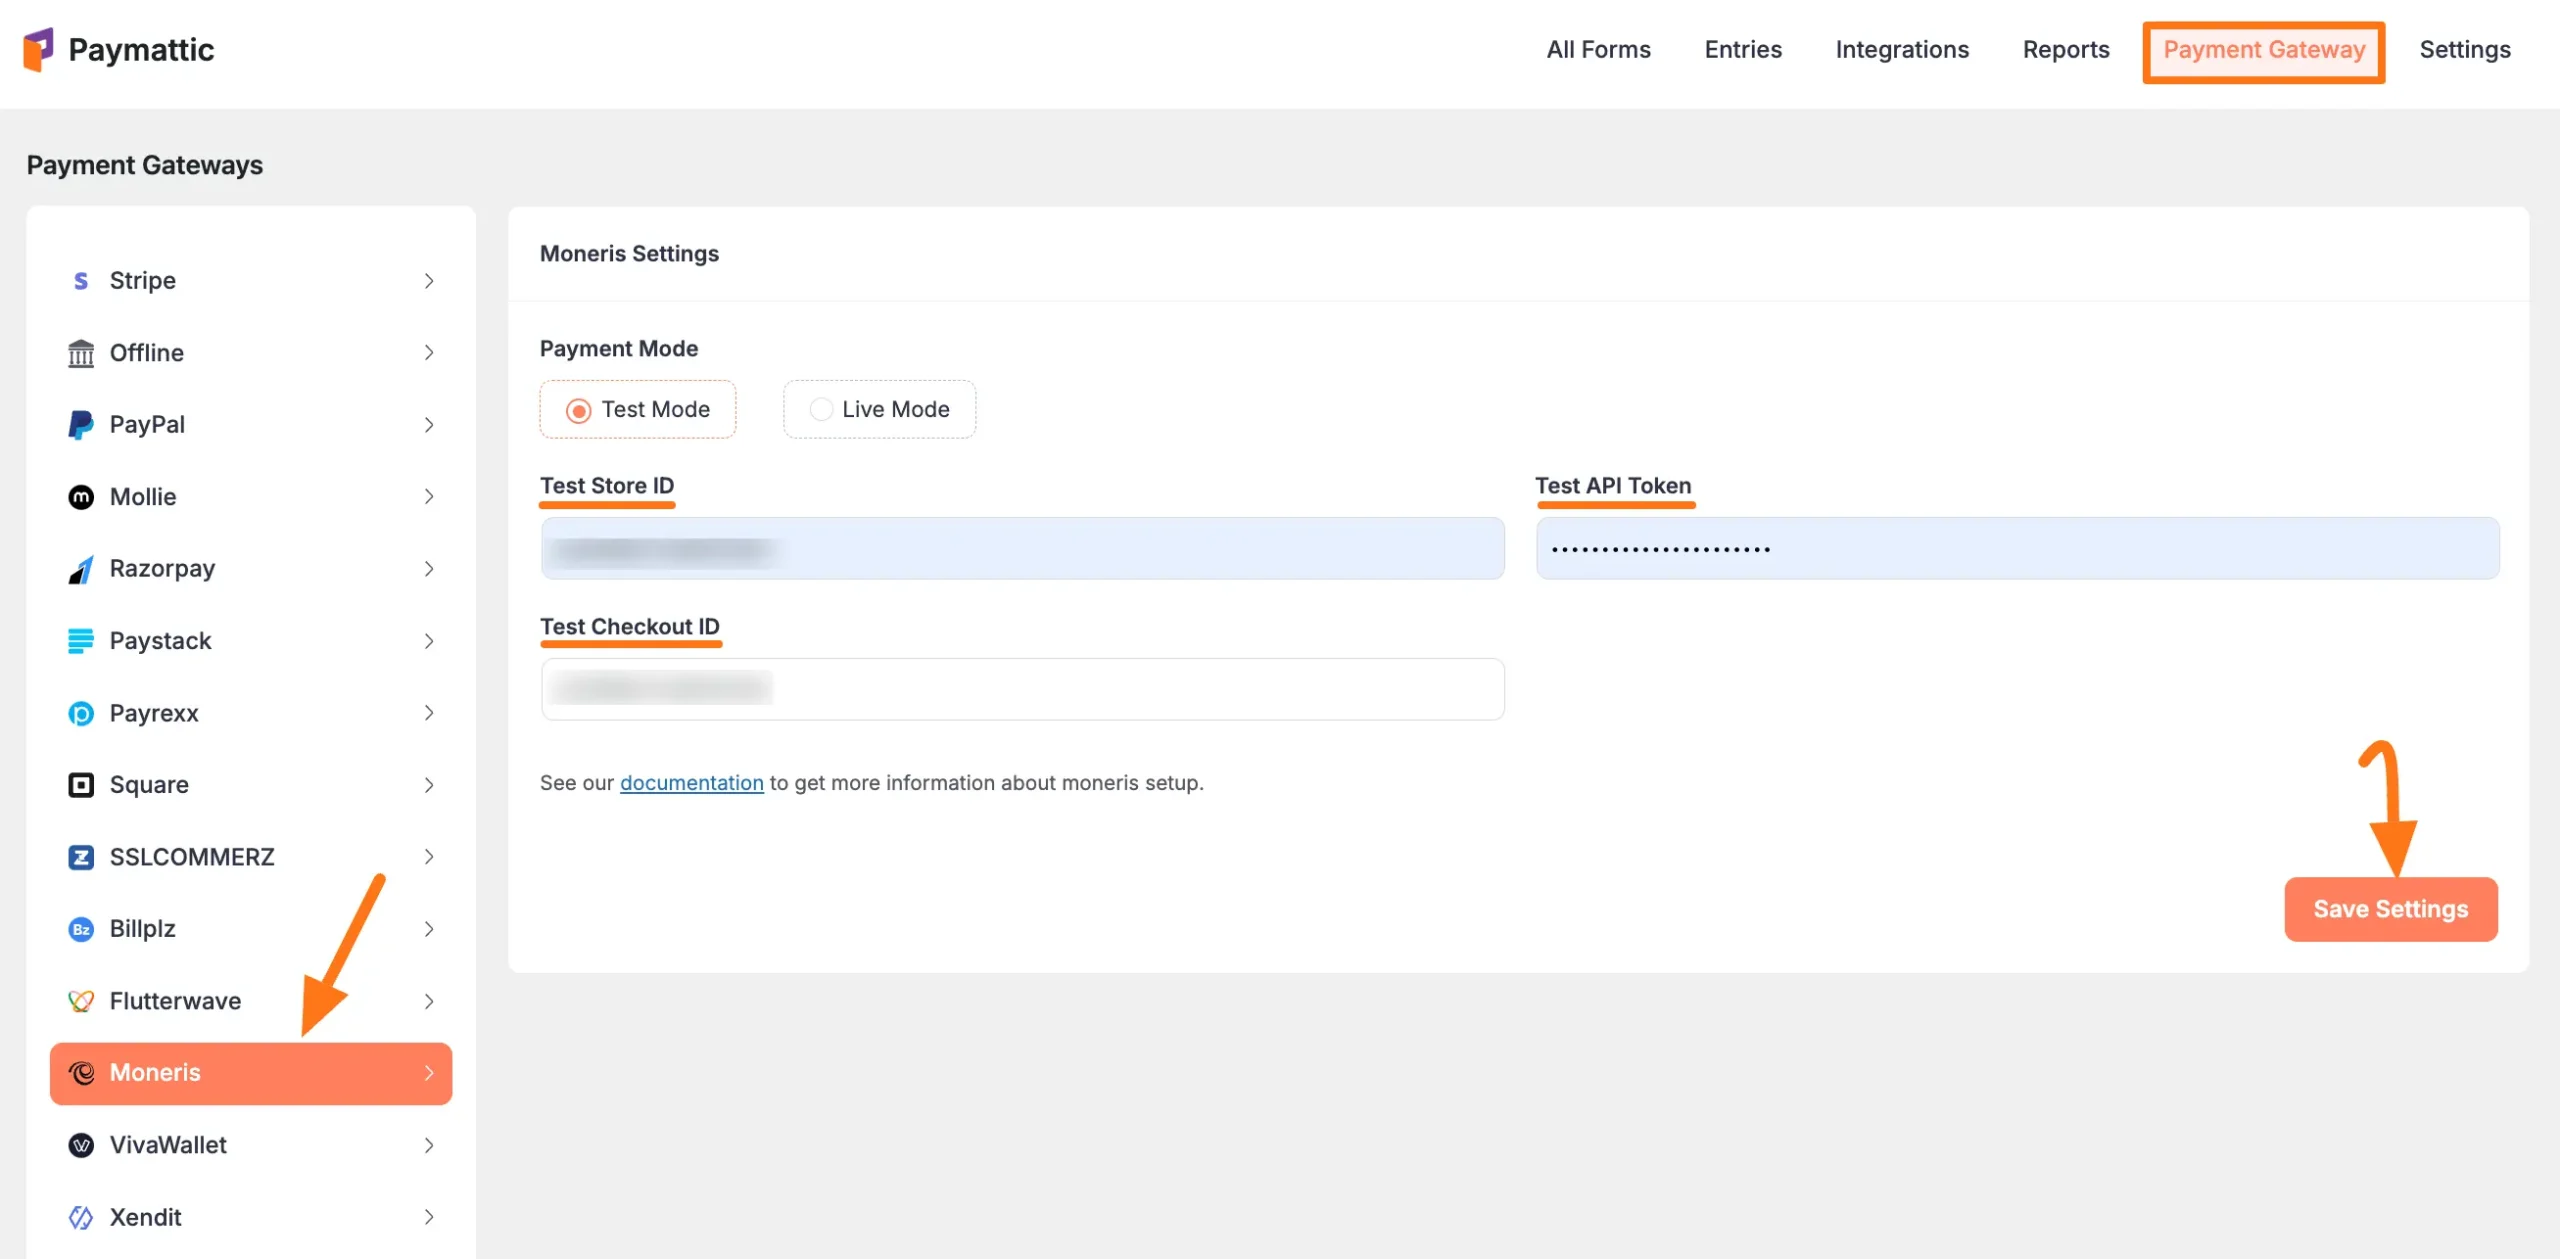
First, go to Payment Gateway from the Paymattic Navbar, click the Moneris tab from the left sidebar, and the Moneris Settings page will open.
Click the Install and Activate Moneris button to connect Moneris with Paymattic Pro.
This add-on needs to be installed the first time you integrate with Moneris.
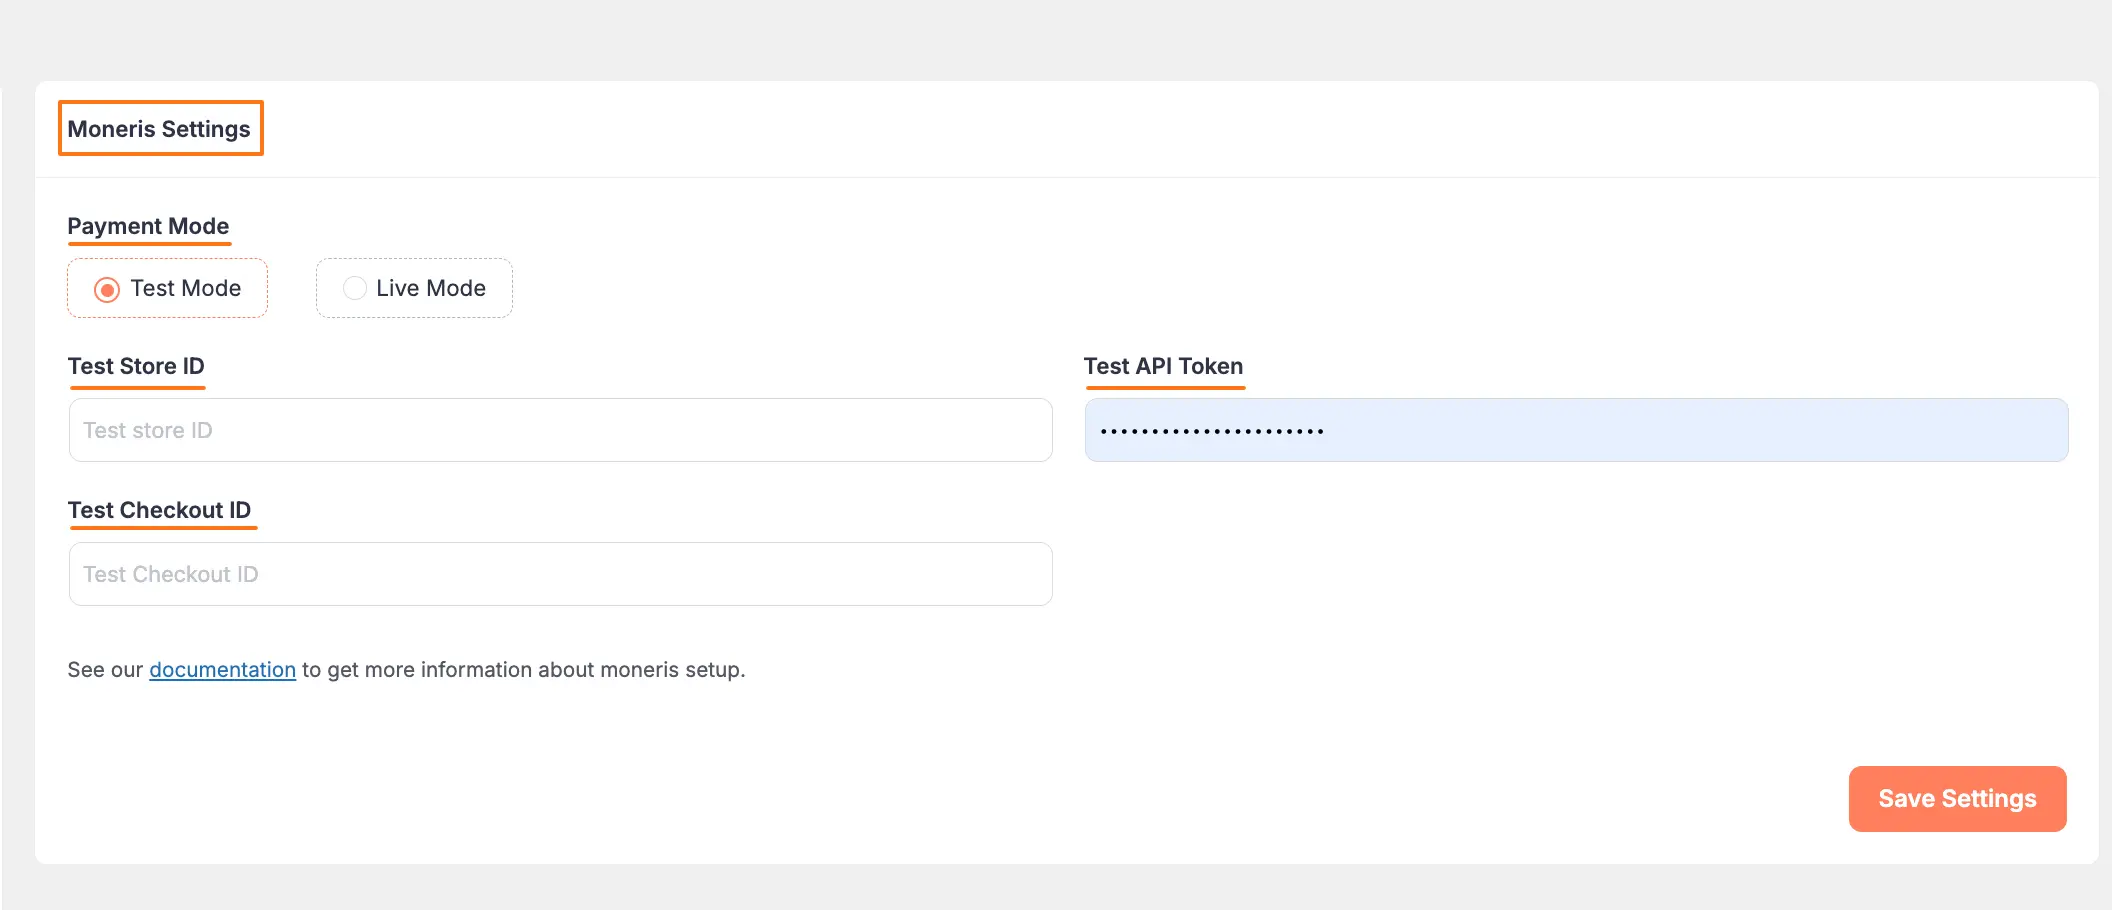
Select any Payment Mode between Test (for test payments) and Live ( for real payments) as both options follow the same configuration process, e.g., I choose the Test Mode.
Then, you need to obtain the Store ID, API Token, and Checkout ID from your Moneris Account.
Get All the Credentials from the Moneris #
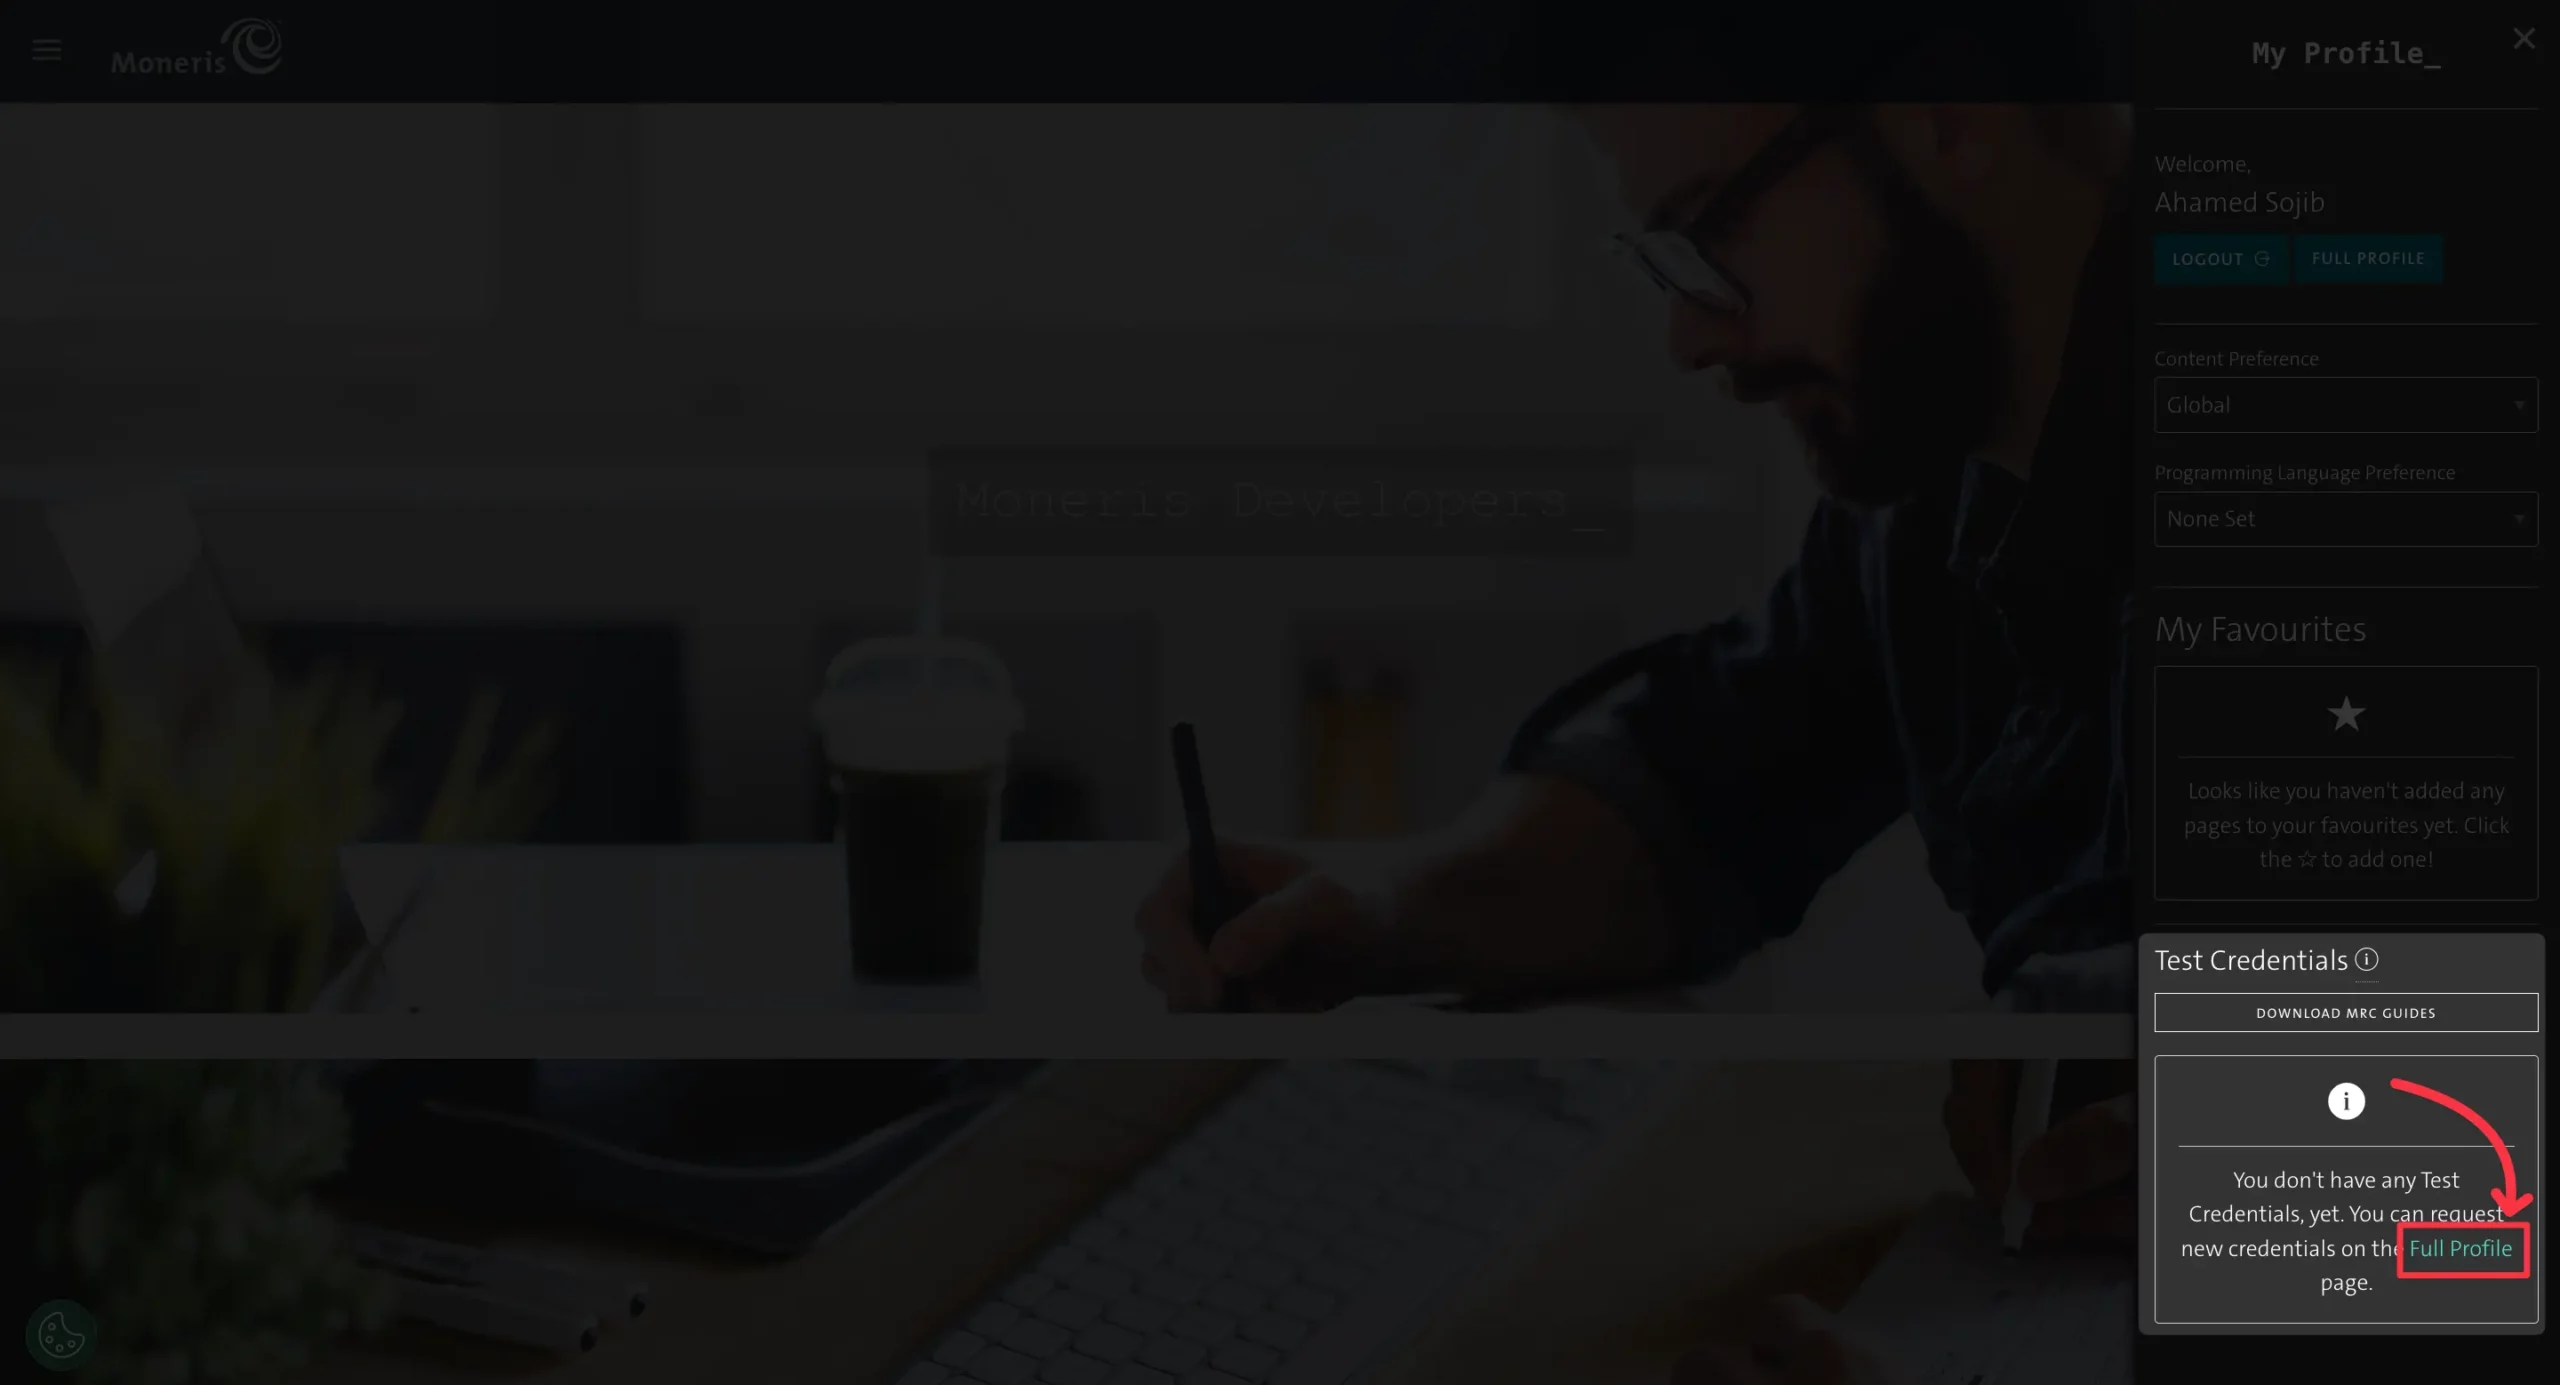
To get all credentials, first, log in to your Moneris Account. If you do not have an account, sign up from here.
Once you log in, go to your Profile Details from the right sidebar, and click on the Full Profile button in the Test Credential section.
Remember, to get the credentials you need to complete your Profile Details.
Get Moneris Store ID & API Token #
Give all the necessary details here then click on the Request Testing Credentials button.
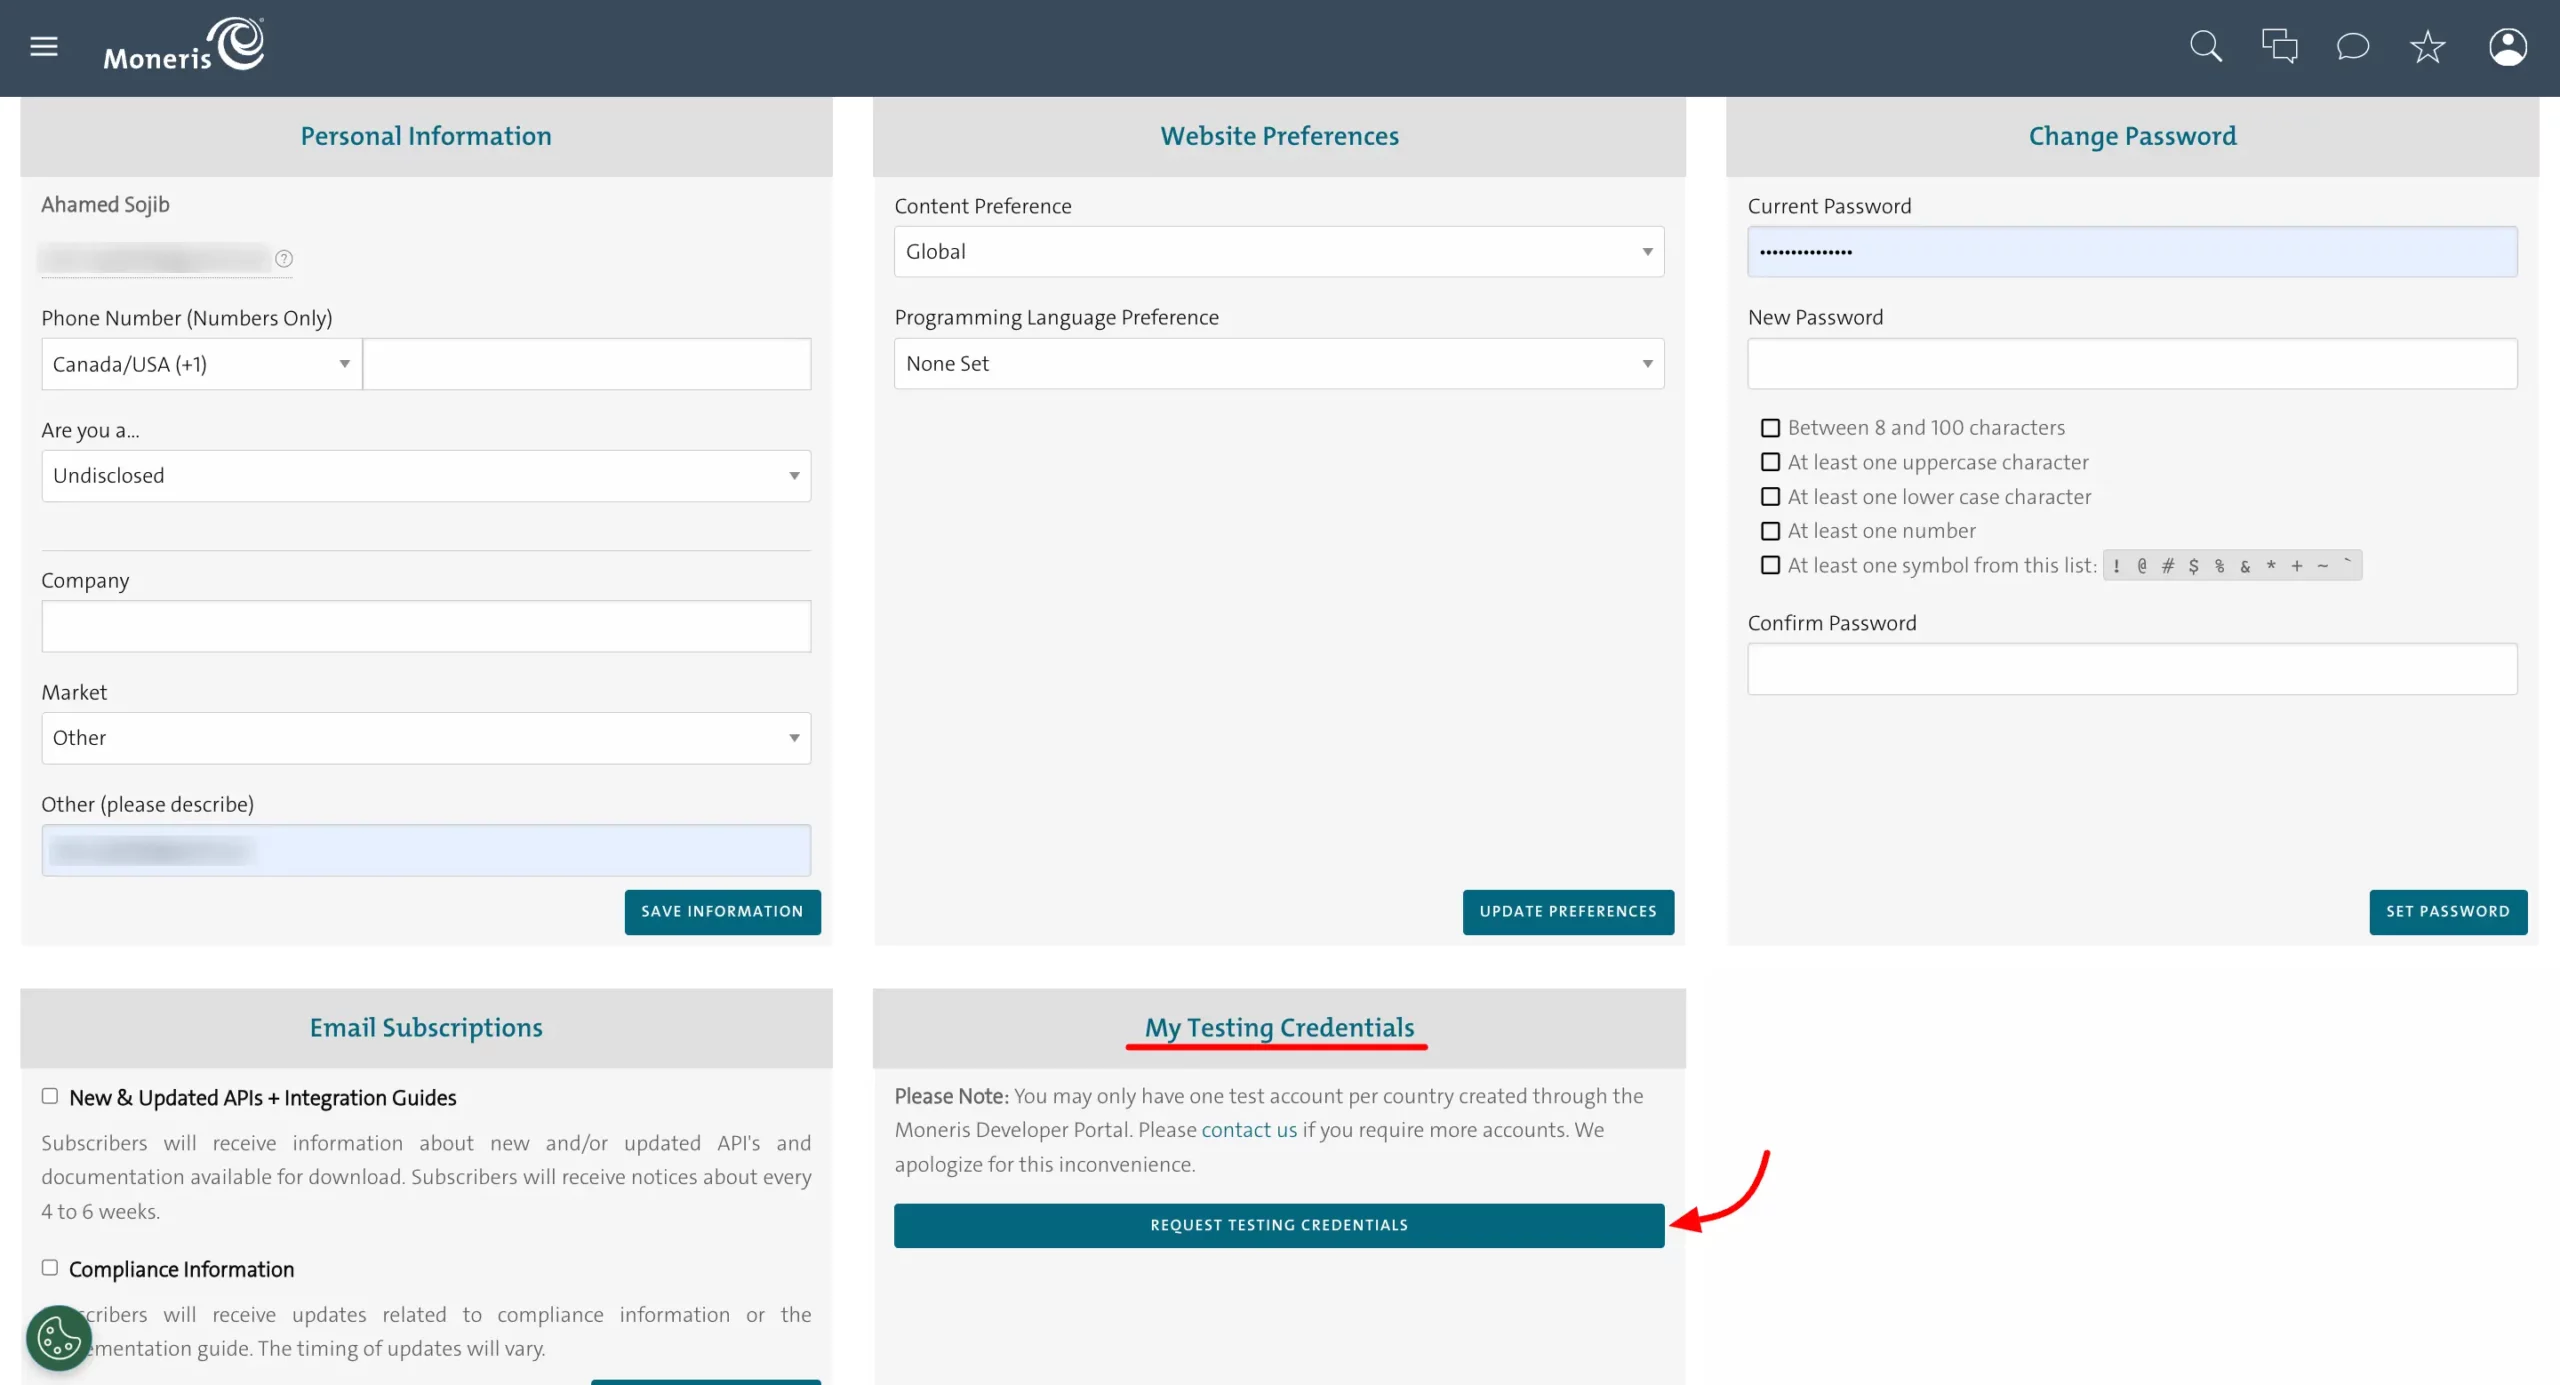
Now you will get your Store ID and API Token here. Copy these credentials into the clipboard for later use.

Get Moneris Checkout ID #
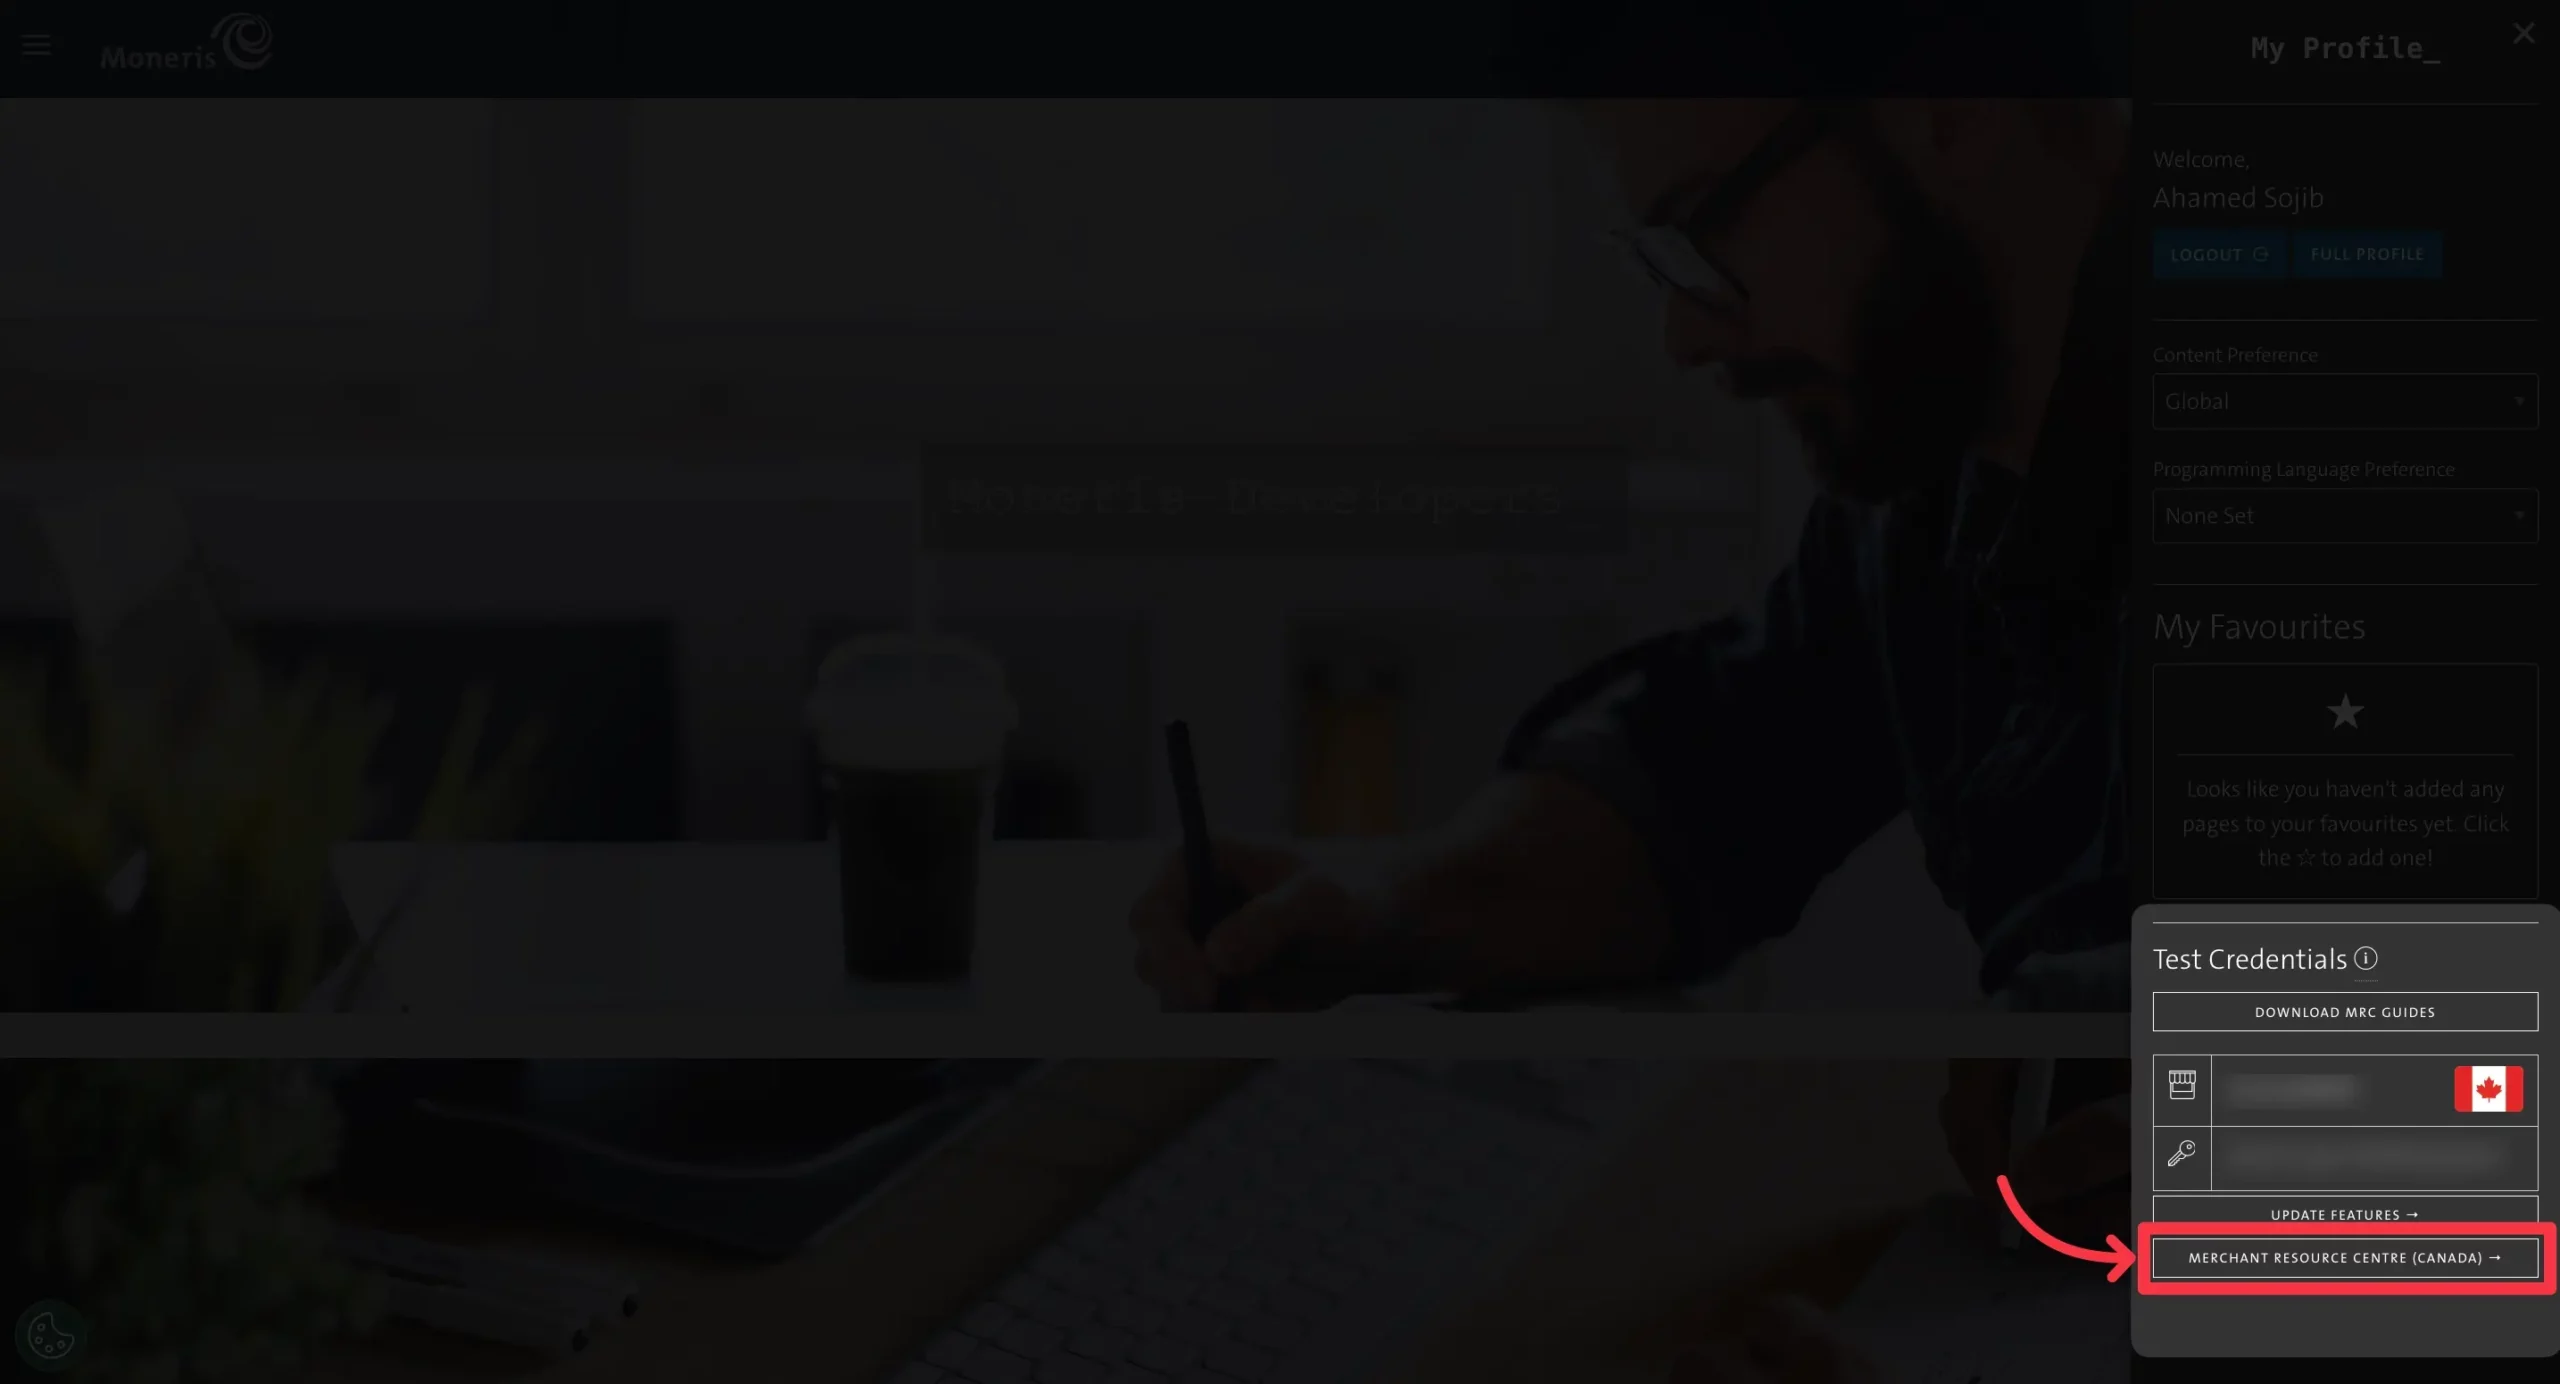
To get the Moneris Checkout ID, go to your Moneris Profile again, in the Test Credential section, you will see your Store ID and API Access Token.
Now, right below the credentials, you will find the Merchant Resource Center button. Click on it.
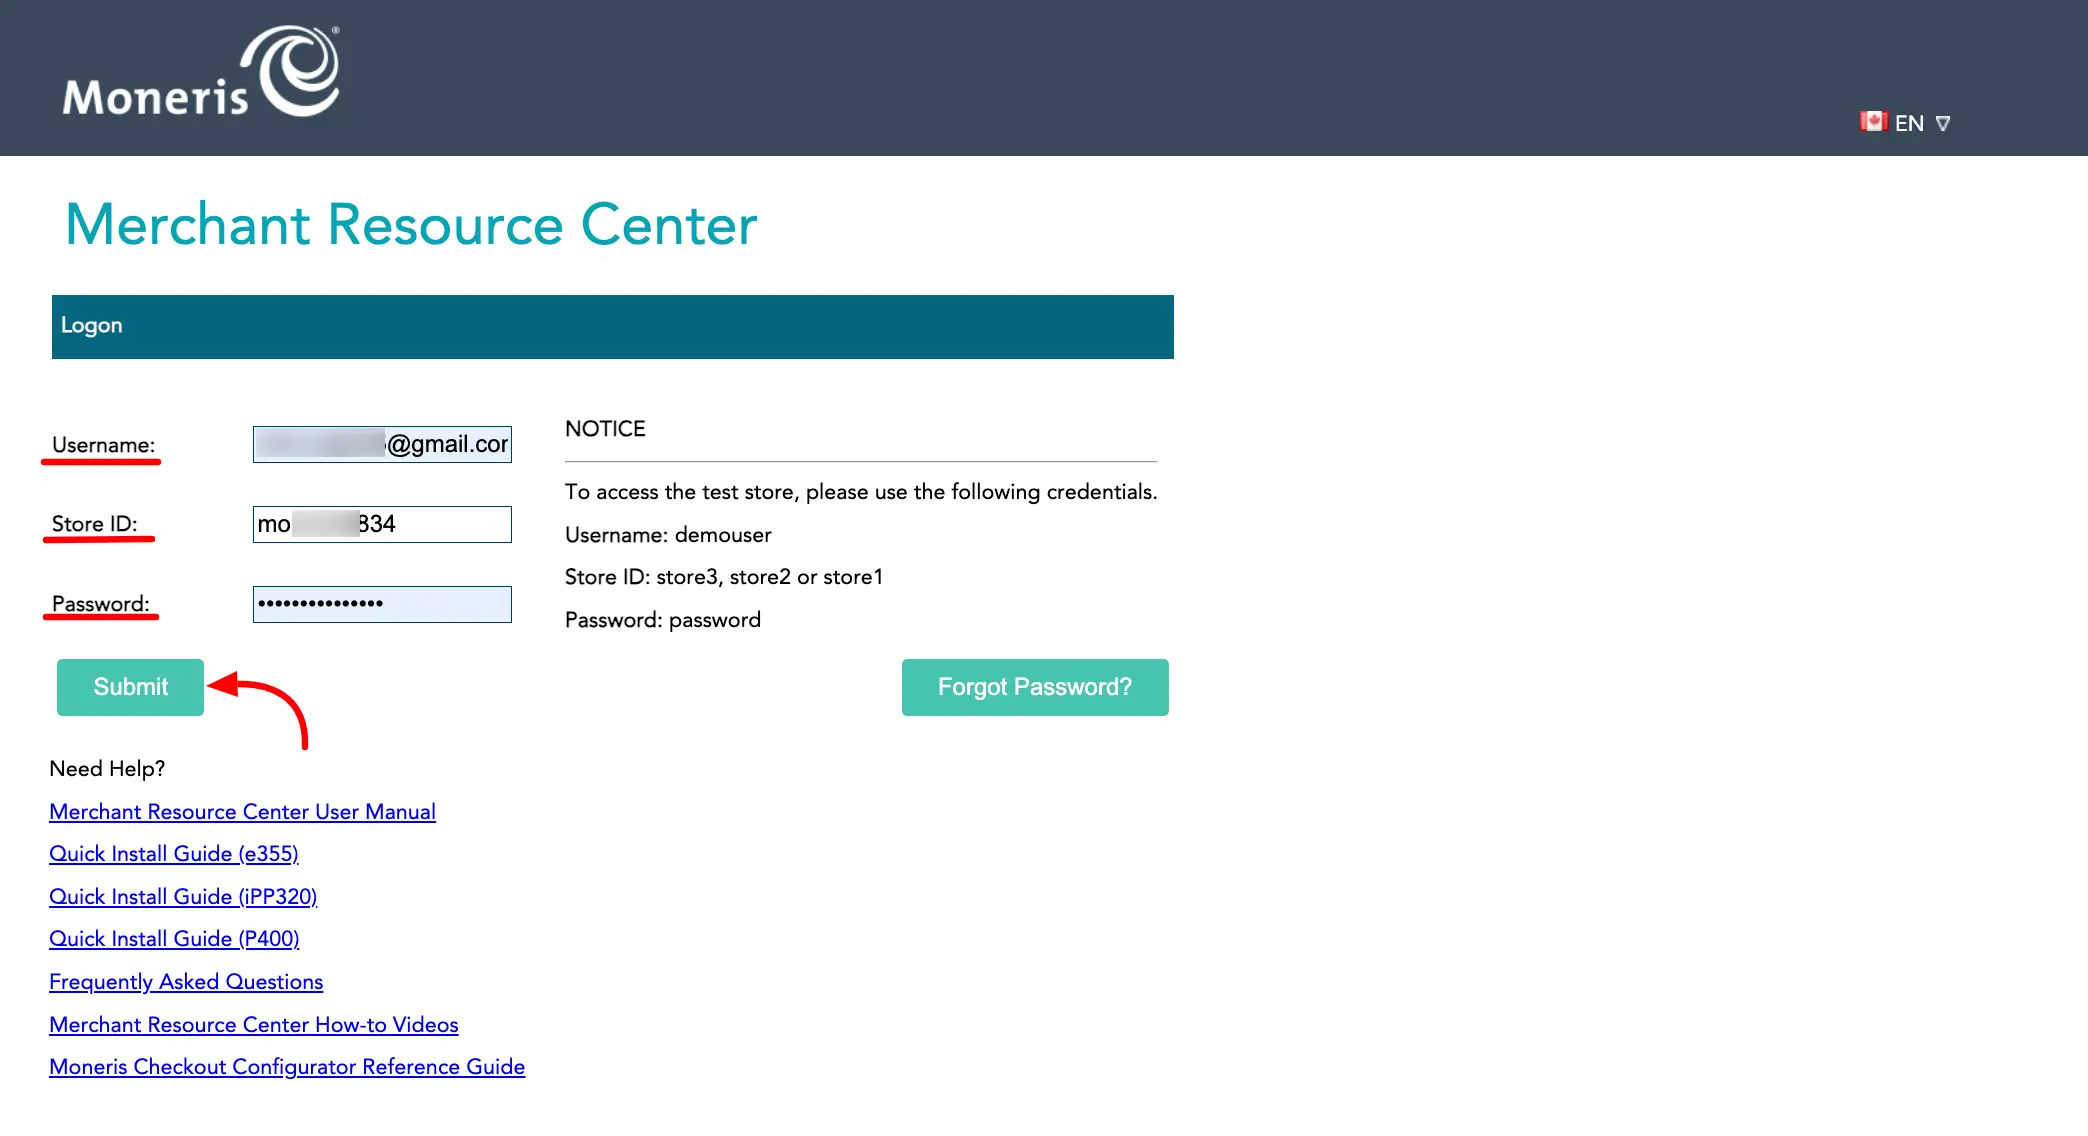
Here give your Username, Store ID, and Password and click on the Submit button.
To set your Moneris Account in Live Mode, you have to visit the Merchant Resource Center with this URL.
Other steps will be the same as in Test Mode. You have to manage Moneris Checkout Config, Moneris Checkout Page, and Recurring Payments from this URL.
You need to add some security questions here. Add them and click on the Save Reset Password Data button now.

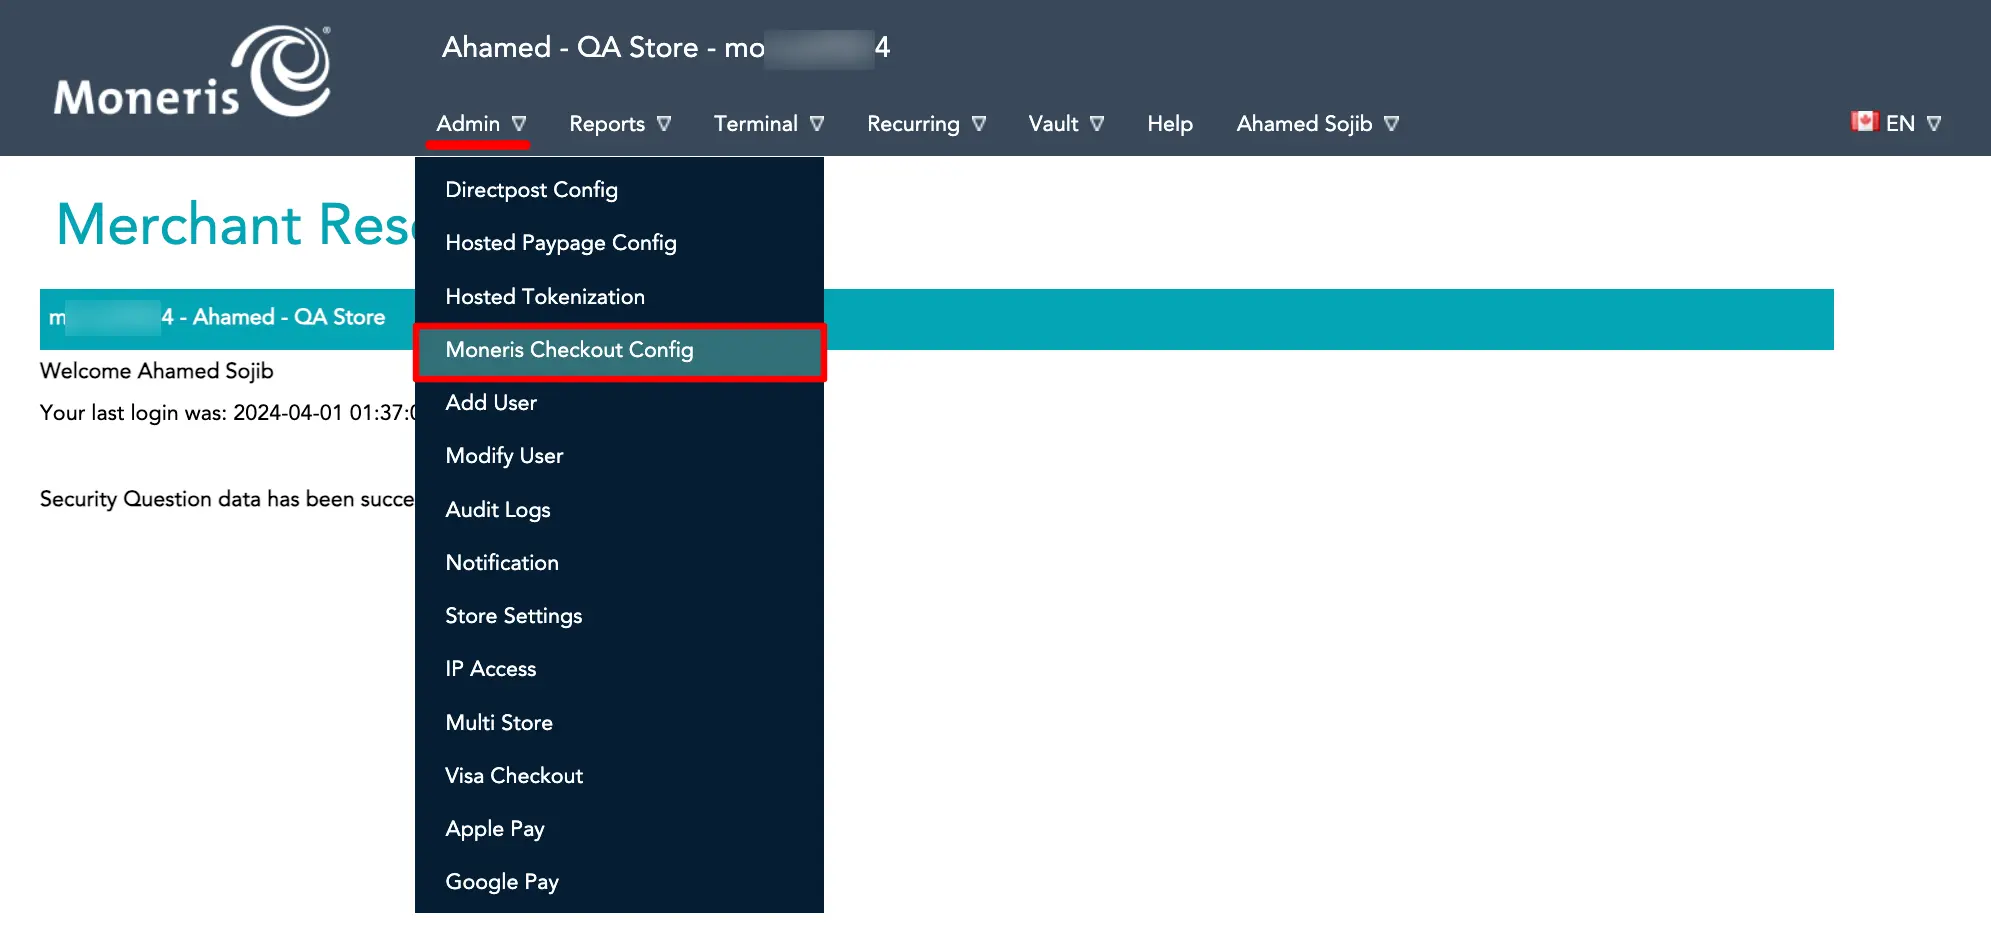
Now you will get access to the Moneris Resource Center. Select the Admin from the Nav bar and select the Moneris Checkout Config option from the dropdown list.
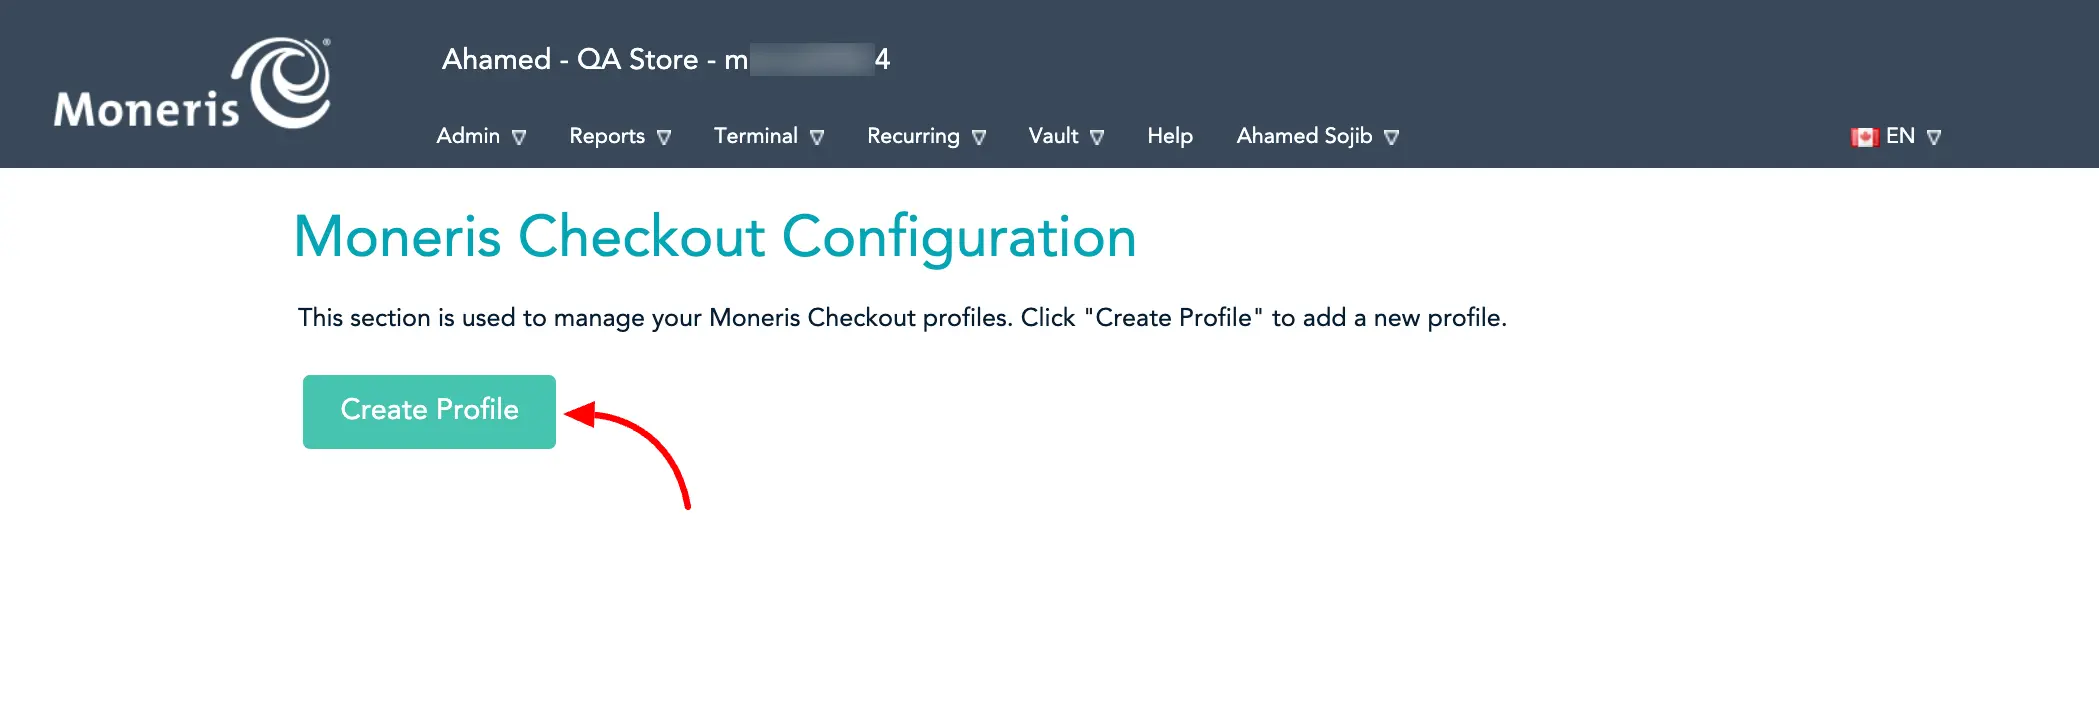
Click on the Create Profile button.
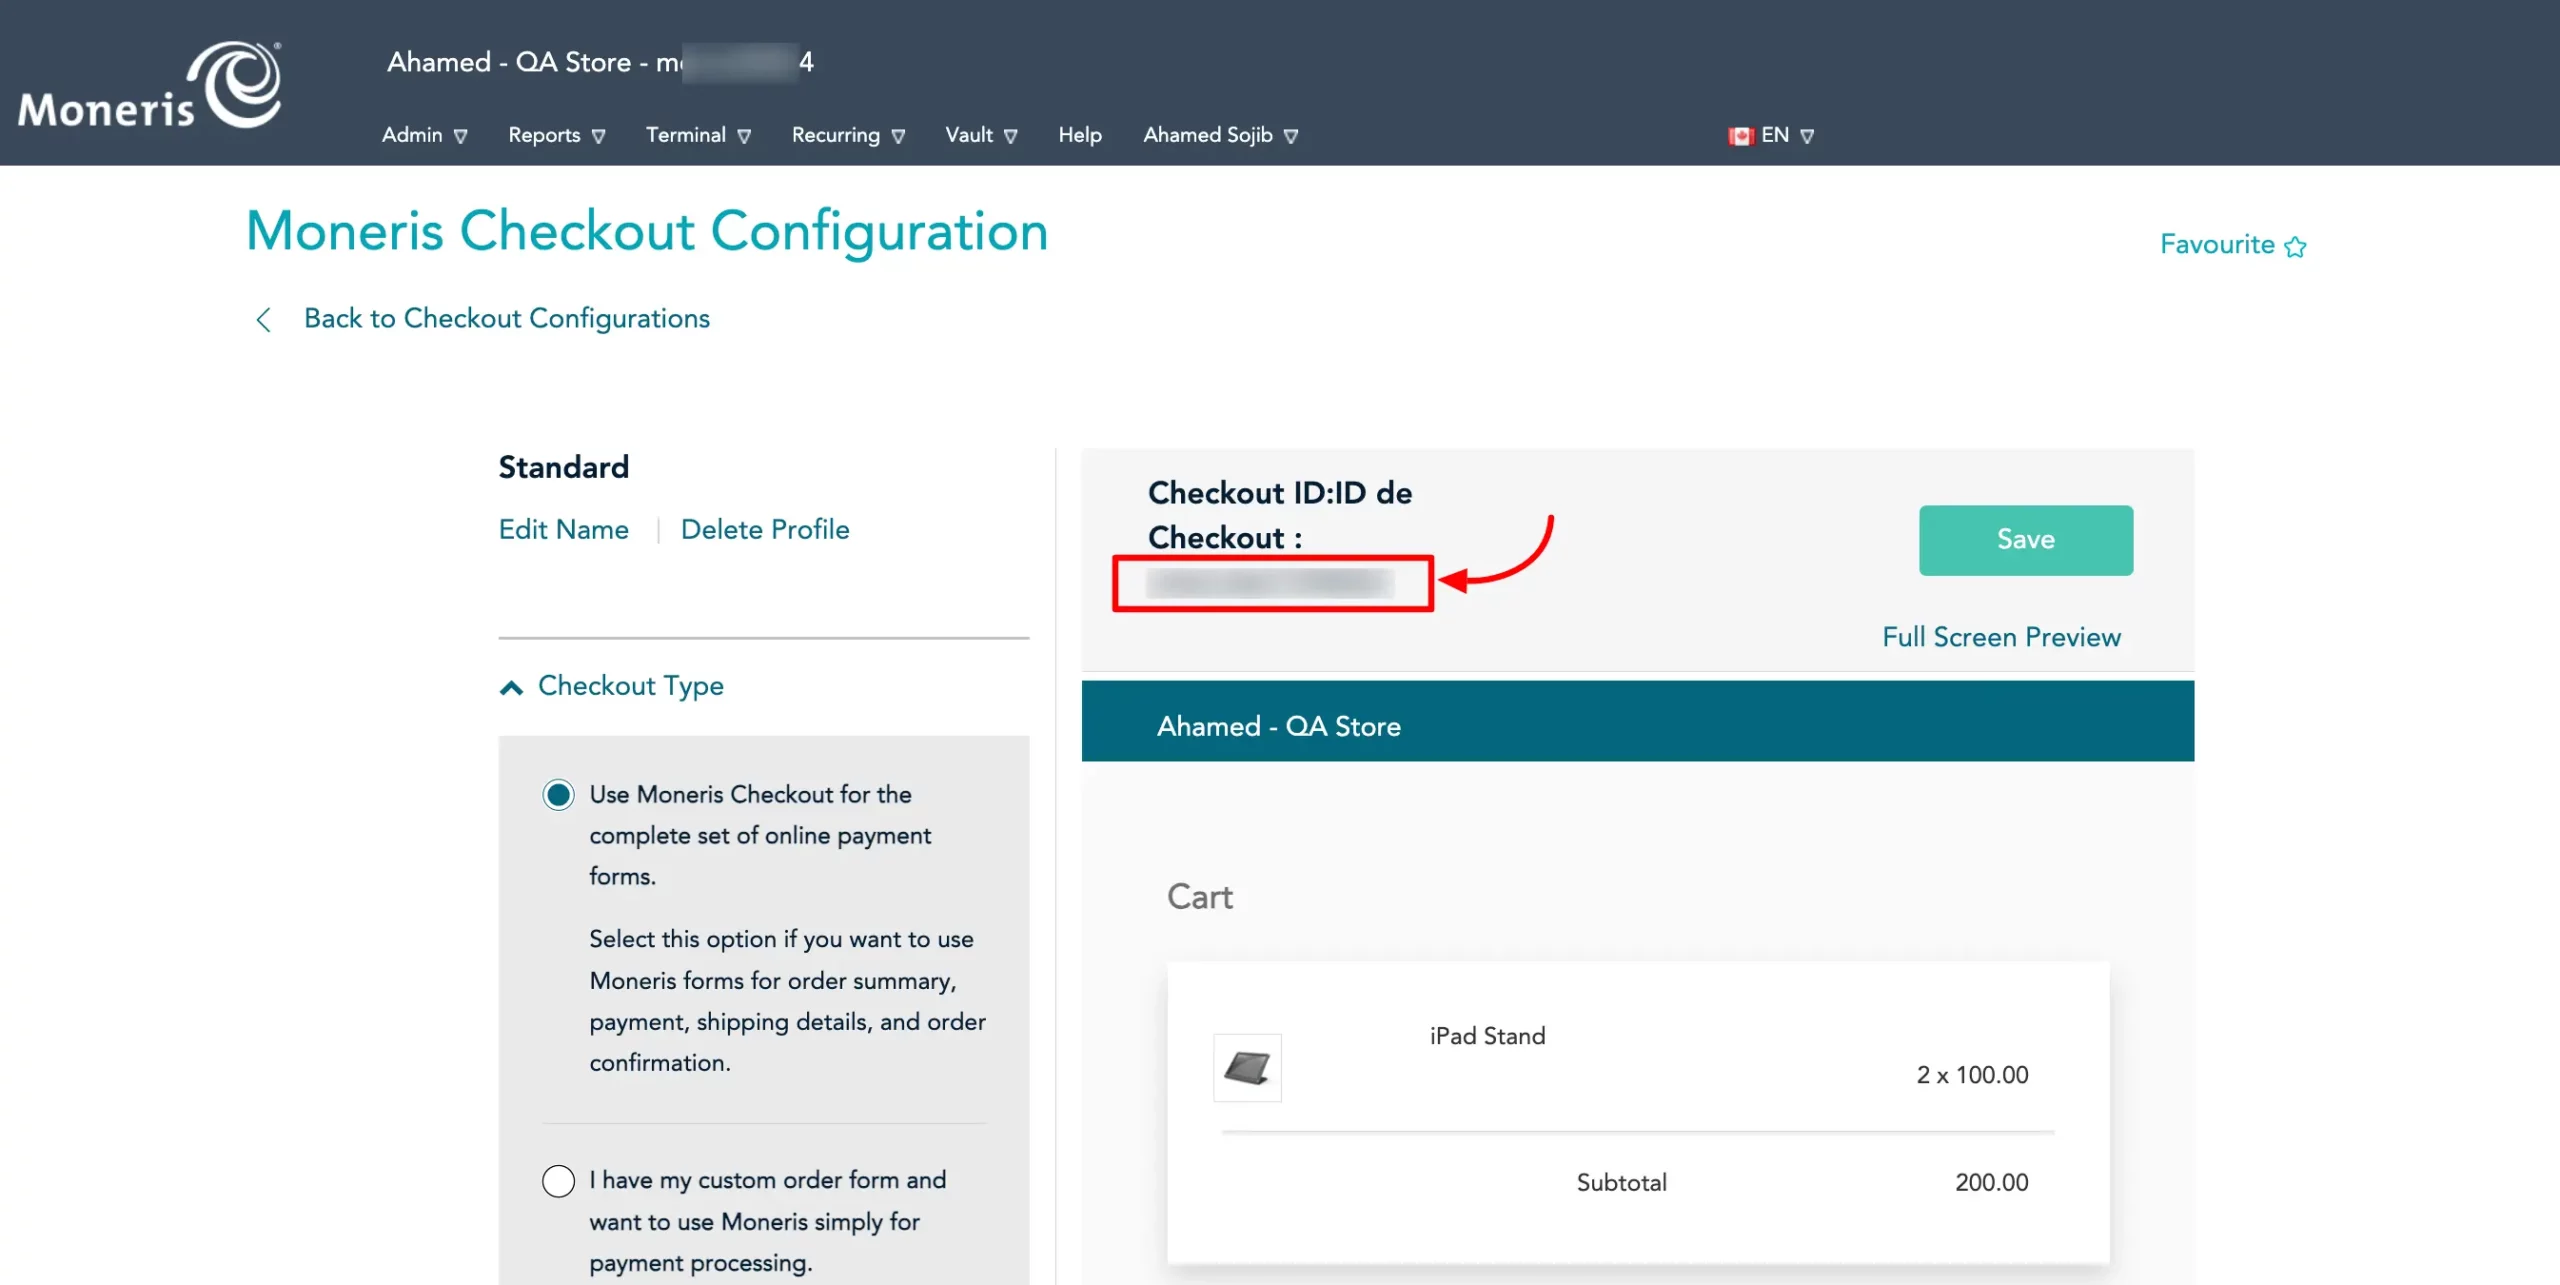
Moneris Checkout Page Settings #
You should be concerned about some settings on the Moneris Checkout Page:
- In Checkout Type use Moneris Checkout Froms for Paymnets.
- We don’t recommend Product Images in the Order Summary (Cart Details).
- The Email field should be Mandatory in the Customer’s Personal Details.
- If you enable AVS (Address Verification System) in Payment Security then the billing address field in Paymattic will be mandatory.
You will see the Checkout ID here. Copy the Checkout ID for later use from here.
Configuring Moneris Settings #
Return to Payment Gateway from the Paymattic Navbar, click the Moneris tab, and paste the Store ID, API Token, and Checkout ID you copied from the Moneris account into the respective fields.
Finally, press the Save Settings button and your Moneris account will be integrated with Paymattic for your WordPress Site.
Add Moneris in Forms #
Once you finish setting up your Moneris payment gateway, you can easily add this payment method to any of your existing Payment Form.
If you do not have any existing forms, read Create a Form from Scratch or Create a Form using Templates documentation.
To learn the detailed process of adding a payment method to an existing form, read this Documentation.
But, remember, the added Moneris payment method in your Form will not function unless you complete the configuration process properly.
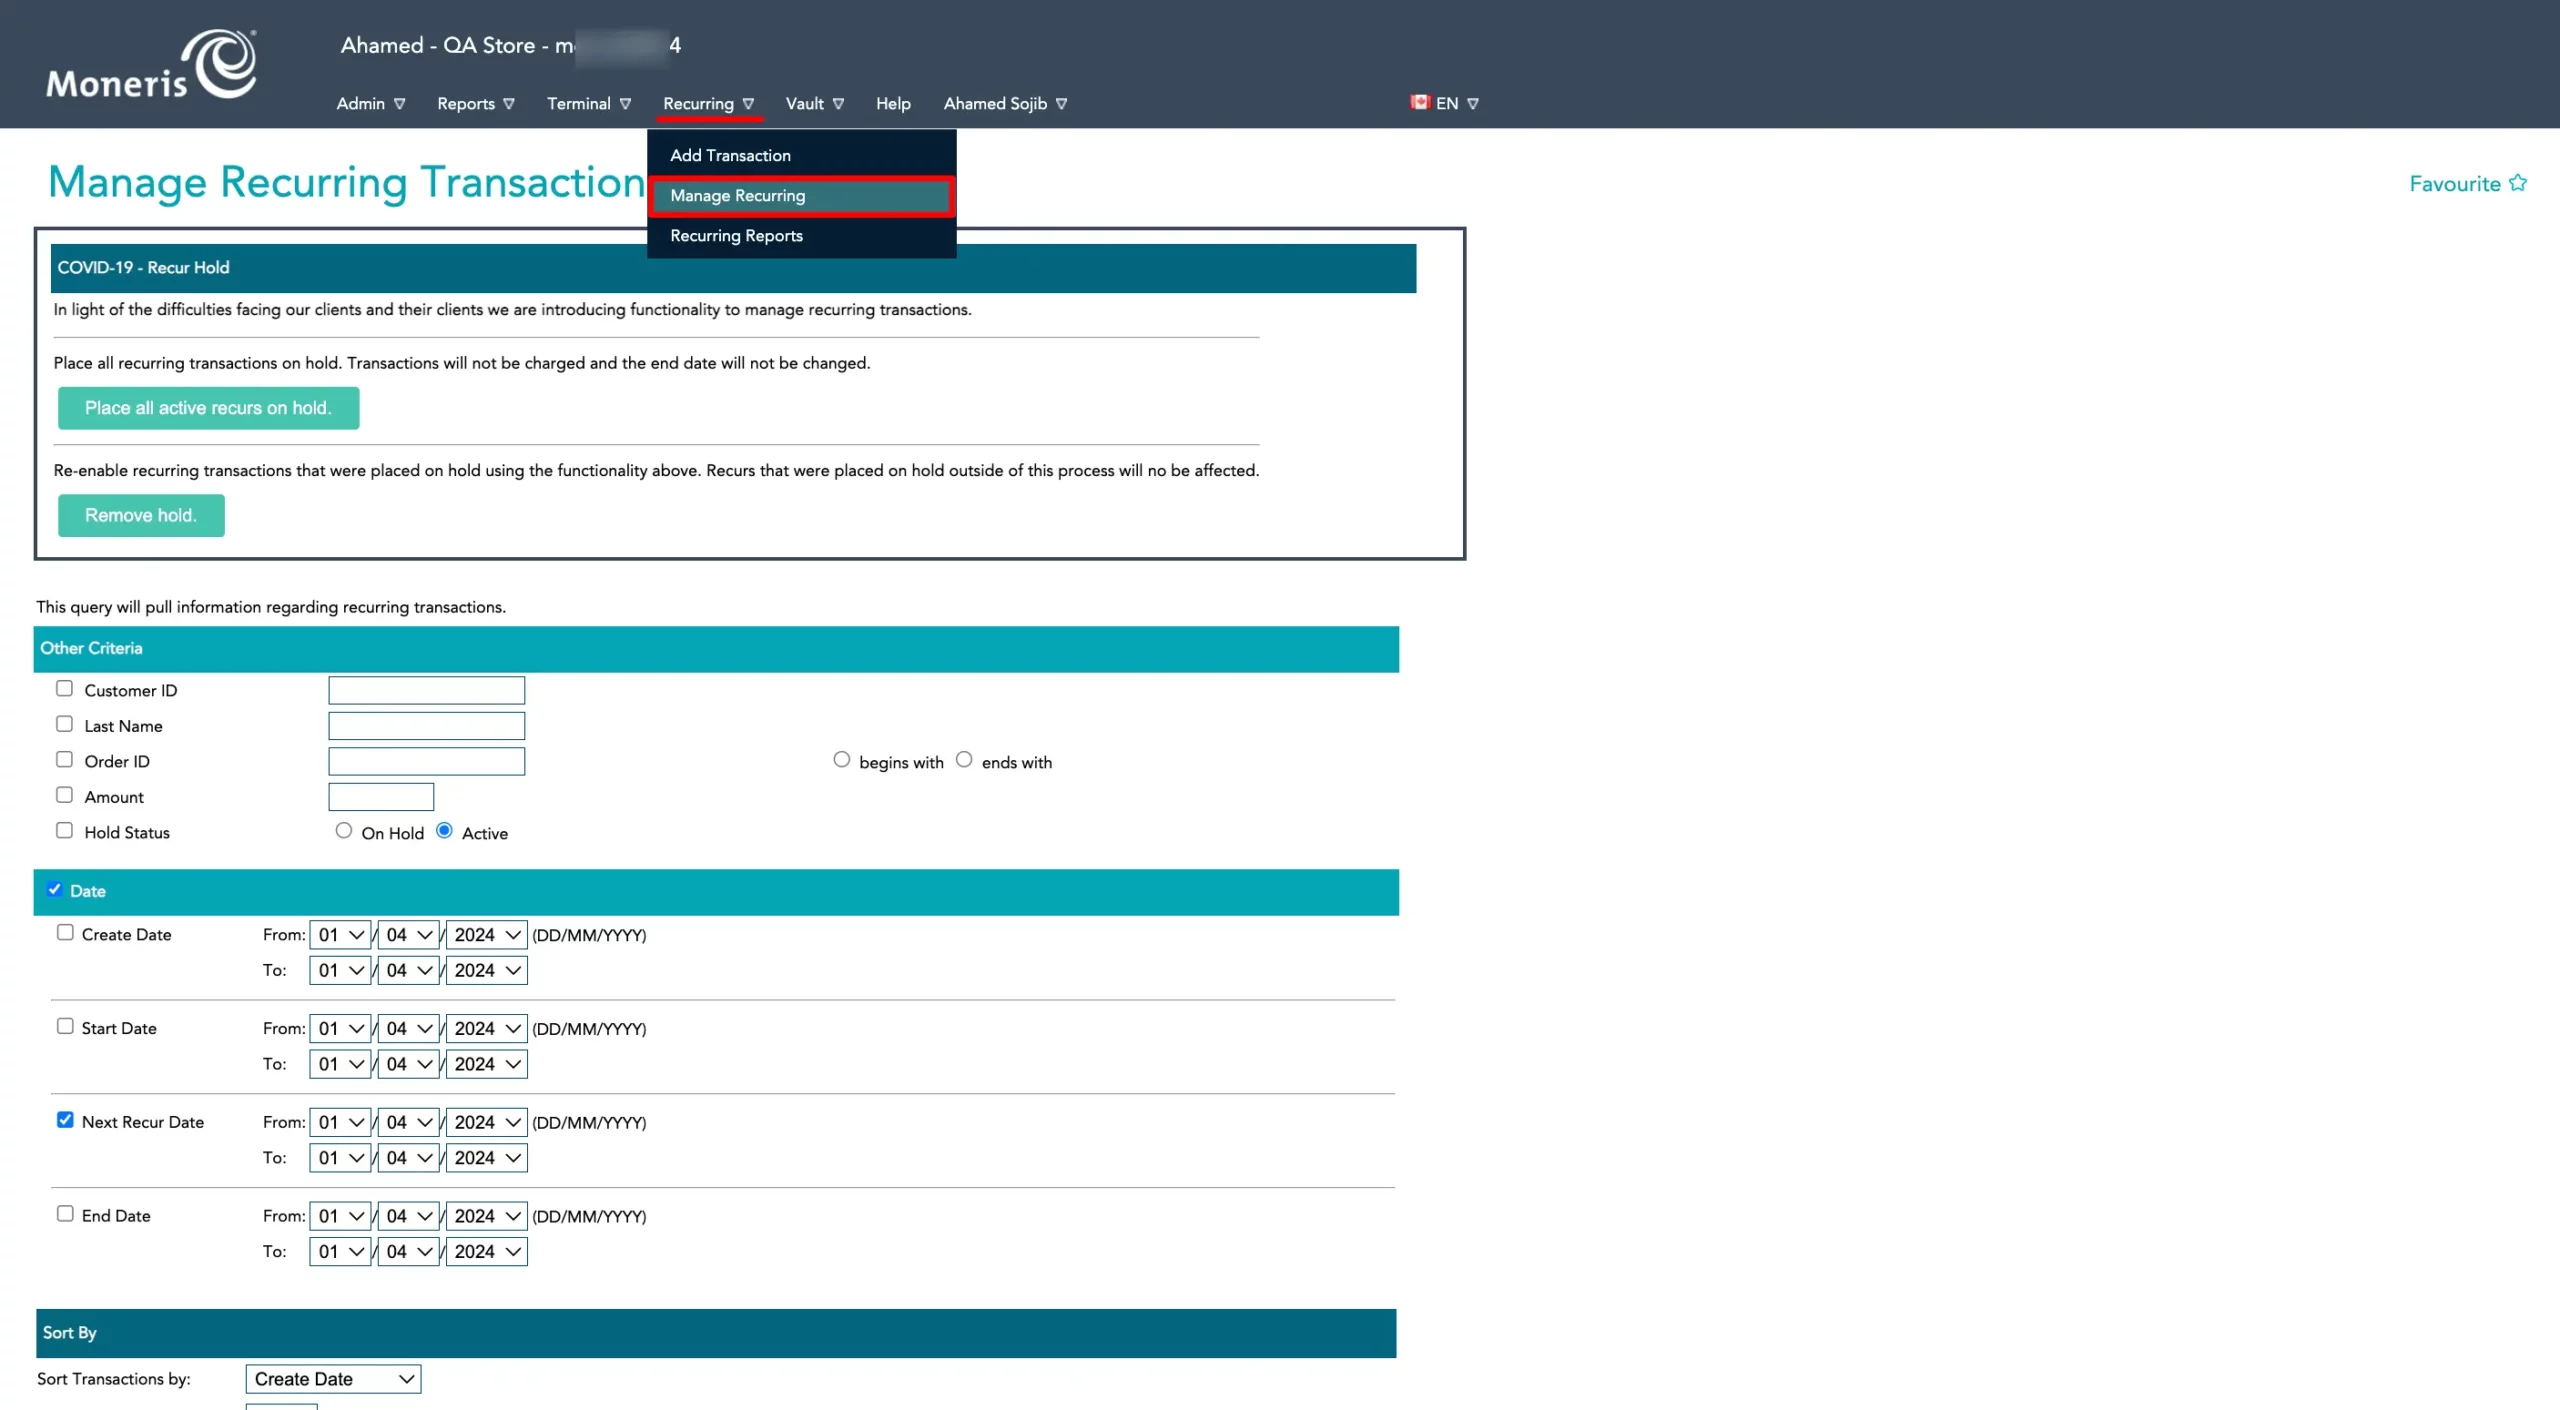
Managing Recurring Payments in Moneris #
To manage Recurring Payments in Moneris, go to the Recurring and then select Manage Recurring.
Now the Manage Recurring Transaction page will come and you can manage your Recurring Payments from here.
If you have any further questions, concerns, or suggestions, please do not hesitate to contact our @support team. Thank you.


