With Paymattic, you can easily integrate the Viva Wallet payment method to accept payments. This article will guide you through configuring Viva Wallet on your WordPress Site with the Paymattic plugin.
Remember, to get access to the Viva Wallet payment gateway, you need the Paymattic Pro Plugin.
Enabling Viva Wallet Payment Method #
To learn how to enable the Viva Wallet payment gateway through Paymattic, follow the steps with screenshots below –
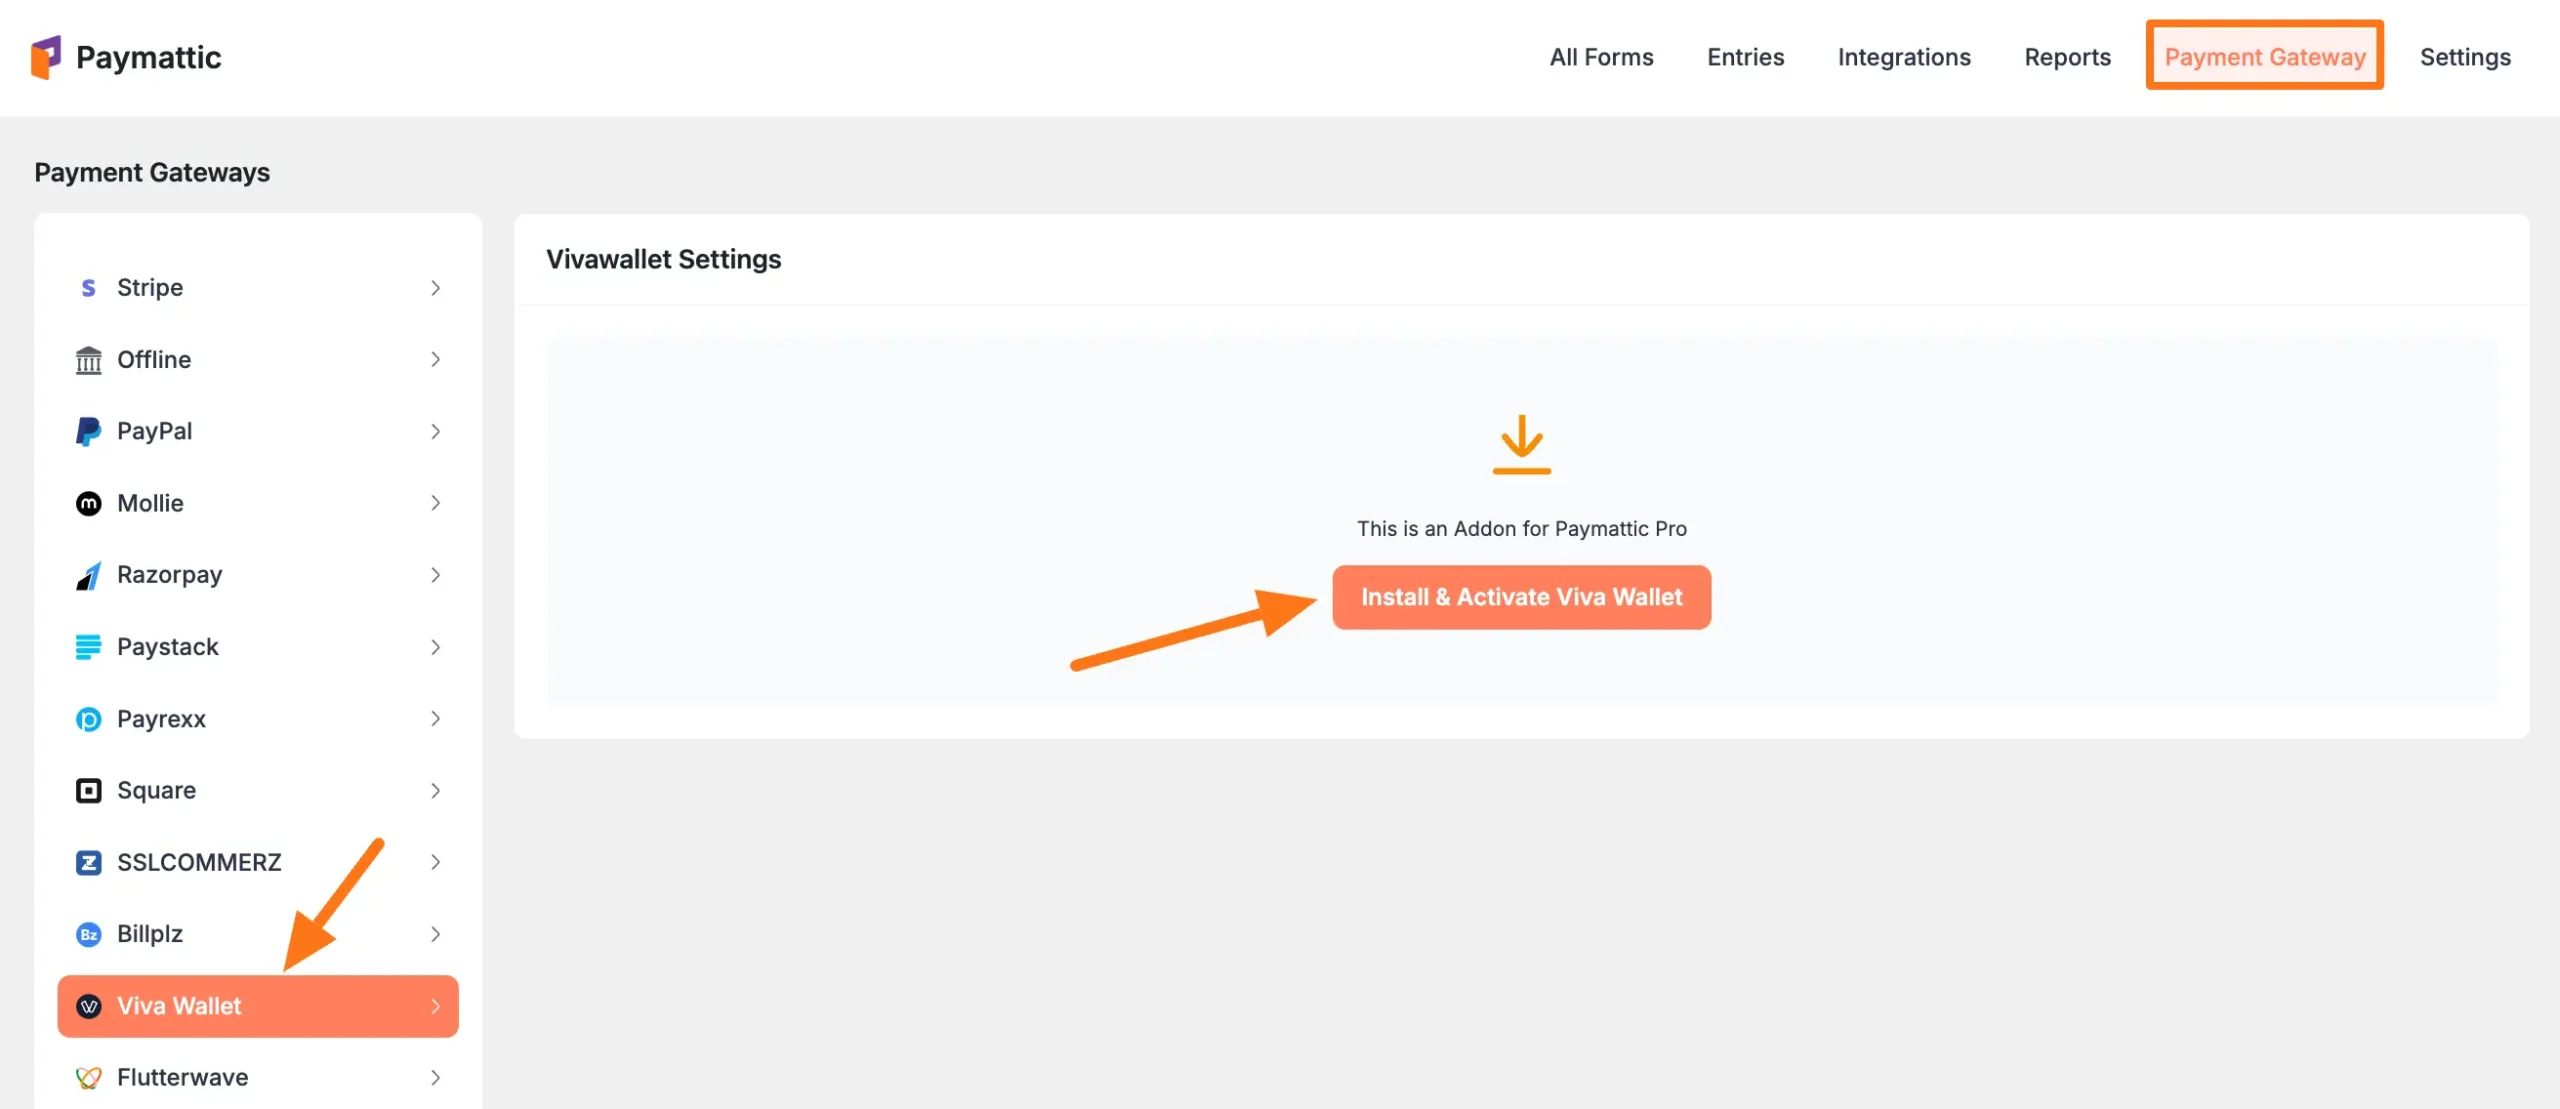
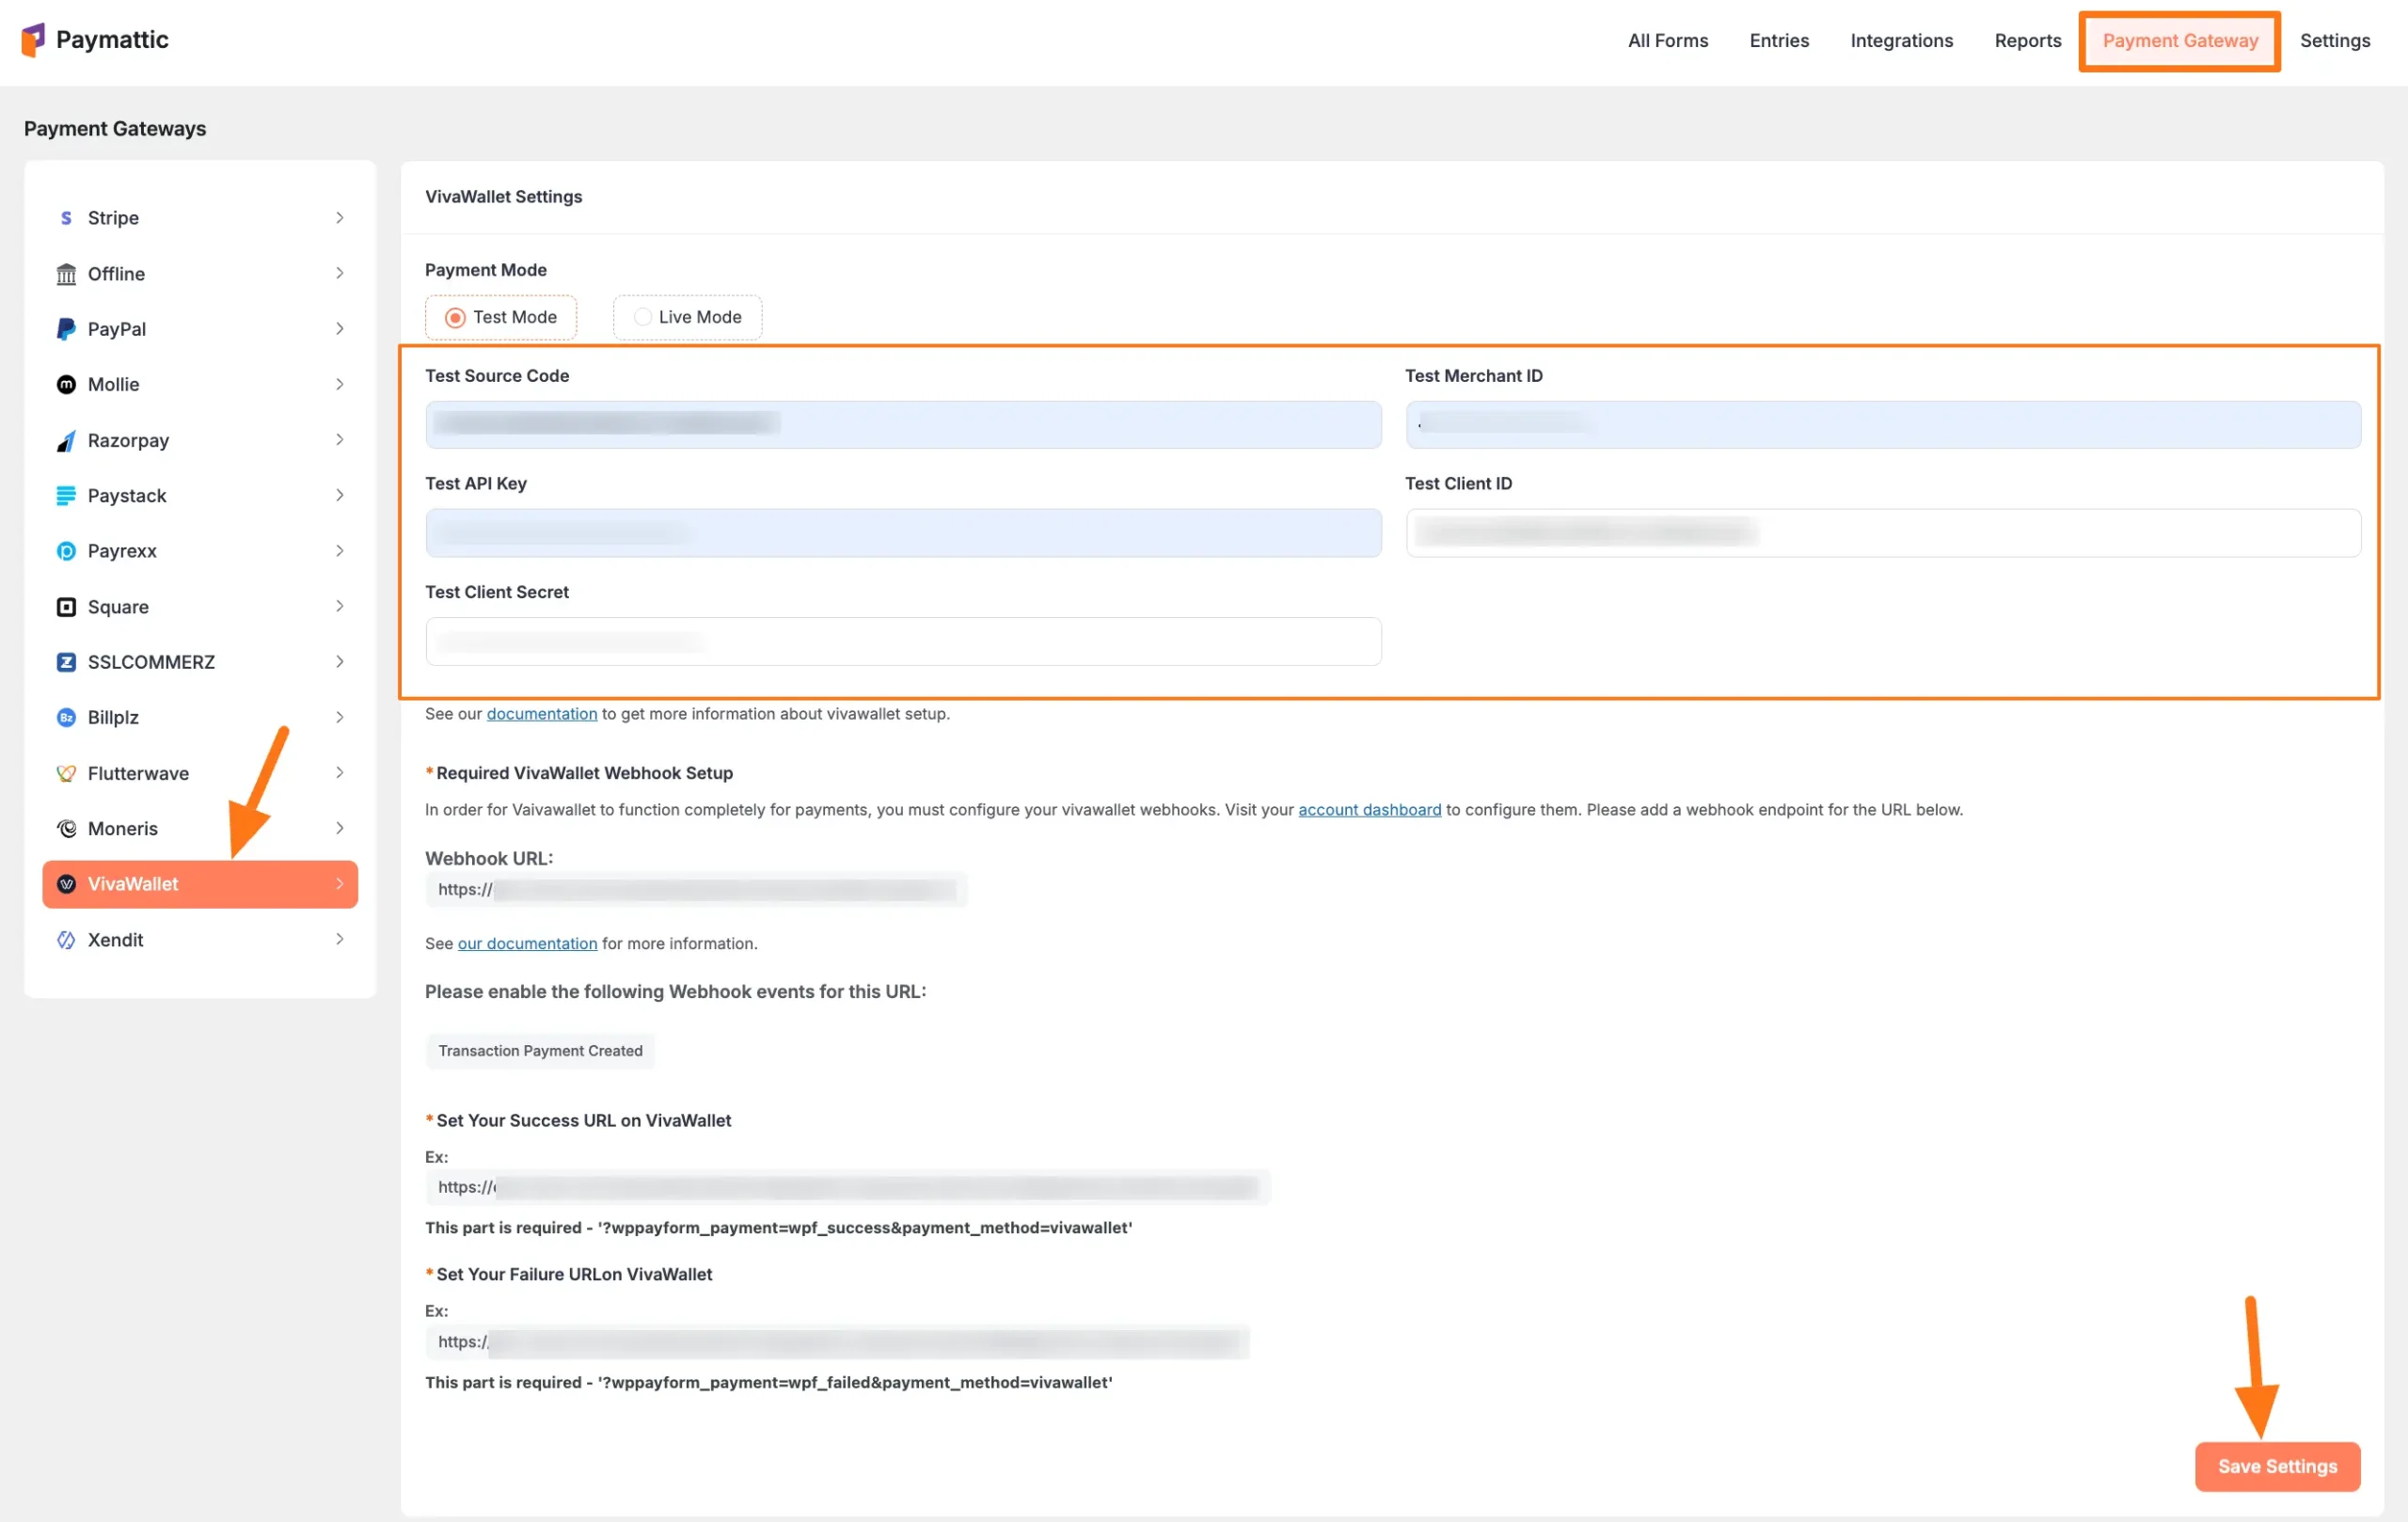
First, go to Payment Gateway from the Paymattic Navbar, click the Viva Wallet tab from the left sidebar, and the Viva Wallet Settings page will open.
Click the Install and Activate Viva Wallet button to connect Viva Wallet with Paymattic Pro.
This add-on needs to be installed the first time you integrate with Viva Wallet.
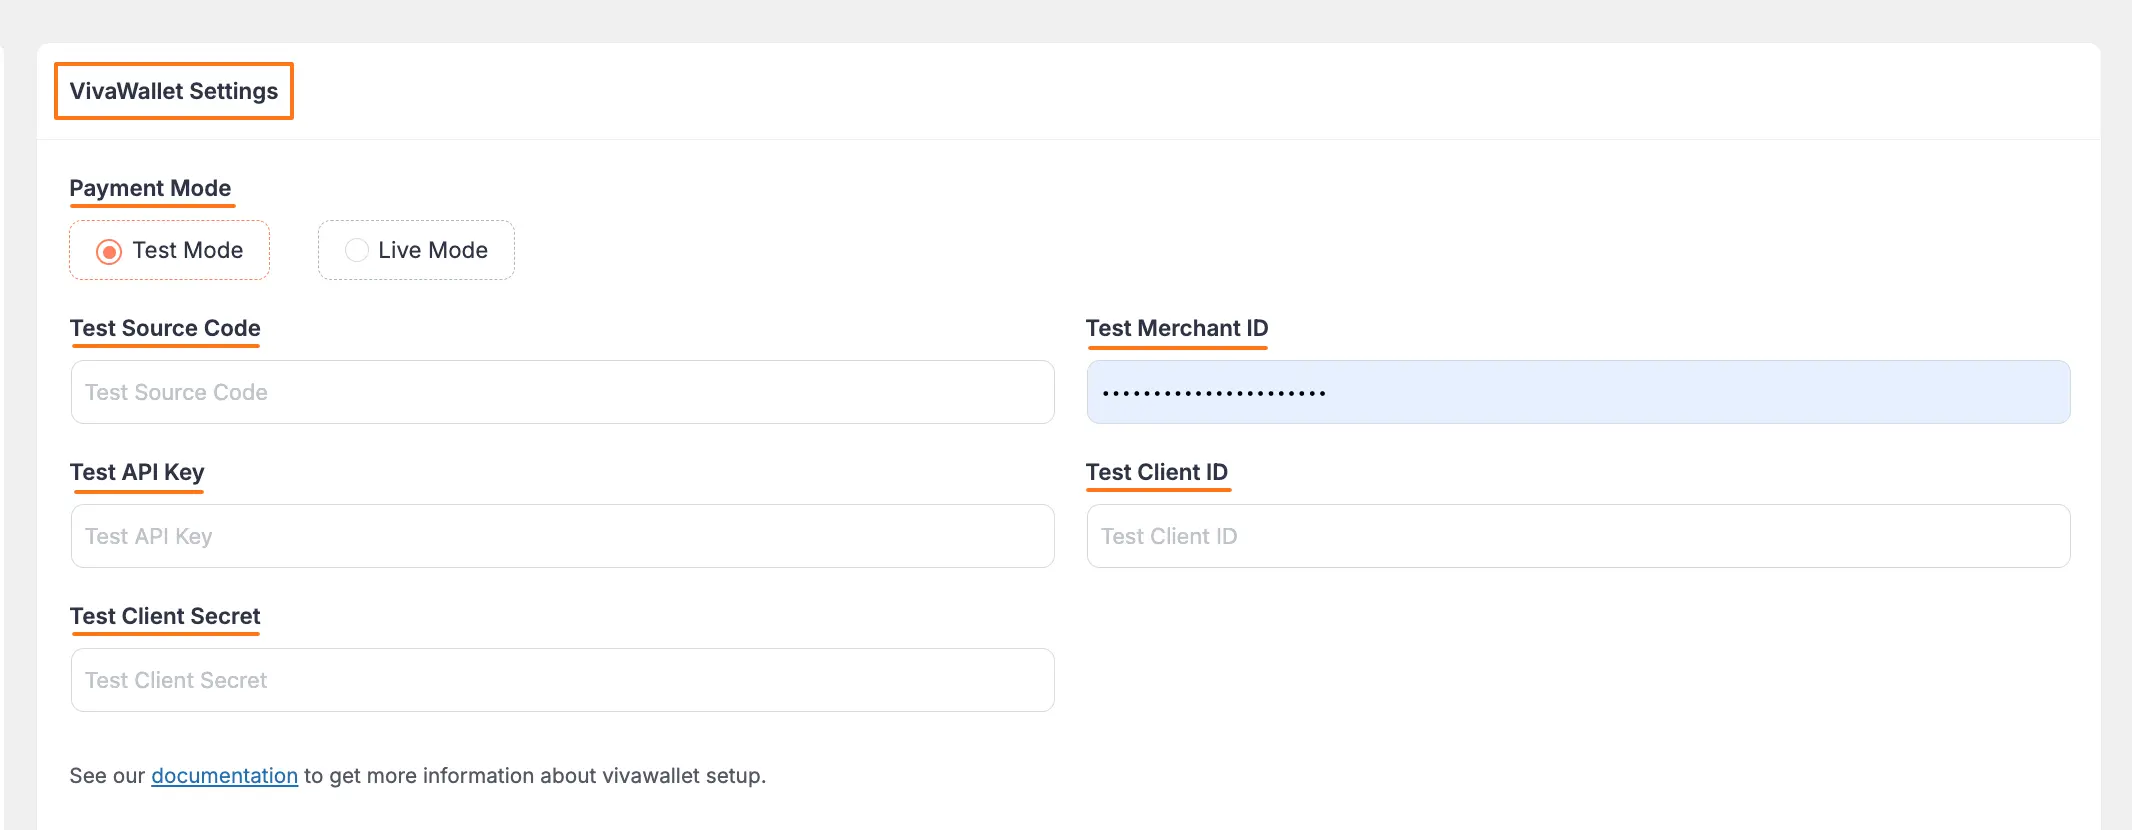
Select any Payment Mode between Test (for test payments) and Live ( for real payments) as both options follow the same configuration process, e.g., I choose the Test Mode.
Now, you need to obtain all the necessary Credentials (Source Code, Merchant ID, API Key, Client ID, and Client Secret) from your Viva Wallet Account.
Get All the Credentials from the Viva Wallet #
To learn how to get all the Credentials from your Viva Wallet for the configuration, follow the steps with screenshots below –
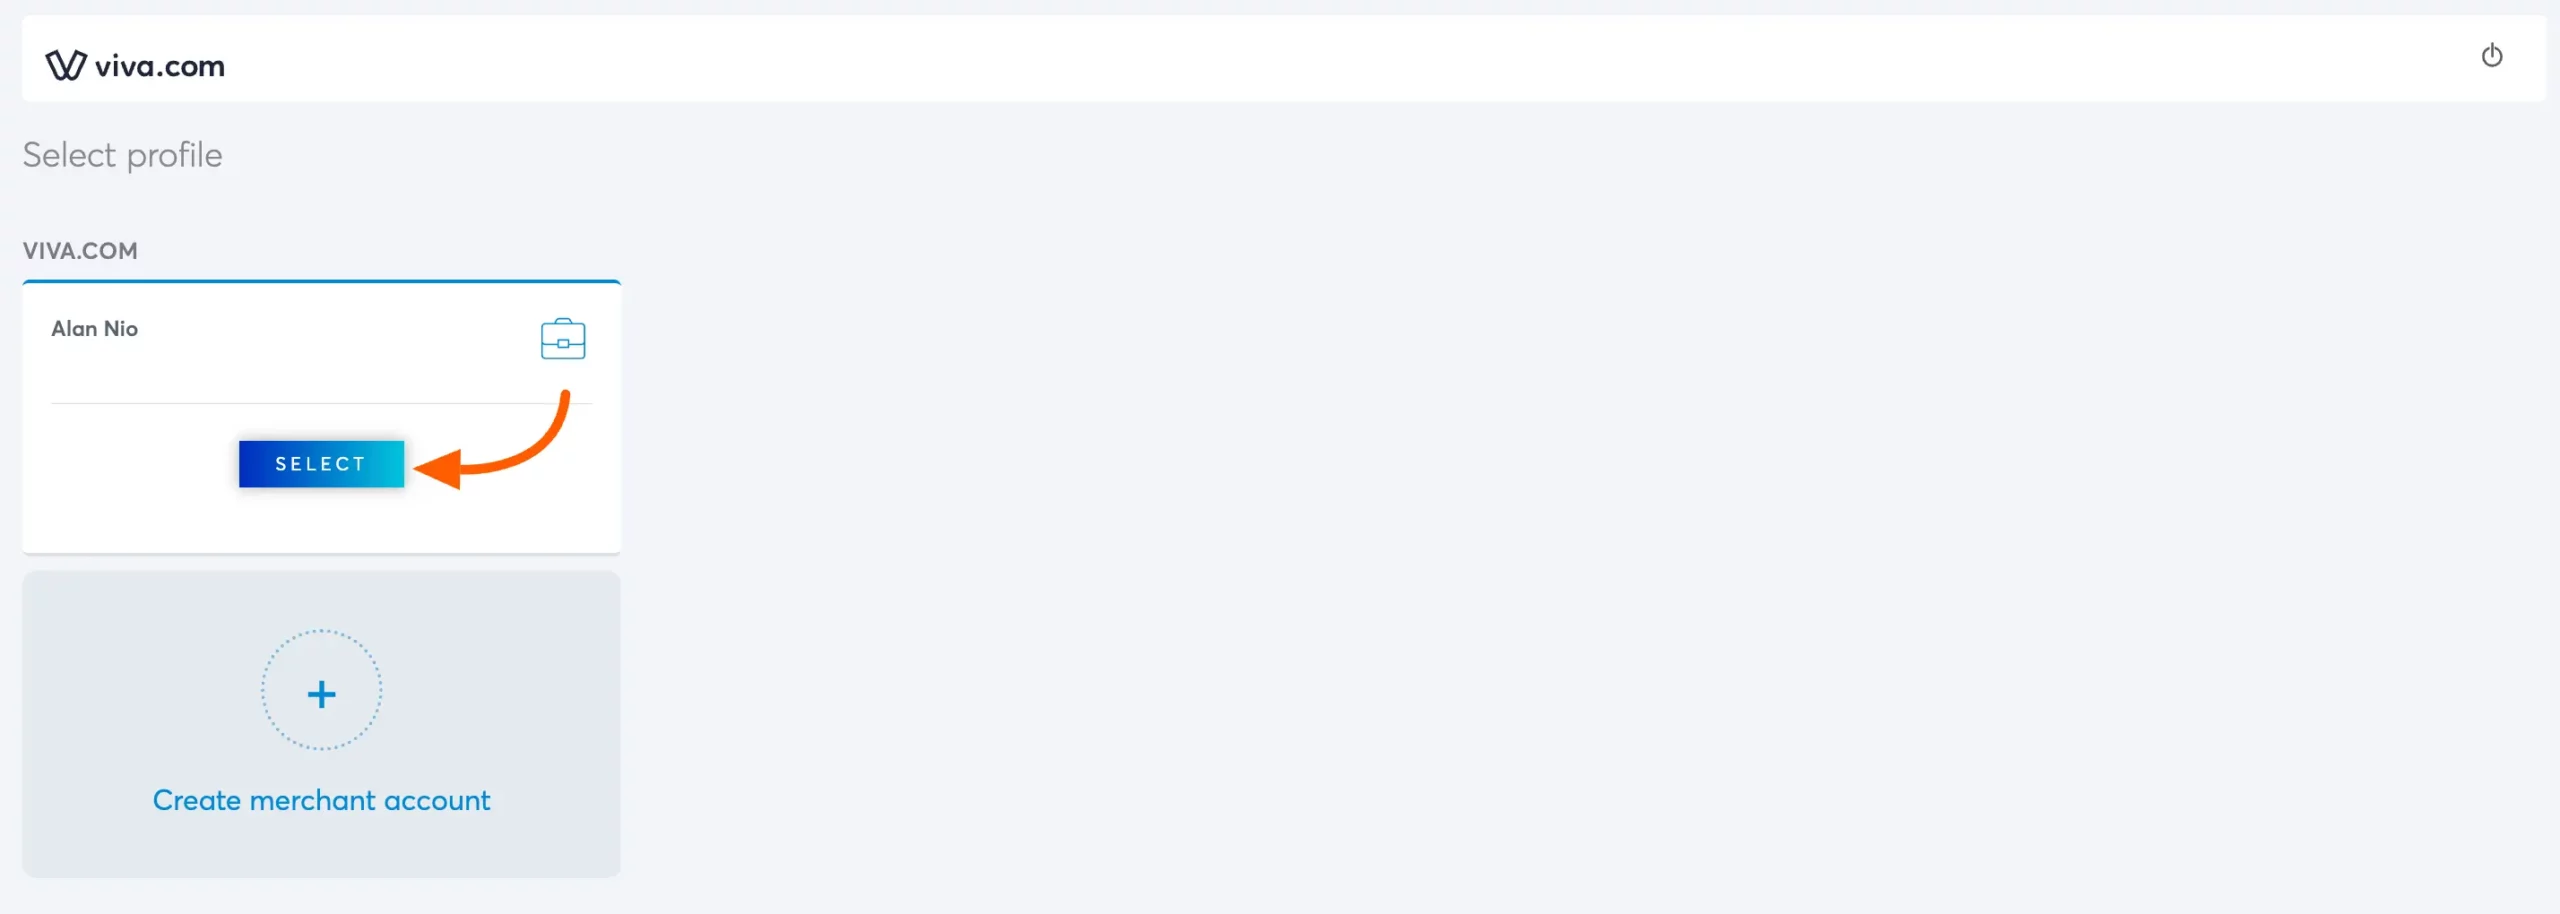
First, log in to your Viva Wallet Account for Test Mode and Live Mode. If you do not have an account, sign up from here.
Once you log in to your account, click the Select button on your Viva Account Profile.
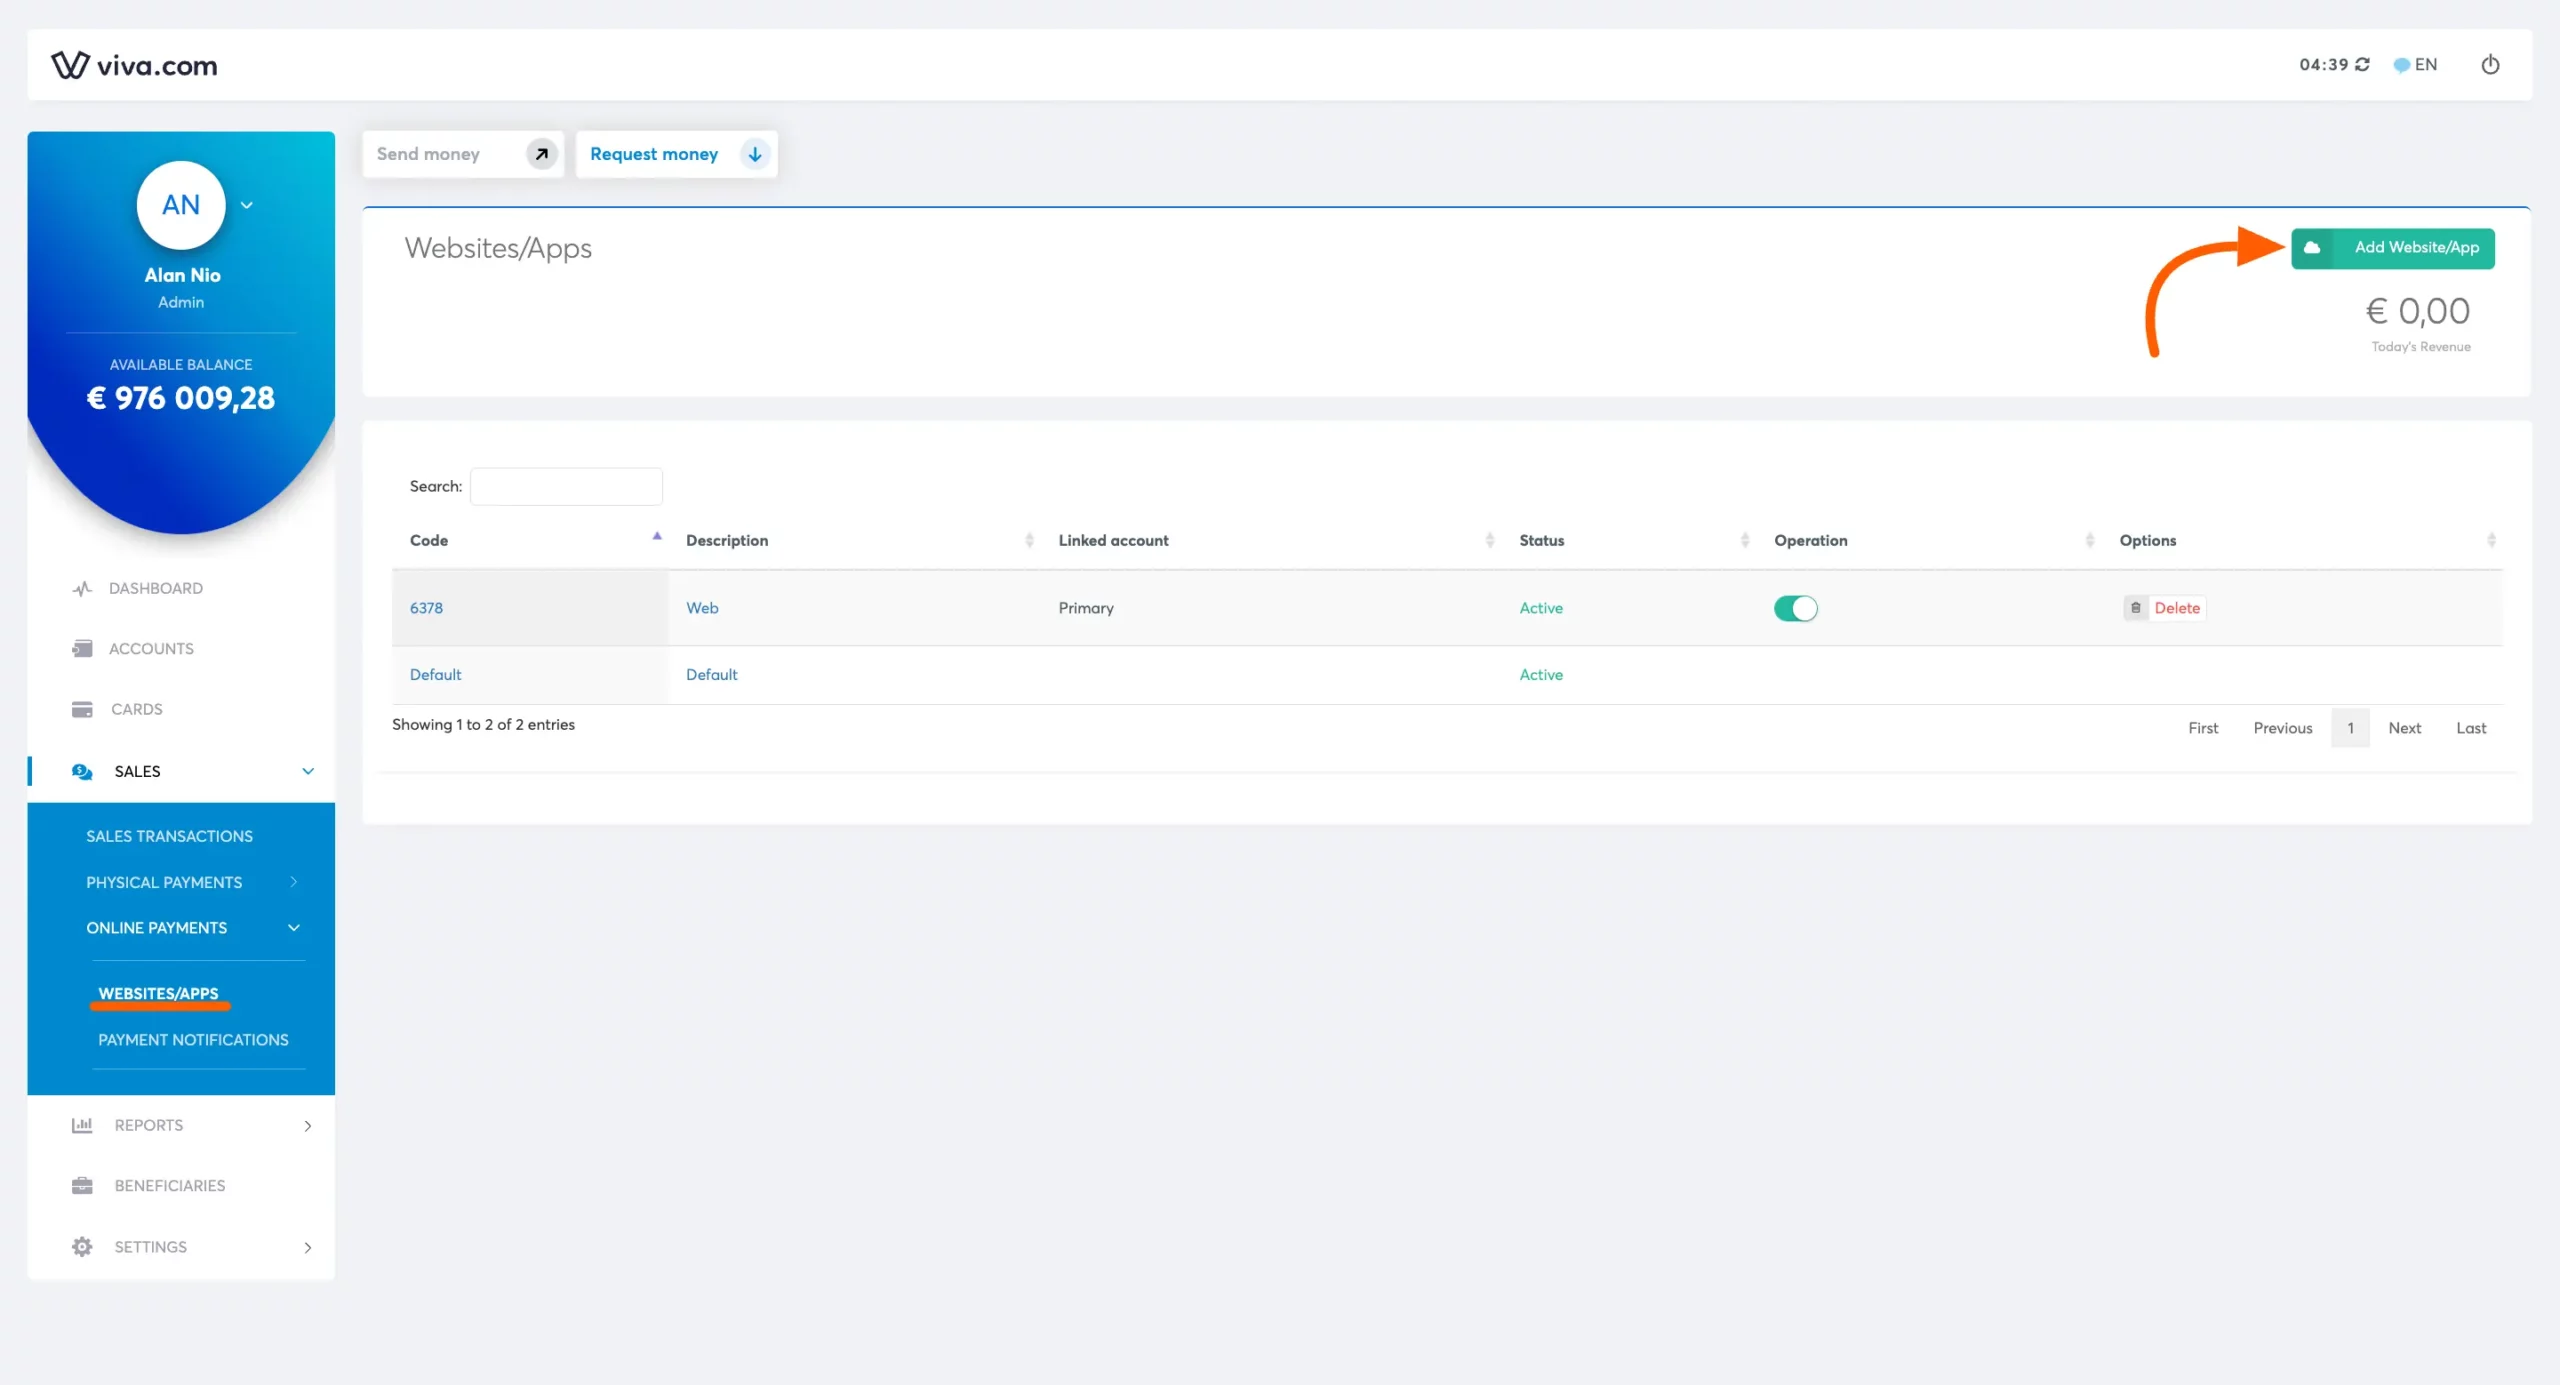
Your Viva Wallet profile settings option will come now. You have to create a Web App now so select the Sales > Online Payment > Website/Apps.
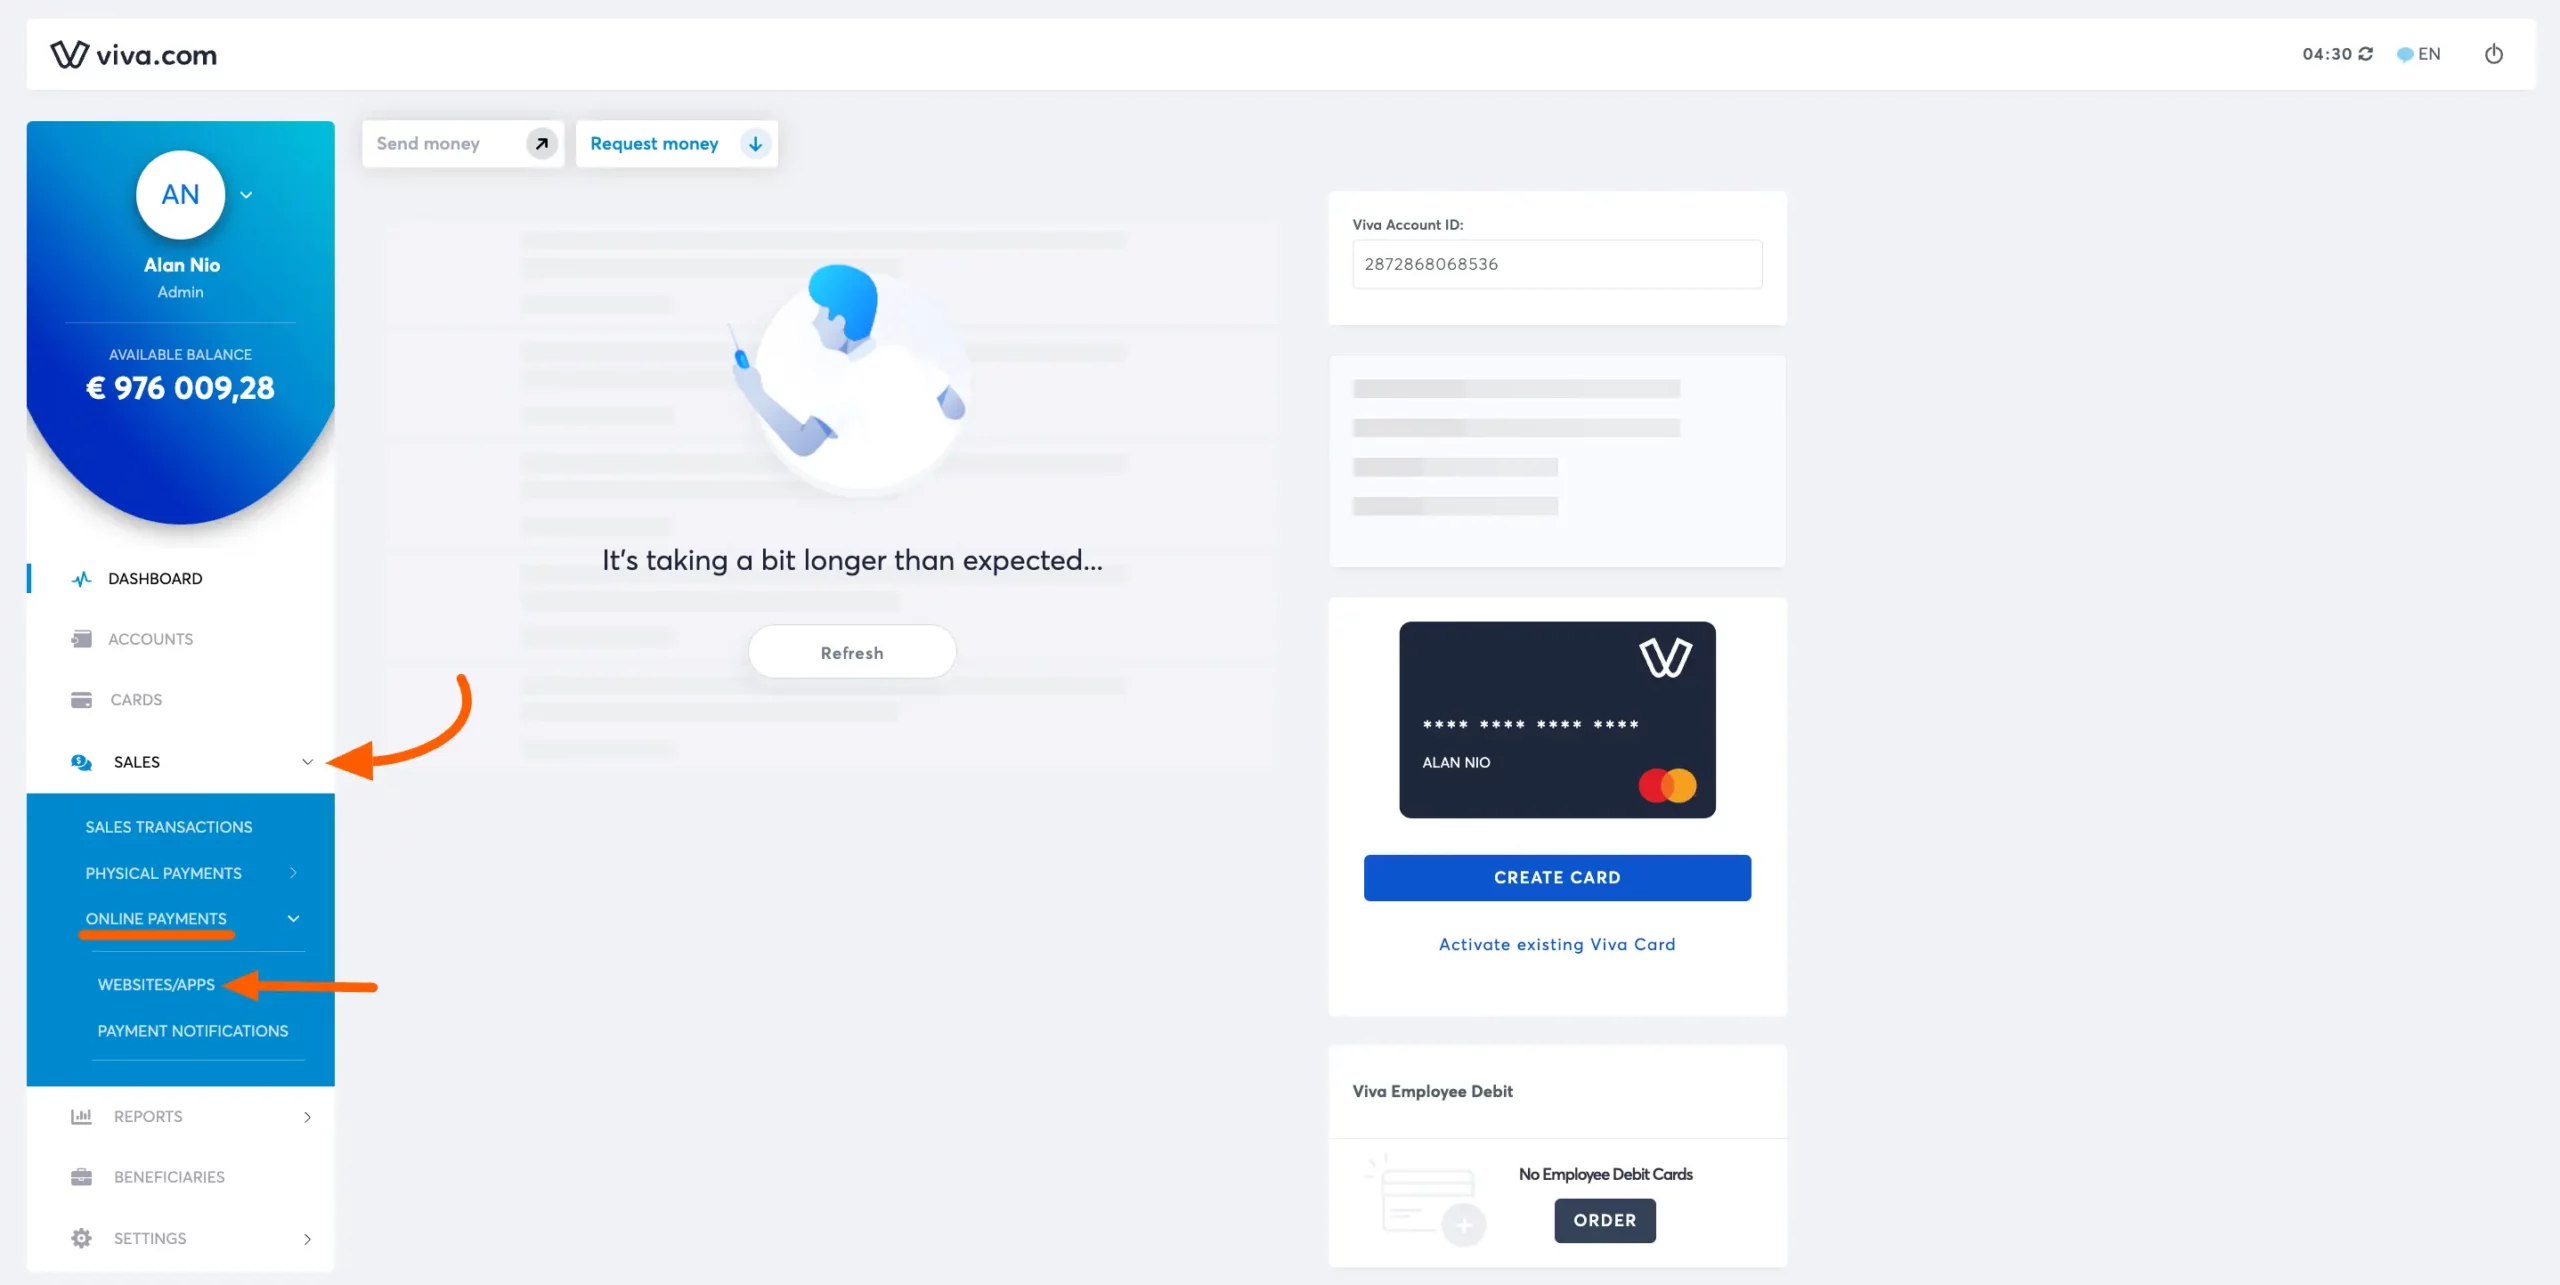
Click on the Add Website/App button.
Getting Source Code #
Here you will get a Code copy of the code for later use. This is the Source Code that you have to paste into your Paymattic.
Then give your Domain name, Success URL, and Failure URL. Check on all the Checkboxes and click on the Create button.
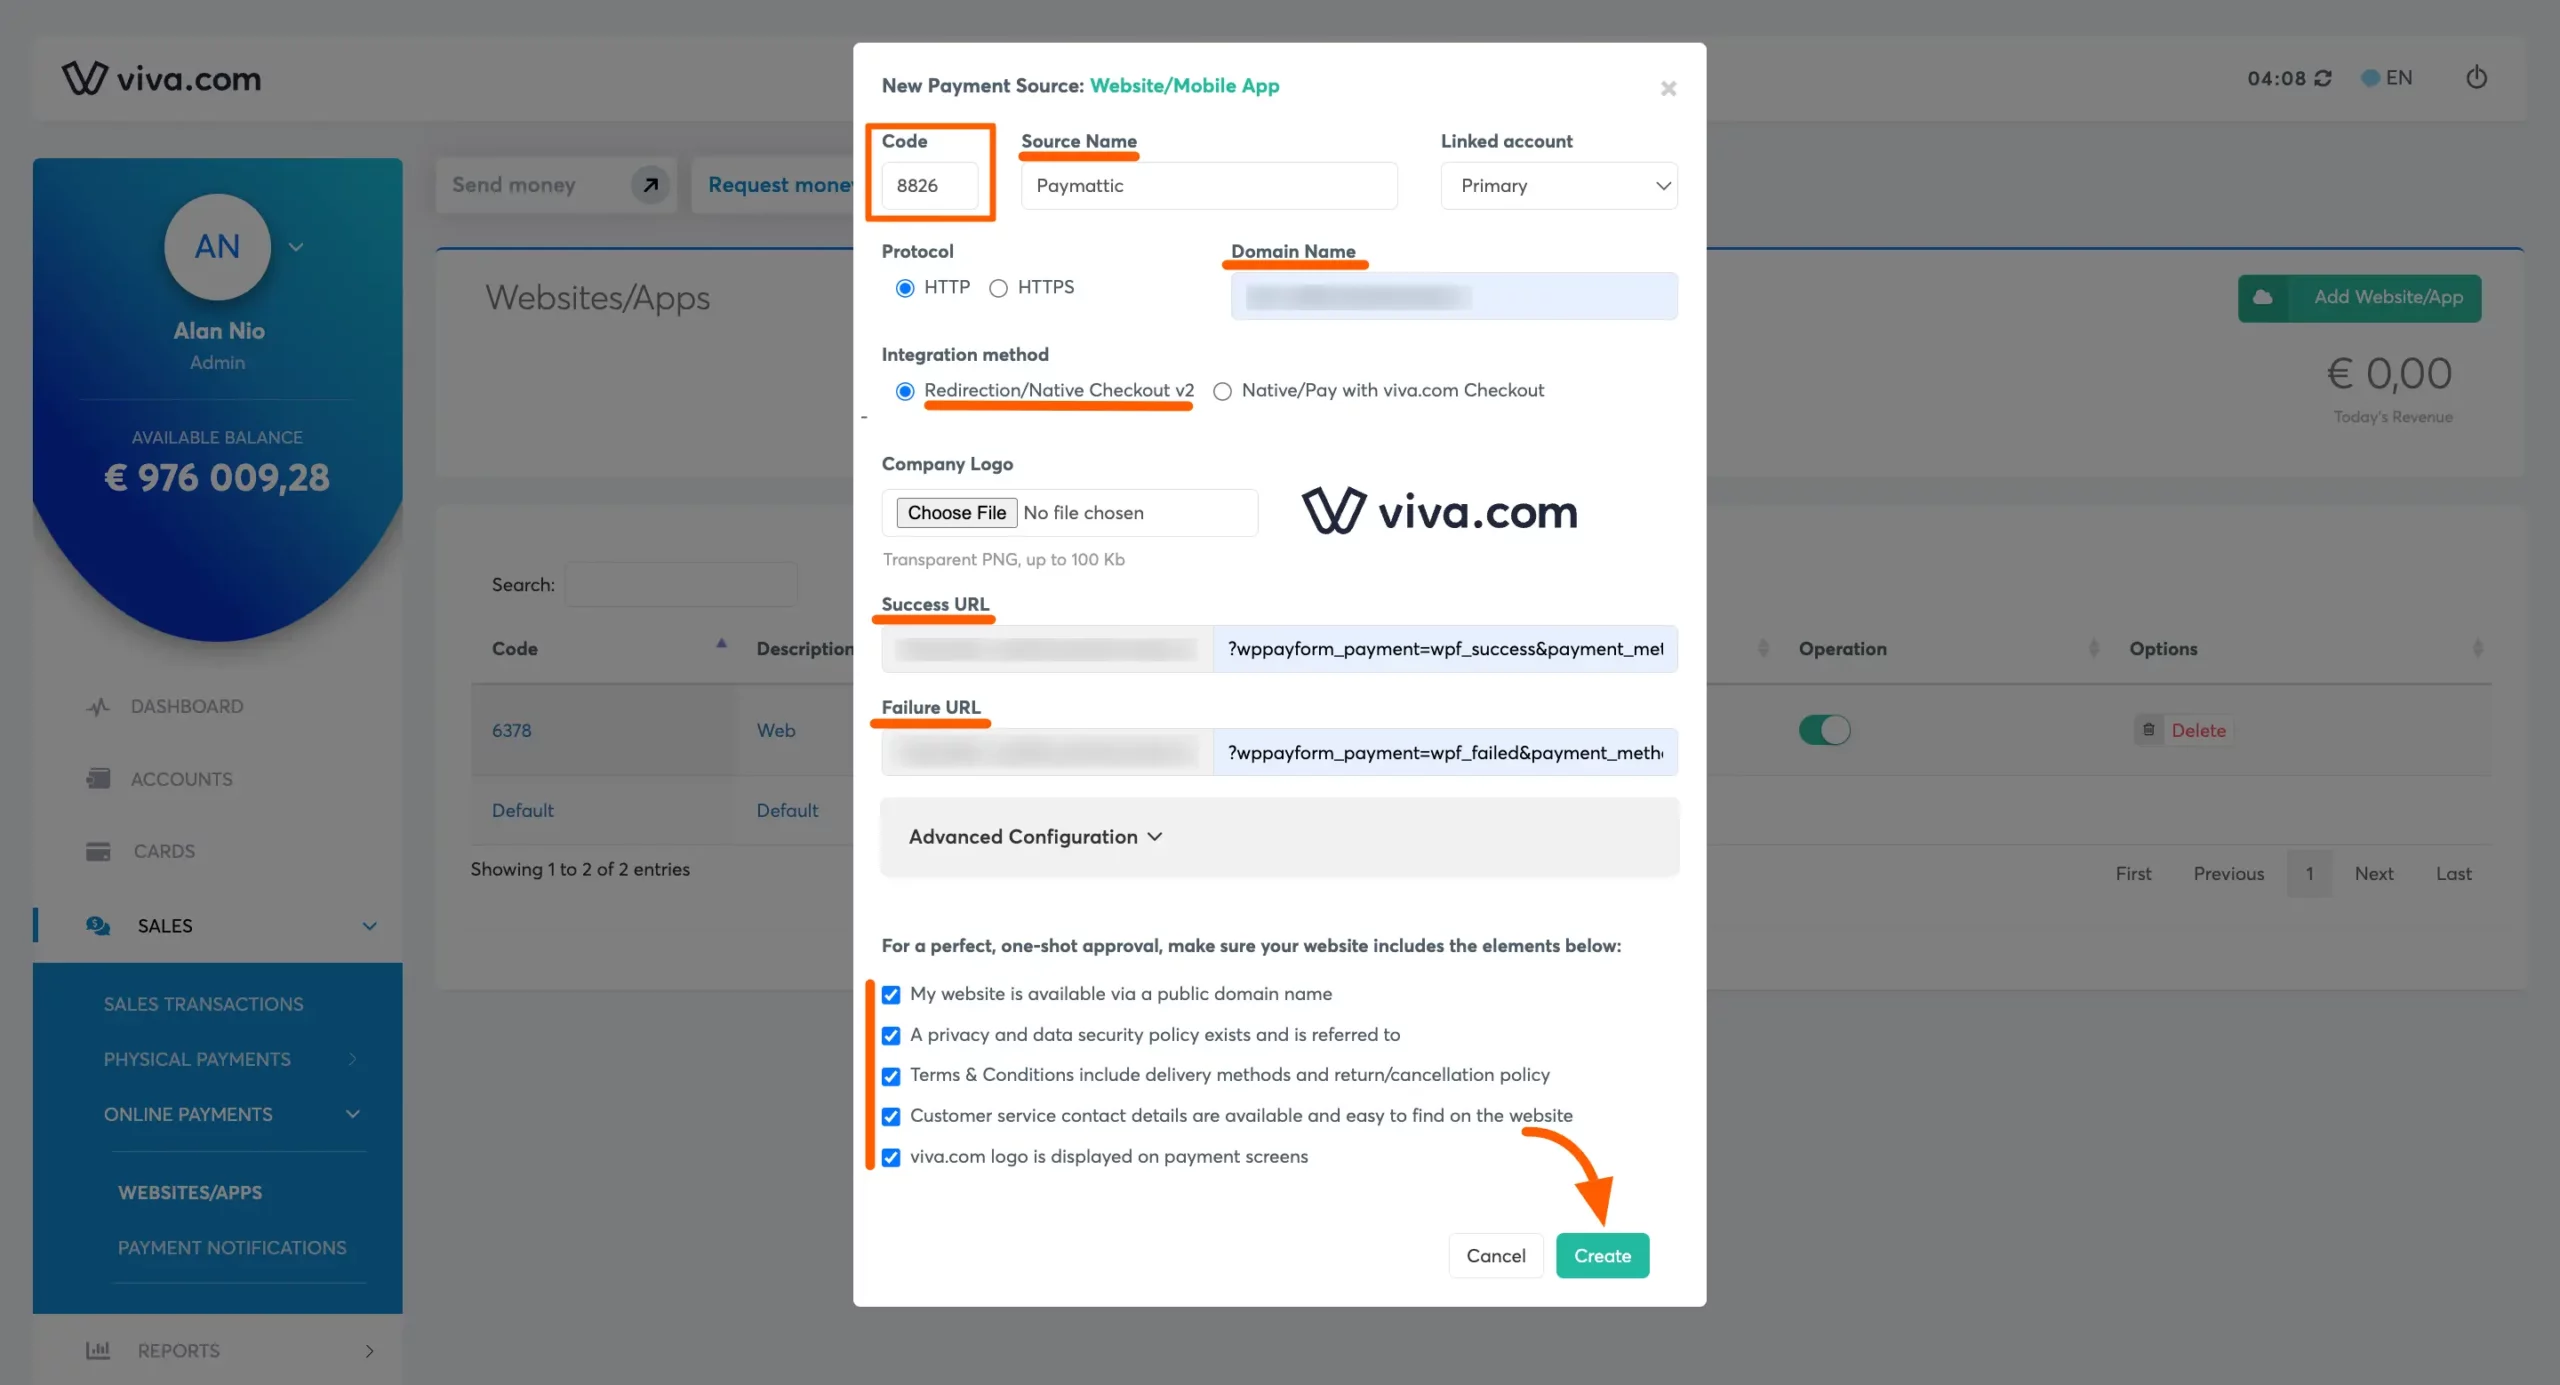
You will get your Domain Name, Success URL, and Failure URL in the Viva Wallet Settings option in Paymattic.

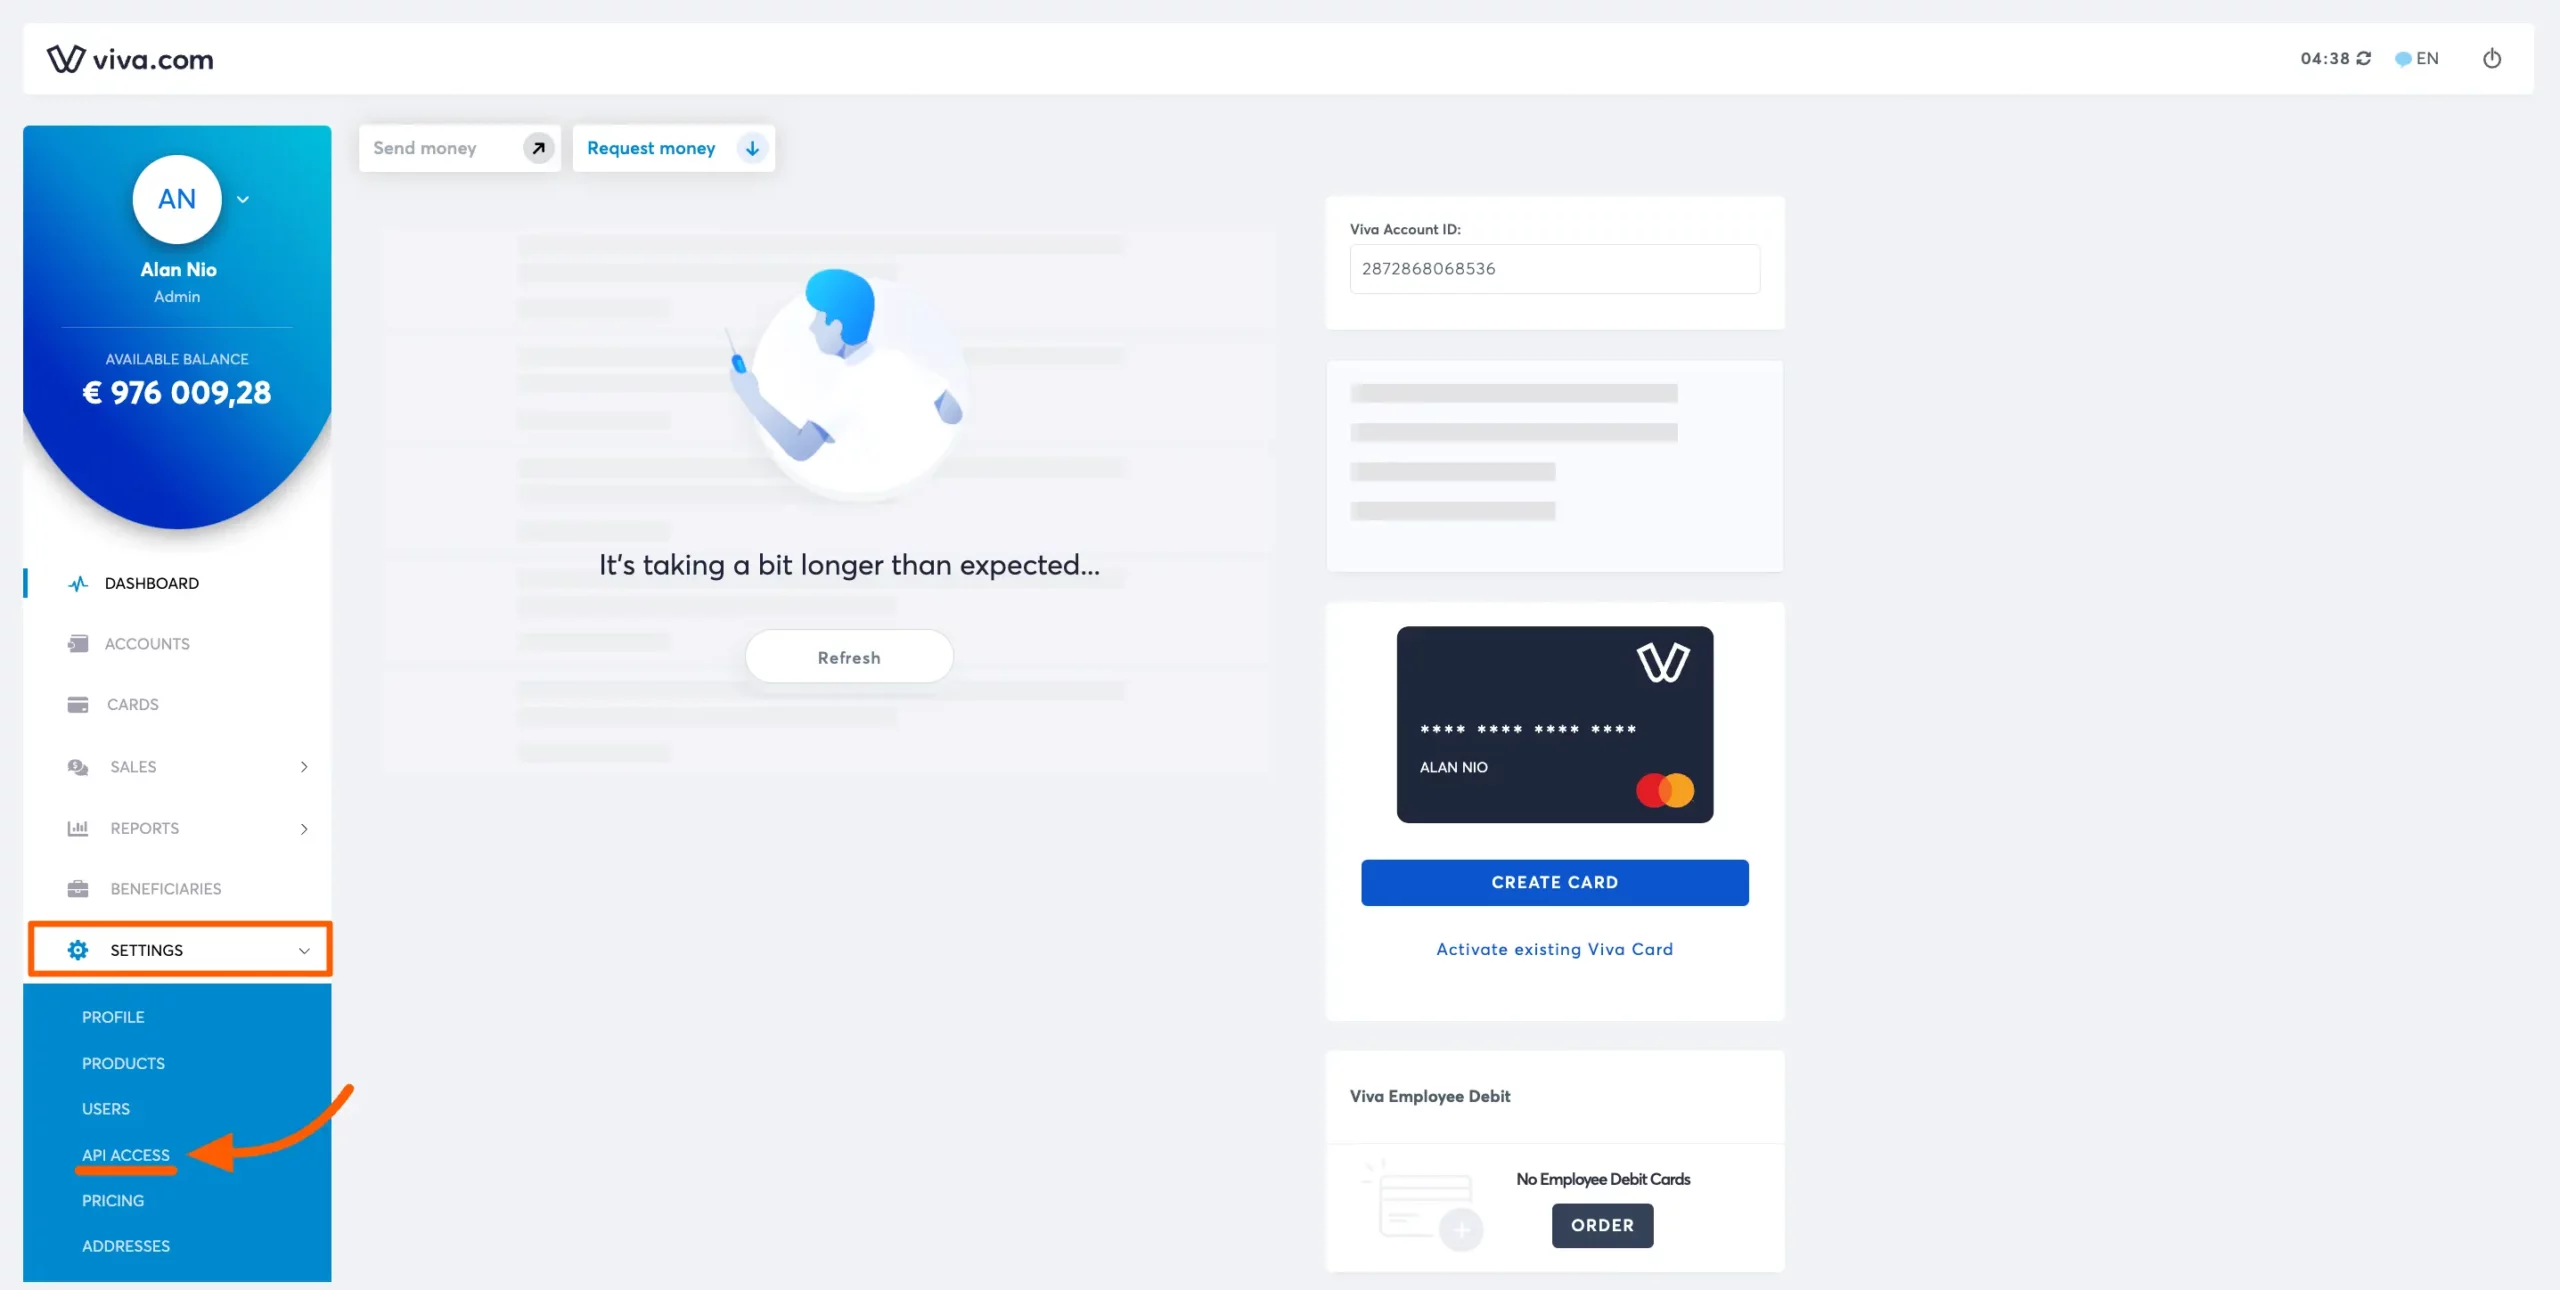
After that, Go to Settings of your Viva Wallet profile and click on API Access
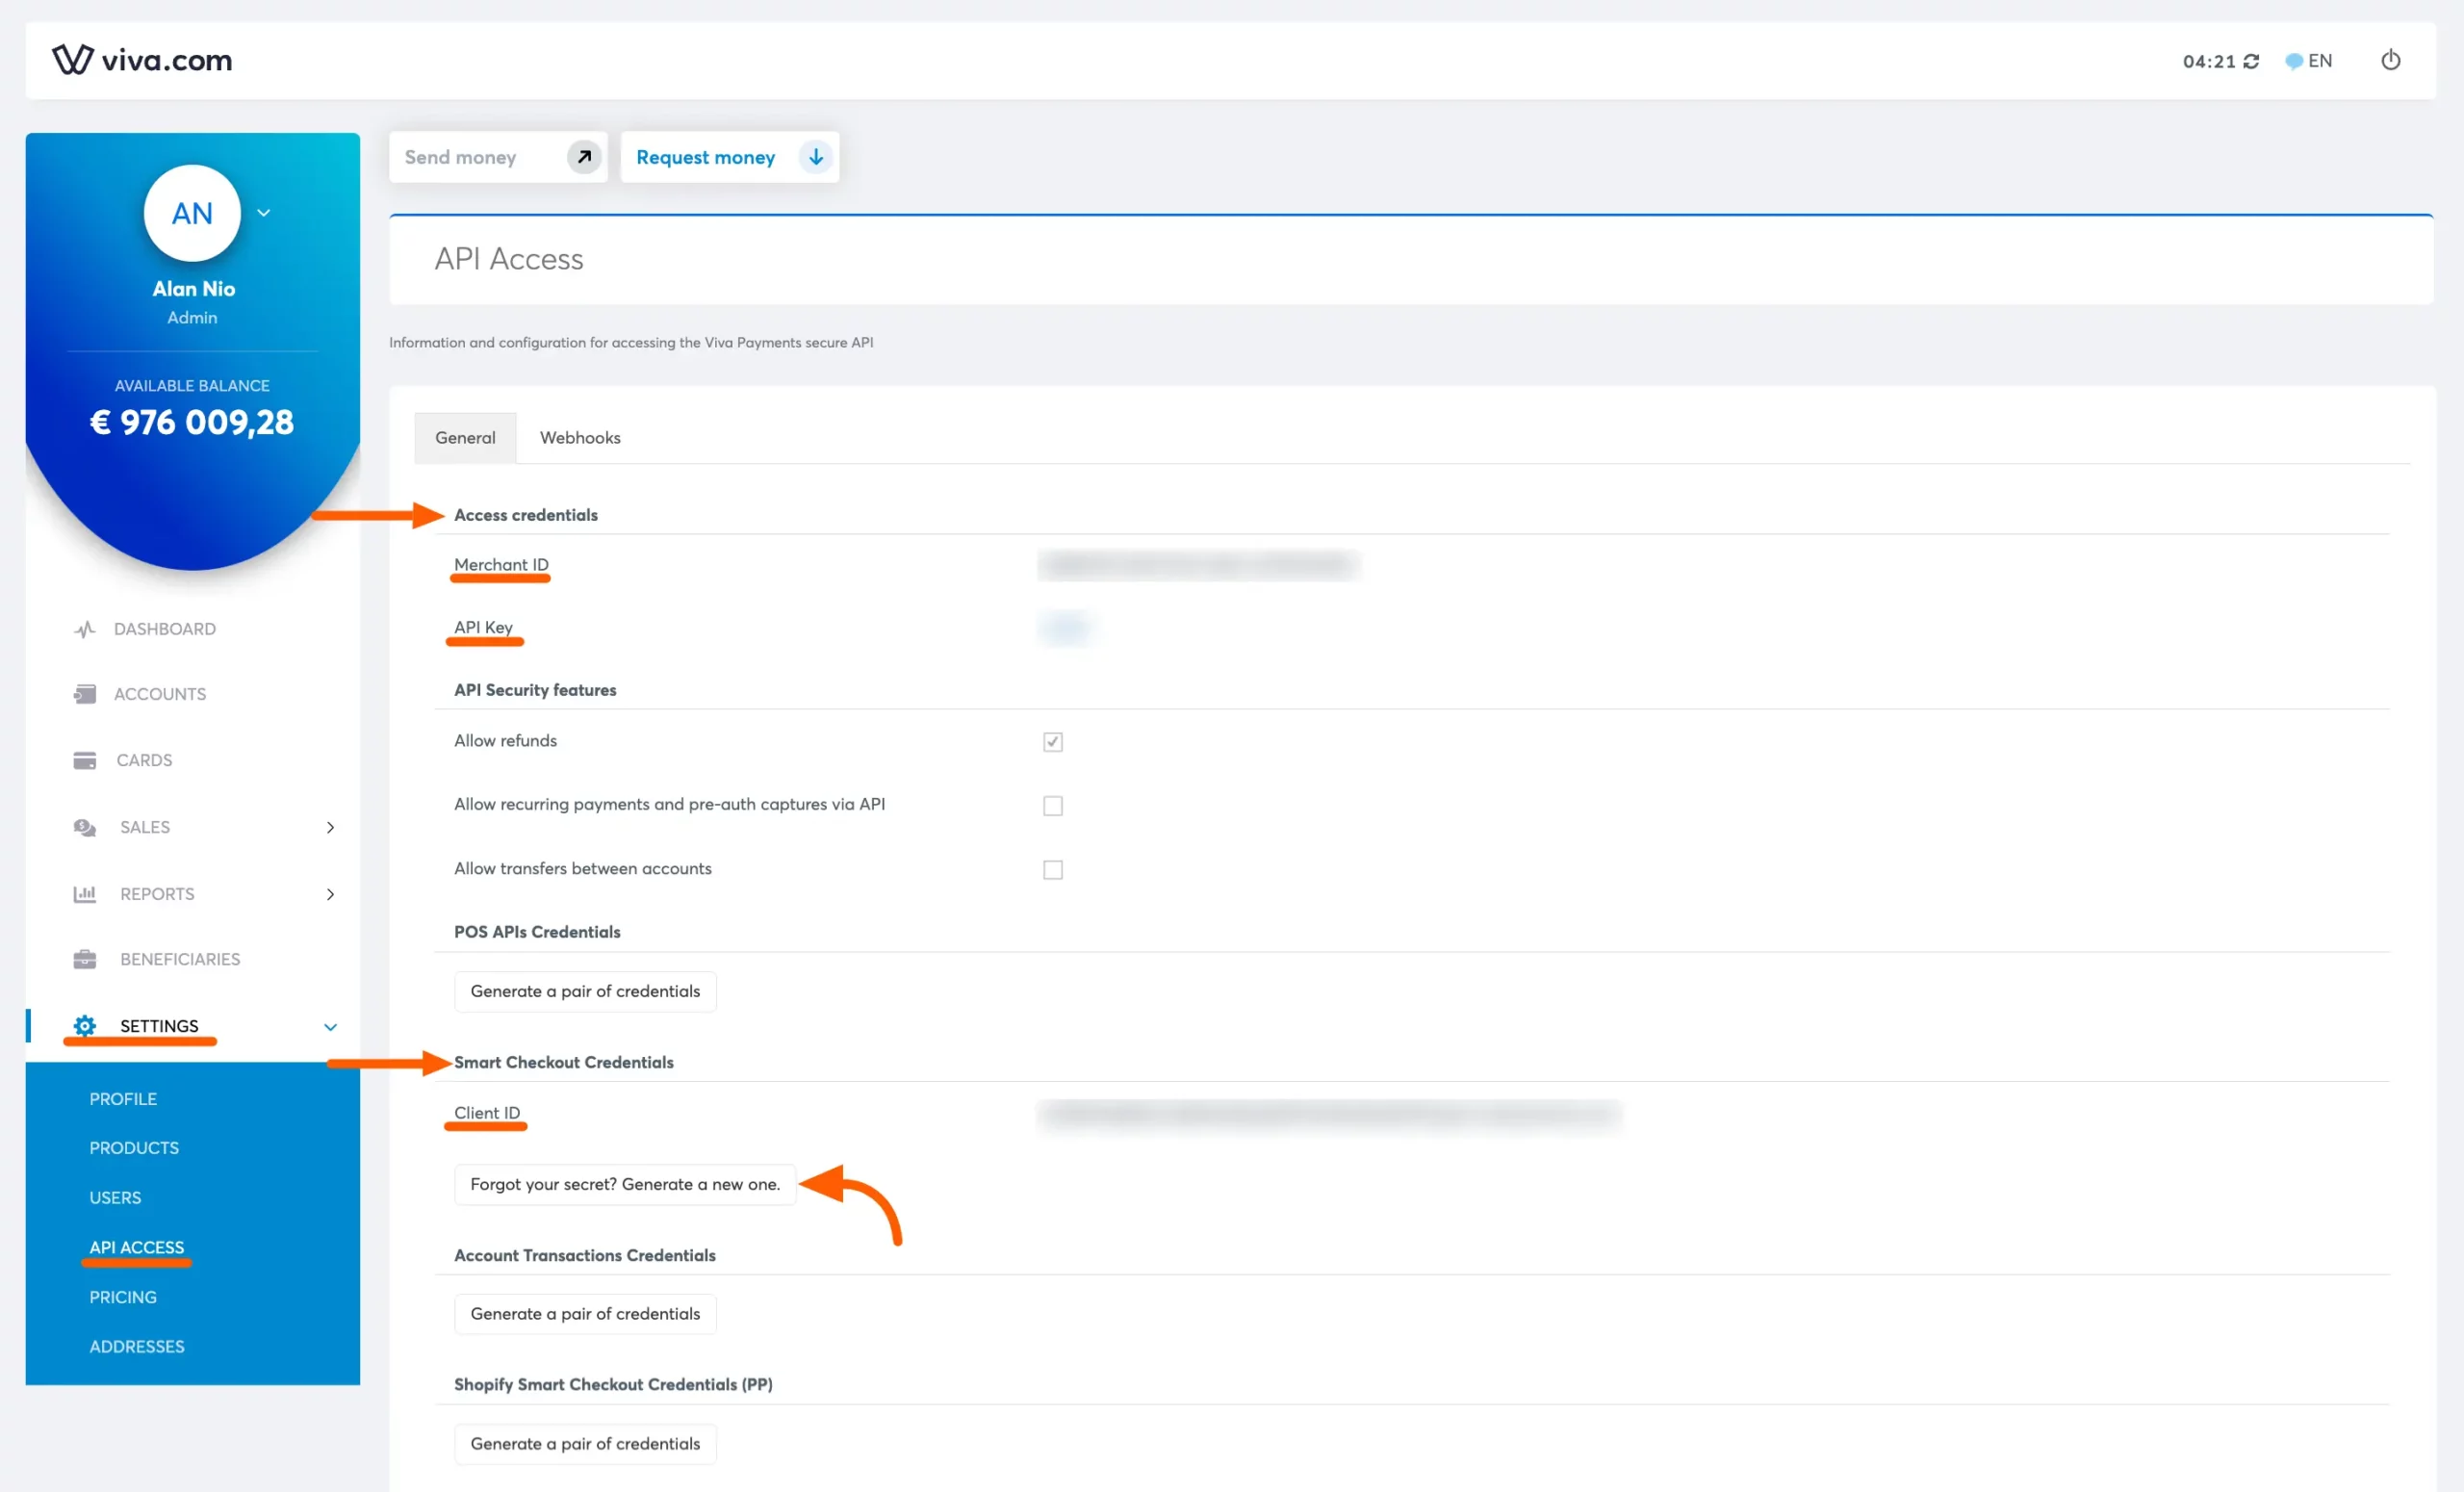
Getting Merchant ID, API Key, and Client ID #
In your Viva Wallet account, you will find the Access Credentials section, where you can locate your Merchant ID and API Key. Additionally, in the Smart Checkout Credentials section, you can obtain your Client ID. To generate a new secret code, click on the Forgot your Secret button.
Copy all these credentials to your clipboard.
Configuring Viva Wallet Settings #
Return to Payment Gateway from the Paymattic Navbar, click the Viva Wallet tab and paste all the Credentials you copied from Viva Wallet into the respective fields.
Finally, press the Save Settings button and your Viva Wallet account will be integrated with Paymattic for your WordPress Site.
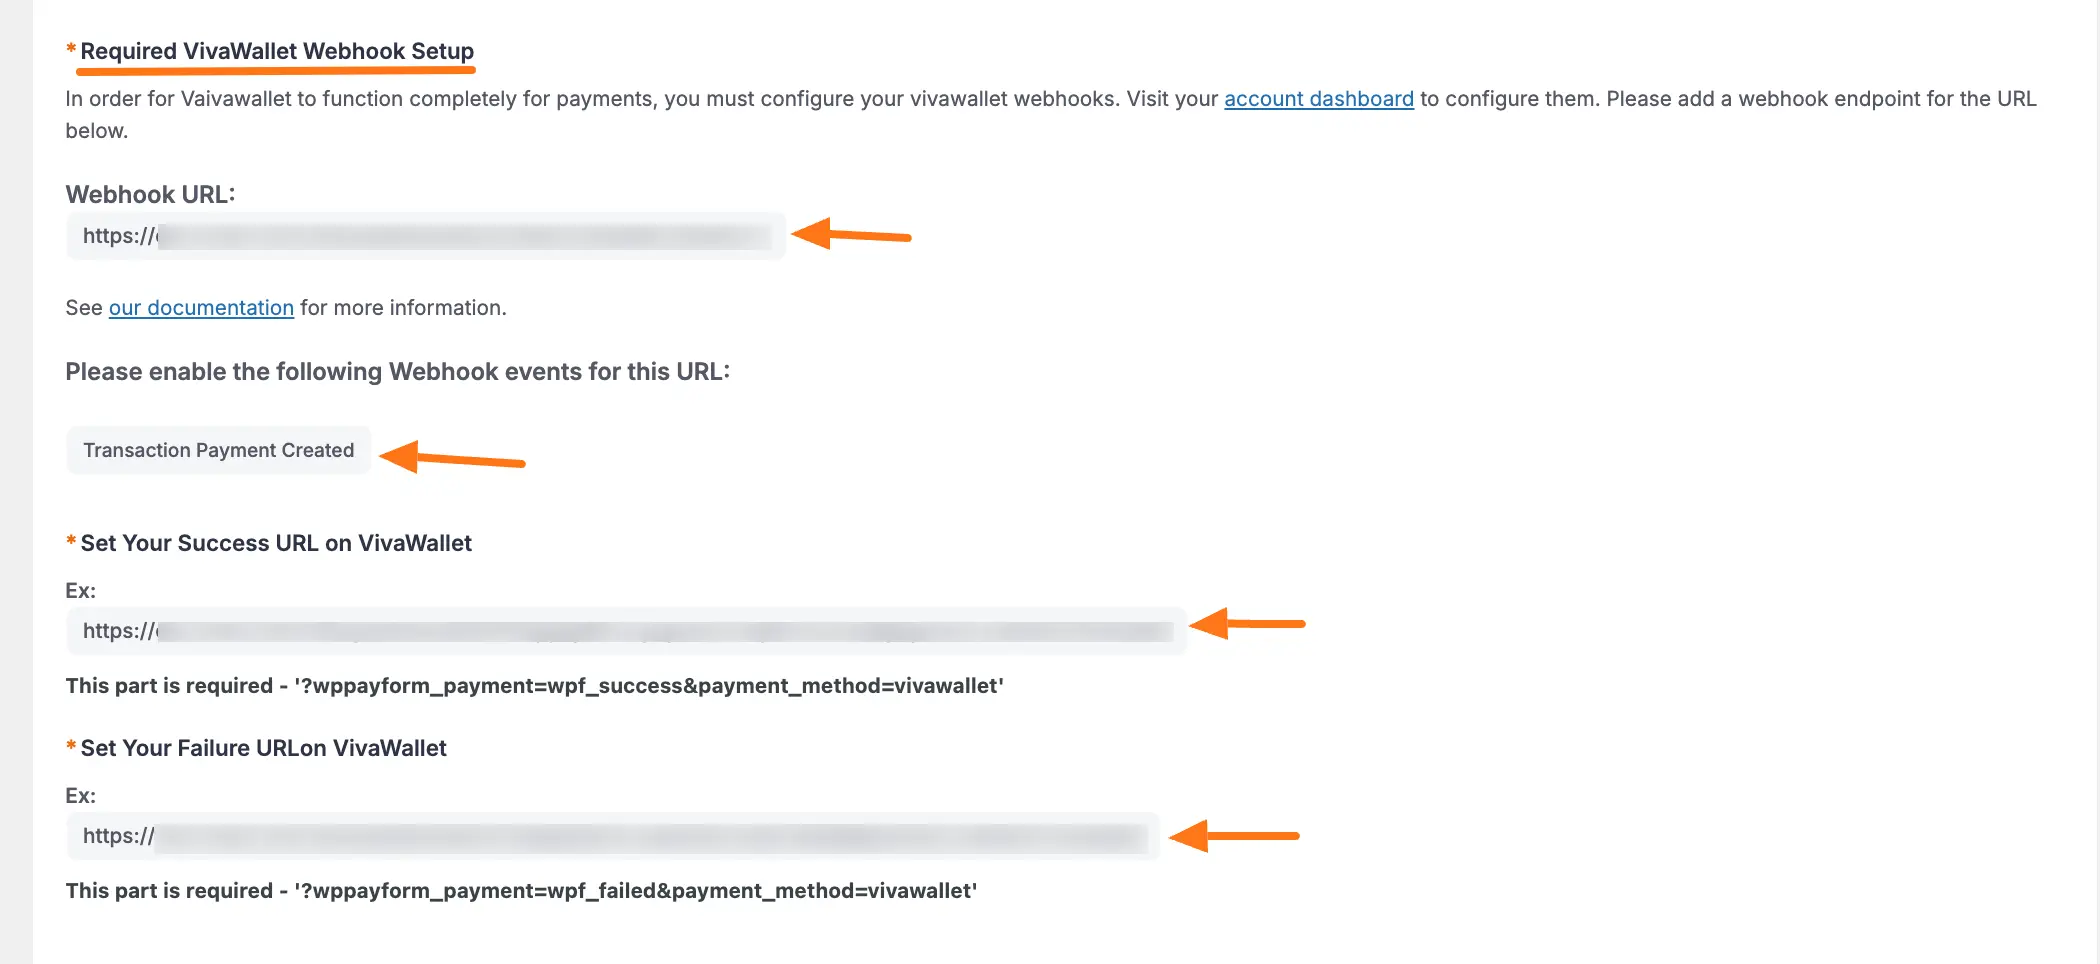
Add Viva Wallet Webhooks #
To learn how to configure the Viva Wallet Webhooks to your WordPress Site, follow the steps with the screenshots below –
To ensure your Viva Wallet dashboard and Paymattic dashboard are in sync, you must configure the Viva Wallet Webhooks.
First, copy the Webhook URL and paste it to the suggested Webhook Event of Viva Wallet for smooth transactions based on Viva Wallet Data.
Also, copy the Success and Failure URLs and set them on Viva Wallet.
You will need all of them later to configure Viva Wallet Webhooks to your WordPress Site.
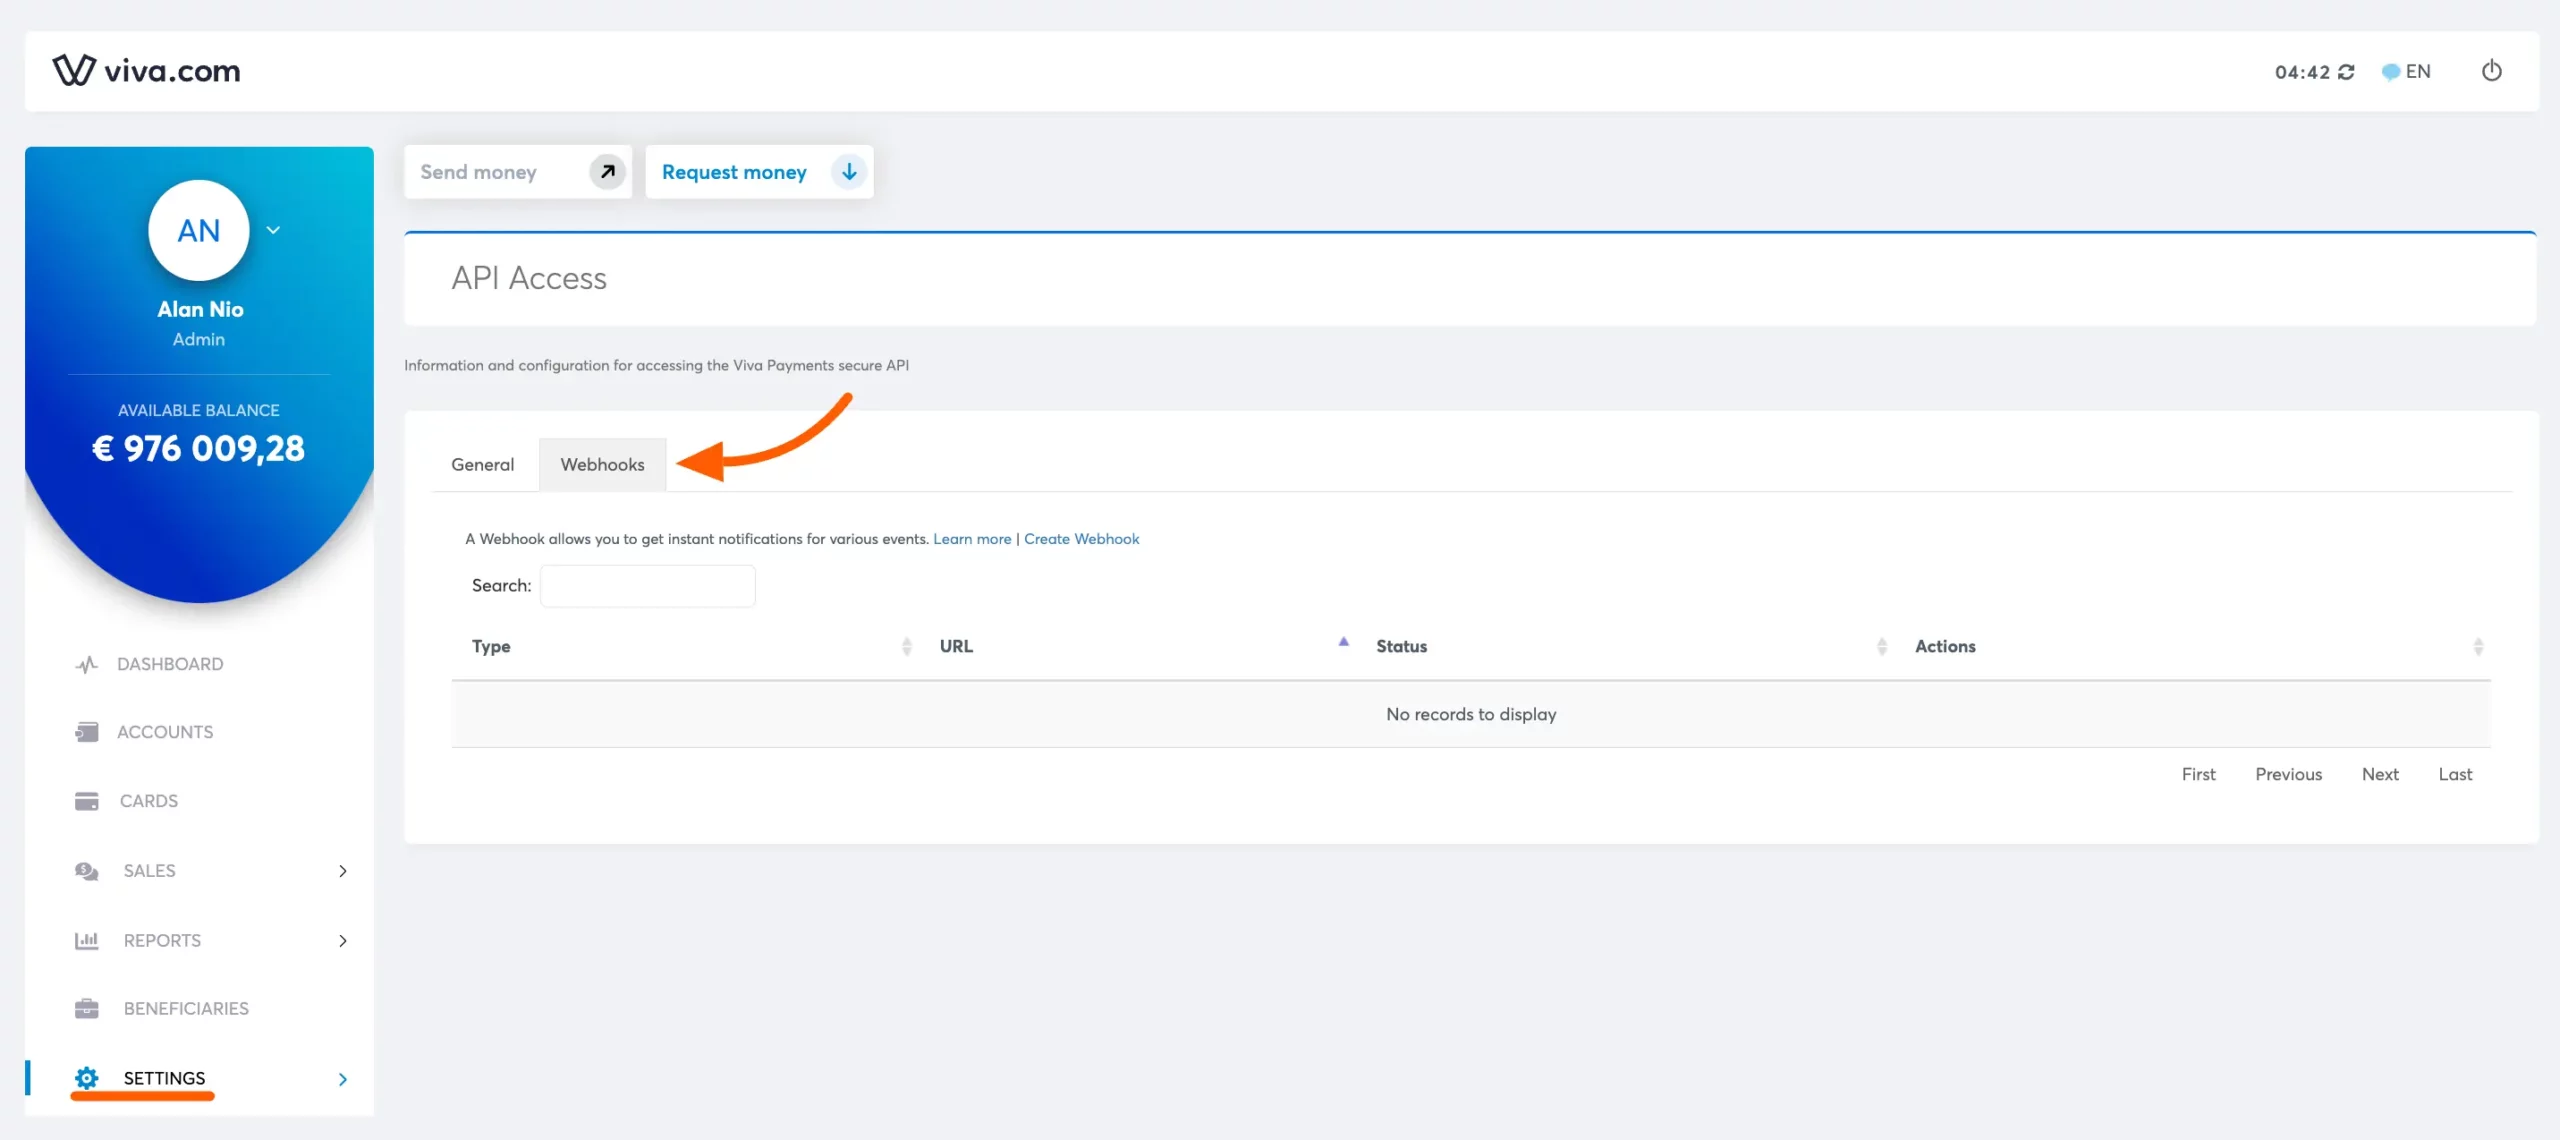
Now, visit your Viva Wallet Dashboard, go to the Settings section from the left sidebar, and click the Webhooks
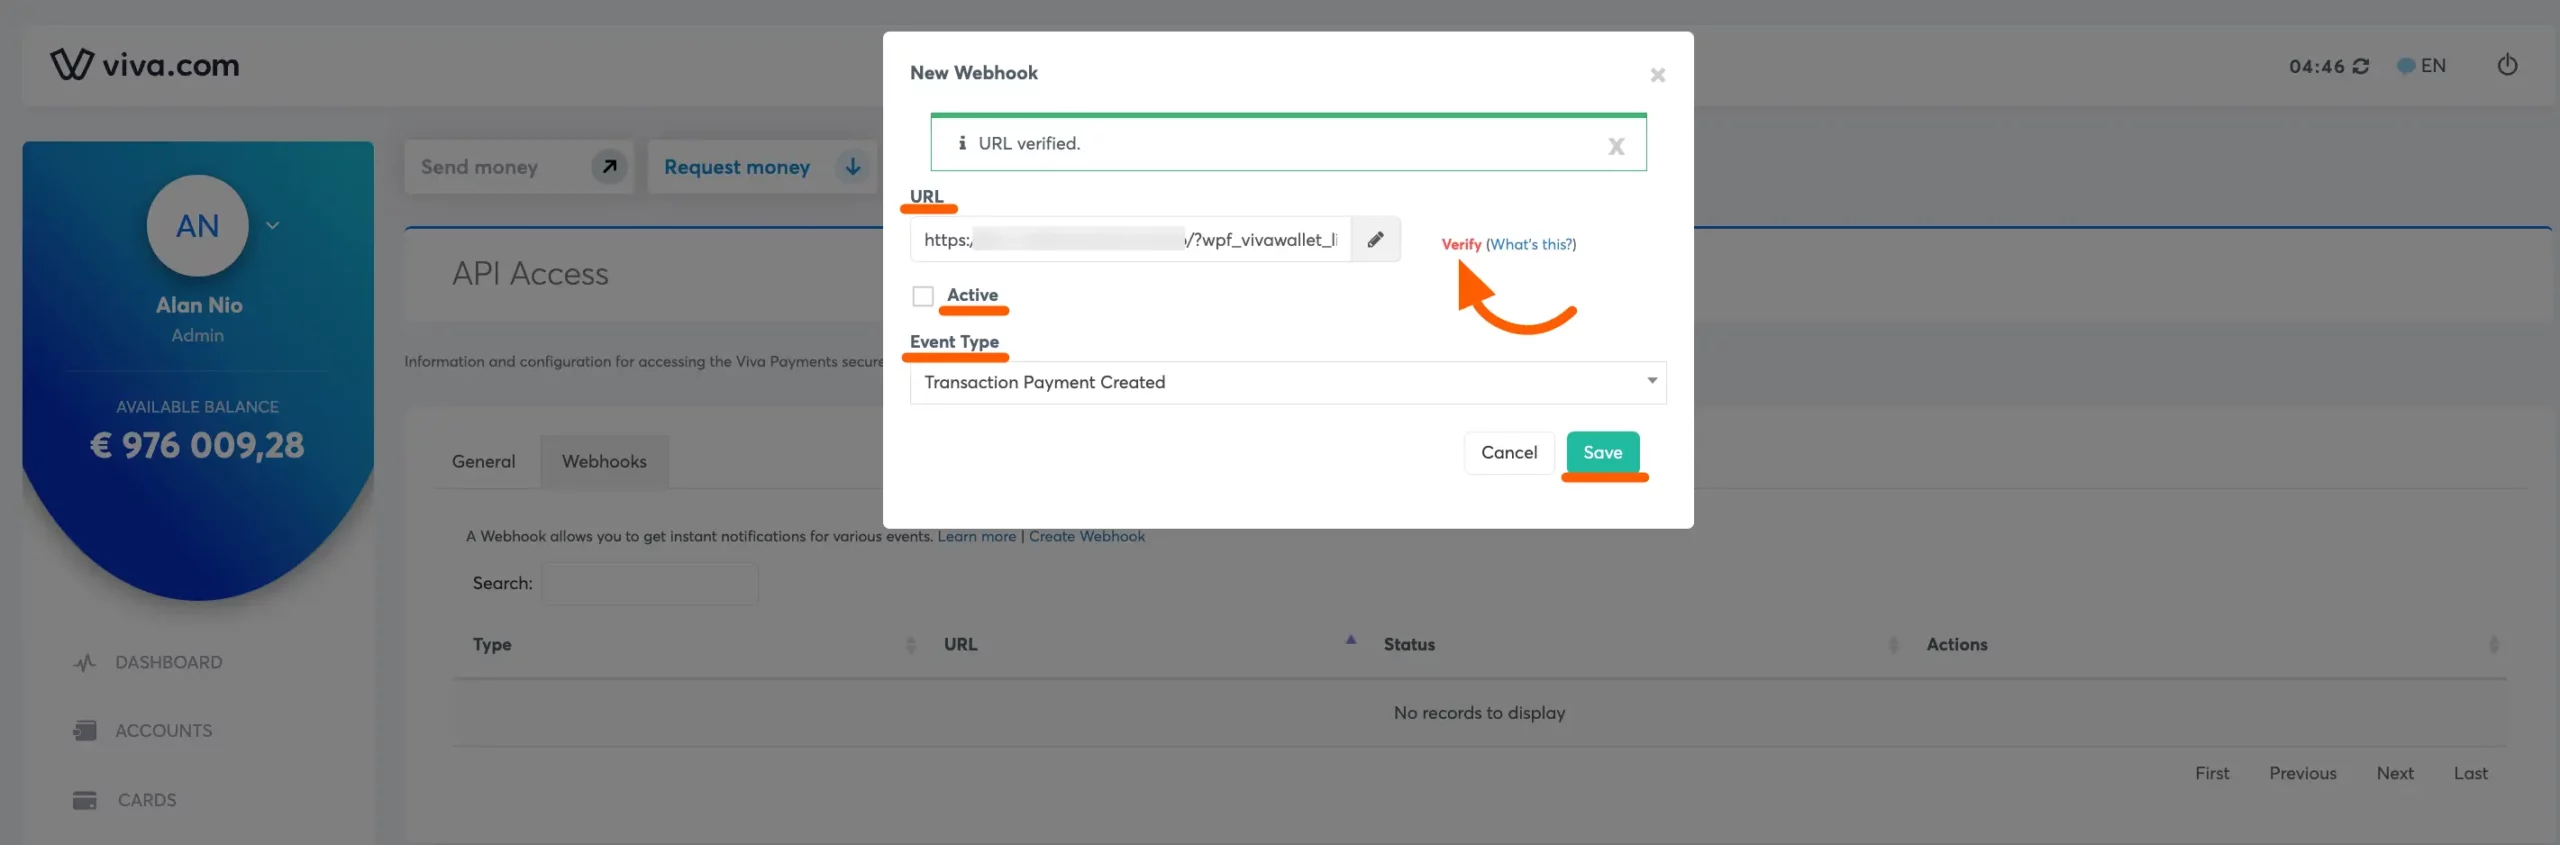
Now, Paste the Webhook URL you copied from the Viva Wallet settings page. Check the Active box Select Transaction Payment Created from the dropdown menu and click on the Save button. And, your webhook will be added!
Add Viva Wallet in Forms #
Once you finish setting up your Vivaa Wallet payment gateway, you can easily add this payment method to any of your existing Payment Form.
If you do not have any existing forms, read Create a Form from Scratch or Create a Form using Templates documentation.
To learn the detailed process of adding a payment method to an existing form, read this Documentation.
But, remember, the added Vivaa Wallet payment method in your Form will not function unless you complete the configuration process properly.
Currency Selection in Payment Form #
In your Payment Form, you have to select the Payment Currency according to your Viva Wallet account to make the transaction functional and smooth.
To learn how you can change currency settings for a specific form, read this Documentation.
If you have any further questions, concerns, or suggestions, please do not hesitate to contact our @support team. Thank you.


