Paymattic offers a simple and integrated way to handle customer refunds directly from your WordPress dashboard. This guide will walk you through the process step-by-step, using screenshots from the plugin interface.
There are two primary ways to manage a refund:
- Change Payment Status (For Full Refunds): This is the quickest way to process a full refund for a one-time or recurring payment. Also, for changing your payment status.
- Process Refund Button (For Partial or Subscription Refunds): This method provides more flexibility, allowing you to issue partial refunds or handle refunds for subscription-based payments.
Important Note: Supported Payment Gateways
Please be aware that the automatic refund processing described in this guide (for both full and partial refunds) is only available for the following payment methods:
For all other payment gateways, you will need to first process the refund directly from your account on the gateway’s website. After doing so, you can follow the steps in Part 1 (using “Change Payment Status”) to update your records in Paymattic.
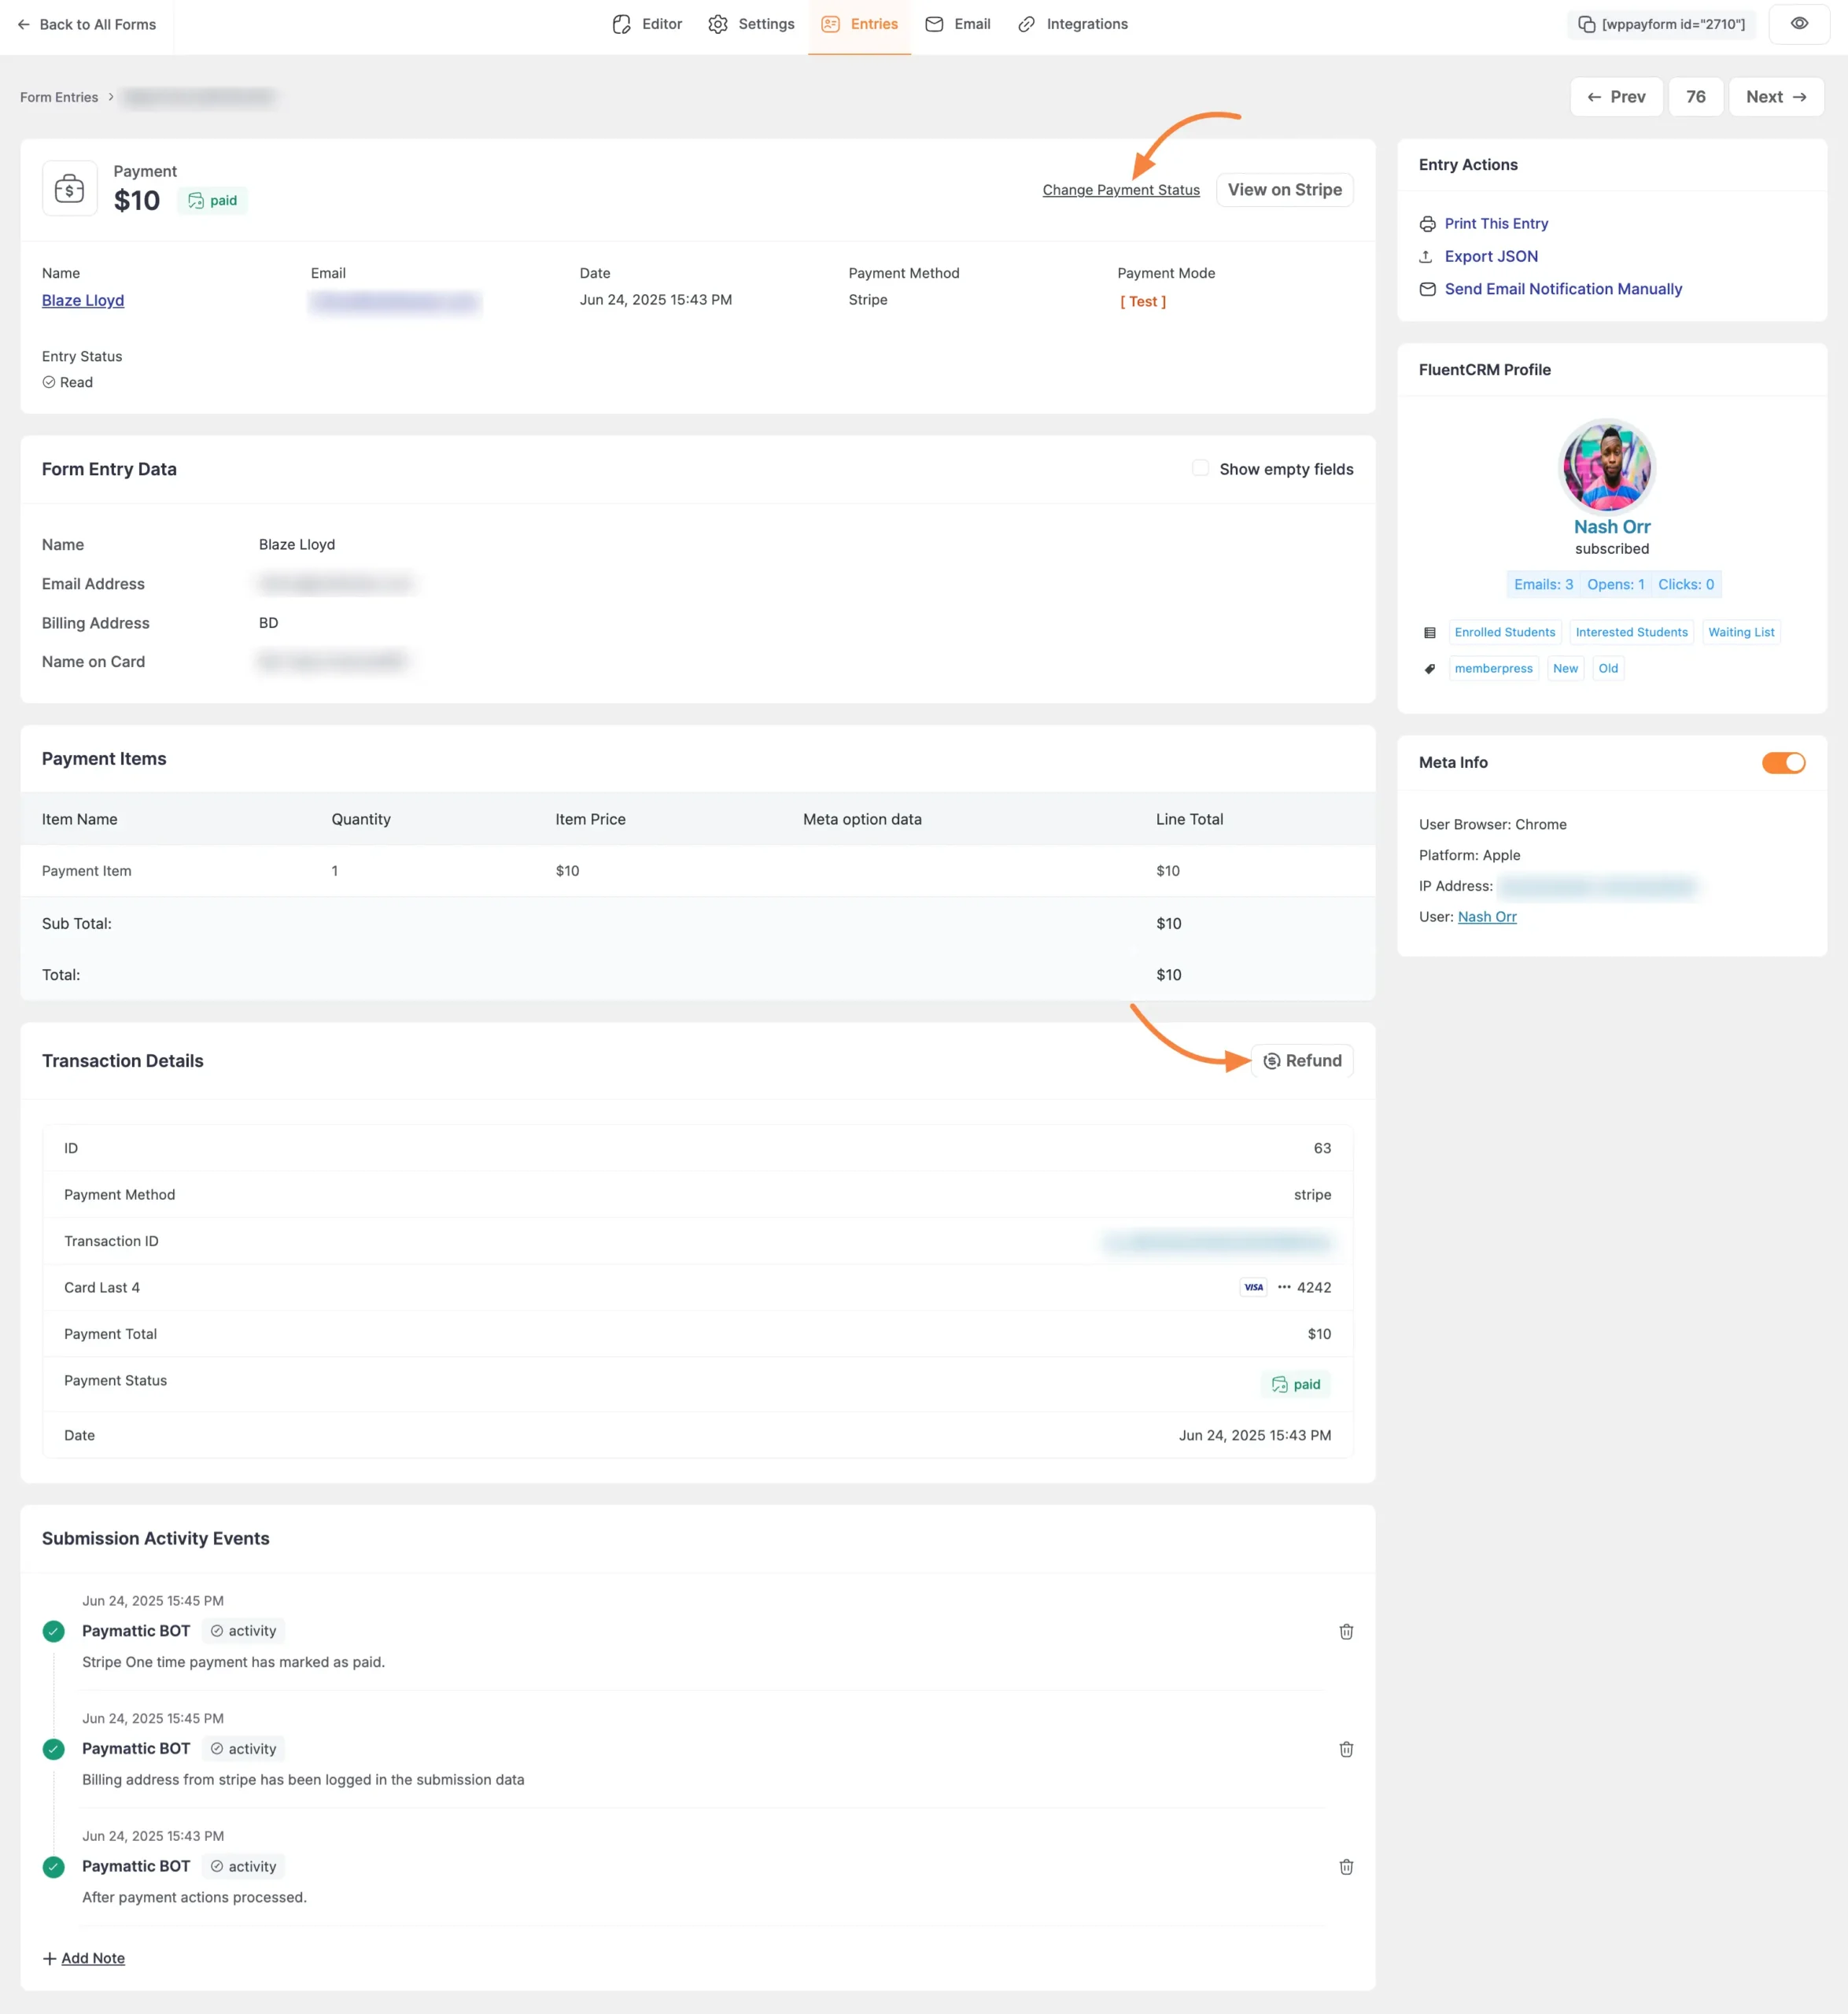
Process a Full Refund #
Use this method when you need to return the entire amount of a single transaction. For supported gateways, this process will automatically send the full payment back to the customer.
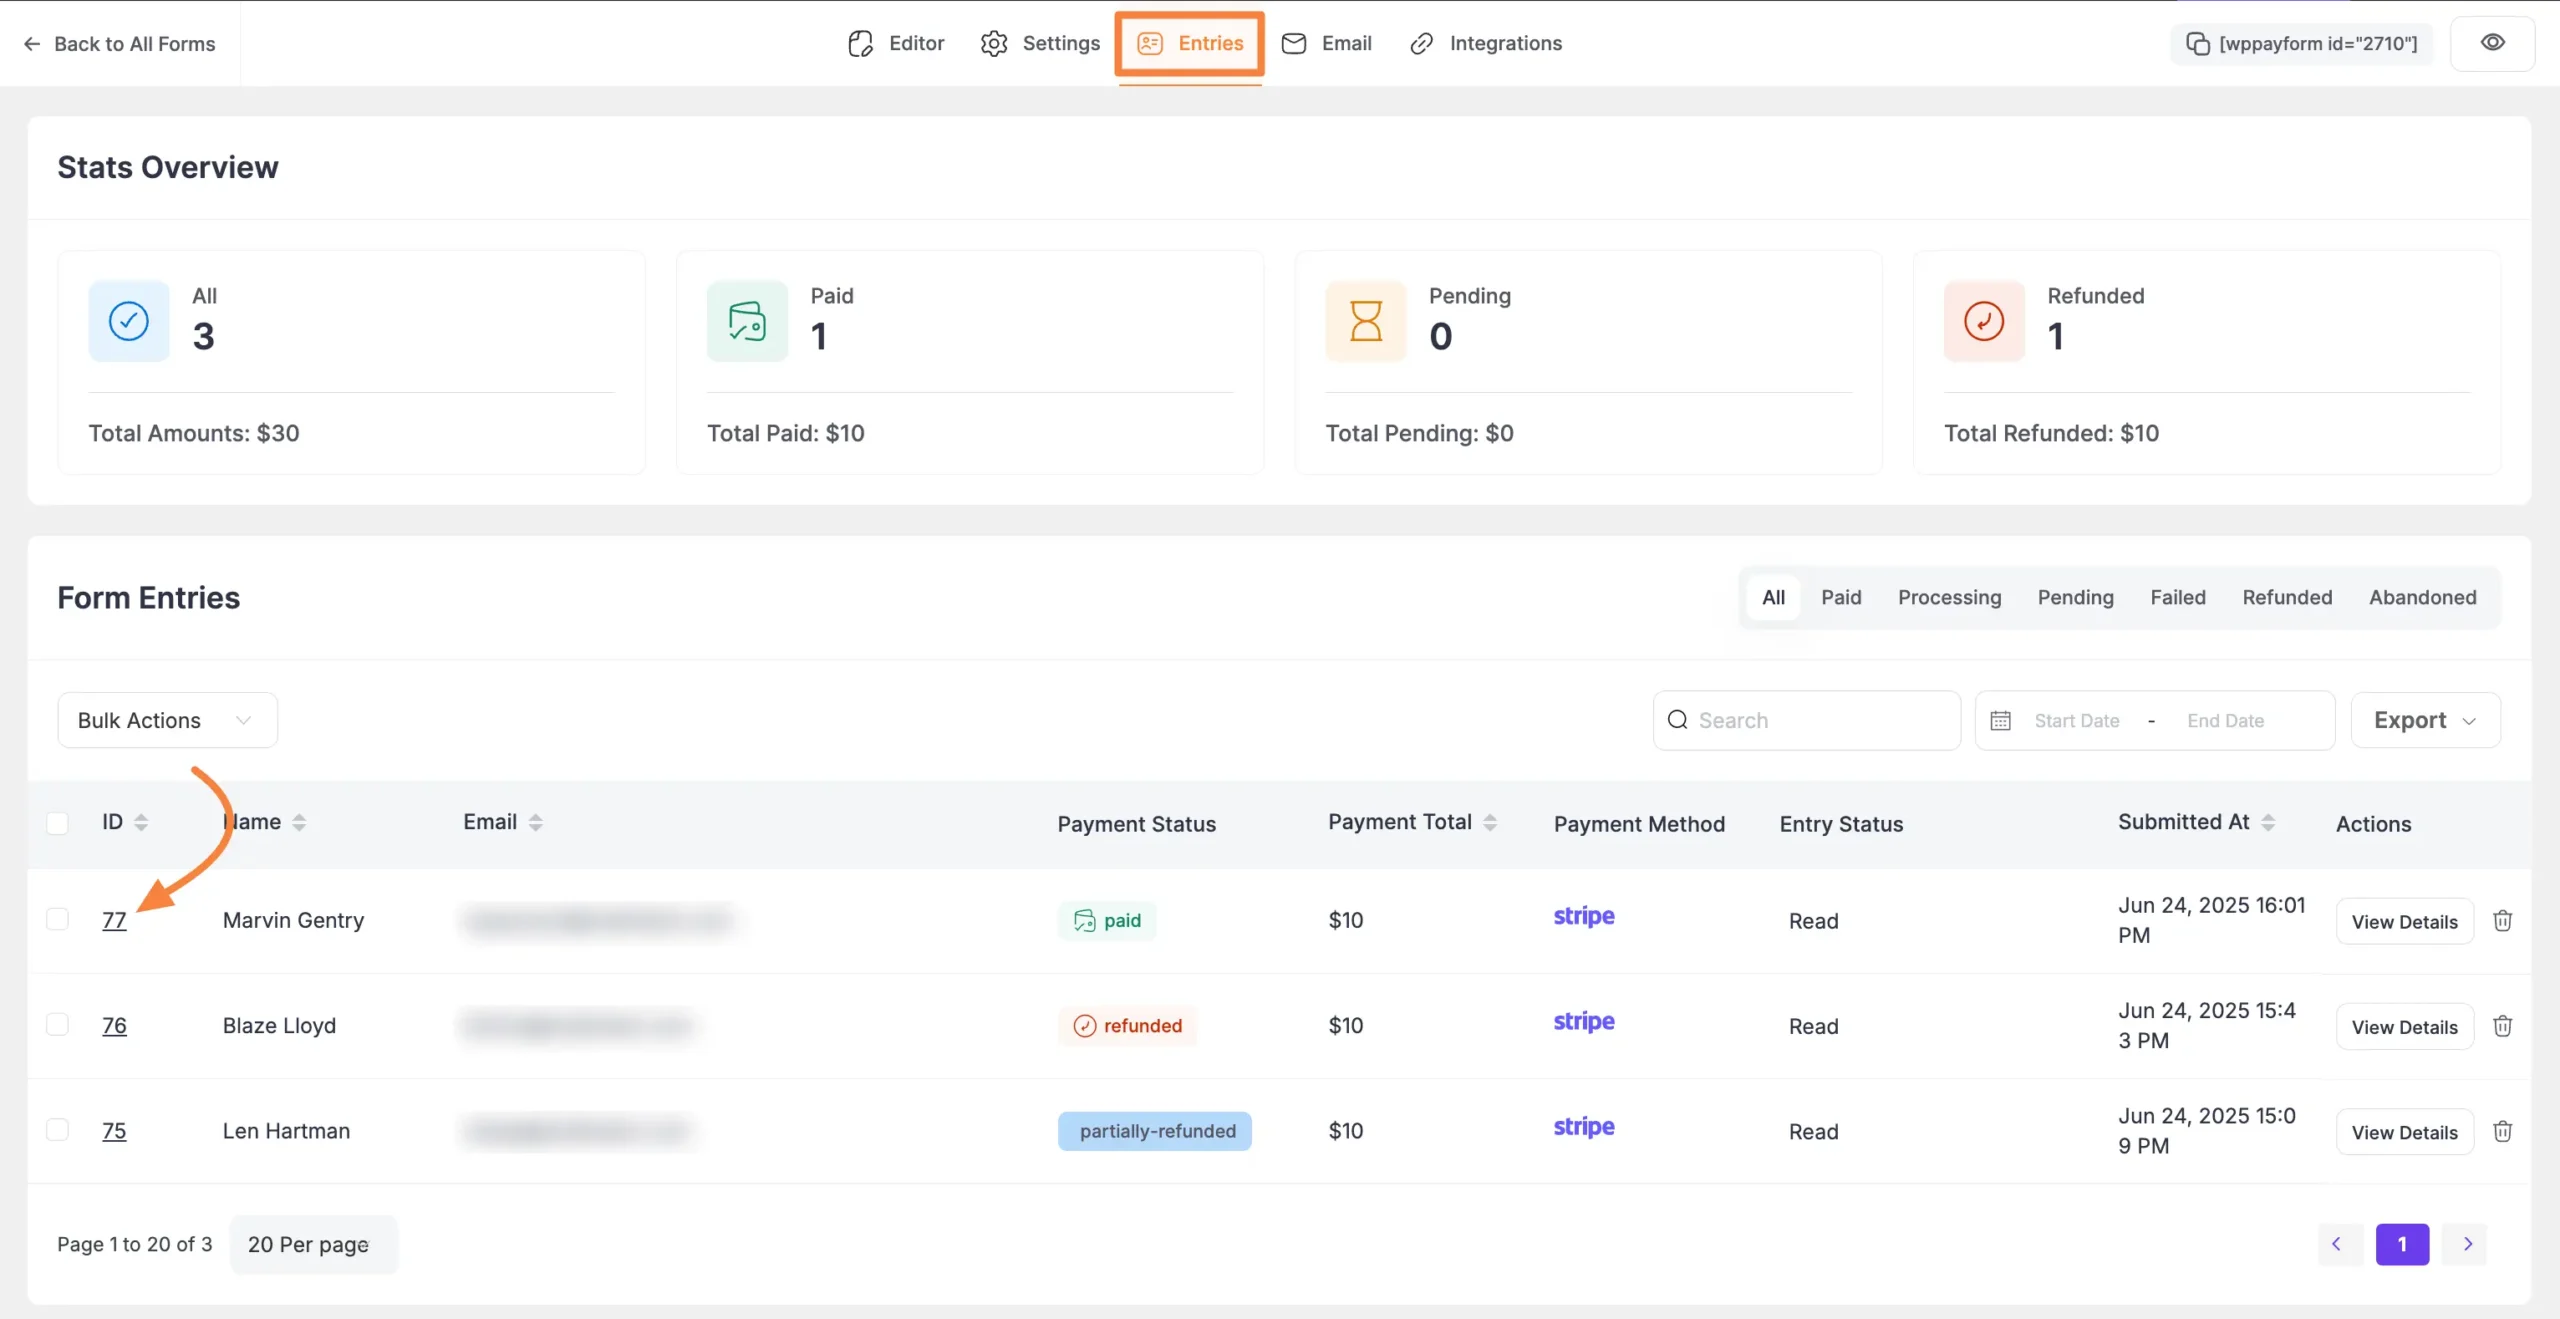
Step 1: Go to Form Entries #
First, navigate to the form where the payment was made. From the form editor, click on the Entries tab.
Step 2: View the Transaction #
On the “Form Entries” page, find the transaction you wish to refund and click on ID to view details.
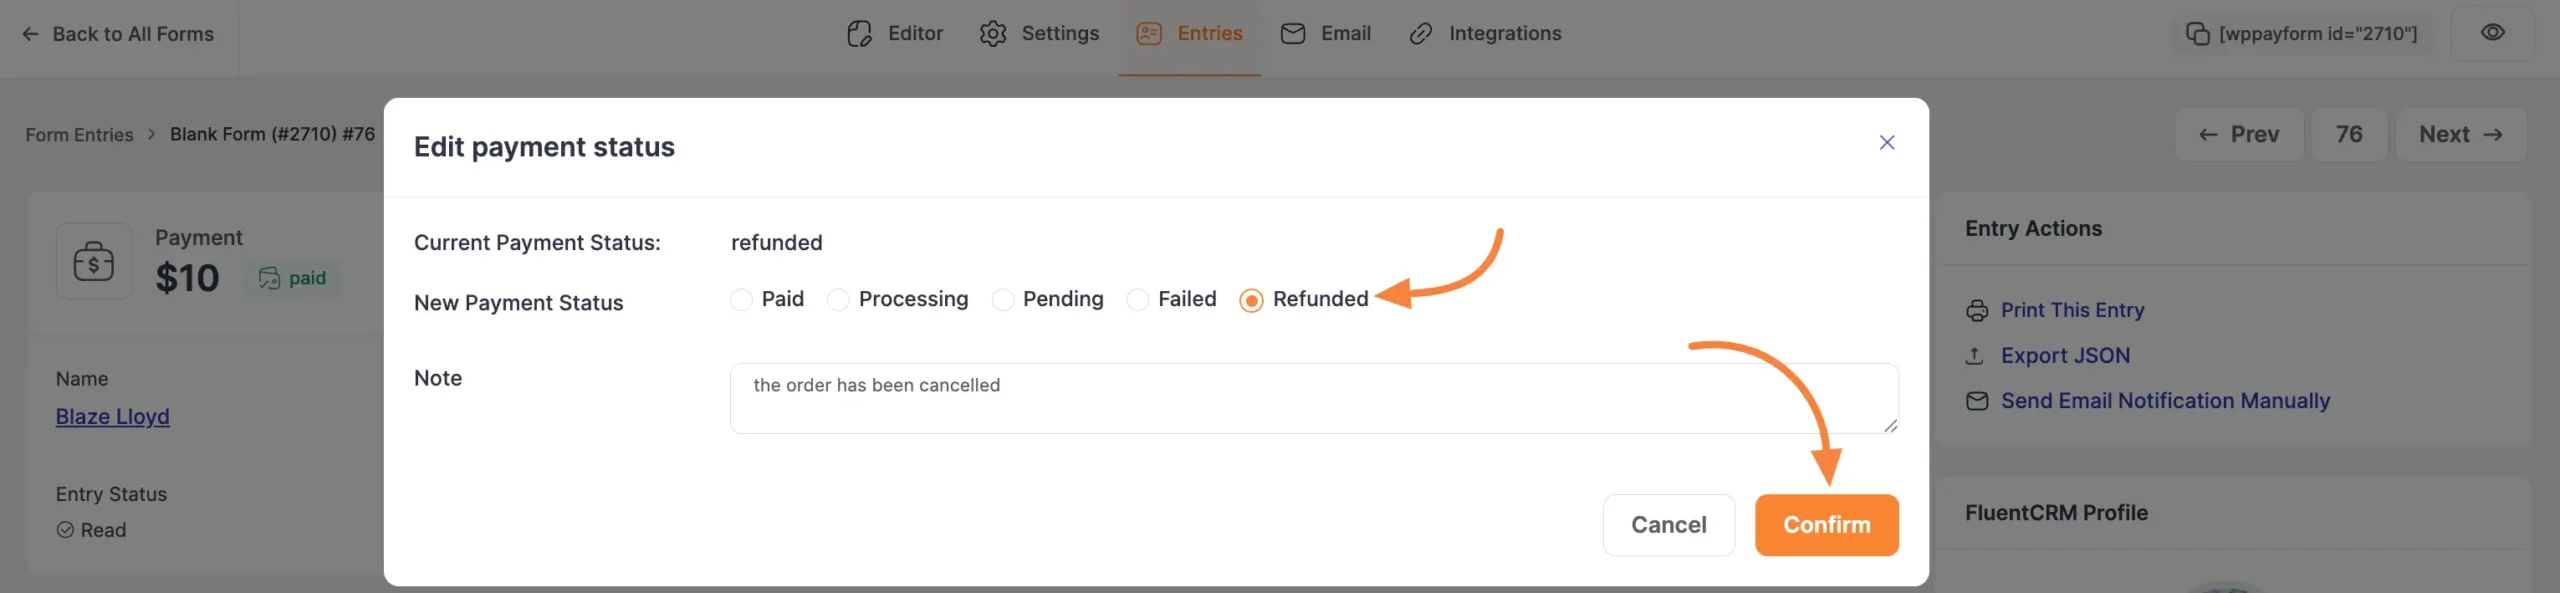
Step 3: Use the “Change Payment Status” Link #
In the single entry view, locate the Change Payment Status link next to the main payment details and click on it.
In the “Edit payment status” popup, select Refunded as the “New Payment Status.” This action instructs Paymattic to process a full refund through the connected payment gateway. You can add an internal note for your records.
Click the Confirm button to proceed.
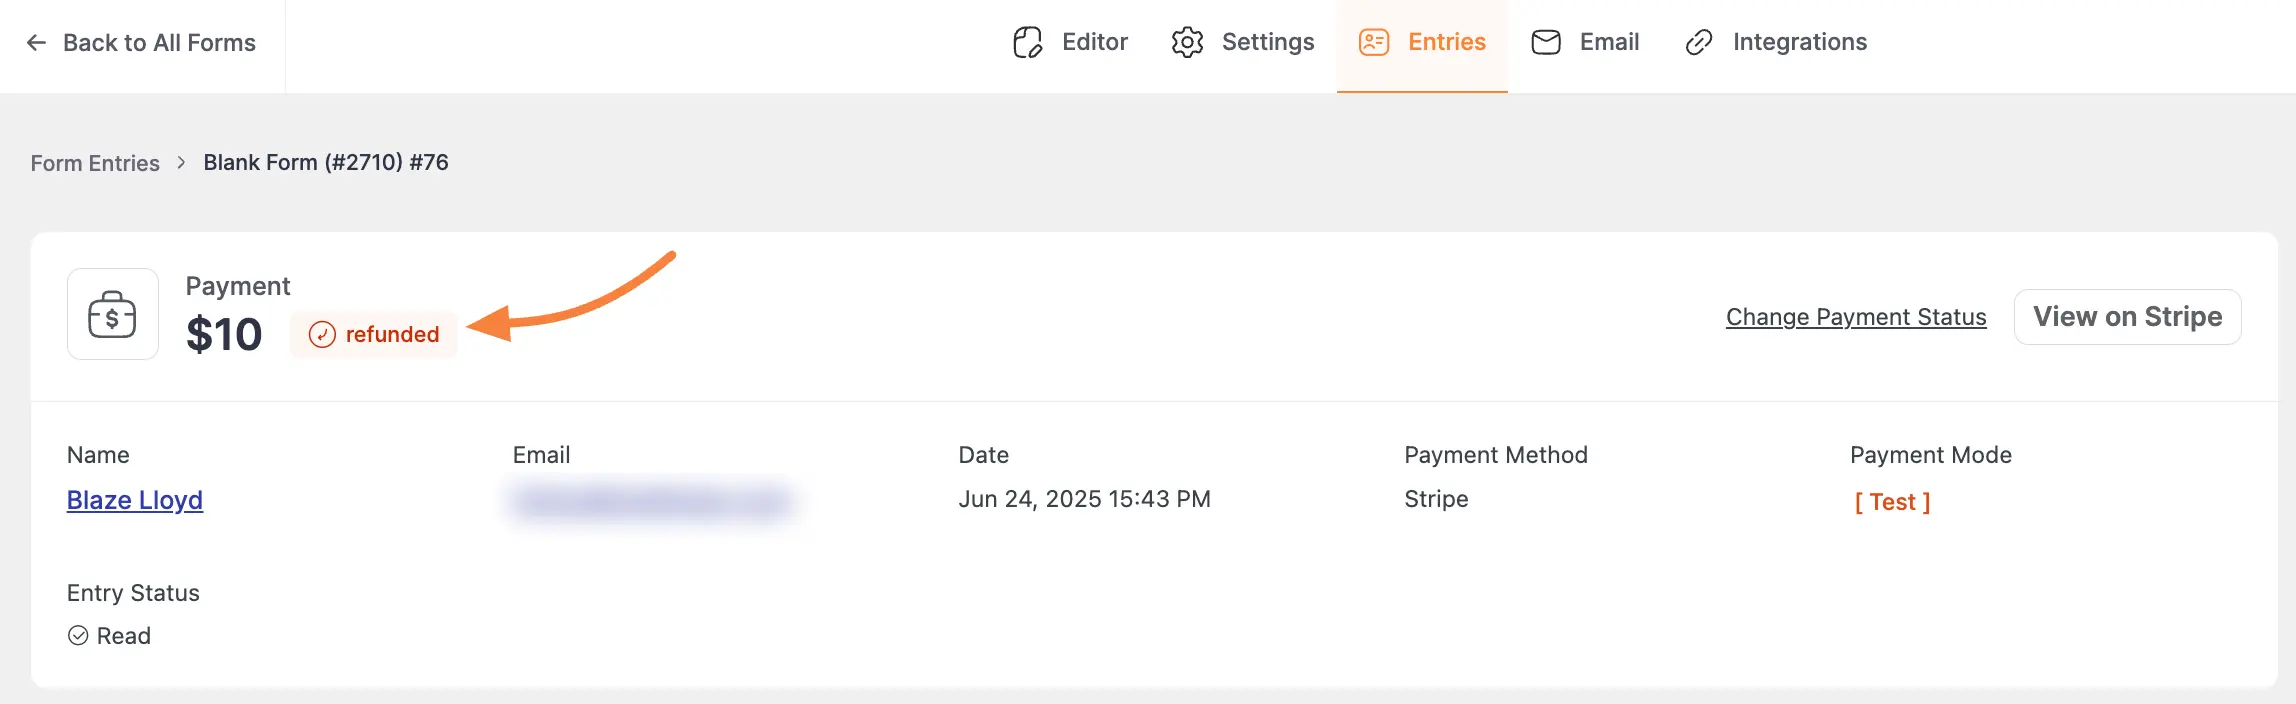
After processing, the payment status will automatically update to refunded, confirming the full amount has been returned.
Process a Partial or Subscription Refund #
Use this method when you need more flexibility, such as refunding only a portion of a payment or managing refunds for recurring subscriptions. This method also only works for the supported gateways listed in the note above.
Step 1 & 2: Navigate and View the Transaction #
Just like in the first method, navigate to Entries and click on ID to view details for the specific transaction.
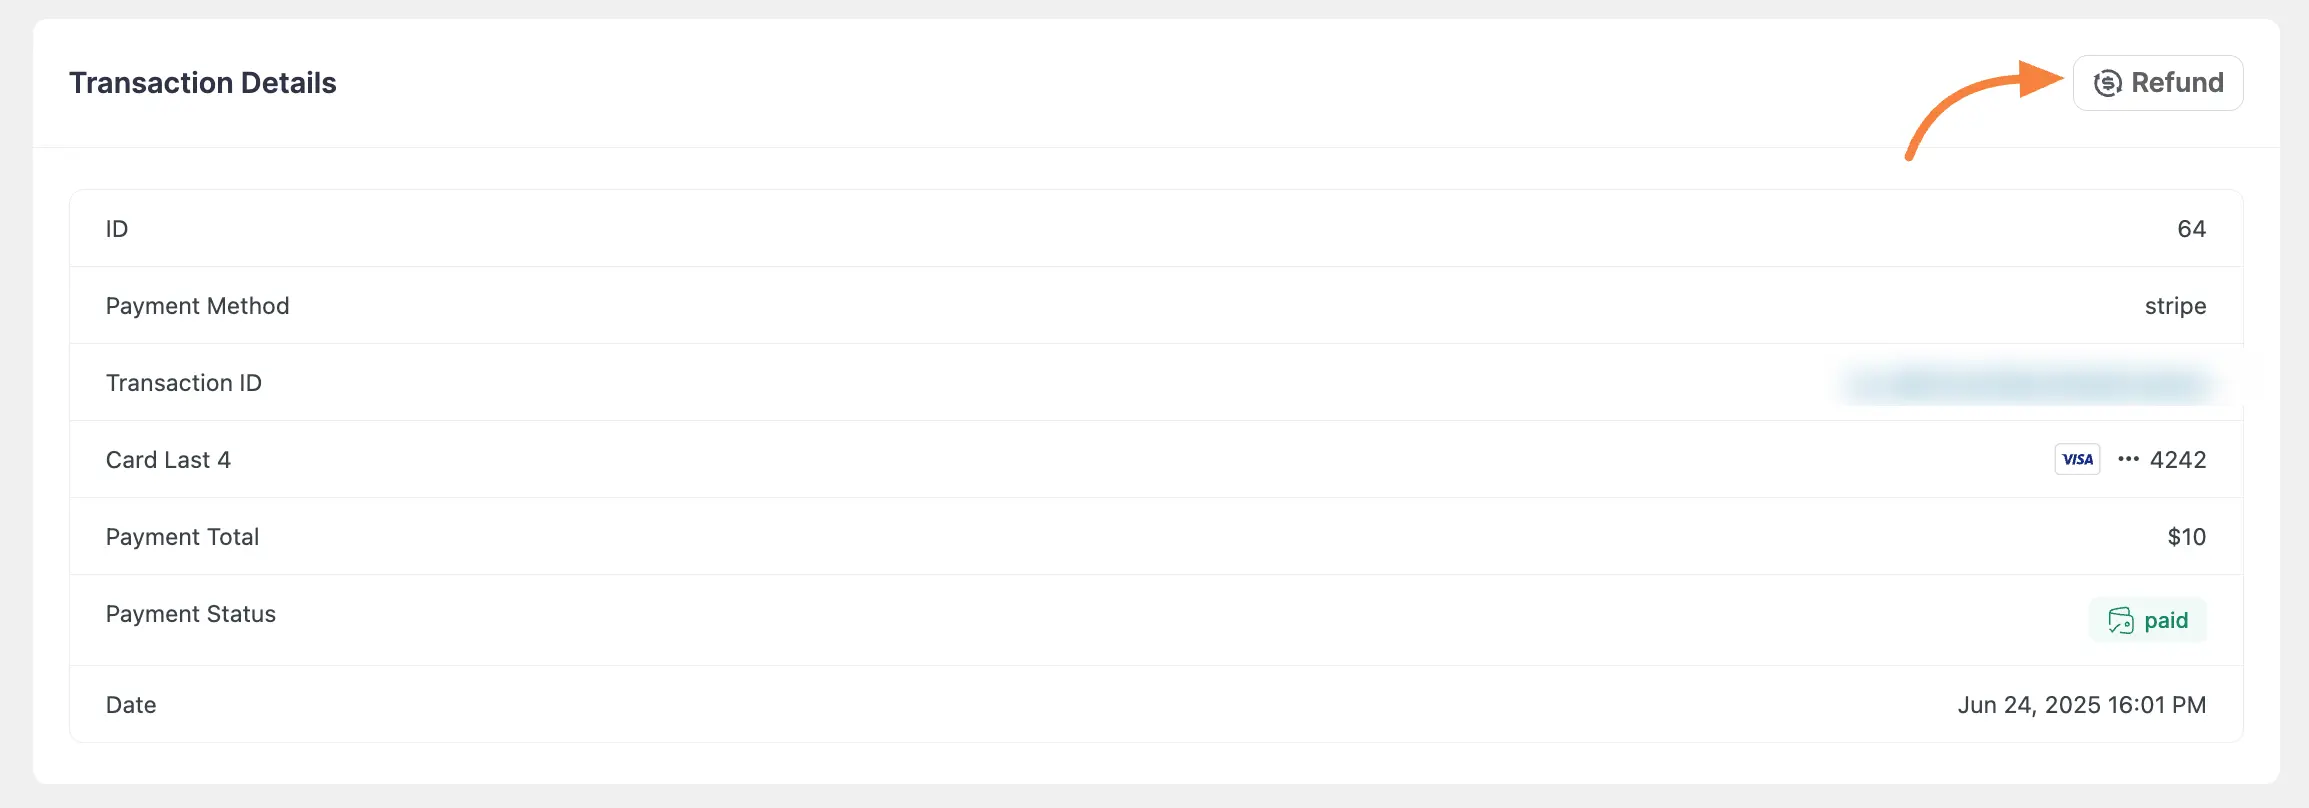
Step 3: Use the “Refund” Button #
Scroll down to the Transaction Details section. Click on the Refund button located at the top right of this section. This will open the advanced refund options.
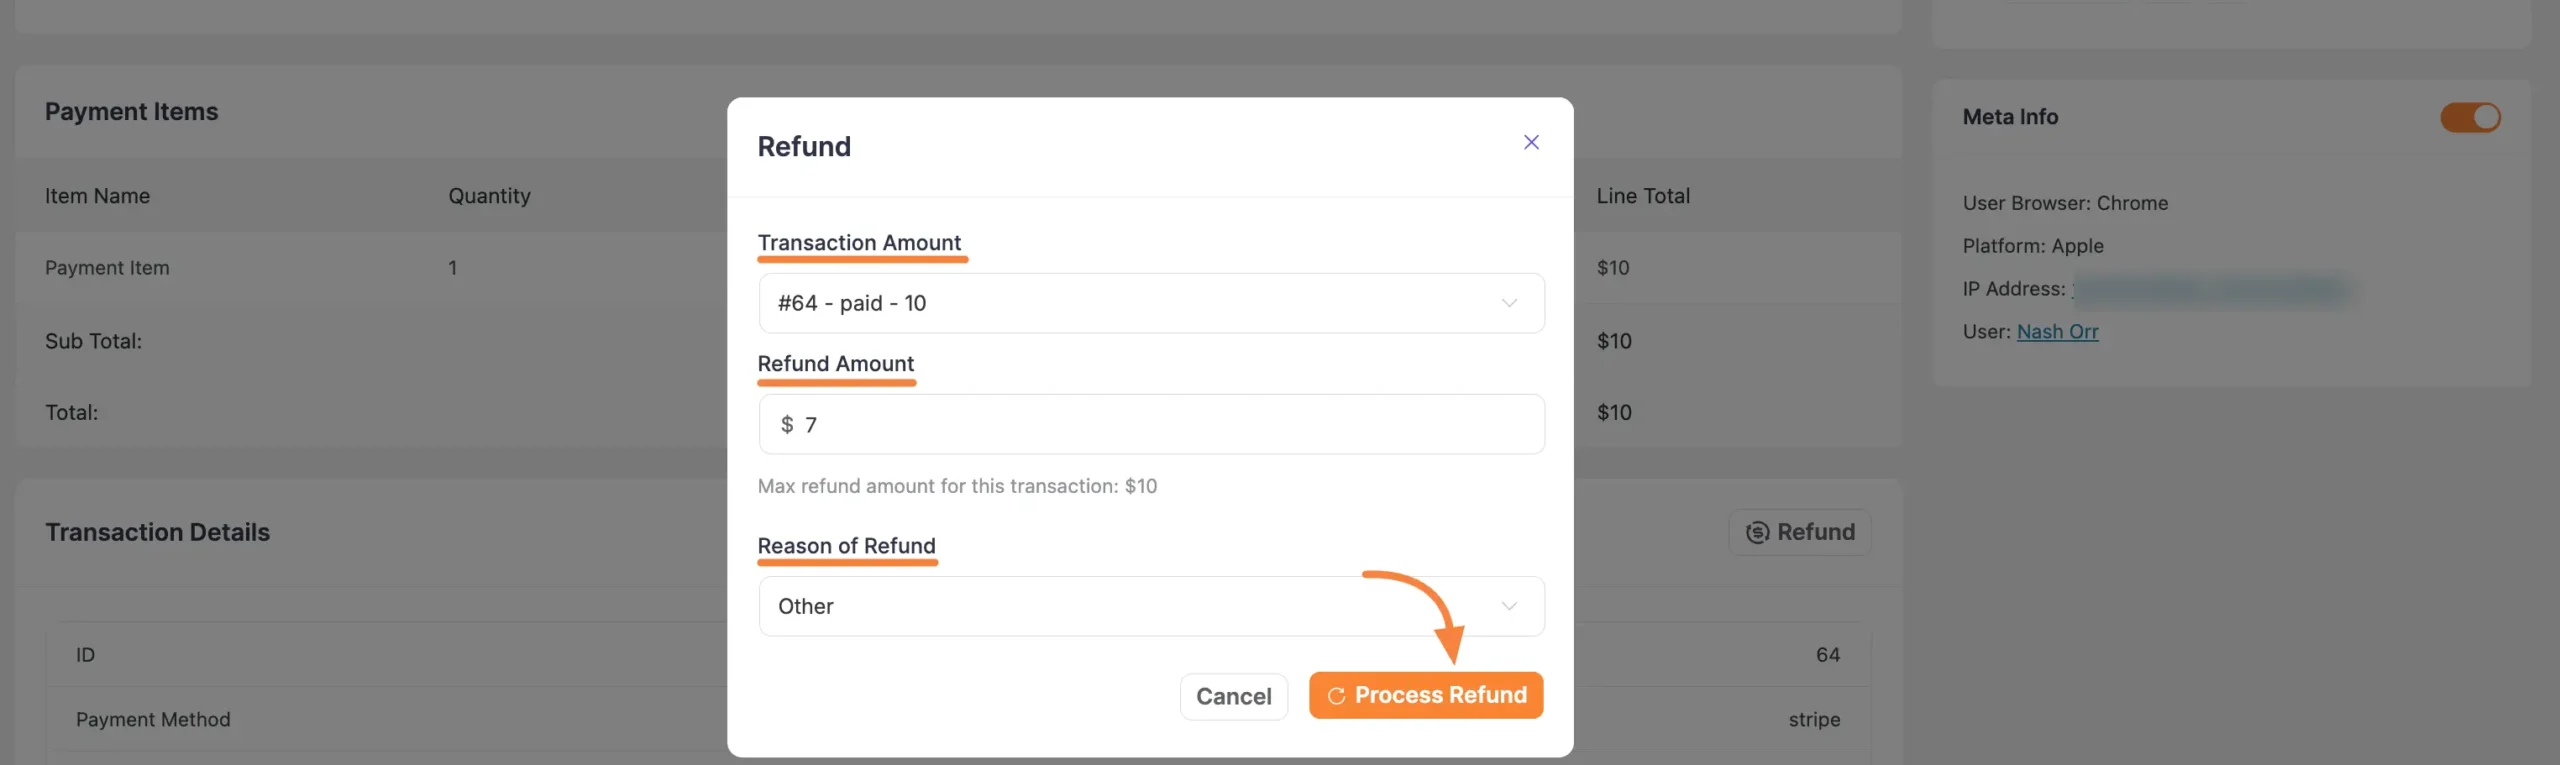
Step 4: Specify the Refund Amount #
The Refund popup will appear. In the Refund Amount field, enter the specific partial amount you wish to return (e.g., $7). You can also process a full refund from here if needed.
You may also select a Reason of Refund for your records. Once you have entered the desired amount, click the Process Refund button.
The transaction status will update to Partially-Refunded or Refunded, depending on the amount you chose to return.


