Paymattic provides 15 payment method fields to design a standard payment form to collect payments for your WordPress Site. This article will give you an overview of Paymattic’s Payment Method Fields.
You must have the Paymattic Pro plugin to get access to All Payment Method Fields except for Stripe and Offline/Cheque payment methods.
Payment Method Fields Section #
To learn how you can find the Payment Method Fields section, follow the steps with the screenshots below –
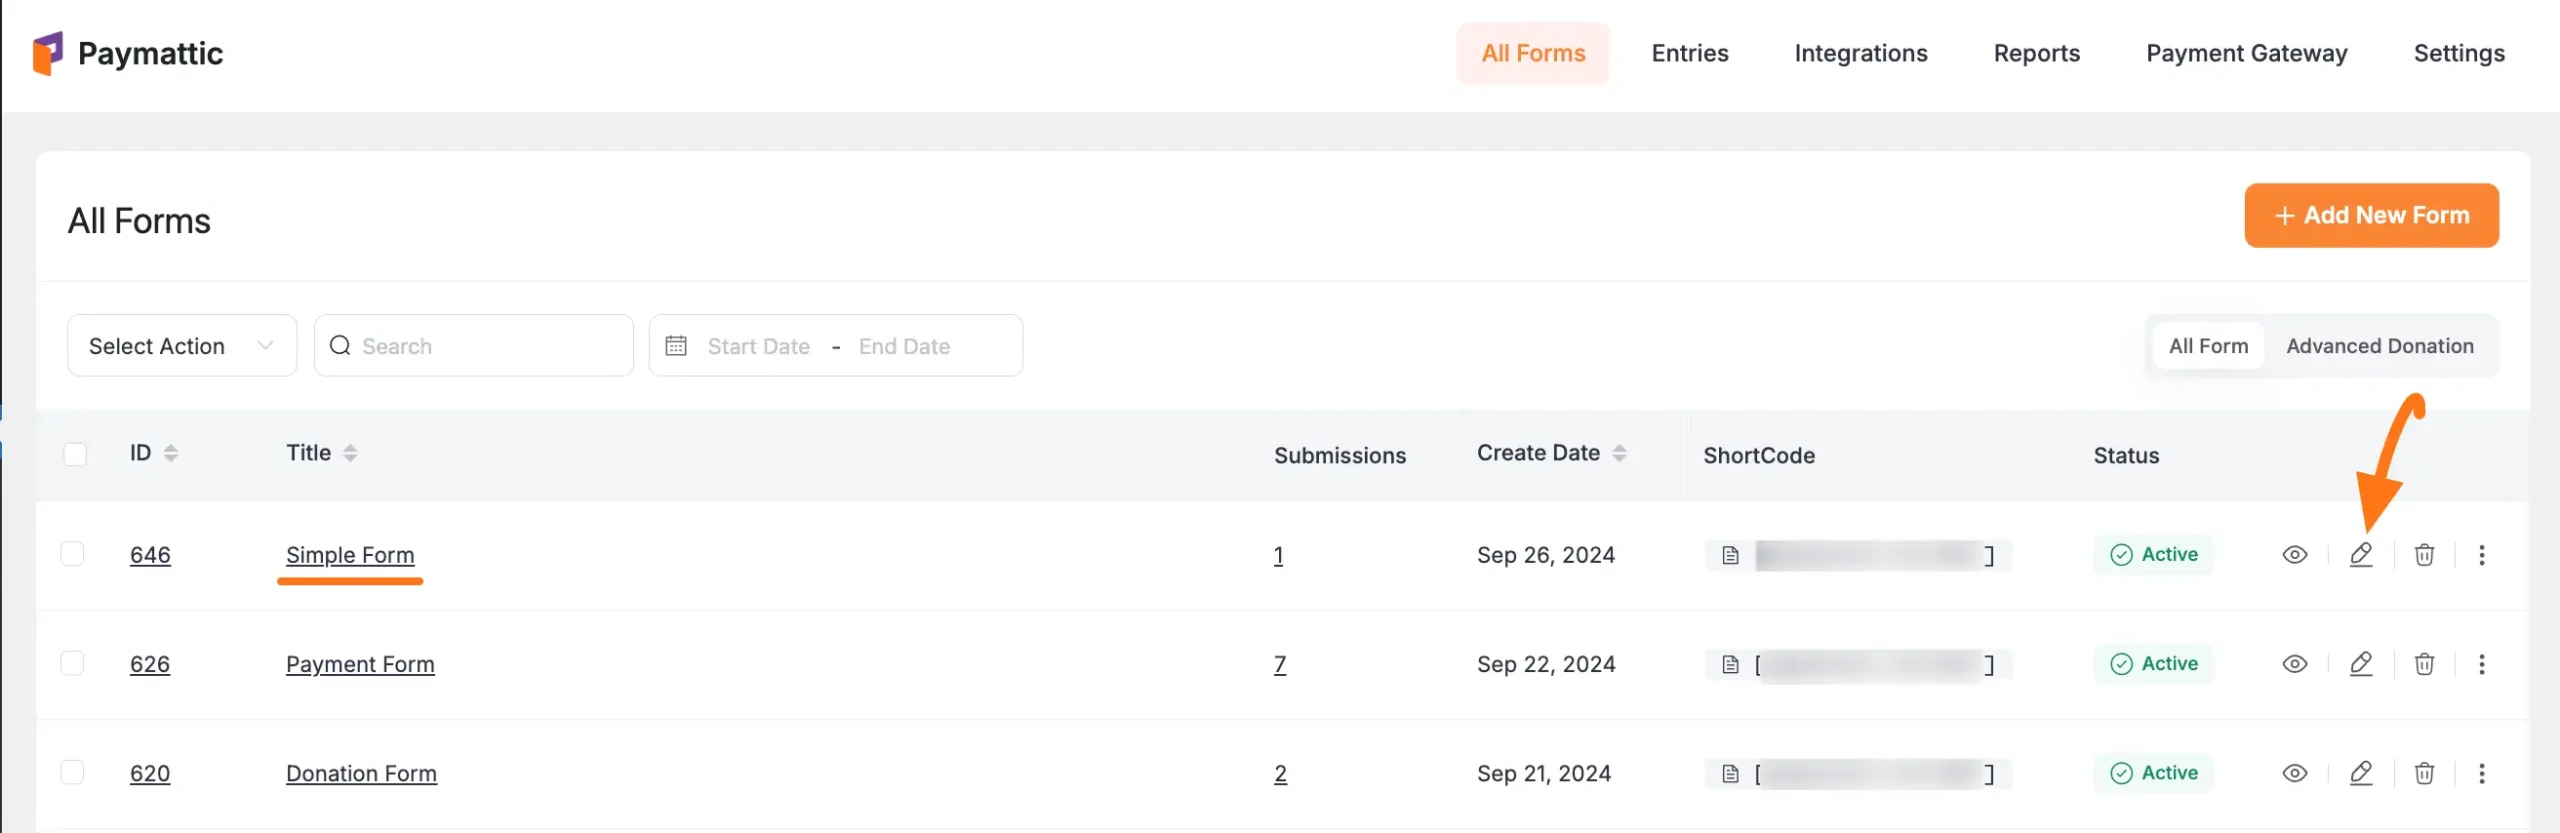
First, go to the All Forms section from the Pymattic Navbar, choose a Form, and click the Pencil/Edit icon to open the Editor page of that form.
If you do not have any existing form, read this Create a Form from Scratch or Create a Form using Templates documentation to create one.
For example, I choose an existing form to show the whole process.
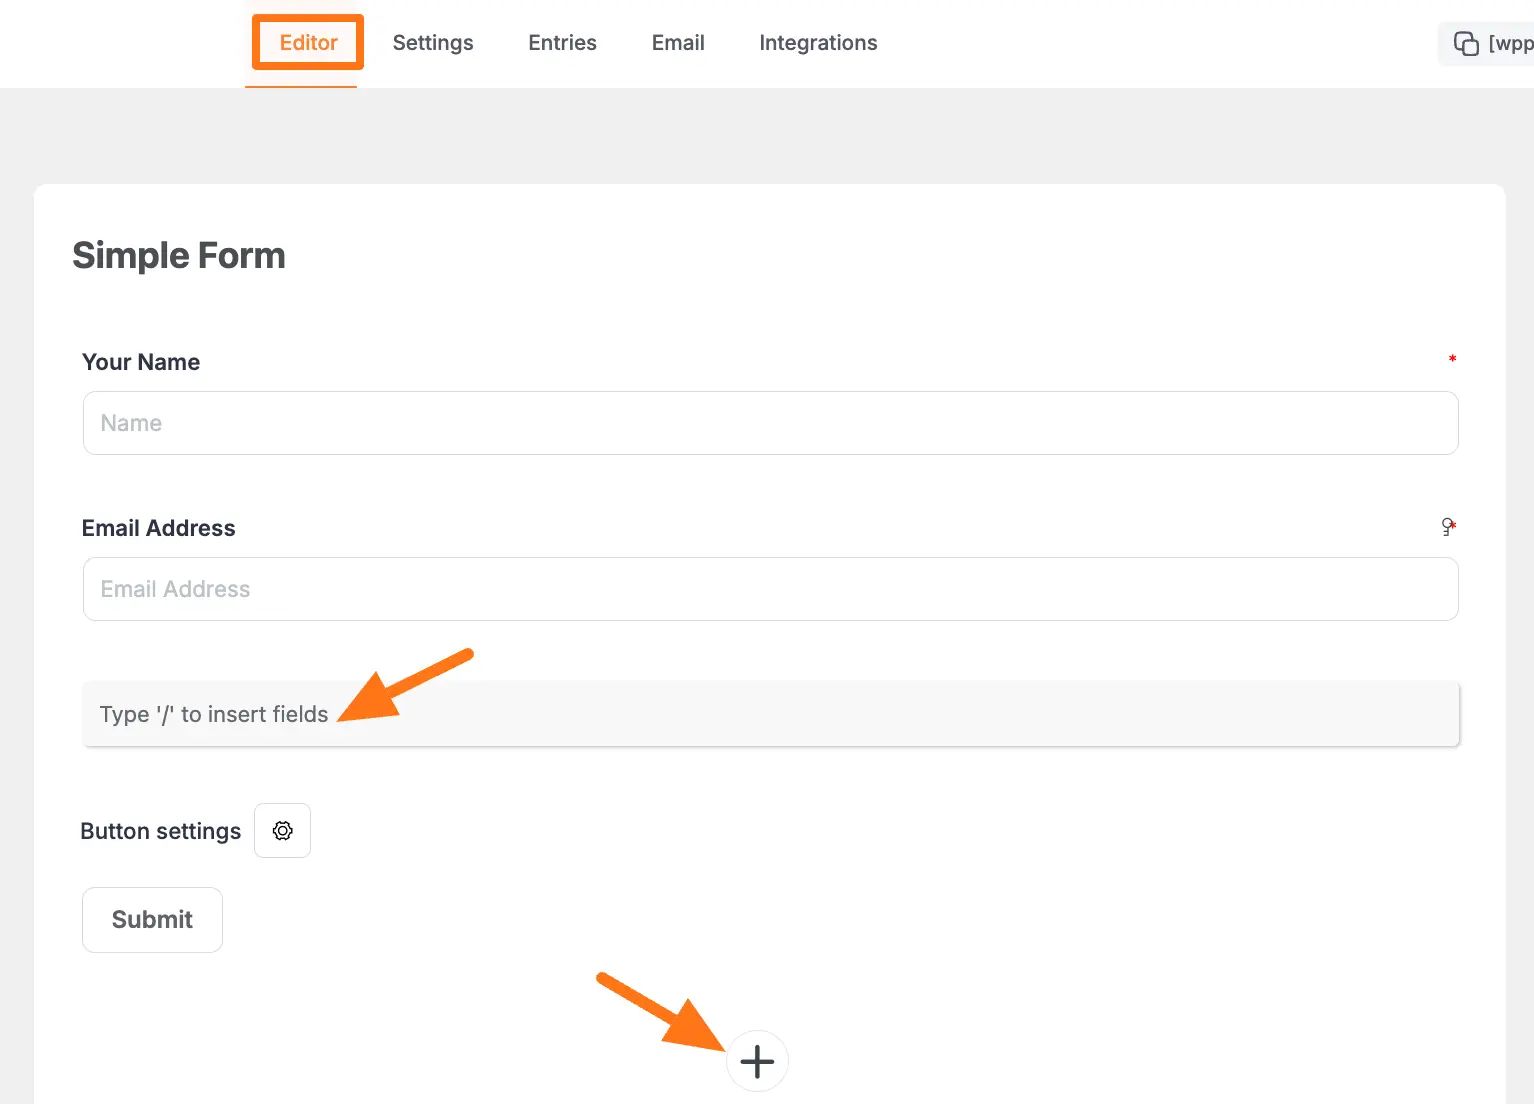
Once you open the Editor page, type the “ / ” or click the “ + ” icon placed at the bottom to get the Payment Method Fields section.
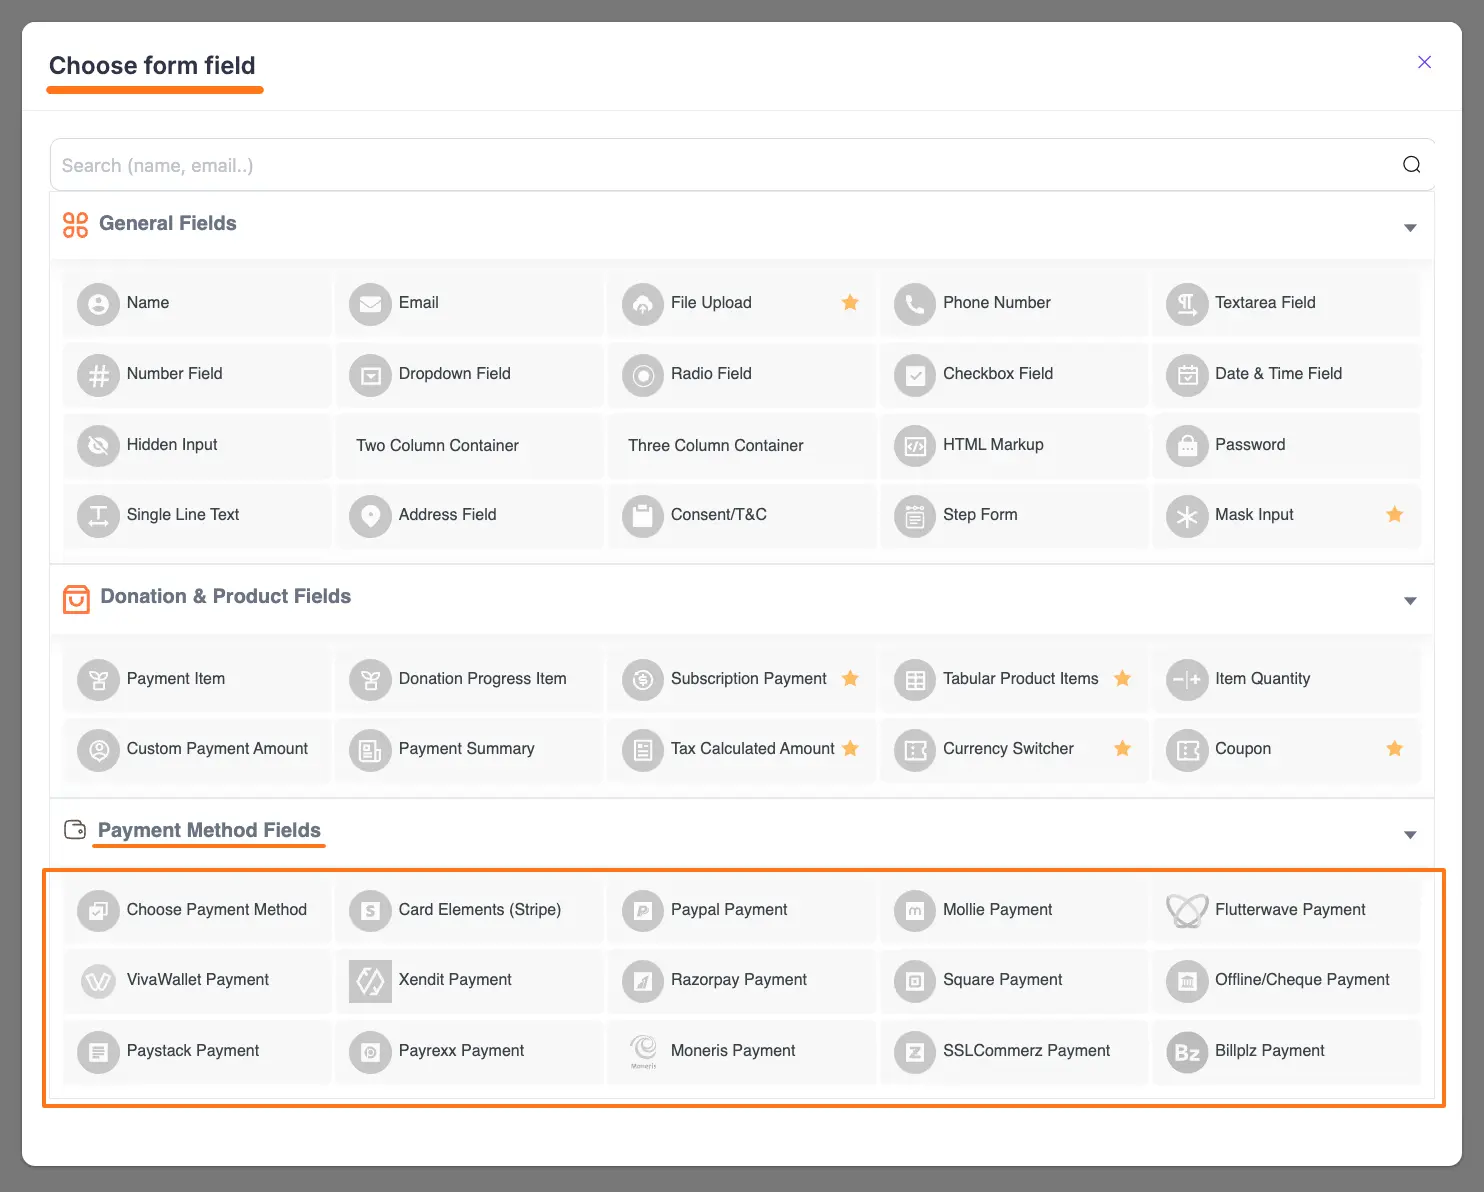
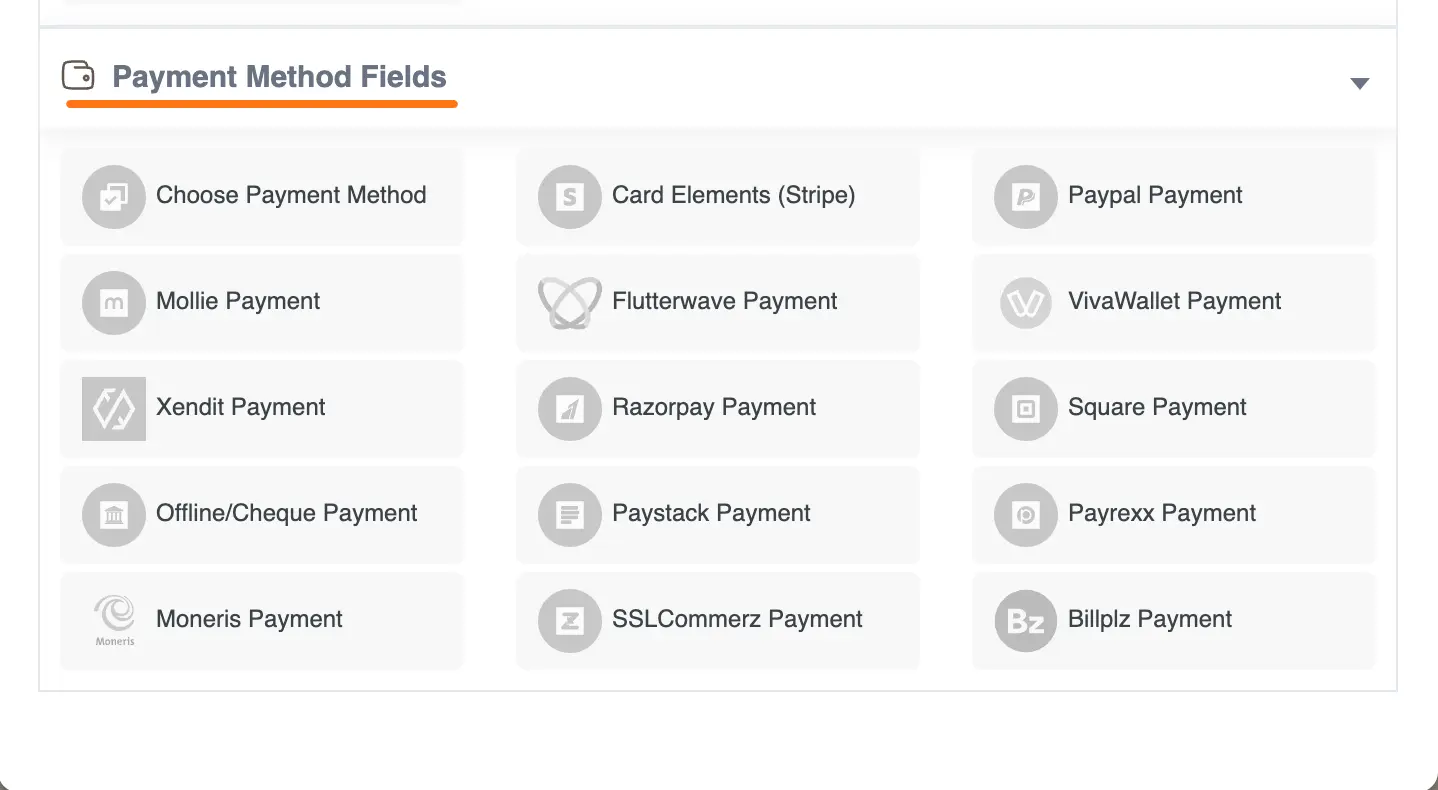
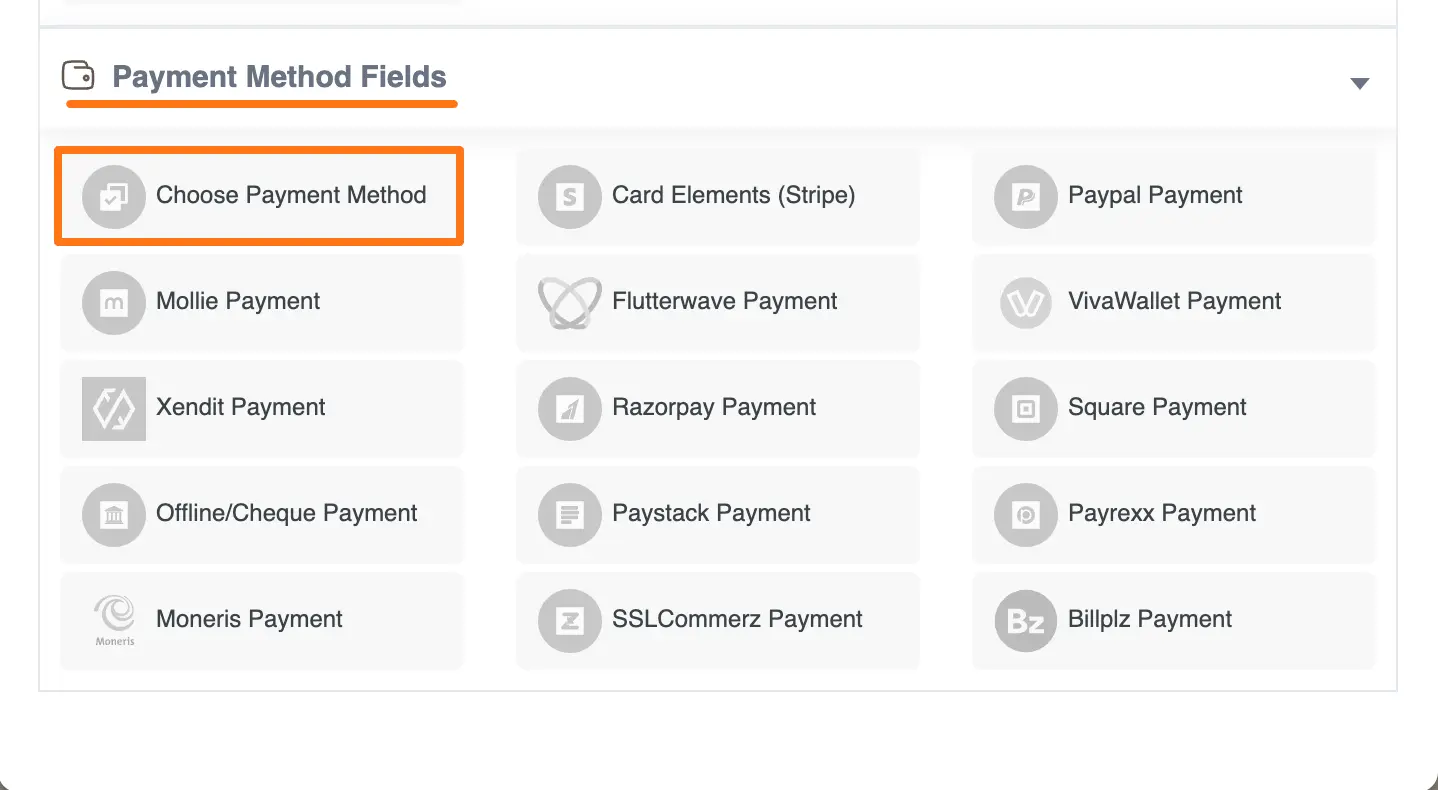
On the Choose form field page, you will find all the desired payment gateways under the Payment Method Fields section.
But, you will only see the Payment Method Fields that you have already configured on your site through Paymattic. To learn the Configuration process of Payment Gateways, click here and read all documentation.
Types of Adding Payment Method Fields #
In Paymattic, you can add the payment method to a form in two different ways. These are:
- Single Payment Method
- Multiple Payment Method
Single Payment Method #
You can add a Single Payment Method by clicking on any desired payment gateway’s name.
You must have the Paymattic Pro plugin to get All Payment Method Fields except for Stripe and Offline/Cheque payment methods.
Multiple/Choose Payment Method #
You can add Multiple Payment Methods in one form, by clicking the Choose Payment Method field.
You must have the Paymattic Pro plugin to get All Payment Method Fields except for Stripe and Offline/Cheque payment methods.
Once you add the field, you can see that the Stripe payment gateway is added by default.
Now, hover over the field and click the Settings icon in the right corner to add more payment methods according to your preference.
Once you click the Settings Icon, two settings options will appear. These are:
- General Settings
- Advanced Settings
General Settings #
Under the General settings tab, you will get the following settings options:
- Select Payment Method
- Payment Method Settings
- Default Payment Method
- Enable Image
Once you set up all the settings, click the Update button to save all the customizations.
All the General Settings mentioned above are explained below:
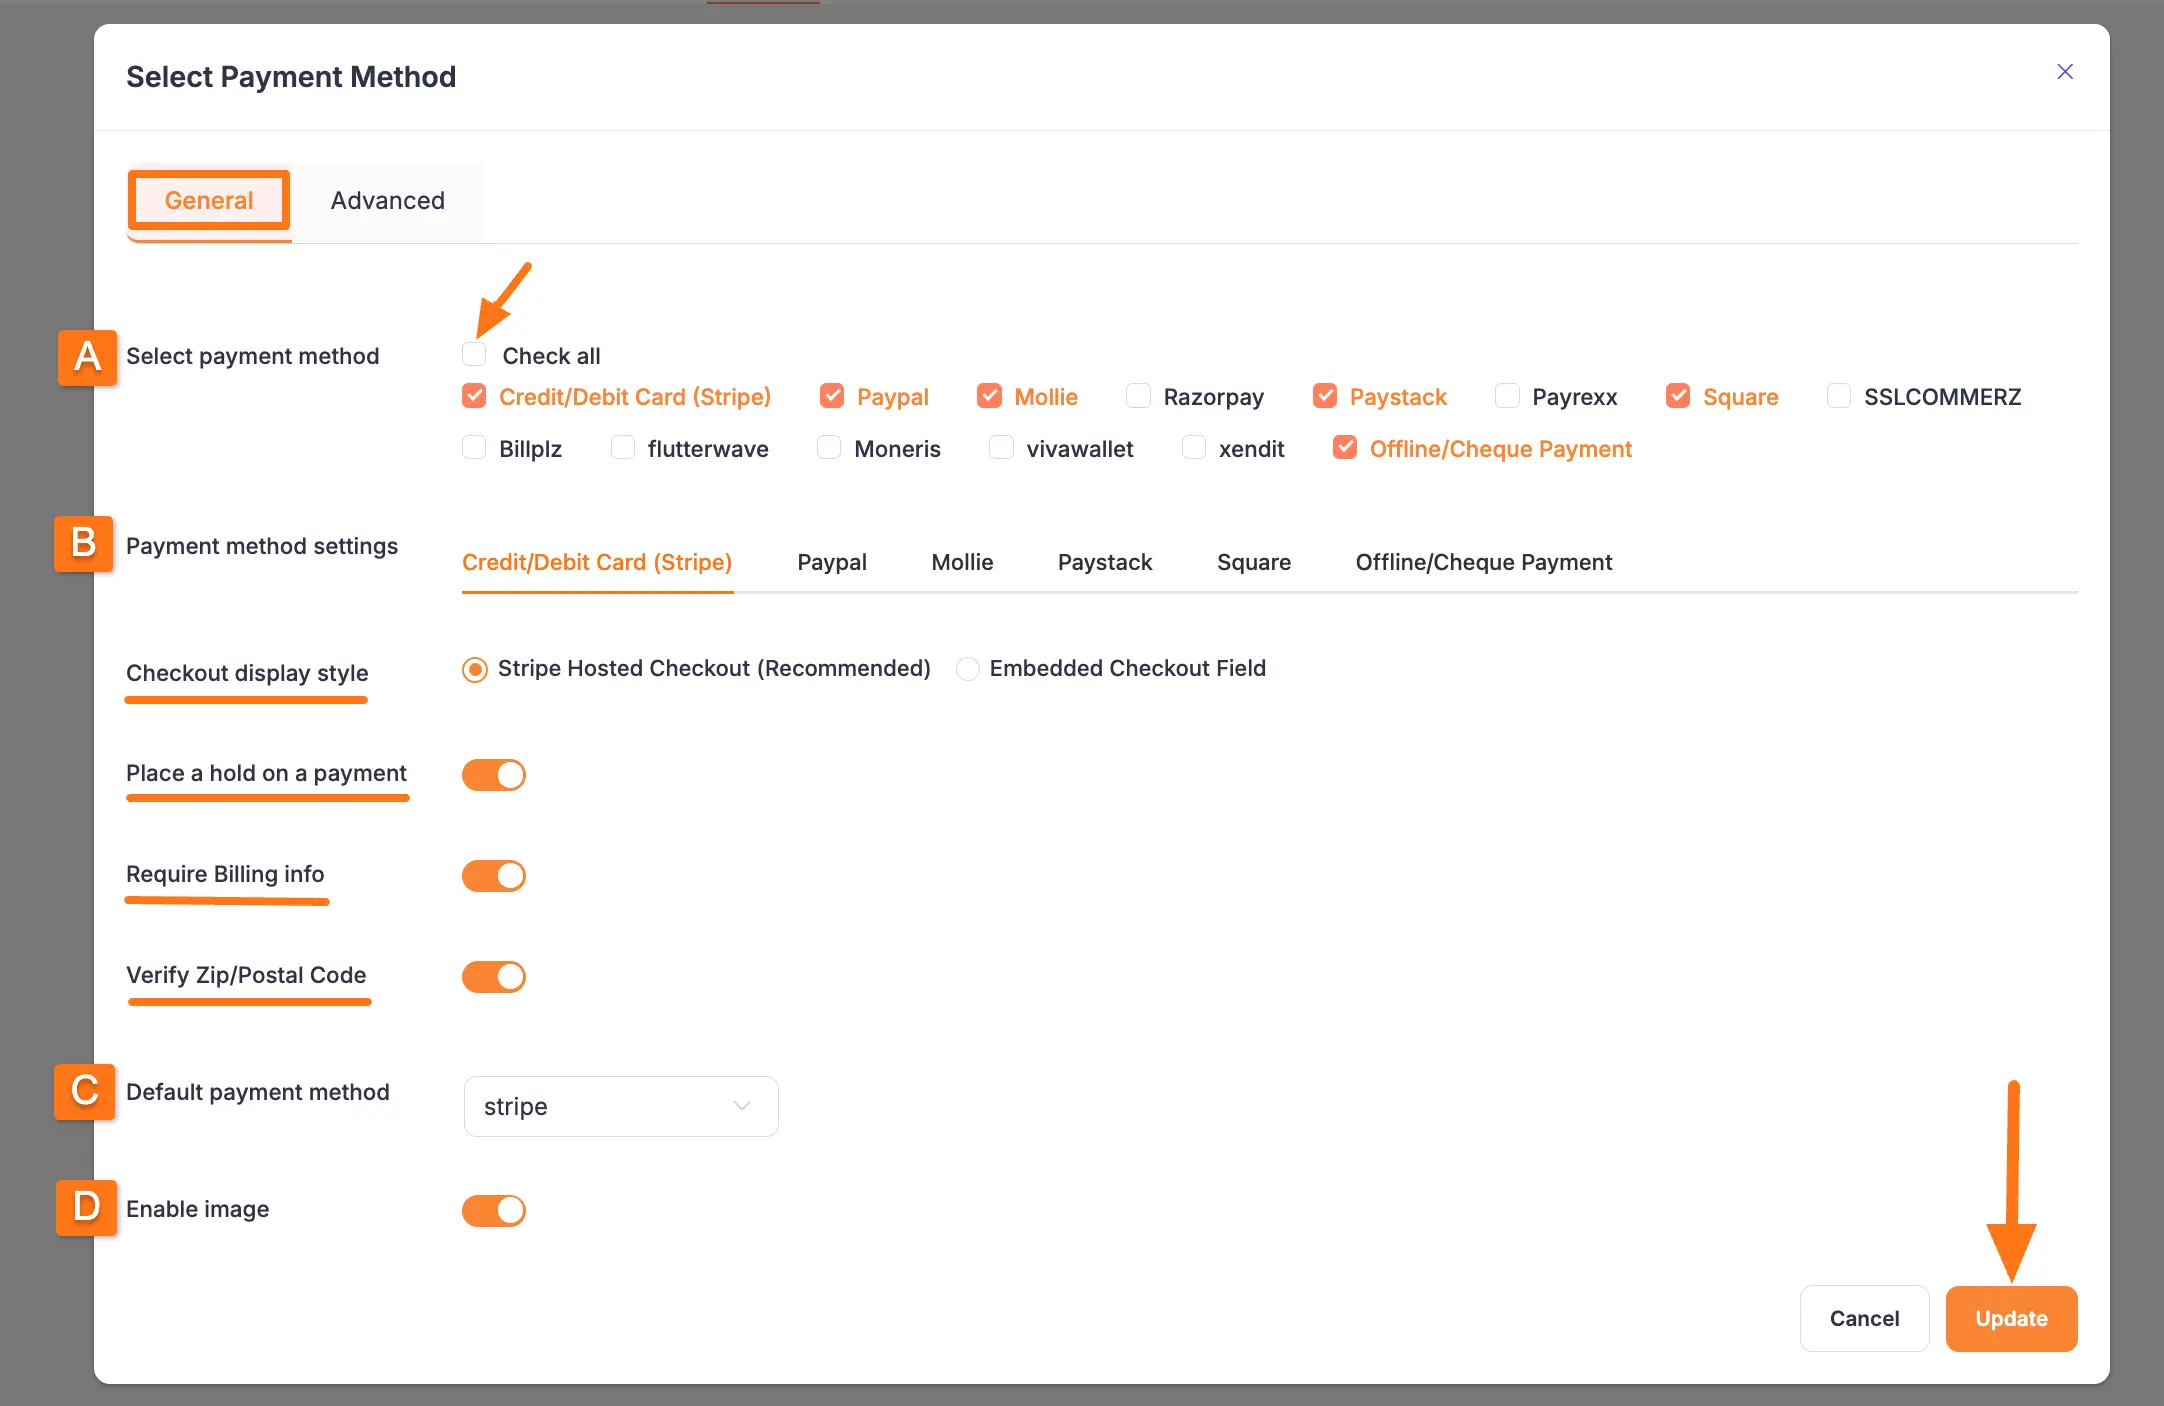
A. Select payment method #
Here, you can select the preferred payment gateways you want to offer to your customers.
Also, you can select all payment methods by simply clicking the Check all button.
B. Payment Method Settings #
With this option, you can configure a few necessary settings for your selected payment methods. As an example, I described the settings of Stripe below –
- Checkout Display Style: Select this Stripe Hosted Checkout as the checkout display style to take users to the Stripe Hosted page during checkout. Or, select this Embedded Checkout Field to display the checkout option as a pop-up. But we always recommend the first option to set as a checkout style.
- Place a hold on a payment: Stripe will place a hold on the payment method, basically when you create a payment, you can place a hold on an eligible payment method to reserve funds that you can capture later. If the payment is not captured before the expiring date, the hold amount will be released to the customer’s account. To know how to place a hold on a payment method that works and its benefits, read this Documentation.
- Require Billing Info: Enabling this option will allow you to make the billing info required for your users.
- Verify Zip/Postal Code: You can also verify zip/postal code by enabling the Verify Zip/Postal Code option. Now press the Update button.
C. Default Payment Method #
When you add multiple payment methods to collect payments, you can select one payment platform as a default method from the dropdown list of all added payment methods.
D. Enable Image #
Enable this Toggle button to show the Payment Method Platforms’ official logo images on your form. Otherwise, only the payment platforms’ Names will be visible on your form.
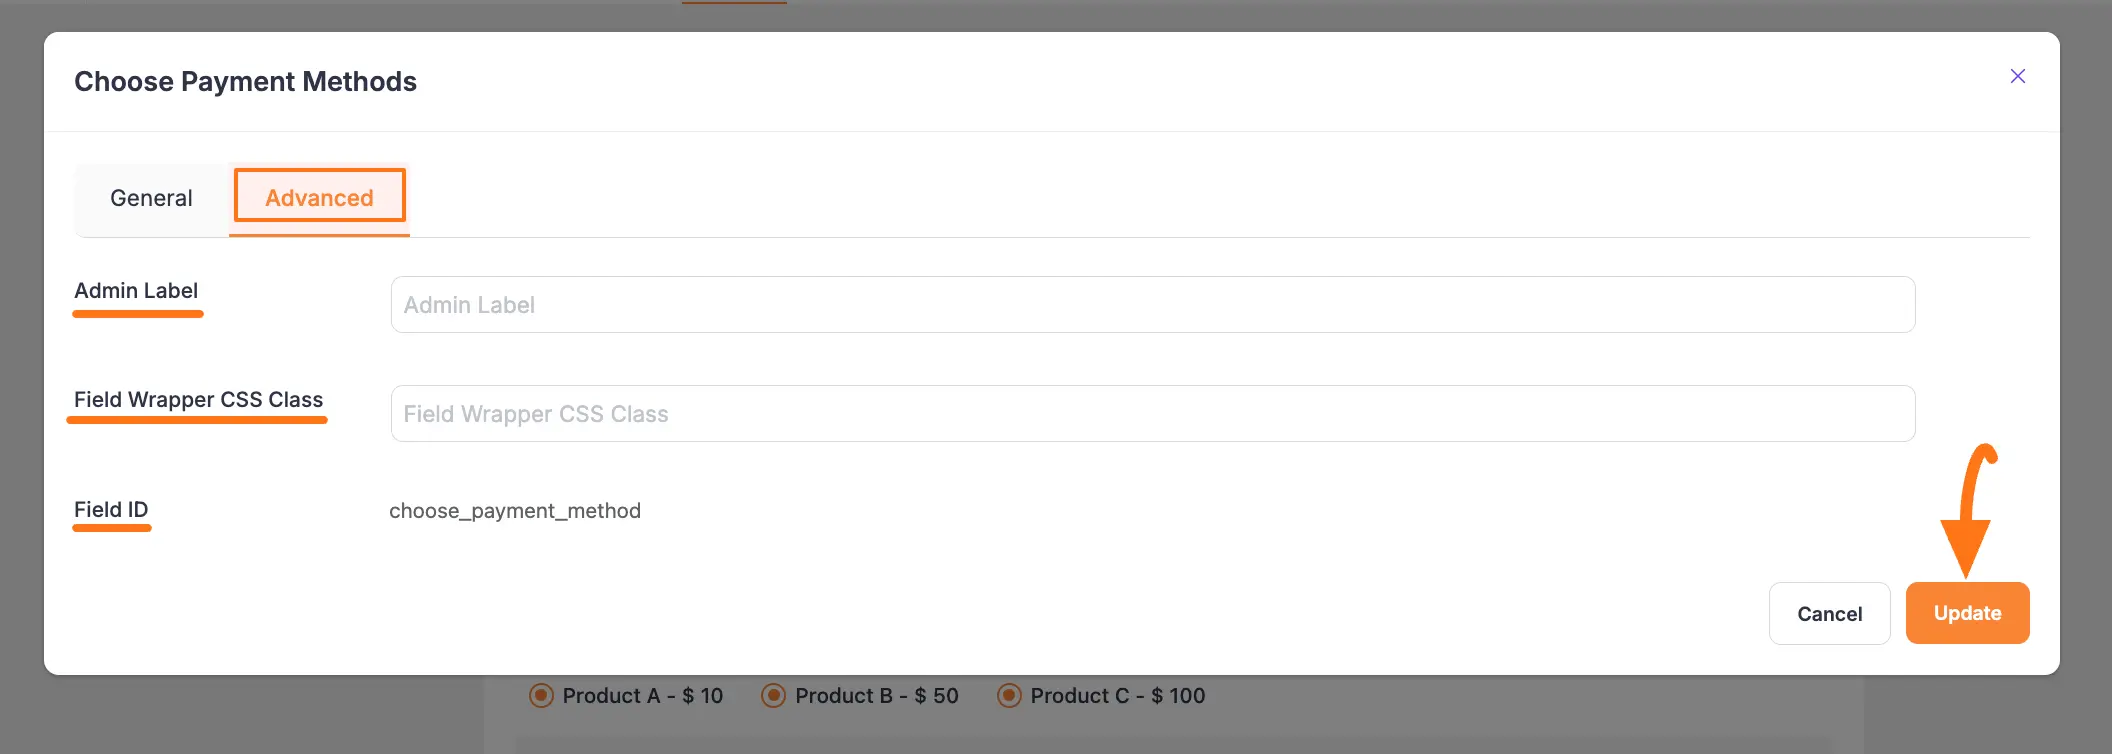
Advanced Settings #
Once you complete the General settings, go to the Advanced tab, and you will find the advanced settings for your chosen field.
- Admin Label: This label is used for the admin who wants to see the field’s label from the back end.
- Field Wrapper CSS Class: This is used for adding a Custom CSS/JS for an entire field of a specific form using the Field Wrapper CSS Class element. To learn more, click here.
- Field ID: This option is used for adding or tracking form fields. Plus, creating the custom CSS/JS for a specific form field.
Once you finish, click the Update button to save all your configuration.
Preview of Payment Methods Fields #
Once you complete adding/editing the Payment Method field, press the Save button to save all your changes. And, to see the Preview of the form, click the Eye icon.
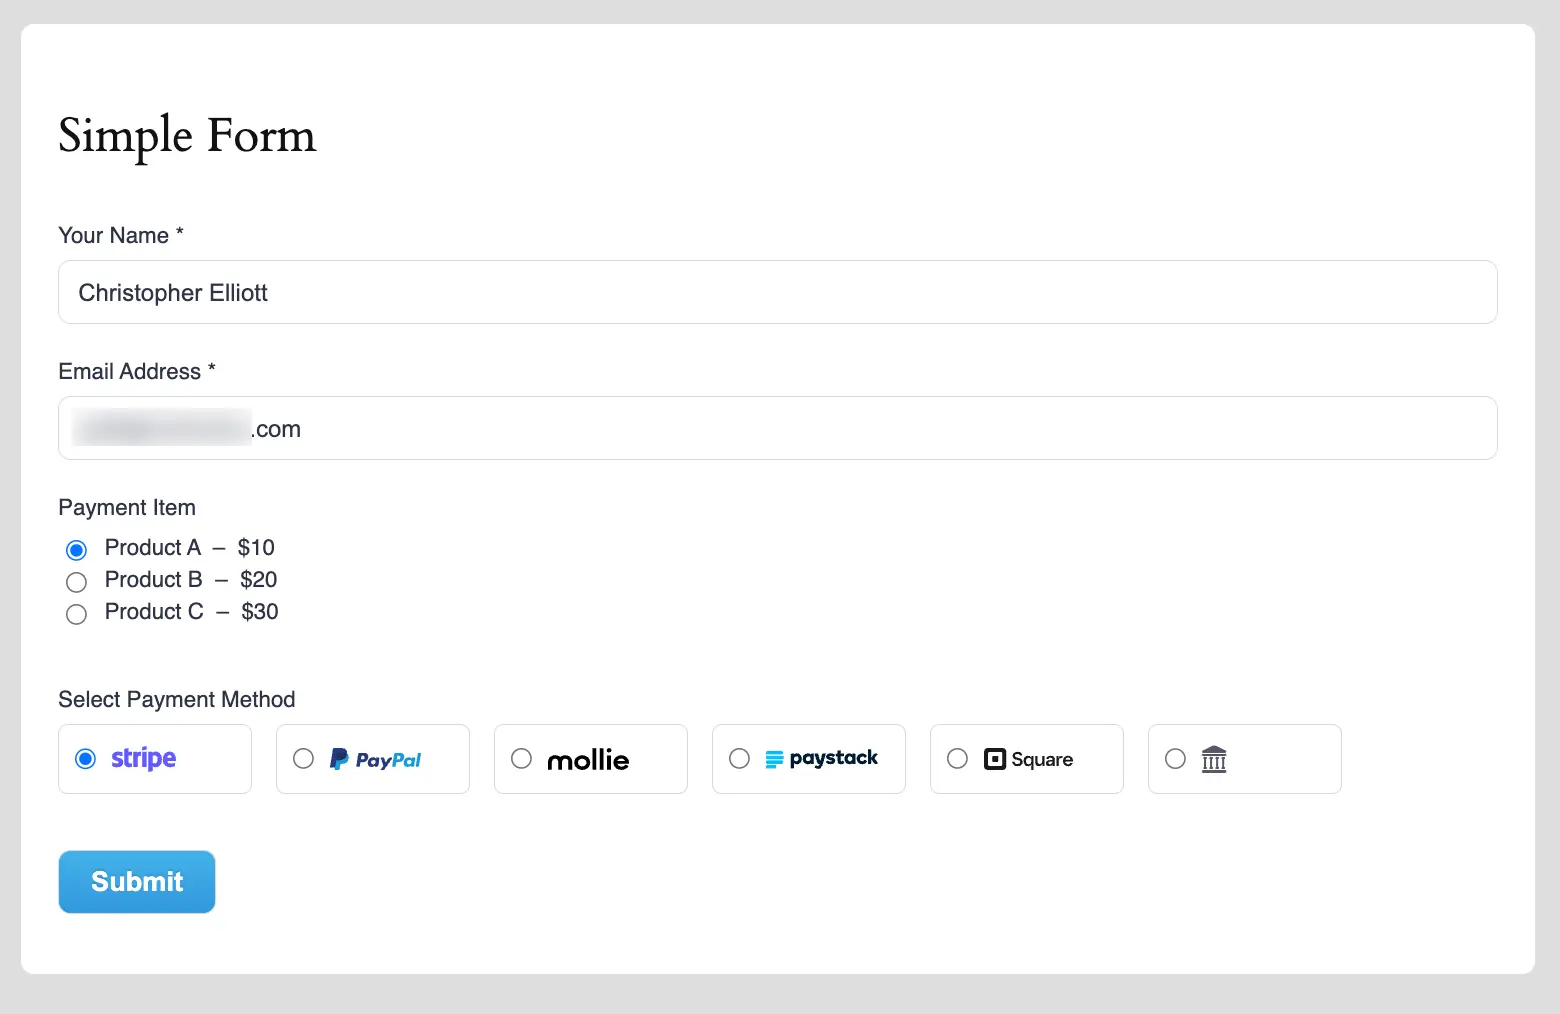
Remember, your Payment Method field will not work until you have any Product Field in your form. For example, I added the Payment Item field as a product field.
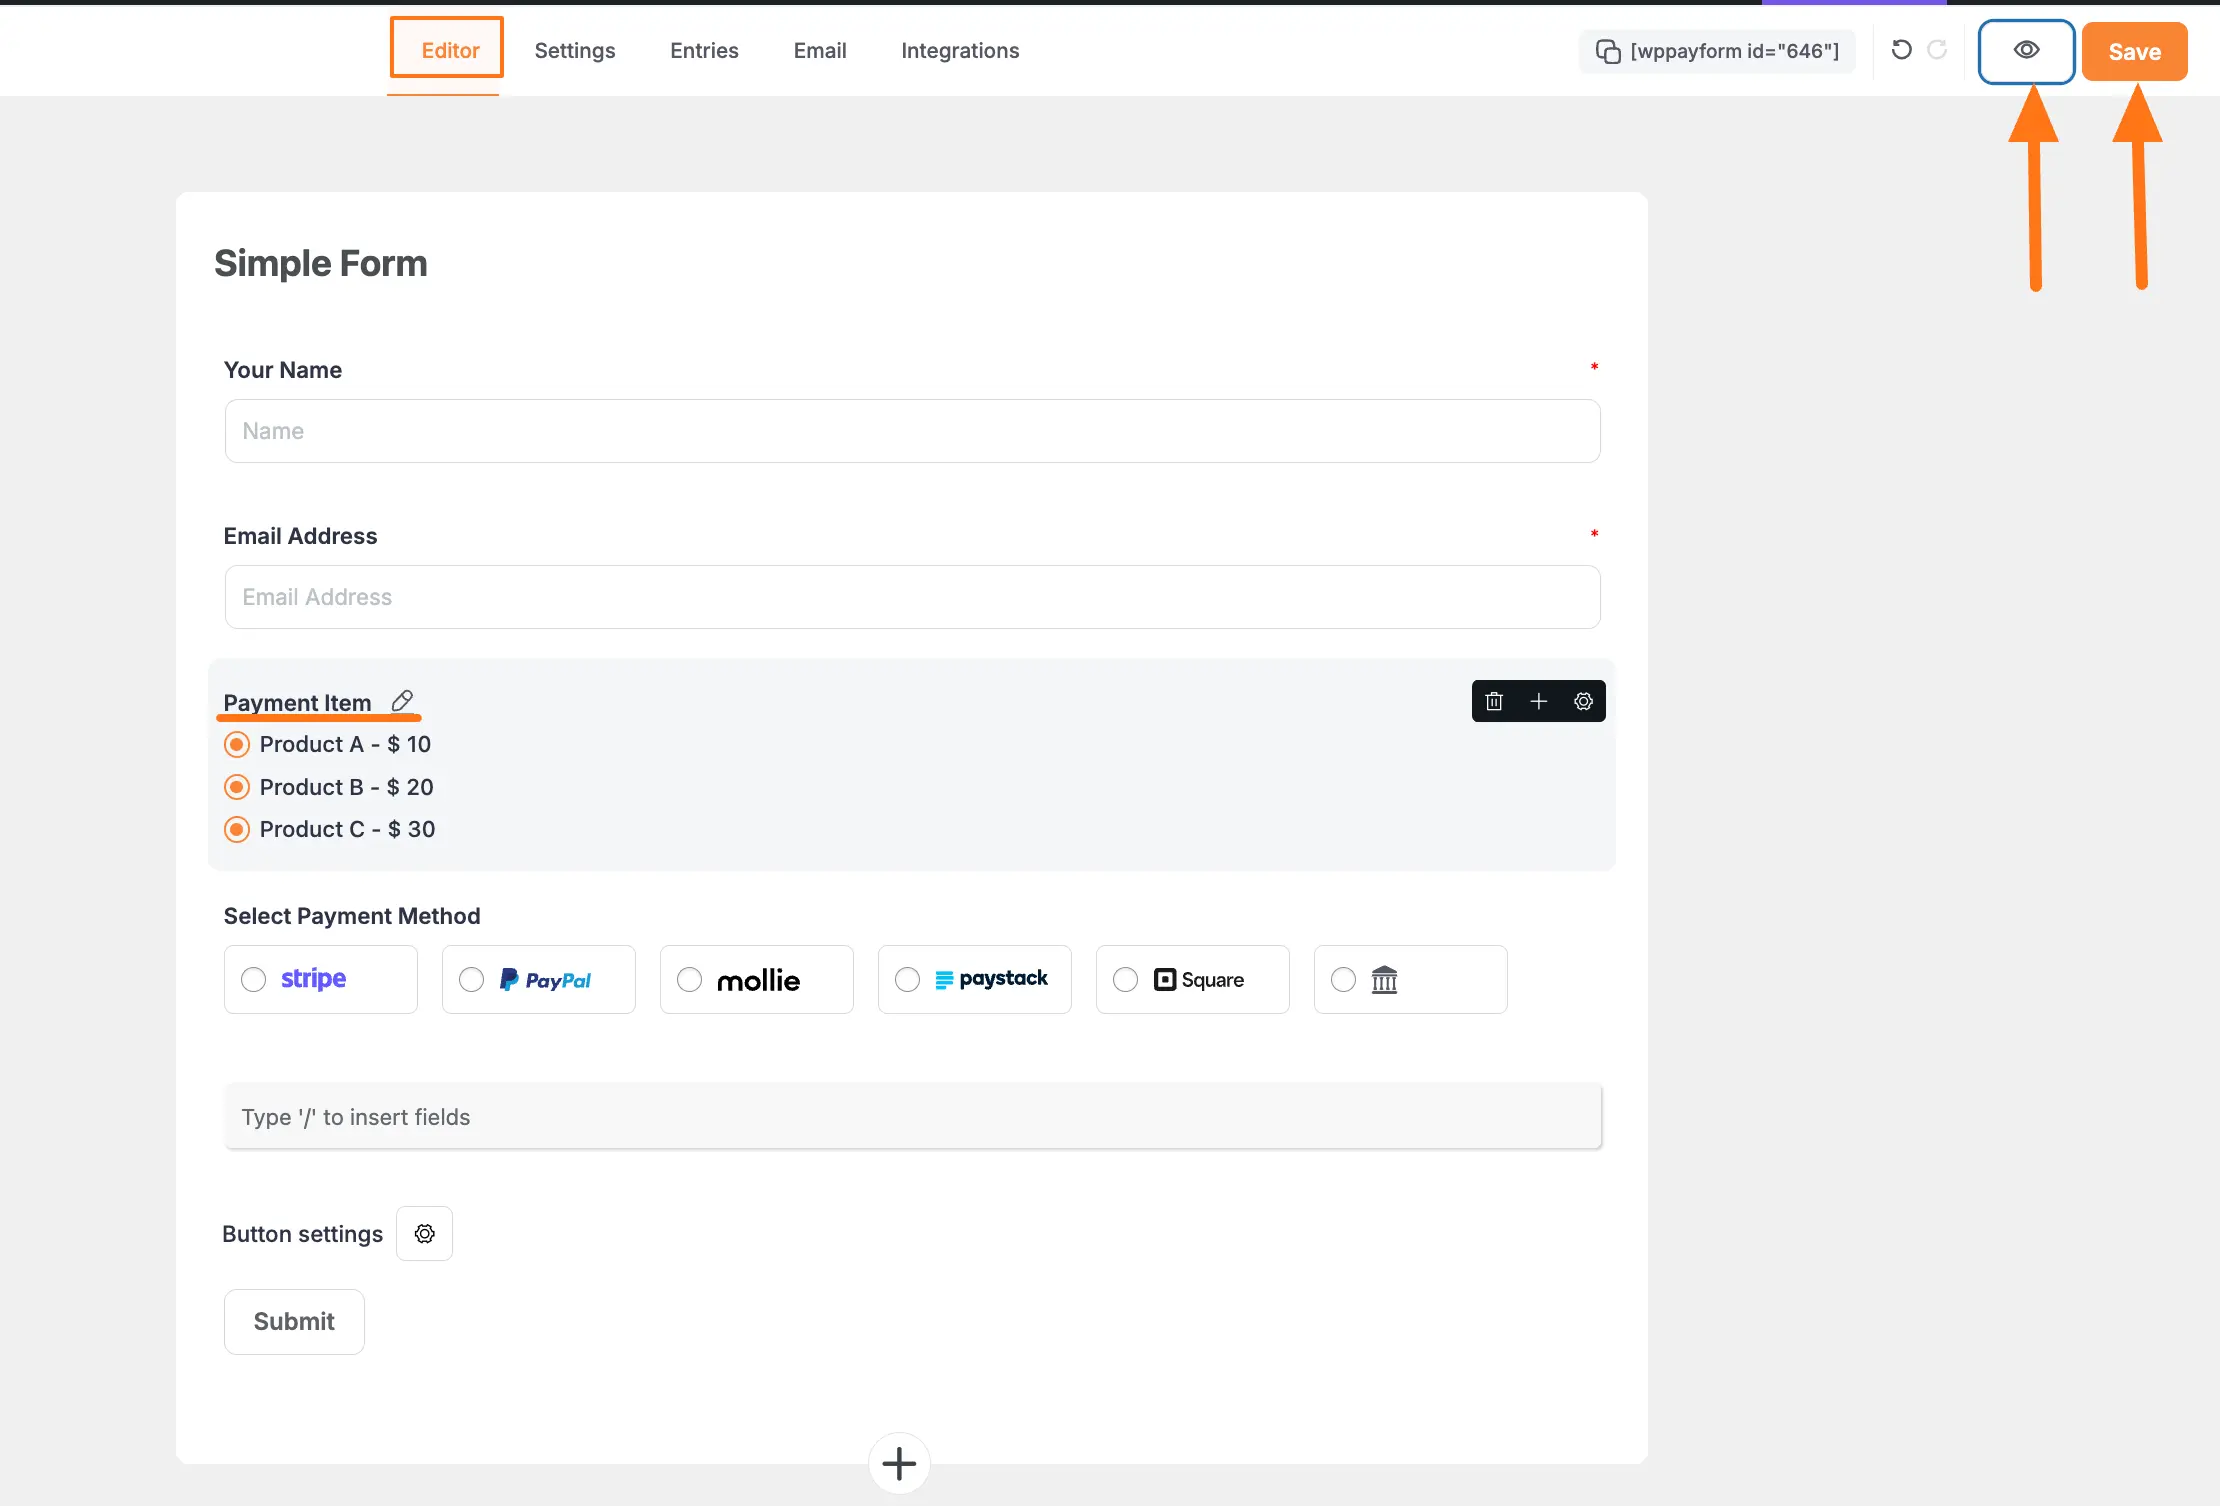
Here is the preview of the added Payment Method fields in a Form.
These are all the Payment Method Fields you can use while creating forms in Paymattic.
If you have any further questions, concerns, or suggestions, please do not hesitate to contact our @support team. Thank you.


