Paymattic allows you to view and manage a single form entry or submission data very precisely. This article will guide you through how to view and manage a single form entry in Paymattic.
View & Manage A Sigle Form Entry #
To learn how to view & manage a single form entry or submission in Paymattic, follow the steps with the screenshots below –
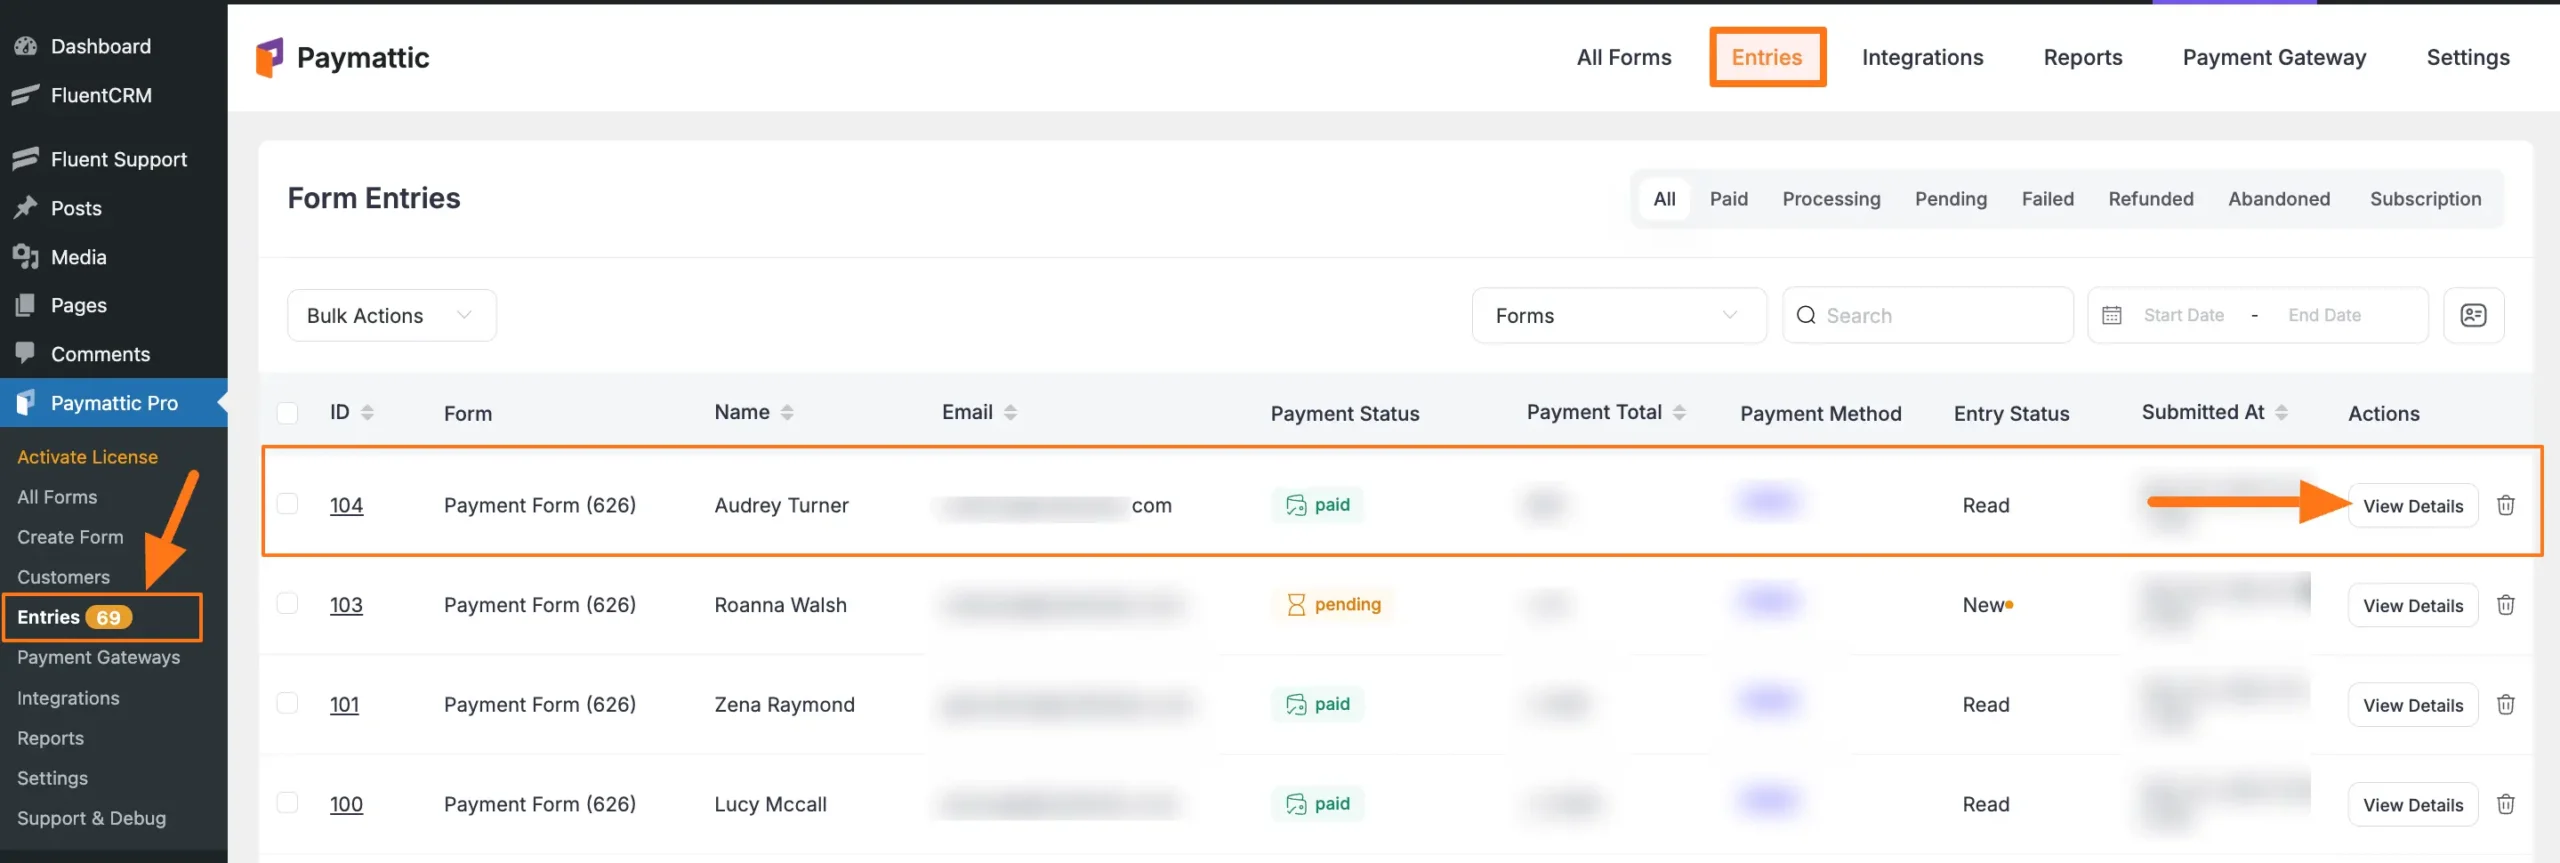
First, go to Paymattic Dashboard from the WordPress Left Sidebar, click the Entries section, and click the View Details button of the desired form entry you want to view.
All the features for viewing the entire activities of this specific form entry are organized into nine major options: These are:
- Change Payment Status
- Entry Actions
- Form Entry Data
- Payment Items
- Transaction Details
- Submission Activity Events
- FluentCRM Profile
- Meta Info
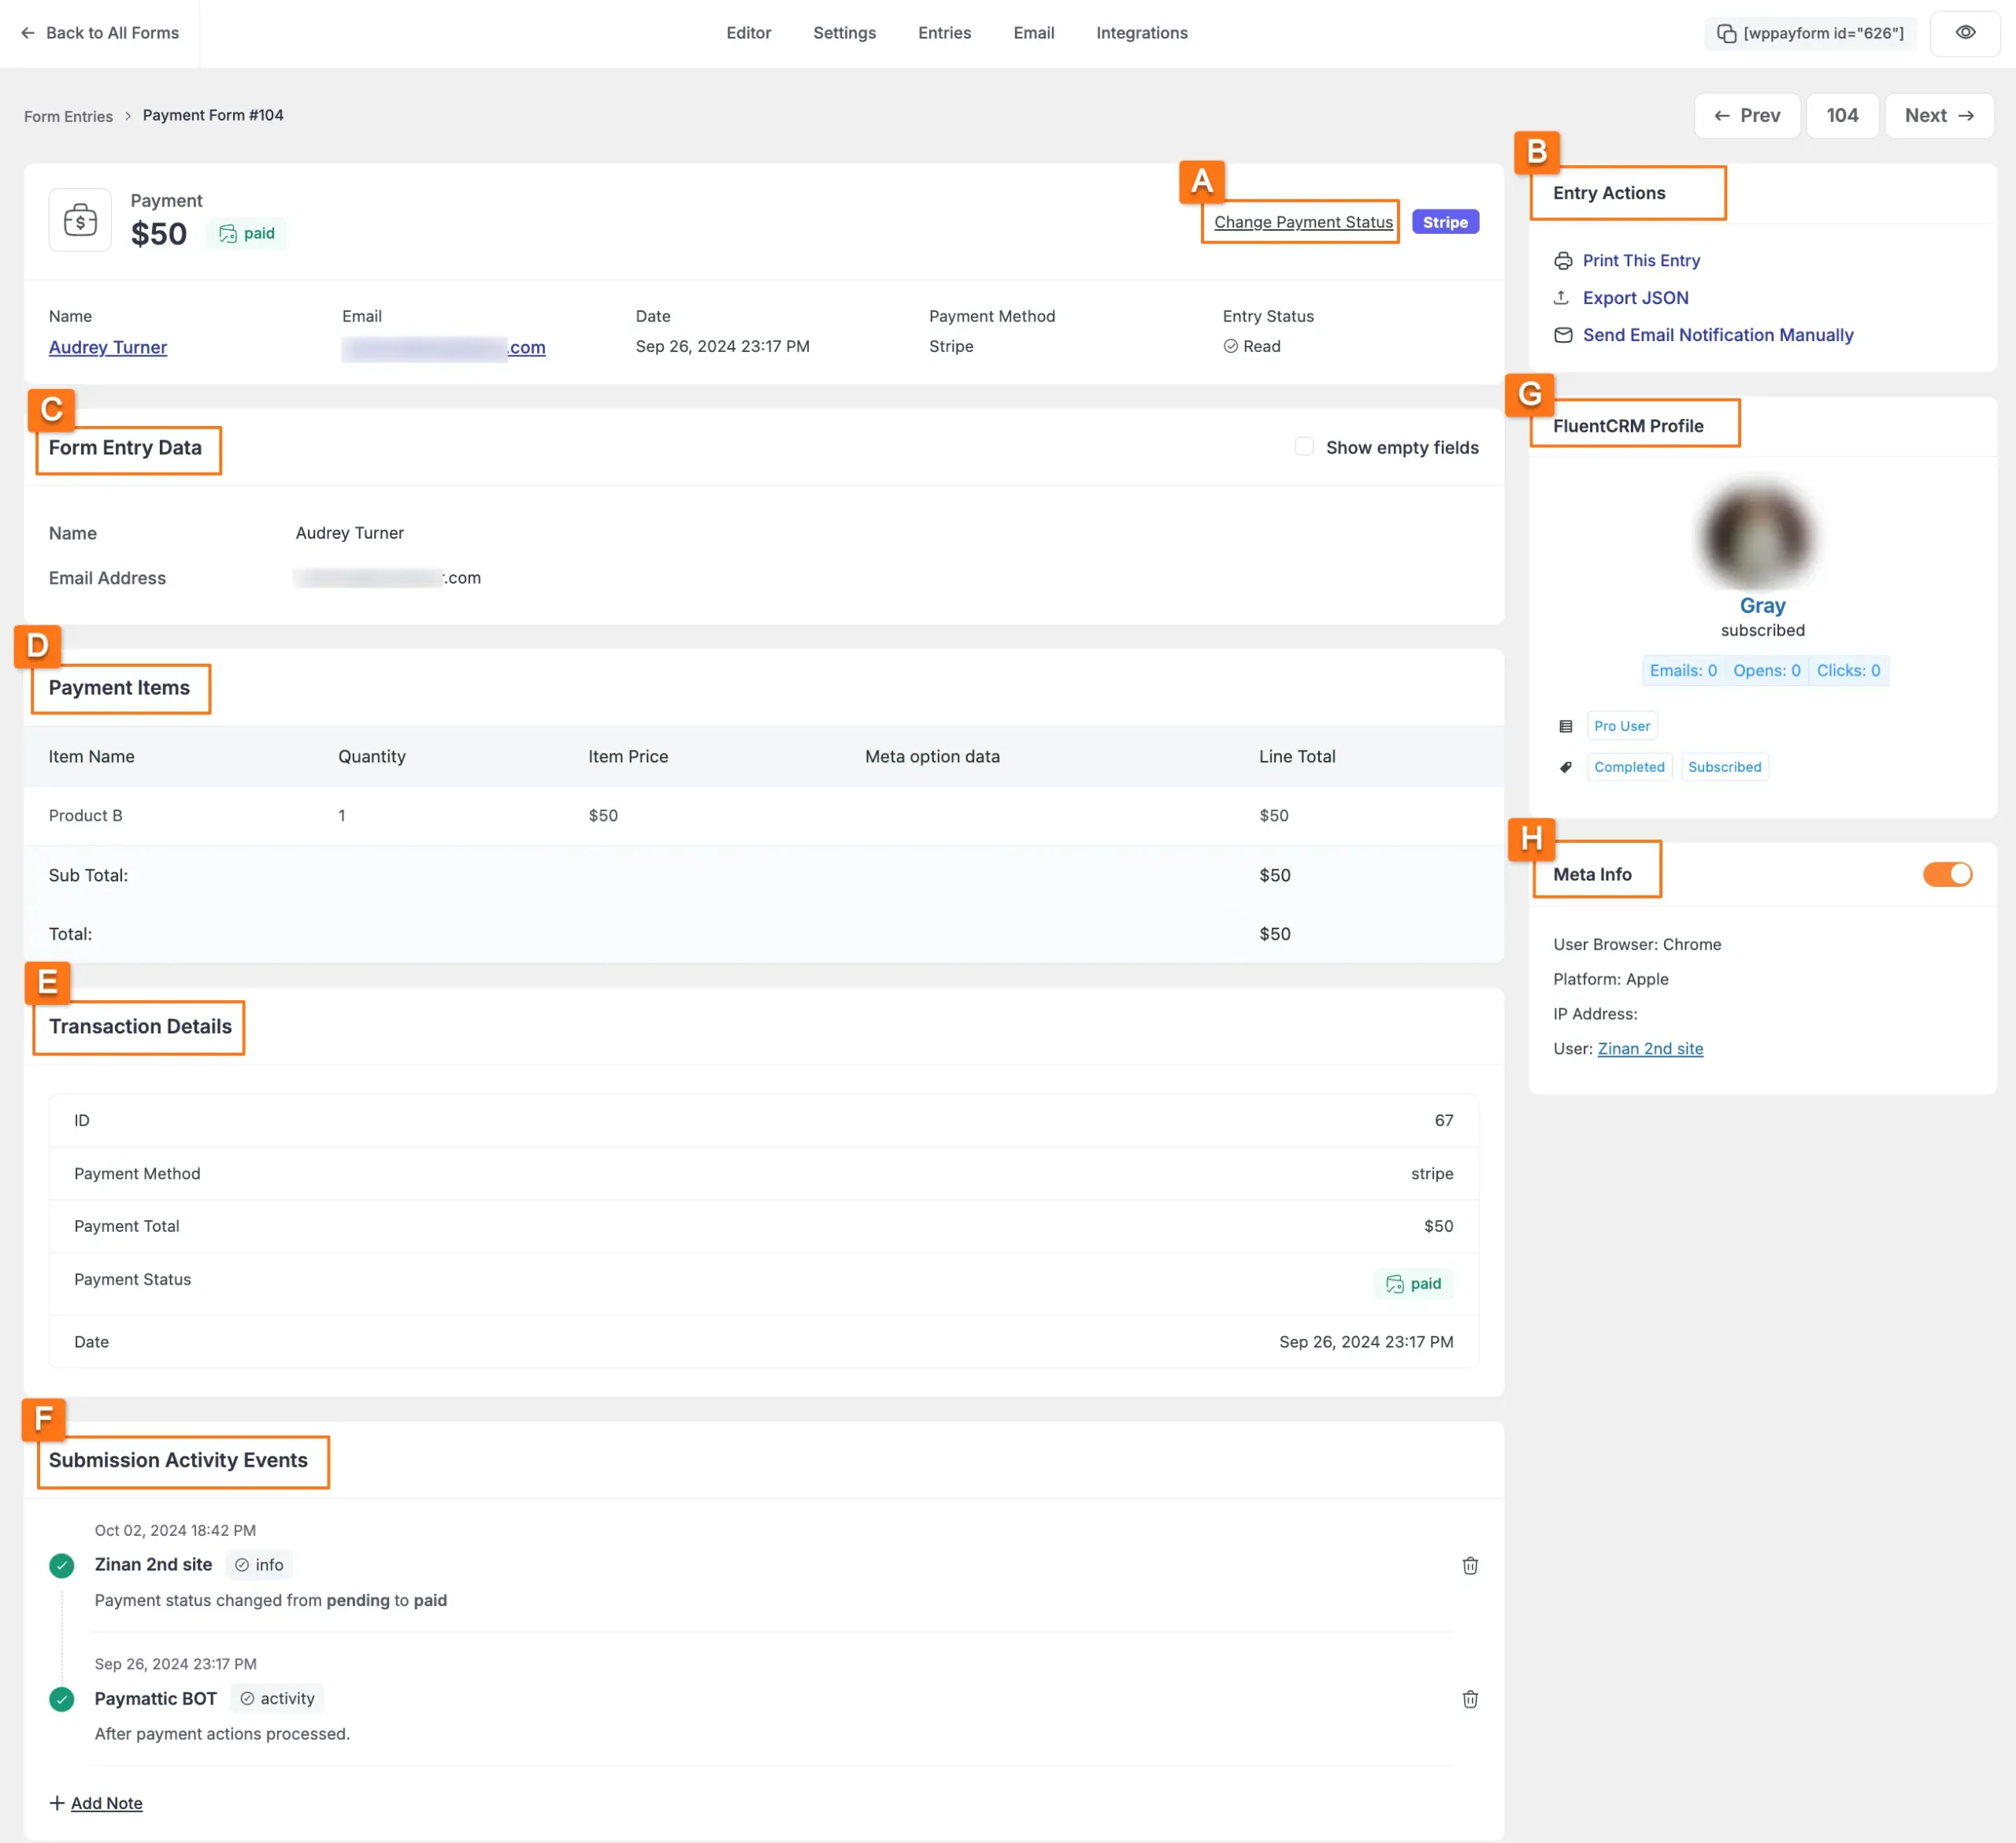
All the available options mentioned above to view & manage a single form entry are explained below:
A. Change Payment Status #
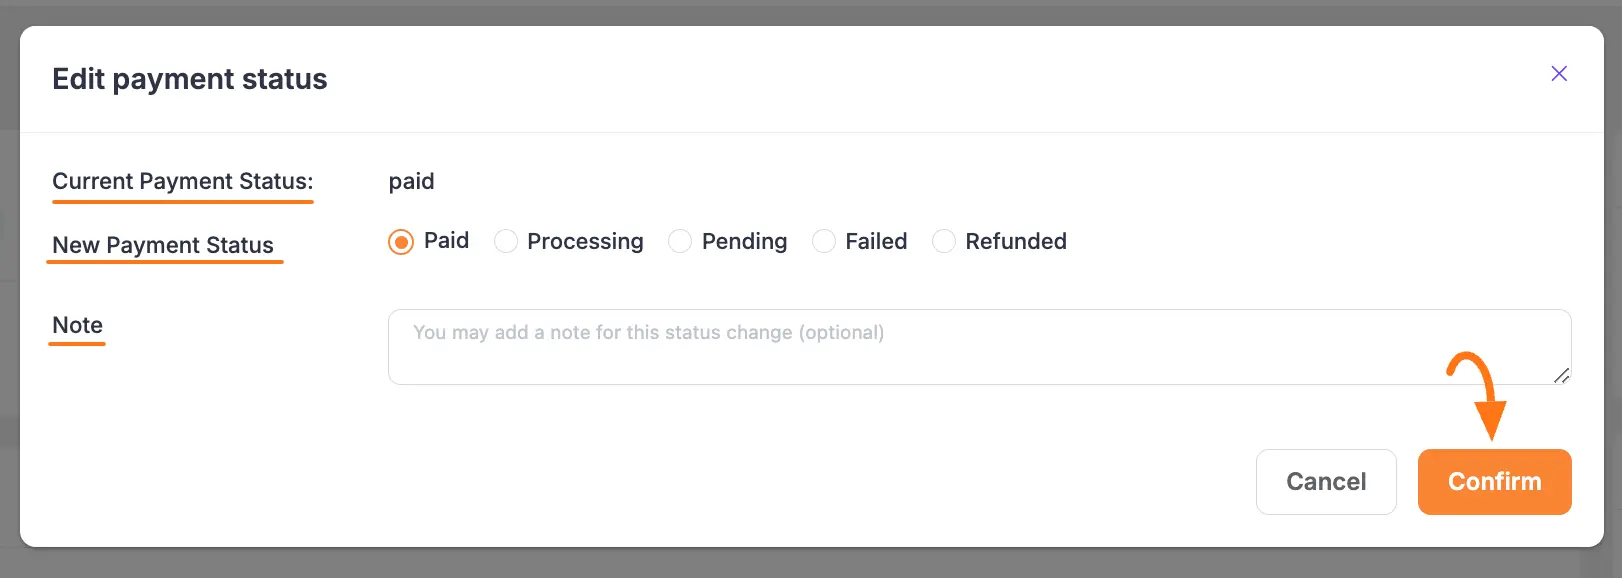
Using this option, you can change the payment status of your desired form entry anytime if needed.
Simply click the Change Payment Status button.

Now, select a new payment status that fits your needs and click the Confirm button.
Also, if you want, you can add a Note for this entry during the status change.
B. Entry Actions #
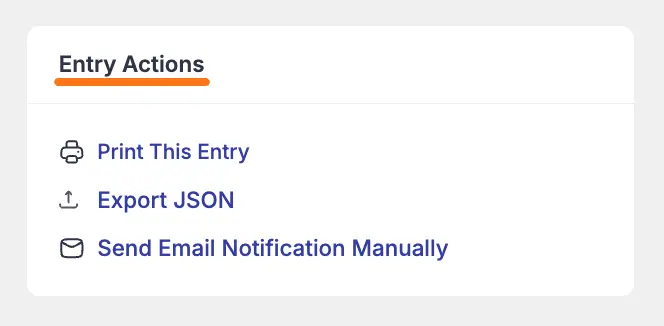
Here you will find three action options. These are:
- Print This Entry: Click this button to print the submitted data of a specific form entry.
- Export JSON: Click this button to export the data of this form entry in JSON format.
- Send Email Notification Manually: Click this button to send an email notification to the Admin/User manually for this entry. To learn the process of doing it, click here.
C. Form Entry Data #
Here, you can view the Name and Email Address of the user who submitted this entry.
Also, check the Show empty fields box if you want to view fields under the Form Entry Data section that are not filled in during the submissions.

D. Payment Items #
Here, you can see the ordered payment item/s Name, Quantity, Meta option data, and price (both single, subtotal, and total).

E. Transaction Details #
Here, you can see the payment method that the user used to pay, the total amount of payment, the payment status, and the submission date of this payment transaction.

F. Submission Activity Events #
Here, you can see all the activity events sequentially based on the timeline for this specific submission.
You can also add a note for the submission activity by clicking the + Add Note button and delete any activity by clicking the Trash icon.

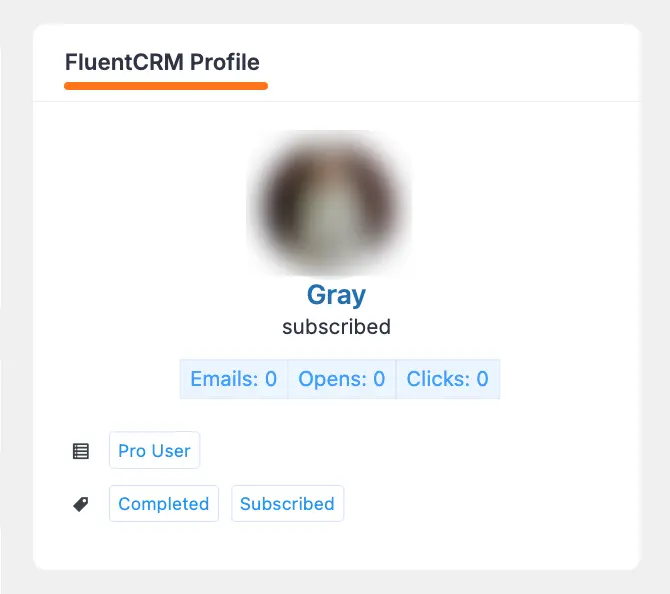
G. FluentCRM Profile #
This section will only appear in a form entry if the user is a FluentCRM user.
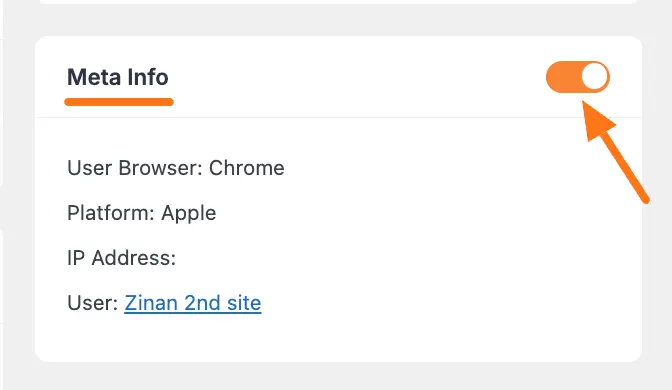
H. Meta Info #
By enabling this option, you can see the Meta information about the user who submitted this form.
This is how you can View & Manage a single Form Entry in Paymattic!
If you have any further questions, concerns, or suggestions, please do not hesitate to contact our @support team. Thank you.


