
Now you can present your products on your website in shopping cart style with Paymattic. This feature helps you sell more and make some extra money with the same payment form you are using for accepting payments.
[Shopping cart is a pro feature of Paymattic. Upgrade to Paymattic Pro to avail of this feature]
Let’s see how to add shopping cart in WordPress with Paymattic –
- To create a shopping cart, first, you need to create a form. If you are a beginner you can learn here how to create a form.
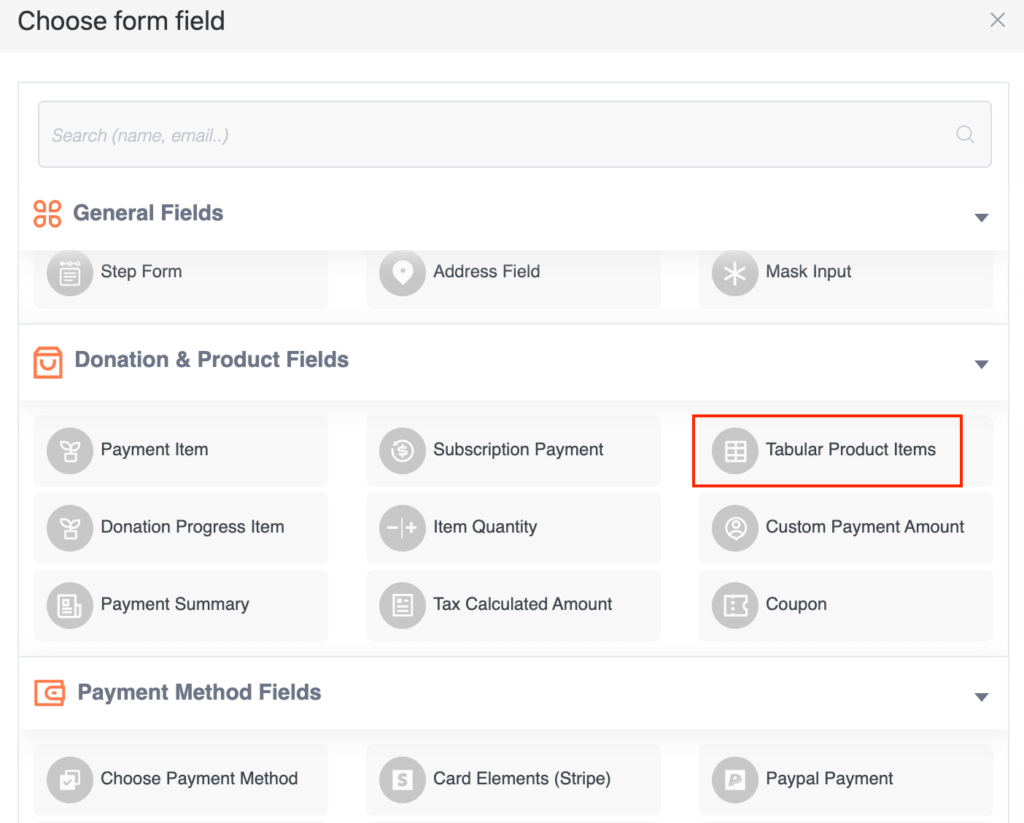
- After creating the form go to the form editor and add Tabular Product Item.
- Now hover the mouse over the field and press the gear icon.
- Here, you can configure your shopping cart and add products.

- There are three templates – Table Template, Grid Template and Single Line Template. Select the Grid Template for a grid-style shopping cart and select the Single Line Template if you want to show all product details in the same row.
- Toggle the switches Enable Custom Options, Enable Categories or Enable Product Filters. These are helpful to add multiple options, categories and filter your products in the form.
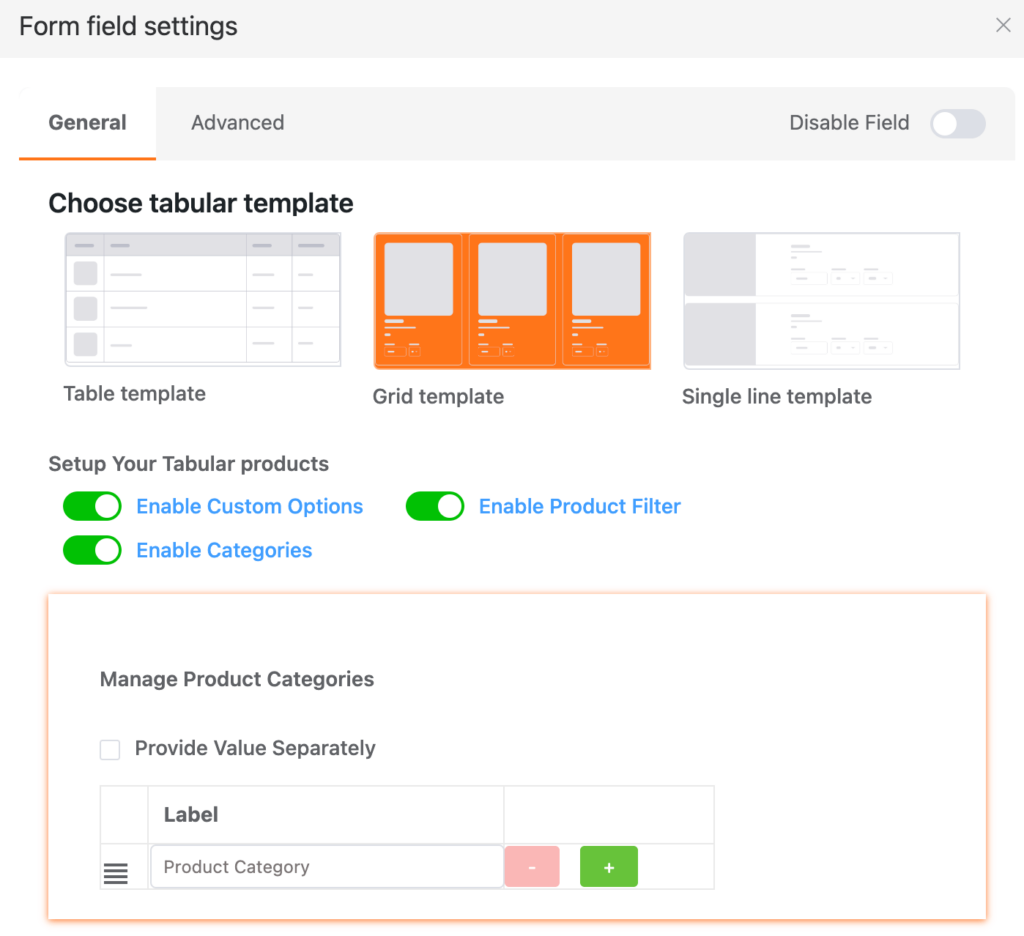
- Next, you can add categories from the Manage Product Categories section.
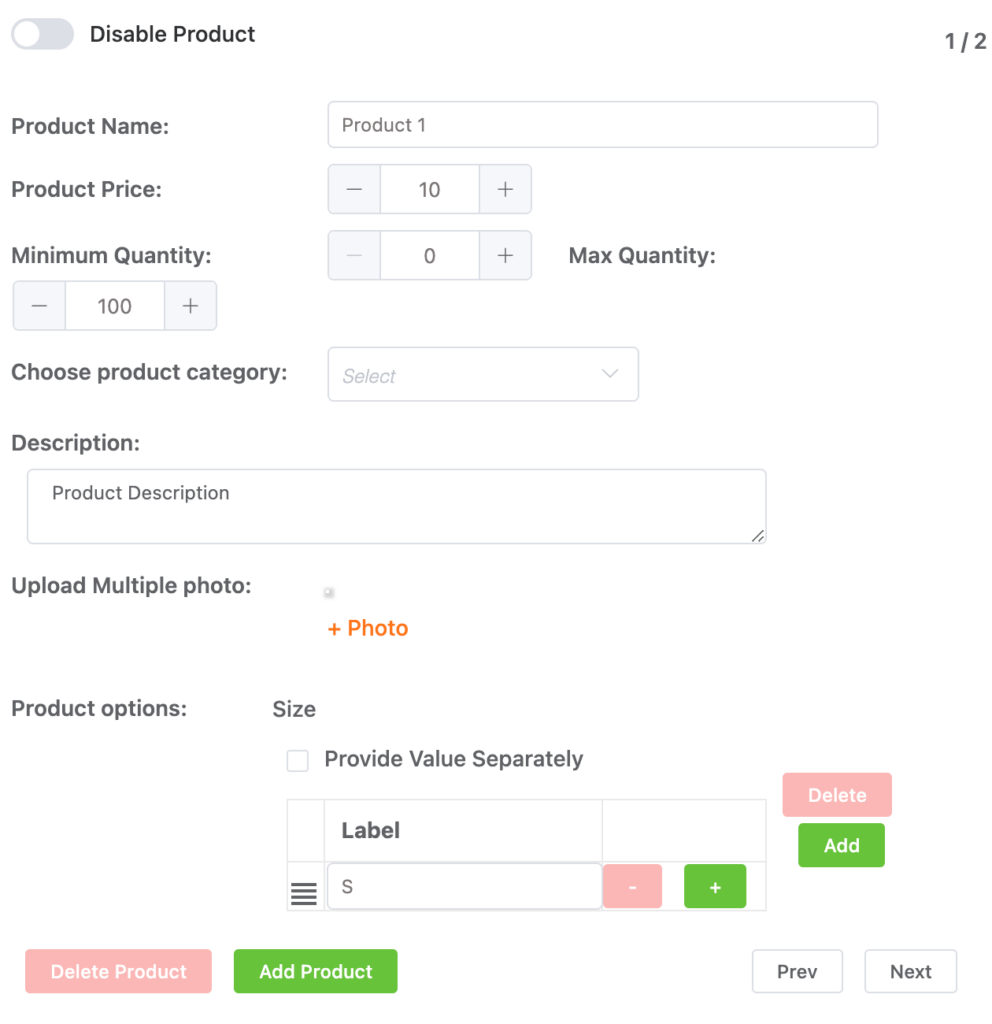
- Then, you will find the Manage Product Settings section where you can configure your product.
- Here, you can set the name of your product, price, minimum and maximum quantity, product category and description.
- Add various product options such as image, size, color, etc. as per your requirement.
- Toggle the Disable Product switch if you do not want to publish the product. This option is helpful in case you run out of stock, or you do not want to sell any specific product.
- Click the Delete Product button to remove a product or Add Product button to add new products.
- There’s a Subtotal switch if you want to display the subtotal amount to the users.
- Use the Next and Prev button to configure other products.
- Click the Update button to save the settings.
Finally, click on the Save button at the top right corner and save the form. Copy the shortcode of your form and publish it on a webpage.
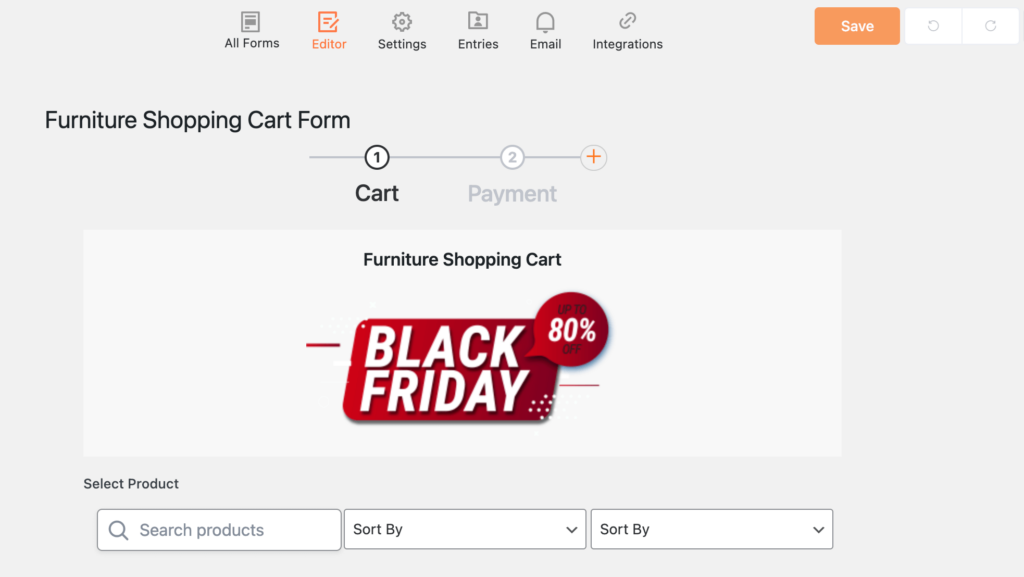
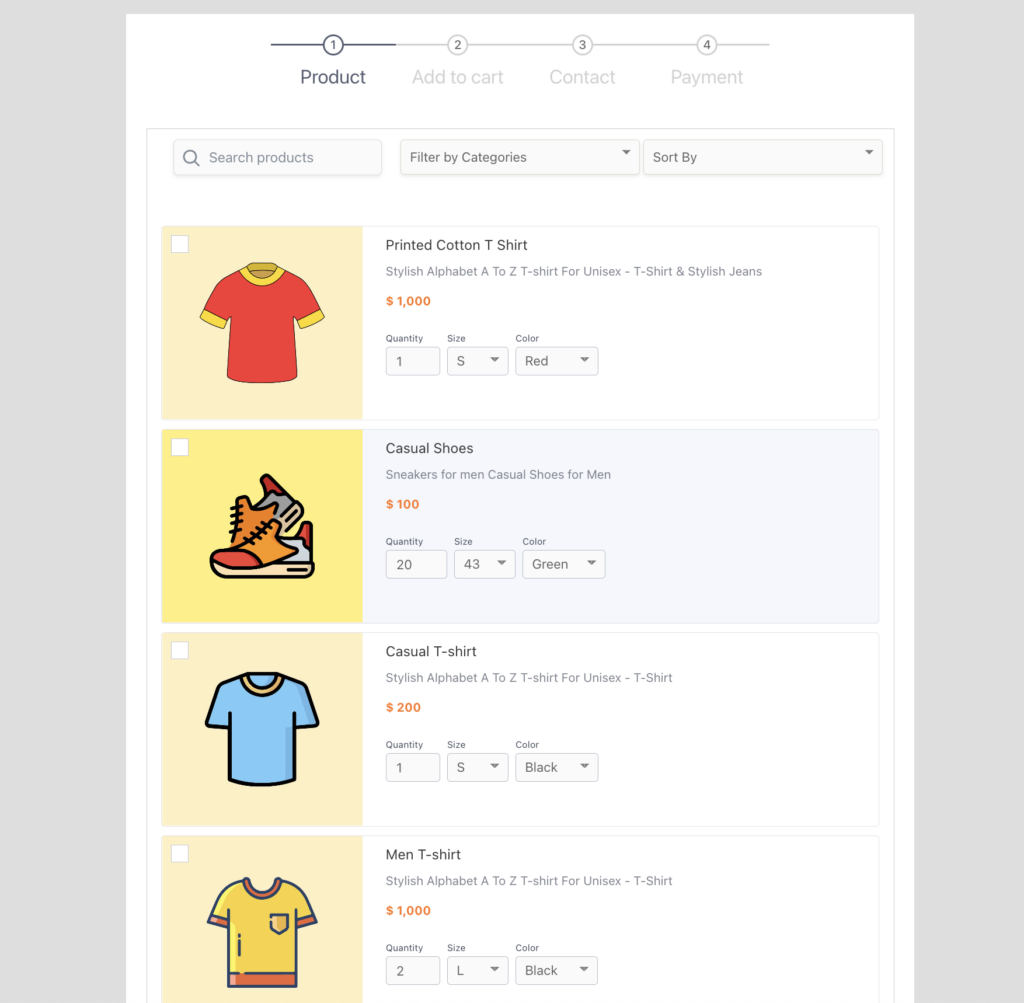
The form cart will look like this with step form:

This is the simple process to add a shopping cart in WordPress with Paymattic.


